Scrolls were used in ancient times to record all manner of information. These scrolls could hold some pretty standard information, but they have also been known to hold more interesting records as well.
They have also become popular in fantasy stories as a means to write down magic spells and incantations on.
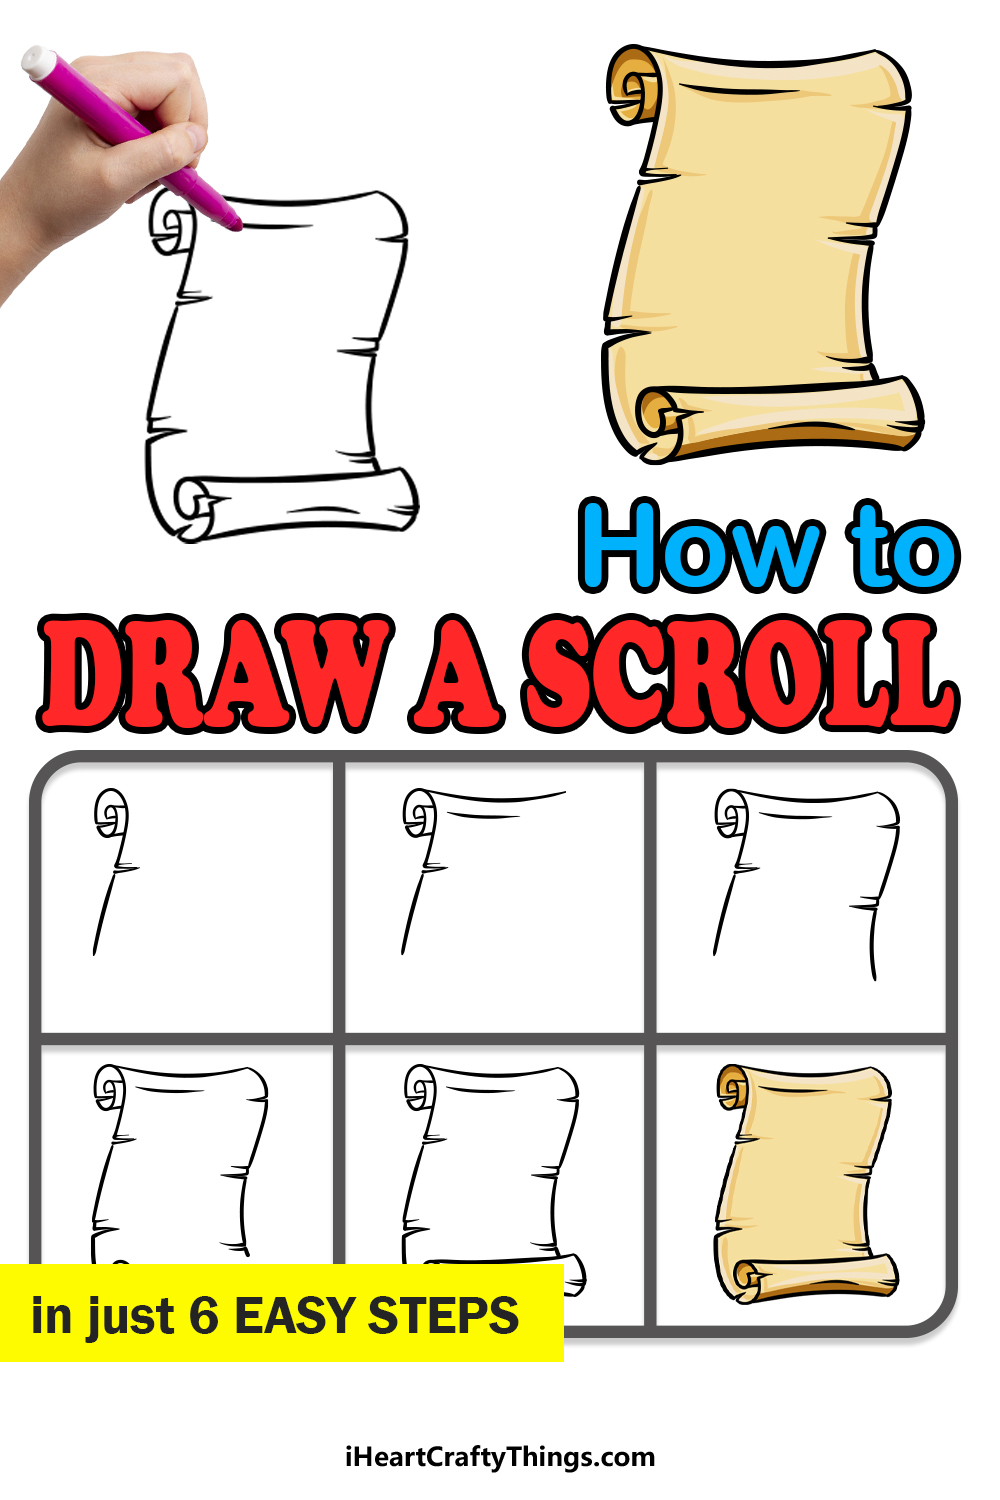
You may be familiar with scrolls in one way or another, but it can still be a bit of a challenge learning how to draw a scroll.
This guide you’re about to complete will show you how easy and fun it can be to do!
Our step-by-step guide on how to draw a scroll will show you how to do it while having fun as well!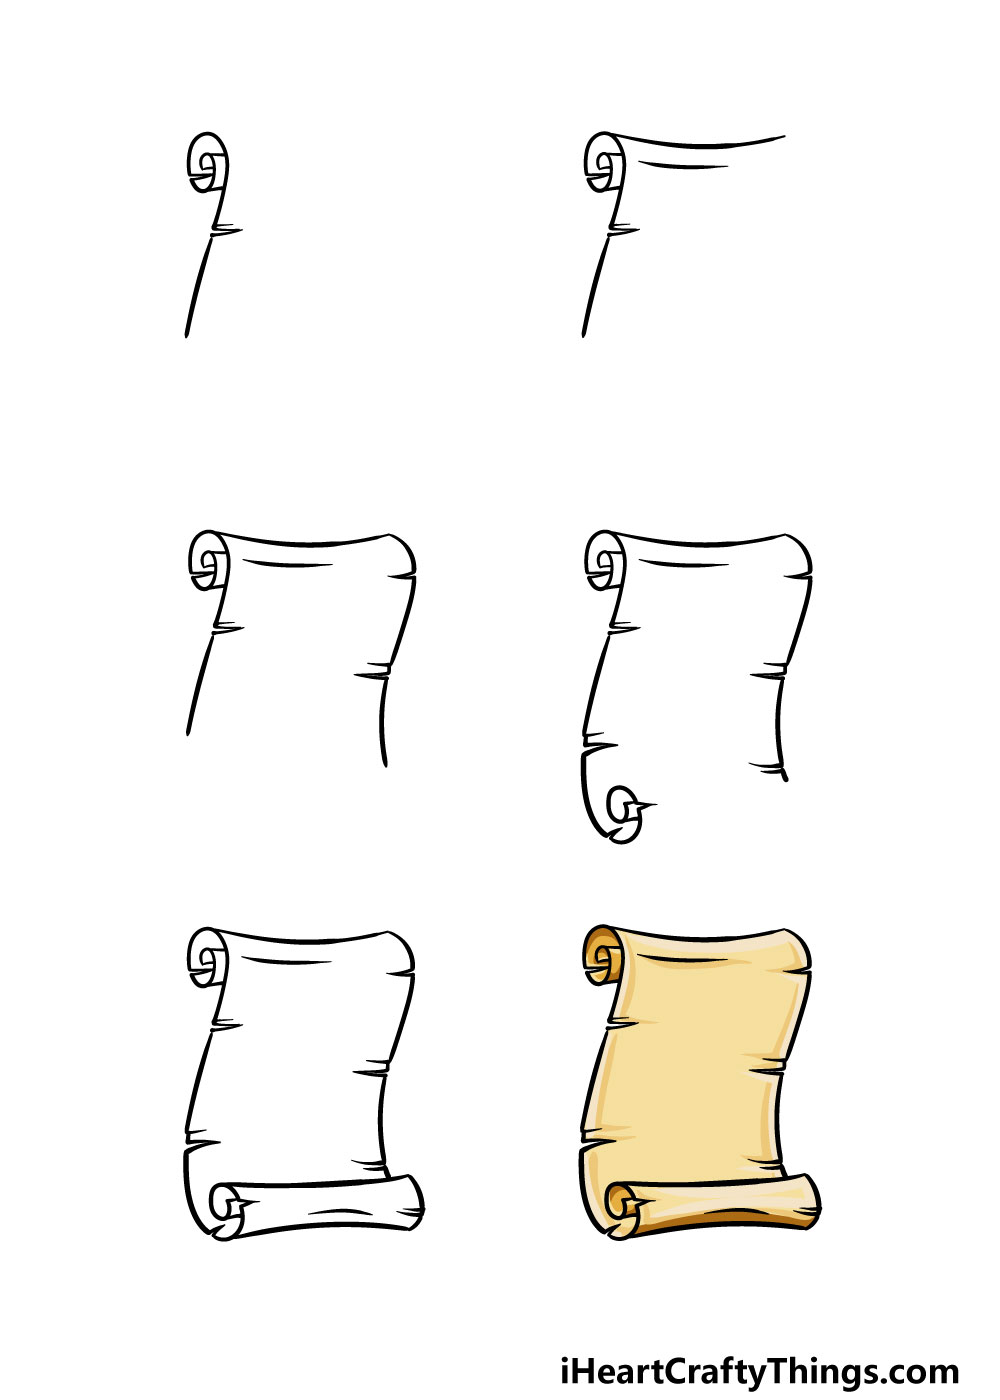
How to Draw A Scroll – Let’s get Started!
Step 1
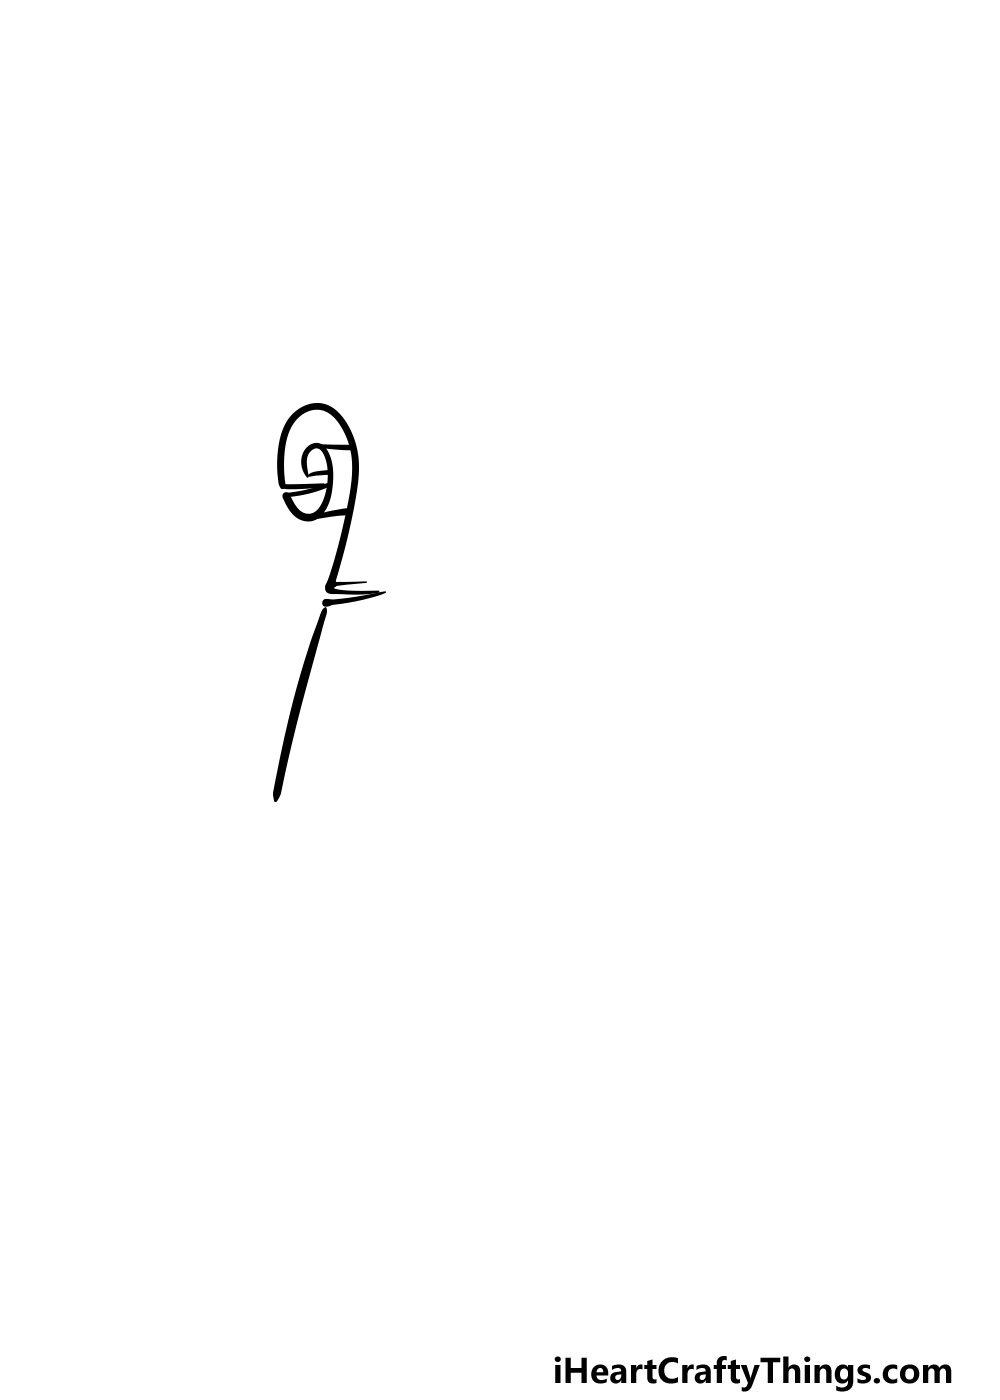
For this first step of our guide on how to draw a scroll, we will be focusing on the curled-up part at the top left side of the scroll.
To do this, you will start with a rounded line going in on itself. Then you will use some straight lines within that curled line for some texture detail and to finish off the curl effect.
That may sound complicated, but if you follow the reference image closely then you should have no problem with it!
Then, once you have this curl drawn then you can draw a straight line going down. You can then add some sharp, jagged edges into this line to make it look a bit damaged.
Once you have these details drawn, you’re ready to move on to step 2!
Step 2 – Draw the top of the scroll in this next step
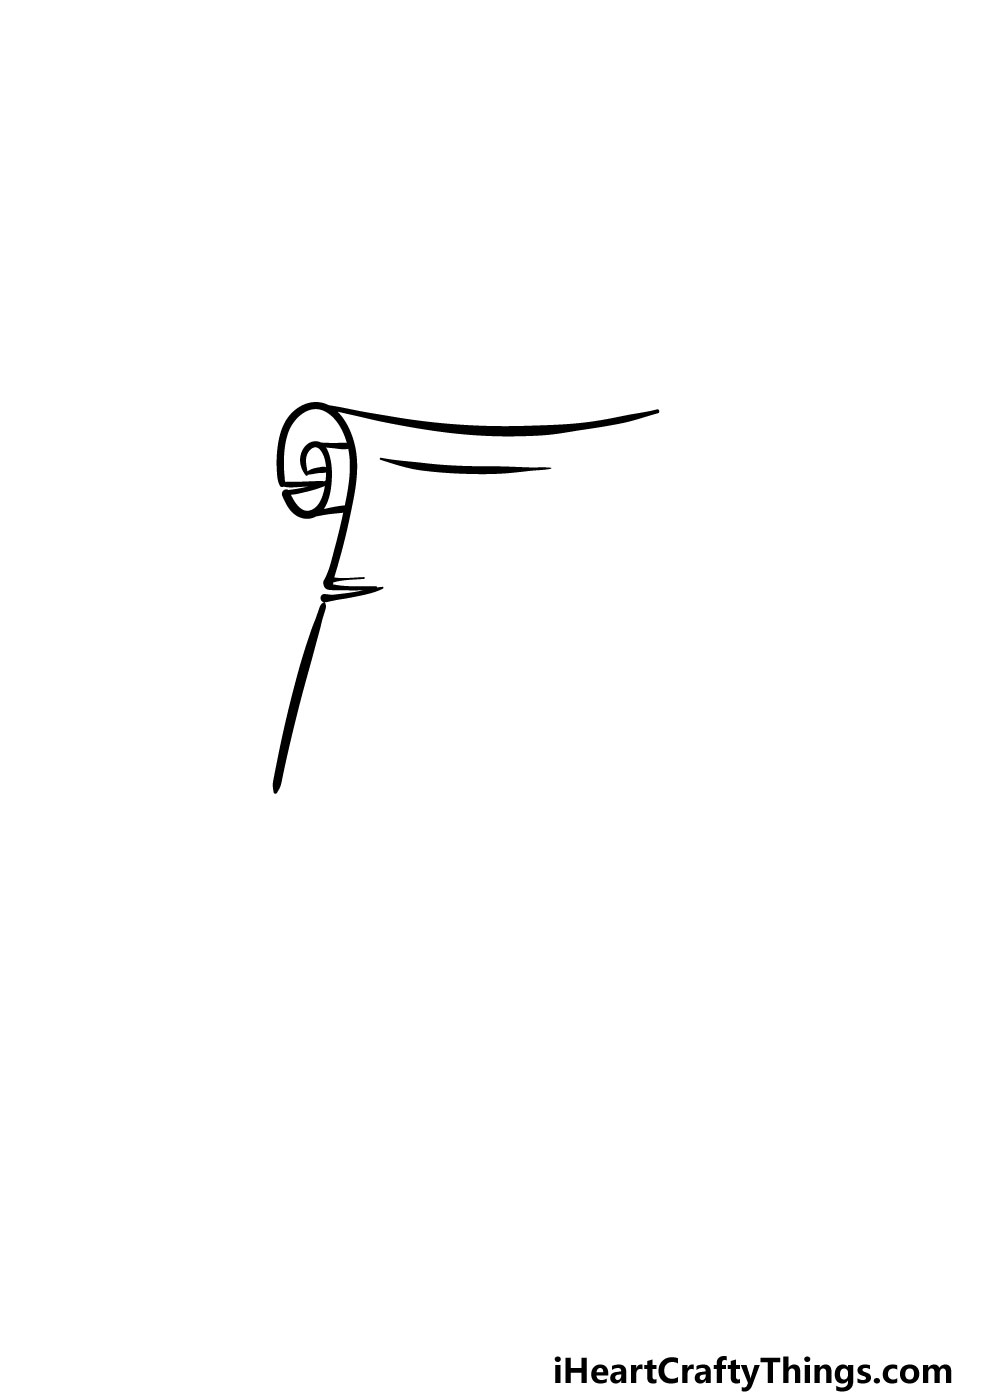
This second part of your scroll drawing should be quite a simple one to do! All that you need to do is draw a slightly curved line going horizontally from the top of the scroll and to the right.
It will be curved to make it look like it’s drooping in the middle a bit.
You can then finish off this step by adding a small line under this drooping one. That’s all there is to it for this part, and you’re ready for the next part!
Step 3 – Now, you can draw the right-hand side of the scroll
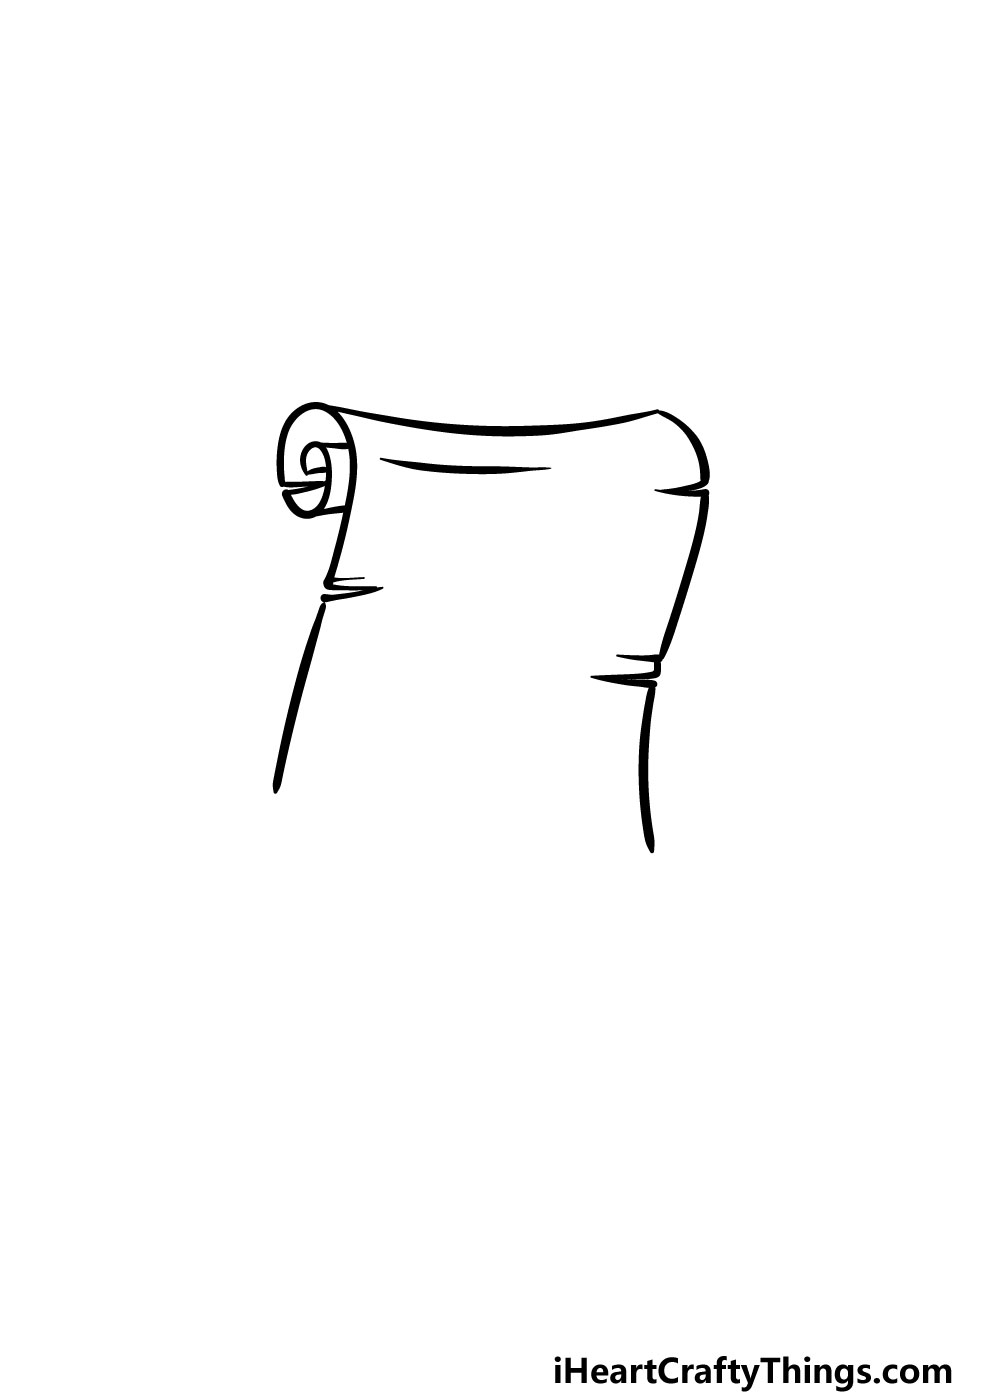
For this part of our guide on how to draw a scroll, we will be drawing the right-hand side of the scroll.
To do this, you can simply draw another curved line coming down from the right-hand top corner of the scroll.
This side of the scroll will also have some jagged lines in it to further make the scroll look a bit damaged and aged.
Step 4 – Next, draw the bottom curl of the scroll
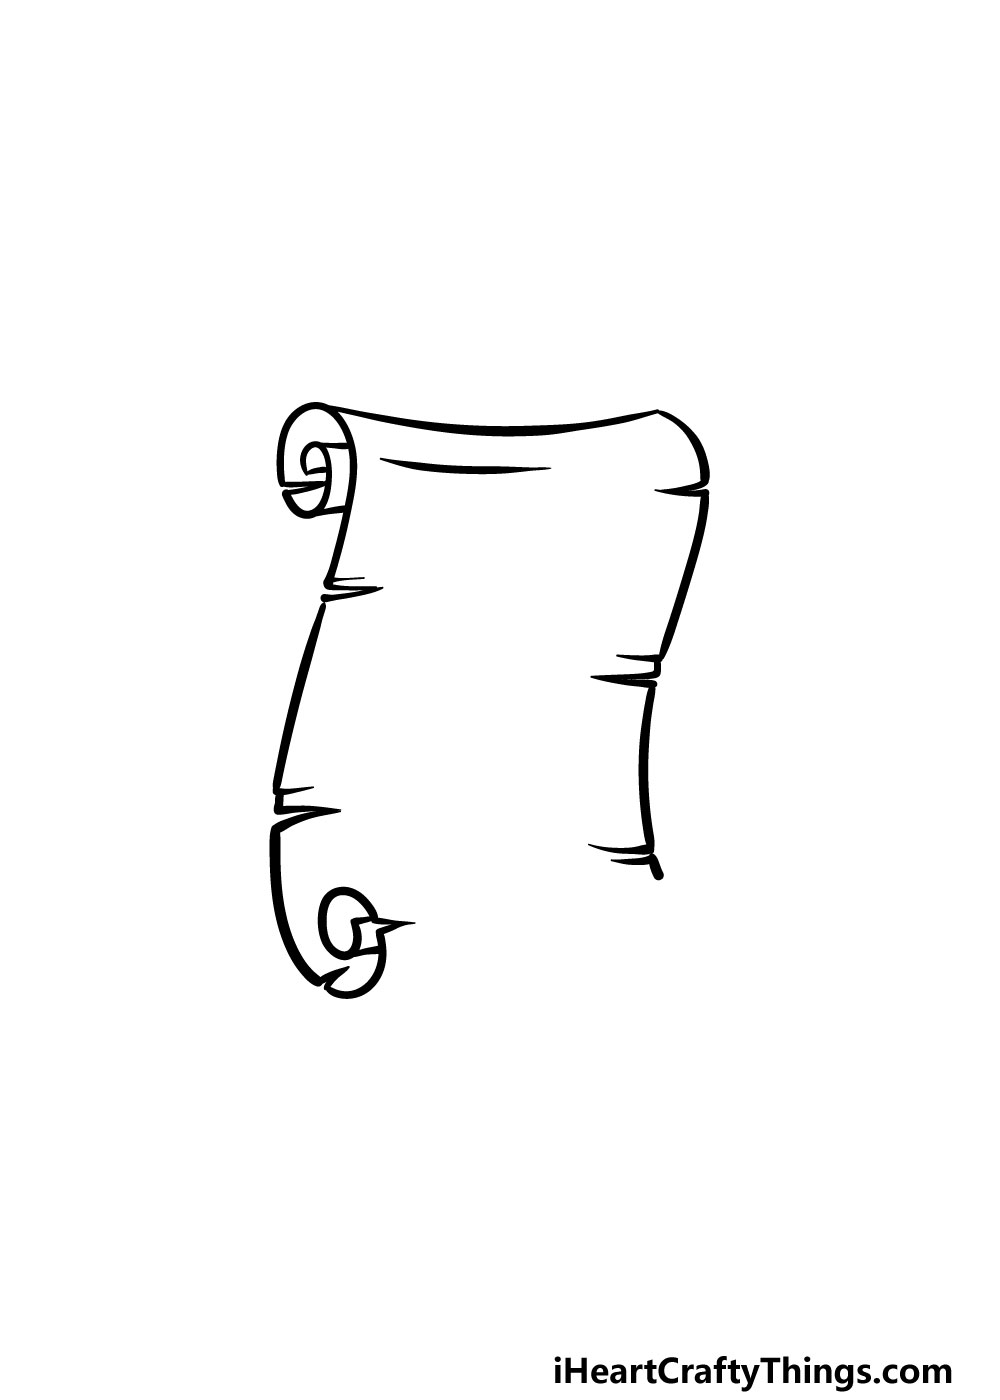
You’ve already drawn the top curl of the scroll in the first step of your scroll drawing, and in this step you will draw a similar one on the bottom.
This one will be drawn in almost the same way that the first one was, but it will be somewhat reversed.
Before you draw this curl, however, you should first extend the left-hand side of the scroll a bit before drawing the curl.
This left-hand side of the scroll will yet again have some nicks in it drawn using some jagged lines.
Step 5 – Now, you can add the final details of your scroll drawing

Before you move on to the final step of this guide on how to draw a scroll, there are just a few finishing touches to add.
First, you can finish off the curled-up part at the base of the scroll by drawing some more slightly curved lines going to the right of the picture.
You can then add some lines inside of this curl while also adding some more little dents and details.
That will finish up all of the drawing steps of this guide, but before you move on you should feel free to add any details of your own!
The scroll is looking pretty empty at the moment, so one thing you could do would be to draw what you think is written on the scroll.
This could be anything from a list of rules or facts to some creative new alphabet that you can design!
If you want to go with a fantasy theme for the image, you could also draw a background to make it look like this scroll is on a desk with other magical objects.
What creative ways can you think of to finish off this image?
Step 6 – Finish off your scroll drawing with some color
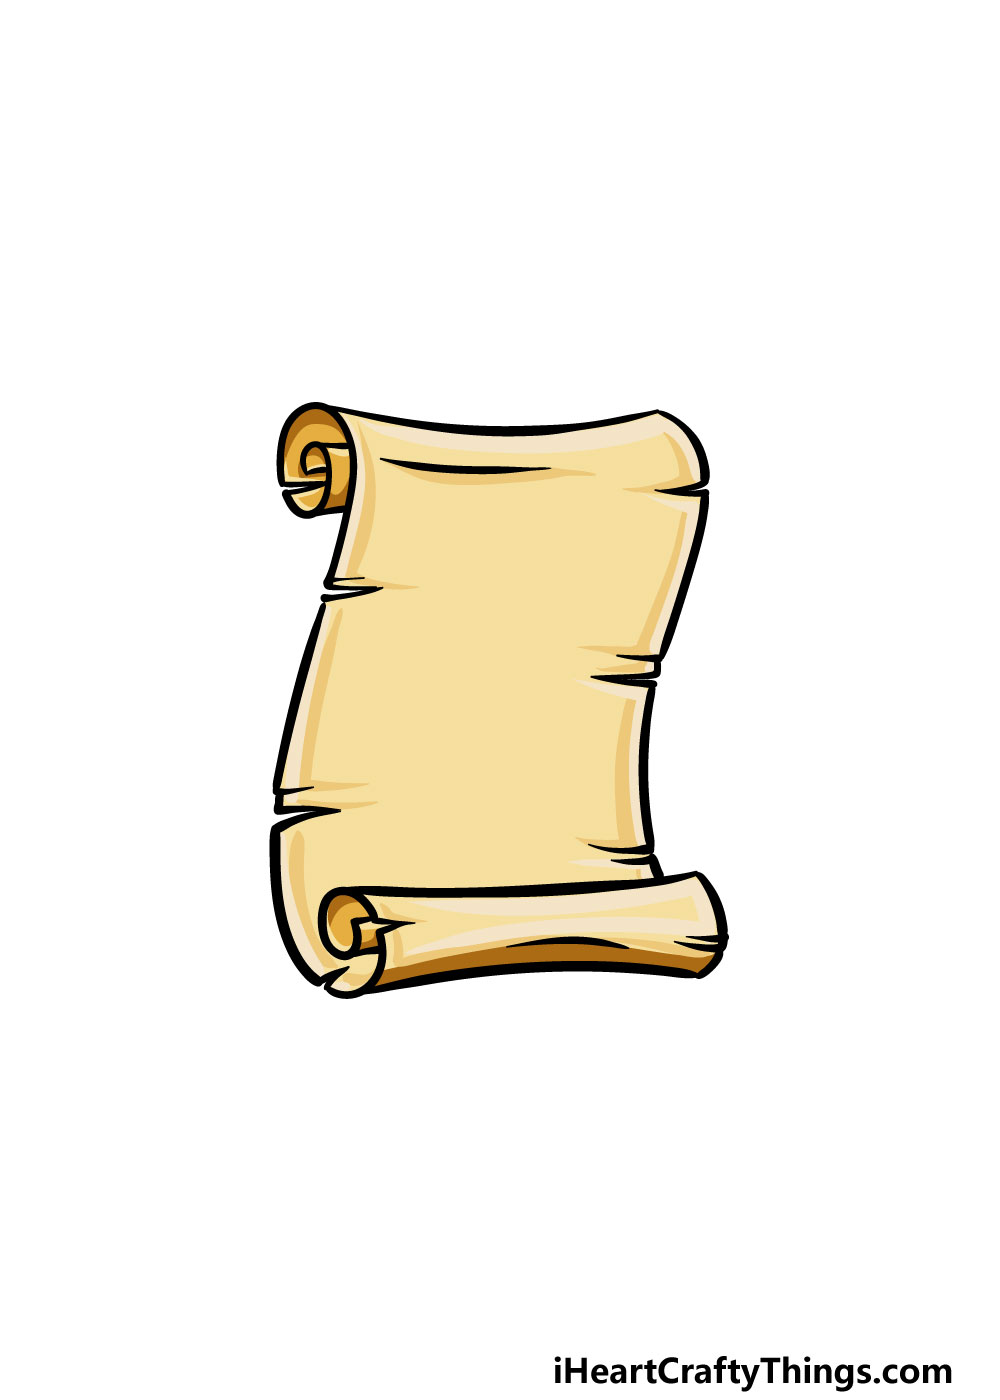
Now that you have finished your scroll drawing, the only thing left to do is add some color to it! In our reference image, we went with a more muted beige color to give this scroll the look of old faded parchment.
This is just one approach to take, however, and even if you go for a more muted look like this there are lots of ways that you can put your own colorful spin on it!
If you drew anything onto the parchment, then you would be able to incorporate colors onto those elements.
If you drew a background, then you can also work in any other colors you love into it for even more variation.
Which of your favorite colors and art mediums will you use for your image to finish it off?
3 More tips to make your scroll drawing easy!
Get ready to unroll these fun tips for making this scroll drawing even easier!
In the guide, we showed you how to break it down to make this scroll drawing easy. It can be made even easier if you use a real-life model!
You could make your very own scroll by using a sheet of paper. A regular piece of paper would do, but if you can get a longer than normal piece then that would be even better.
Roll the ends of the piece of paper in the way that the scroll is in the guide, and you will have yourself your very own scroll! Having this homemade scroll in hand will help make drawing the folds and shape of the scroll much easier.
You could also make this easy to draw scroll even easier by simplifying a few of the details. We made the paper of the scroll look a bit more weathered by adding some small nicks in the outline.
This effect looks really cool, but it can make it a bit harder to make this drawing. These are an example of details you could remove in order to make this scroll sketch easier.
Then, once you have gotten the hang of this design, you could make a new version that has all of the details you may have left out.
When it comes to drawing, the more you can prepare, the better! That’s why we would recommend preparing well for this scroll drawing.
The best way to do this is by using a light pencil. You can start by drawing some of the basic shape outlines.
Then, use progressively darker pencil lines to add some of the finer details. Using a pencil is ideal because any mistakes can be easily erased!
When you’re happy with the lines, you can then go over them with your pen. The final step is to erase the pencil lines you used to help you.
Just make sure the pen ink is completely dry before you erase to avoid smudging!
Your Scroll Drawing is Complete!
We hope that you found this guide on how to draw a scroll to be really helpful, easy to use and above all lots of fun as well!
When taking on a new drawing, it always helps to break it down into more manageable and easy steps, so that is what we aimed to do in this guide.
Now that you have finished the guide, you can take it even further with your own details and elements.
We mentioned drawing a background and other props for the picture, but what else can you think of to finish off your scroll drawing?
The drawing fun doesn’t have to stop here! When you’re ready for more, you can visit us on our website where we have plenty of amazing guides for you to enjoy.
We upload new ones all the time too, so be sure to check in often to never miss out!
We would love to see the creative ways that you brought this scroll drawing to life, so once it’s done we hope that you will share it on our Facebook and Pinterest pages for us to enjoy!