Scooby-Doo is one of the most popular and enduring cartoon characters ever created.
He made his first mystery-solving appearance in 1969, and these days he’s more popular than ever with countless films, shows, video games and toys based around him.
Despite this success, this design can make it difficult to learn how to draw Scooby-Doo properly.
Luckily, with this guide you will find out how easy it can be! You’ll want to read all the way to the end to see how it’s done.
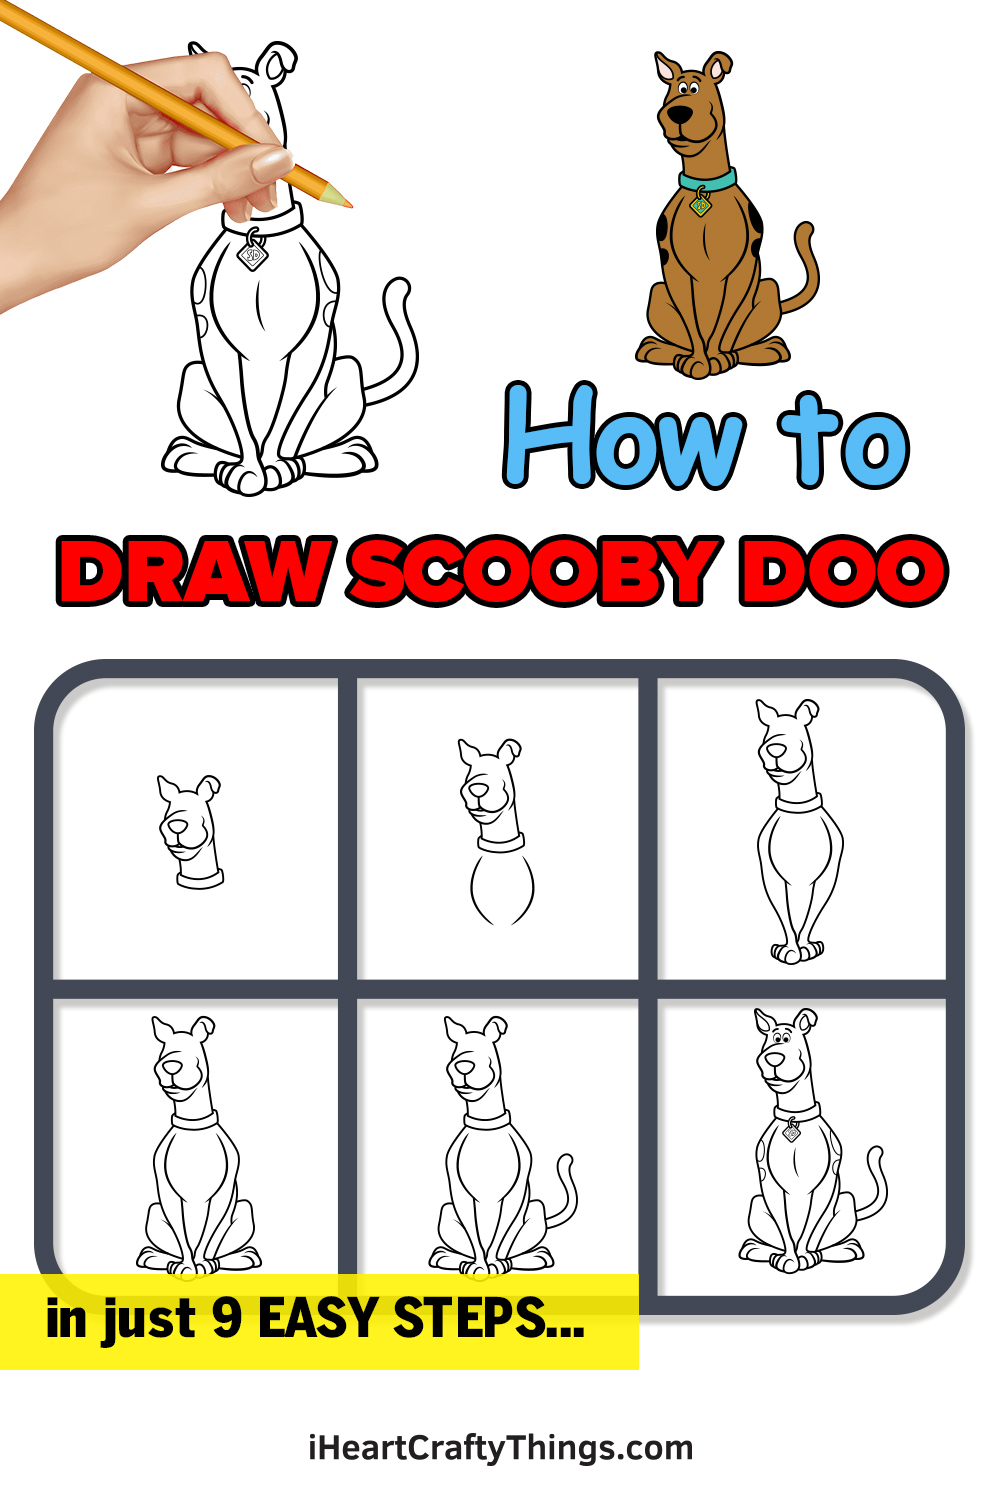
Our step-by-step guide on how to draw Scooby-Doo in just 10 steps will make sure that the secret to drawing this cowardly dog is no mystery!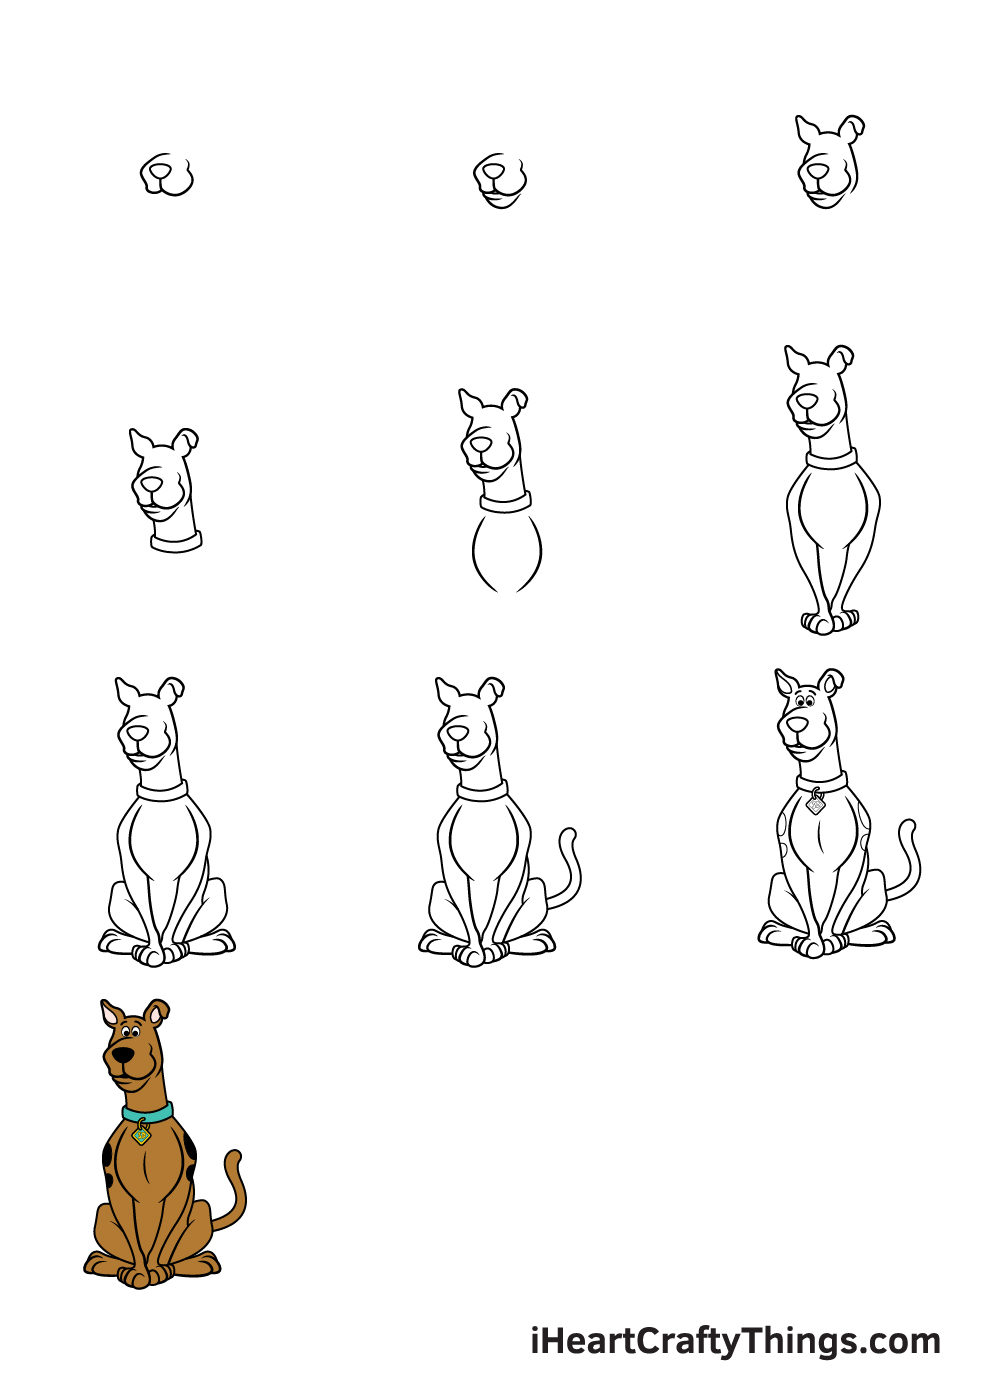
How to Draw Scooby-Doo – Let’s get Started!
Step 1
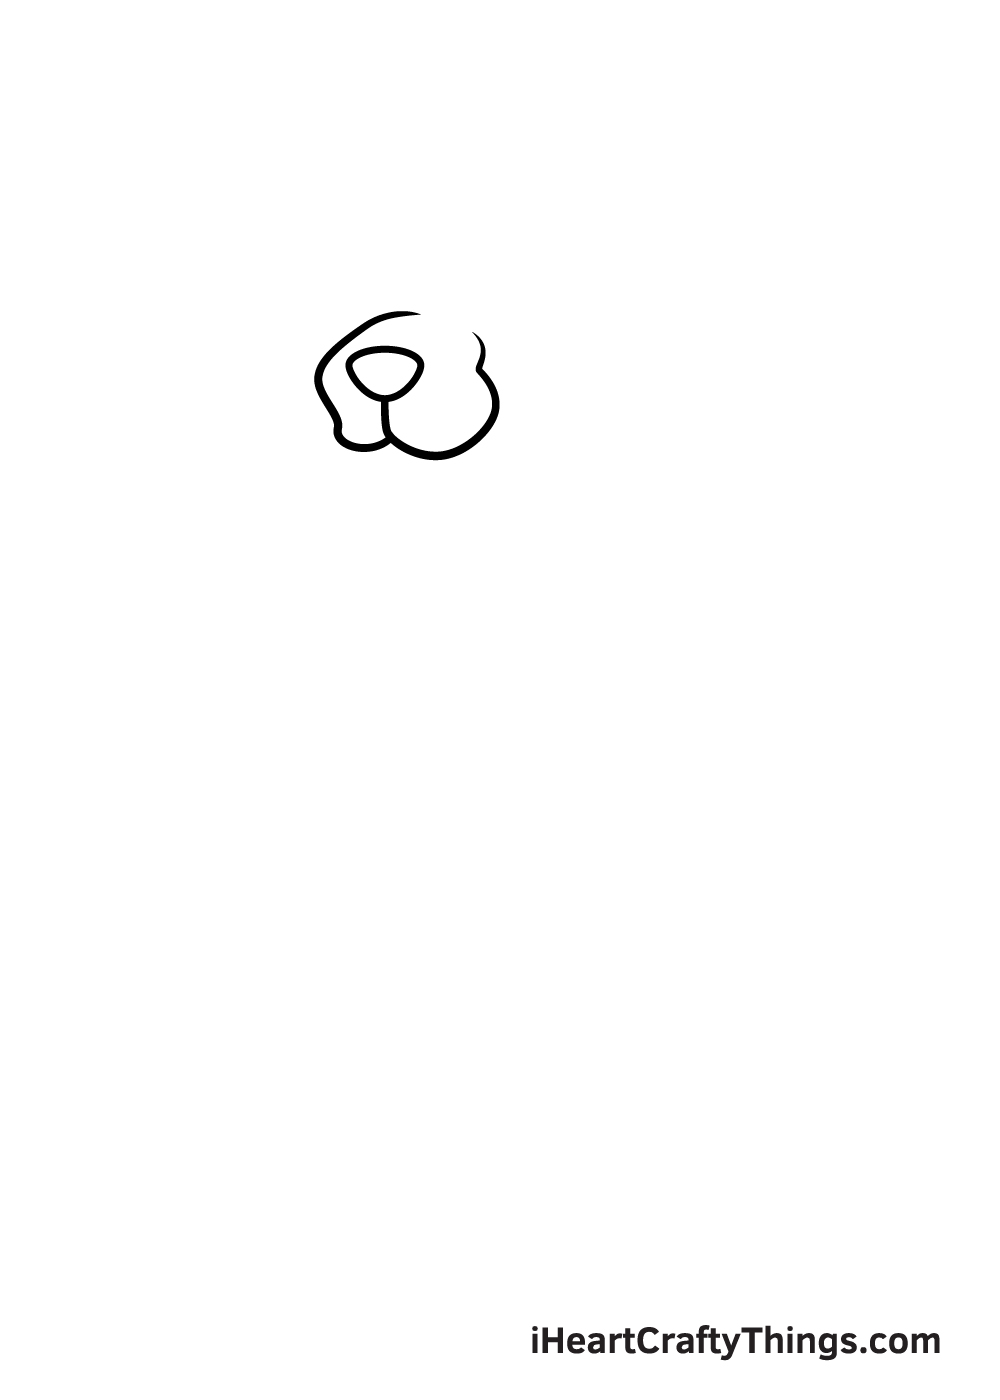
In this first step of our guide on how to draw Scooby-Doo, we will begin with his snout and nose. First, his nose will be drawn with a rounded triangle shape.
Then, you can use some curved lines around the nose to create the outline of his snout.
As you can see in the reference image, there will be a divide at the center of the snout where it connects to the nose.
Step 2 – Draw the bottom of his mouth and chin
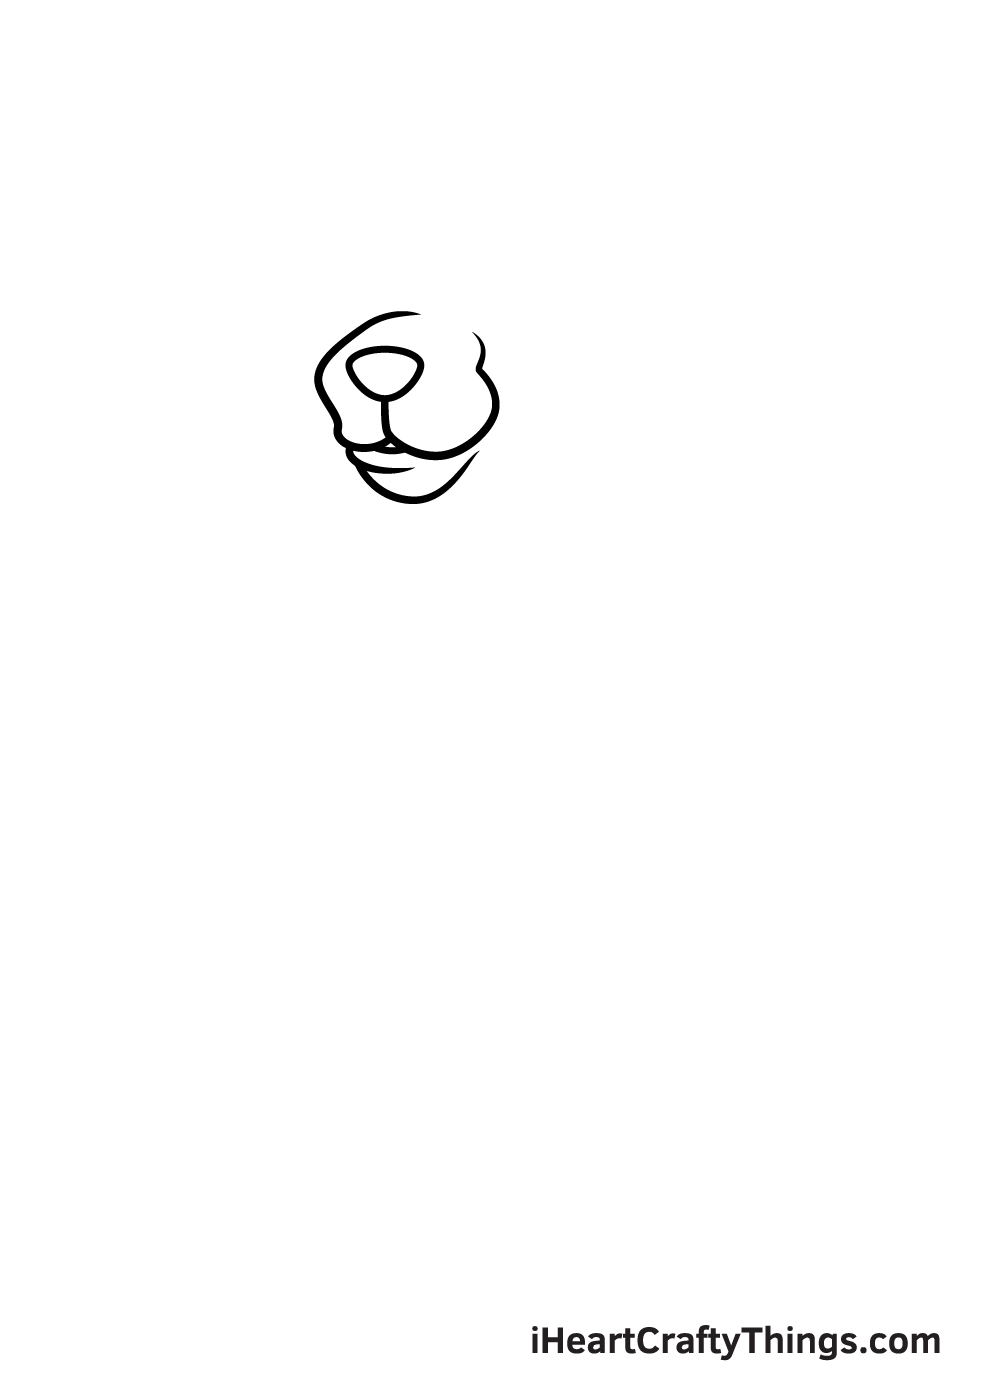
Continuing on with your Scooby-Doo drawing, you will be adding the bottom of his mouth and chin.
First, use a curved line underneath his snout for his bottom lip. Then, you can use another curved line for his chin beneath that.
Step 3 – Next, draw the top of his head and ears
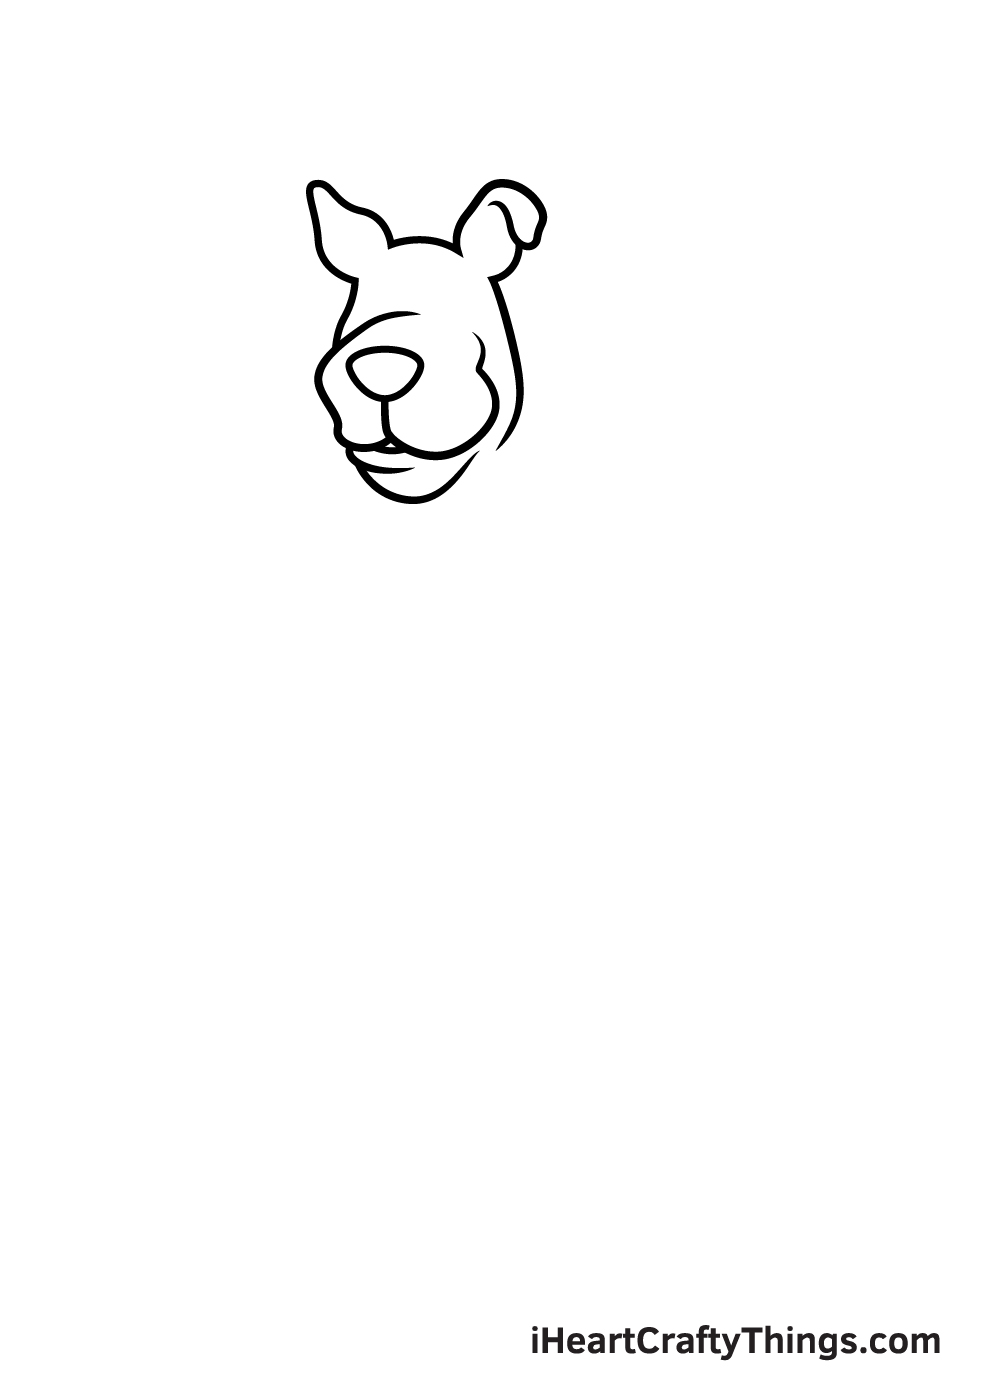
Now that you have his nose, snout and mouth drawn, we will be adding the top of the head and ears in this step of our guide on how to draw Scooby-Doo.
You can use some simple curved lines for the sides of his head, and then draw in his pointy ears.
The top of the ear on the right will be flopping over a bit at the top.
Step 4 – Now draw his neck and collar
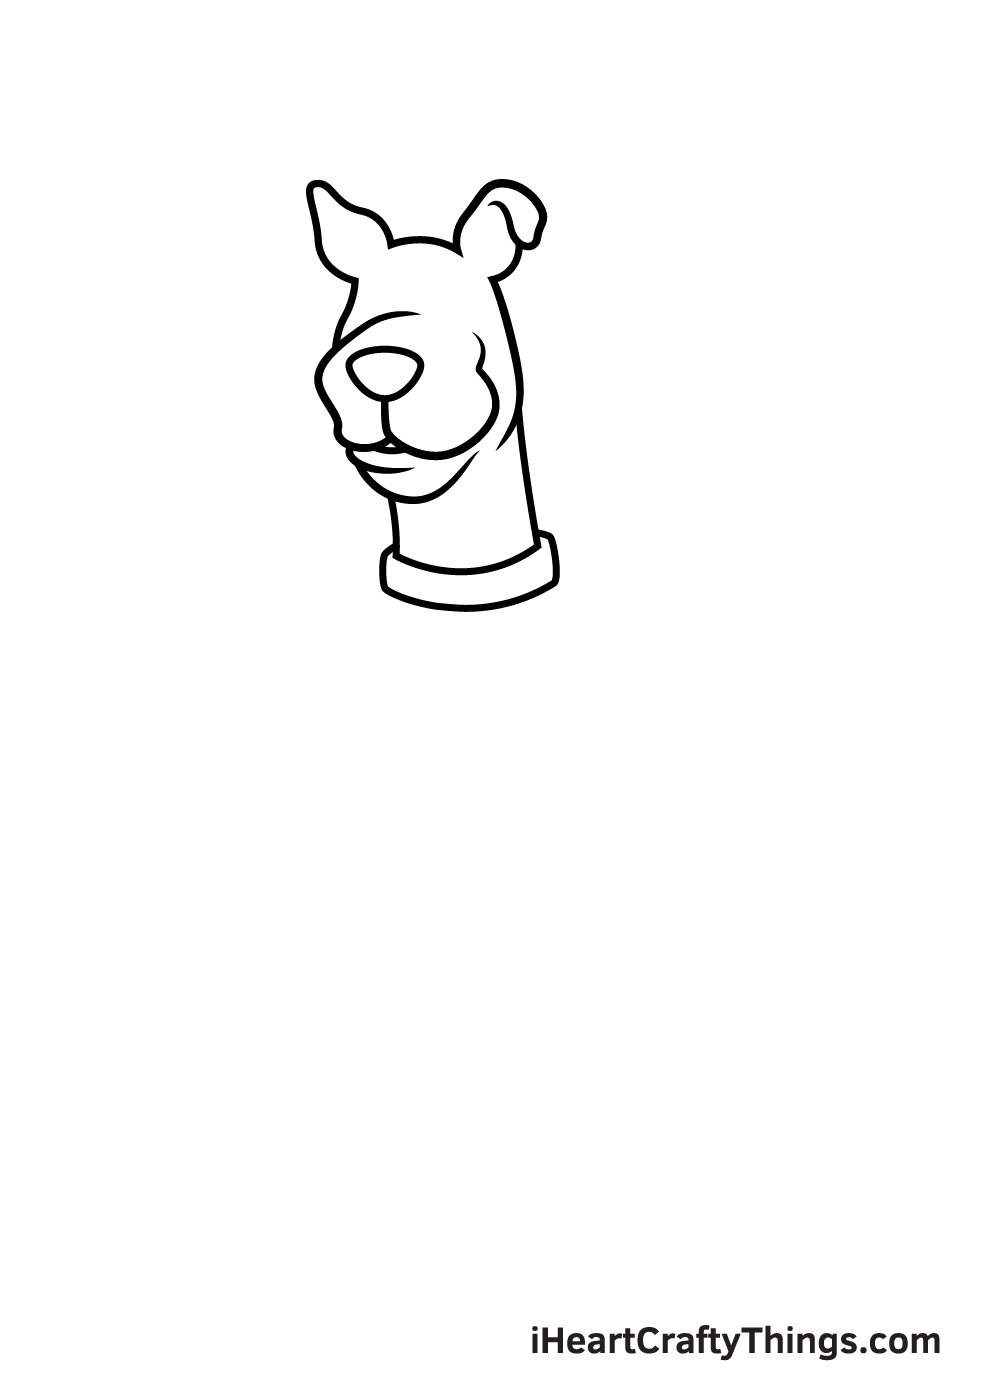
For this part of your Scooby-Doo drawing, you will be drawing his neck and collar. For his neck, you can simply extend two fairly straight lines down from his head.
Then, you can draw a thin, rounded rectangular shape for his collar as shown in the reference picture.
Step 5 – Start drawing Scooby’s chest in this part
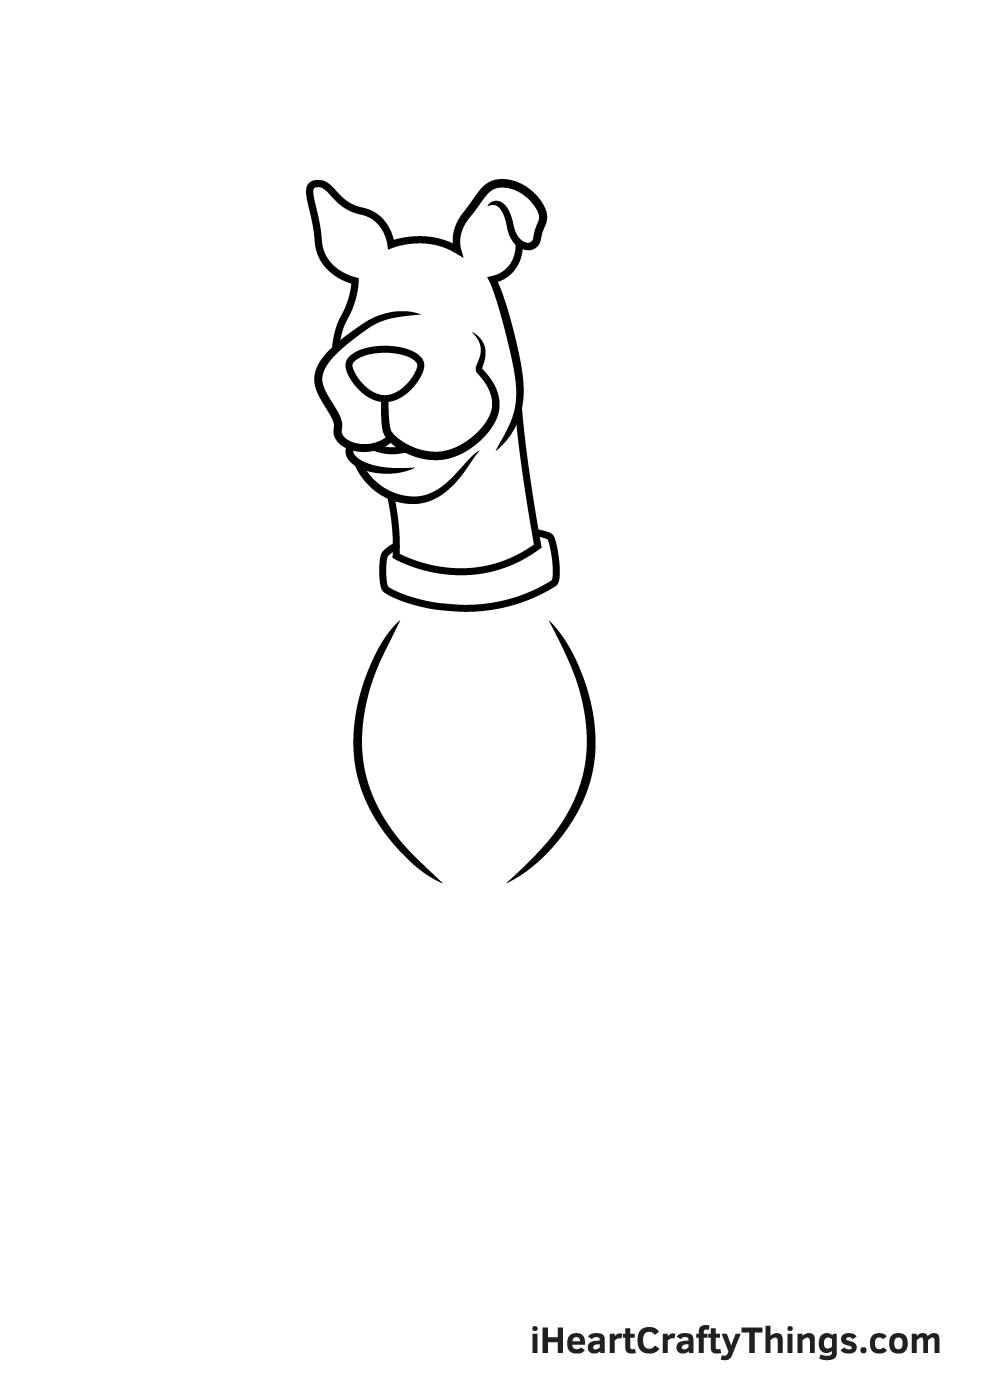
We will be leaving Scooby’s head for now as you draw a chest for him in this step of our guide on how to draw Scooby-Doo.
To draw his chest, simply use two curved lines mirroring each other below his head. The reference picture will show you how far down these chest lines should be.
Step 6 – Next, start drawing his front legs
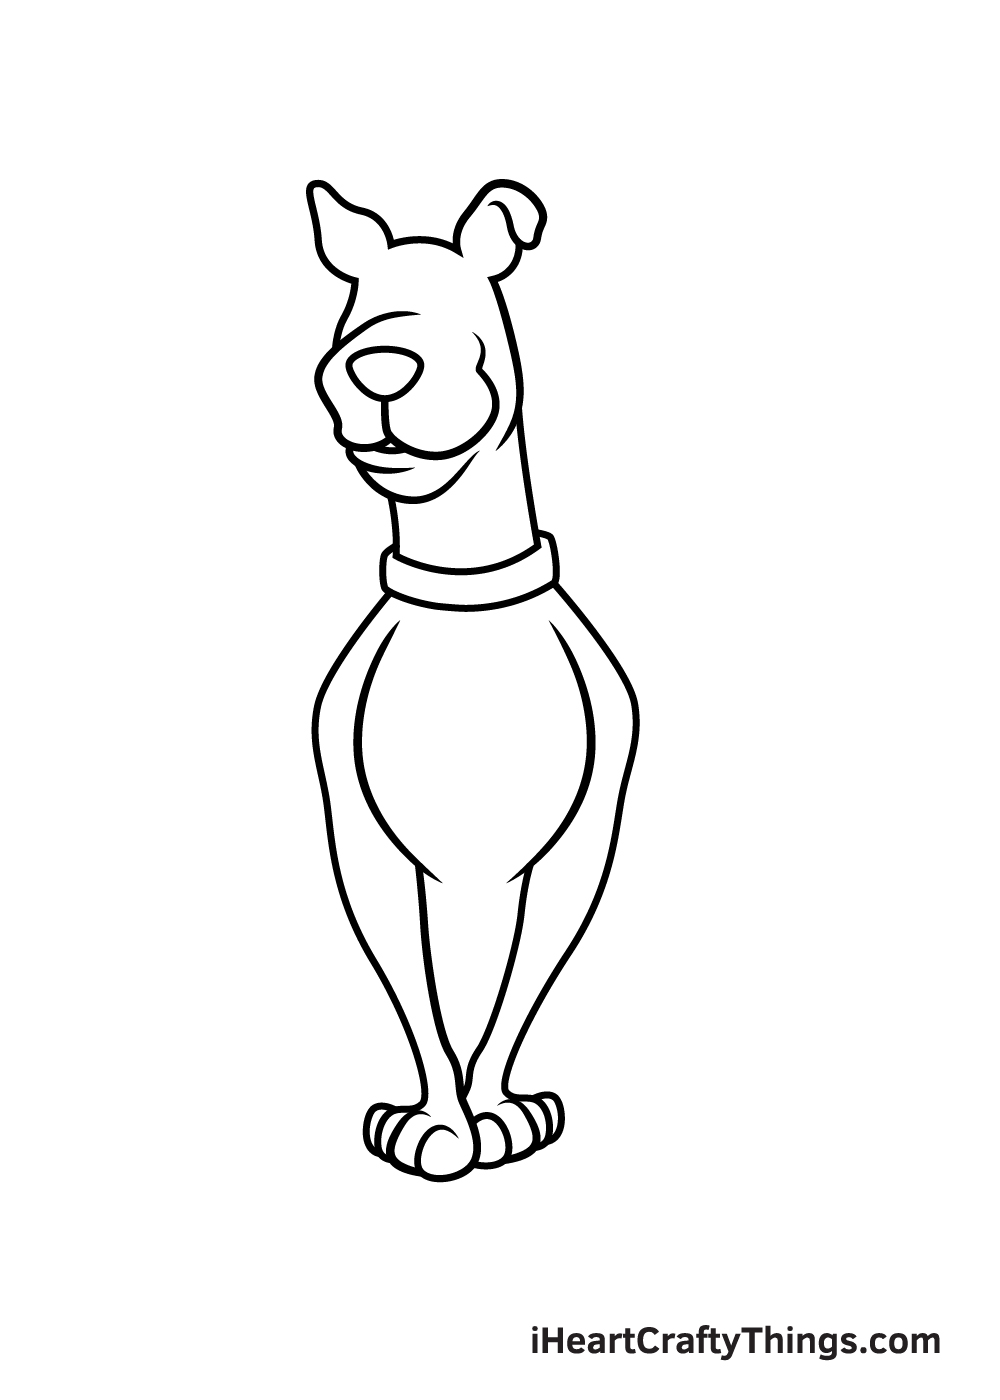
This step of your Scooby-Doo drawing will see you adding his front legs.
You can start these by drawing some curved lines for his shoulders and then give him some thin legs that end in curved shapes for his toes.
Step 7 – Now draw some back legs for Scooby
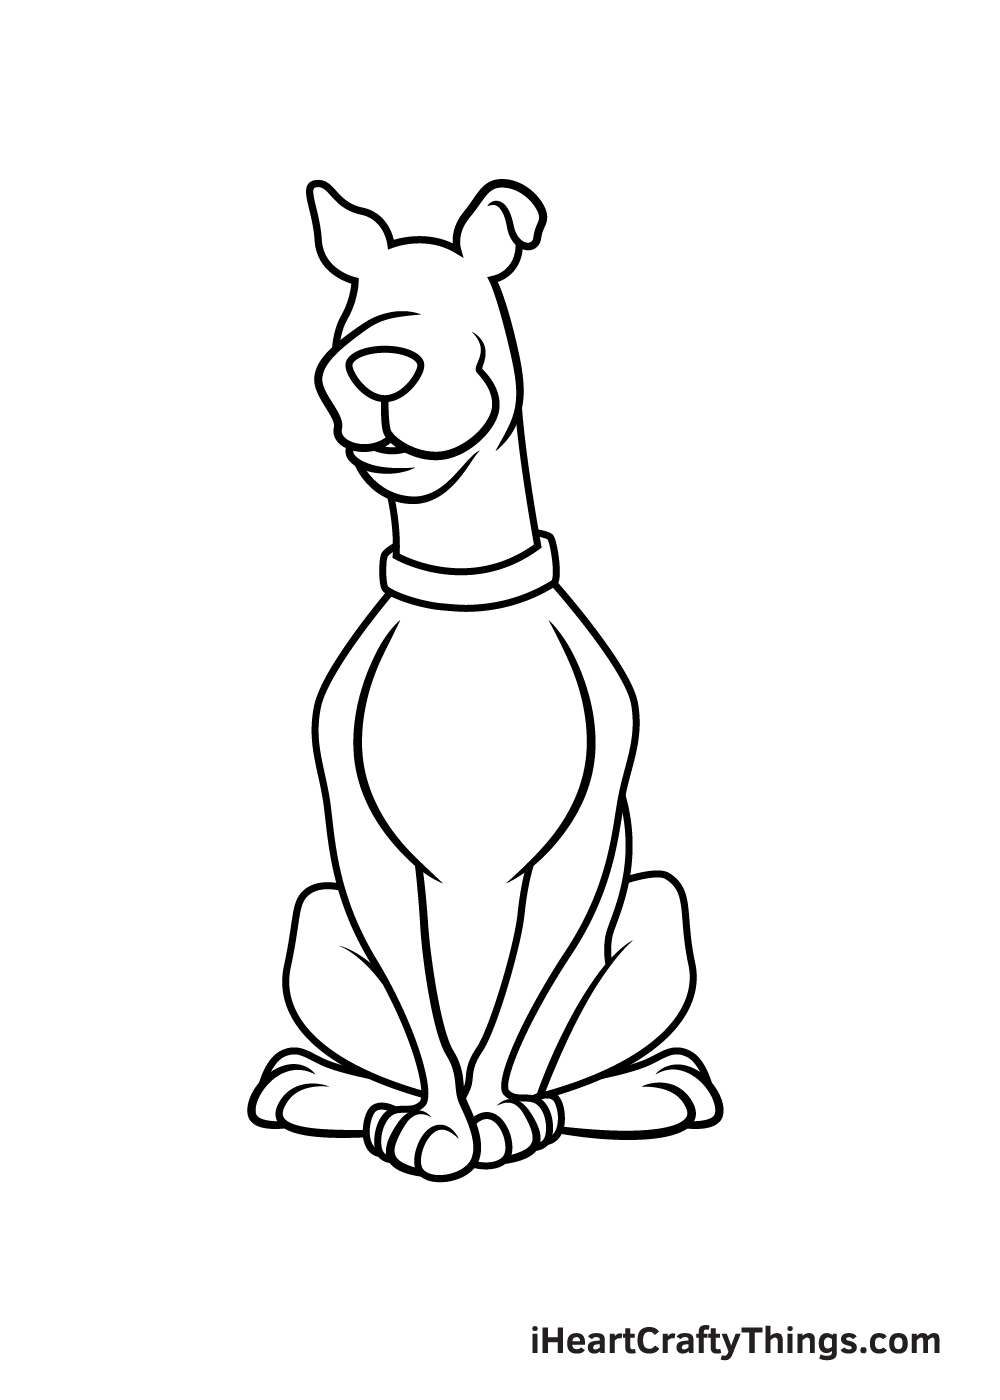
Scooby is sitting down in this image, so we will draw his back legs to reflect that in this step of our guide on how to draw Scooby-Doo.
His hips and tops of his back legs will be drawn with some curved lines. Then, his feet will be drawn with a combination of straight and curved lines for his toes.
If it sounds confusing, be sure to closely follow the reference image we’ve provided to help you out!
Step 8 – Draw a tail for Scooby
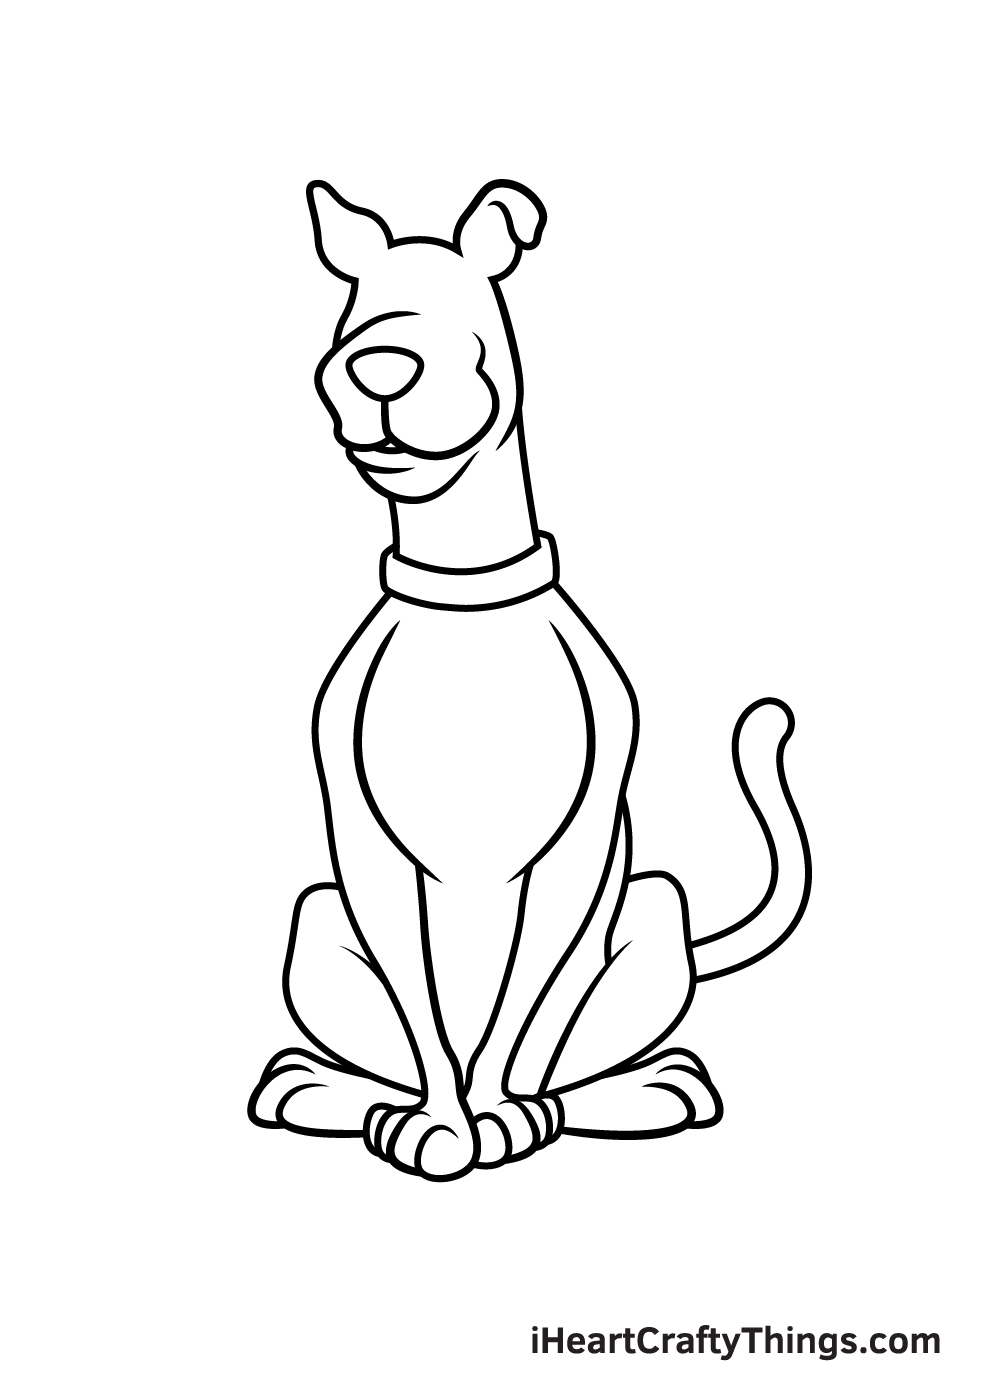
This part of your Scooby-Doo drawing should be an easy one for you to do! All you need to do is draw his tail coming out from the side of his right-hand back leg.
You can draw this with a curved line as shown in the picture we provided. It’s as easy as that and you’re ready for the final details!
Step 9 – Add in the final details for Scooby
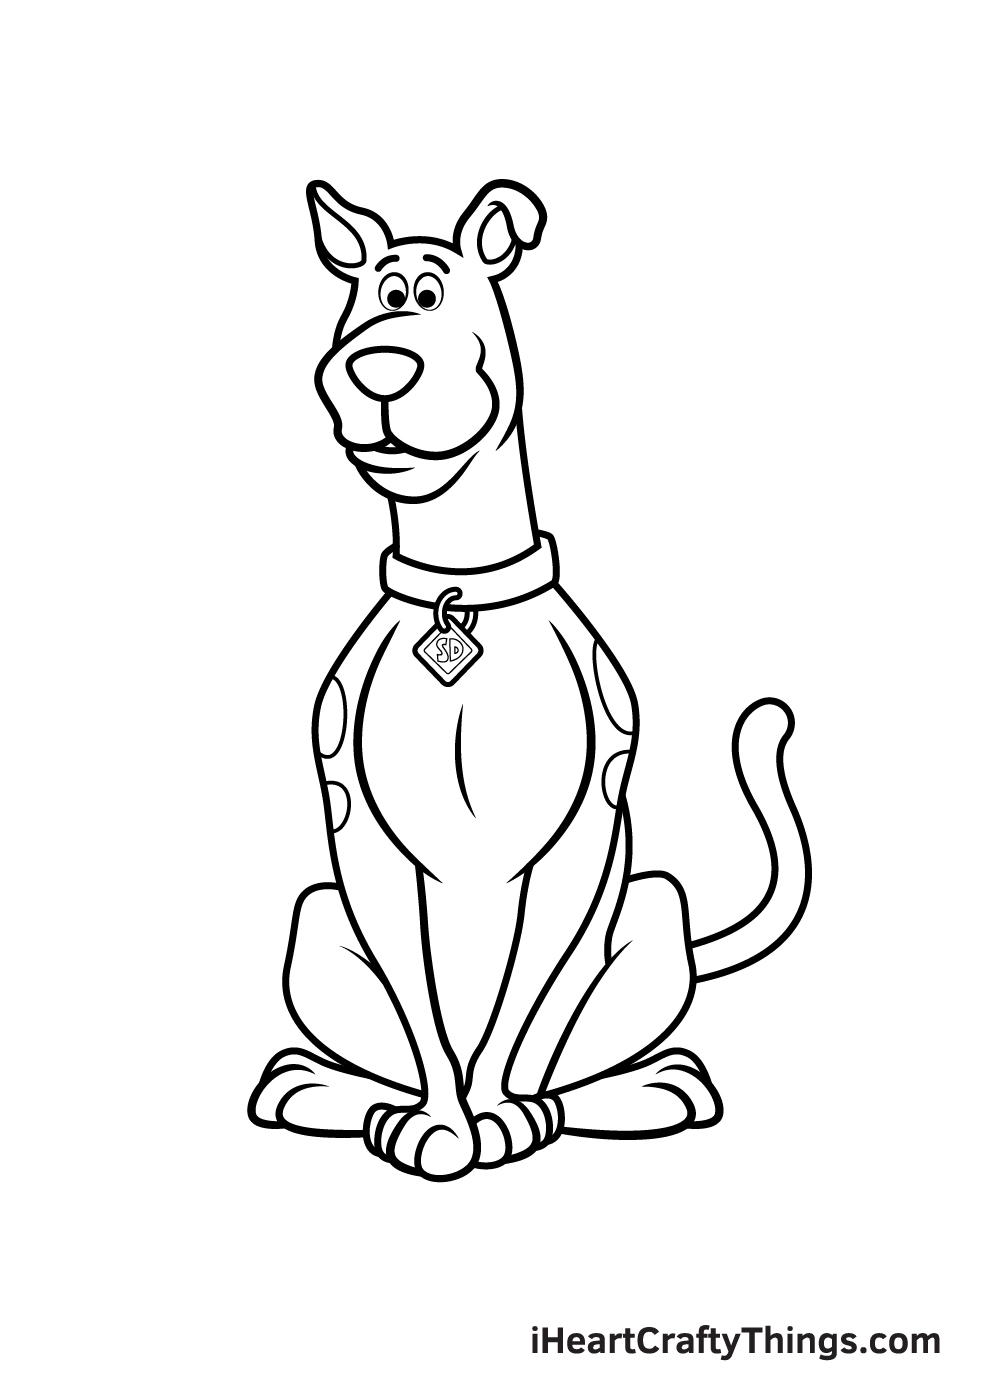
Before you add some colors in the final step of this guide on how to draw Scooby-Doo, we have just a few last details and touches to add! First, you can draw his little eyes with some simple ovals.
Then, you can add smaller details such as the inner portions of his ears and the SD logo on his collar. Finally, you can add some spots to his shoulders.
Before you move on, you can also add some extra details of your own! Perhaps you could draw some other Scooby-Doo characters or draw a background to replicate your favorite Scooby-Doo moment!
For the final part of your Scooby-Doo drawing, you can relax with some fun coloring! In our reference picture we used his typical coloring of brown for his body with blue and yellow for his collar.
That will give you a good reference point if you would like to keep his classic color scheme!
Be sure to color in any extra elements or background details you may have added as well!
You can also experiment with different art tools and mediums to really bring this drawing to life. We can’t wait to see what you come up with!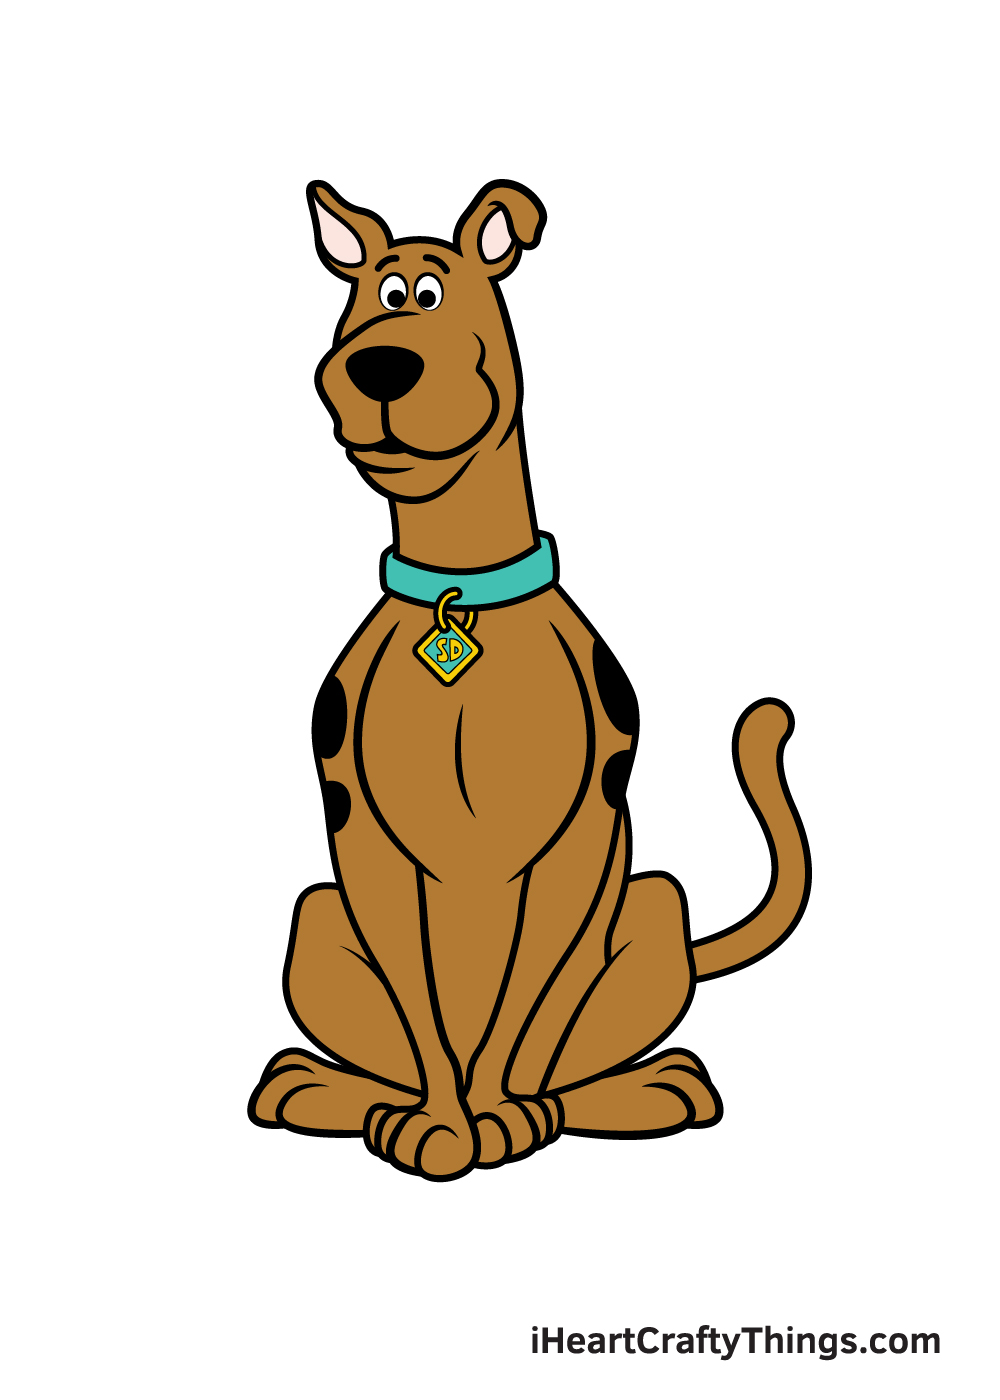
5 Tips To Make Your Scooby-Doo Drawing Even Better!
Find out how to make your Scooby-Doo sketch look ready for adventure!
If there’s one thing we know about Scooby, it’s that he loves to eat! This would be a great place to start for some additions to your Scooby-Doo drawing.
You could add all sorts of tasty treats around him in order to show that he is having a really good day! If you were to add these details, what are some types of food you could use?
Another way you could make your drawing of Scooby-Doo even better would be by adding some of his friends. You could add his best friend Shaggy or maybe the rest of the gang.
There are many allies to choose from, and you could use the show to help you if you want to add these characters. Who would you like to add from the Scooby-Doo cast?
Of course, you don’t need to stick to the heroes! You could also add one of the many spooky villains from the series.
You would certainly have enough characters to choose from! Most of the characters from the show are styled after monsters and ghouls, so you could pick your favorites.
Or, maybe you could design your very own unique Scooby-Doo villain!
Once you really have the hang of this Scooby-Doo sketch, you could change things up a bit. You could do this by changing the pose and facial expression that Scooby-Doo is showing.
This could be challenging, but once again you can use the show or images online to help you draw a new pose. What kinds of poses or facial expressions would you like to create?
Lastly, you may want to finish off your easy to draw Scooby-Doo artwork with a background. Just as there are many iconic characters, there are also lots of famous locations from the series.
You could recreate one of the spooky settings from your favorite episodes, but it could also be a chance to design a new one of your own.
What background would you choose for this picture?
Your Scooby-Doo Drawing is Complete!
That brings you to the end of this guide on how to draw Scooby-Doo! We hope that it was a lot of fun for you to learn how to draw this iconic character.
With this guide to help you, we also hope that it was made a lot easier to do as well!
Now that you have mastered this Scooby-Doo drawing, you can keep the fun going by continuing with your own details, background elements and details!
We mentioned a few ideas such as drawing a background from your favorite Scooby-Doo scene or adding some other characters from the show. Be sure to get creative with it and see what happens!
When you’re finished with this guide, the drawing fun doesn’t need to stop! You can learn how to draw plenty of cool things by checking out the guides on our website. We upload new ones all the time, so be sure to check in often!
Once your Scooby-Doo drawing is complete, we would love to see your artwork! Please be sure to share it on our Facebook and Pinterest pages for us to admire!