


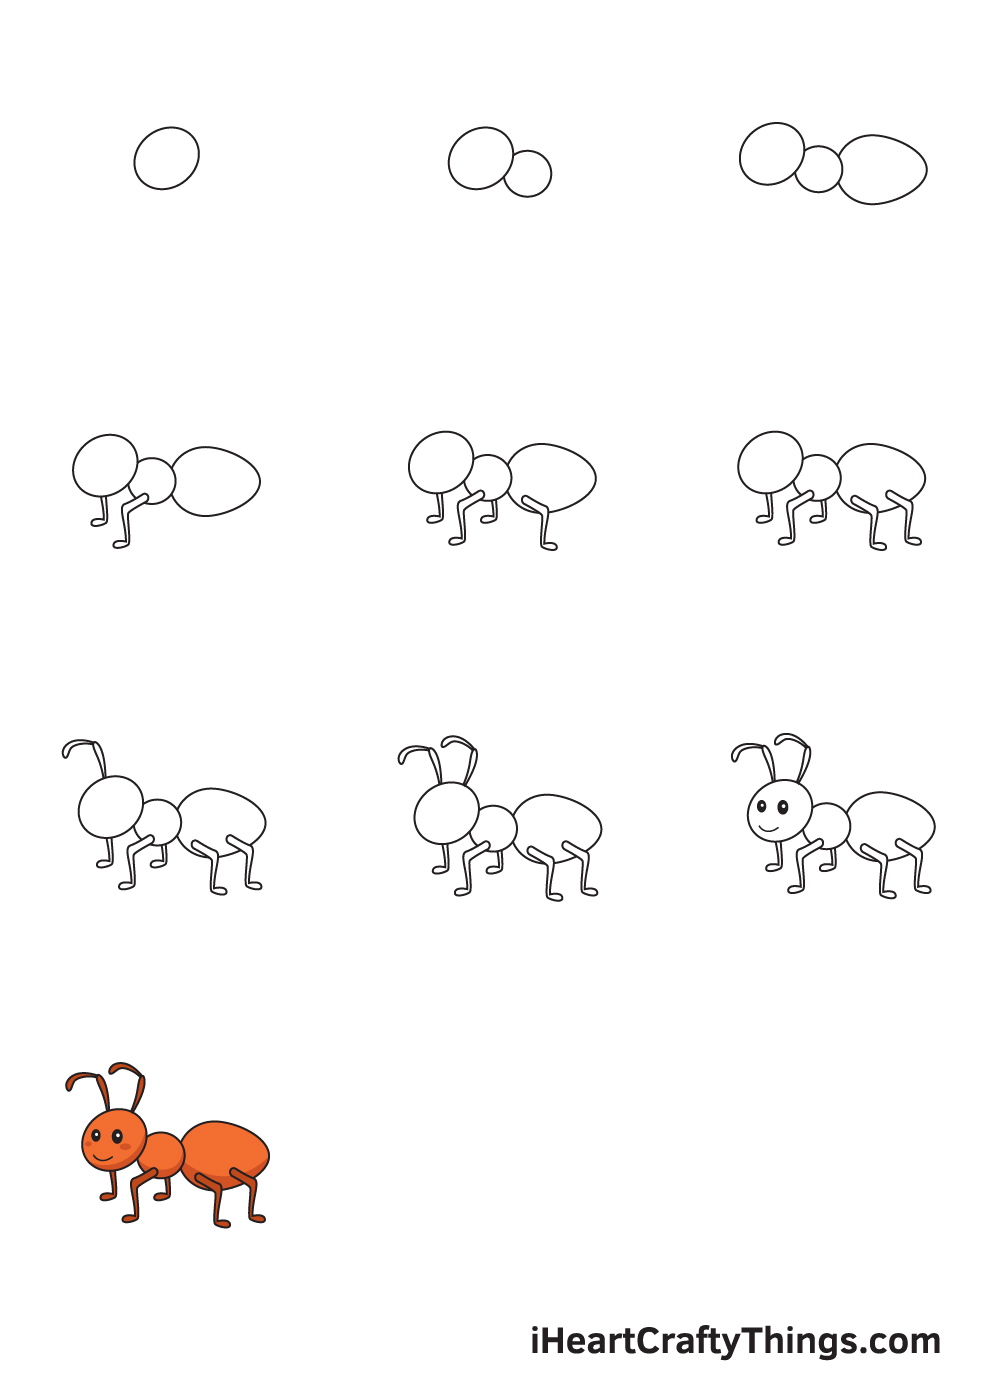
It’s time to join me as we learn how to draw an ant together! You’re just a few steps away from discovering how to make your very own cute cartoon ant.
We may not notice them all the time, but ants are usually around us at all times. They’re some of the hardest workers in the animal kingdom and are constantly on the move.
They’re so small that we may not pay much attention to them, but when you look closely you will see that they are more complex than you may think.
That complexity can make them hard to draw, but I will show you the easiest way to do it. Once you have this little cartoon ant drawn, you could draw as many of them as you like to make a whole colony!
See How To Make Your Ant Drawing
How to Draw an Ant — Let’s get started!
Step 1
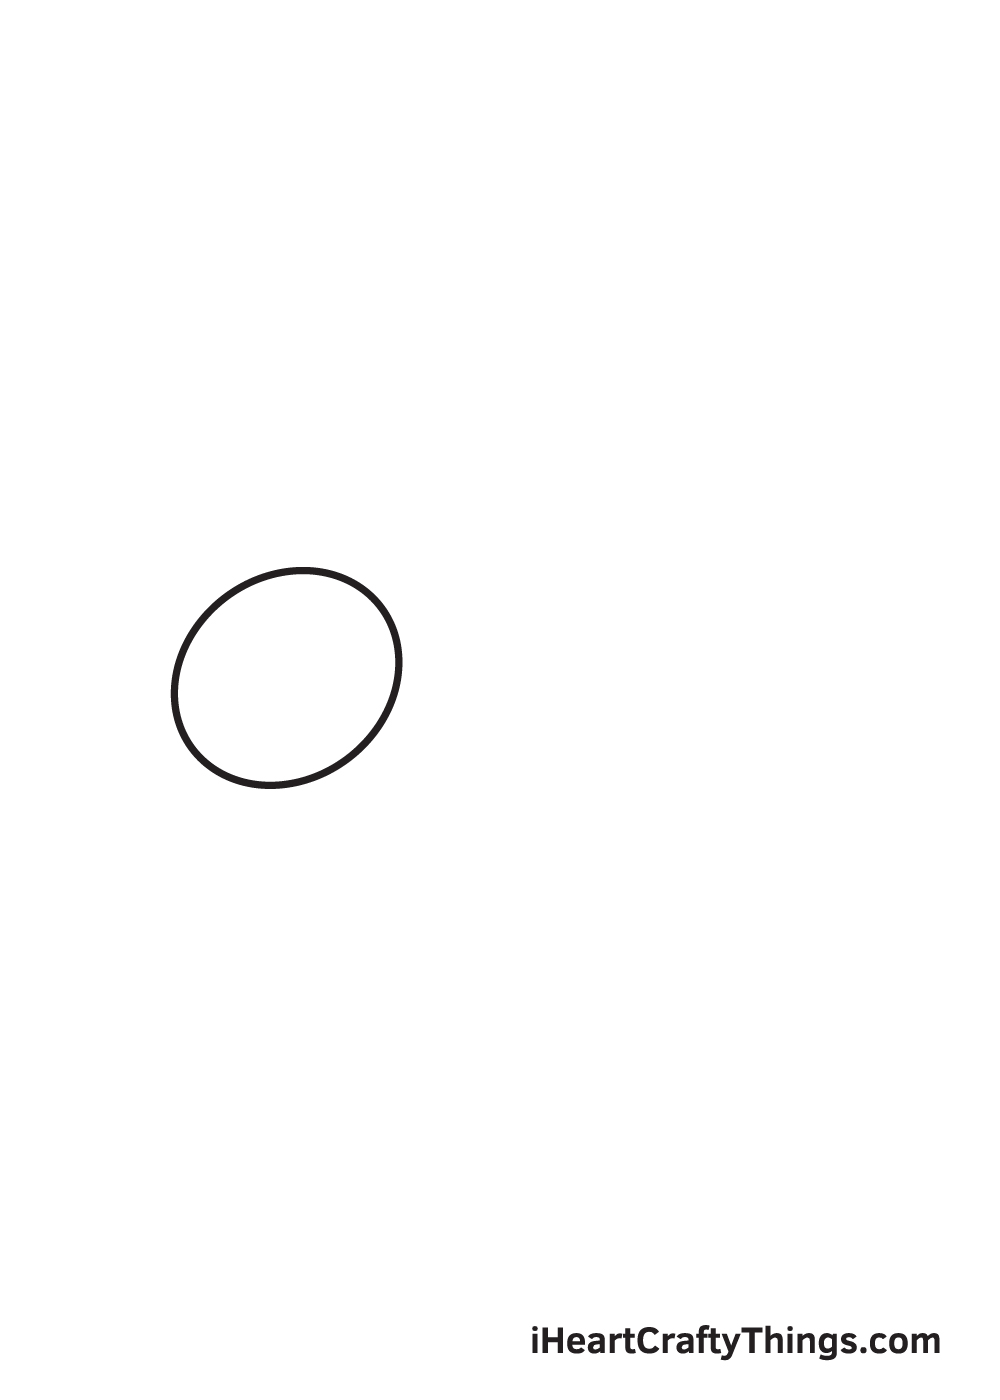
Begin by drawing a diagonal oval shape on the left side of your paper. This creates the shape of the ant’s head.
Create reference lines by drawing an intersecting horizontal and vertical line across your paper. The horizontal line on the left side marks the spot where you should draw the outline of the ant’s head.
Once you’re done drawing an ant, you can easily get rid of the guidelines using an eraser. This step is optional, but it can help you ensure that the ant will be drawn in the center.
Step 2 — Outline of the Head and the Thorax
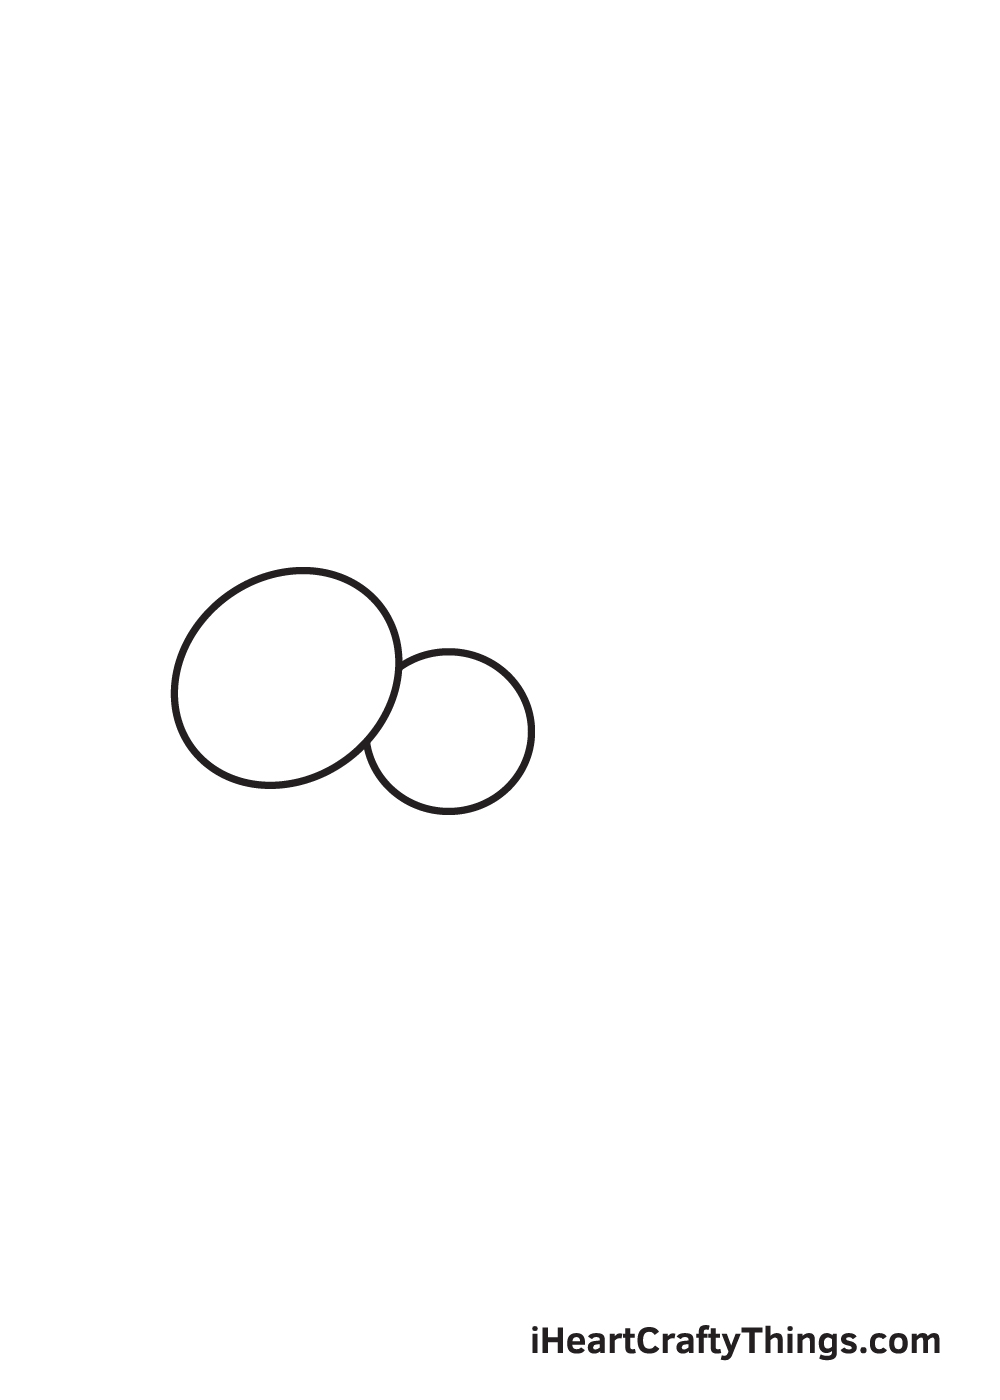
Draw a circle shape on the right side of the head. This forms the ant’s thorax, which is the part of its body that connects its head to its abdomen.
Keep in mind that the circle forming the thorax must be slightly smaller than the head. It should also be overlapping or directly connected to the head, as shown in the illustration.
Step 3 — Afterwards, Draw the Ant’s Abdomen
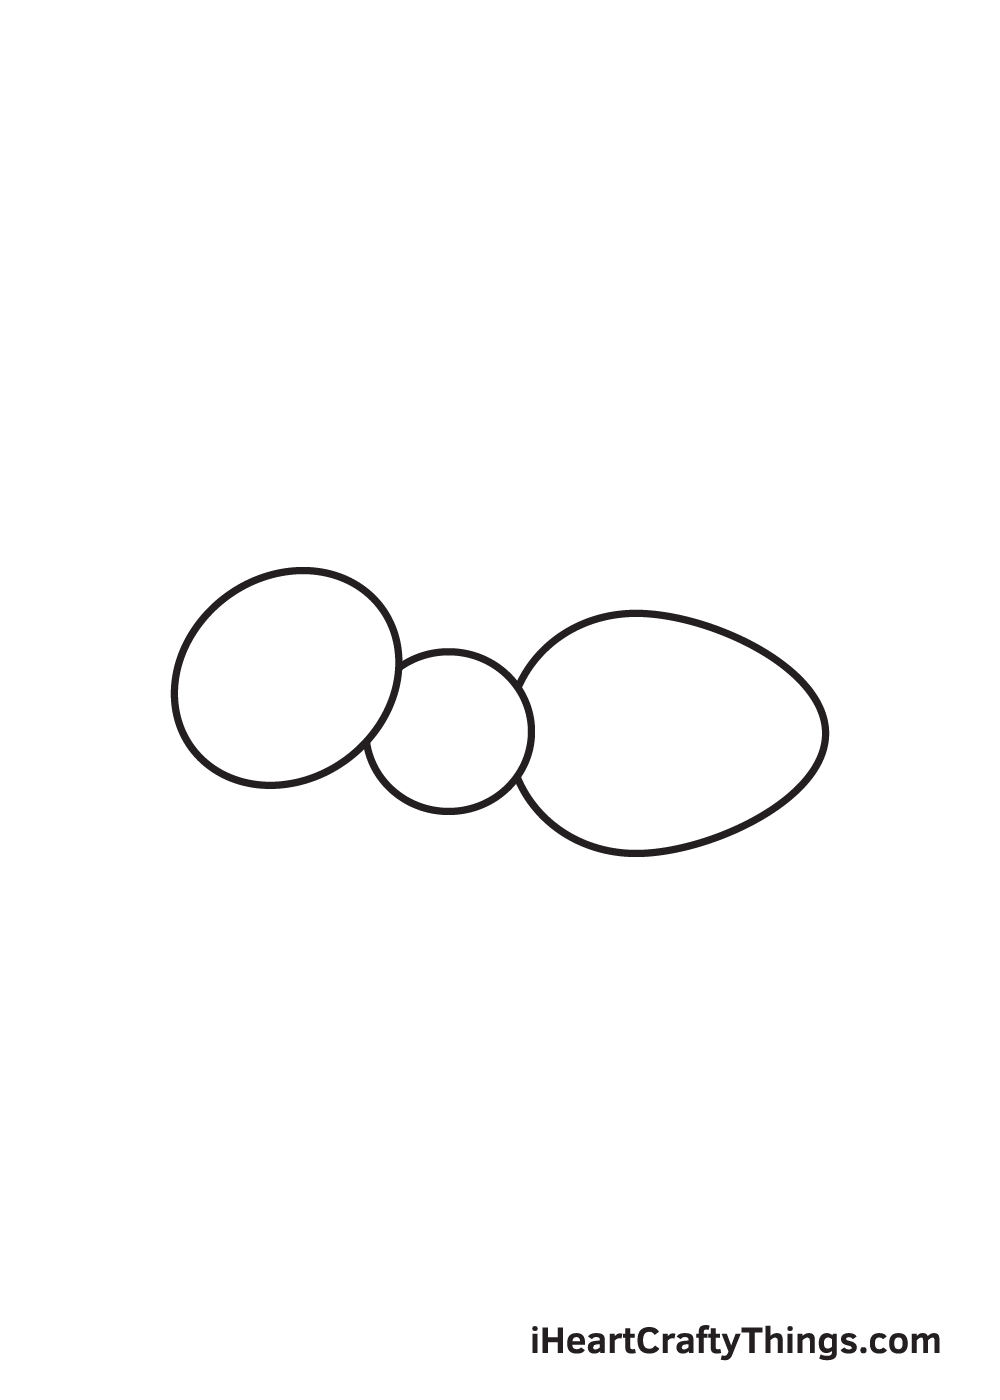
Draw a sideways irregular oval shape with a slightly tapered end right next to the thorax, which we drew in the previous step.
This structures the abdomen of the ant. When drawn correctly, the shape of the abdomen should look like an egg.
Take note: the ant’s abdomen must be significantly larger than its head and thorax.
Step 4 — Next, Draw the Front Legs of the Ant
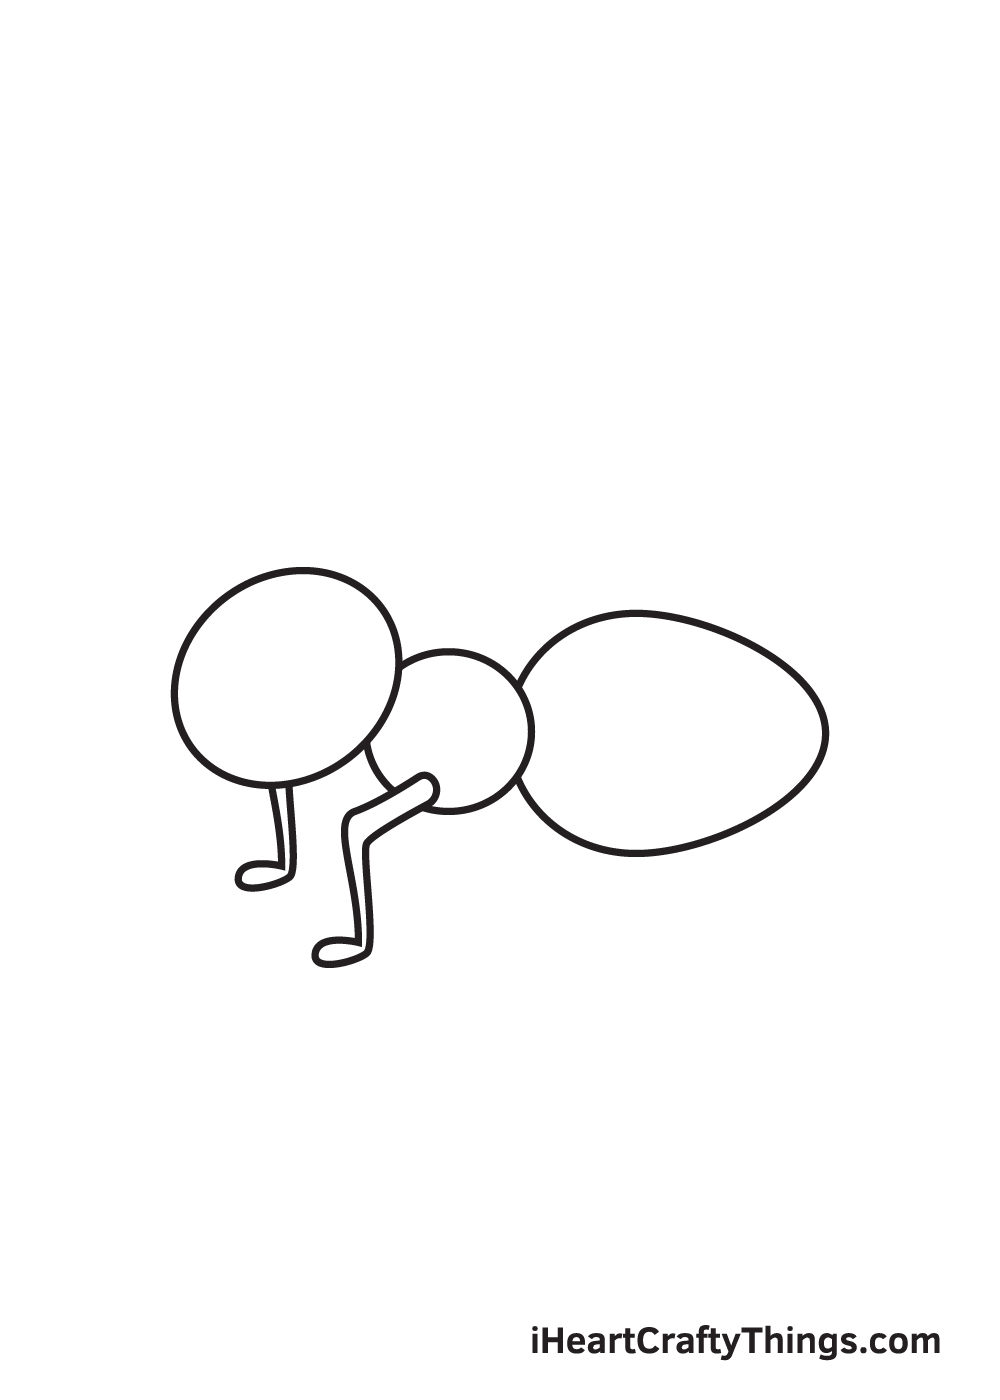
Draw two parallel angled lines with a small sideways oval shape at the bottom underneath the thorax. Then, repeat the same step on the opposite side. This forms the ant’s pair of legs.
Since the ant is facing towards the left side, its left leg is only partially visible.
Step 5 — Then, Draw the Hind Legs of the Ant
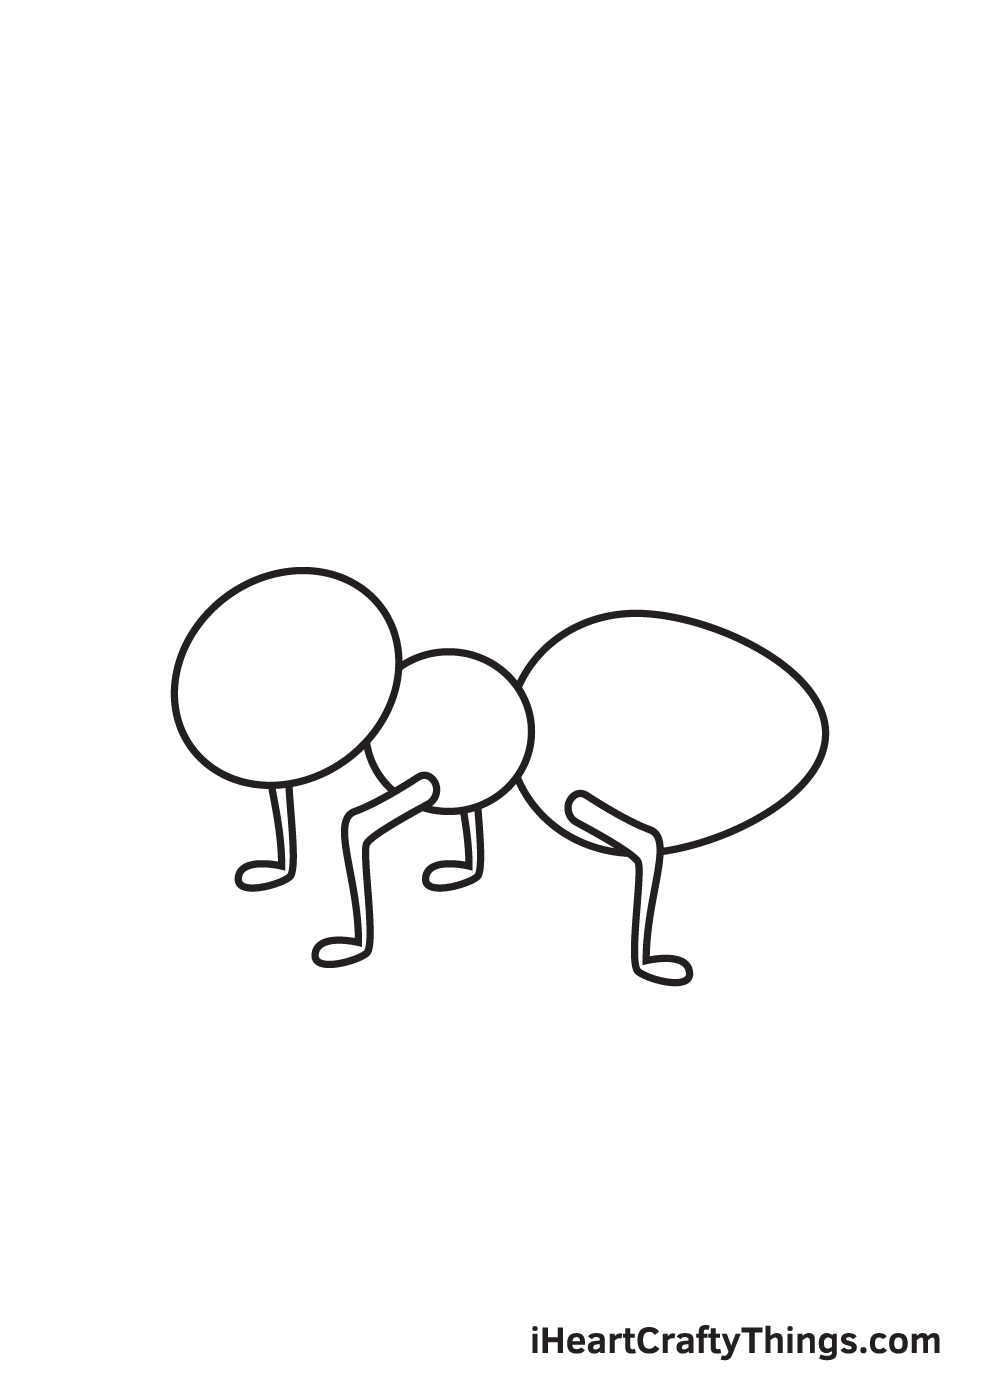
Repeat the previous step to create the hind legs of the ant. This time, however, the legs are connected to the abdomen instead of the thorax.
Step 6 — Now, Complete the Ant’s Set of Legs
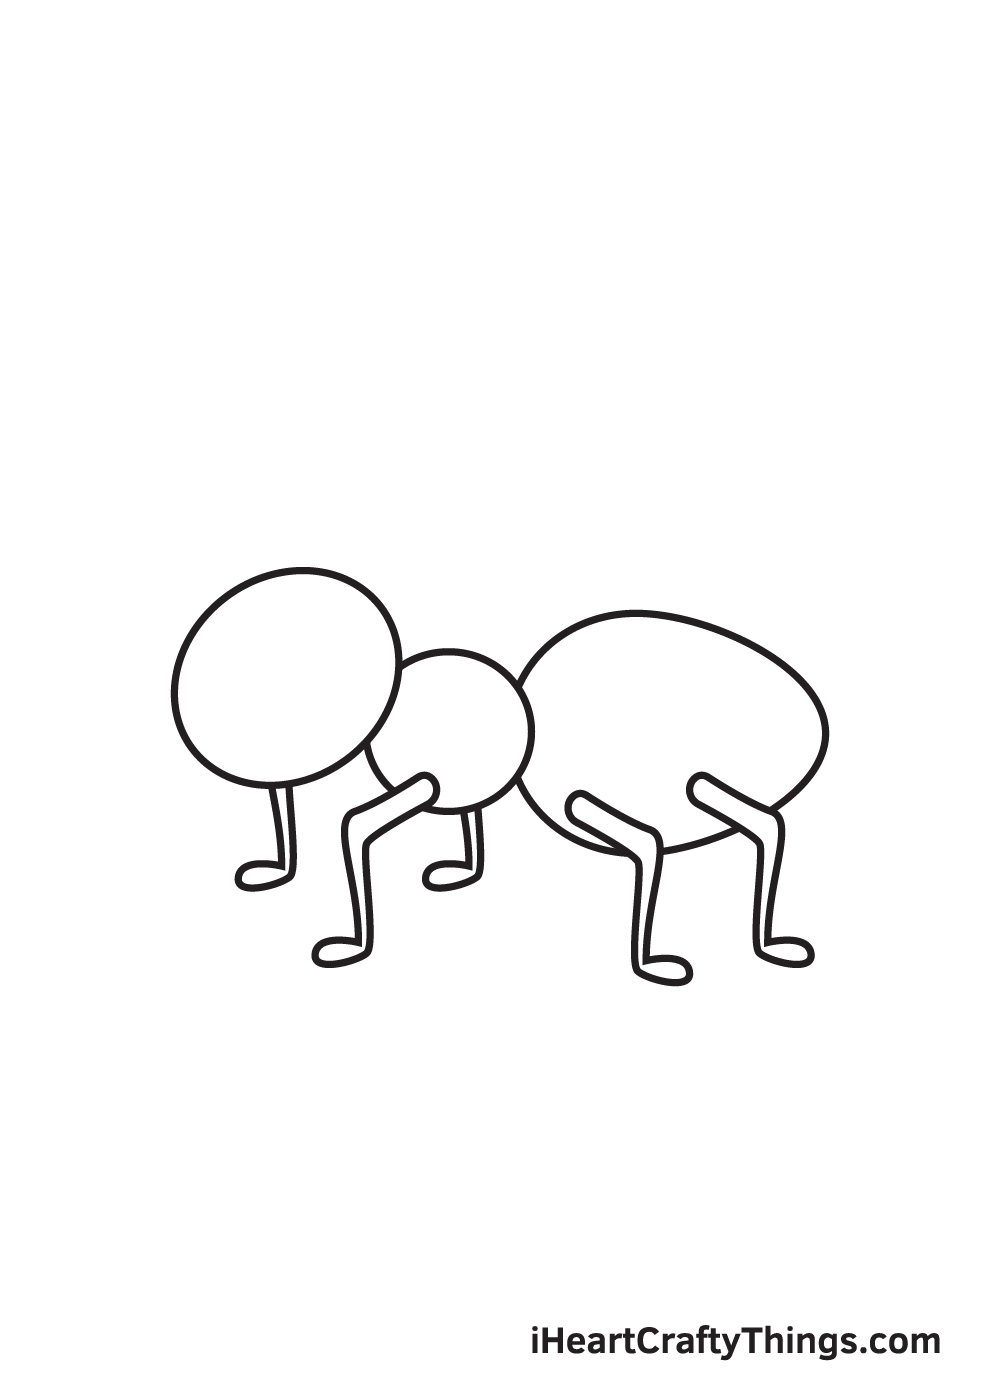
Remember, ants have six legs. So, in this step, we’ll be completing its set of legs.
Draw another leg underneath the rear part of the ant’s abdomen. As you can see in the illustration, the opposite leg isn’t visible because it’s being covered by the huge abdomen. Don’t worry about it!
Step 7 — Next, Draw the Left Antenna of the Ant
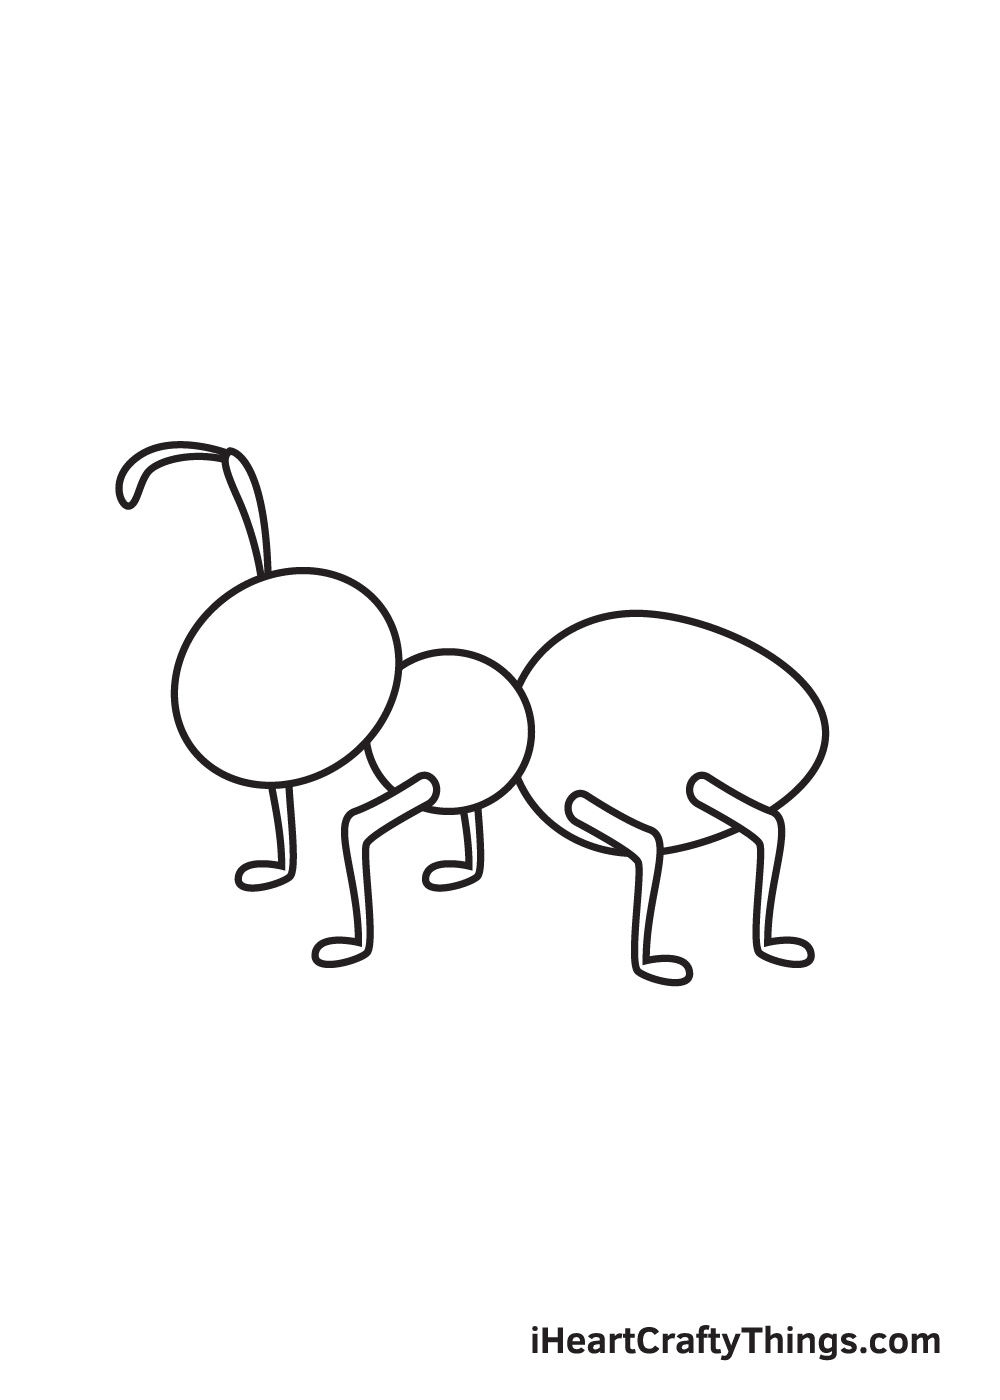
Draw two connected narrow line figures on the left side at the top of the ant’s head. This forms the ant’s left antenna.
Keep in mind that the bottom line figure should be standing upright while the one at the top is sideways, thus forming an angle.
Step 8 — Now, Finalize the Antennae of the Ant

Repeat the previous step on the opposite side at the top of the ant’s head. This forms the ant’s right antenna, thus completing its pair of antennae.
Remember, the two antennas should have a similar form and structure.
Step 9 — Draw the Features on the Face of the Ant

In this step, we’ll be drawing the facial features of the ant to finalize the drawing.
Continue by drawing two standing oval shapes with a tiny circle inside each oval. This forms the pair of eyes of the ant.
Afterwards, shade the entire eyes while leaving out the small circles unshaded to create a dramatic “sparkling eyes” effect.
Now, draw a wide upward curve below the eyes. This forms the wide smile on the ant’s face, making it look extremely happy!
Finally, it’s time for the most exciting step, which is coloring the ant! This is the part where you can showcase your artistic skills, primarily your ability to mix and match various colors.
Ants are mostly either red or black in color. However, there are also ant species that are colored green and some even have metallic lustre.
Whether you’ll choose to color the ant using its standard colors or use a customized set of colors, we’re sure the colors will turn out beautifully either way! Feel free to color the ant however you like and have fun playing with colors!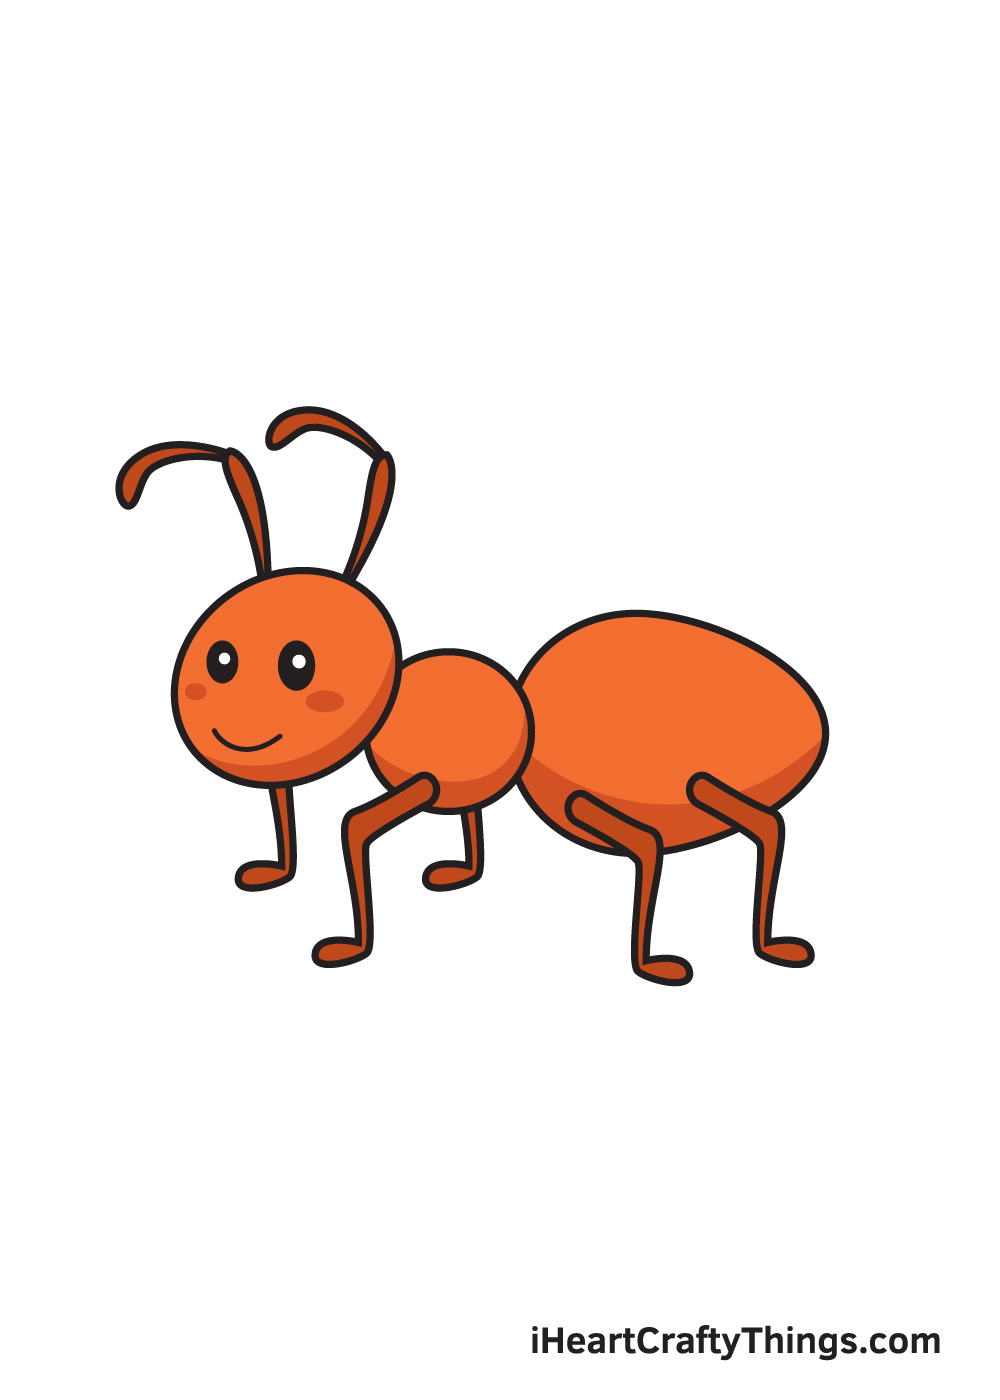
Do this to take your ant drawing to the next level
Check out these fantastic tips on how to make your ant sketch even better!
We created a really cute cartoon portrayal for this ant sketch, but if you want to change it up then you can make it more realistic.
You can find lots of pictures of ants that have been enlarged, and you can use these pictures to help you draw a more realistic one.
By changing the legs, thorax, abdomen and antennae, you can already be on the way to having a more realistic ant. Do you think you will try to change the design?
Whether you go for a realistic look or leave it cartoony, you can also have fun adding a background. Ants can be found in pretty much any location, so you could get really creative.
It could be crawling around a picnic or maybe a kitchen counter. Or, if you want something a bit wackier, you could make this ant gigantic and have it attack a city.
These are just a few things to try, but we know you will have some amazing ideas of your own!
Ants rarely travel alone, so another way to make this drawing of an ant even better is by adding more ants.
You know how to do it after completing this guide, so it should be easy for you to do now!
If you’re feeling extra patient, we think it would look great to squeeze as many ants as you can onto the page. It could take time, but it will be worth it when you have a busy, awesome image to behold!
Ants aren’t super colorful creatures, but you could still use some fun colors for this ant sketch! You could keep the colors muted and realistic, but you could also get a bit more creative with your color choices.
It can be fun to try out different mediums and techniques, so why not experiment with this one? You may be surprised what you end up with when you let your creativity take over?
Your Ant Drawing is Complete!
We hope that you had a fun drawing activity with this step-by-step drawing tutorial.
Remember, all of our drawing tutorials are completely free for you to use as learning materials to help you learn how to draw human characters, various animals, interesting objects, and many more!
We are regularly updating our “How to Draw” catalog, so don’t forget to keep checking back to continuously enjoy brand-new drawing tutorials.
What would you like to learn how to draw next? Let us know and we’ll do our best to create a drawing tutorial for that subject.
Completing a drawing of an ant is an achievement, so you should feel proud of yourself for creating such a masterpiece!
Once you’re done with your artwork, make sure to take a photo of it and share it on our Facebook page as well as on Pinterest.
We would love to see your ant drawing!