Scarves are an item of clothing that can be taken for granted! These helpful garments help to not only prevent our necks from freezing but can also work as a great fashion statement.
They can come in a huge variety of different colors and patterns, and learning how to draw a scarf is a great way to design your own variations.
If you would like to design your own cool scarves, then you’re on the right guide!
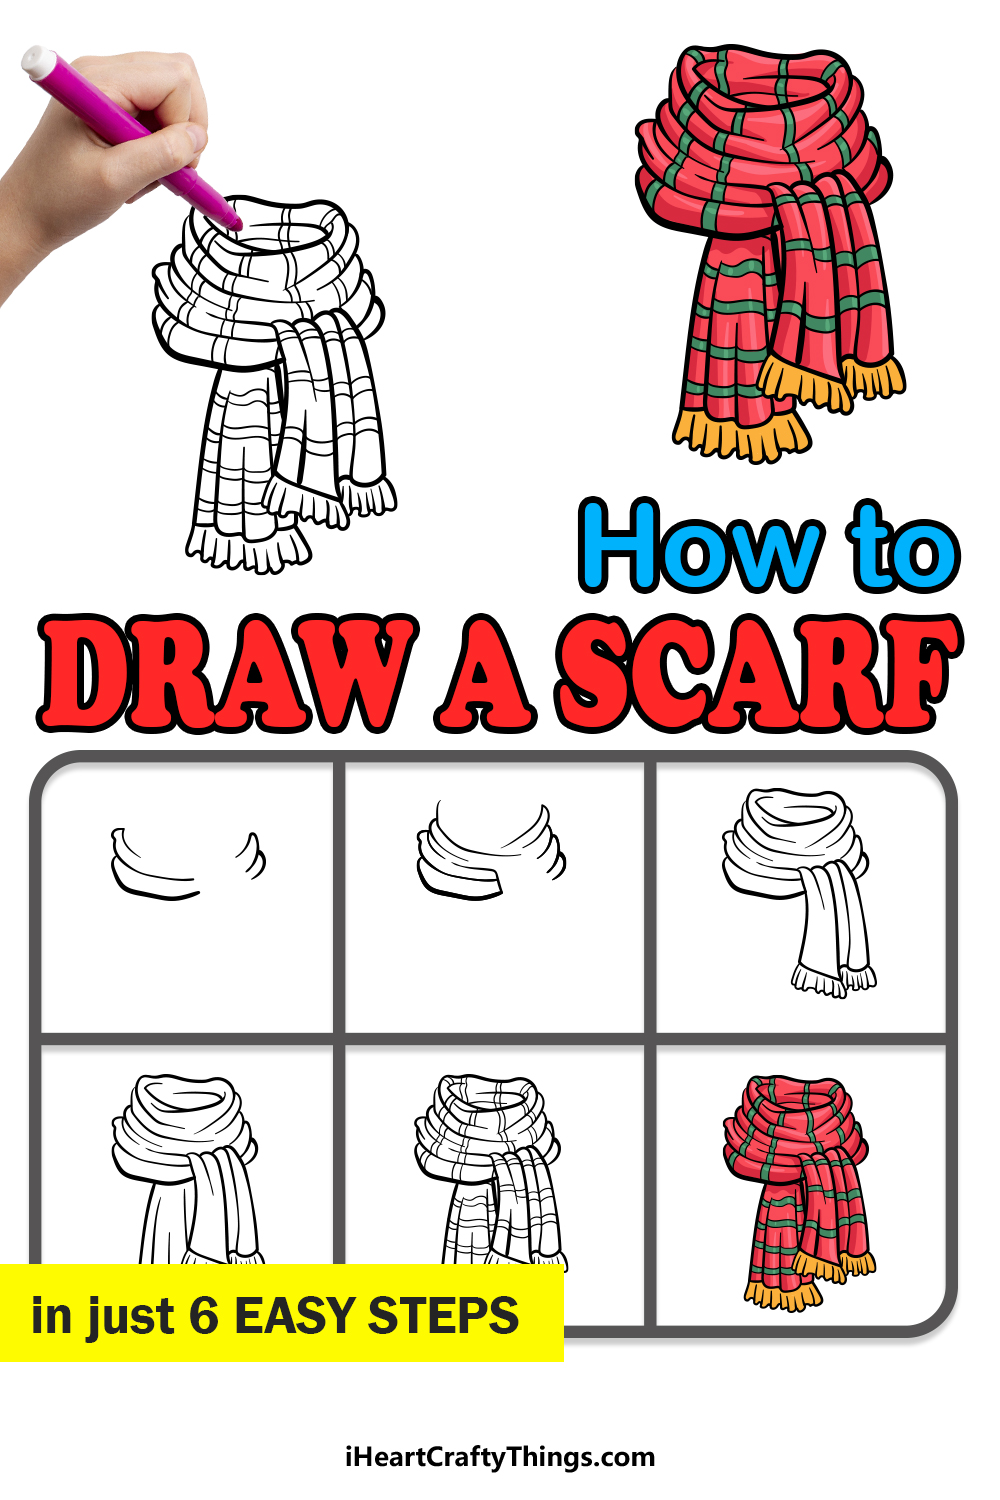
This step-by-step guide on how to draw a scarf in just 6 easy steps will provide some Winter themed fun no matter the time of year.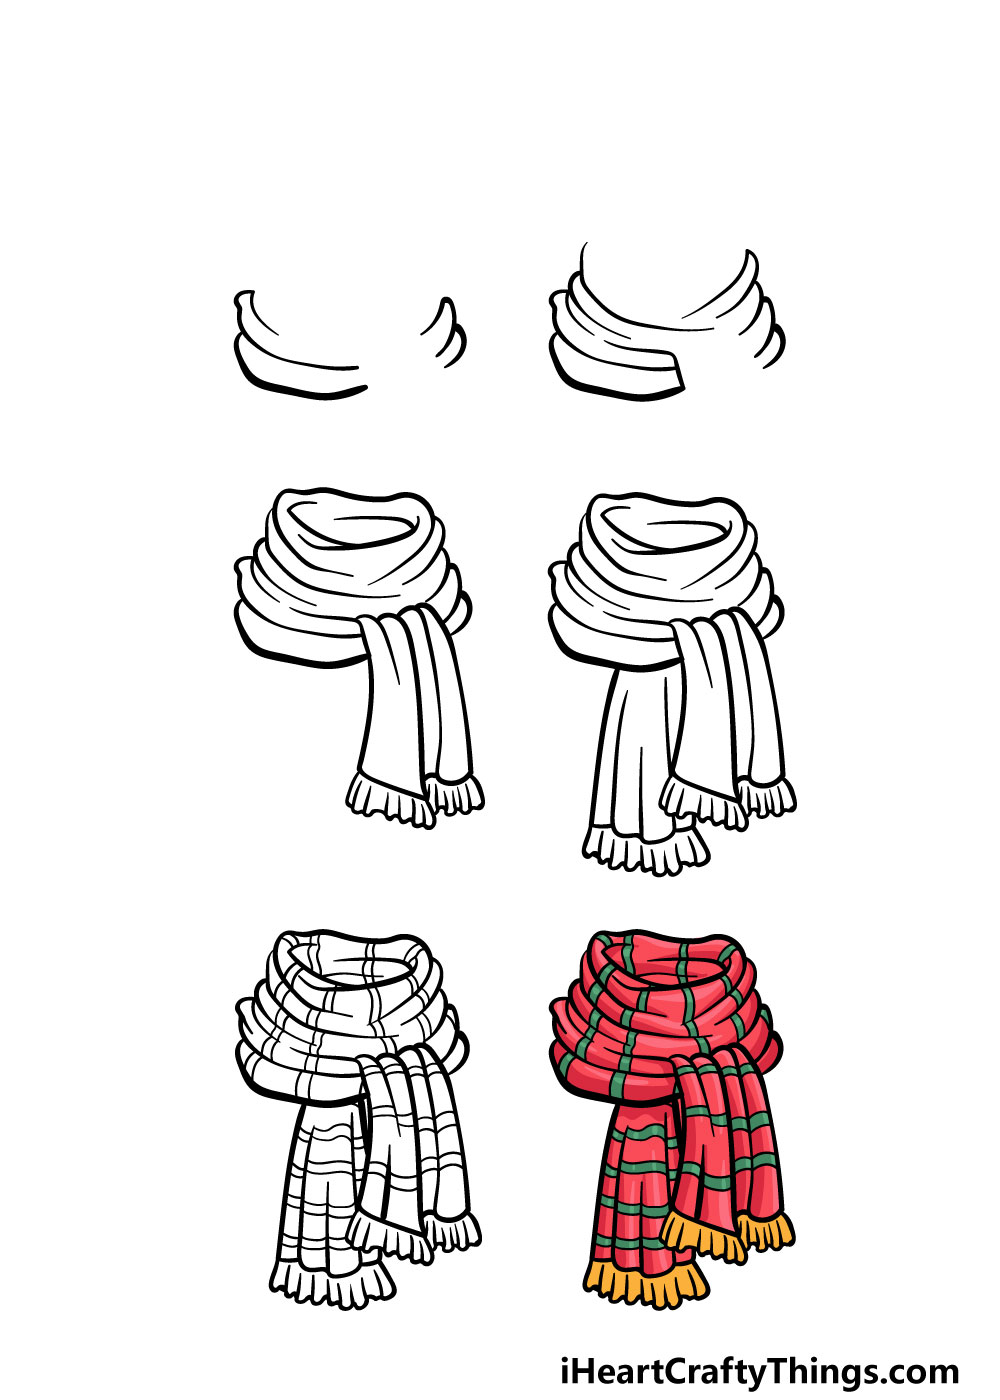
How to Draw A Scarf – Let’s get Started!
Step 1
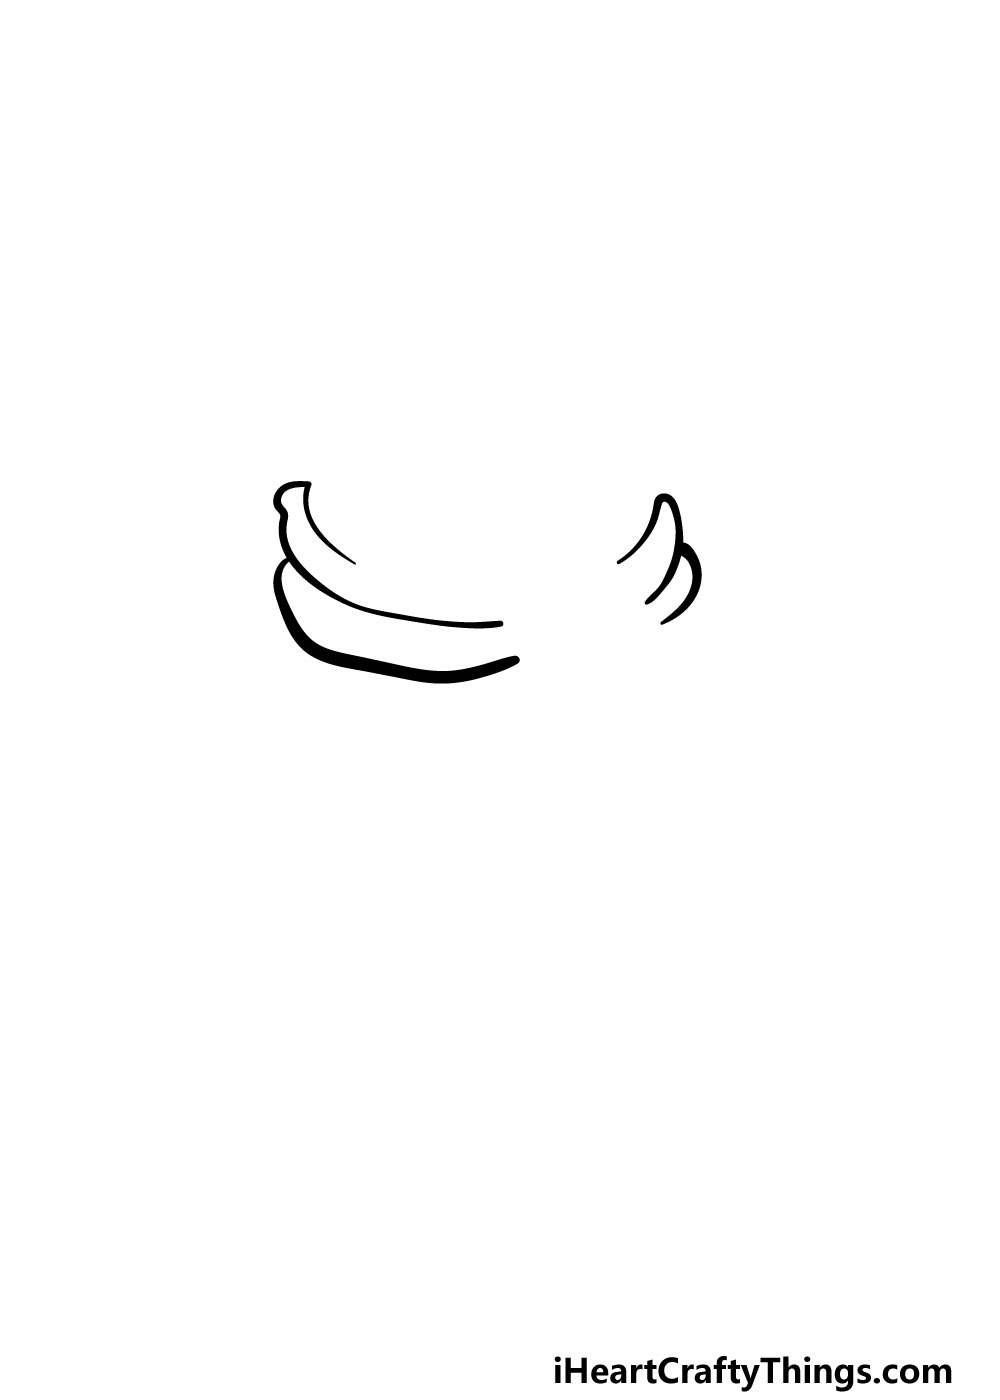
The scarf that we will be creating in this guide on how to draw a scarf will be wrapped around the neck of the wearer. In this first step, we will be starting on the outline of the scarf.
For the scarf, we will be using lots of curved lines connecting to one another to give the impression of fabric wrapping around itself.
For now, we will be drawing three of these curved lines for each side of the scarf. The ones on the left will be quite a bit longer and larger than the ones on the right, as shown in our reference image.
Once you are happy with how these lines look then you’re ready to move on to step 2!
Step 2 – Draw some more of the folds for the scarf
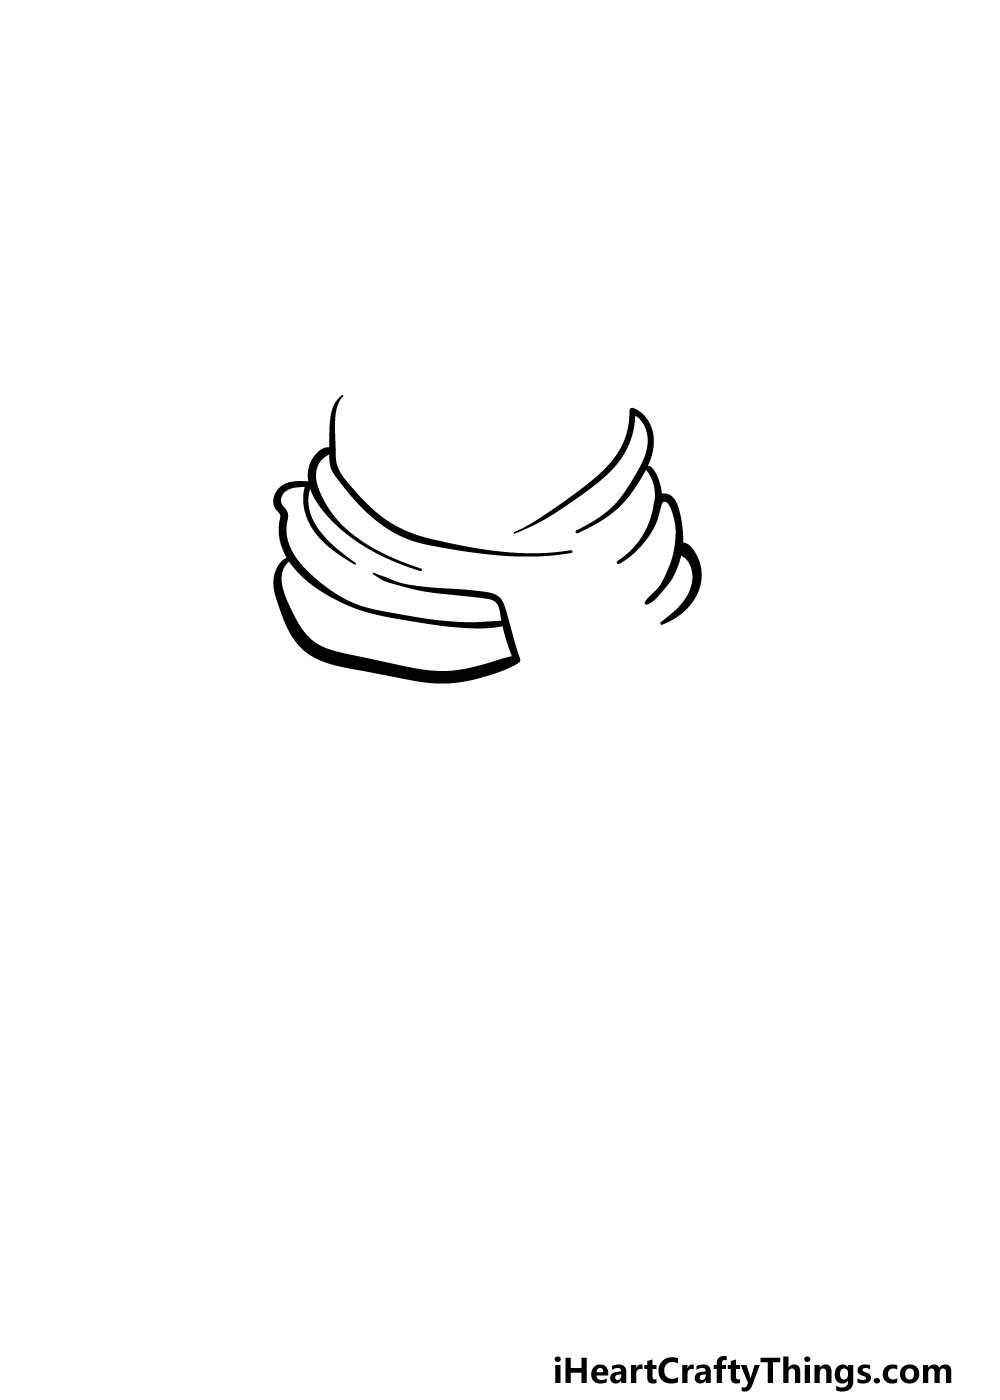
In this second part of your scarf drawing, we will be adding more folds to the scarf. The placement of the lines can get a bit tricky for the next few steps, so you may want to take it slowly and follow the reference image very closely.
We will be adding some more curved lines to both sides of the scarf, and they will go above and connect to the ones that you drew in the previous step.
Provided you followed the guiding pictures, there should be a large gap at the top of the scarf with a smaller one at the bottom. Worry not, however, as we will fill those gaps very soon in the next few steps!
Step 3 – Now, finish the outline of the scarf
We mentioned filling the gaps of the scarf in the previous step of this guide on how to draw a scarf. We will fulfill that promise now as we draw some elements into both gaps.
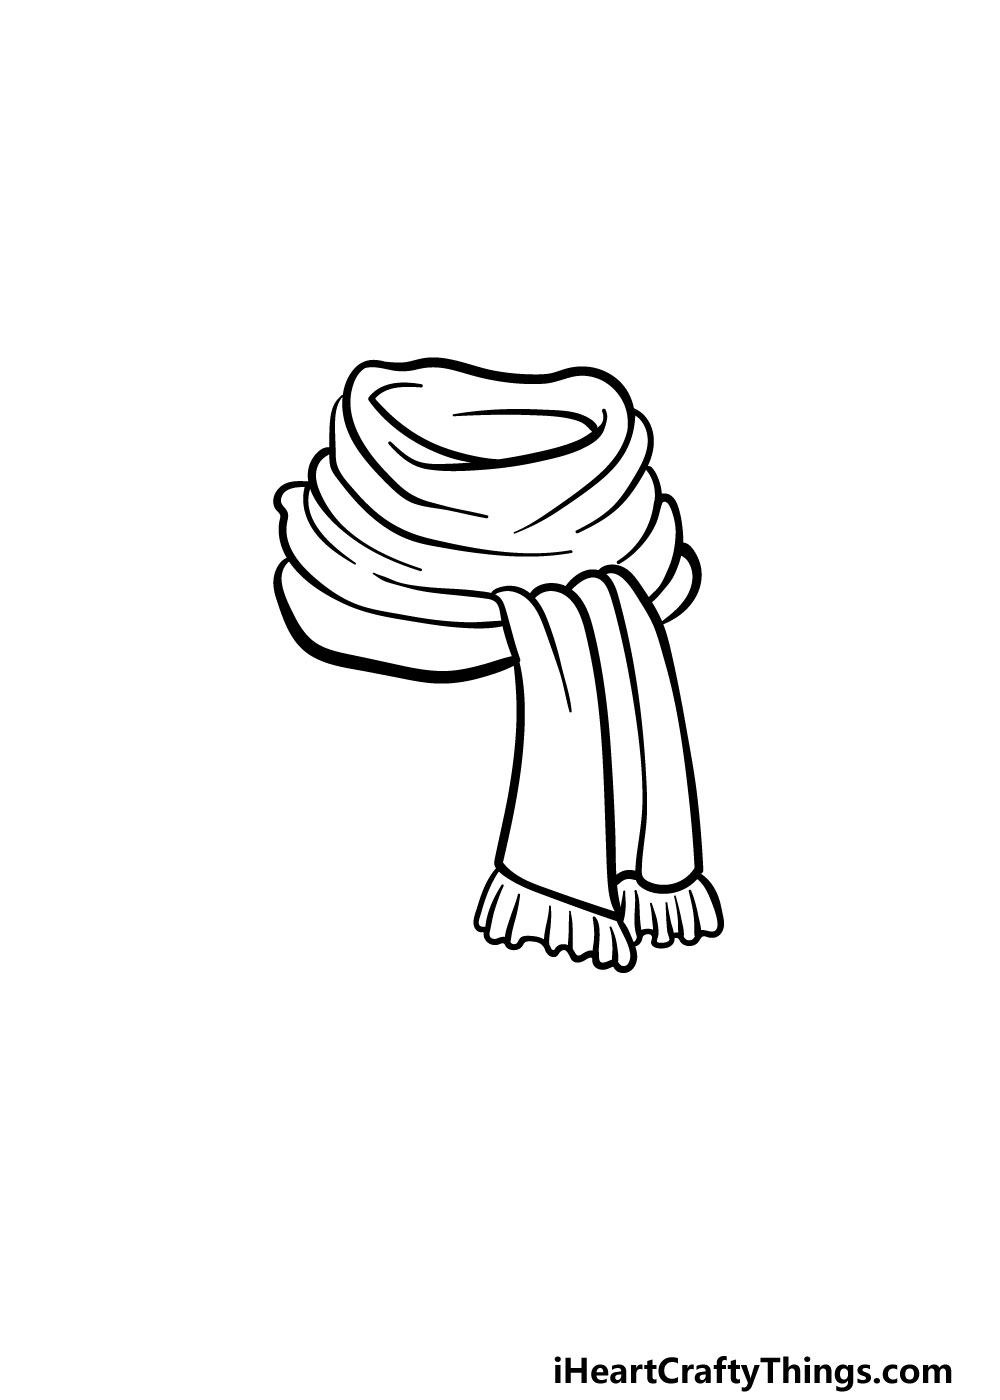
For the top of the scarf, we will be adding some more curved lines, and at the top there will be some of these that connect to create a roughly oval shape.
Then, for the gap at the bottom, we will be drawing some slightly curved lines to create two ends of the scarf falling down. We will finish these off by adding some bumpy lines at the end to make them seem furrier.
Step 4 – Add another end for the scarf
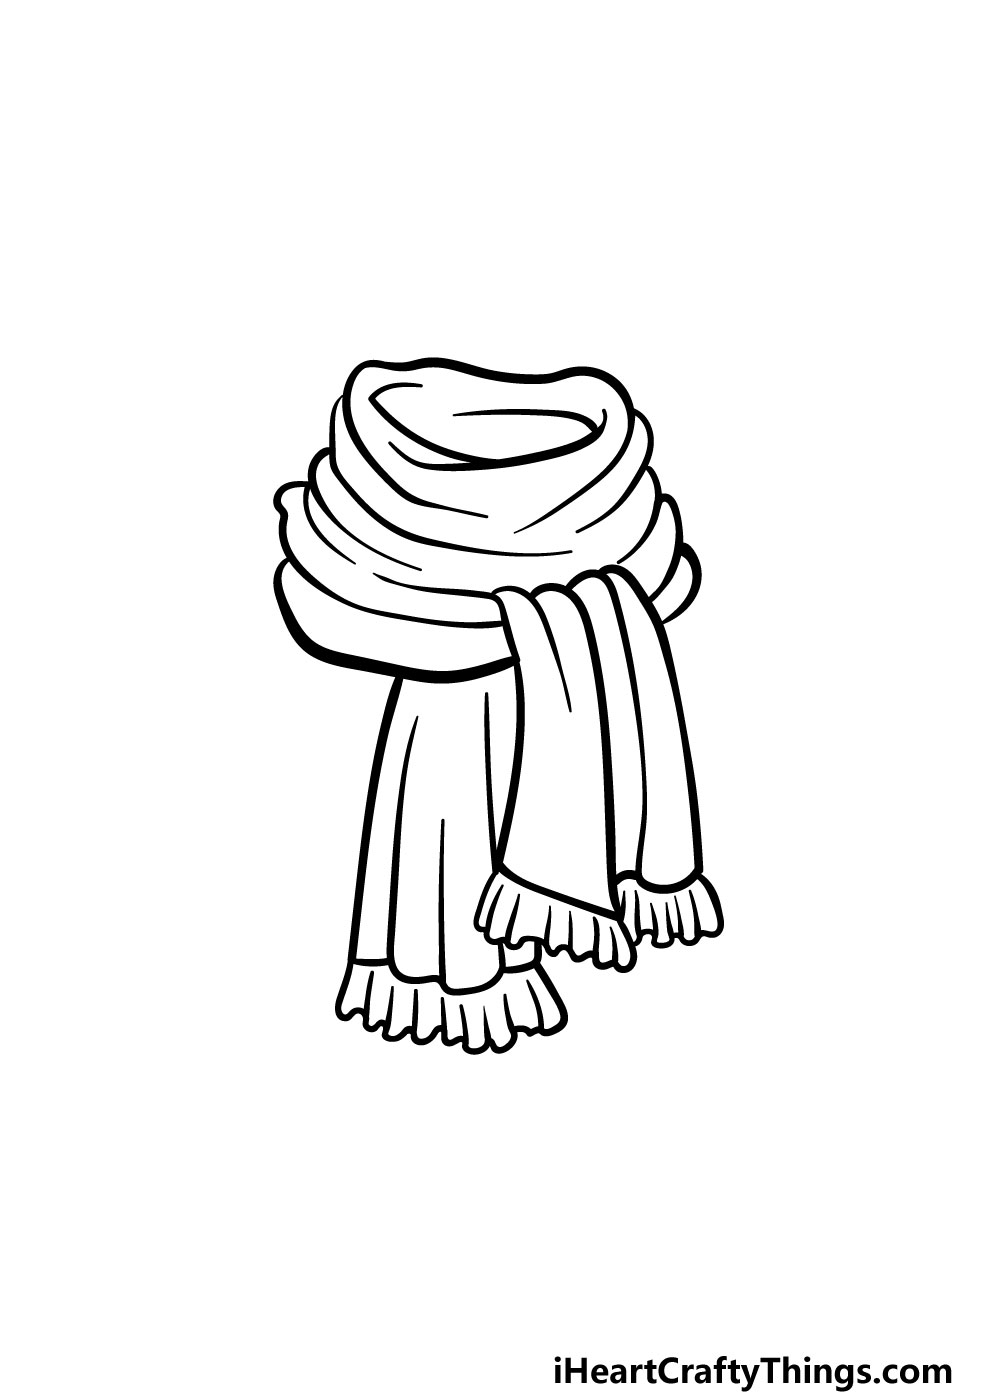
It’s almost time to start adding some decoration details for your scarf drawing, but before we do that we have one more end of the scarf to draw.
For this one, we will add more slightly curved lines to make an even thicker section hanging down than the ones you drew previously.
Then you’re ready to decorate your scarf with some patterns before the final step!
Step 5 – Now, you can draw the details for your scarf
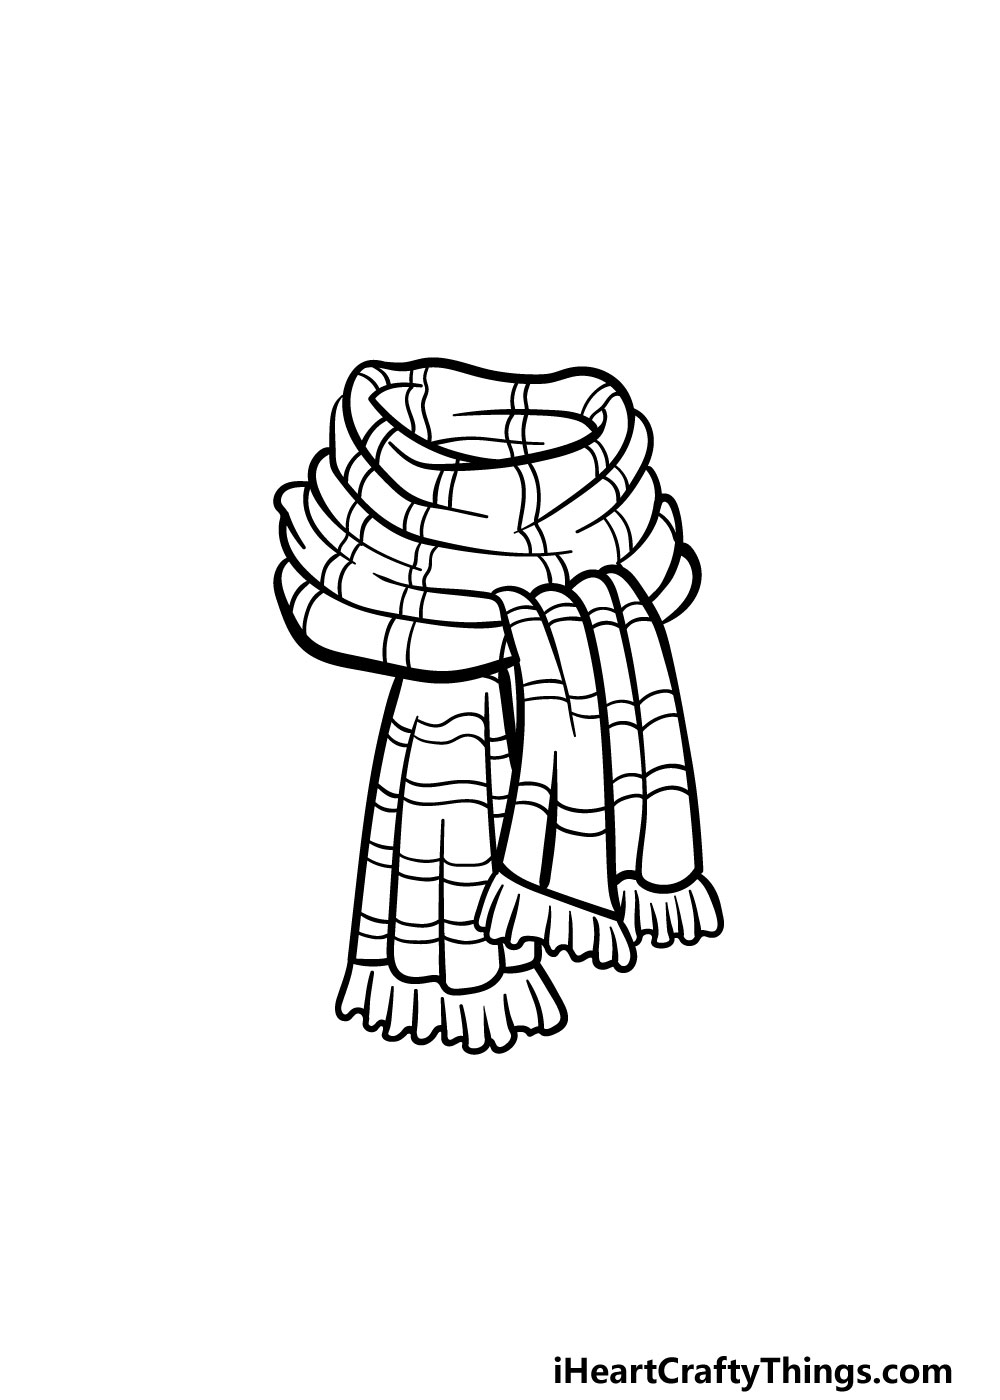
To finish off this guide on how to draw a scarf, we will be drawing some pattern detail for it. In our reference image, we went for a striped design for the scarf.
You may think that drawing stripes should be very easy, but seeing as the fabric is folding over itself, it can get a little more complicated.
This is another step where you may want to closely refer to the reference image! As you draw the lines for the stripes, try to keep in mind how they would look in relation to the flow of the fabric.
This pattern is also just one of many ways that you could go about decorating this scarf, too!
You could also create your own pattern design to really put your own spin on this drawing. You could go for some polka dots, draw some little snowflakes or cover it with bobbles for just a few ideas.
Be sure to get creative with it and have fun as you design your own awesome scarf!
Step 6 – Finish off your Scarf drawing with some color
Now it’s time for the final step of this scarf drawing! In this one, you can have some fun adding some amazing colors to your drawing.
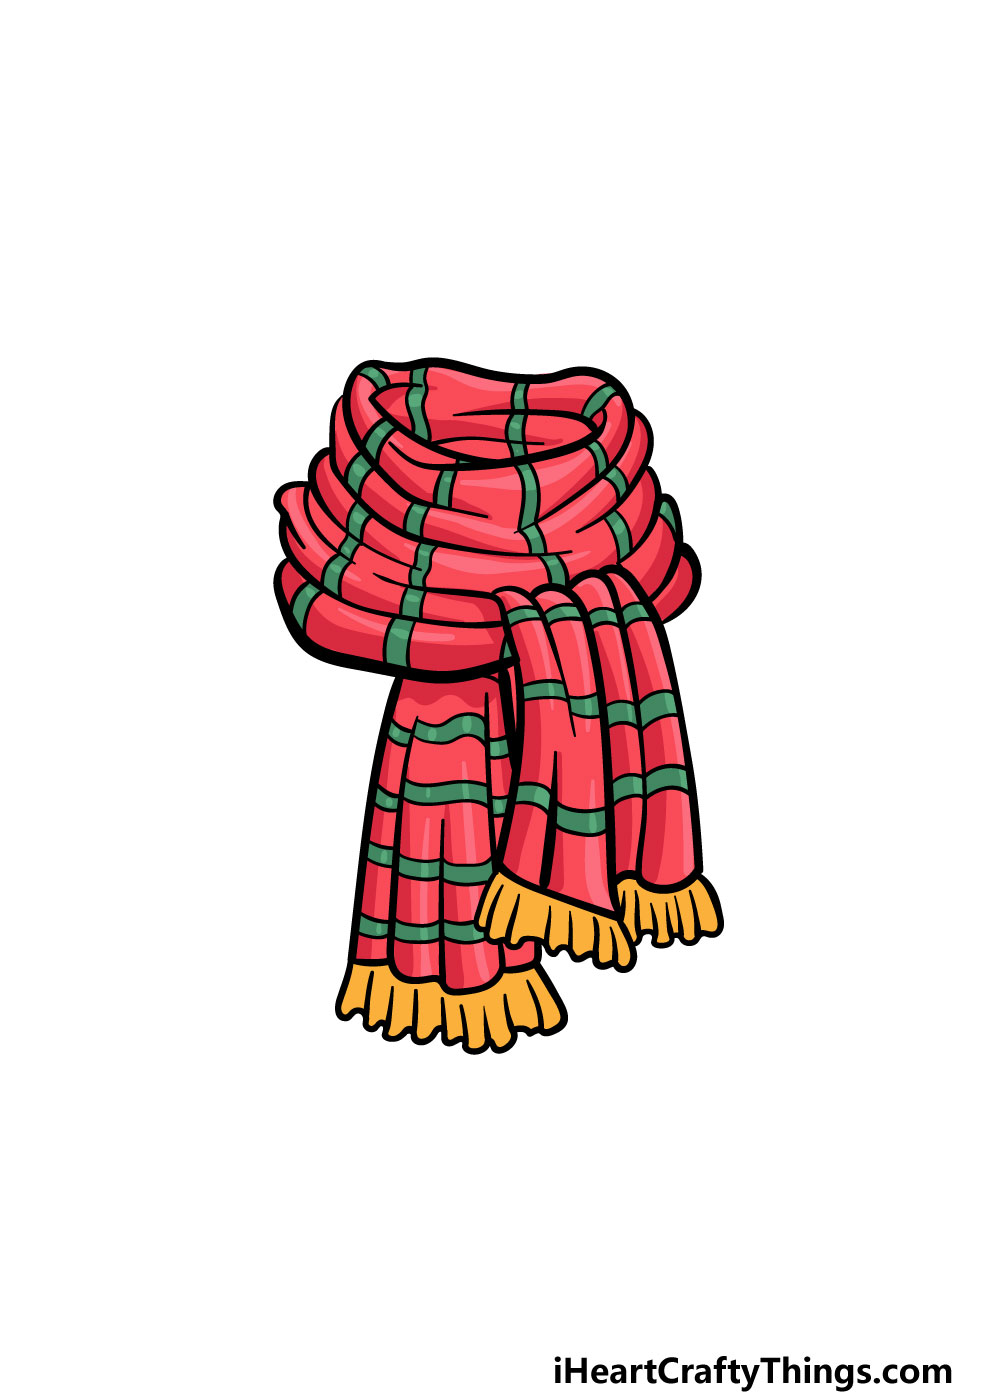
In our reference image we went with some reds, greens and yellows for the scarf.
These colors almost give it a bit of a plaid feel! These are just a few of the many colors that you could use for your own drawing, however.
Scarves can come in any colors you can imagine, so now it’s up to you to show us what awesome colors you feel would best suit your scarf.
We can’t wait to see what colors, art mediums and tools you use to finish off your wonderful scarf drawing!
5 Tips To Make Your Scarf Drawing Even Better!
Wrap up this scarf sketch with these 5 tips we have to make it even better1
This drawing of a scarf shows one that has a pleasing and simple red and green pattern. It is a great look for the scarf, but you could also customize it with your own patterns.
This could be a complex tartan pattern, or you could draw some simple shapes and lines. There are so many ways you could customize the scarf, so what will you choose?
Often when you wear a scarf, it is best paired with other warm clothing. You could add some of this clothing to your image to show what you would wear with the scarf.
Some ideas would be a hat and a sweater that have matching colors and patterns. You could also show the gloves, pants, shoes and other clothing you would wear with it.
Speaking of colors, that is another aspect you could play with when finishing this scarf drawing. We mentioned the green and red colors of this scarf, but you could use any combination of colors you like.
Not only that, but you could try out different art tools and mediums to make the colors contrast or blend in interesting ways.
Once you have the outfit mapped out, it could also be fun to draw someone wearing the clothing. For a starter, why not make yourself into a character wearing this outfit?
If you don’t typically draw real people, then you could draw the person you choose in a simple cartoon style to make it easier on yourself. Who should be wearing this outfit?
A scarf will most often be worn in chilly environments, so you could add a cold background to this scarf sketch. There would be many ways you could have an icy background!
The person wearing the scarf could be taking a stroll through a snowy forest or park, for instance. Or, you could have the scarf on a table with some other cold weather gear that it will be worn with.
Your Scarf Drawing is Complete!
You have worked through all six steps of this guide on how to draw a scarf, and you have landed up with an incredible picture to show for it!
This drawing was deceptively difficult, as the folds of the fabric can make it tricky to keep looking realistic.
We hope that this guide made drawing this scarf not only much easier but also more fun than you may have expected.
But it doesn’t have to stop here, and you can keep the fun going for this drawing!
There are lots of ways to do this, from drawing some unique patterns, using some amazing colors or even drawing yourself wearing the scarf! What other ideas do you have for some amazing scarves?
When you have finished drawing some cool scarves, you can find your next drawing challenge on our website. We have tons of incredible guides for you and we upload new ones frequently!
We would love to see your cozy scarf drawing, so please be sure to share it on our Facebook and Pinterest pages when it’s done!