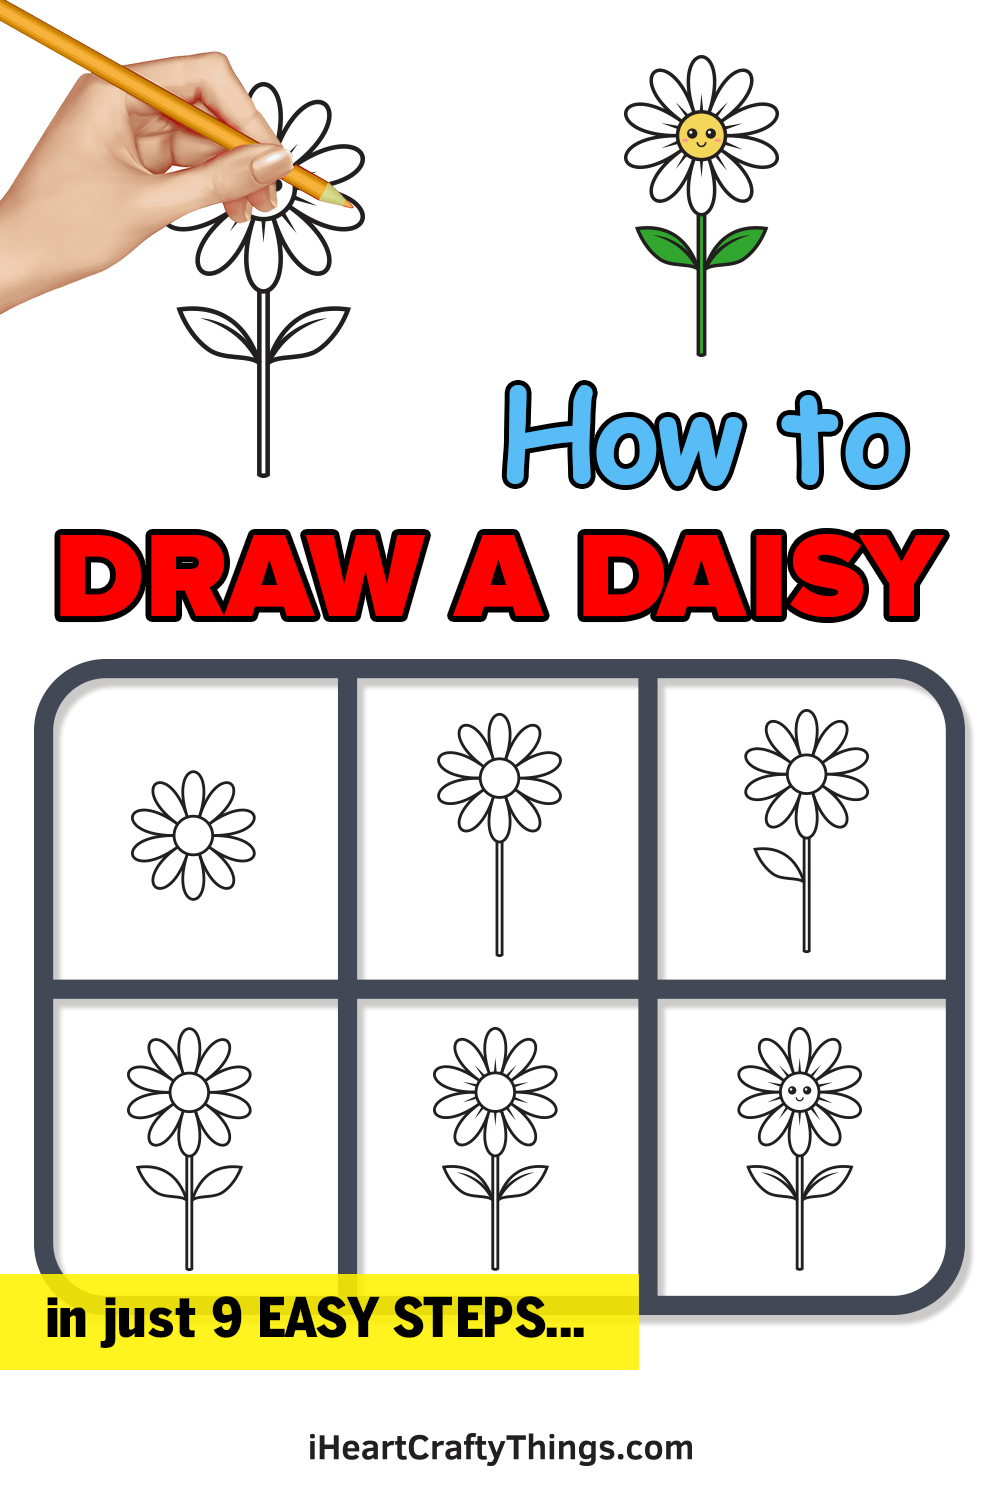
Learning how to draw a daisy can be a surprisingly tricky task, but I will change that perception with this guide. By the end, you will find the easiest way to make your own cute daisy.
Daisies are well-loved around the world thanks to their simplicity and beauty. They may be simple, but drawing them can be harder than it looks.
Because so many people love daisies, I wanted to make it easier for anyone who loves them. To make it even better, I turned this daisy into a little cartoon character.
When making your own version, you could change the facial expression or remove it entirely if you want it to be more realistic. It’s up to you, and all you need to do to get started is work through the guide with me.
It’s time to learn how to make this cute flower, so let’s begin!
Learn How To Make A Daisy Drawing By Following This Guide
How to Draw a Daisy – Let’s get started!
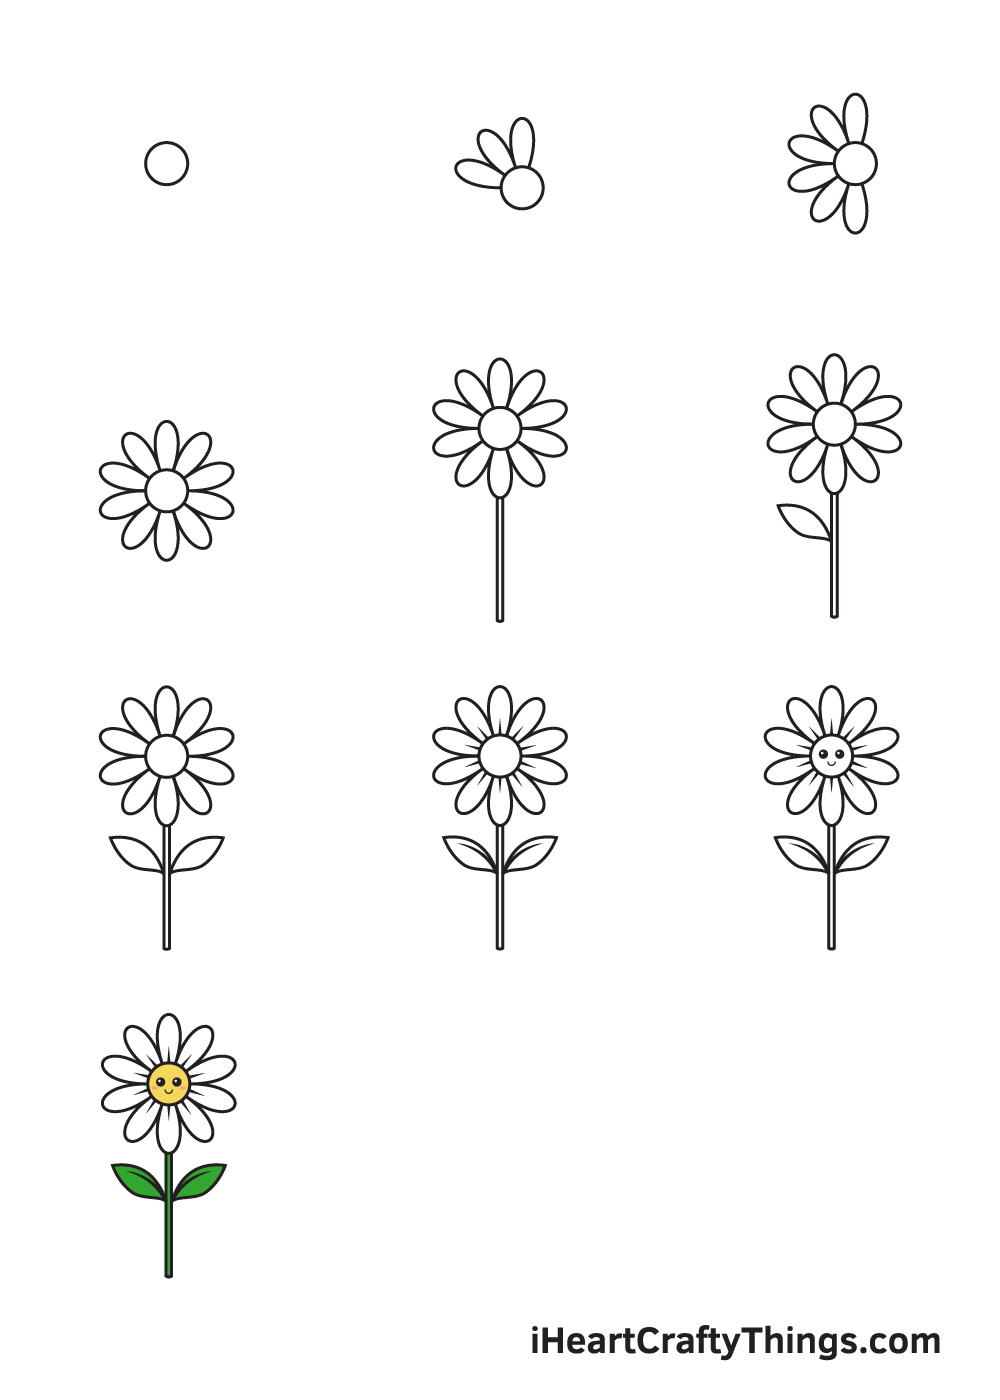
Step 1

On the upper portion of your paper, draw a perfect circle to outline the disk in the very middle of the daisy.
Feel free to use a compass if you need help in drawing a perfect circle. A compass is a drawing tool that enables you to draw an even and proportional circle quickly and easily.
In order to make sure that the flower will be drawn in the middle, draw an intersecting horizontal and vertical line across your paper. The vertical line above the horizontal line is where you should draw the circle.
Starting in the upper part of your paper gives you sufficient space to draw the entire flower along with its parts, including the stem and the leaves.
Step 2 – Draw the First Three Petals of the Daisy
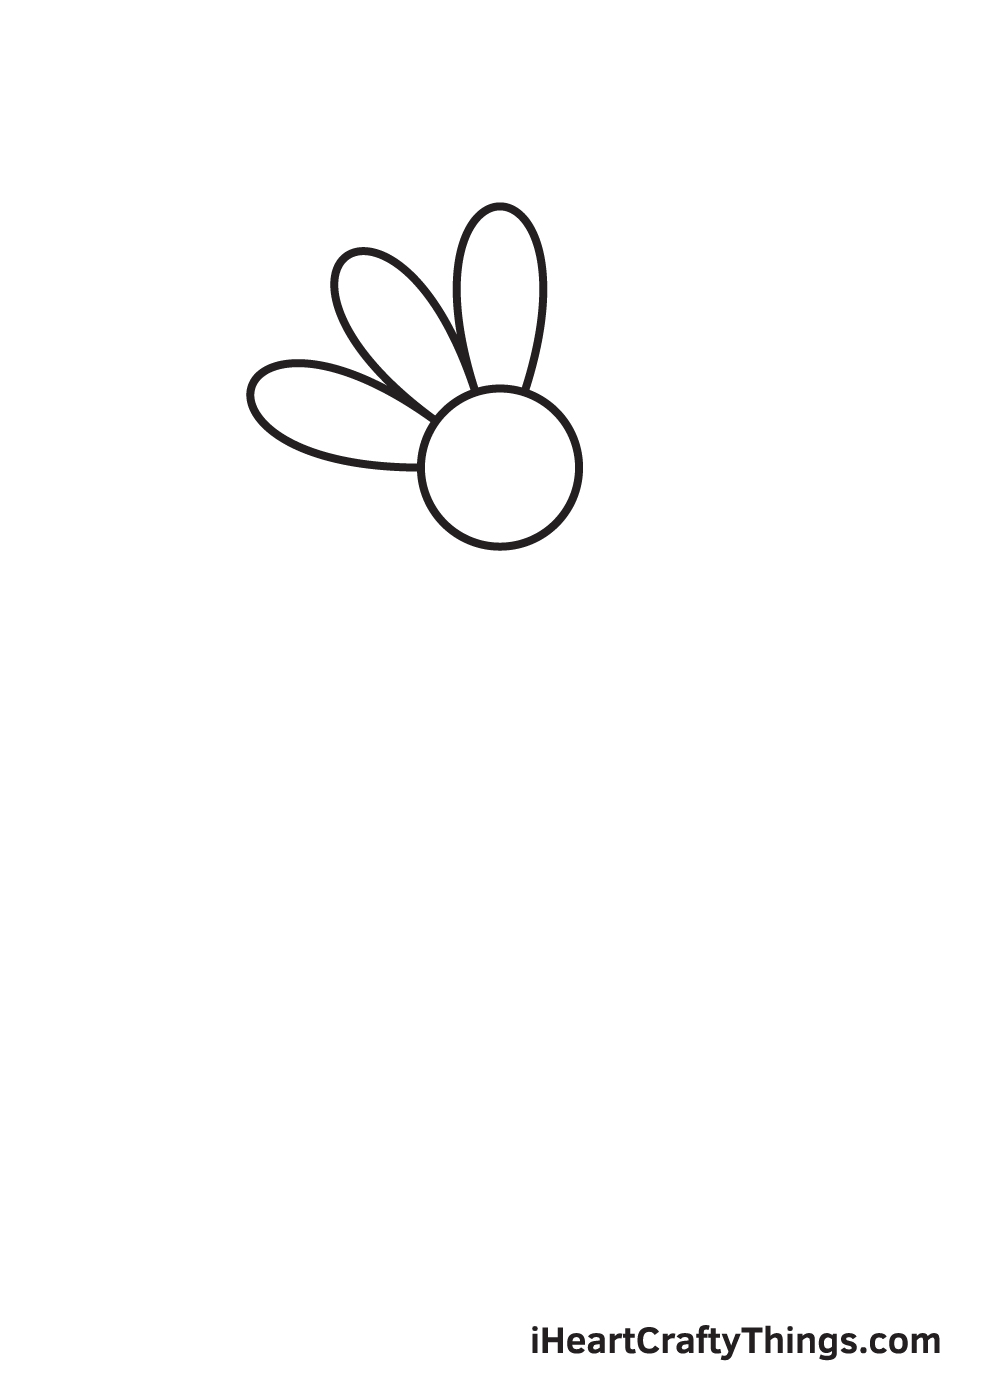
Draw three long, narrow oval shapes on the upper left side of the circle shape we drew previously.
Keep in mind that the bottom endpoint part of the petals shouldn’t be visible as they are directly connected to the disk in the middle of the daisy.
Step 3 – Then, Draw Another Three Petals
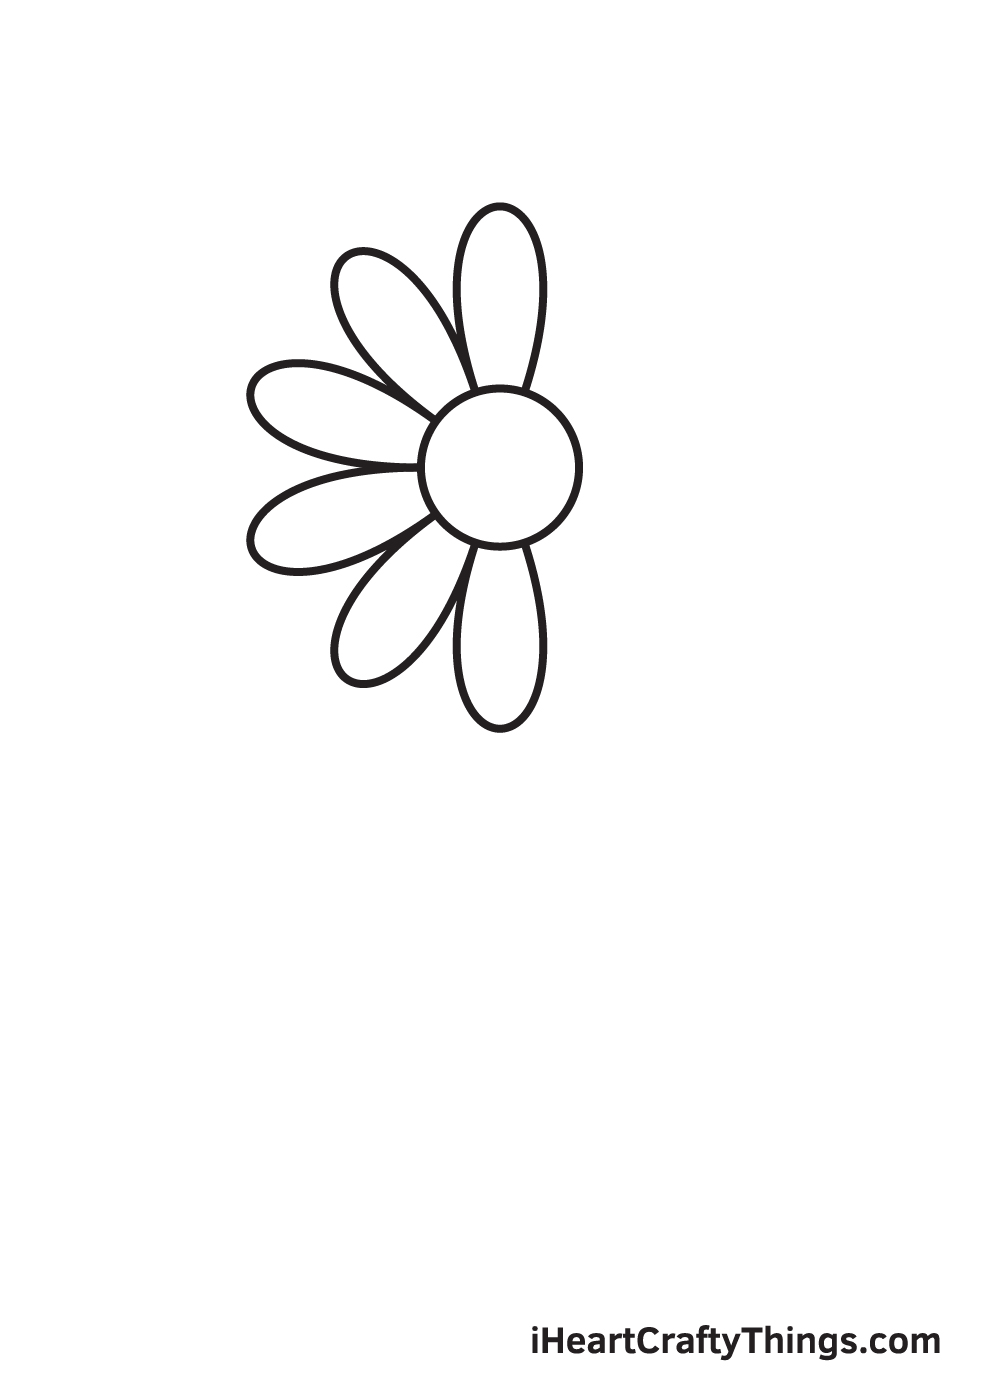
Repeat the previous step and draw another three petals right beside the ones we drew previously.
Make sure that the petals are uniformed and evenly shaped.
Step 4 – Complete All the Petals of the Daisy

Keep repeating the previous step and drawing petals surrounding the disk until all the ten petals of your daisy is completed.
Now, watch as your daisy fully blooms! Look how beautiful it is!
Step 5 – Afterwards, Add a Stem Below the Daisy
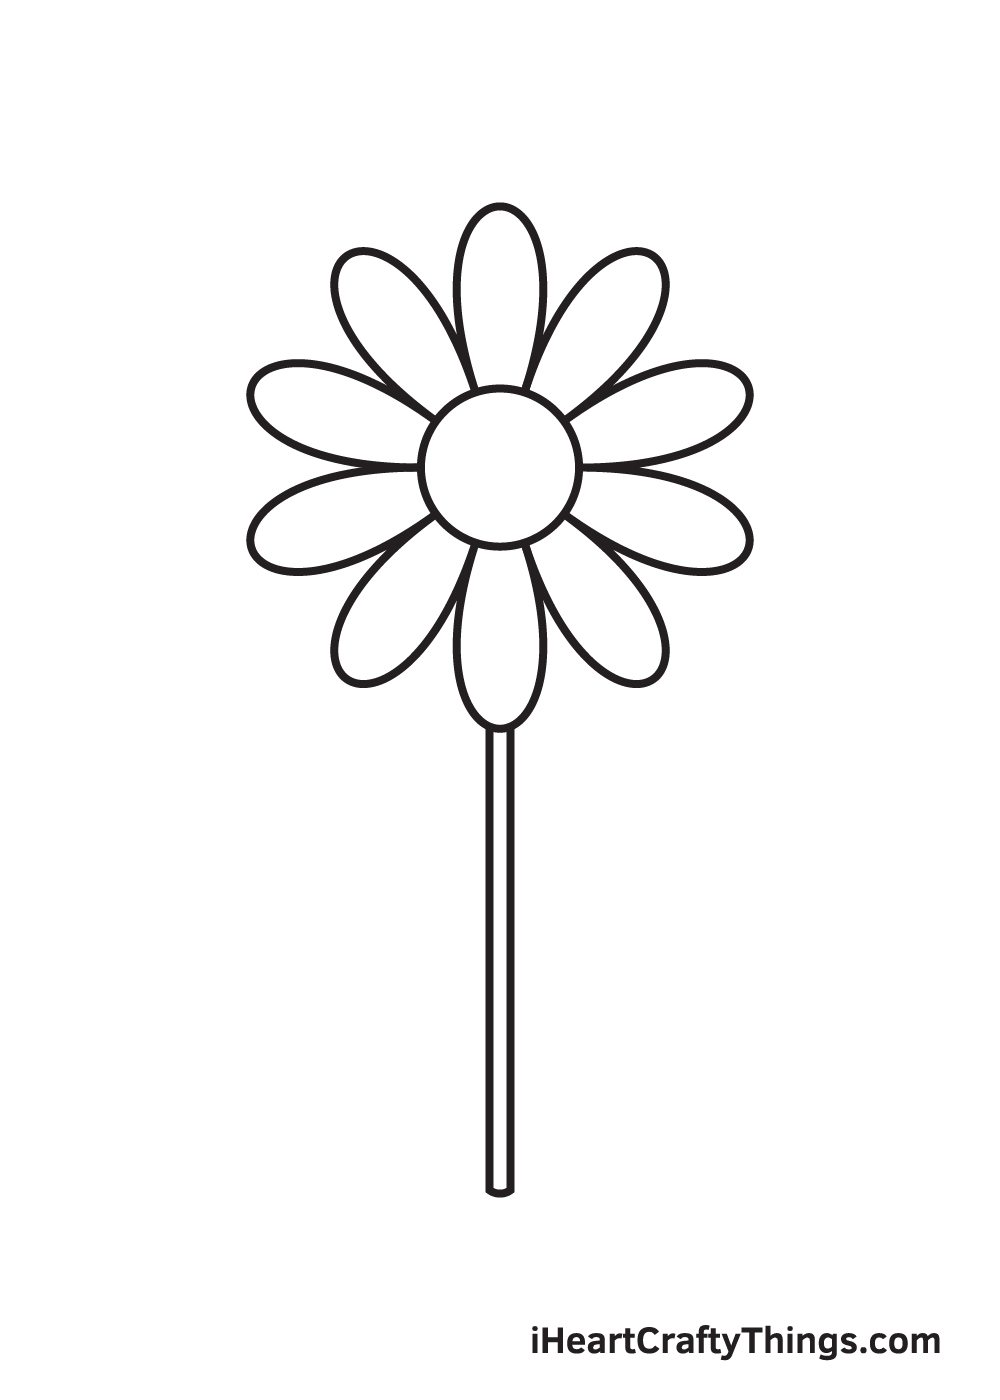
Now that we have successfully drawn the flower, it’s time to draw the stem.
Right underneath the flower we drew in the previous step, draw two parallel vertical lines to create the stem. The lines should be long, extending all the way down to the bottom of your paper.
You can use a ruler to help you draw straight lines quickly and easily. Using this drawing tool will help ensure that your stem is upright and symmetrical.
Step 6 – Draw a Leaf Attached to the Stem
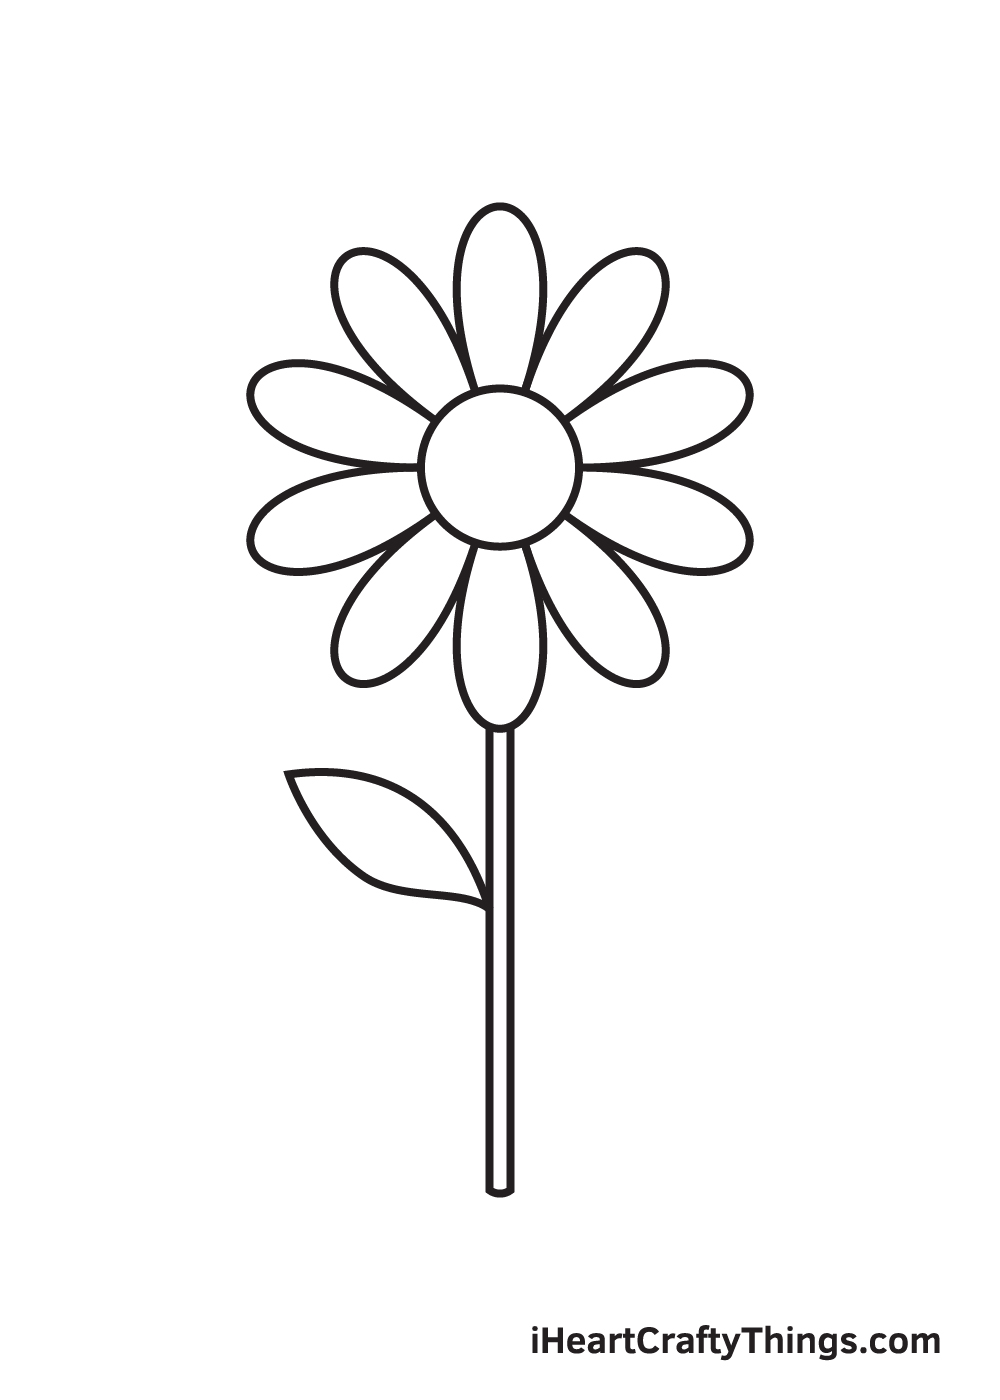
Draw a single leaf on the left side of the stem.
The leaf can be created by simply drawing two connected curved lines. Both end points of the leaf should be pointed.
Step 7 – Next, Draw Another Leaf on the Stem
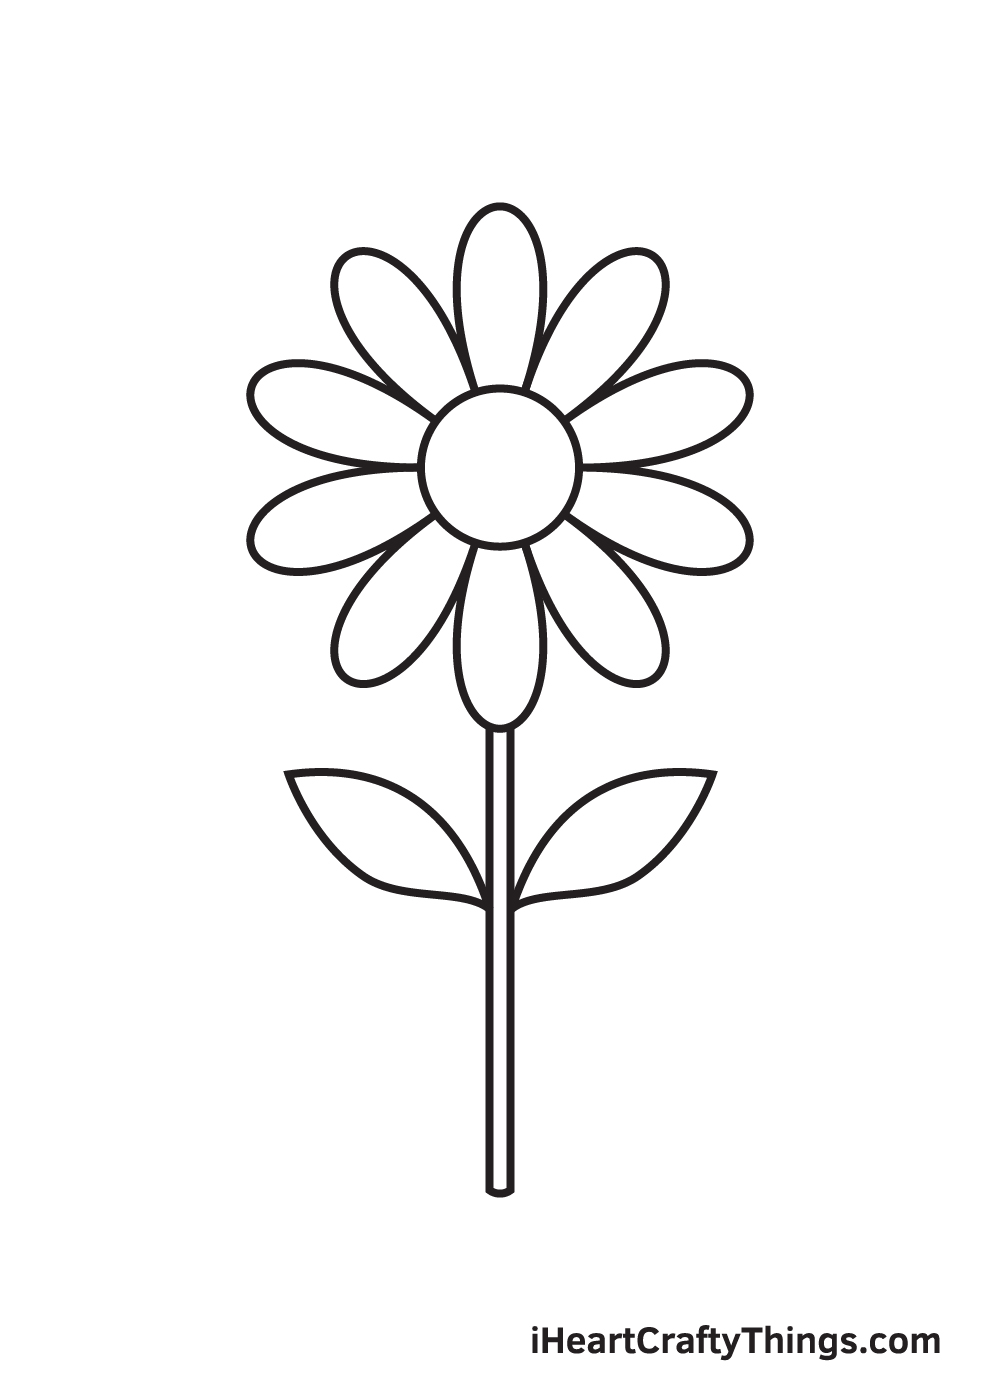
Repeat the previous step on the opposite side of the stem.
After completing this step, you should now have two full leaves attached to the stem!
Step 8 – Add Patterns on All the Flower Petals
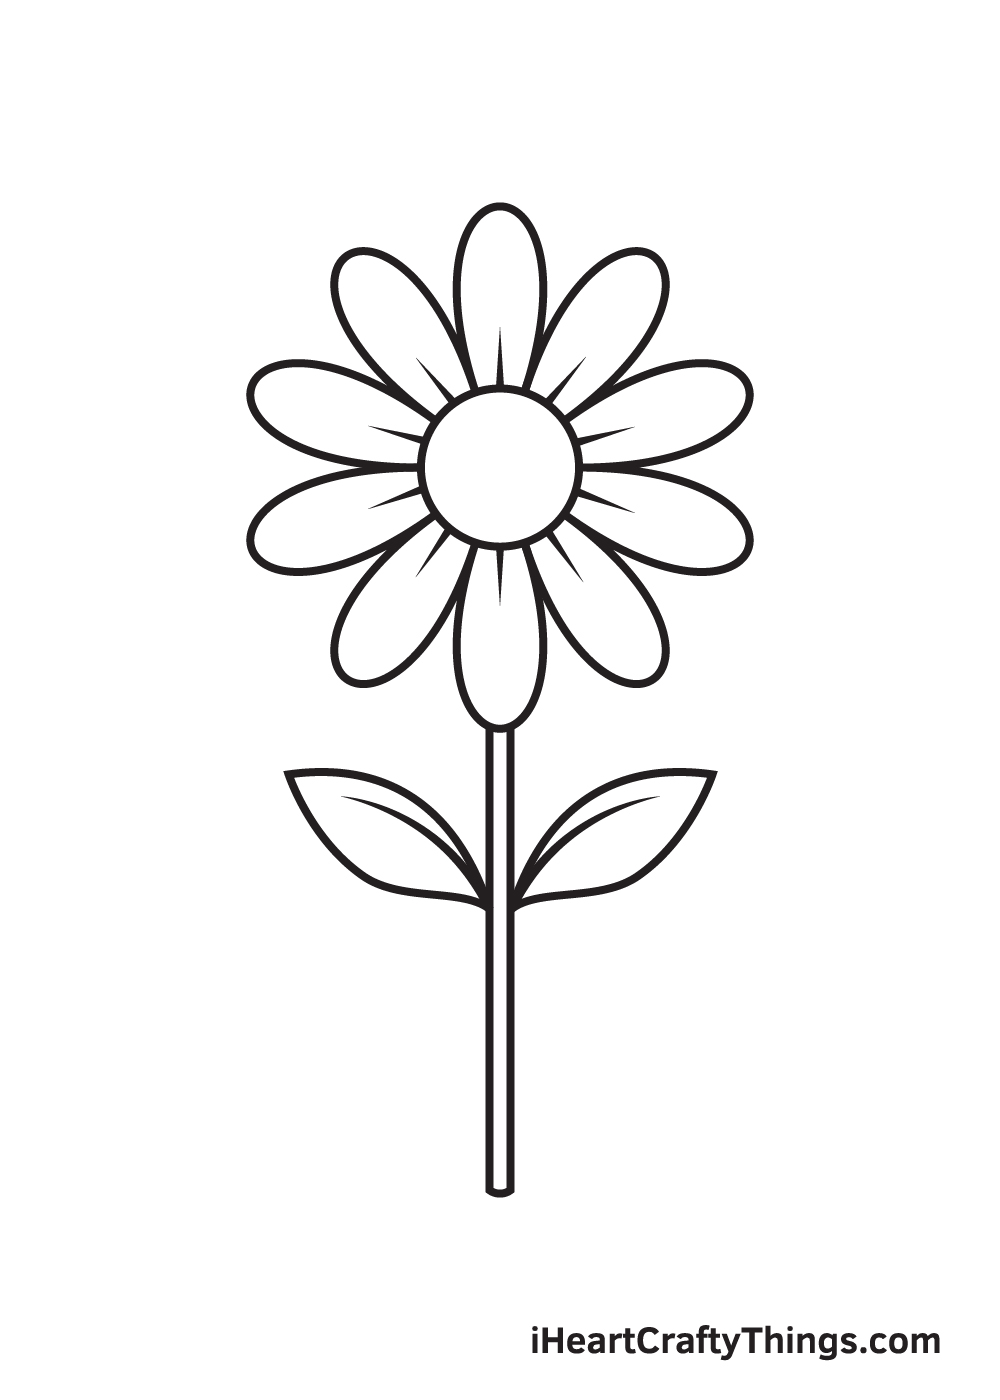
In order to make flowers appear realistic, drawing patterns on the surface of the petals is essential to it look textured.
Creating the patterns on a daisy’s petals is plain and easy. Simply draw a short straight line on the bottom part of each petal.
Step 9 – Draw a Cute Face in the Middle of the Daisy
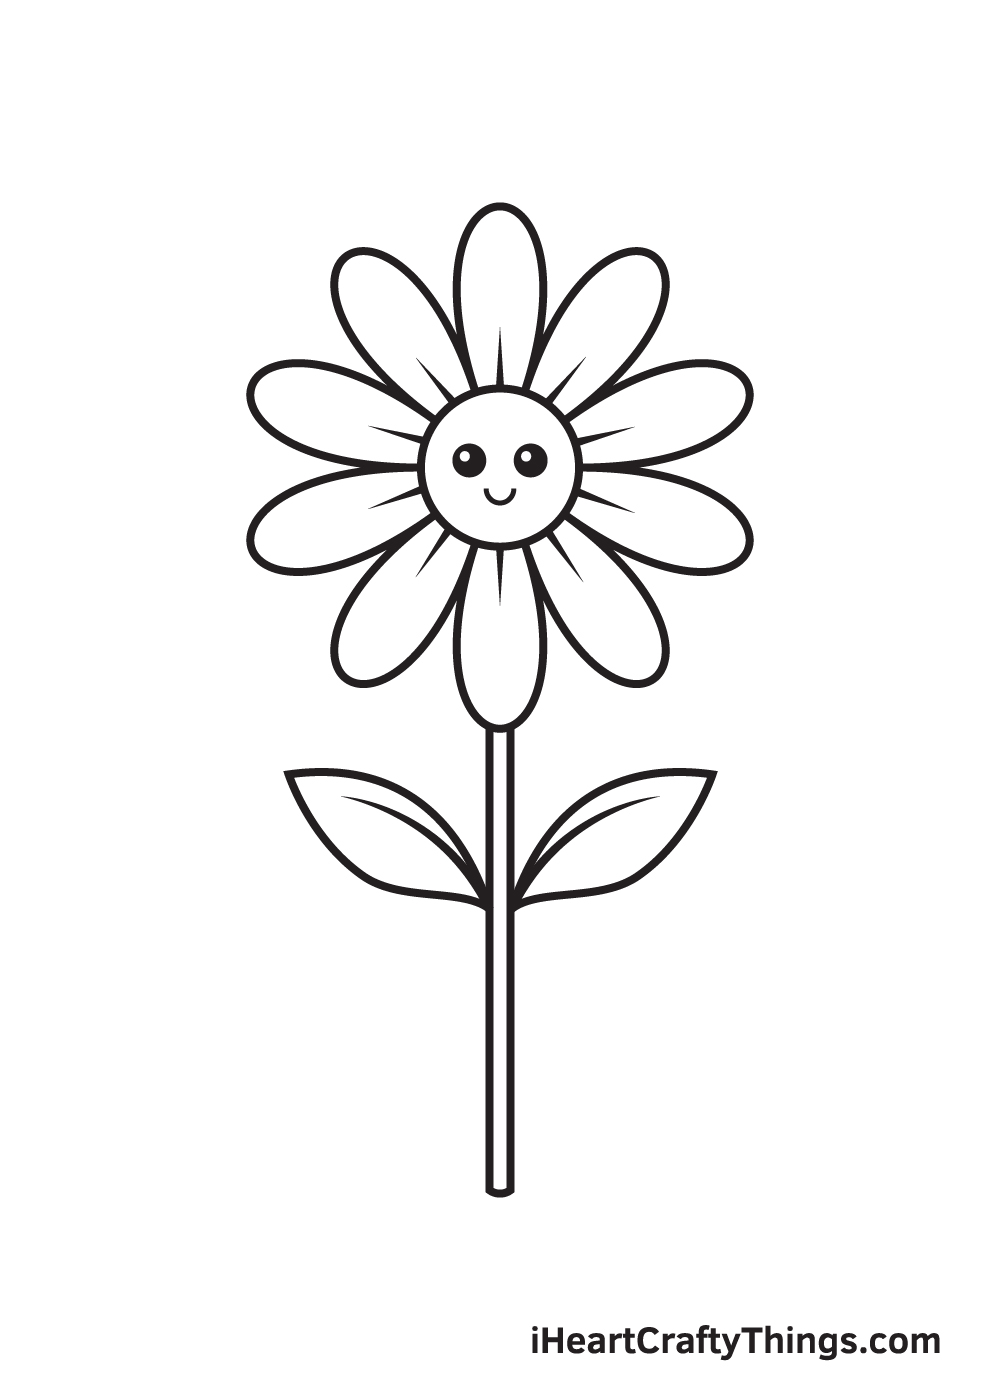
Give your daisy a happy facial expression by drawing two small circles for the eyes and an upward curved line for the smile within the disk.
Don’t forget to shade the eyes and leave out a tiny circle inside of it to make its eyes appeal like it’s gleaming—so adorable!
After finishing this step, your daisy drawing should now be finally complete. Now, all it’s missing is a set of colors to make it look vibrant and colorful!
Finally, here is the most enjoyable part—choosing the colors and coloring your drawing! This is the part where you can showcase your artistic skills and your ability to mix and match various colors!
Daisies exist in a wide range of varieties with different color combinations, with white and yellow, yellow and black, and sky blue and yellow being the most common.
This gives you a lot of color options to choose from when coloring your daisy.
Have fun picking the colors and coloring your daisy!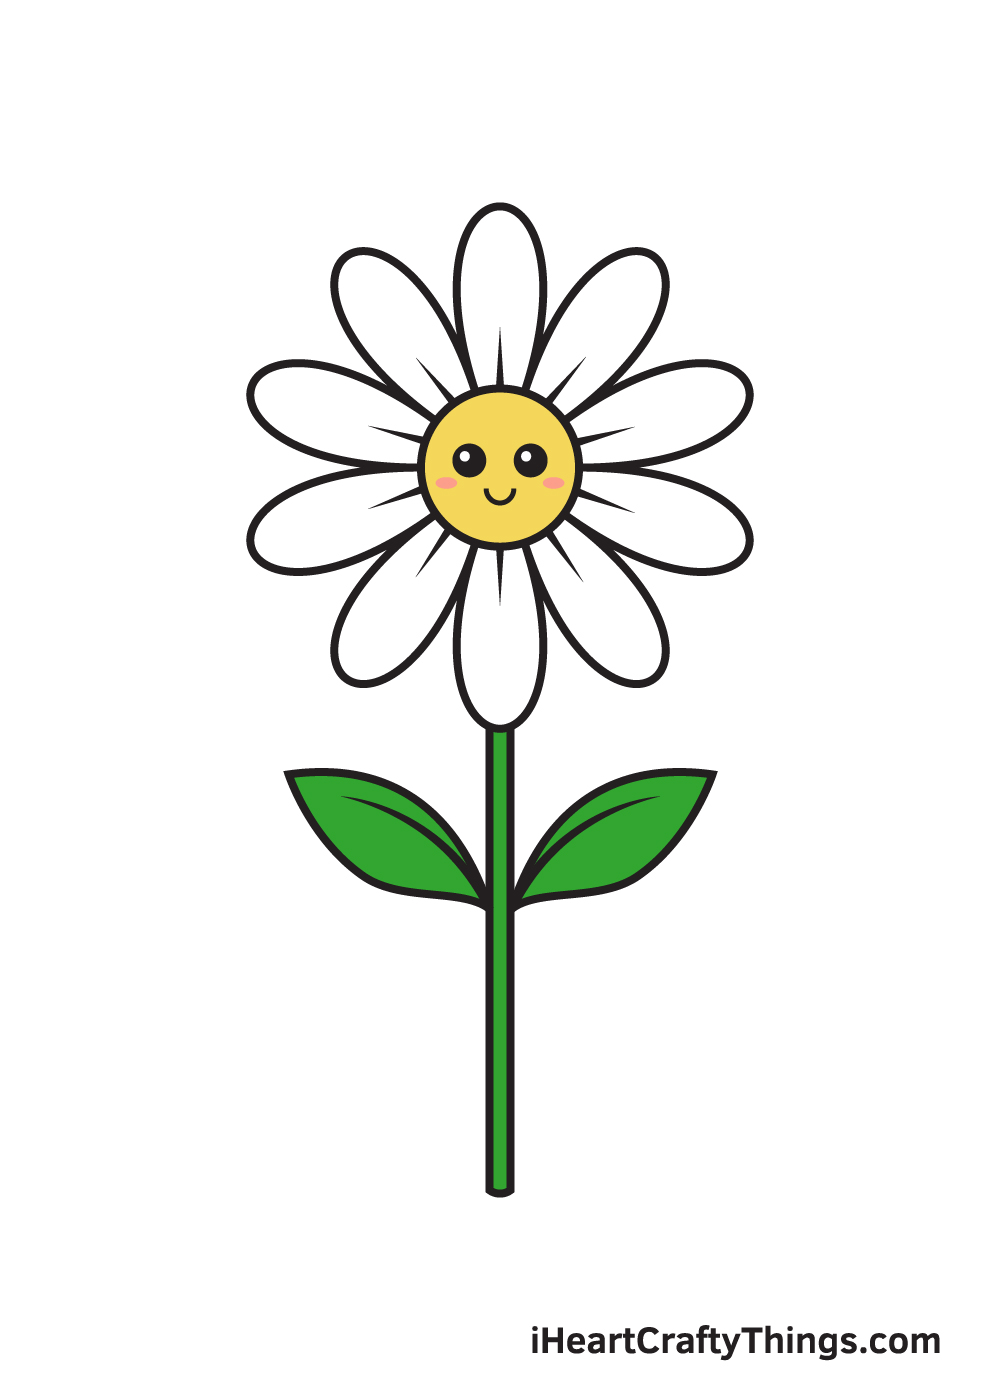
Bonus: Try Out Some Different Art Styles For This Daisy
We love the simple look of this beautiful daisy drawing. We intentionally wanted to create a simplified cartoony look for the flower to capture a daisy’s happy, breezy feeling.
Despite this, you may want to experiment with different interpretations of this daisy drawing. One of the ways you could do this would be by changing the art style to a different one.
This could be done in place of the daisy drawing in this guide, or you could make some companion pieces to contrast it. One style you could try would be to make the daisy more realistic.
You could use a real daisy as a reference or look up some pictures of real daisies. Then, simply go through the guide again in order to change the required details to make it more realistic.
This would consist of details such as the shapes of the petals and some of the more minor texture details. You would also probably want to remove the smiling face, as cute as it looks.
Going in a more realistic direction isn’t the only way to go about it, however. You could go in an even more stylized direction instead and go for something more abstract.
Using paint would make this easy to do, as you can be really expressive with brush strokes as you express your feelings. If you have too many ideas for how to interpret this daisy drawing, then it could be fun to make a series out of these.
Each picture could be placed next to one another so that anyone who looks at them can see all of the ways you approached it and how they differ from one another.
5 Tips To Make Your Daisy Drawing Even Better!
Make your daisy sketch even prettier with these 5 fun tips!
The only thing prettier than a daisy would be many daisies, and now that you have completed this guide you can make that happen!
It would be a lot of fun to add as many flowers as you like to this cute daisy drawing. Simply follow the steps of the guide again and maybe change a few small details in order to make a stunning arrangement.
Adding more daisies to this design is one idea, but you could also add different kinds of flowers! If there are some kinds of flowers you love then you should definitely add them to this drawing of a daisy.
Whether it’s roses or lilies or maybe some sunflowers, you have so many options for creating a stunning bouquet. Which flowers would you choose for this arrangement?
You could also create a different kind of setting for this daisy sketch even if you stick to one flower. For example, the daisy could be in a pot or maybe growing in a lush garden.
These are two ideas, but you could go as wild and creative as you like when choosing your background! You could even add some small animals such as mice or rabbits to make it even cuter.
The cute cartoon design of this daisy drawing is so adorable, but you could also try out some different styles. By changing just a few details, you could make the daisy look a bit more realistic.
This would be much easier if you look up some pictures of real daisies online. If you happen to have a real daisy nearby then that would be even better!
Daisies are known for their soft delicate colors, and we showed you how to recreate them in the guide. You don’t necessarily have to stick to this color scheme, though!
You could use any bright and wonderful colors you like when coloring this cute daisy. Don’t be shy about mixing and matching different colors, art tools and mediums as well.
Your Daisy Drawing is Complete!
We hope you enjoy this step-by-step daisy drawing tutorial. We think this daisy drawing would make a beautiful decoration inside your home once it is fully colored and framed.
It would look great to be hung up on a wall on any part of your house. We imagine this would look best on the living room or even on your bedroom. What do you think?
We are always uploading new content on our “how to draw” catalog, so make sure you keep re-visiting our website to continuously enjoy newly uploaded drawing tutorials.
If you would like to see a drawing tutorial of a different kind of flower that we haven’t covered yet, let us know about it! We always strive to deliver our readers’ requests.
As soon as you finish drawing and coloring a daisy, don’t forget to show off your completed masterpiece! Take a picture of your artwork and post it on our Facebook page and on Pinterest.
Don’t be embarrassed to flaunt your work of art! You’ve worked so hard to create it, so we can already tell that it looks incredible for sure!
We are excited to see your colorful daisy drawing!
Here Is A Daisy Drawing For Kids To Inspire You!
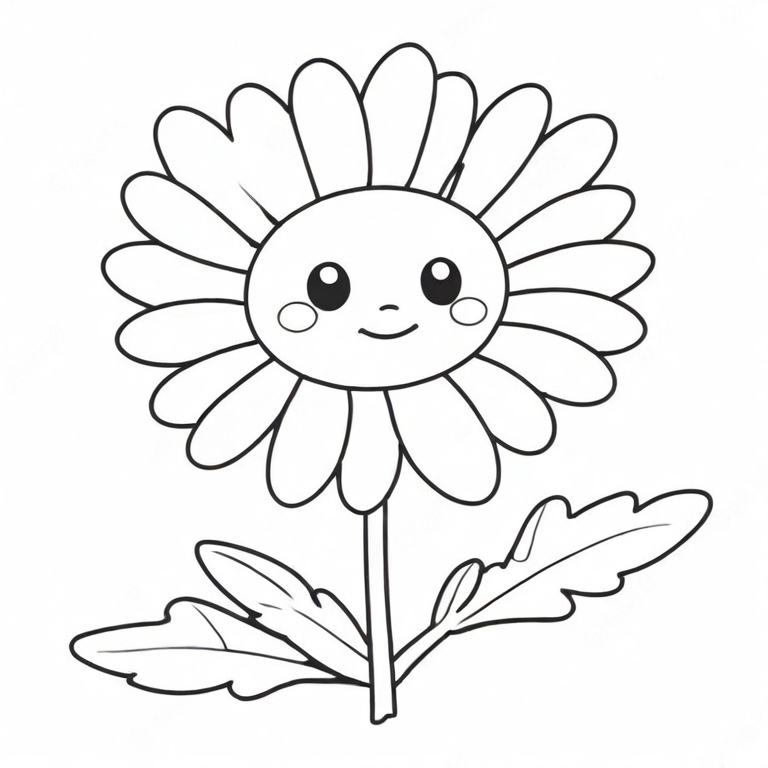
Daisies are such pretty little flowers, and if you need some inspiration for your drawing of one, then we have you covered! Our artist Amanda created this daisy drawing for kids to help you with yours.
She kept it nice and simple for the drawing, but sometimes simplicity is just what you need for an artwork!
The details are easy to replicate, and she added a simple yet cute facial expression for the flower.
When you draw your own one, you can keep it simple as she did or you can make it a bit more detailed if you wish. One way of making it more detailed would be to add to the background.
This would be a great way to add to the drawing, and you could maybe even add a few more daisies to the picture!