They say that Christmas is the most magical time of the year, and it’s hard to argue that sentiment!
This is a time where there are bright decorations around the house and in the streets, and colorful presents are picked and wrapped for loved ones.
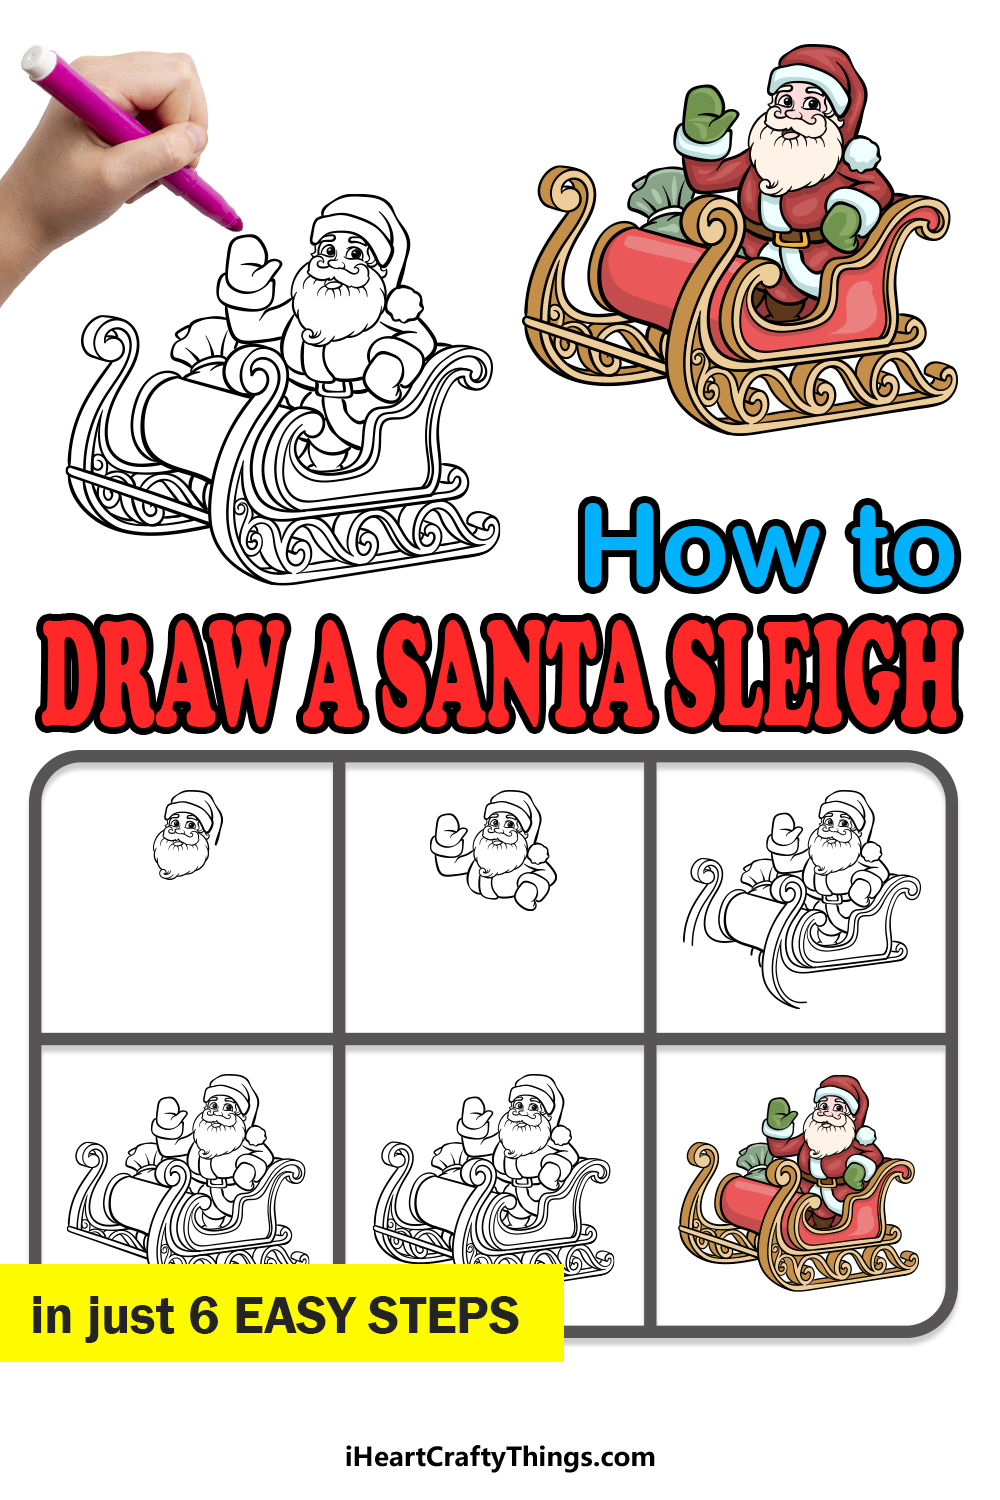
It’s also the time where Santa will load his magic sleigh with presents for kids around the world, and many people like to get into the spirit by learning how to draw a Santa sleigh.
In this very festive tutorial, we will show you how you can draw a truly charming Santa sleigh!
We hope that you have a wonderful time working with us on this step-by-step guide on how to draw a Santa sleigh in just 6 easy steps!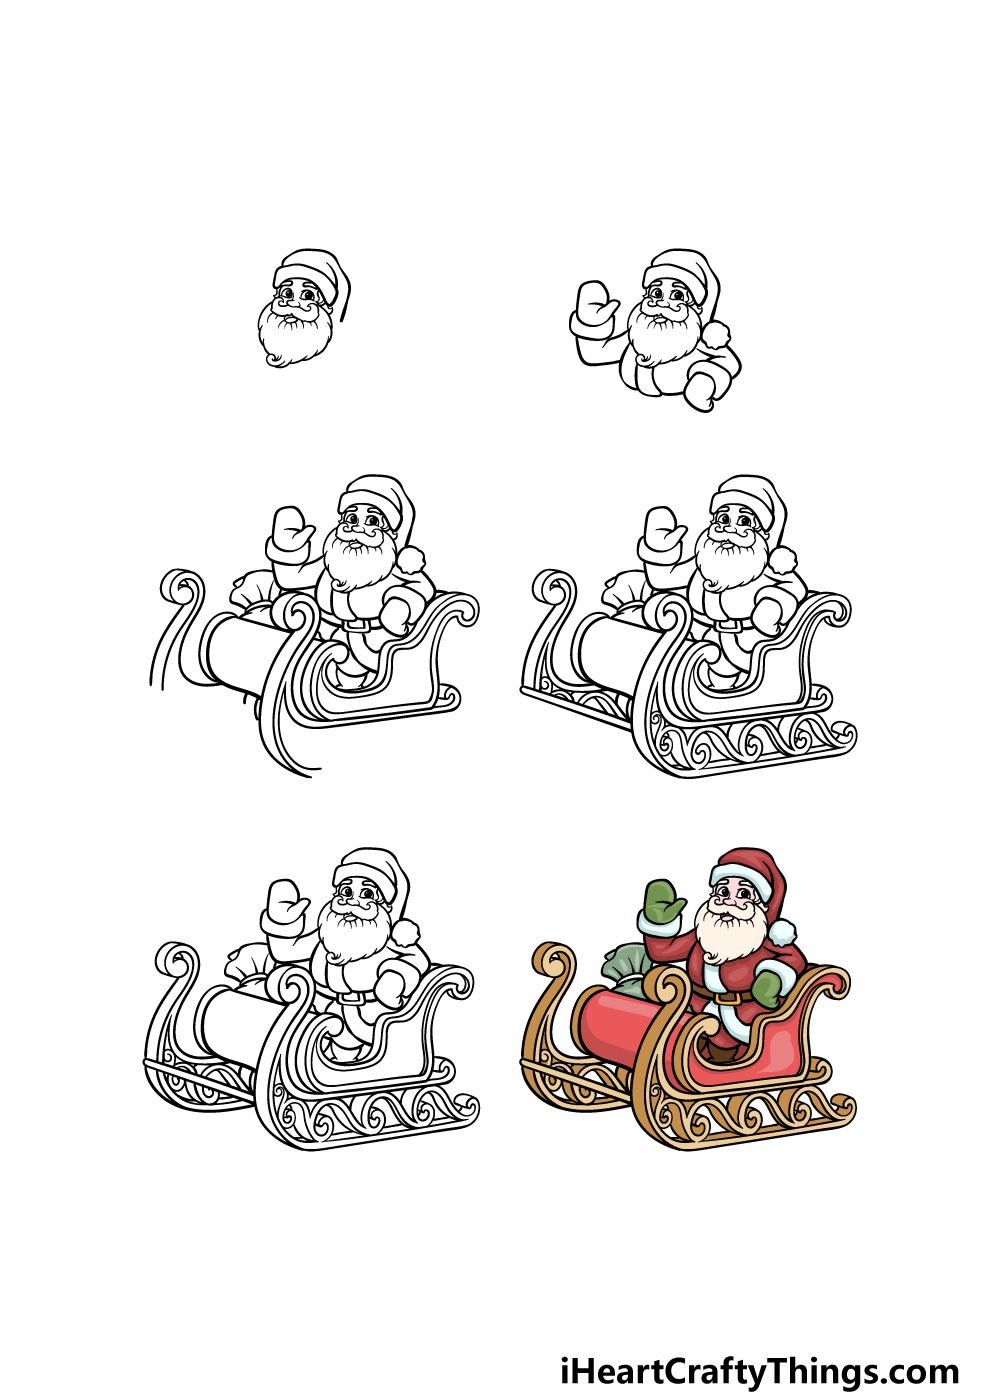
How to Draw A Santa Sleigh – Let’s Get Started!
Step 1
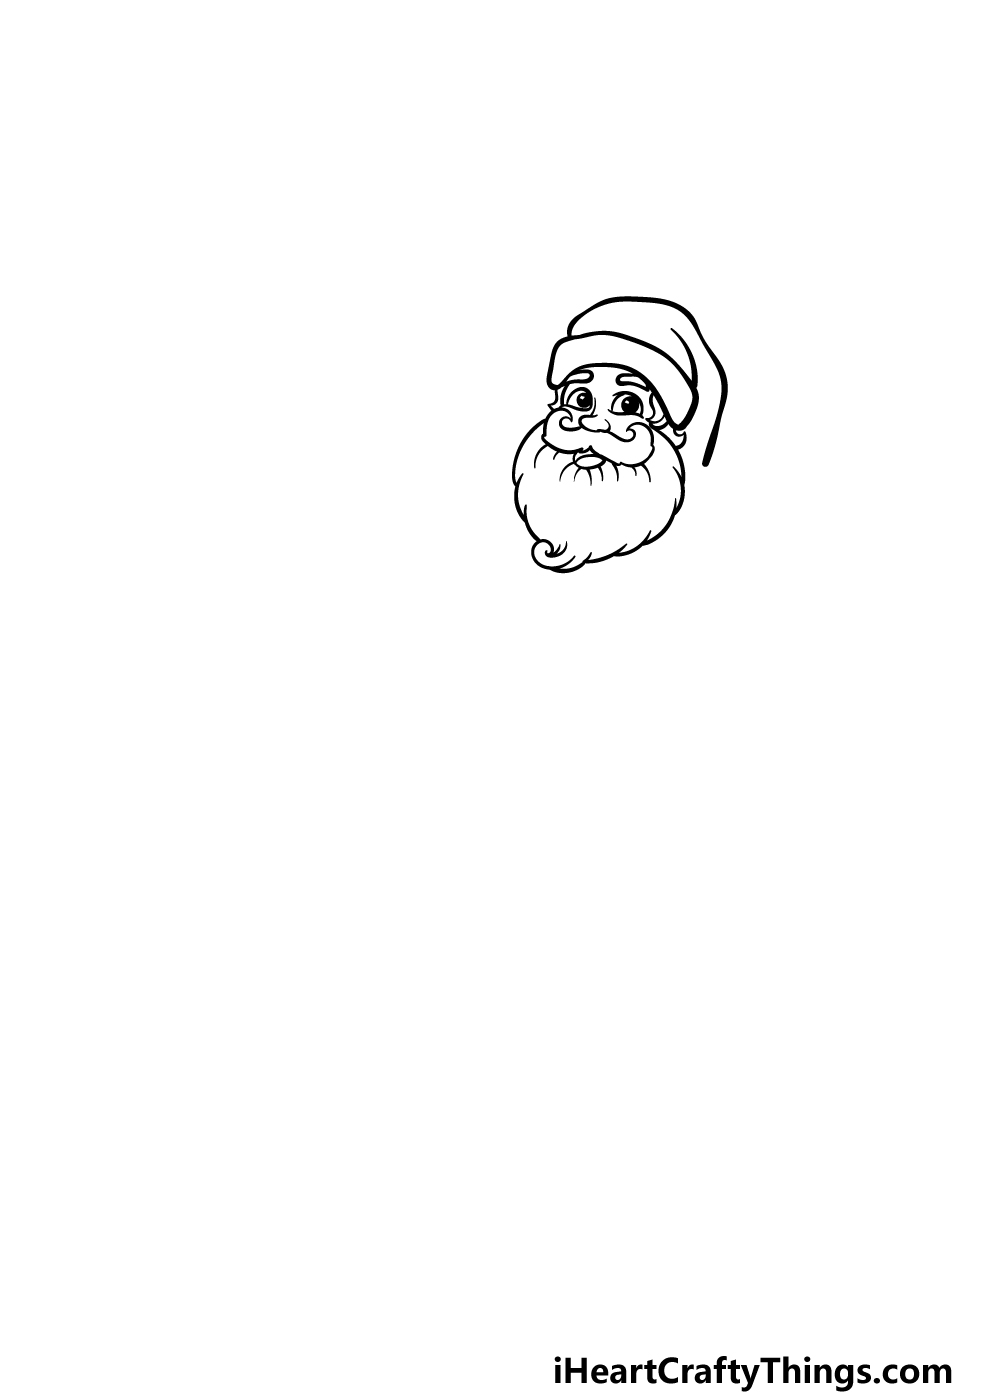
In this guide on how to draw a Santa sleigh, we will not only be drawing the sleigh but also Santa himself sitting in it! With that in mind, we shall start this guide off by drawing Santa’s head.
First, use some smooth lines to create the rim of his hat. Then, we will use some curved lines for the floppy upper section of his hat drooping over.
Next, we will draw some facial details such as eyes and nose. Under his nose, we will use some bumpy, curved lines for his big mustache underneath.
Finally, it wouldn’t be much of a Satna portrayal without a big bushy beard, so we shall add one for him before proceeding to step 2.
Step 2 – Now, draw his arms and chest
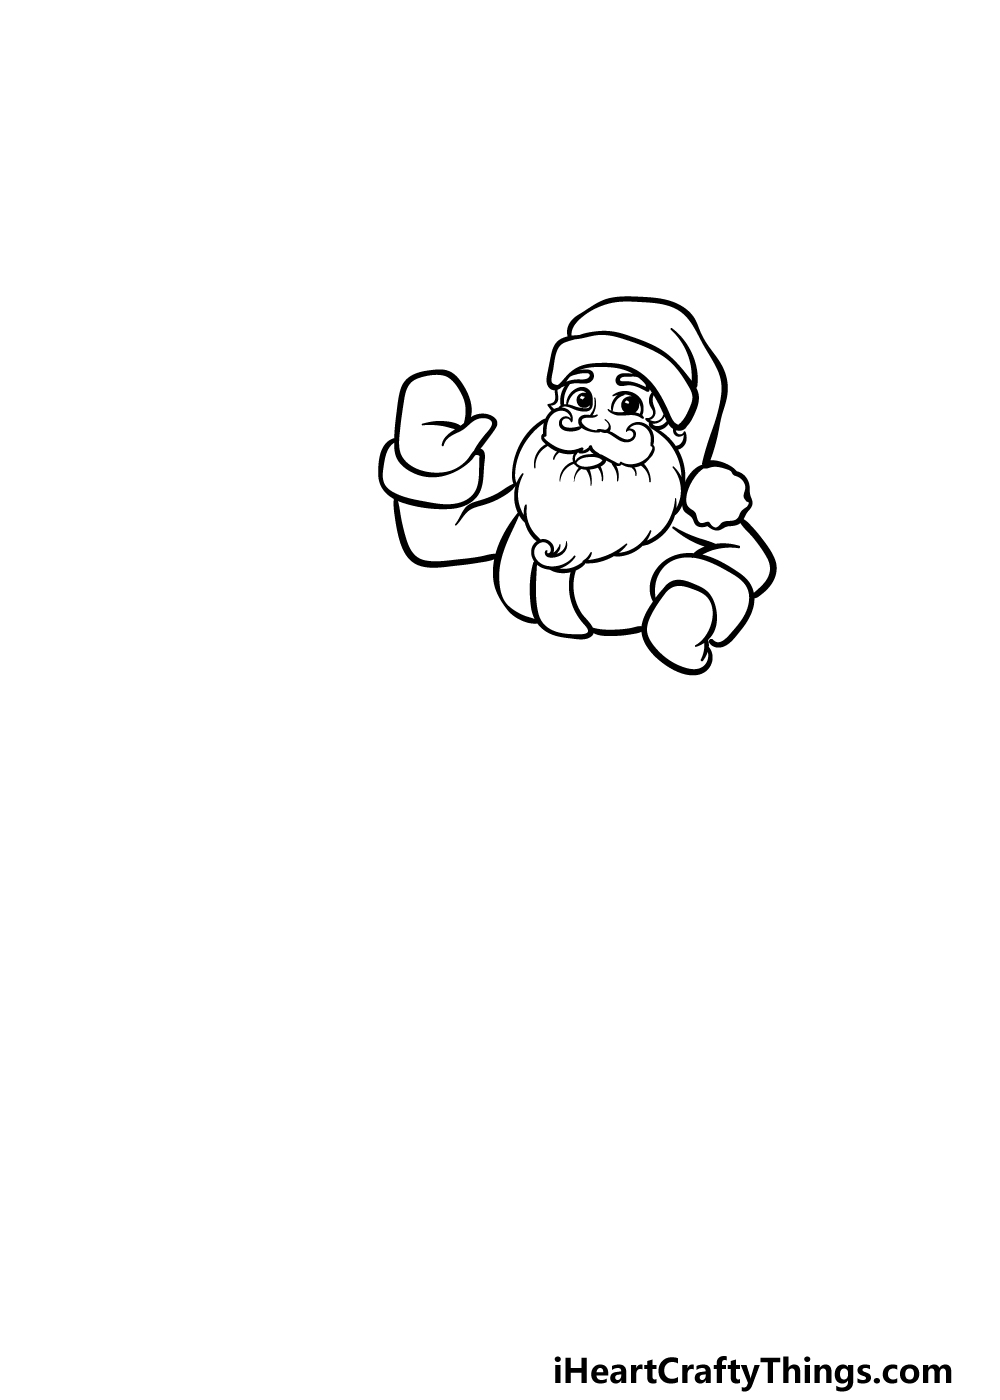
To continue this Santa sleigh drawing, we will be adding some arms and the chest for Santa. First, use some curved lines for his chest outline, and then add a thin rounded shape to the center of it.
The next thing to do will be to draw his arms. The arm on the right will be folded over a bit, while the one on the left will be raised up in a wave.
Each hand will have a fluffy rim at the base, and he will be wearing some thick mittens as well. With these elements drawn, it’s time for step 3 of the guide.
Step 3 – Start drawing the sleigh
Now we shall start drawing the sleigh itself as we move into the third step of this guide on how to draw a Santa sleigh.
This part of the guide has a lot to add, so be sure to take it slowly and follow the reference image closely as you draw.
We will use a lot of curved lines for the frame of the sleigh, and you can also draw the rest of Santa’s body standing in the sleigh.
Then, draw the side sections using some more curved lines, and be sure to incorporate the detailing as well. Finally, draw a sack of presents next to Santa, and then we can move to step 4.
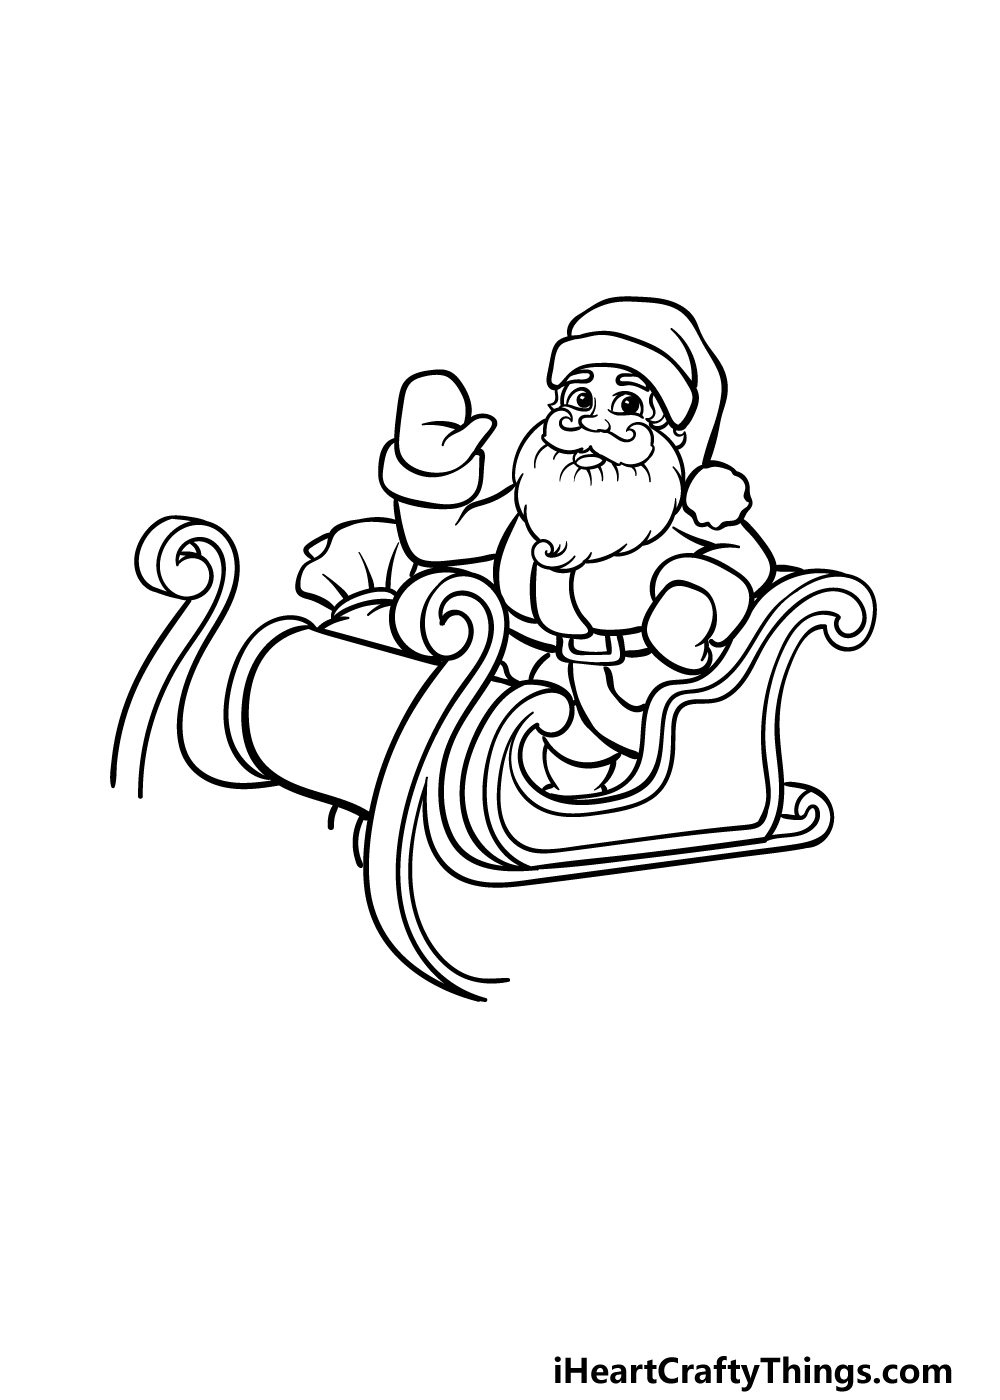
Step 4 – Next, draw the bottom rails for the sleigh
For this fourth part of the guide, we will be adding some rails to the base of the sleigh.
The design for this rail is rather detailed and intricate, so you may want to closely follow the reference image as you add it!
For this step, we will be adding the rails on the right-hand side of the image. You can also draw a straighter section to the front center part of the sleigh.
Once these are drawn, we will add the final parts of the rail in the next step of the guide.
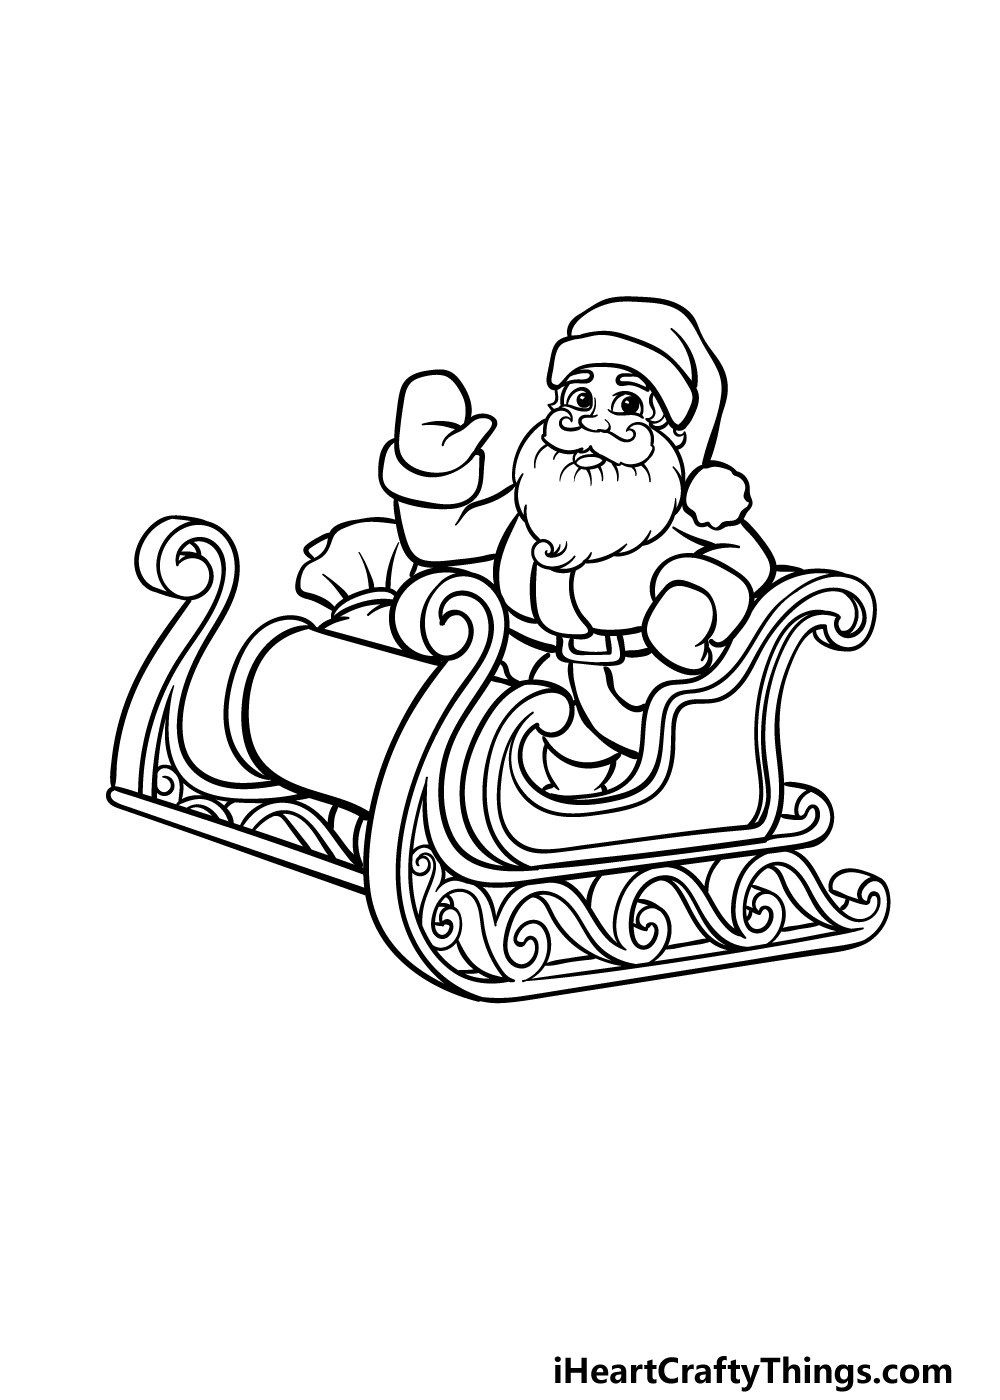
Step 5 – Add the final details to your Santa sleigh drawing
This fifth step of our guide on how to draw a Santa sleigh will wrap up the final elements and details of the image.
The main thing we will be adding will be the bottom of the left-hand side of the bottom rail for the sleigh.
This final portion will also have the same intricate pattern that the previous parts of the sleigh rail had.
Once you have finished up this final section, you could also add some more details and elements of your own!
You could draw a lovely background or add some small details to the sleigh and presents for a few ideas.
What kinds of additions and changes can you think of that would make this amazing image even better?
Step 6 – Finish off your Santa sleigh drawing with color
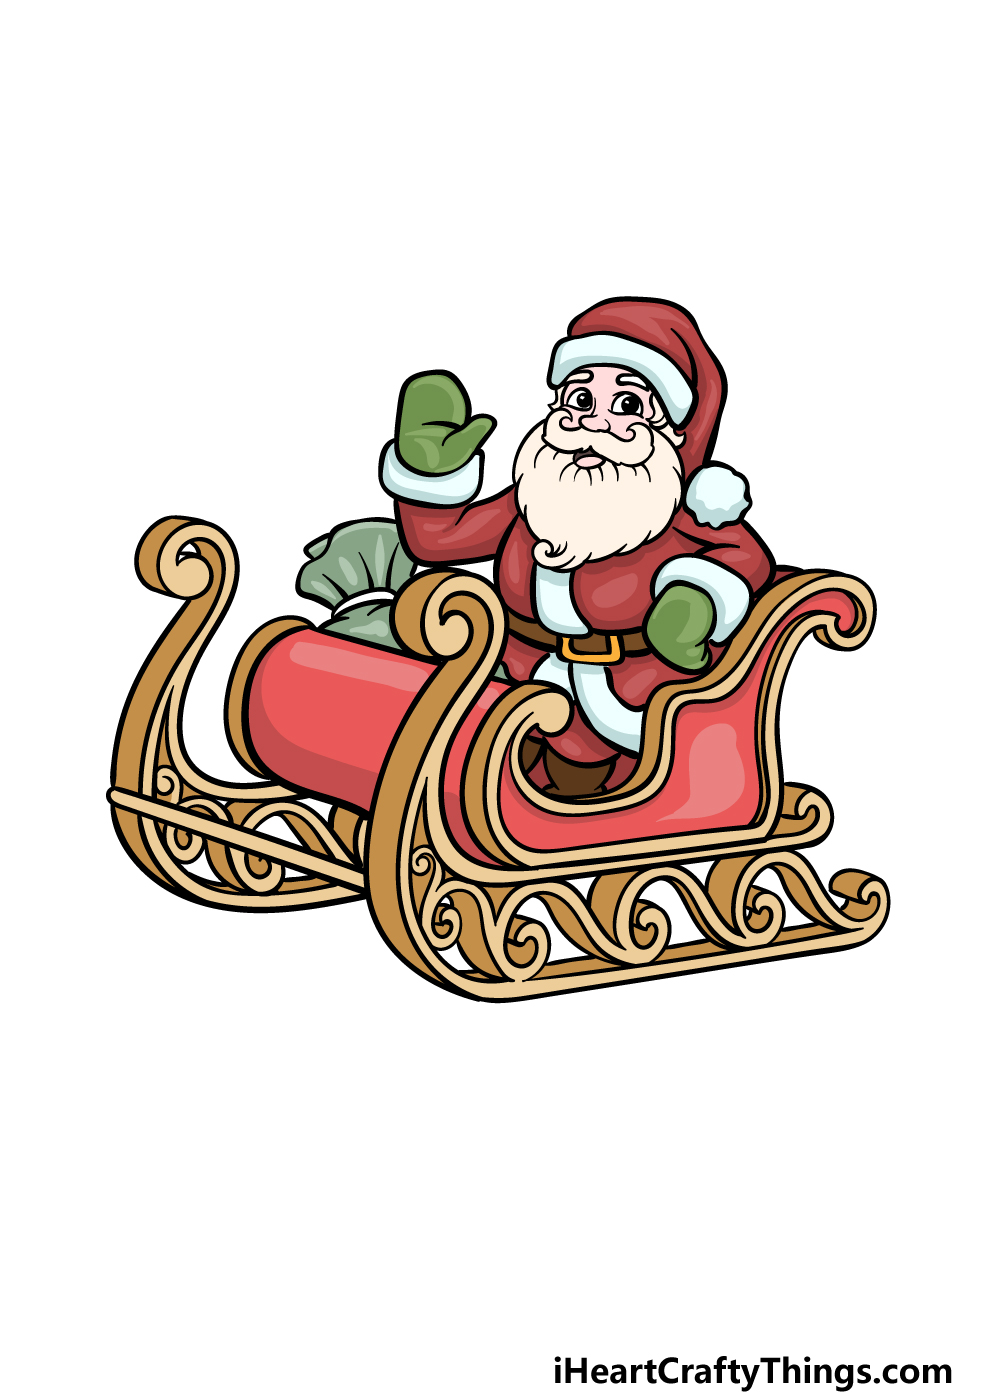
Now you’re ready to finish up this charming Santa sleigh drawing with some amazing colors! In our reference image, we showed you some colors that you could use to create a lovely festive image.
We used a lot of warm reds for Santa’s outfit and for his sleigh as well. We also incorporated some greens for his mittens, and we also used some golds for other elements of the sleigh.
These are some of the colors you could use for this image, but you should also feel free to use any other colors you love for it!
You can also play around with various art mediums to achieve your colors, but you could also use some fun crafts to add even more dimension to the picture.
What colors and art tools will you use to finish up this image?
Here’s how you can make your Santa sleigh drawing even better…
Get into the festive spirit by making your Santa sleigh sketch even more amazing!
This drawing of a Santa sleigh shows the man himself sitting in his iconic vehicle. It won’t get very far without something to pull it, so that could be a great way to make it even better!
Reindeer are the most common animals associated with Santa, so these would be great animals to add. You could even add the iconic character of Rudolph leading the pack with his red nose!
This sleigh has a few presents loaded on it, but you could add many more piled up behind Santa to make it look even more festive. These presents could be in all sorts of shapes and sizes!
You could even cut out pieces of actual wrapping paper into small squares that you could then stick on the image. This would make the presents look even more realistic and shiny on the page.
How many presents should be loaded on this Santa sleigh?
With all of these presents, Santa may need a hand to get everything done on time. That’s why we think it would be fun to add some elves to this Santa sleigh drawing!
These elves could be based on a design you have seen in a film or other adaptation, or they could be an entirely unique design of your own.
They could be shown loading presents on the sleigh or they could be hanging around it for a few ideas. What sort of scene would you like to create with some Christmas elves?
Finally, you would have plenty of options at your disposal if you were to create a background for your Santa sleigh sketch.
For example, you could show the sleigh in front of his workshop at the North Pole.
This would be a great one to go for if you took our suggestion of adding elves. Another option would be to have the Santa sleigh flying through the night sky on a delivery.
These are just two idea, but what other backgrounds could you do?
Your Santa Sleigh Drawing is Complete!
We have reached the end of this guide on how to draw a Santa sleigh, and we hope it was a lot of fun for you to work on!
In this guide, we aimed to not only create a wonderful Christmas image for you to work on, but also to make sure that it would be an easy experience for you.
That allows you to focus on the fun and creativity of drawing with less frustration!
Now that you have finished this image, there is a lot that you can do to finish it off with your own details and creativity.
These could include a fun festive background, some smaller details or some creative colors, mediums and crafts. How will you finish off this wonderful picture?
There are also many more amazing guides to enjoy on our website! We plan to bring many more out soon, so be sure to keep checking in.
You can then share your amazing Santa sleigh drawing on our website for us to enjoy! We can’t wait to see how it turned out!