Drawing material of any sort can be quite a challenge to draw. That is because it is made up of many different materials and can move and flow in unpredictable ways as it’s moved around.
Ruffles can be especially difficult, as on top of these obstacles it’s also made up of many complex layers. That can make learning how to draw ruffles a bit of a frustrating task.
Luckily, it doesn’t have to be that difficult once you know what to do!
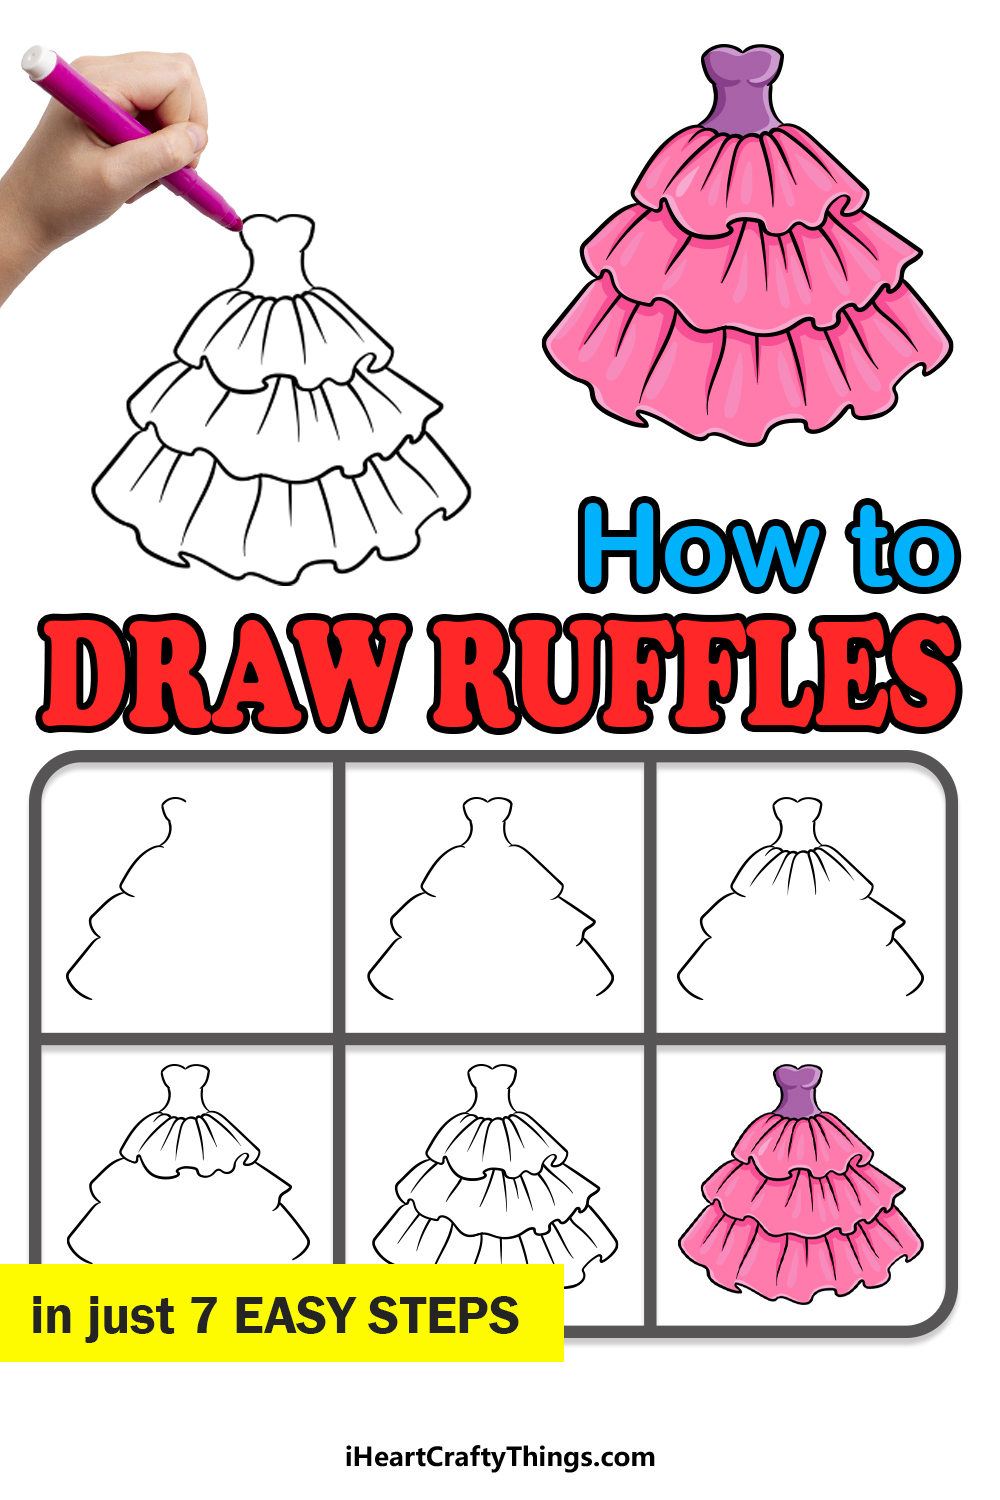
Our step-by-step guide on how to draw ruffles in just 7 steps will let you unleash your inner fashion designer!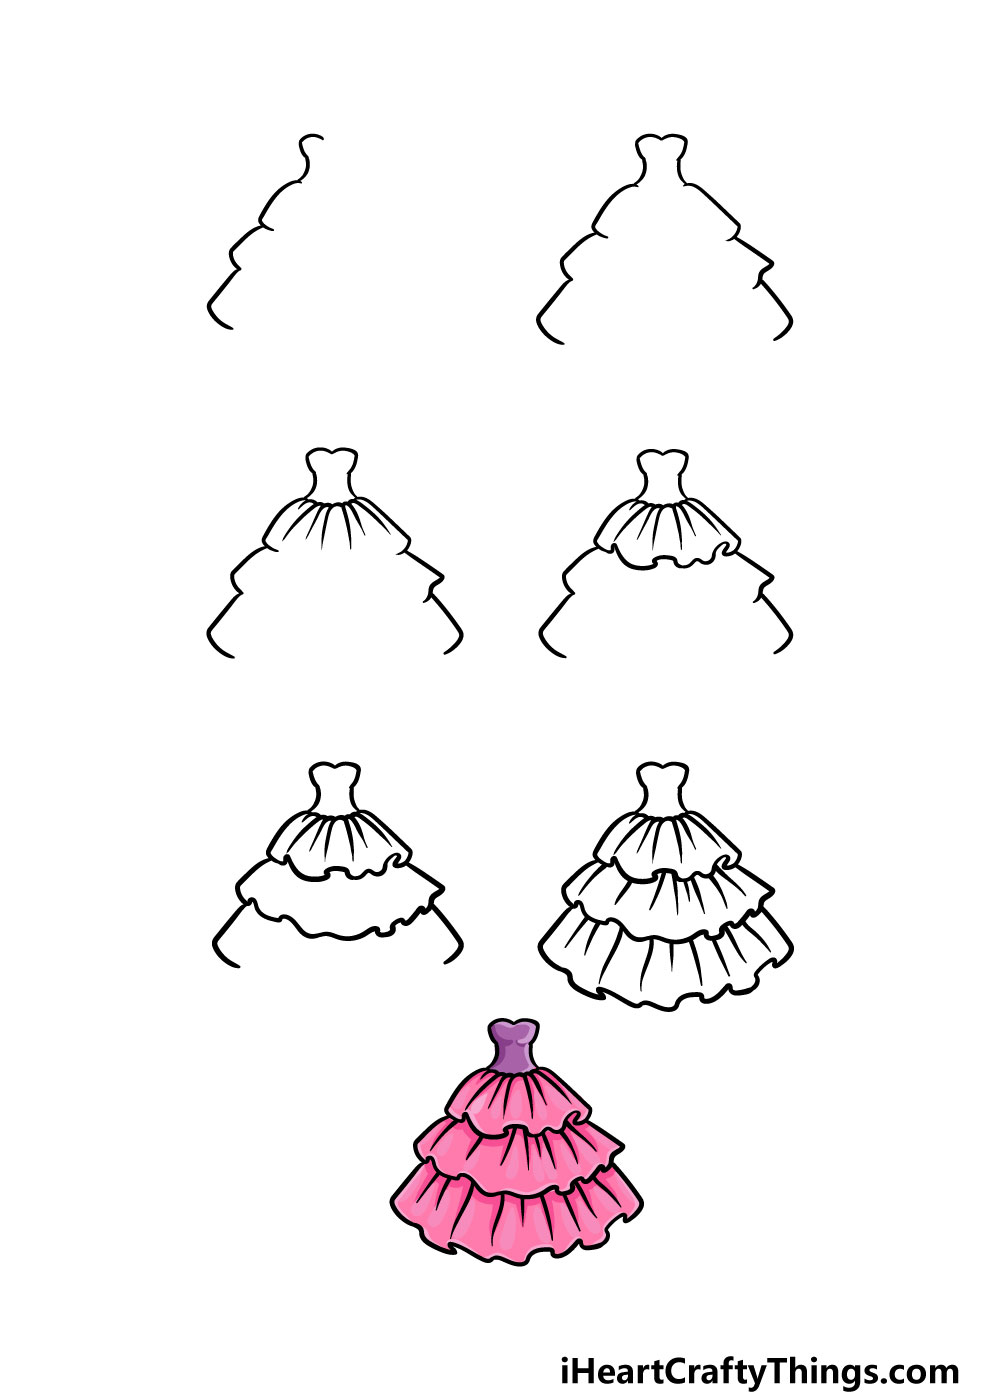
How to Draw Ruffles – Let’s get Started!
Step 1
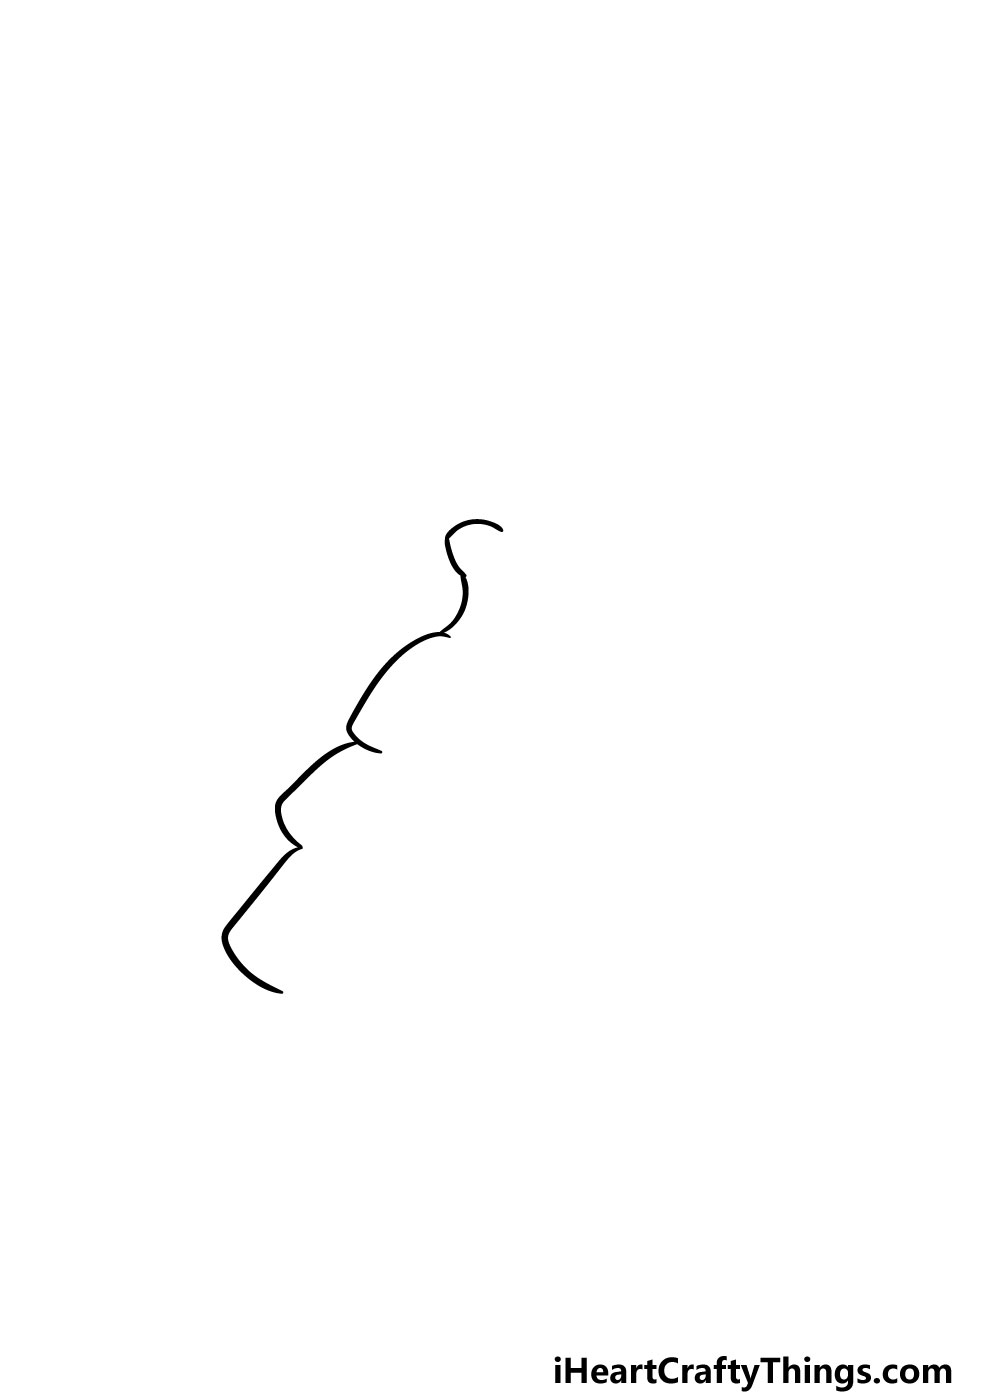
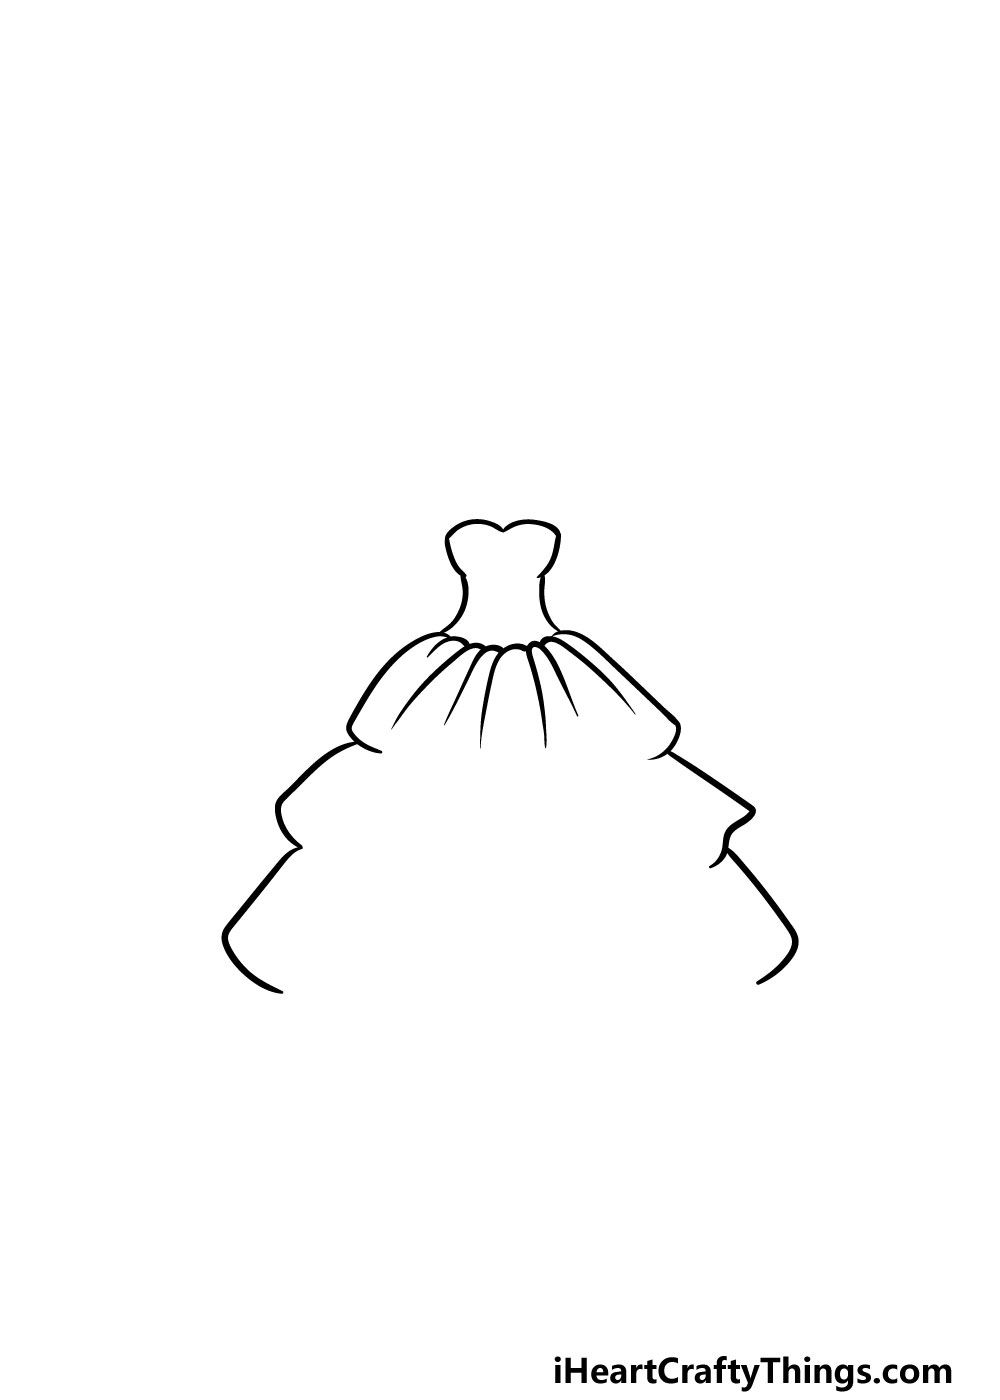
In this guide on how to draw ruffles, we will be drawing a dress that has a lot of ruffles making up the lower half. For this first step, we will begin with the left-hand side of the dress outline.
You will be doing this by using some curved lines that connect with one another to form the layers of the dress.
We will be extending these sections later on in the guide, so now you are ready to move on!
Step 2 – Mirror what you did in the previous step
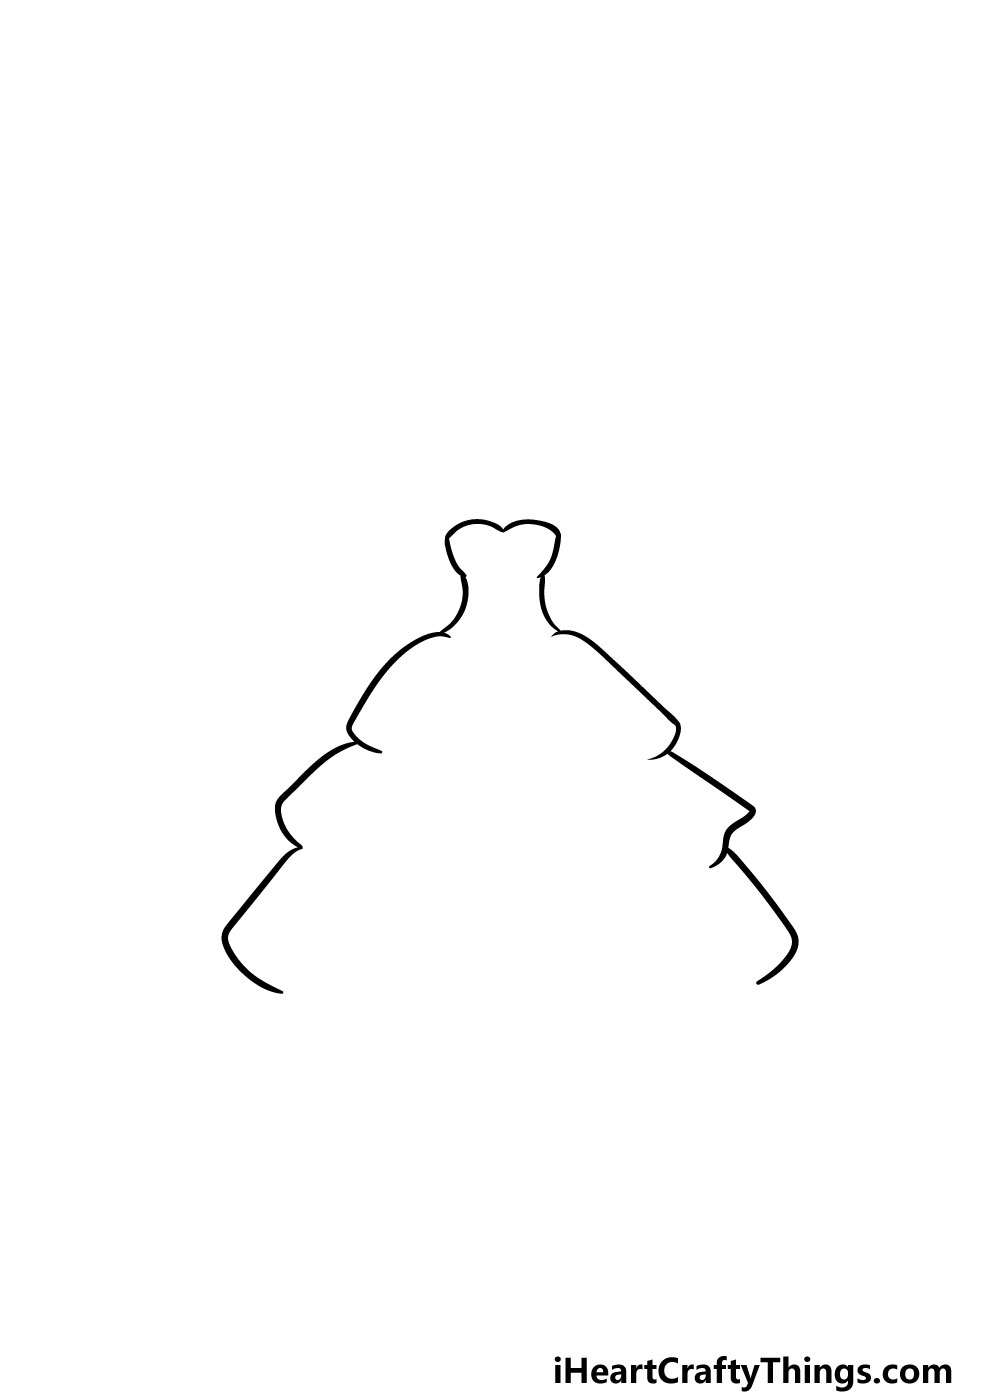
For this part of your ruffles drawing, you will be mirroring what you did in step 1. That should make it easy for you, as you’ve technically already done what you’ll be doing in this step!
Once you have both outlines of the dress drawn, you’ll then be ready to connect them with some details in the next few steps.
Step 3 – Add the first inner details
Now that you have the outlines drawn, you can start on the inner details for your picture in this third step of our guide on how to draw ruffles.
We mentioned that this dress will be made up of many different layers, and we will create the first of these layers now.
For the top of the dress, you will be using several curved lines connecting to one another on this first layer to form the material bunching up where it’s connected.
If that sounds confusing at all, it should become very clear once you refer to the reference image to guide you.
Step 4 – Now draw the next layer
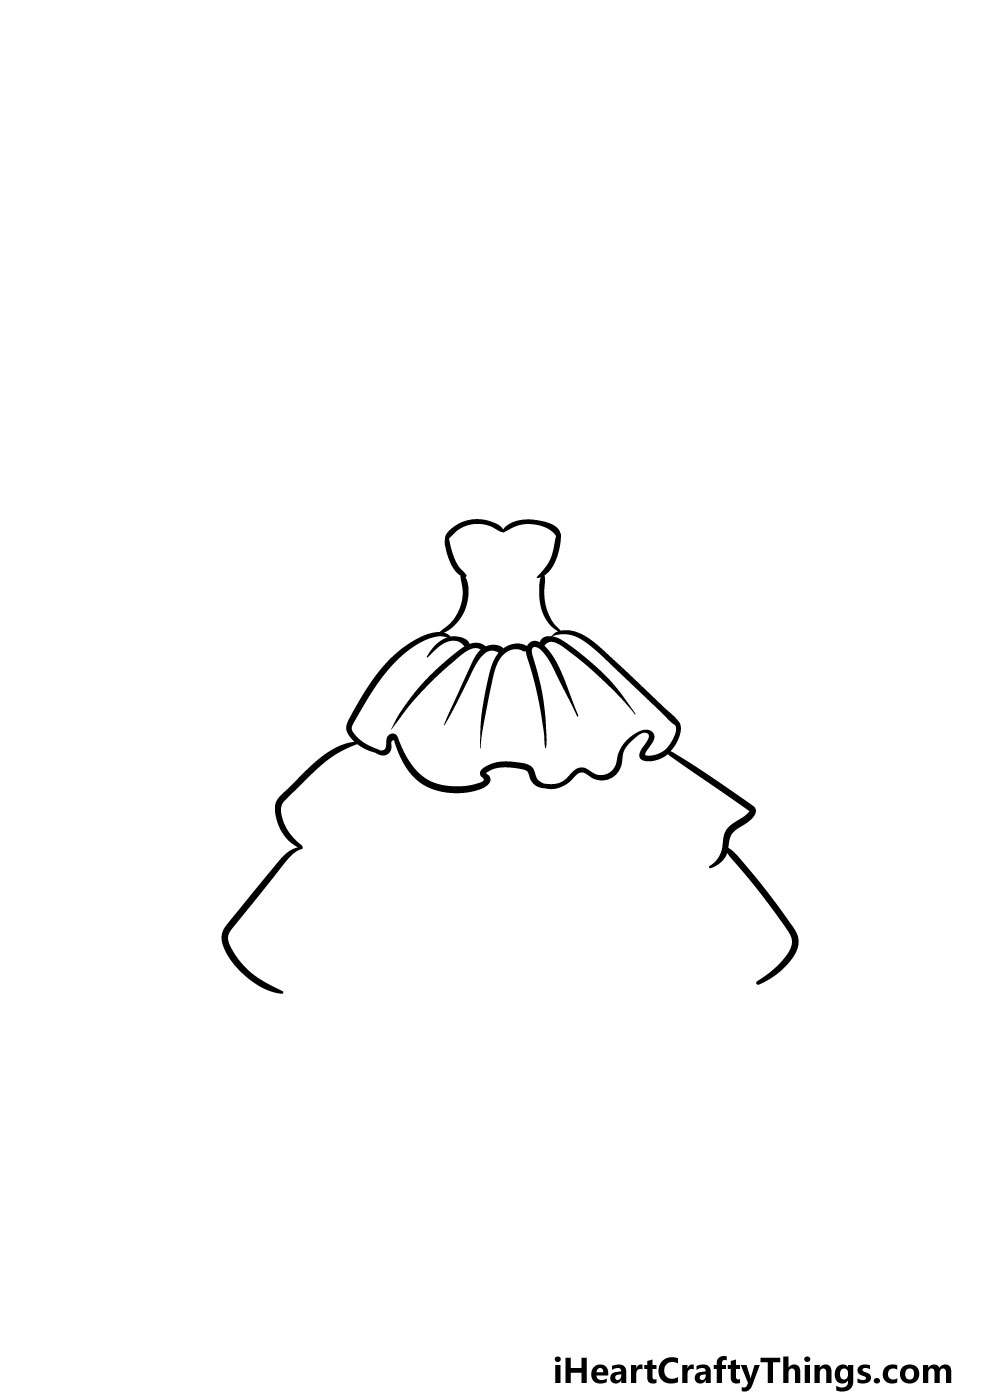
We will continue to add some layers to your ruffles drawing in this part. In fact, this step will see you drawing the first ruffles themselves!
To do this, you will be using a wavy line to create the edge of these ruffles, as shown in the reference image.
The wavier you can make these lines, the better! With that layer, you can begin to see how we will be building up the layers of the ruffles for the rest of the dress as we move on.
Step 5 – Draw the next layer of ruffles
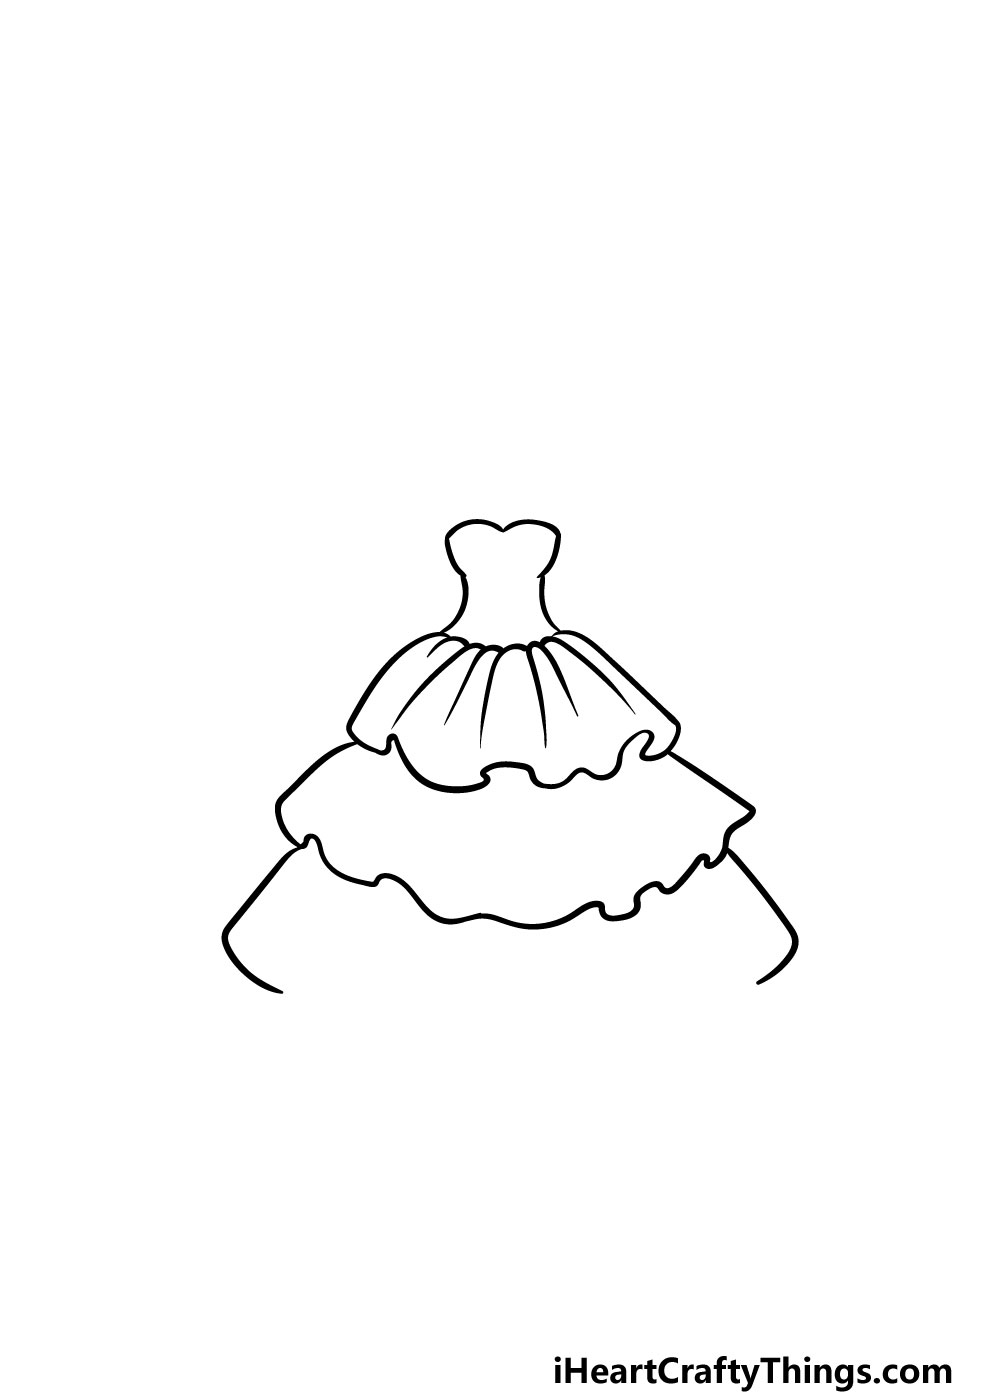
This step of our guide on how to draw ruffles will see you repeating the previous step. To do this, you will be adding another wavy line to form the next layers of ruffles.
You won’t be mirroring the steps exactly, but the idea will be the same. The wavy lines that you’re drawing will help to give the appearance of the ruffles flowing fabric.
Now that you have this next layer, we can finish off the final details in the next step, so let us move on!
Step 6 – Now, add the final details
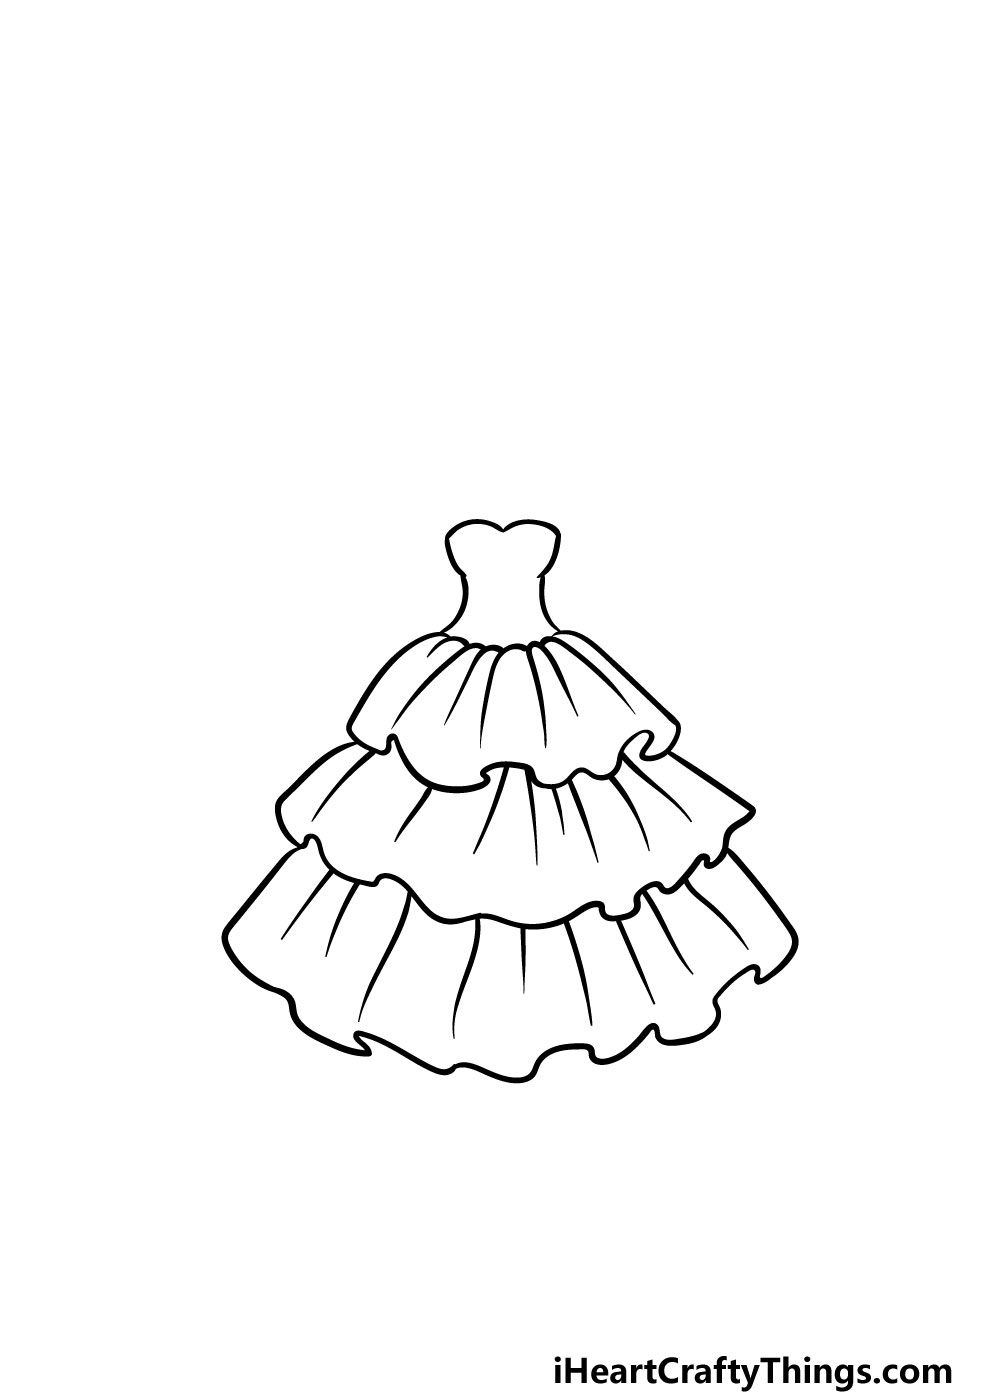
Step 6 of your ruffles drawing will see you adding the final details and elements before you start adding some amazing colors to it in the next step.
First, you will be doing what you did in the previous step and add another wavy line for the ruffles at the base of the dress.
As with the previous ones, you can change this up a bit to fit your preference. Once you have those wavy lines drawn, all that remains is to add some slightly curved lines coming down from each layer of the dress. These lines will help to give the fabric some texture detailing.
Once you have these details drawn, you’re technically ready for the final step! Before you move on, however, you should feel free to add any details of your own that you may want.
You could change up some of the smaller details for your own design, or maybe even make a bigger addition such as drawing a background or someone wearing the dress.
These are just a few ideas, but what else can you think of to finish off this ruffles drawing?
Step 7 – Finish off your ruffles drawing with some color
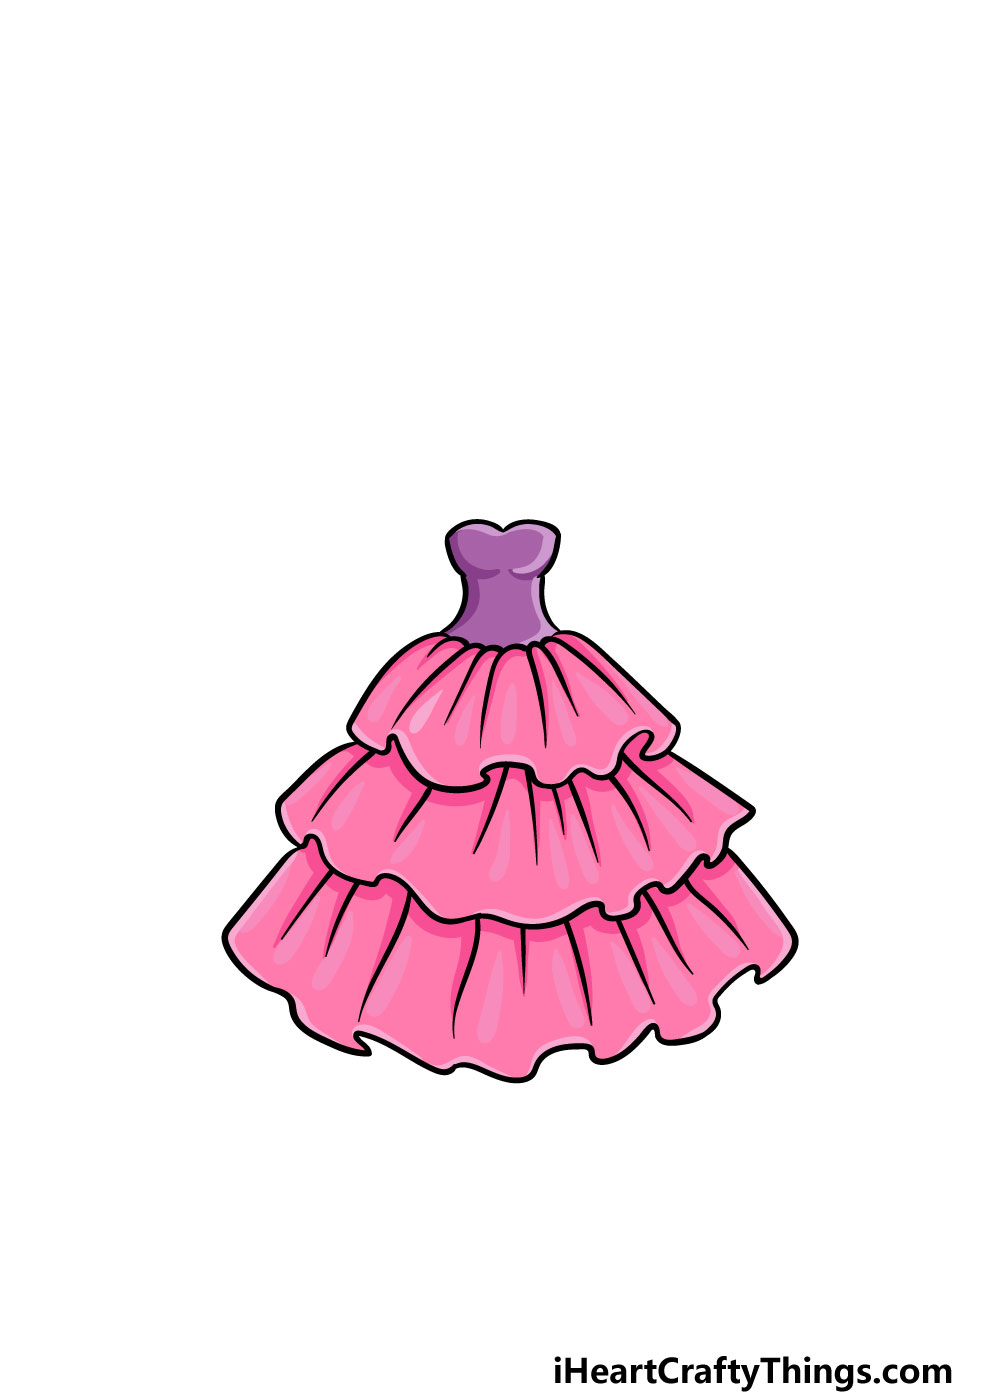
The drawing is complete, so now you can have some fun adding some amazing colors to it in the final step of our guide on how to draw ruffles!
In our reference image, we used various shades of purples and pinks to color in the picture, but this is just a suggestion that you could go with
. You should feel free to use any colors that you want though, as this is your chance to really unleash your creativity!
Once you know what color scheme you would like to go with, you can also have some fun choosing what art mediums and tools you will use to bring them to life.
You could use some fun crafts as well, incorporating ones like stickers, sequins or glitter to really make this ruffles drawing pop off of the page!
What colors and mediums will you use to make this picture look even more amazing?
Do this to take your ruffles drawing to the next level
Add some layers to your ruffles sketch with these 4 tips to try out!
We went for a simple yet really pretty pink and purple color scheme for this drawing of ruffles. While it looks so great, you could also go for some other colors you love instead.
This would depend on your own preferences, and you could show off all of your favorite colors!
Don’t be shy about using a mixture of different art mediums and tools as well.
What kinds of color schemes and patterns do you think would best suit this pretty ruffles design?
The ruffles in this drawing were incorporated into a dress, and this pretty outfit could use some accessories. There are so many fun details you could add to complete this look.
First, you could have various kinds of jewelry to compliment the dress. Or, you could add some fancy gloves, shoes and even a tiara.
This is your chance to show off what a great fashion designer you can be as you make this dress look even more amazing.
In the previous step, we mentioned adding more items to this ruffles drawing, and this would be even better if you added a person wearing it.
Adding a person would not only make it much better but would also make it easier to incorporate other clothing items to the look.
For an extra fun touch, you could make yourself into the character that is wearing this dress! If not, then maybe you could use a famous princess character that you love as a stand in.
The dress in this ruffles sketch is so lovely and fancy, and it makes you wonder where you would wear it to. You could show off what your ideas would be by drawing a background setting.
We think that the fancier you could make this setting, the better! It could be a grand party or maybe a royal procession for a few ideas.
Where else could you set this gorgeous artwork you have created?
Your Ruffles Drawing is Complete!
That brings you to the end of this step-by-step guide on how to draw ruffles! We created this guide to give you all of the tools that you need to get creative with this fashionable drawing, so we hope that it was easy and fun for you to do.
Don’t forget that you can add some of your own details, elements and additions to it as well. That along with the colors and mediums you choose can really help to put your own spin on this picture.
We have lots of incredible drawing guides for you to enjoy on our website! Be sure to visit often, as we frequently upload new ones as well.
When you have finished your amazing ruffles drawing, we would love to see your design! We hope that you will share your artwork on our Facebook and Pinterest pages.