When there is injustice towards groups of people in any society, sometimes it takes a few brave souls to stand up for what they believe in.
In the case of Rosa Parks, she sat down for what she believed in during an instance where when refused to leave her seat on a segregated bus.
This act of defiance would become emblematic of the Civil Rights Movement and inspired many others to stand up against bigotry and segregation.
Rosa Parks would become a hugely famous and inspiring figure in this movement, and many like to tribute her by learning how to draw Rosa Parks.
If you are one of the people inspired by this great woman, then this is certainly the guide for you!
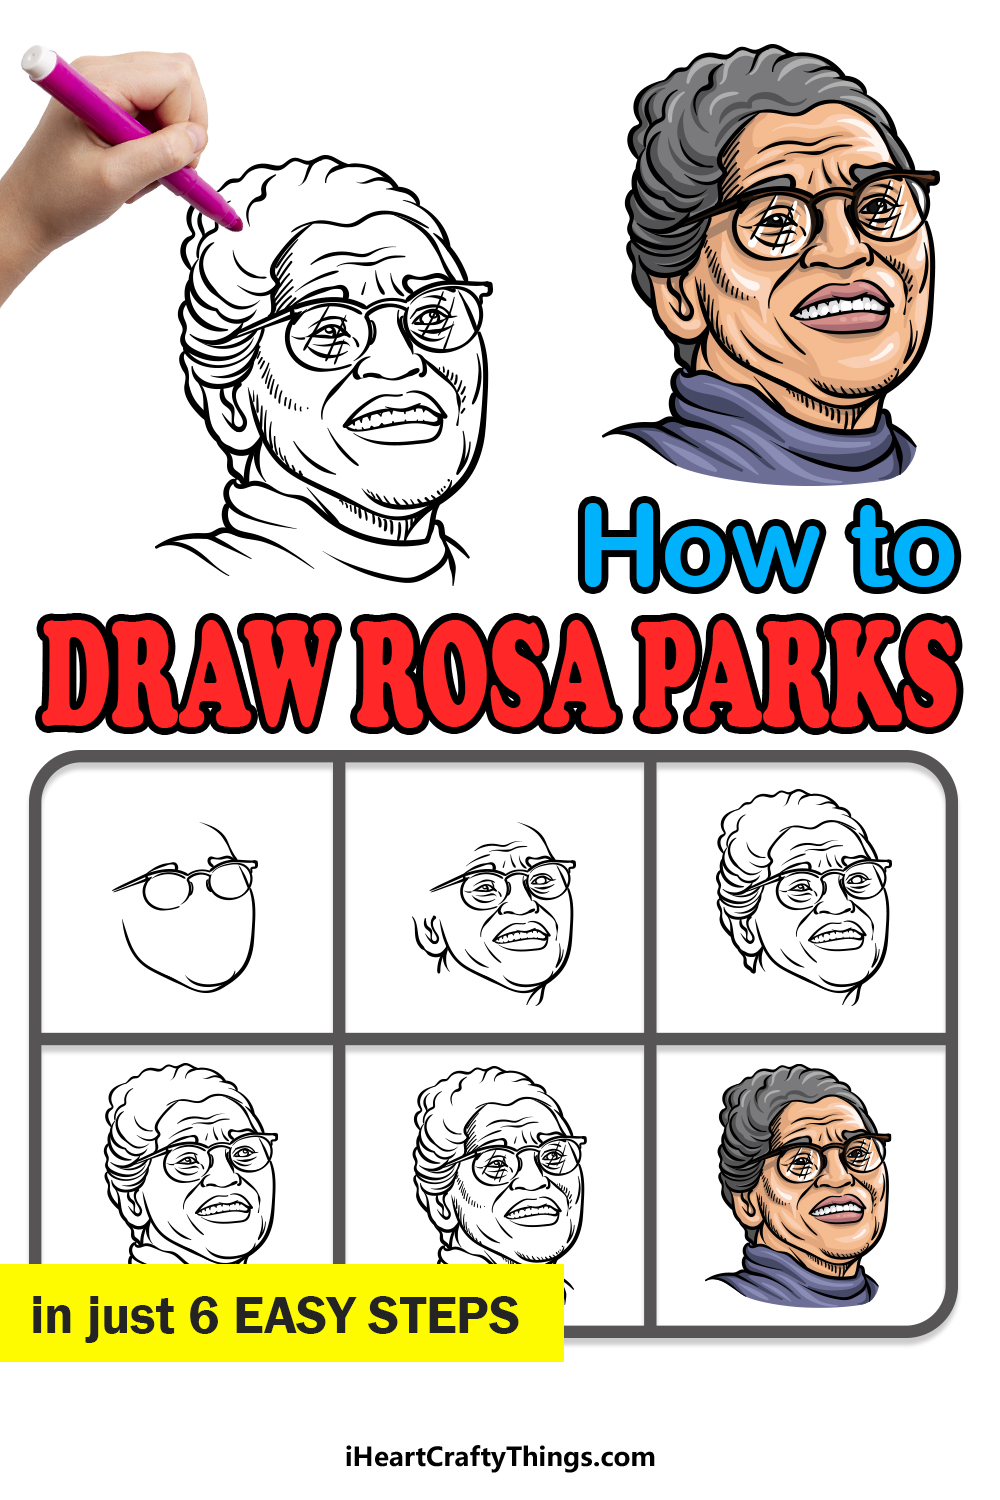
Our step-by-step guide on how to draw Rosa Parks in just 6 easy steps will help you to tribute this iconic figure with your artwork.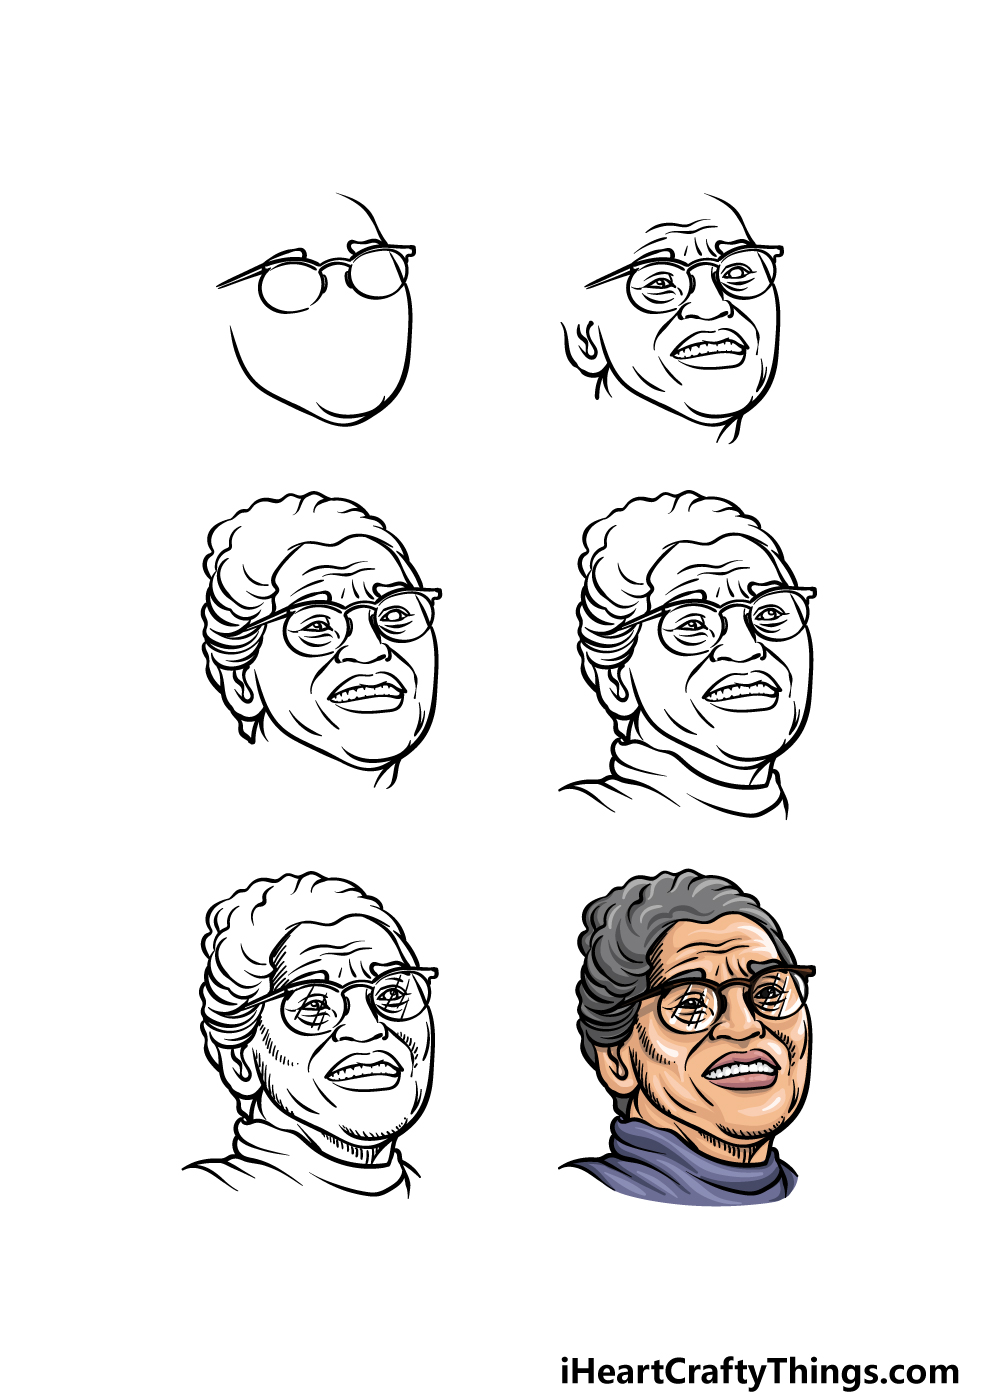
How to Draw Rosa Parks – Let’s Get Started!
Step 1

Drawing real people can prove quite a challenge to even seasoned artists, as you have to get the details right in order to make someone look recognizable.
While this can be tricky, we will be making it easier for you by breaking it down into smaller steps as we begin this guide on how to draw Rosa Parks!
To begin, we will draw her glasses and face outline. You can use some rounded shapes for the lenses of her glasses, and then use some thin curved shapes for the frames.
Draw her eyebrows above the glasses, and then you can finish off with some rounded lines for the outlines of her face. Then you will be ready for step 2 of this guide!
Step 2 – Now, draw her facial details
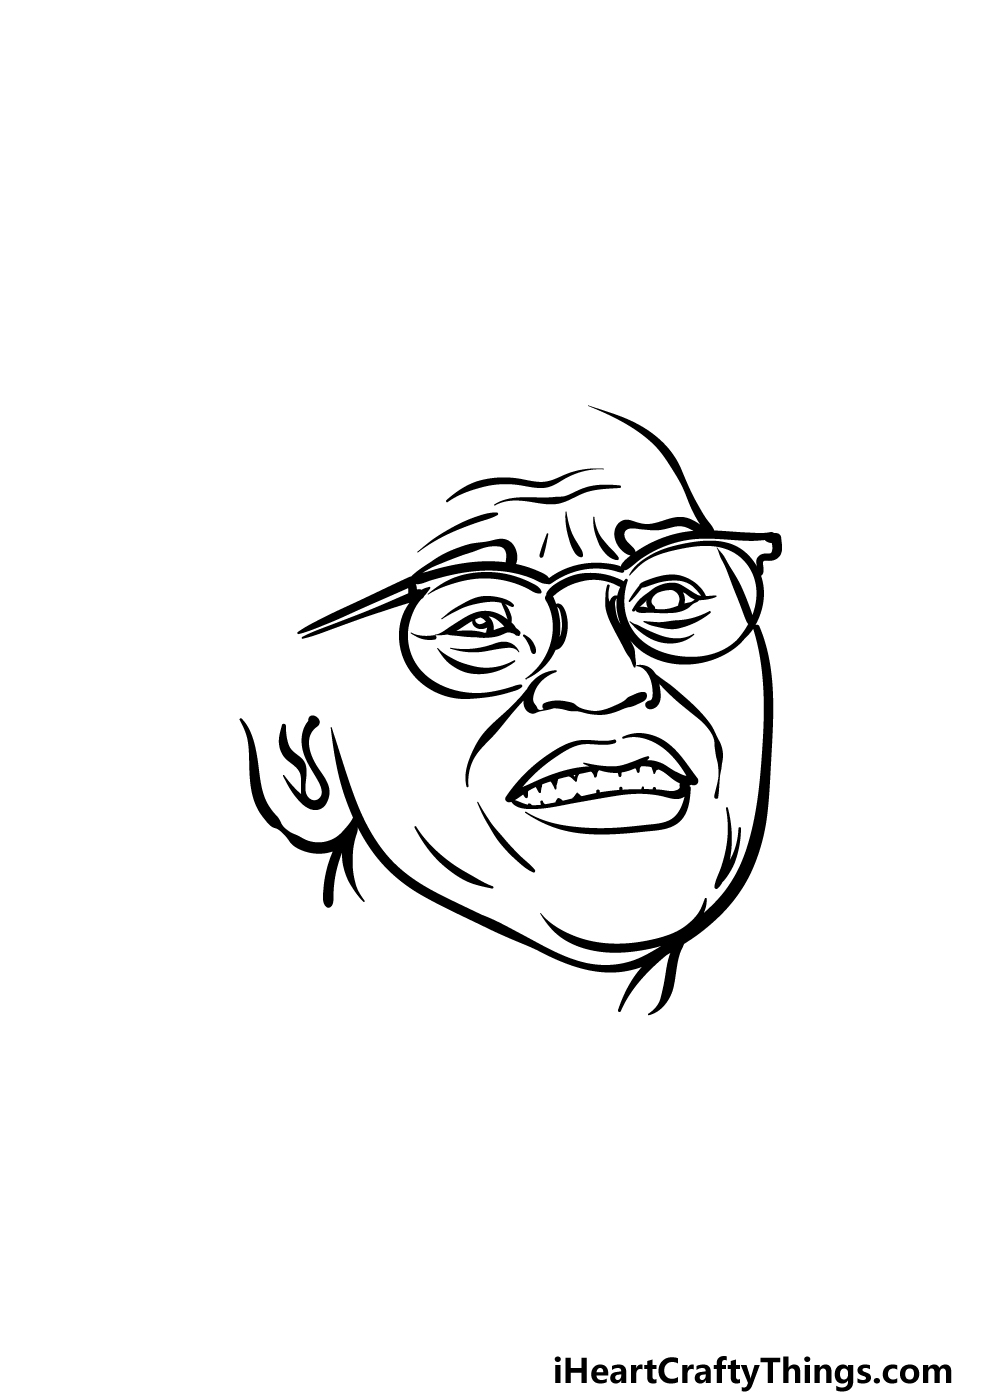
In this second part of your Rosa Parks drawing, we will be adding her facial features.
This could be one of the trickiest steps of this guide, so when working on it you may want to try and closely copy our reference image.
It may look complicated, but if you take it one section at a time and work slowly and carefully then you should have no problems doing it!
Add elements such as her eyes, nose, mouth and ears and then use some curving lines for the wrinkles on her face.
Step 3 – Draw the outline of her hair
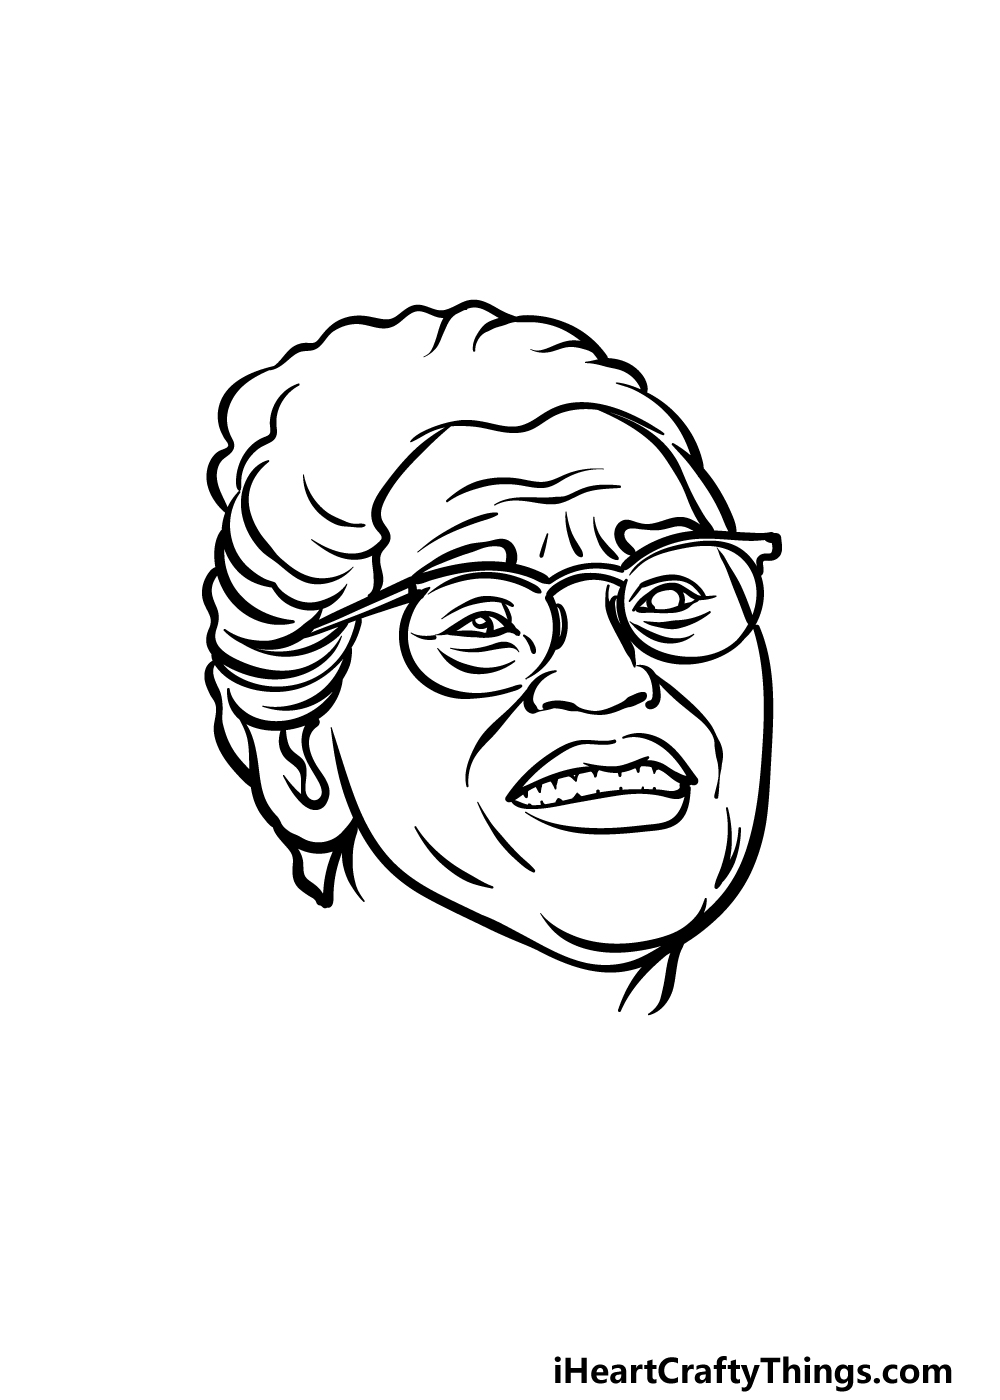
With her face drawn, we can now move on to the outline of her hair in this third step of our guide on how to draw Rosa Parks.
For the sides of her hairstyle, we will be using many curved lines close to one another to make it look tied back.
Then, we will be using some curved and bumpy lines for the top of her hairstyle to finish it off.
When you’re happy with how this element of the drawing looks, we can then proceed to the fourth part of the guide.
Step 4 – Next, draw the collar of her sweater
You’re almost ready to add some final details and touches to your Rosa Parks drawing, but first we will be finishing up the outlines of the picture.
To do this, we will be drawing the collar of the sweater she is wearing.
You can use some curving lines at the base of her neck and then add more of these curved lines around the rim of the sweater to make it look more creased.
That will leave you ready for those final touches when you tackle step 5 of the guide!
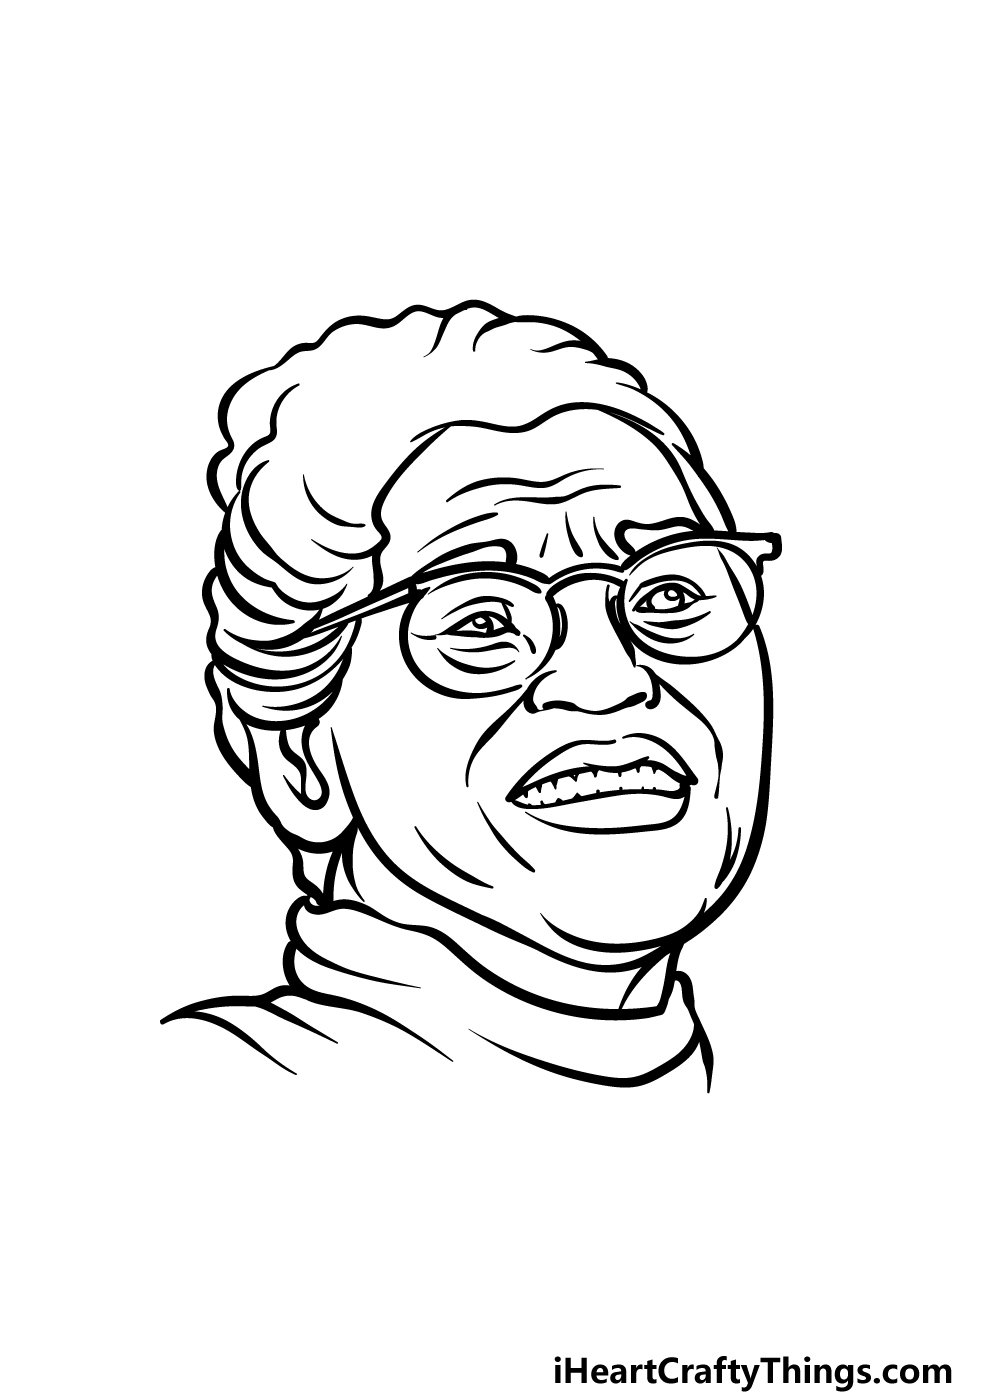
Step 5 – Add the final details to your Rosa Parks drawing
To finish off this drawing, we will be adding some smaller details that will really help to give this picture some more depth.
These final details will get you ready for the final step of this guide on how to draw Rosa Parks!
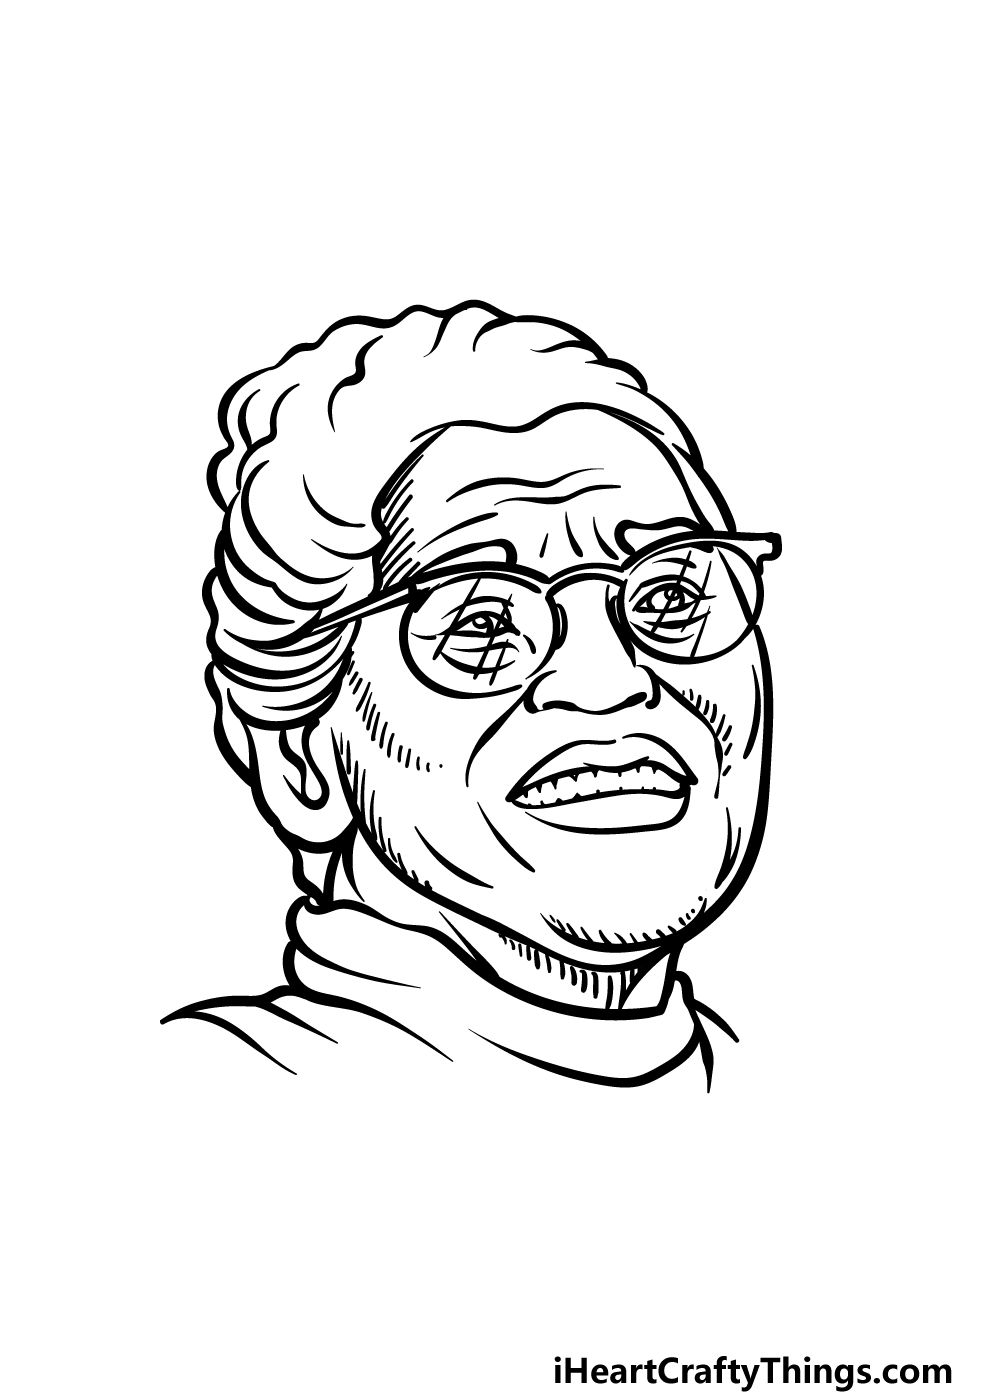
When adding these finer details, we will keep them subtle by adding smaller lines throughout her face and clothing.
These little details help to make the image look more shaded, and you can add some straight lines onto her glasses to make them look shiny.
When you have finished the details, you could also keep it going with your own details and ideas!
There are some great ways that you could go about doing this, and one idea would be to incorporate text displaying some famous Rosa Parks quotes.
This is one idea, but what else can you think of to finish this off nicely?
Step 6 – Finish off your Rosa Parks drawing with color
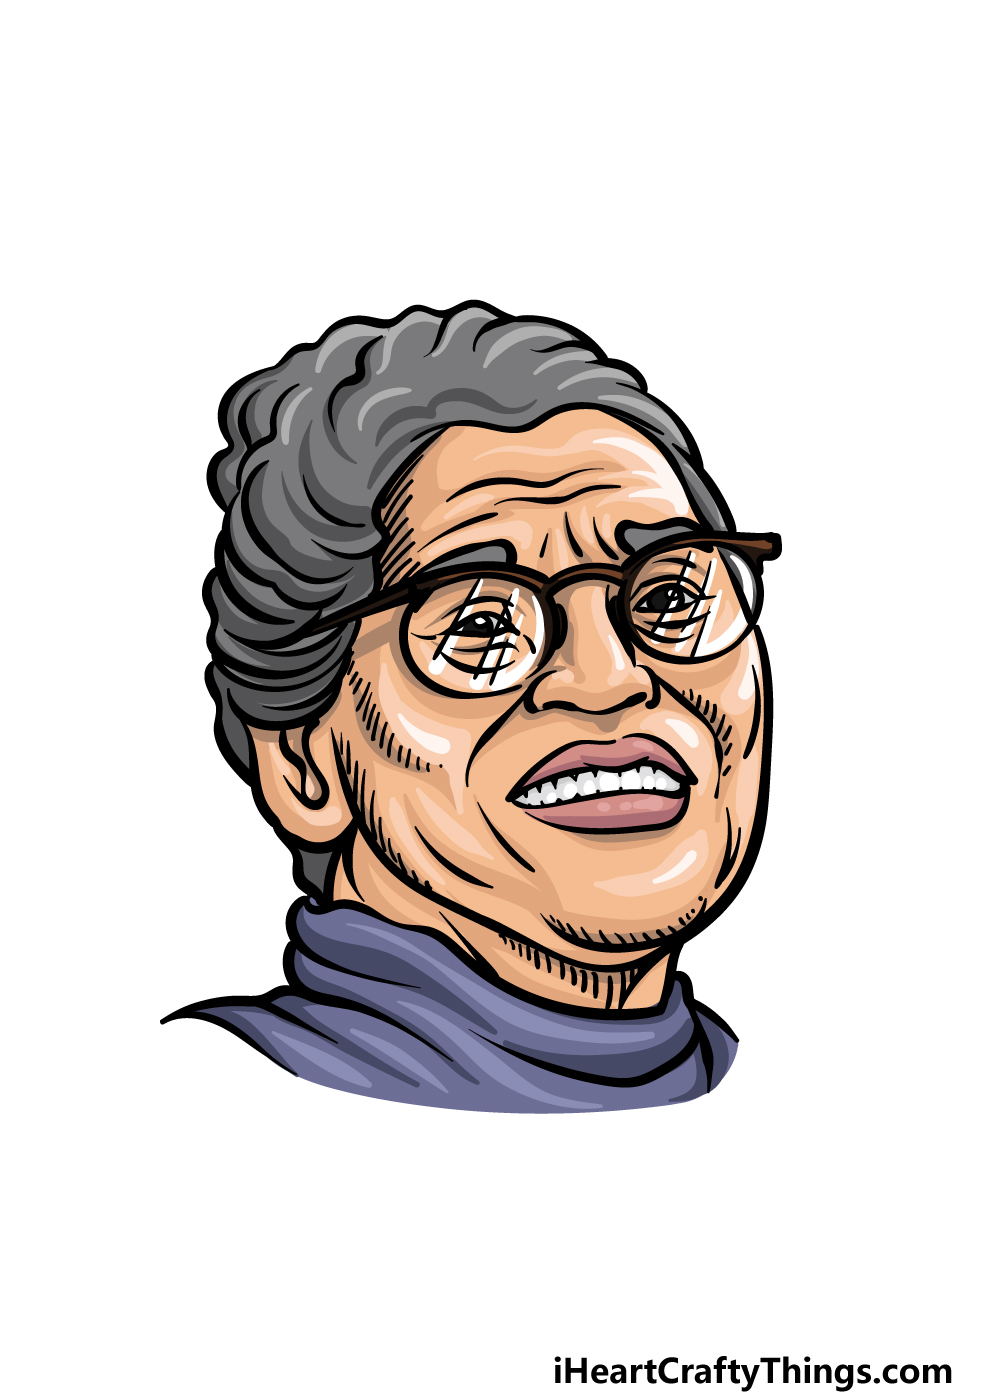
Now, you’re ready to finish up this Rosa Parks drawing with some color! In our reference image, we kept the colors a bit more muted and realistic to create a nice soft look to the image.
You could use darker shades if you prefer, and you could even incorporate a more stylistic color scheme for a unique approach.
If you would like to go for a similar color palette to the one we used, then mediums such as watercolor paints and colored pencils would be a great choice.
You could use others like colored markers and acrylic paints for heavier tones, so what colors and mediums will you choose to finish it up?
3 More tips to make your Rosa Parks drawing easy!
Celebrate this iconic historical figure with some tips to make your Rosa Parks drawing easier.
For this drawing of Rosa Parks, we attempted to go for a style that is realistic but also slightly stylized.
This high level of detail can make the drawing much more difficult, so you could remove or alter some of the details.
Where you do this would depend on the parts of the drawing you’re having a hard time with. This could also be done by changing the style of the drawing even more.
For example, you could go for a simpler cartoon portrayal or pick another style that you are comfortable with. What are some styles you could use to make this drawing easier for you?
This Rosa Parks sketch shows her at a later part of her life. Drawing people who are a bit older can make it more difficult as there are generally more details such as wrinkles to portray.
If you find drawing these kinds of details to be too frustrating, you could maybe portray her at an earlier part of her life.
This could be as simple as removing some of the wrinkle lines or giving her a simpler hairstyle.
Another way to do this would be by drawing her smaller on the page and maybe adding more of her body and a background.
Finally, we would suggest using pictures of the real person to make this Rosa Parks drawing easy to do. If you search her name online, you will find lots of archival photos showing what she looked like.
If you decide to use these, you would be best off trying to find ones where she is posed similarly to our example image. Finding pictures that show her at a similar time of her life would also be recommended.
Using photos would also be helpful if you decide to go with our previous suggestion and draw a younger version of Rosa Parks.
It would also be helpful if you wish to draw a more dynamic pose or scene.
Your Rosa Parks Drawing is Complete!
Rosa Parks is one of the most inspiring figures from recent history, and we hope that you had a great time creating this artwork featuring her in this guide on how to draw Rosa Parks!
Drawing real people isn’t always an easy task, so during this guide we aimed to break it down into smaller steps so that it would be easier and even more fun for you.
Now that you have finished this design, remember that there are ways you can take it even further.
We mentioned how you could draw a background for this picture, and in doing so you could incorporate elements such as famous quotes or events from her life.
These are just a few ideas, so how will you finish up this image?
If you enjoyed working on this guide, we have many more to enjoy on our website. These guides feature subjects from other famous figures to animals and popular cartoon characters.
Be sure to check in often, as we upload new guides frequently!
We would love to see how you finished up this Rosa Parks drawing, so please share your creation on our Facebook and Pinterest pages for us to see!