Cartoons were once seen as mindless entertainment for children, but the medium of animation has garnered much more respect in recent years.
There are even many animated shows and movies geared specifically to adults, and Rick and Morty is one of the most popular examples of this.
Known for its quirky characters, smart plotting and dark humor, it has won many fans around the world.
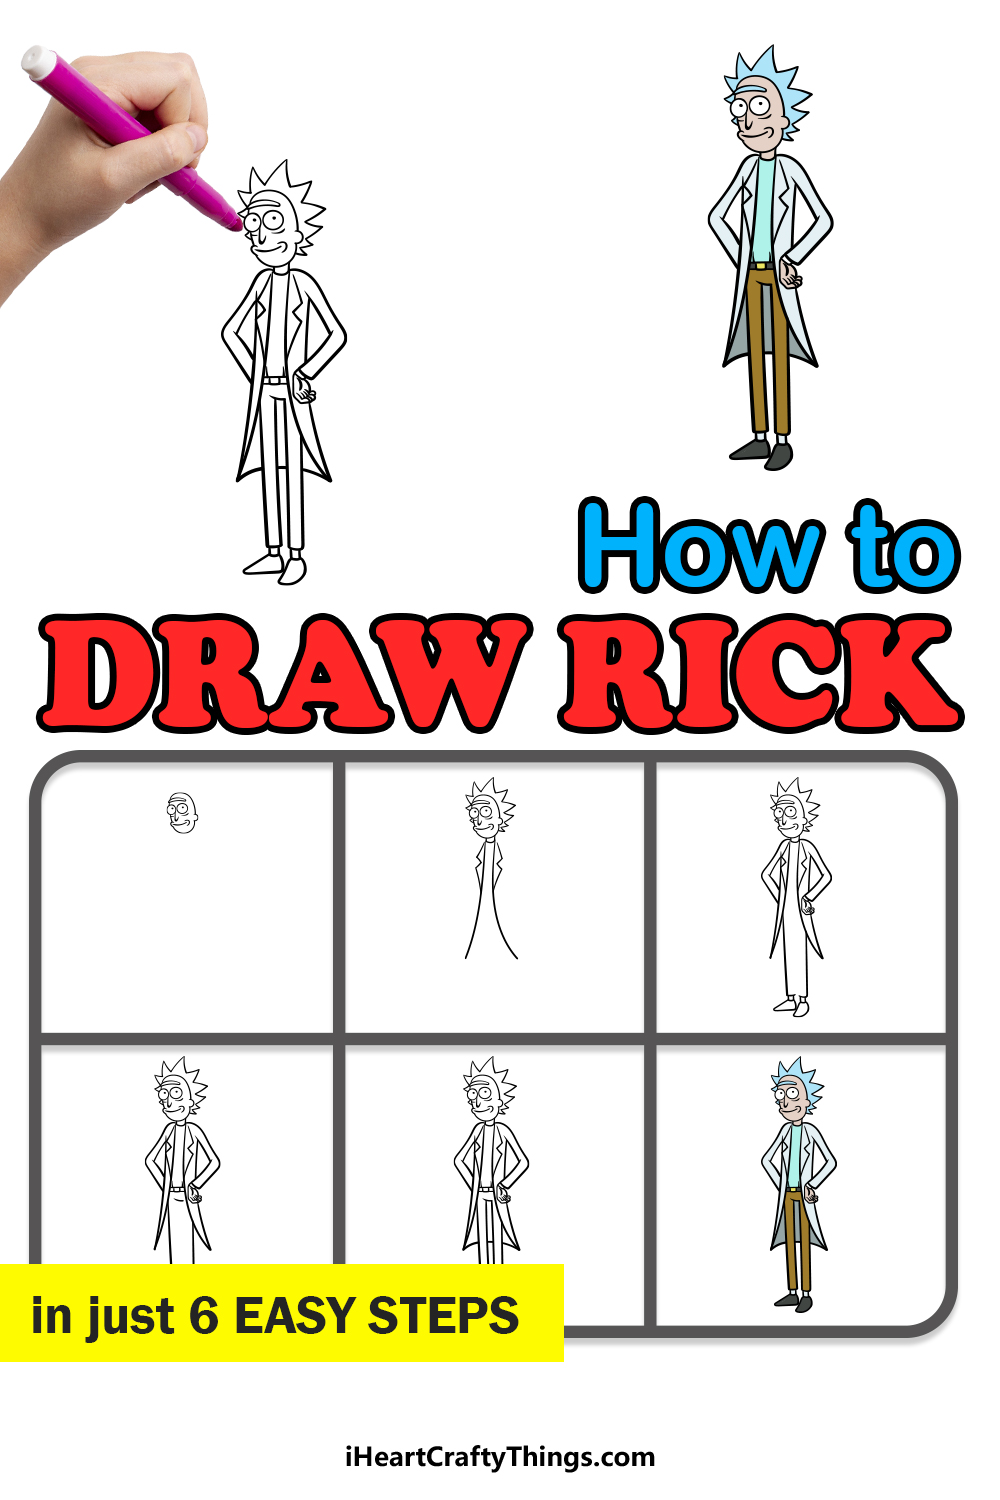
Learning how to draw Rick from the show is a great way to put this great character in some unique scenarios!
By the end of this guide, you will know everything there is to know about drawing this troubled genius.
We hope that you enjoy this step-by-step guide on how to draw Rick in just 6 steps!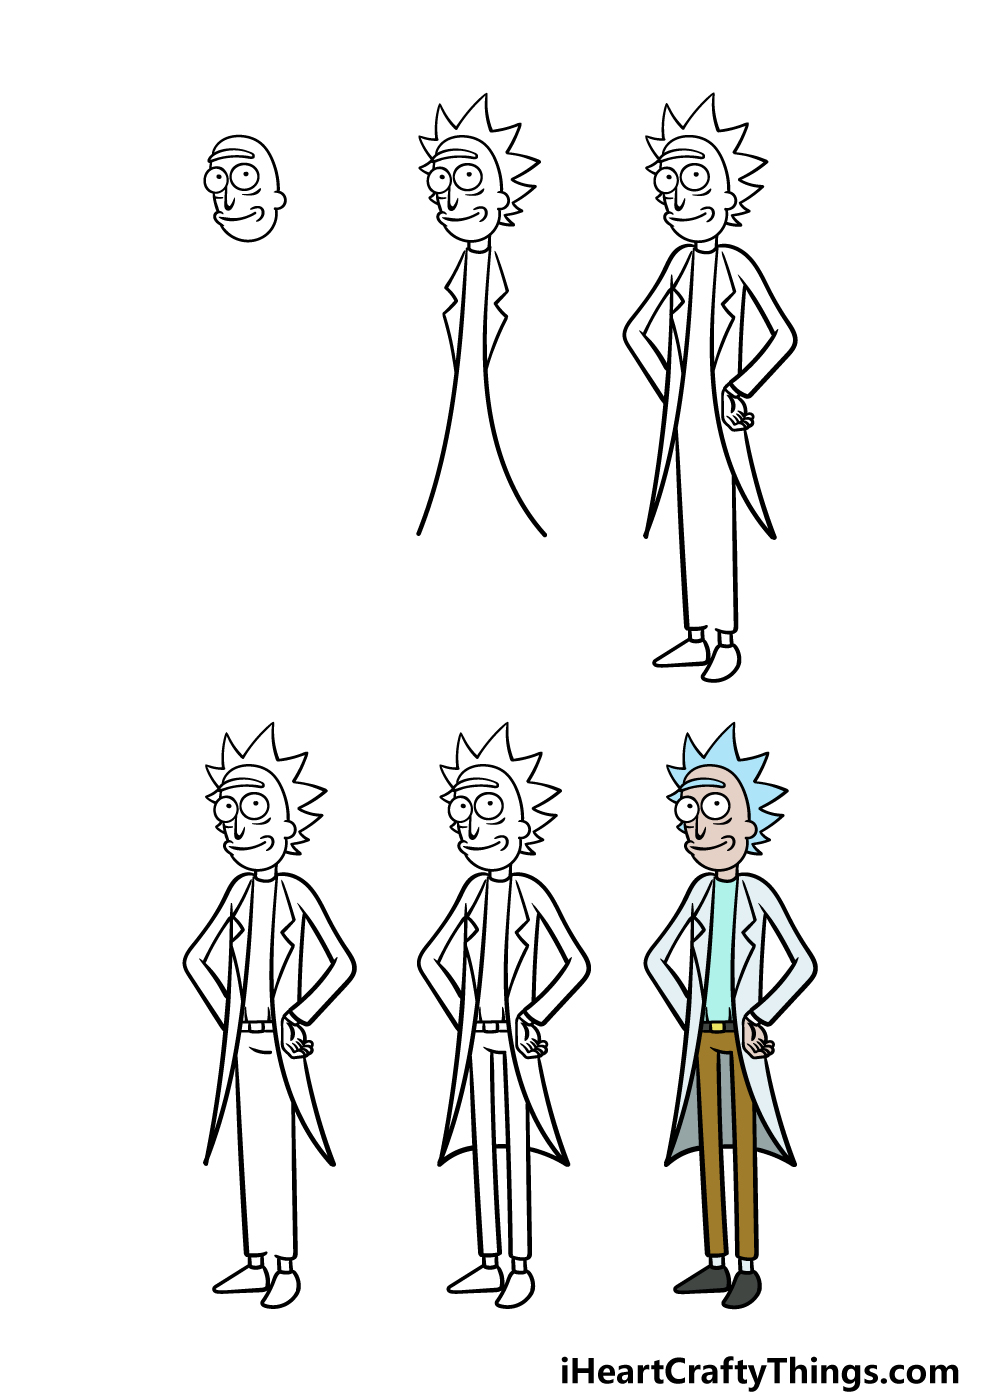
How to Draw Rick – Let’s Get Started!
Step 1

To get this guide on how to draw Rick started, we will begin by drawing his head and face. His face is drawn as a separate ‘piece’ to his spiky hair that we shall be drawing in the next step.
Start his face by drawing two circles close to one another. His nose will then be drawn as a curved line angled downward.
You can then draw a curved line for his smiling mouth, and then add a small curved line at each corner.
Then, add another curved line underneath each eye to give him some more expression. Rick then has a singular eyebrow over his eyes, and you can draw it as a long, thin shape above them.
Finish off this step by drawing the rest of his facial outline, and you can also add a curved line for his ear.
Step 2 – Now, draw his hair outline and start his coat
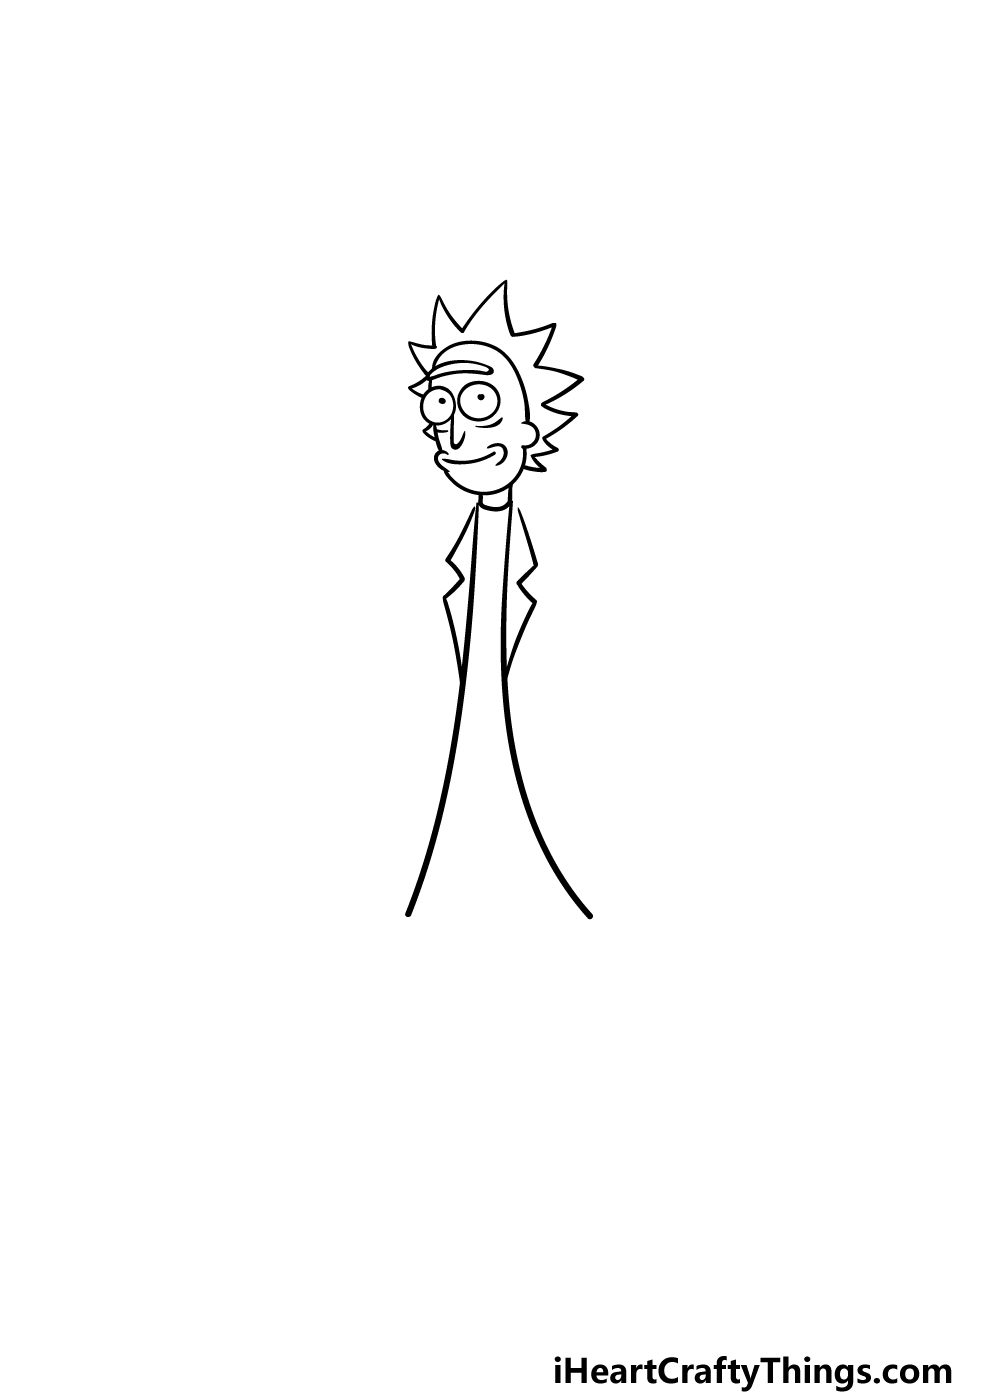
We mentioned Rick’s spiky hair in the previous step of your Rick drawing, and we shall add that in this second part!
His hair is made up of lots of pointy shapes surrounding the outline of his head, as shown in the reference image.
The size of each spike will vary, with the largest ones being on top with the smallest at the base of his head.
Rick wears a white lab coat, and we shall start drawing that in this step as well. Draw a small neck for Rick, and then use some curved lines with pointy tips for the lapels of his coat.
Finally, use some curved lines for the opening of his coat.
Step 3 – Next, draw his arm and leg outlines

This third step of our guide on how to draw Rick will see you beginning the arms and legs for him.
Use some curved lines to draw the thin outlines of his coat sleeves, and they will be positioned in such a way as to have his hands at his hips.
You can then draw his hands and then add the rest of the outlines for his coat. Finally, use some straight lines to begin the outlines for his legs, and then draw his shoes beneath them.
Step 4 – Now, draw his belt
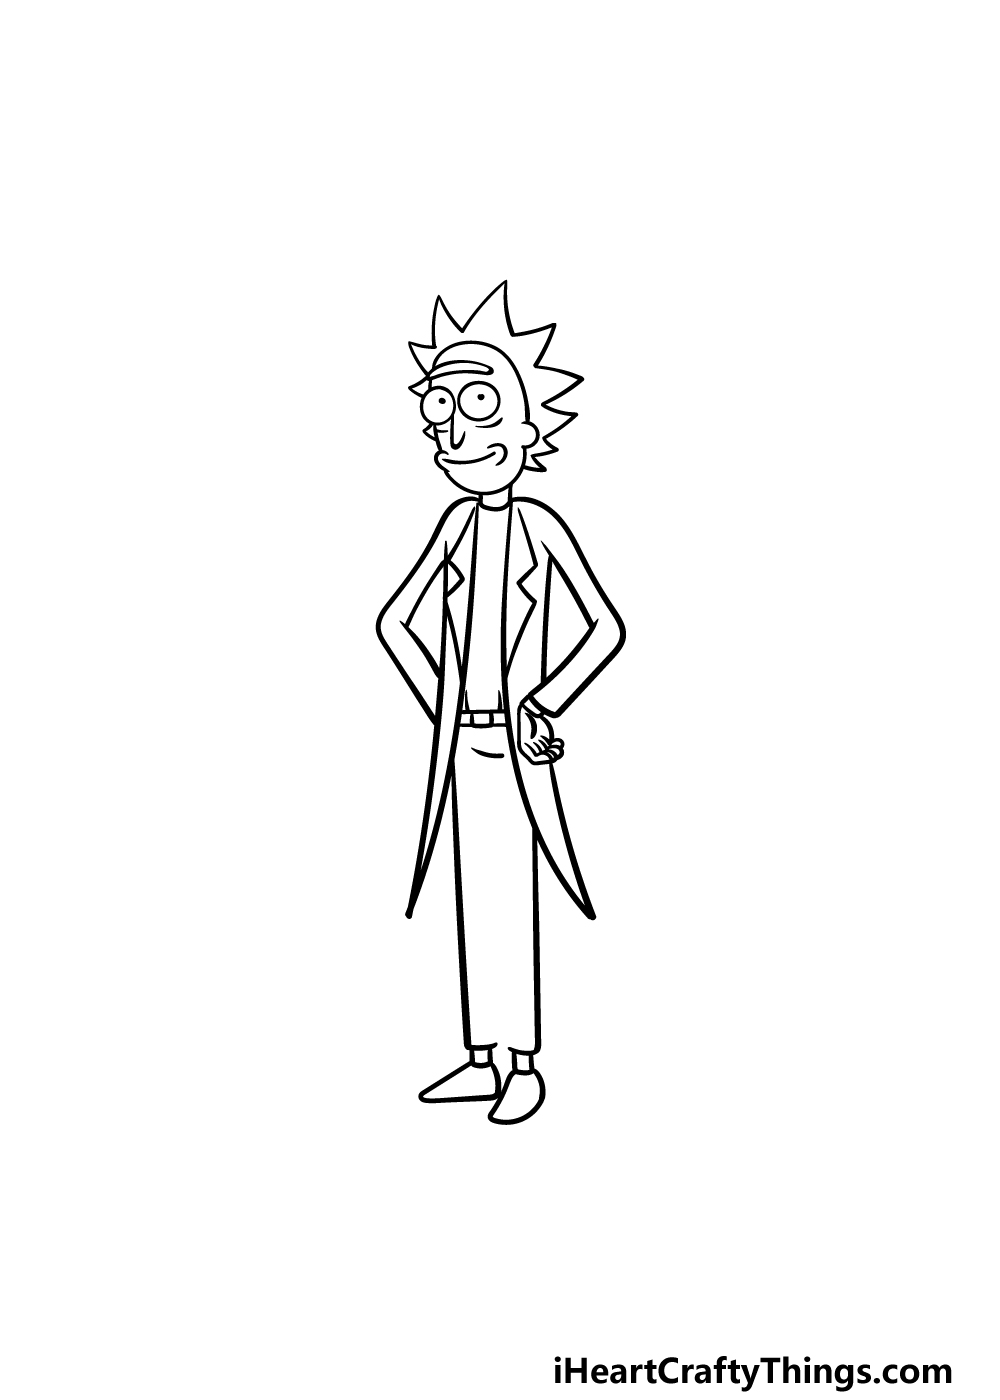
You will be moving on to the final details of your Rick drawing in the next few steps. This fourth step of the guide should be pretty easy for you to do!
All we will be doing in this step is drawing his belt. To do this, simply draw some straight lines to form the thin outline of the belt at his waist.
Then, we will draw some more small lines for the small belt buckle. Add a few more lines of detail, and then you will be ready for the final details in the next step.
Step 5 – Add the final details to your Rick drawing
Now you are ready to add the final details and touches in this step of our guide on how to draw Rick! To begin, we will use some more straight lines to create the inner outlines of the legs.
Then, you can finish off by drawing the back of the base of his coat going behind his legs.
Once these details are drawn, you will be ready to move on to the final step! Before you do that, you could also add some details and ideas of your own.
One fun idea would be to draw a background. Rick goes on many bizarre adventures in the show, so you could draw one of your favorite Rick and Morty scenes behind him.
You could even draw his grandson Morty next to him or show one of his crazy inventions beside him. What can you think of to finish off this drawing?
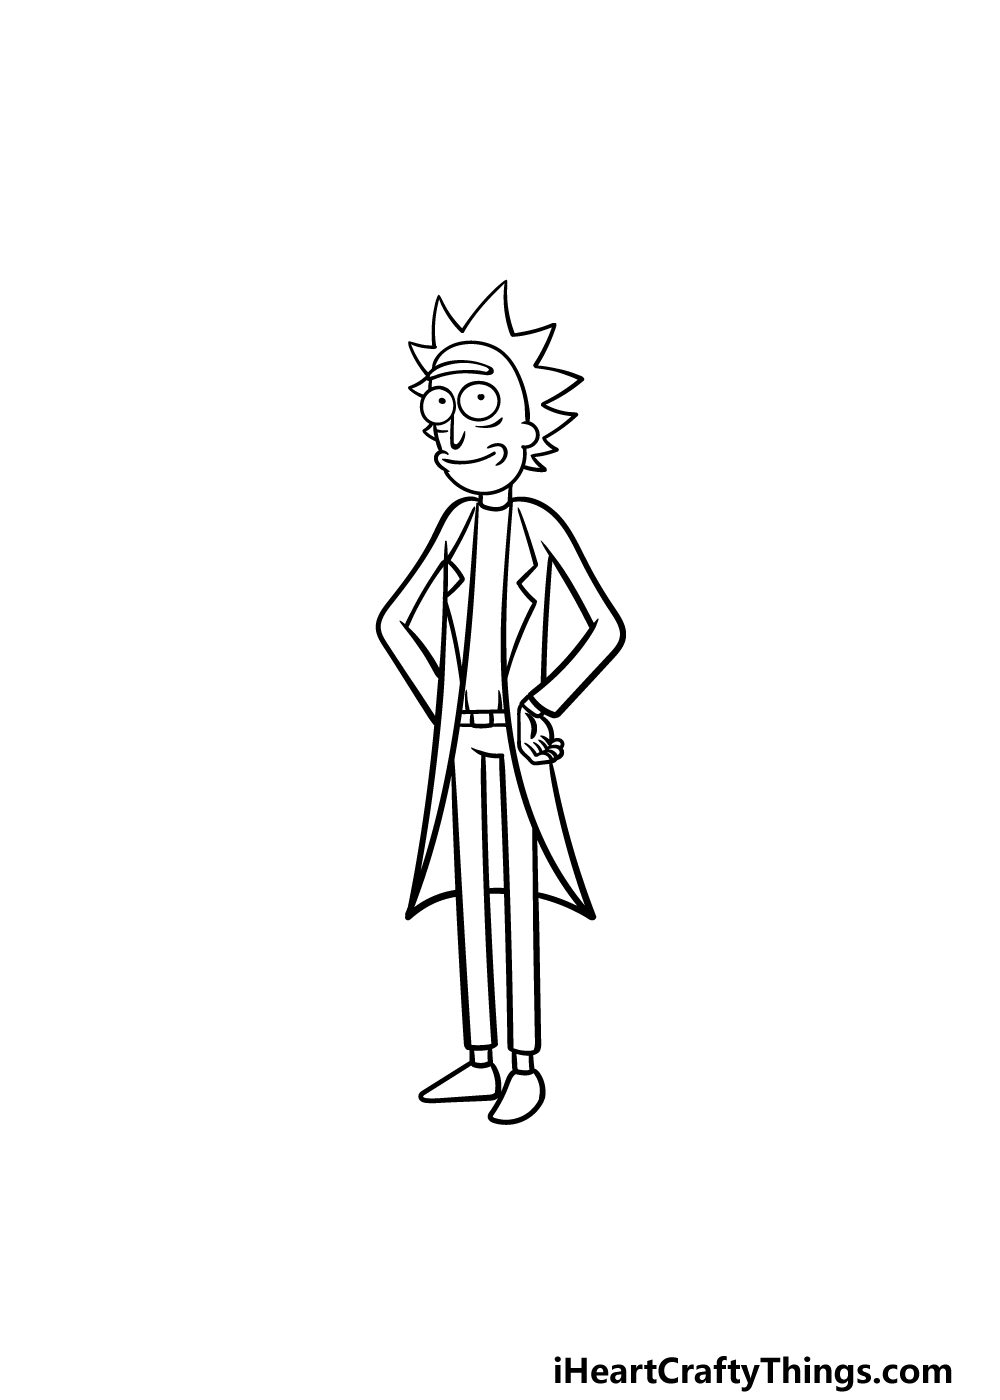
Step 6 – Finish off your Rick drawing with color

This is the final step of your Rick drawing, and in it we shall complete him with some colors! In our reference image, we colored him in with the typical colors he is seen with in the show.
In the show, he is usually seen with a white lab coat, a light blue shirt and hair and then some brown trousers.
You can use our reference image as a guide if you would like to make sure that Rick looks as he does in the show, or you could use some unique color choices of your own.
We can’t wait to see what colors and art mediums you choose to finish off this iconic character!
Do this to take your Rick drawing to the next level
Have a sci-fi drawing adventure as we show you how to make your Rick sketch even better!
In the Rick and Morty TV show, Rick is known to create all kinds of amazing inventions. You could add some of these inventions beside him to make this Rick drawing even more fun!
If you were to do this, you could use some of the inventions from the show. These could include his iconic portal gun or maybe even his spaceship.
While those are some options, you could also create some of your own. He can create pretty much anything, so you could really let your imagination run wild!
This character also finds himself in many different environments, from alien planets to perilous locations on Earth. These would be great for a background to this drawing of Rick!
Once again, you could use some famous examples from the show as your background. Or, it would be another chance for you to use your imagination as you create your own background setting.
What kind of background would you choose?
The series is full of many colorful characters, and you could add some of them to your Rick sketch. The obvious choice would be his faithful sidekick, Morty.
You could also add some other members of the Smith family or maybe some of the famous allies or villains from the series. As always, you could also create some awesome and unique wacky characters of your own!
Do you think you will create your own characters or use some of the established ones?
Rick and Morty has a really bright and vibrant color palette, and you could have lots of fun with the colors of this image. If you add any other characters or add a background then these will also open up opportunities for some great colors.
If you want a look similar to the show, we would recommend using some colored pens and markers.
Acrylic paints would be another good option to go for.
What other mediums could you use?
Your Rick Drawing is Complete!
This is a character known for his many adventures, and we hope that you enjoyed this drawing adventure as we worked through this guide on how to draw Rick!
Even though the character designs on the show aren’t super detailed, it can still be a challenge to draw a character like this.
By following the steps in this guide, we aimed to show you that it can be fun and easy to draw him regardless!
Now that you have finished drawing this character, you can also finish it off by adding your very own elements and details. This is your chance to really show off your creativity!
On our website, we have many more drawing guides for you to enjoy! These cover a wide variety of subjects, many of which focus on more awesome characters. We have more on the way as well, so keep checking in!
We would be thrilled to see how this Rick drawing came out, so please share the finished picture on our Facebook and Pinterest pages!