Certain items of clothing and accessories have gained connotations that are instantly recognizable. The top hat is an example of this, and it has come to represent opulence and fanciness.
These days they’re relegated more to fancy dress costumes, but in times gone by wearing a top hat as a sign that you were probably wealthy and well to do.
Even though they may not be used much anymore, learning how to draw a top hat is a great way to recapture that elegant feeling!
If you are wanting to know how you can draw one of these fancy hats, then this is the perfect guide for you.
Our very fancy step-by-step guide on how to draw a top hat will show you how to do it while having lots of fun!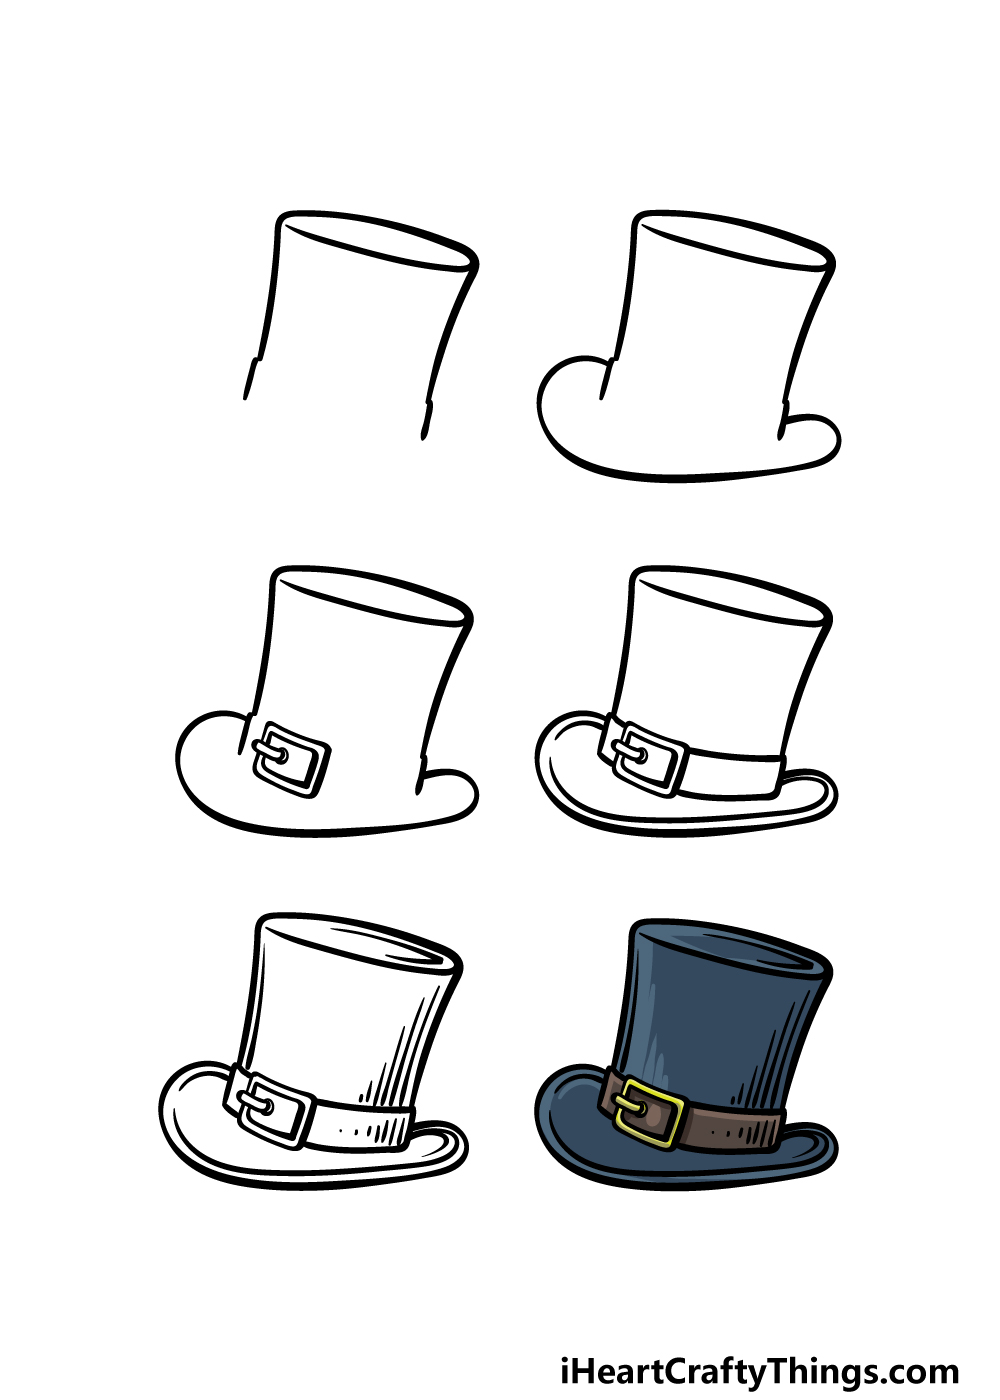
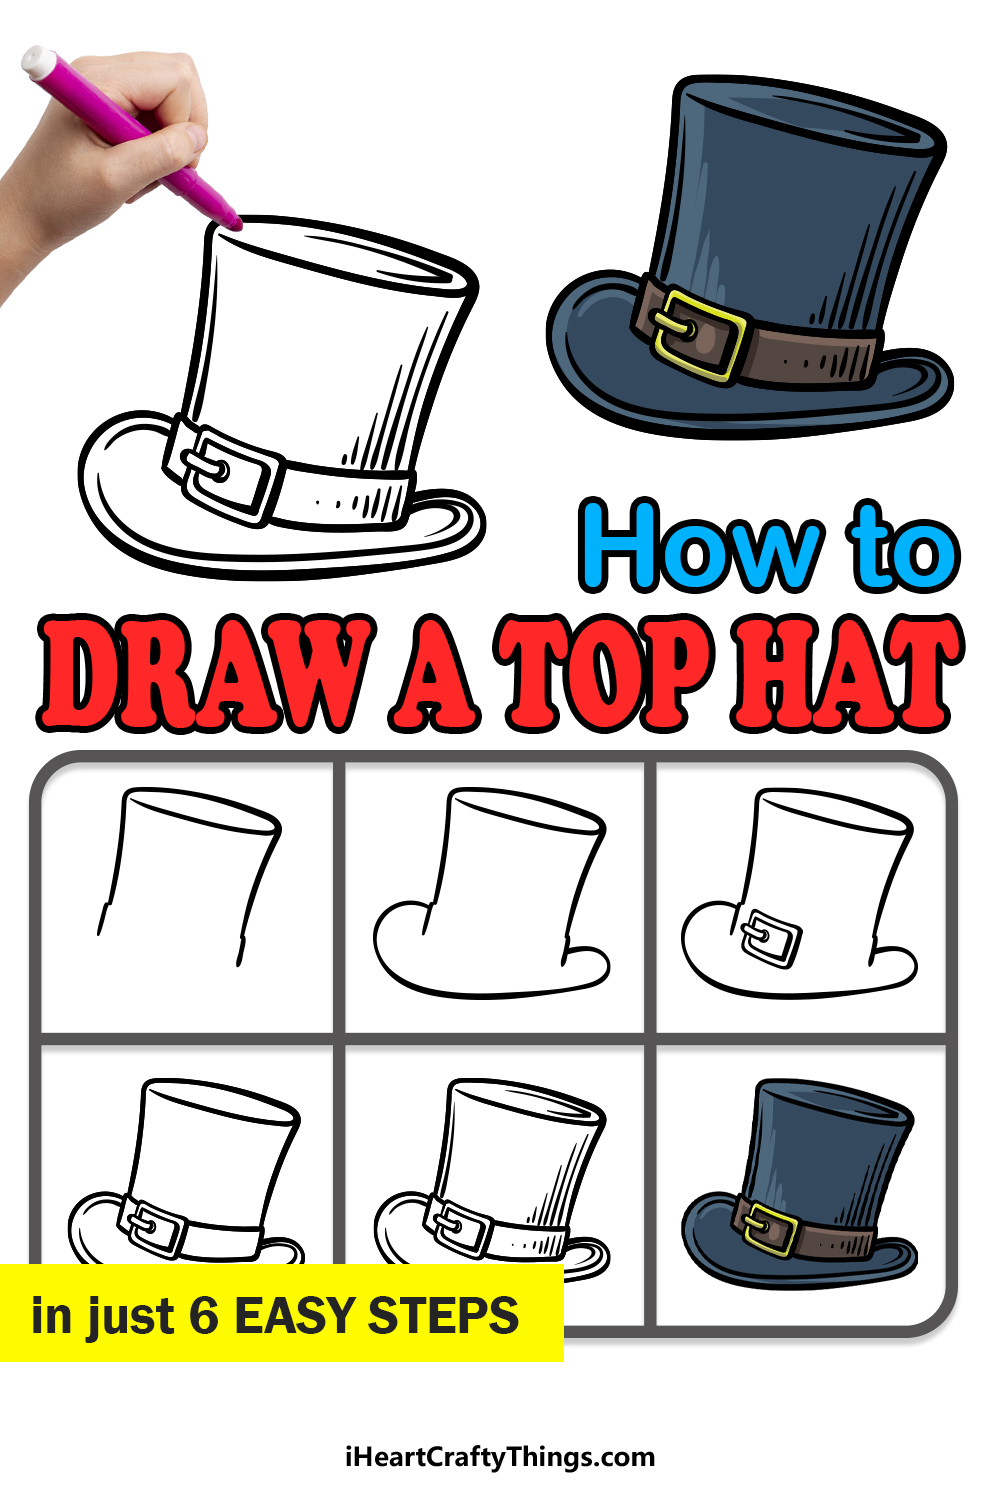
How to Draw A Top Hat – Let’s Get Started!
Step 1
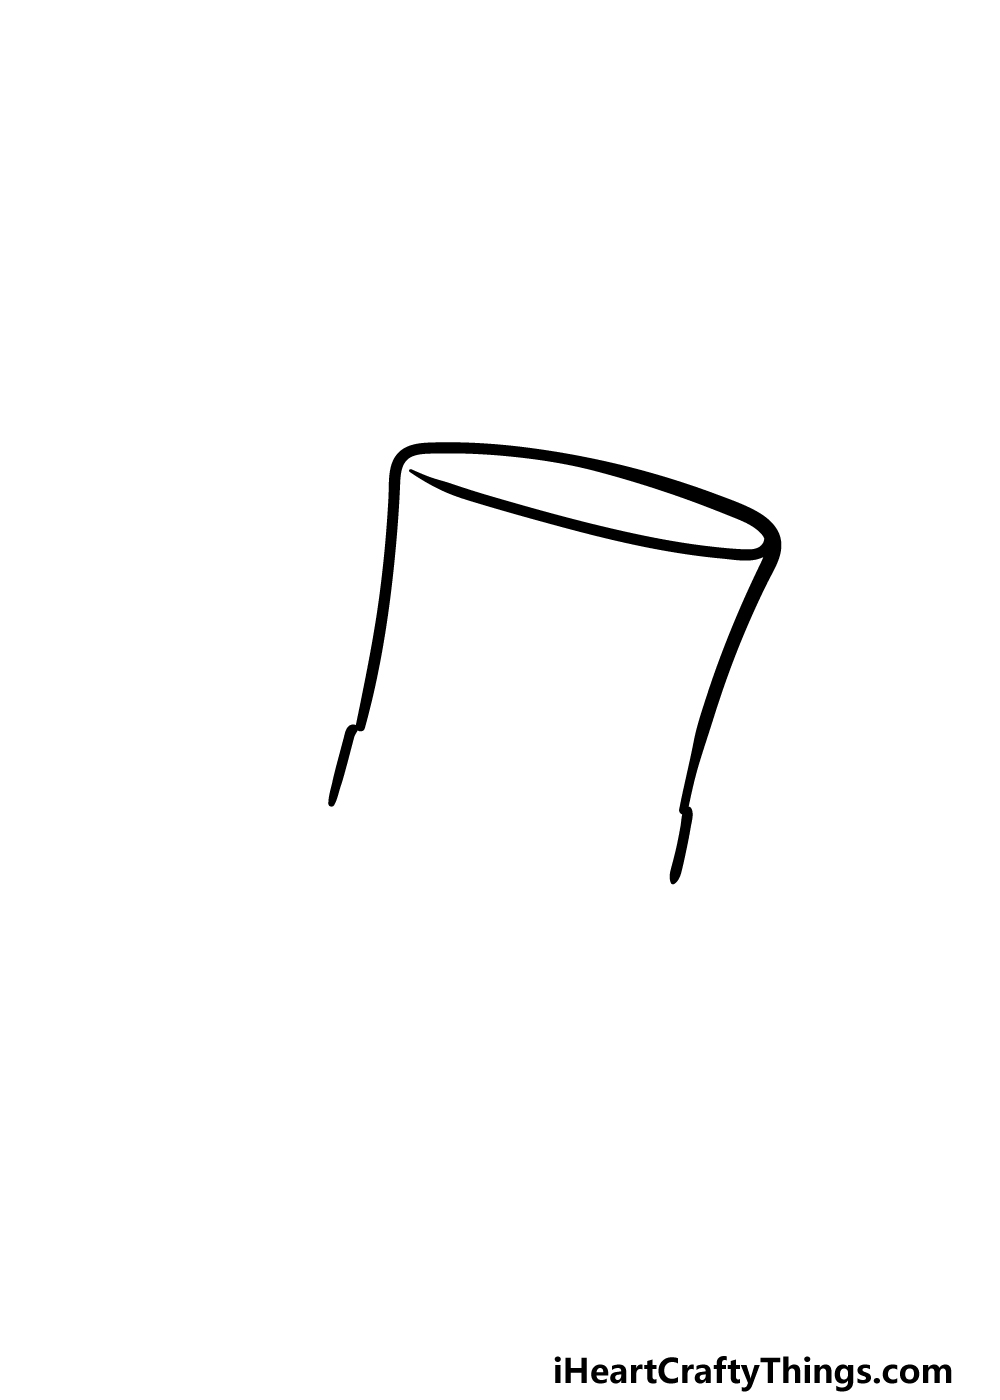
To begin this guide on how to draw a top hat, we will start with the upper half of the hat. Start this by drawing two lines opposite to each other.
These lines will be quite short, and they will be for the sides of the belt that will be wrapped around the hat. Then, extend some slightly curved lines up from these lines for the sides of the hat itself.
You can then draw another curved line for the top of the hat, as shown in the reference image.
Finally, simply draw another curved line beneath this one in the opposite direction, and this will help to form the top of the hat.
Step 2 – Now, draw the rim of the top hat
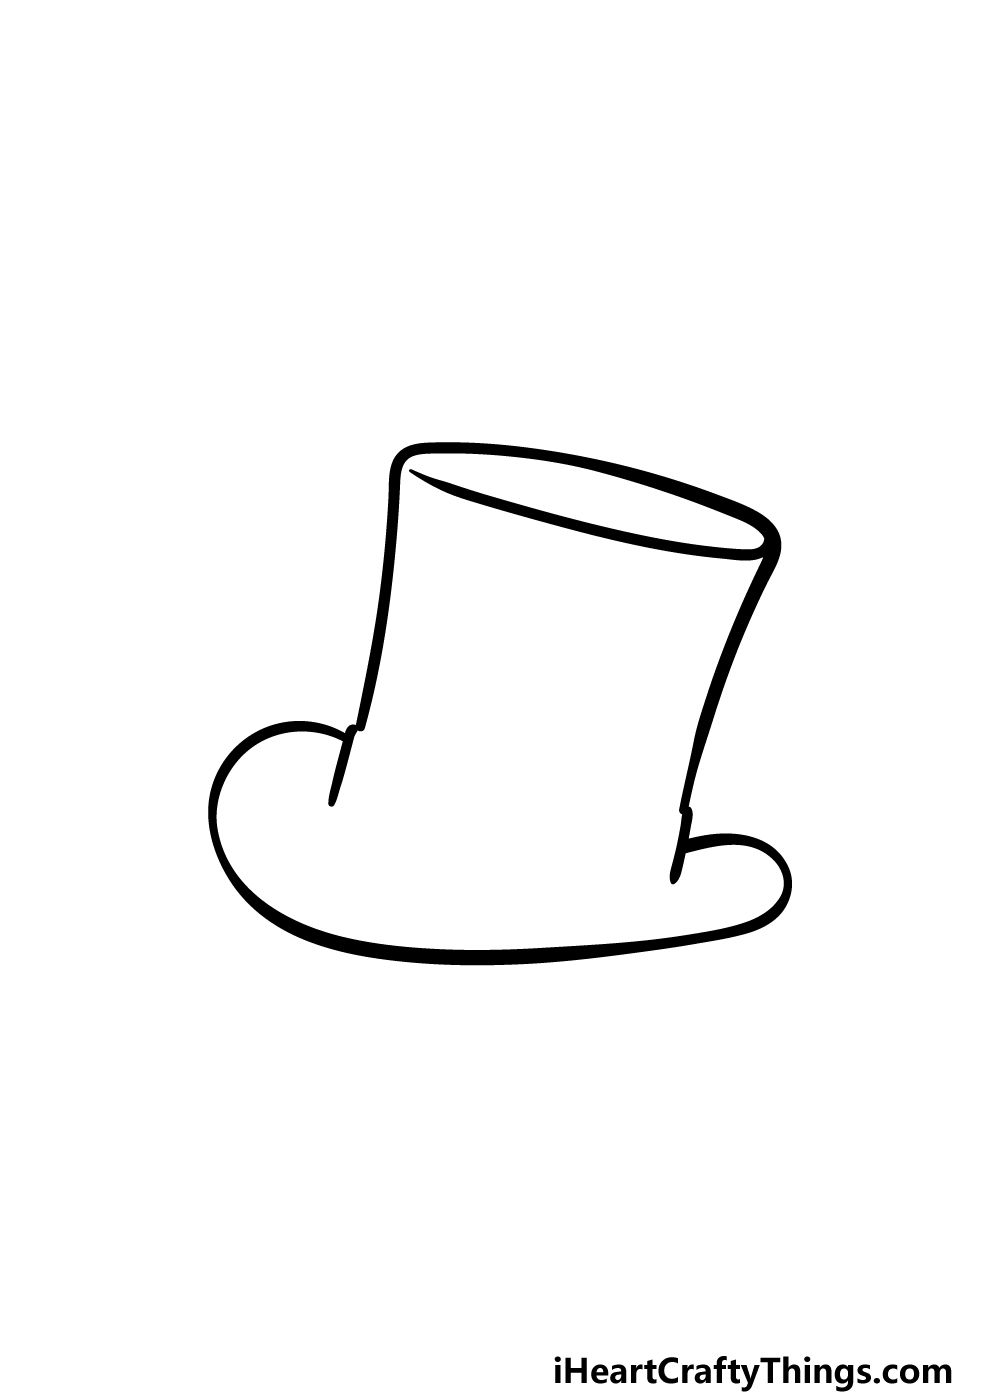
Every good top hat needs a good rim at the base of it! That’s why we will add one to your top hat drawing in this next step.
This rim can be surprisingly tricky to get right, so this is a step where you may want to closely copy what we show in our reference image.
The rim will start from near the top of the belt on the left-hand side, will loop down and then end near the other side of the belt.
There will also be a very rounded tip near the center of the bottom of this rim.
Step 3 – Next, draw the buckle for the belt on the top hat
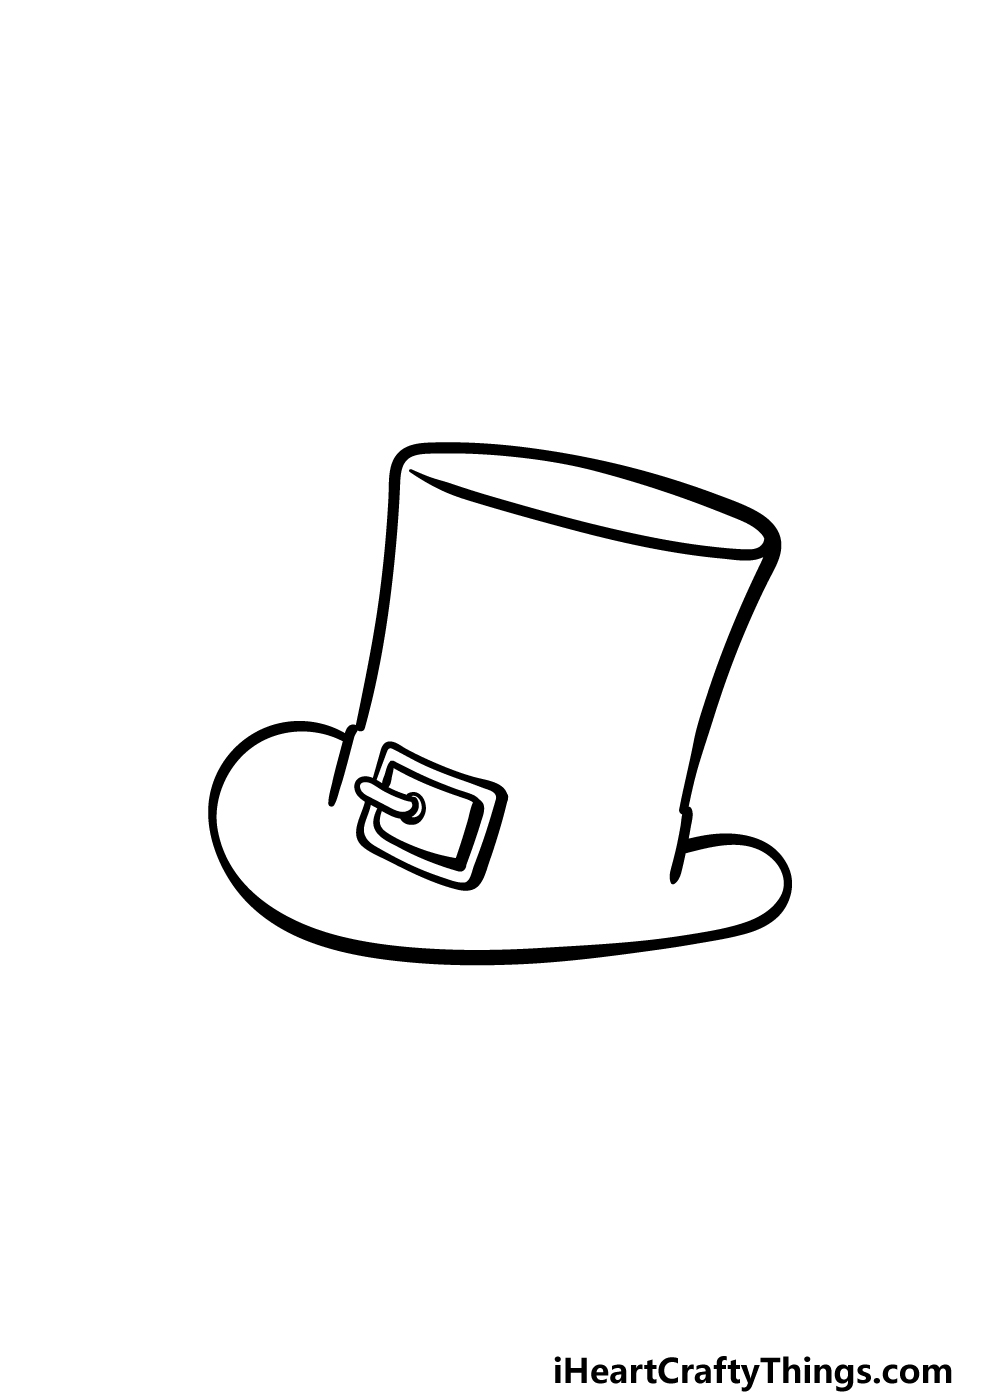
We’ve made a few mentions of the belt around the hat during this guide on how to draw a top hat, and now we shall start drawing it.
To do so, we will begin with the buckle of the belt. Start by drawing a rectangular shape, and then draw a thin, rounded shape poking out of it for the pin of the buckle.
There will then be another rectangular shape drawn within this outer one, as shown in the reference image.
Then you’re ready to proceed to step 4!
Step 4 – Finish off the belt and add some details
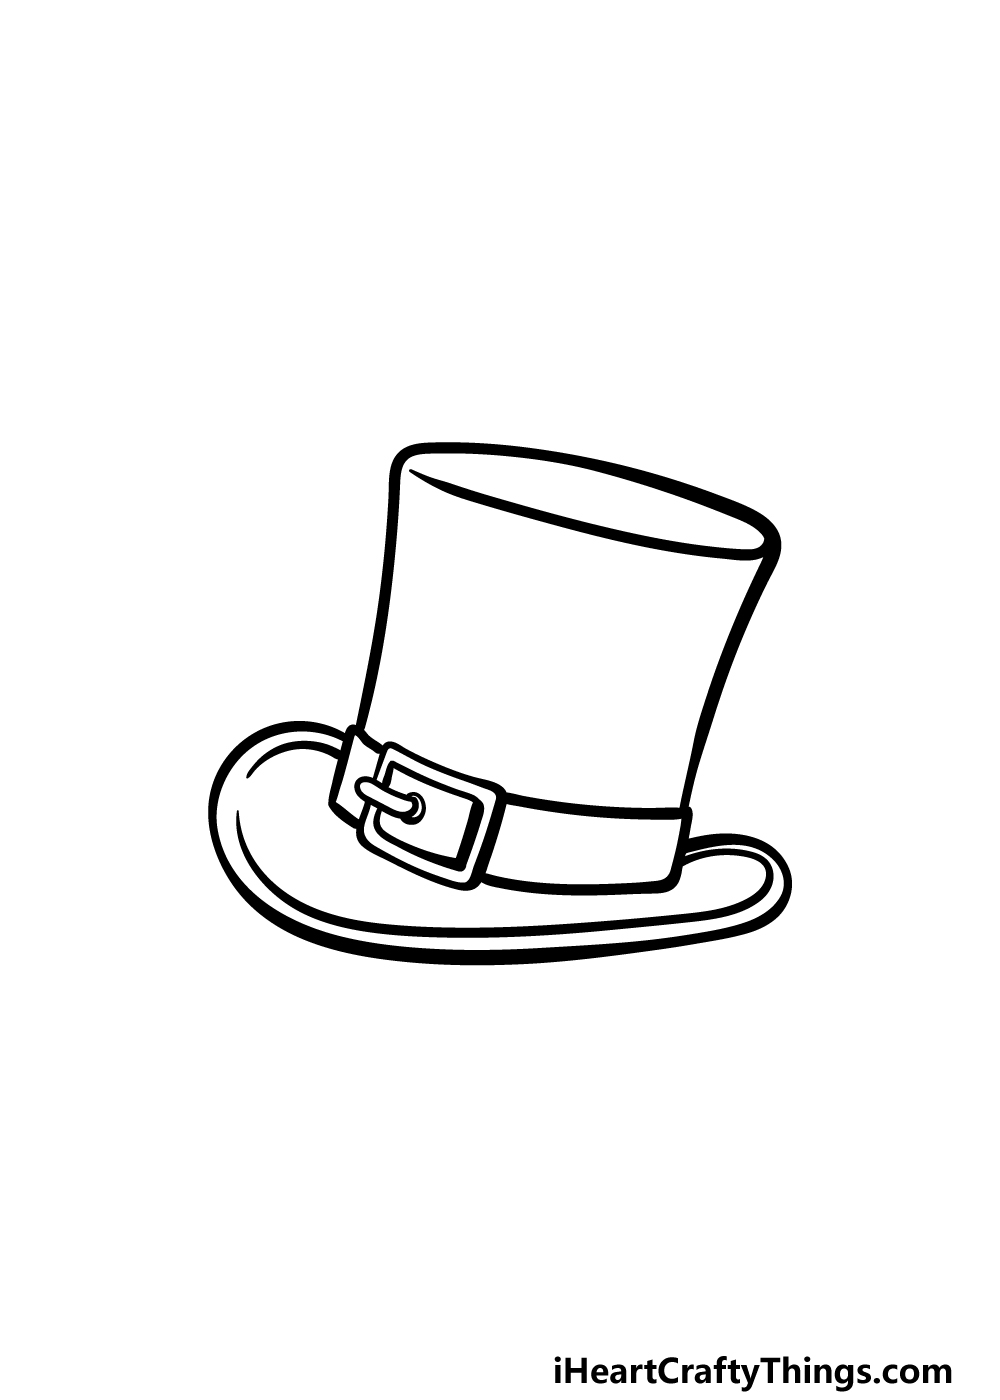
Now that you have the buckle of the belt drawn, we can add the rest of the strap for the belt part in this step of your top hat drawing.
This should be a pretty easy step to take on, as you already have the sides of the belt drawn.
Using those sides of the belt, simply extend some slightly curved lines inward towards the buckle of the belt.
Finally for this step, draw some lines along the inner perimeter of the rim for the hat to finish off, and then we will be ready for some final touches in the next step.
Step 5 – Add the final touches for your top hat drawing
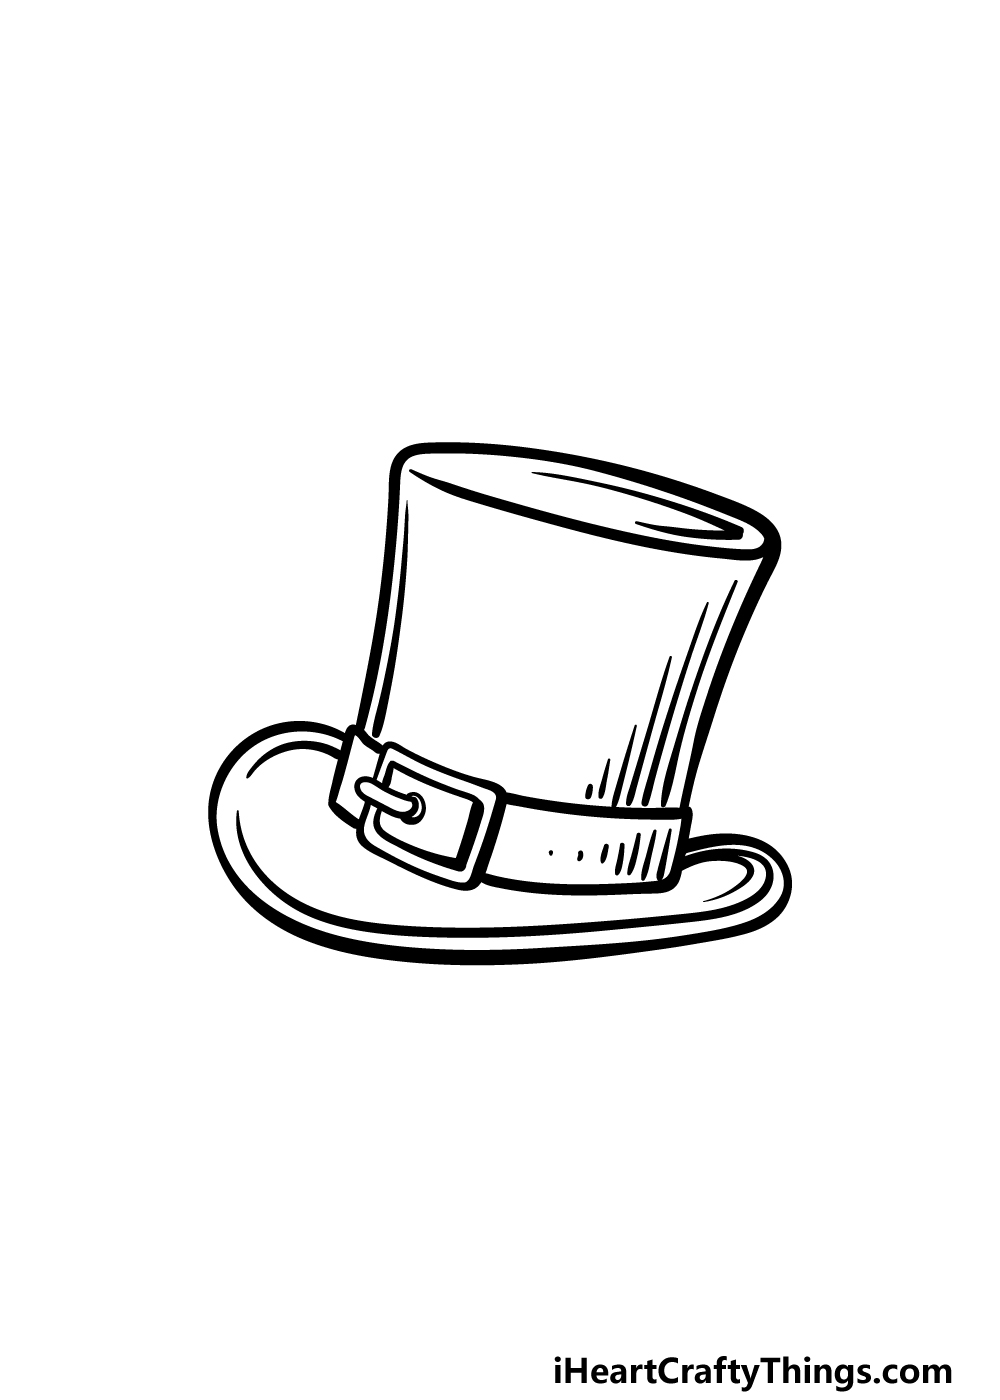
You are now ready to add some final details to your hat in this fifth step of our guide on how to draw a top hat.
You will also be able to add some details and additions of your own, but first we will add these last details.
To do this, we will be adding a line along the left-hand side of the hat, and then add a few lines of varying length on the right-hand side. Finish off with some lines for the top and rim of the hat.
Then you’re ready for your own additions! Maybe you could draw who you think would be wearing this wonderful hat.
What kind of setting can you imagine finding this hat in? Be sure to have fun getting creative with it!
Step 6 – Finish off your top hat drawing with some color
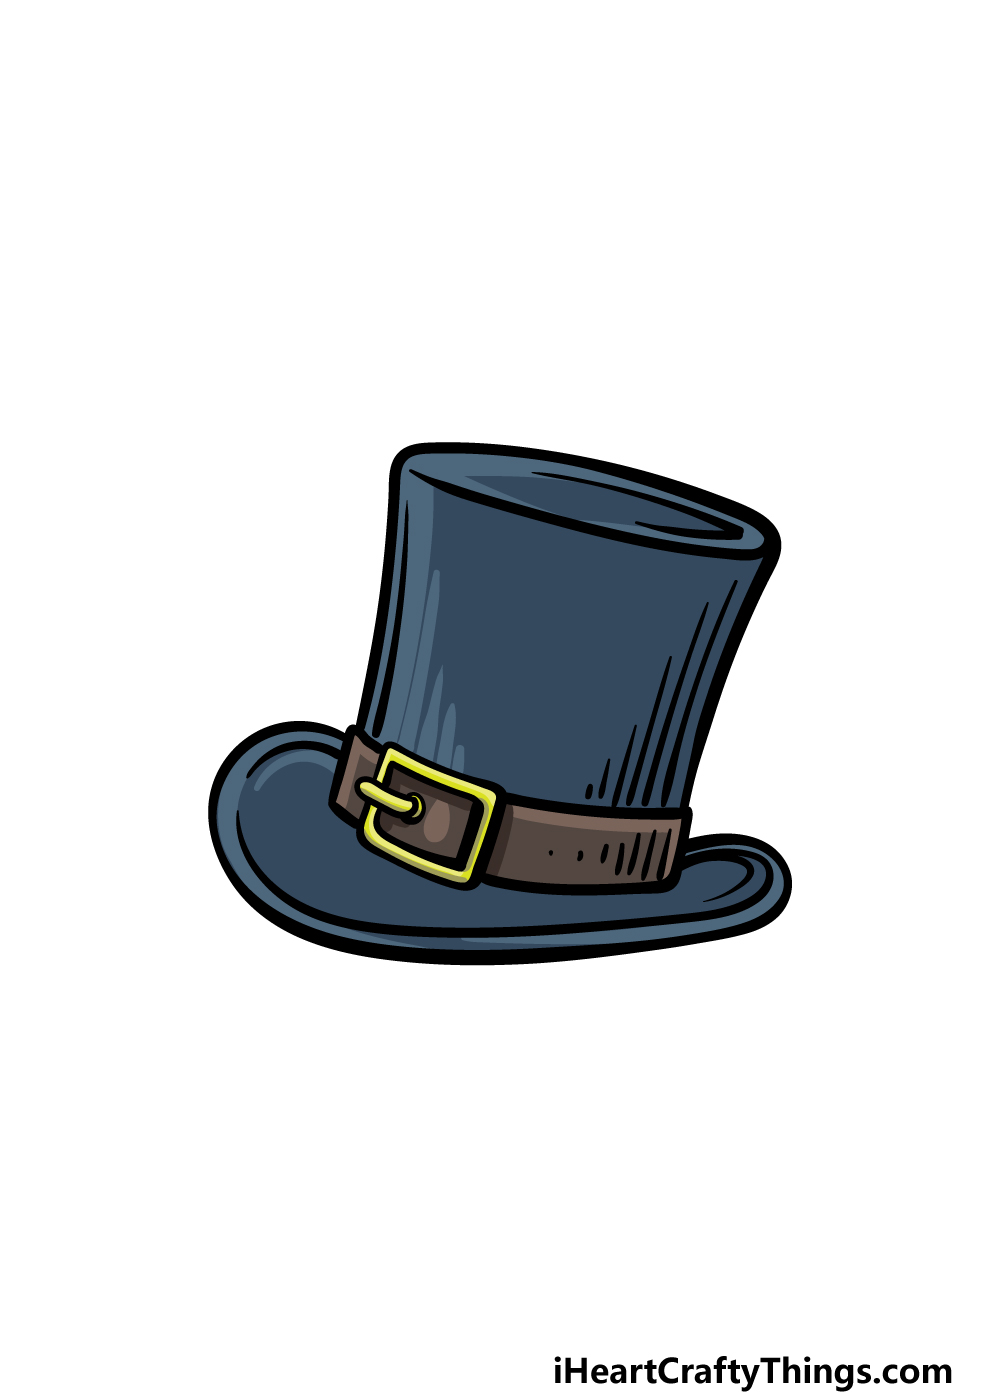
We are at the final step of your top hat drawing now, and in this one we shall be adding some color to it.
Adding color is a great way to bring a drawing together, and in our reference image we showed you just one way that you could color it in.
We chose darker colors for our hat, but even so we still varied the shades up to create some variation.
You could also use much brighter colors if you prefer, perhaps to make it look like this top hat could belong to a character like the Mad Hatter!
You can also play around with various art mediums and tools to achieve the colors you like, so what will you choose for your image to finish it off?
5 Tips To Make Your Top Hat Drawing Even Better!
Create some fancy headwear as we show you how to make your top hat sketch great!
The top hat is a hat often associated with fancy places, and this could give you a place to start if you want to add a background. There are so many possibilities you could go for!
There are fancy parties, mansions and maybe even a magic show for a few ideas. What are some other fancy settings you can think of for this top hat drawing?
A hat is pretty useless if not worn, so adding a character beneath it would be another fun way of adding to the background. If you were to add a character, they could be drawn in any style you like!
Also, if you added a background then they could be drawn to match the style and setting of the background.
Another idea for this drawing of a top hat would be to draw some more objects that you could imagine being associated with this fancy hat.
For instance, you could draw the hat hanging on a fancy hat rack with an umbrella, coat and other items of clothing nearby. This is another way you could build a background scene around this hat!
The top hat is one of many different hats that one can wear, and you could show some more favorite hats you have. It would be fun to think of as many different hats as you can and add them to the image!
There are lots of fun ways you could arrange these hats, and you can look up pictures online to help. What are some hats you could add?
Sometimes, items of clothing will be turned into fun cartoon characters. That is something you could do for this top hat sketch!
By adding some eyes, a mouth and then some simple limbs, you could create your own fancy character. Then, if you do that you can also build an appropriate background for this new character.
What would your hat character be doing if you were to try this?
Your Top Hat Drawing is Complete!
All six steps of this guide on how to draw a top hat are complete, and you have landed up with a wonderfully fancy image!
We tried to make sure that this picture would be nice and detailed while making it so that it would be fun and easy to draw it even though it is detailed. We hope that we achieved these goals for you!
Now that you have finished this guide, you can show off your creativity by adding to this image. We went over just a few of the ways that you could do this, but there are no wrong answers here!
Whether you draw a background, add some details or go for some unique colors and mediums, we know it will look great.
We also have many more incredible guides for you to enjoy on our website! Keep checking in, as we have more on the way as well.
When your top hat drawing is complete, you can show us the finished product by sharing it on our Facebook and Pinterest pages!