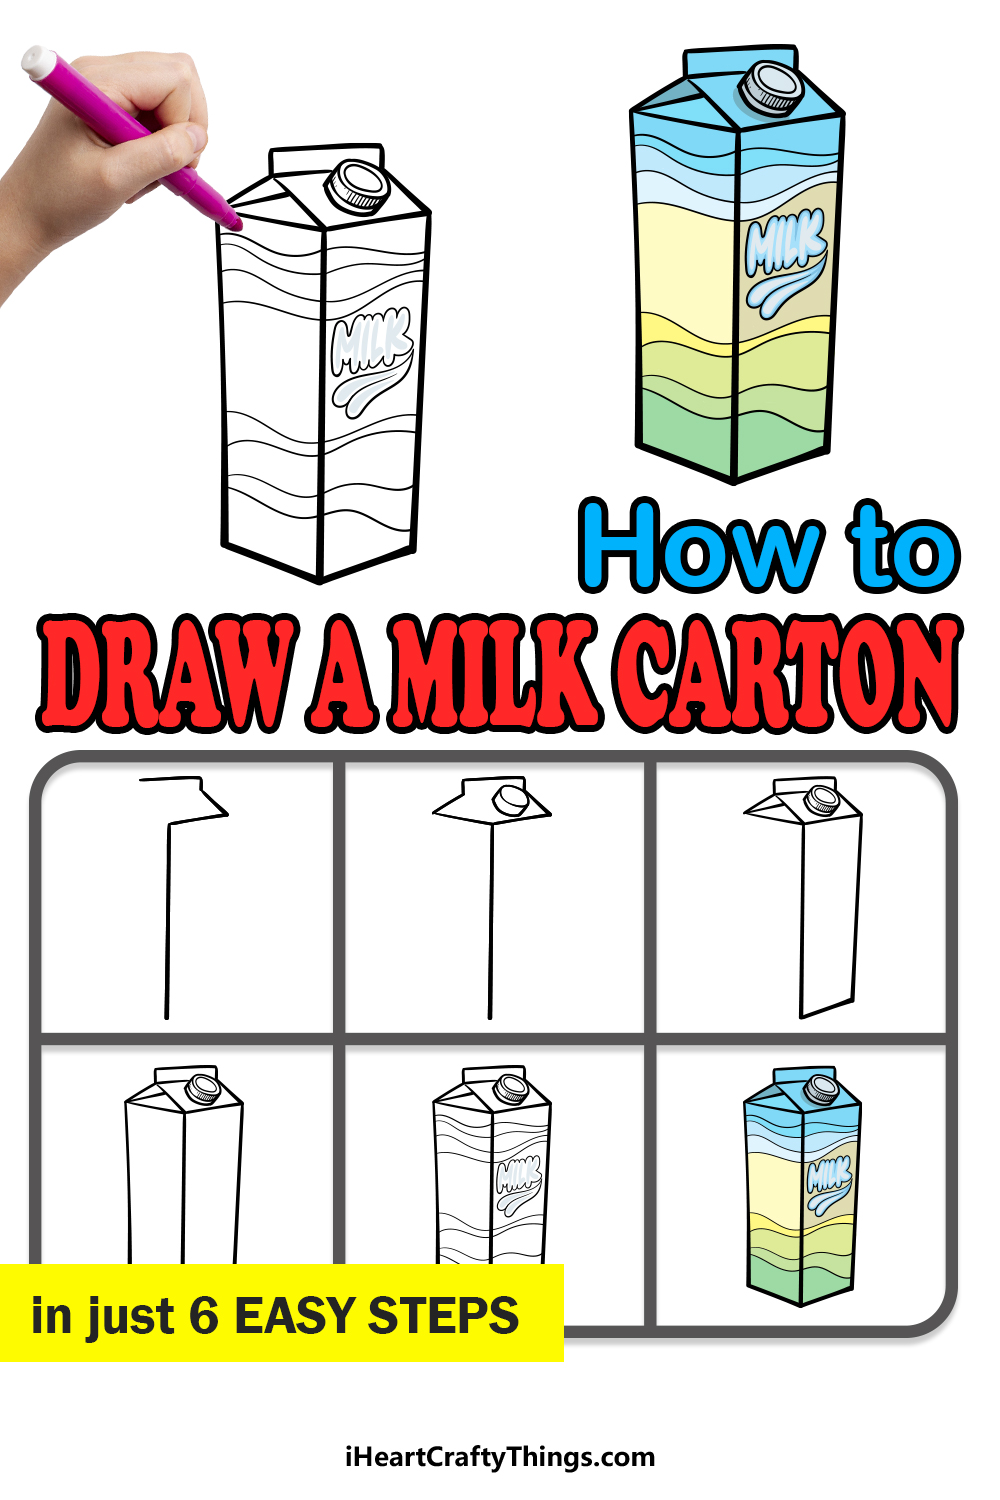
There are some objects that most of us will encounter pretty much every day. Milk cartons are one of these, as many of us use milk for anything from hot beverages to breakfast cereal and baking.
Often, the objects that we are most familiar with are the ones that can prove trickiest to draw. This can make learning how to draw a milk carton perhaps more challenging than expected.
Even though it may be harder than one may expect, that doesn’t mean it can’t be done, and it’s made easier if you know what to do. That’s exactly what we aim to do in the guide you see before you!
Our step-by-step guide on how to draw a milk carton will show you that it can be fun and easy to draw this everyday object.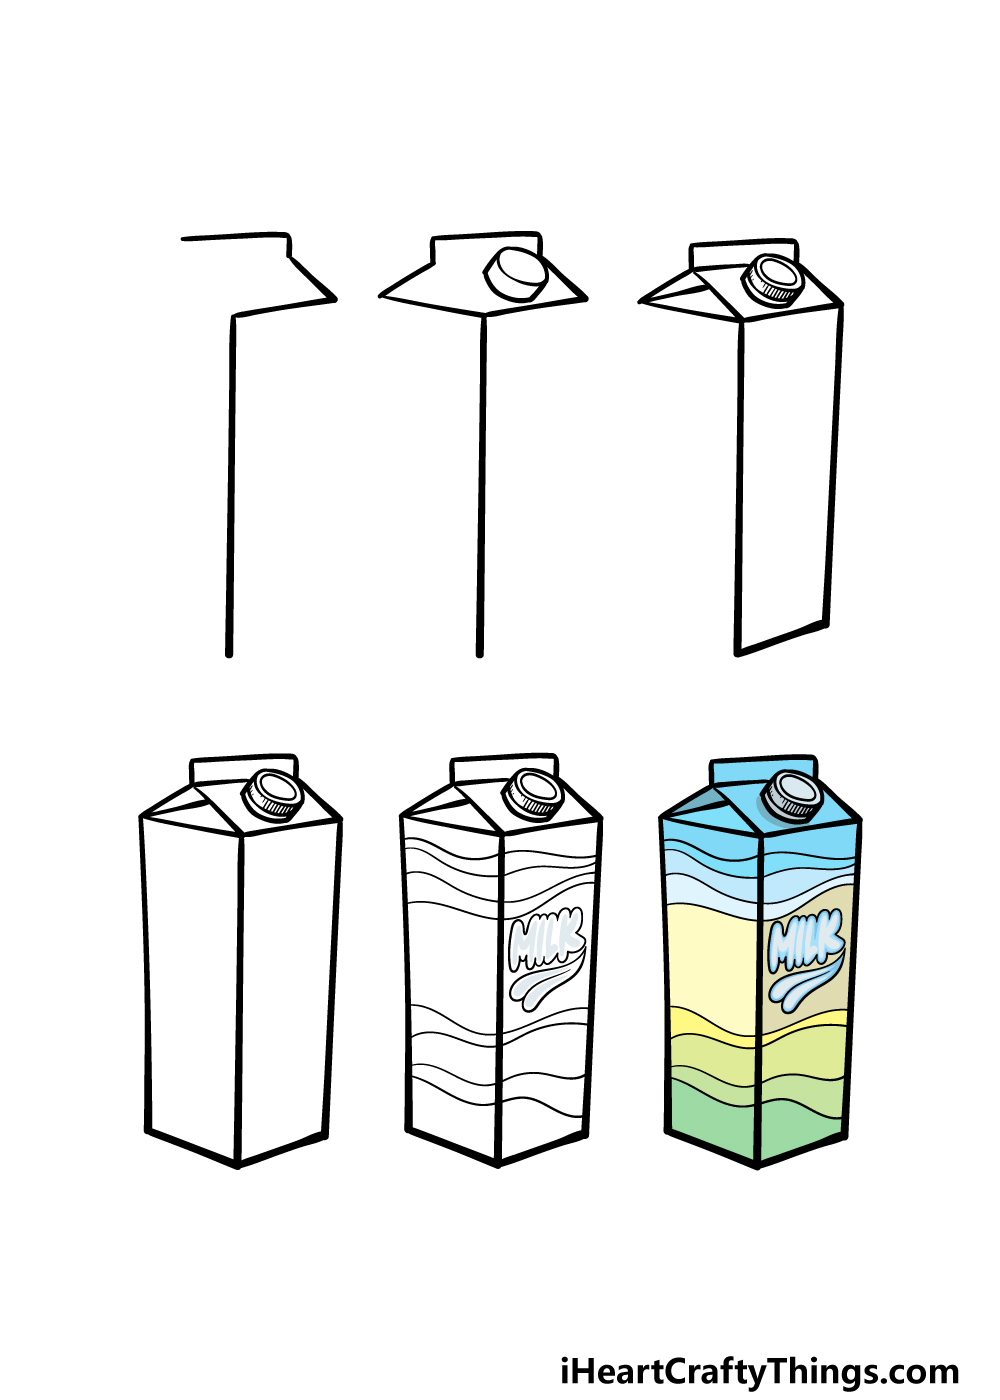
How to Draw A Milk Carton – Let’s Get Started!
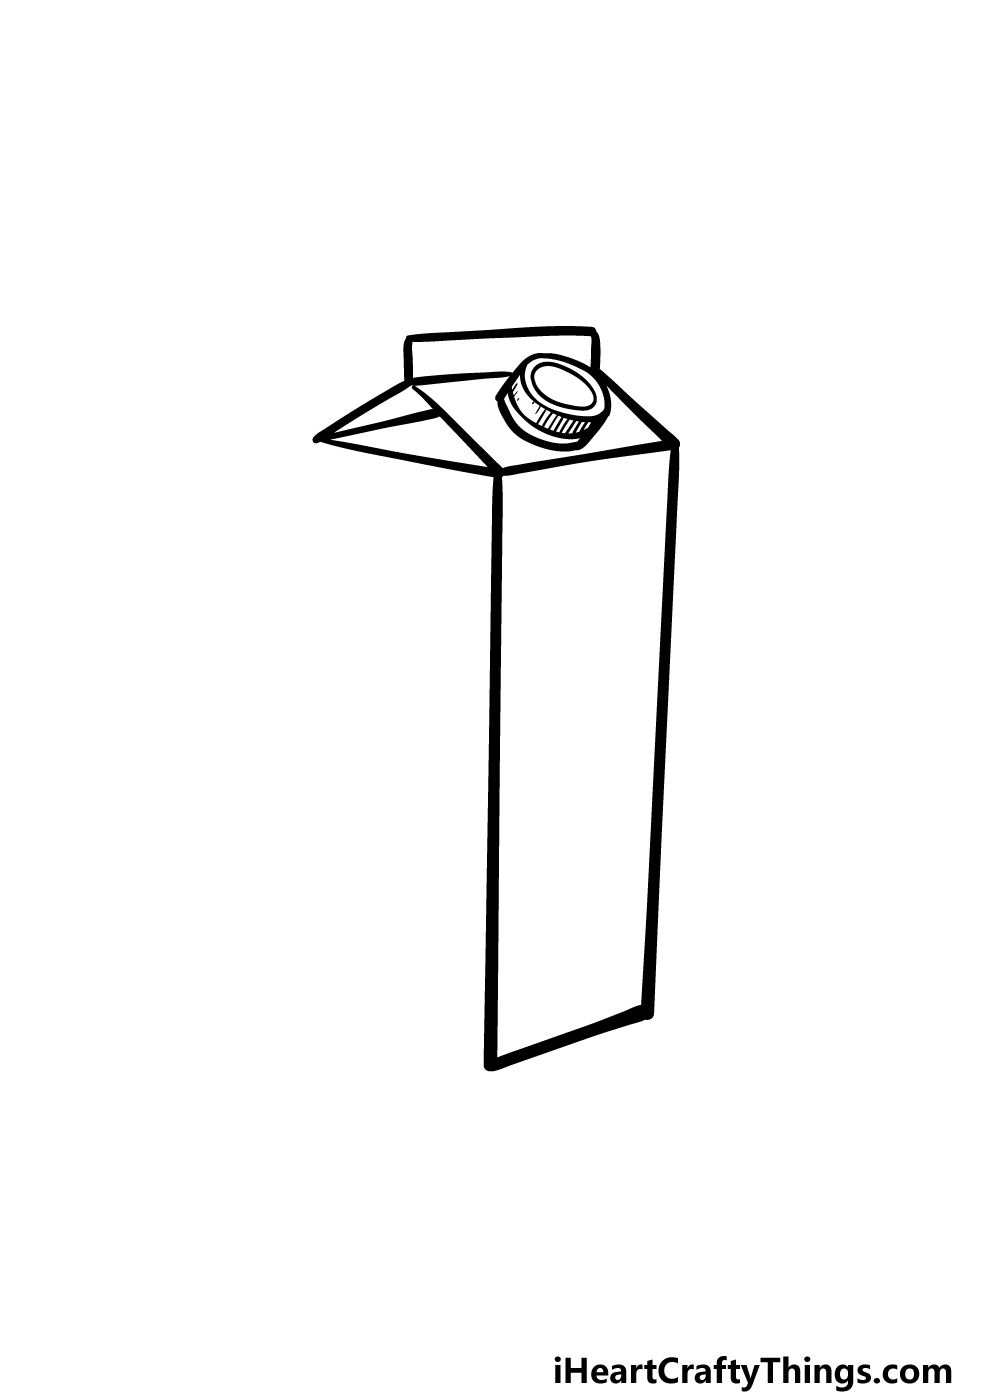
Step 1
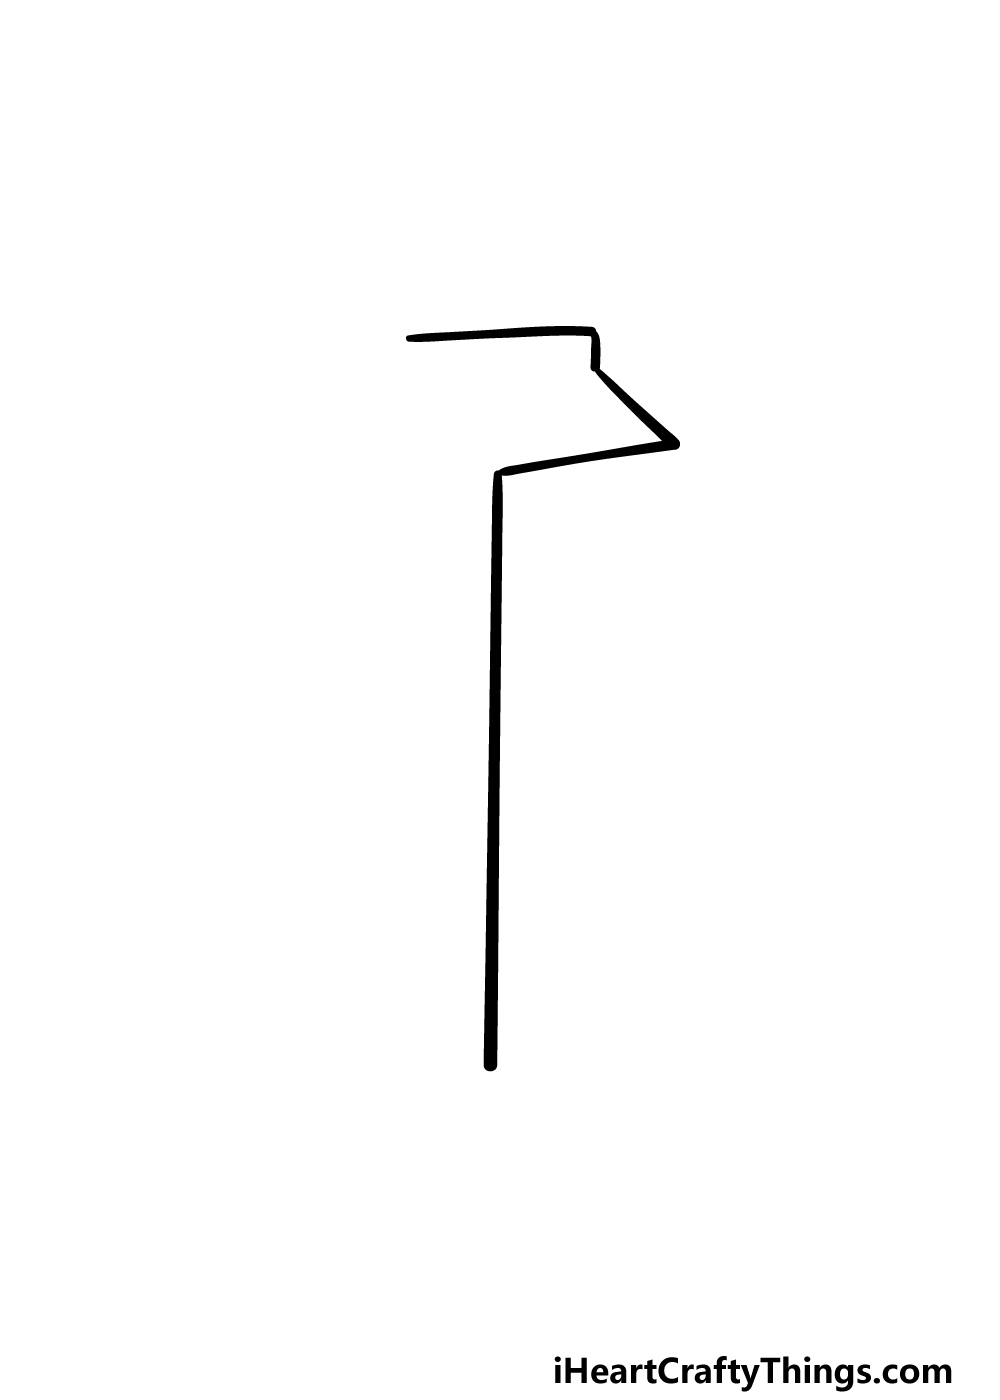
For this guide on how to draw a milk carton, you may want to have a ruler on hand, as we will be drawing several straight lines.
This is certainly true for this first step of the guide, and we will start by drawing a straight, vertical line for the milk carton.
Then, we will be drawing two more much shorter lines above this central one for the top of the carton. Finally, you can add a horizontal line for the very top edge of the carton.
Try your best to replicate these lines as they appear in the reference image, and then we can move on to step 2.
Step 2 – Now, draw some more features for the milk carton
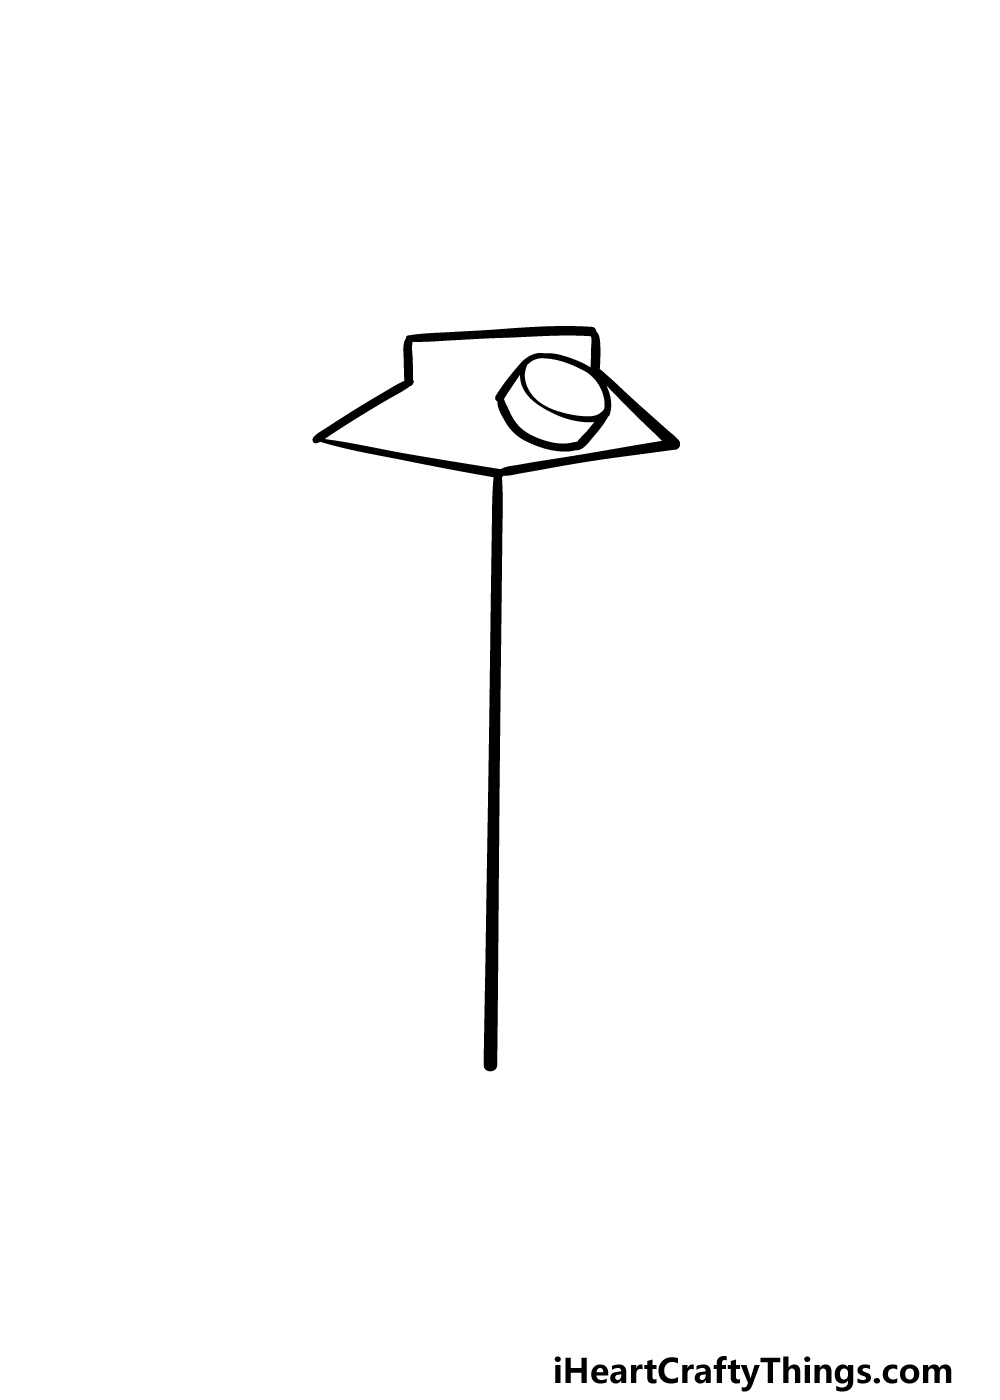
In this part of your milk carton drawing, we will be adding some more to the top of the carton. Once again, a ruler would come in handy for this step!
Start by drawing the cap of the milk carton, which you can do by adding a circle with some straight lines on it to give the appearance of depth.
Finally, finish off this step by drawing the remaining edges of the top of the carton. It may look a bit bare for now, but we will add some details to it shortly enough!
Step 3 – Next, draw some of the folding details for the milk carton
The reason why drawing common objects like this can be tricky is that there are some small details that can be hard to get right.
We will focus on one of these aspects in this step of our guide on how to draw a milk carton. Start by drawing a short diagonal line up from the central corner of the top of the carton up to the flap on top.
Draw another line inside of this triangle that you have created for some depth.
Finally, finish off this step by drawing a straight line on the right-hand side as well as the base of the carton, and add some line details to the cap.
Step 4 – Finish off the outlines in this shape
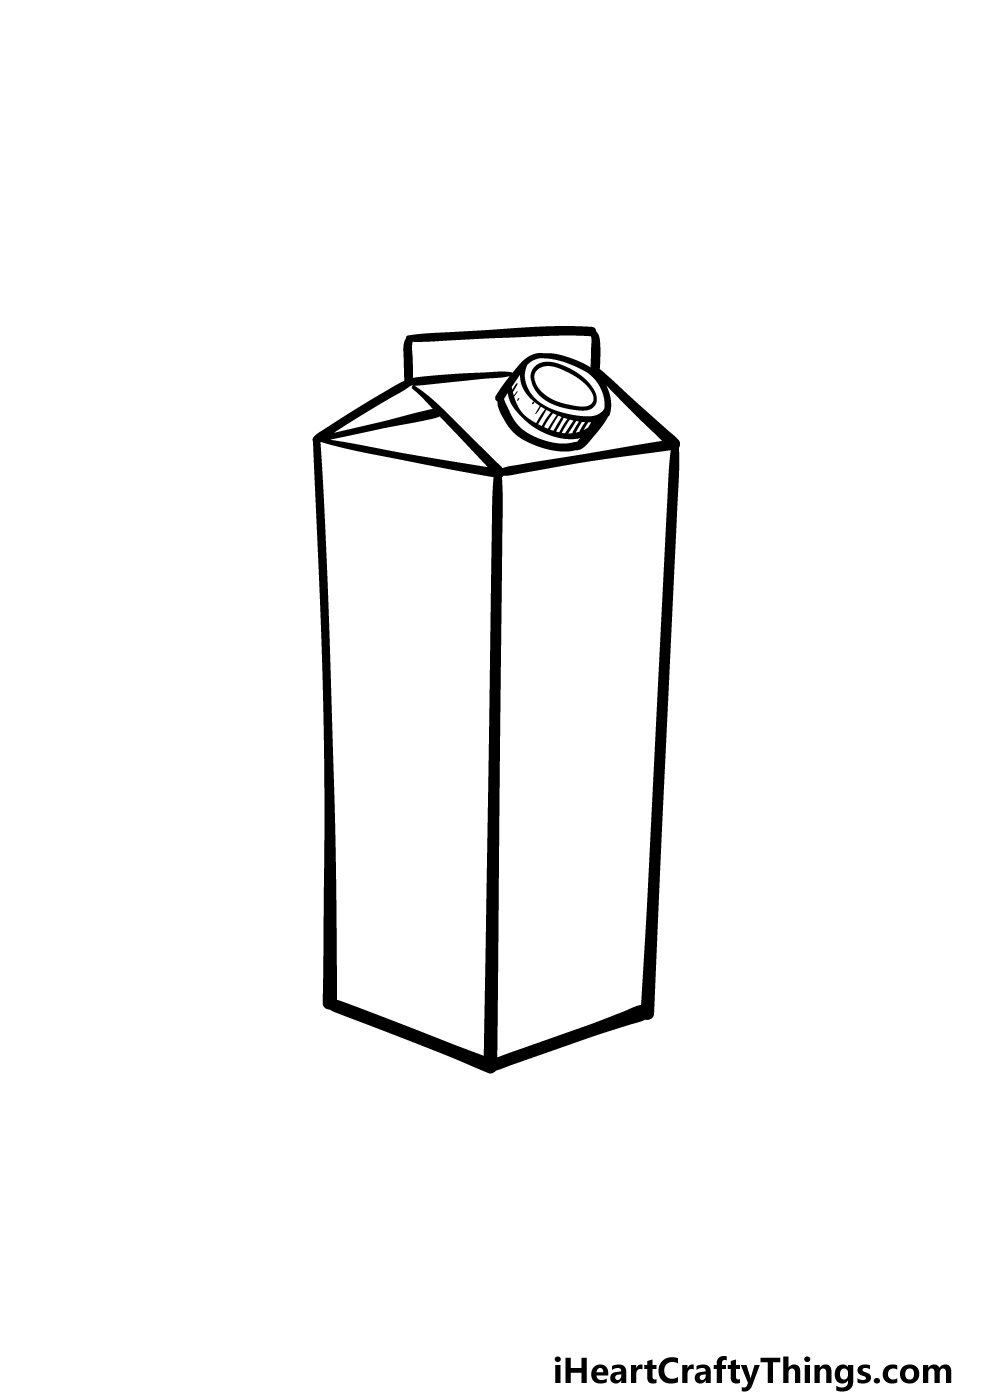
We will be finishing off the outline for your milk carton drawing in this step, and luckily this should be an easy step to do!
Simply use your ruler to draw the line for the left-hand side of the milk carton, and then add another one for the base of it as well.
That’s all there is to it, and now you’re ready to add some decorative details to the milk carton in the next step.
Step 5 – Add the final touches for your milk carton drawing
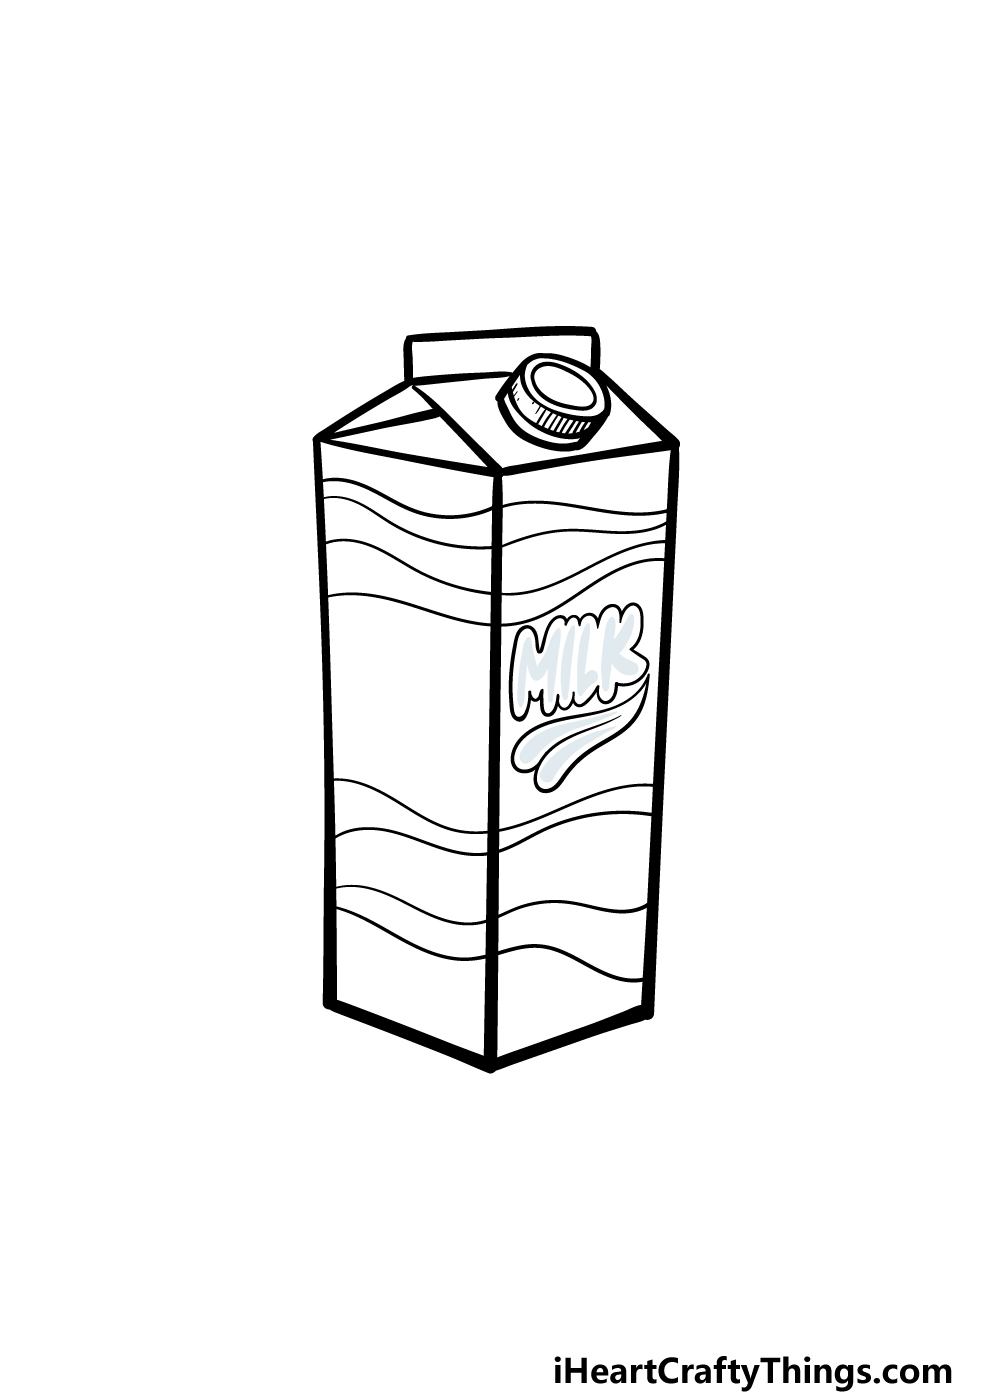
This fifth step of our guide on how to draw a milk carton will be all about adding some decorative details for the sides of the carton.
For our example image, we wrote ‘milk’ in cartoonish bubble letters and then added some wavy lines along the side and front of the carton.
These are the details that we chose, but this is a step where you could change it up! There are lots of lines, text choices and other details that you could use to create a unique image.
Another way to do this is by drawing a background, and one idea would be to draw some other breakfast foods and beverages beside this milk carton.
That’s just one idea, but what else can you think of to finish off this picture?
Step 6 – Finish off your milk carton drawing with some color
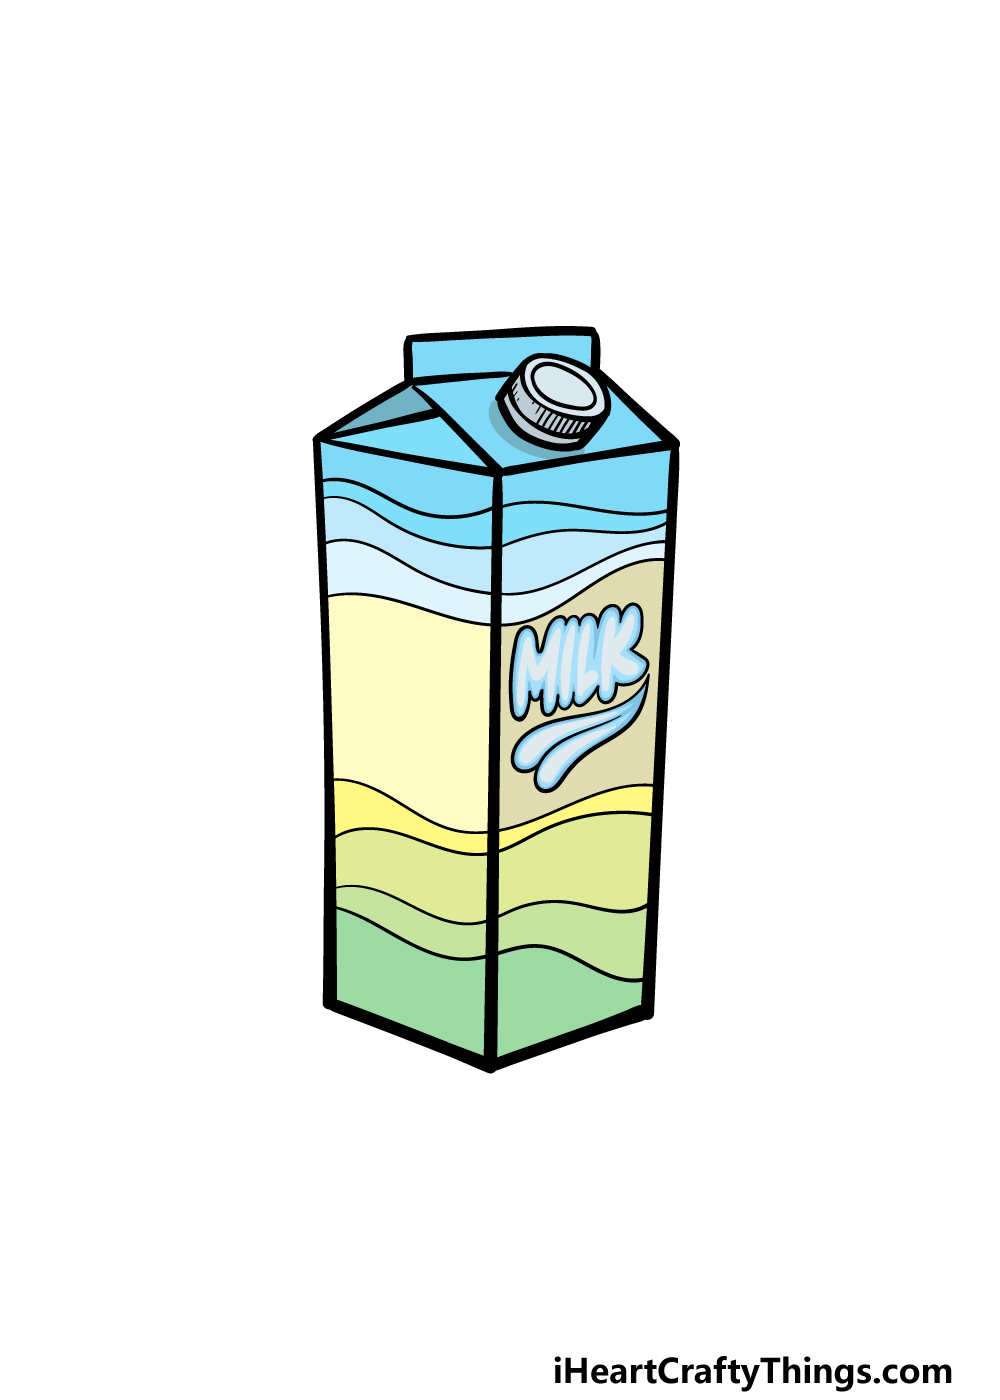
This is the final step of your milk carton drawing, and in this one we will be finishing off with some color.
More than any other step in this guide, this is where you can really take over with your own creative choices.
We went with a colder color palette for our milk carton, and we did this by using some light blues, greens and yellows.
These are just a suggestion, however, and you should definitely use any colors you like.
This is the kind of drawing where you have lots of freedom with how you choose to color it in, so have fun getting creative with it!
Once you know the colors you would like to use, what art mediums will you use to add them? We can’t wait to see what you end up going for!
5 Tips To Make Your Milk Carton Drawing Even Better!
Why not enjoy a glass of milk as we make your milk carton sketch even better?
For this milk carton drawing, we went with a simple yet pleasing wavy pattern design for the carton. This looks great, but you could also create your own design instead!
You would have a few options for doing this. First, you could create your own unique design.
This could incorporate shapes, pictures and text, among other things. Or, you could recreate the design of a real milk carton!
How would you like to customize the design?
Whether you create a new design or keep it as is, you will also want to try out some different colors. We created a lovely muted color palette for our example of this drawing of a milk carton.
Do you think you will go for similar colors or will you try out some other color and art medium combinations?
When you have a milk carton, you will typically have certain food and beverages you will enjoy it with. You could show what you would be using this milk carton for by adding some of these items!
It could be a bowl of cereal or maybe a big mug of cocoa. These are just a few ideas, but what else could you draw into this image?
Once you have finished adding any extras to your milk carton sketch, you may also want to draw a background. This could be a calm kitchen setting as someone settles in to enjoy some breakfast.
You could even add a character who is about to enjoy this milk, and maybe you could model them after yourself! What are some other background settings you could create?
If you would like to show your creativity once you have finished this milk carton drawing, you could have some fun creating variations.
Milk cartons come in many shapes and sizes, and milk can be sold in many different forms as well. You could draw a few of these variations to compare how different they can be!
Your Milk Carton Drawing is Complete!
That will finish off this guide on how to draw a milk carton! We had some goals we hoped to achieve for you in this guide, with the main ones being that this guide would be fun and also easy for you to take on.
Hopefully we achieved both of these goals for you!
The best way to take on a new drawing challenge is by breaking it down into smaller steps, so as long as you follow these steps you will definitely master this picture.
Don’t forget that you can also add to this drawing by adding your own details and elements. How will you finish off this drawing with your own touches and color choices?
Finishing this guide is just the start, and when you’re ready for more you can find some more guides on our website. Be sure to keep checking in, as we have many more coming out soon.
Please also be sure to share your milk carton drawing on our Facebook and Pinterest pages. We always love to see your finished artwork!