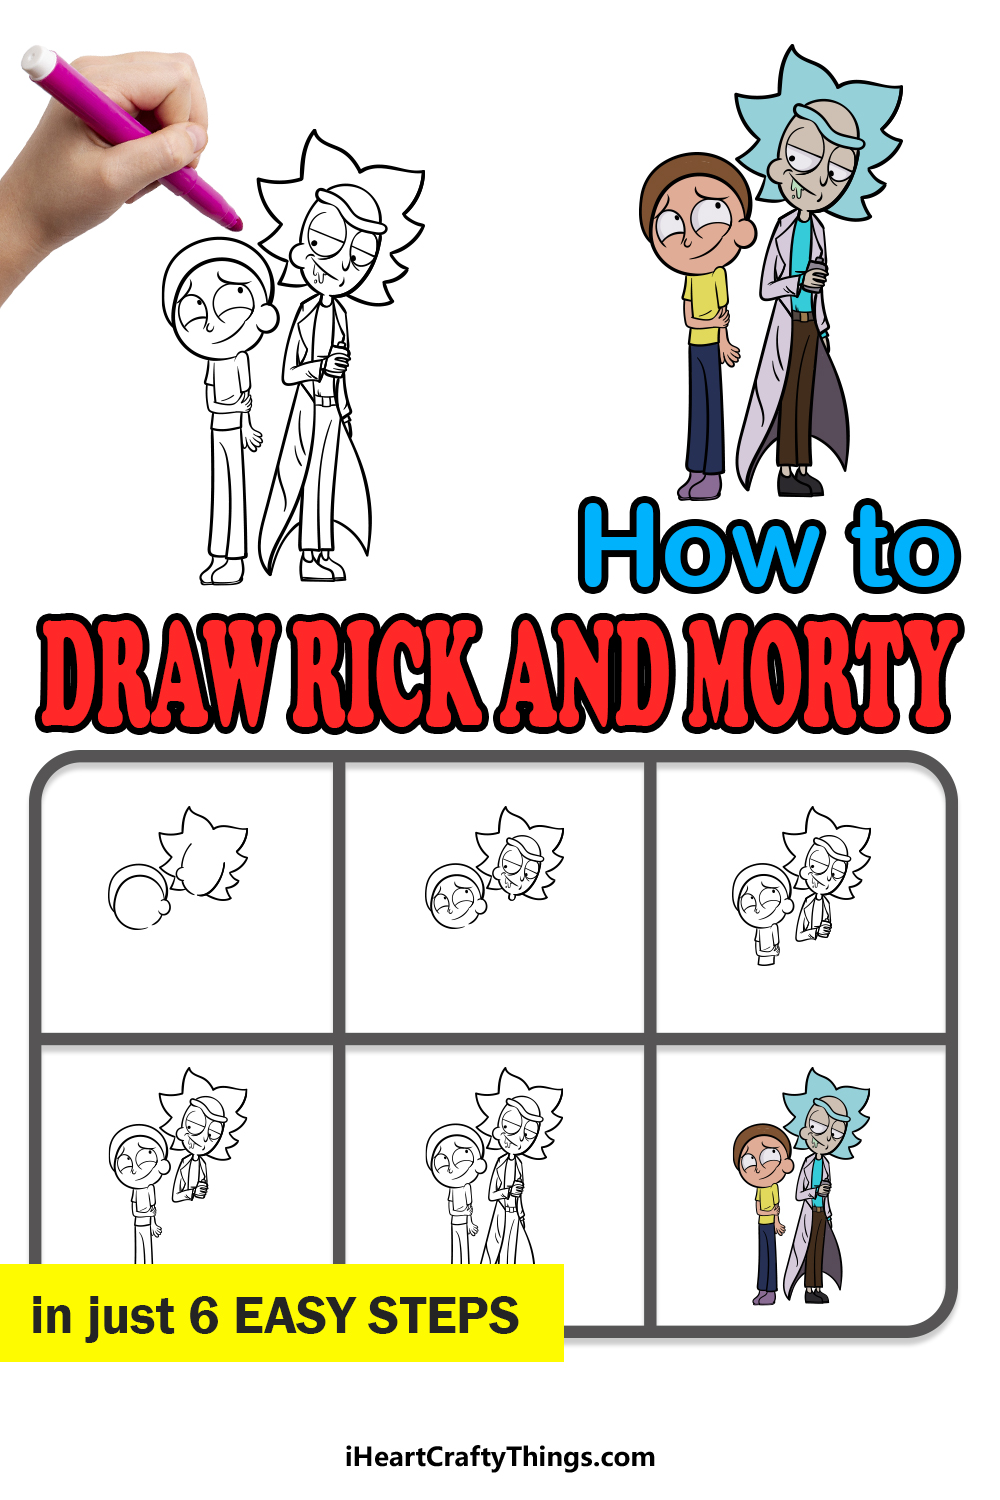
It’s easy to learn how to draw Rick and Morty when you follow this fun guide! Recreate this iconic duo by joining me for these steps.
Rick and Morty are an immensely popular pair of characters who debuted in 2013 as the creation of Justin Roiland and Dan Harmon.
Since then, the show has remained popular thanks to its smart, edgy humor and imaginative character designs and stories. Many fans love to create fan art of this grandfather and grandson team, and now you will be able to as well.
This guide presents a cool and stylized version of Rick and Morty that captures their characters and personalities. Once you have finished the guide, you could draw in many more props, background elements and characters.
So get ready for fun and mayhem as we join Rick and Morty for a drawing adventure!
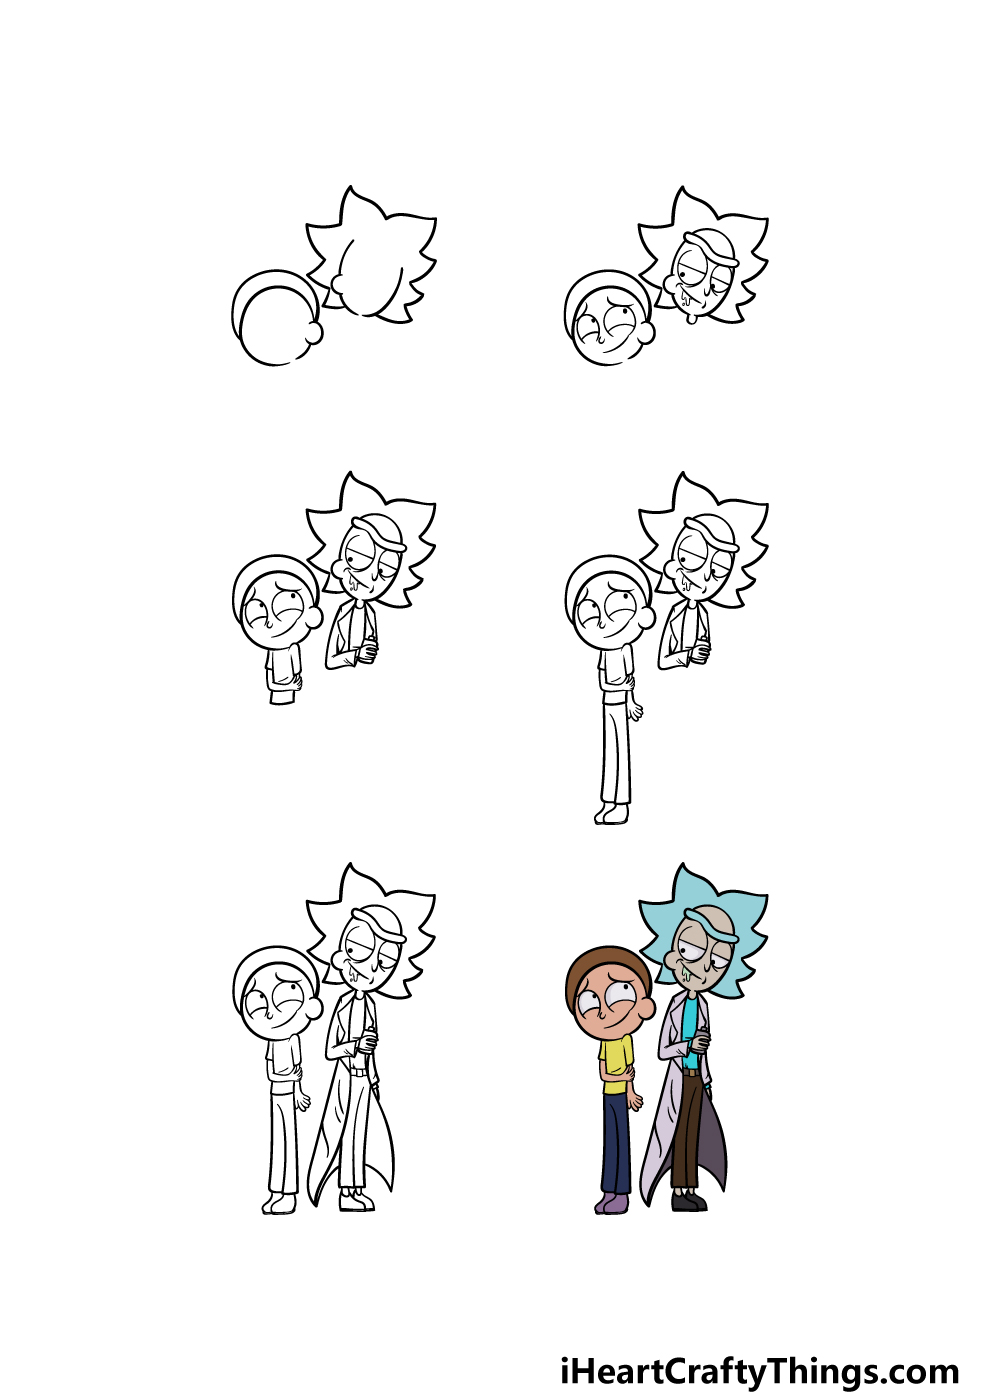
Watch And See How To Draw Rick And Morty
How to Draw Rick and Morty – Let’s Get Started!
Step 1

In this guide on how to draw Rick and Morty, we will be drawing the pair in a slightly stylized style, so they will look a bit different to how they look in the show.
First, we will begin with the head outlines for Morty on the left and Rick on the right. Morty has a rounded head shape, and his hair is also rounded and flat against his head.
Rick has a thinner, longer head, and his hair is large and spiky on top of it. We won’t draw any facial details for now, but we will add these elements soon as we proceed further into the guide.
Step 2 – Now, draw the facial details for Rick and Morty
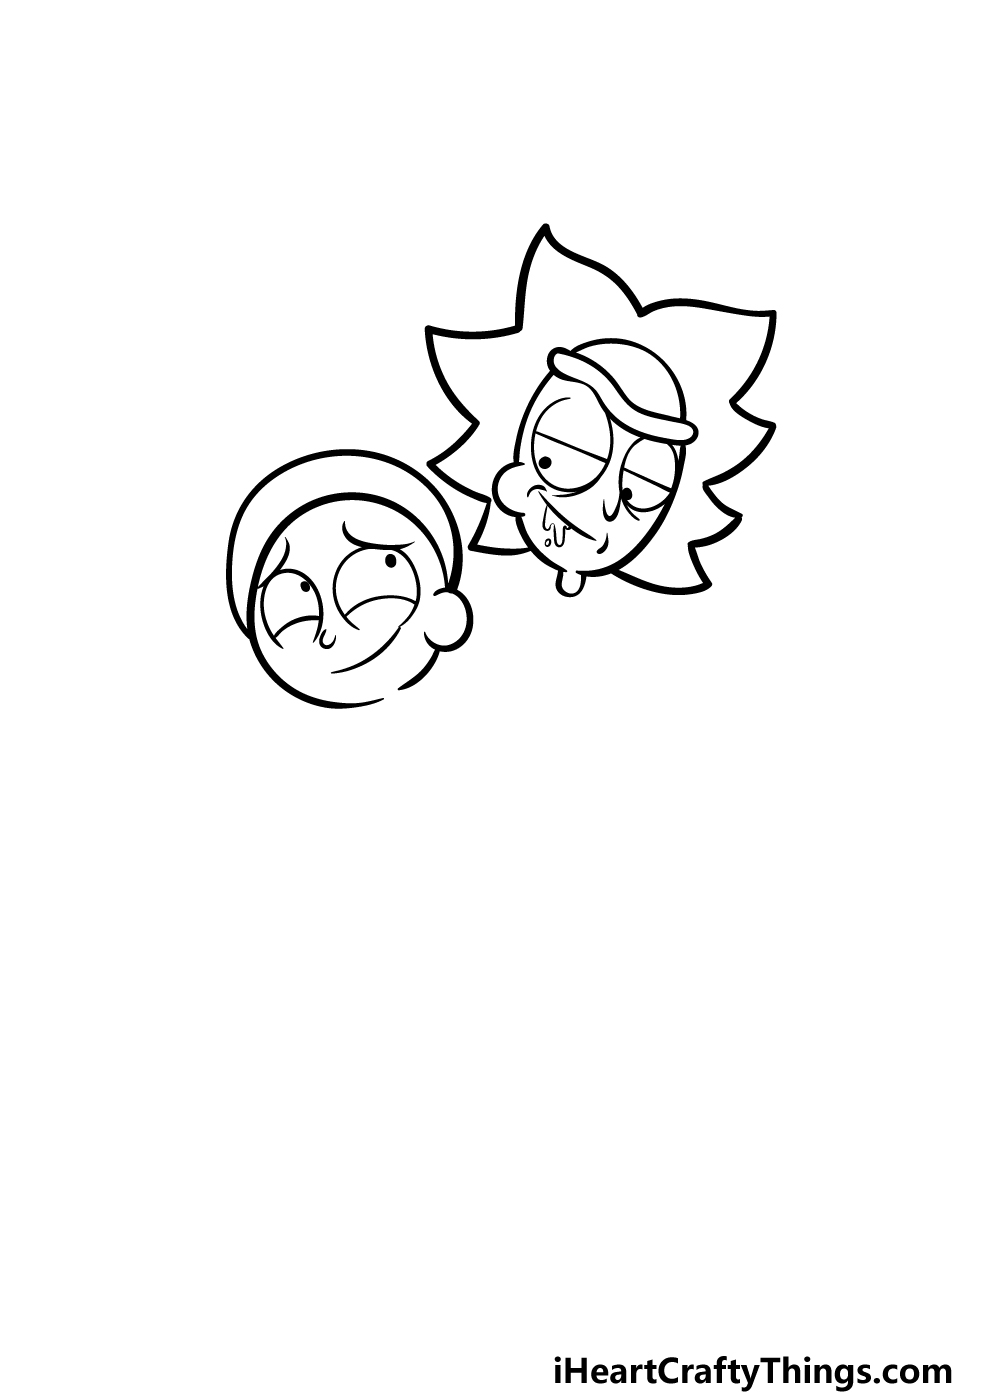
For this part of your Rick and Morty drawing, we will start their facial details.
Morty is a more nervous, anxious character while Rick is more confident, and these character traits will be represented by their expressions.
Morty has rounded eyes with simple line details for his eyelids, eyebrows and mouth. Rick has a single thick eyebrow over his rounded eyes, and his mouth has some drool perpetually dropping down from it.
Once you have drawn all of these features, we can then move on to the third step of the guide.
Step 3 – Draw the chests and arms for the characters
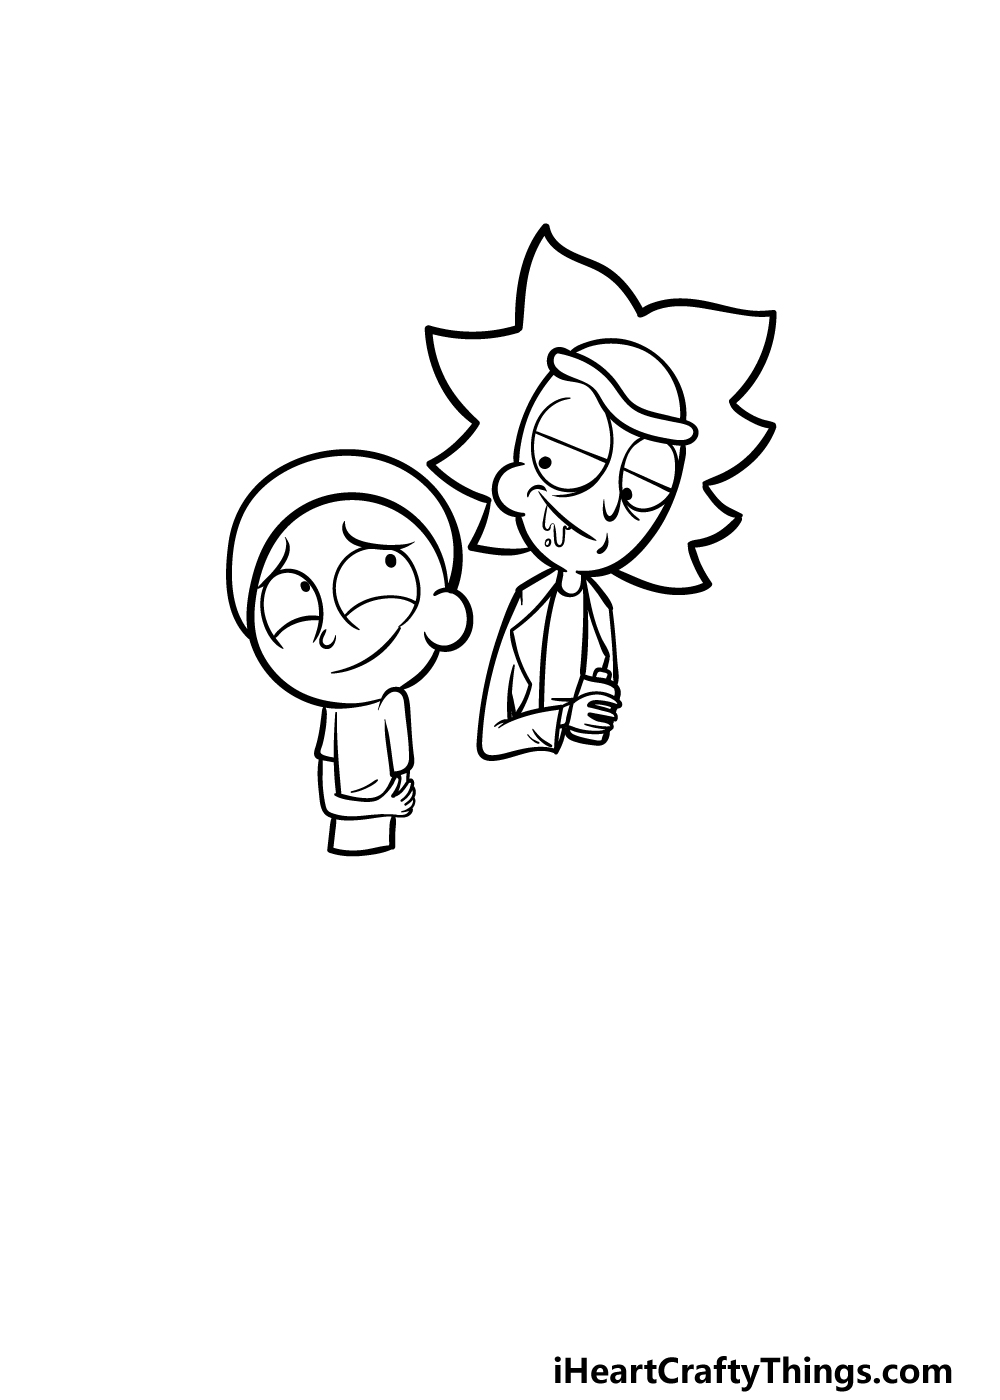
In this third step of our guide on how to draw Rick and Morty, we will focus on the chests and arms of the characters.
These elements will also help to highlight the personality traits of each character. Morty is wearing a simple shirt, and his arm on the left will be nervously clutching the one on the right.
Rick will be wearing an open lab coat, and his hand will be clutching his ever-present flask that he drinks from. That’s all there is to it for this step, and then we can move on to step 4!
Step 4 – Next, draw some legs for Morty
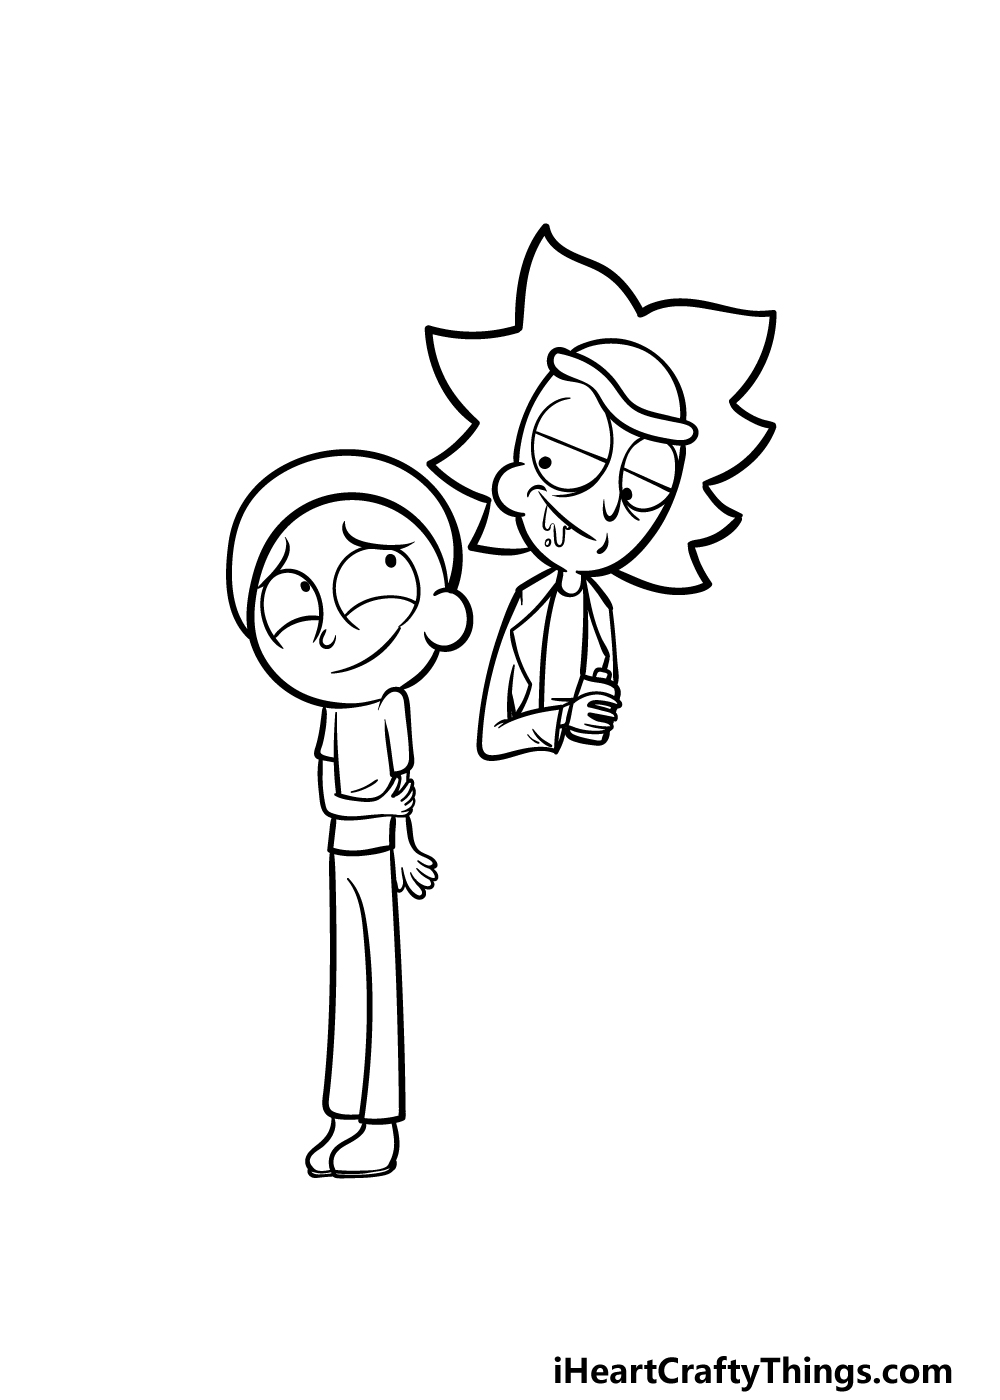
We will turn the focus to Morty in this fourth step of your Rick and Morty drawing! To finish him off, we will be drawing his legs and shoes.
His legs are long, thin and slightly curved. His shoes are also quite small, and they are drawn using some curved, rounded lines.
With Morty’s outline complete, we can focus on Rick’s outline along with any final details and additions in the next step of the guide.
Step 5 – Add the final details to your Rick and Morty drawing
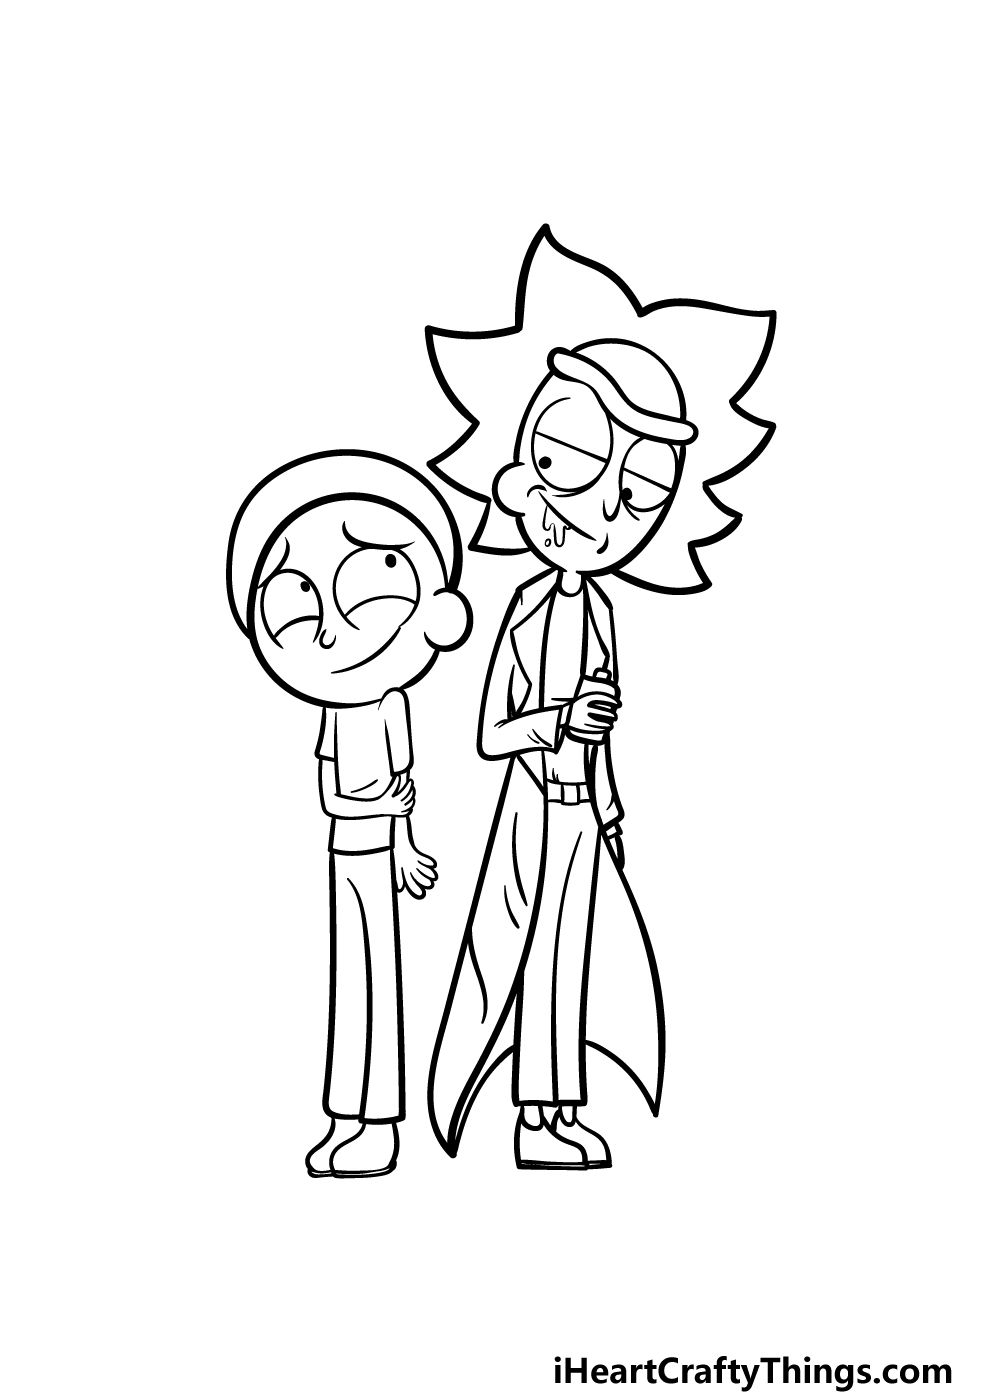
Now you’re ready to finish off the final details of this guide on how to draw Rick and Morty by completing the design for Rick!
Finishing off Rick’s design will be a bit more involved than it was for Morty. First, use some more curved lines to draw his lab coat flowing down from the upper sections.
Then, we will use some simple rectangular and square shapes for the belt that he is wearing. Finally, finish off with some more long, slightly curved lines for the legs of his trousers.
Once you have finished Rick off, you’re ready for the final step! Before you do move on, there’s a lot of room for you to get creative with the image.
In the show, Rick and Morty go on many adventures to imaginative alien worlds, and this could be a chance for you to flex your creative skills as you design a cool setting.
If you have a favorite location from the series, you could also recreate it for this image. How will you complete this Rick and Morty drawing?
Bonus: Draw Rick And Morty In Different Styles
In this guide on how to draw Rick and Morty, we drew the duo in a different style to how they appear in the show. We really love this take on the characters and it presented a fun challenge!
It works in the context of the show as well, as we see many different versions of these characters throughout the series. So, it’s not so hard to believe that there may be a universe where this is how they look.
Now that you have completed this interpretation, we thought it would be fun to experiment with a few different styles! They could even be drawn alongside these ones, as it would work in the context of the show.
The only question is which styles would you choose when drawing these iconic characters? There are so many ideas to go with, and a simple one would be to draw them more as they appear in the show.
This way, you could use the show itself and images online to help you draw them, making it easier. If you would like to challenge yourself even more, then you could try out some different animation styles.
For example, maybe it would be fun to draw the duo in an anime style! It would certainly be a challenge, but a fun one if you enjoy drawing in that style.
Or, if you like to draw realistic people, then it would be interesting to see what they would look like as real people. You could use real people that look fairly similar to them as reference material.
These are just a few ideas, but there are many styles and approaches you could take! How else would you like to portray Rick and Morty before we move on to the final step?
Step 6 – Finish off your Rick and Morty drawing with color
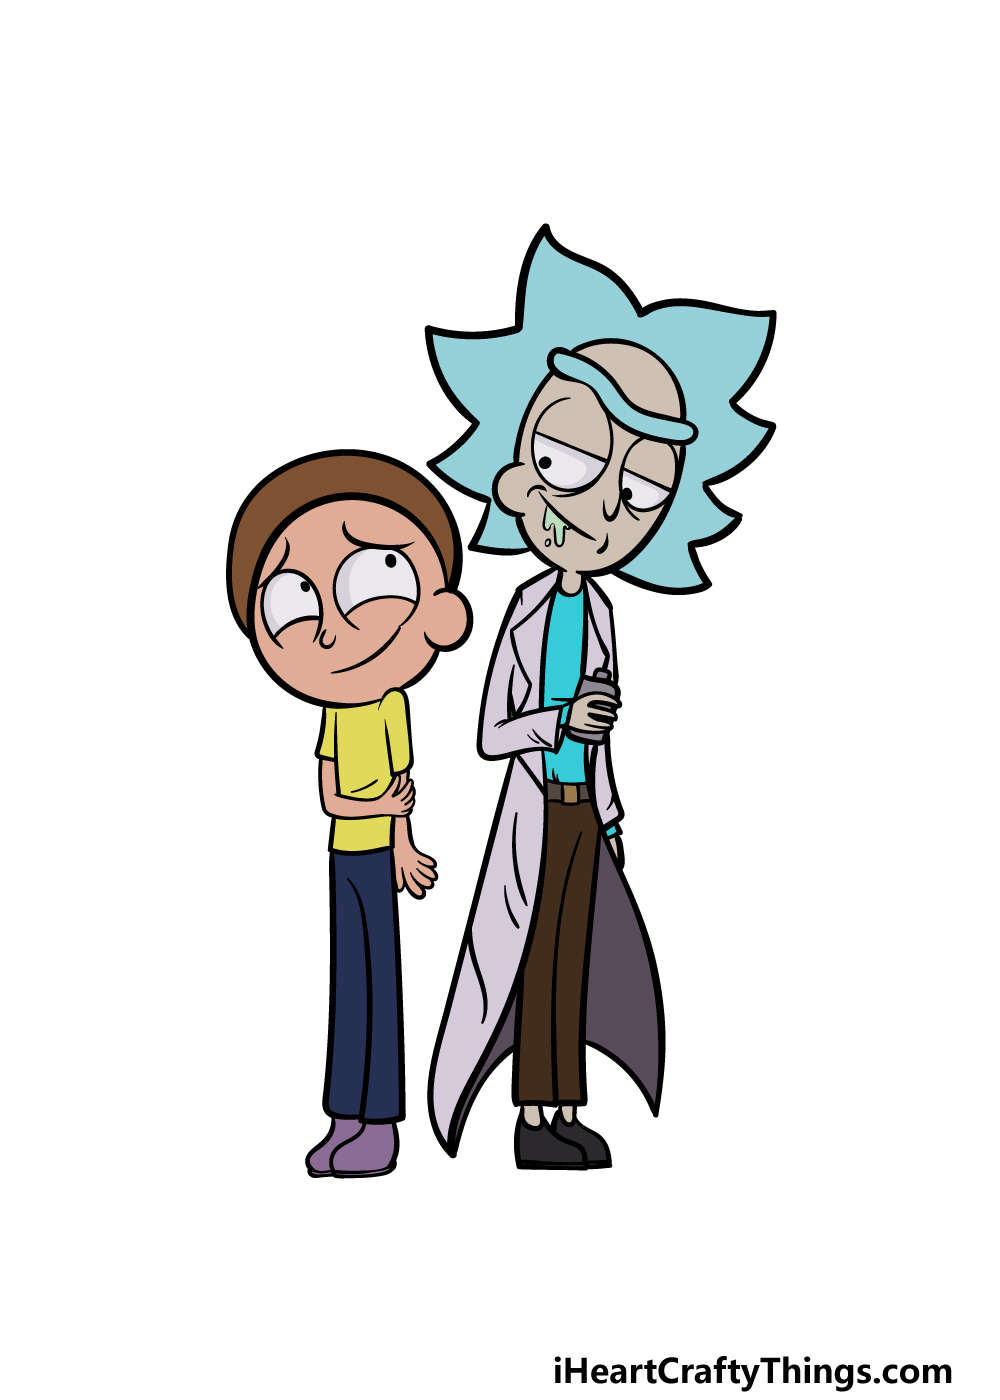
This is the final step of your Rick and Morty drawing, and in it we shall finish off with some colors!
These characters each have a specific color scheme for their clothing, and we aimed to keep the colors accurate to how they look in the show.
Starting with Morty, he has light brown hair with a simple yellow shirt and blue pants.
Rick has light blue hair, and his skin is a pallid grey color. His shirt beneath his white lab coat is a brighter blue, and his pants are brown.
For your image, do you think you will stick with these established colors, or will you create a unique color palette for the duo?
Do this to take your Rick and Morty drawing to the next level
Have some wacky drawing fun as we show you some tips for this Rick and Morty sketch!
In the Rick and Morty series, these two characters travel to all kinds of incredible locations. Some of these would be perfect to use as a background for your Rick and Morty drawing!
Some of these places include crazy spaceships, lush alien worlds or sometimes normal places on Earth. You could use places from the show to help you, but don’t be afraid of creating your own locations!
The places are always very imaginative, you could really let your imagination run wild. What locations could you use?
There are also loads of weird and wonderful characters in the series. These characters would also be fun to add to this drawing of Rick and Morty!
You could add some characters from Morty’s family such as Beth, Jerry and Summer. There are also some crazy characters like Mr. Meeseeks or Rick’s friend Birdperson.
That is just a small selection of characters from the show, but you would have many options. You could even create your own crazy characters inspired by the show!
Rick is a genius that can create any inventions he needs to get him and Morty out of the toughest jams.
Adding some of these inventions to this Rick and Morty sketch would be a fun way to take it to the next level!
One suggestion would be to draw the iconic spaceship that Rick and Morty use to travel in. there are other cool inventions in the show, but this is another case where you could create your own.
Rick and Morty is a very colorful and vibrant show, and that means you can really experiment with colors for this drawing. If you want to recreate the color scheme of the show, then colored pens and markers would be perfect.
You could also use some brighter paints like acrylics for colors that pop. It would also be interesting to have more subdued colors, so don’t be afraid to experiment!
Your Rick and Morty Drawing is Complete!
These characters are known for the wacky adventures they embark upon, and we hope that you enjoyed the drawing adventure in this guide on how to draw Rick and Morty!
Drawing characters like this can be quite challenging even if you’re very familiar with them, so we hope that this guide made it fun and easy for you to do.
There’s a lot of room for you to show off your imagination as you finish this image.
The show is also known for the whimsical, colorful settings the stories take place in, and you could have some fun creating a fun background for them.
What kind of setting would you put these two adventurers in?
You can then venture to our website when you’re ready to take on a new drawing challenge.
Our many drawing guides cover everything from famous characters to awesome animals, so keep checking in to experience our ever-growing selection!
We would be interested to see how your Rick and Morty drawing came out, so please share the finished image on our Facebook and Pinterest pages!
Here Is A Rick And Morty Drawing For Kids To Inspire You!
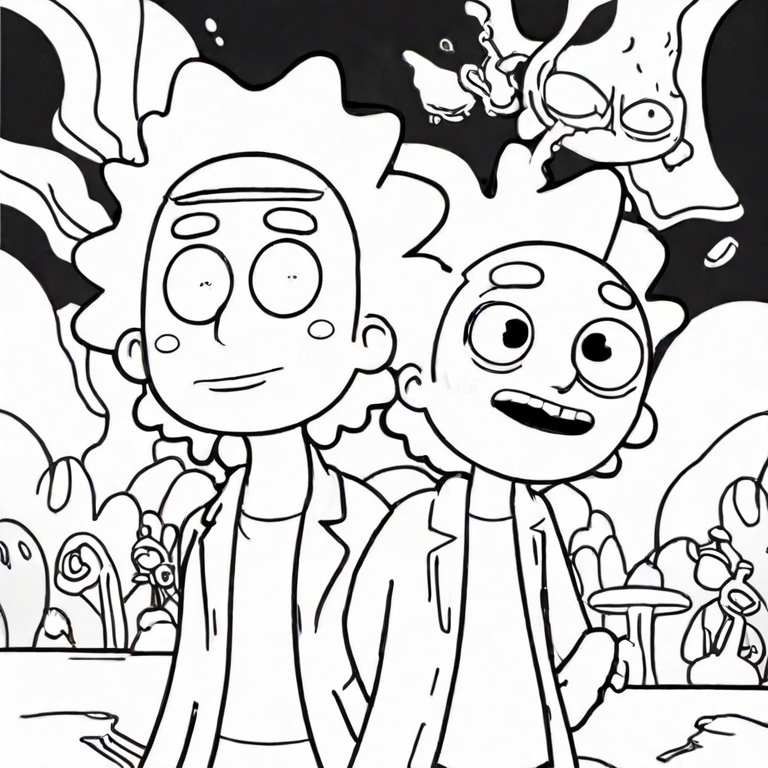
Rick and Morty go on so many awesome adventures to strange alien planets in their hit TV show. In this drawing by our artist Freddy, we have a great piece of inspiration for your own drawing.
This Rick and Morty Drawing for kids captures the duo in a stylized form that will allow you to let your imagination flow. It captures the sense of adventure and imagination that the show exhibits.
Freddy used a lot of black in the background to create a really striking look for the image.
If you want a similar look for your own drawing, then you could use a thick pen to make that black background.
Using a paintbrush would also help to give that rich color. What other colors will you use for this Rick and Morty scene?
