When making any kind of jewelry, you’ll often want to have some kind of impressive fitting or object that serves as a focal point of the piece.
Diamonds are a popular example of this, but you will often find gemstones as the focus of many pieces of jewelry.
Gemstones have a great deal of variety to their different types, and some people associate certain gemstones with zodiac signs and other attributes.
Learning how to draw a gemstone is the best way to imagine what your own perfect gemstone may look like!
If you would like to do just that, then this tutorial will be for you.
Our step-by-step guide on how to draw a gemstone will show you how it’s done in no time, so we hope you enjoy what we have set out for you!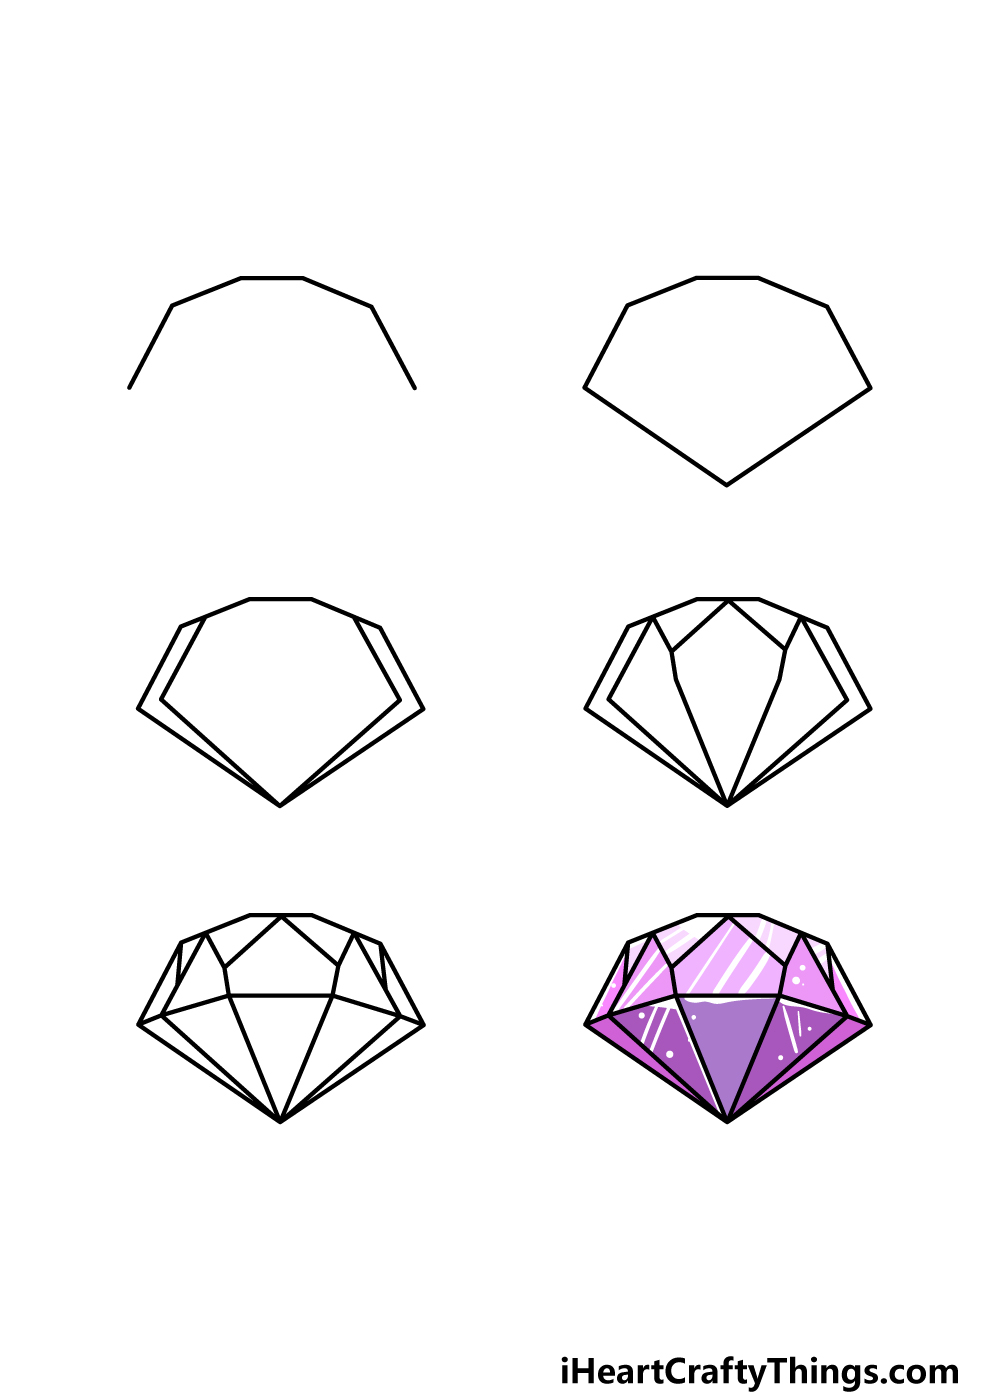
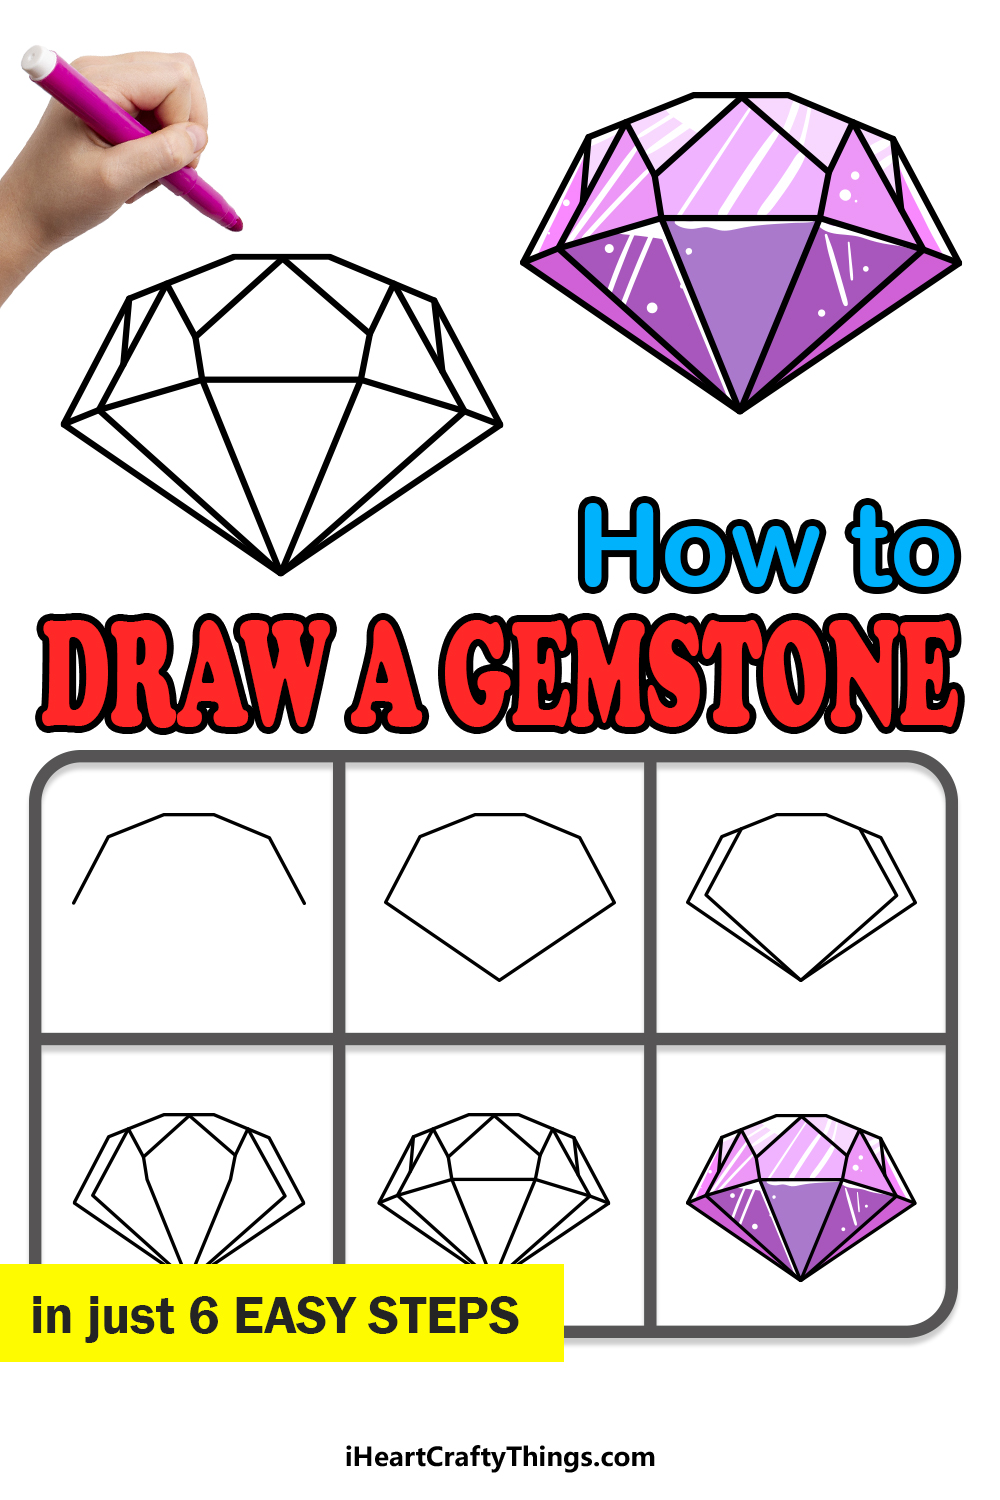
How to Draw A Gemstone – Let’s Get Started!
Step 1
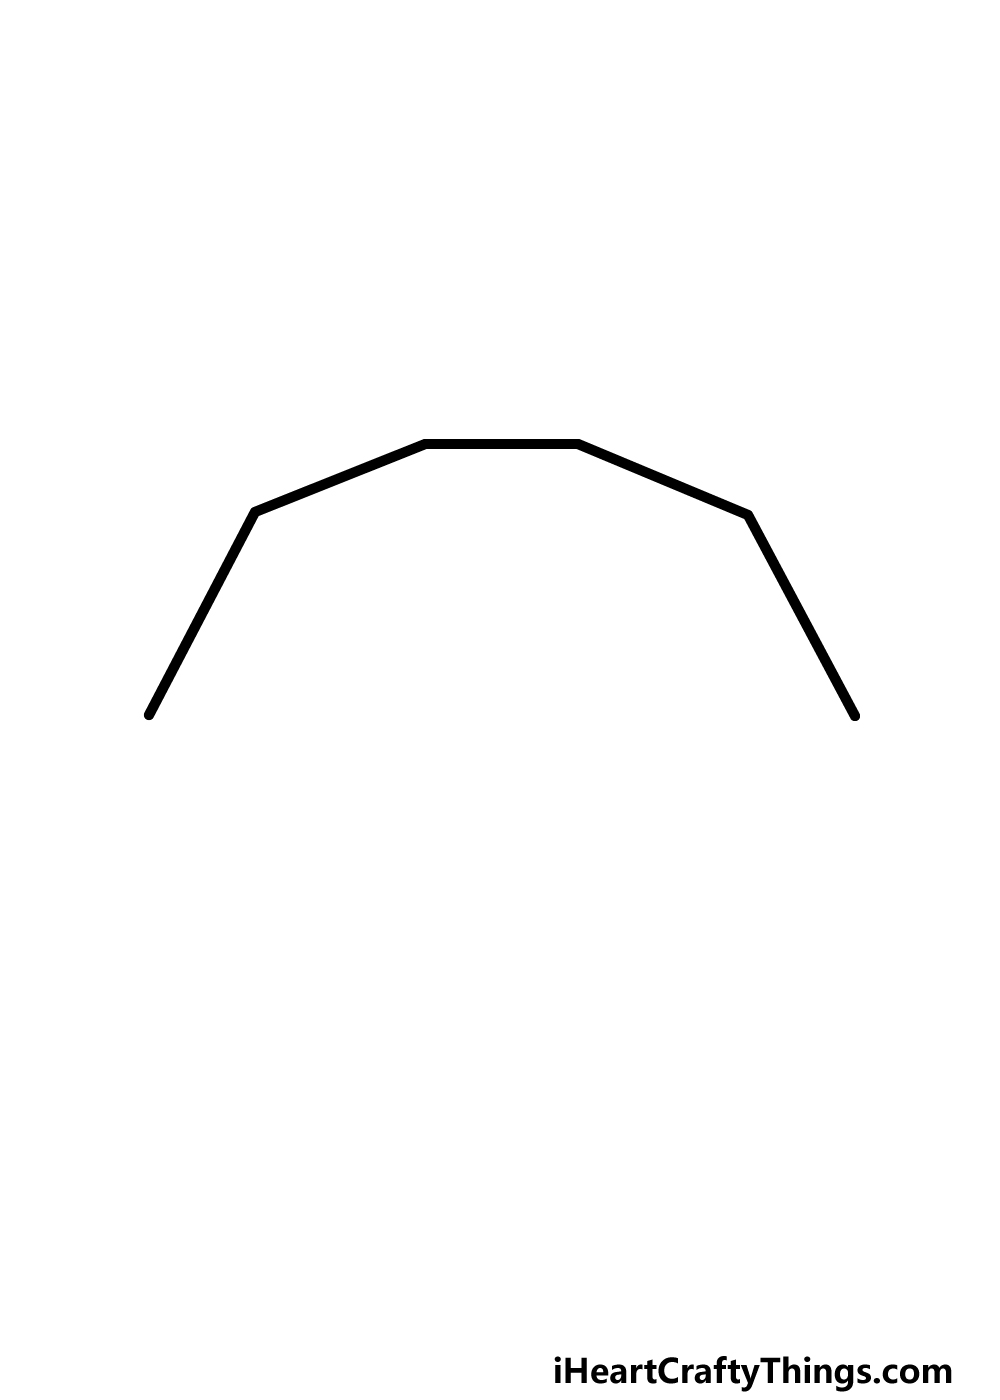
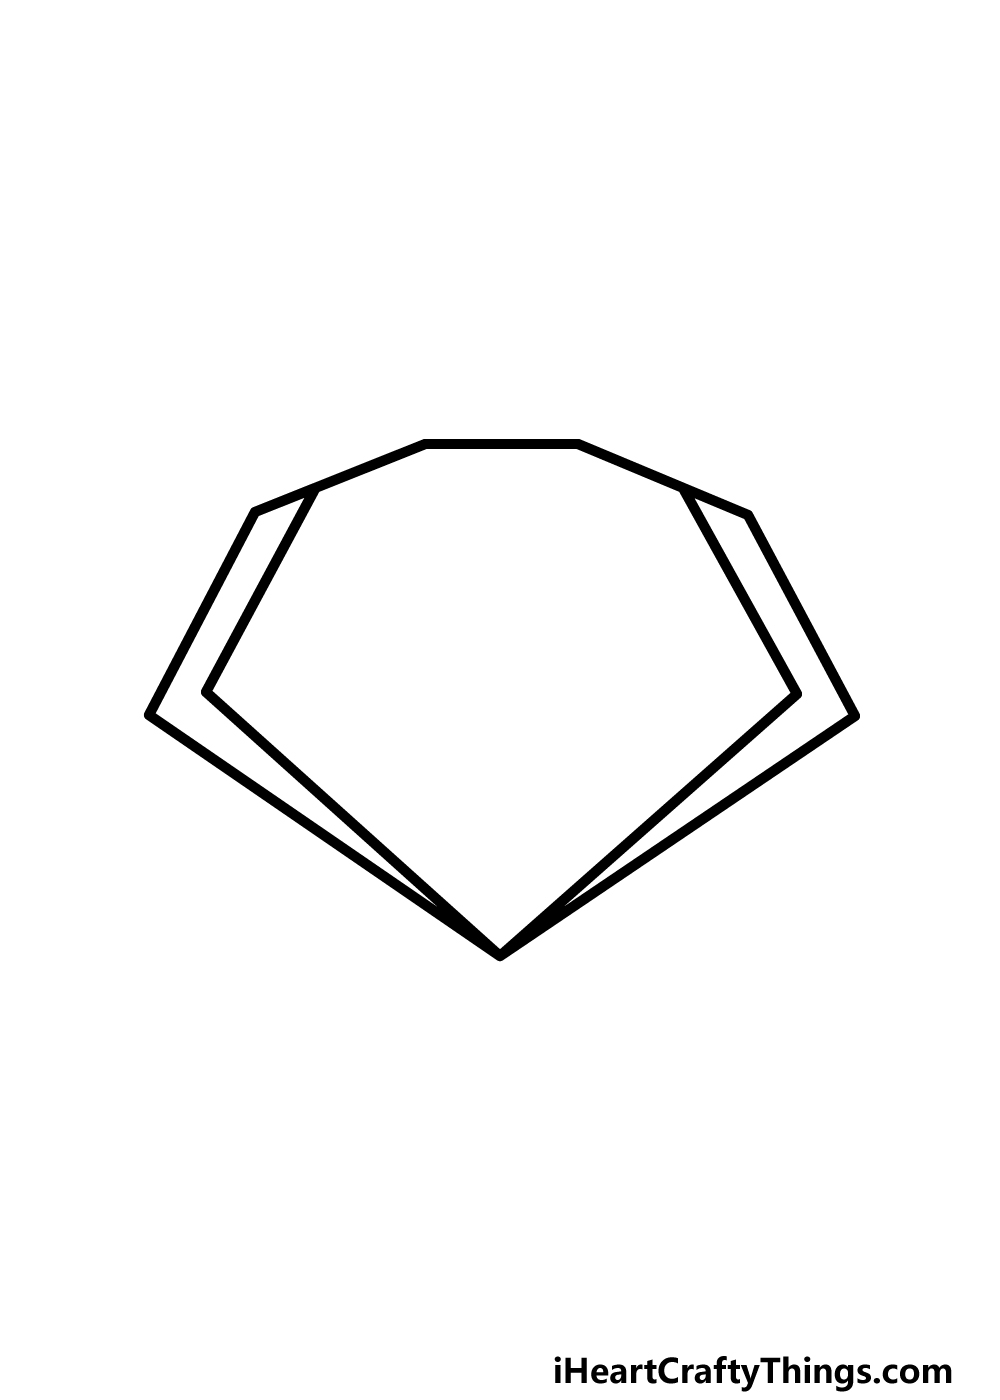
When they’re refined and shaped, gemstones will often have a very angular structure to them. This is true of the one that we will be drawing in this guide on how to draw a gemstone.
For this reason, you may want to use a ruler when drawing, as it will help with the many straight edges that this gemstone has.
For now, we will be drawing the top half of the stone. This top half will have a total of five edges, with the two on the sides being the longest out of all of them.
The two sides above these edges will be a bit smaller, and they will culminate in a flat portion at the very top.
Getting the angle of these edges looking right can be a bit tricky, so be sure to take it slowly and refer closely to our example.
Step 2 – Now, draw the bottom half of the gemstone
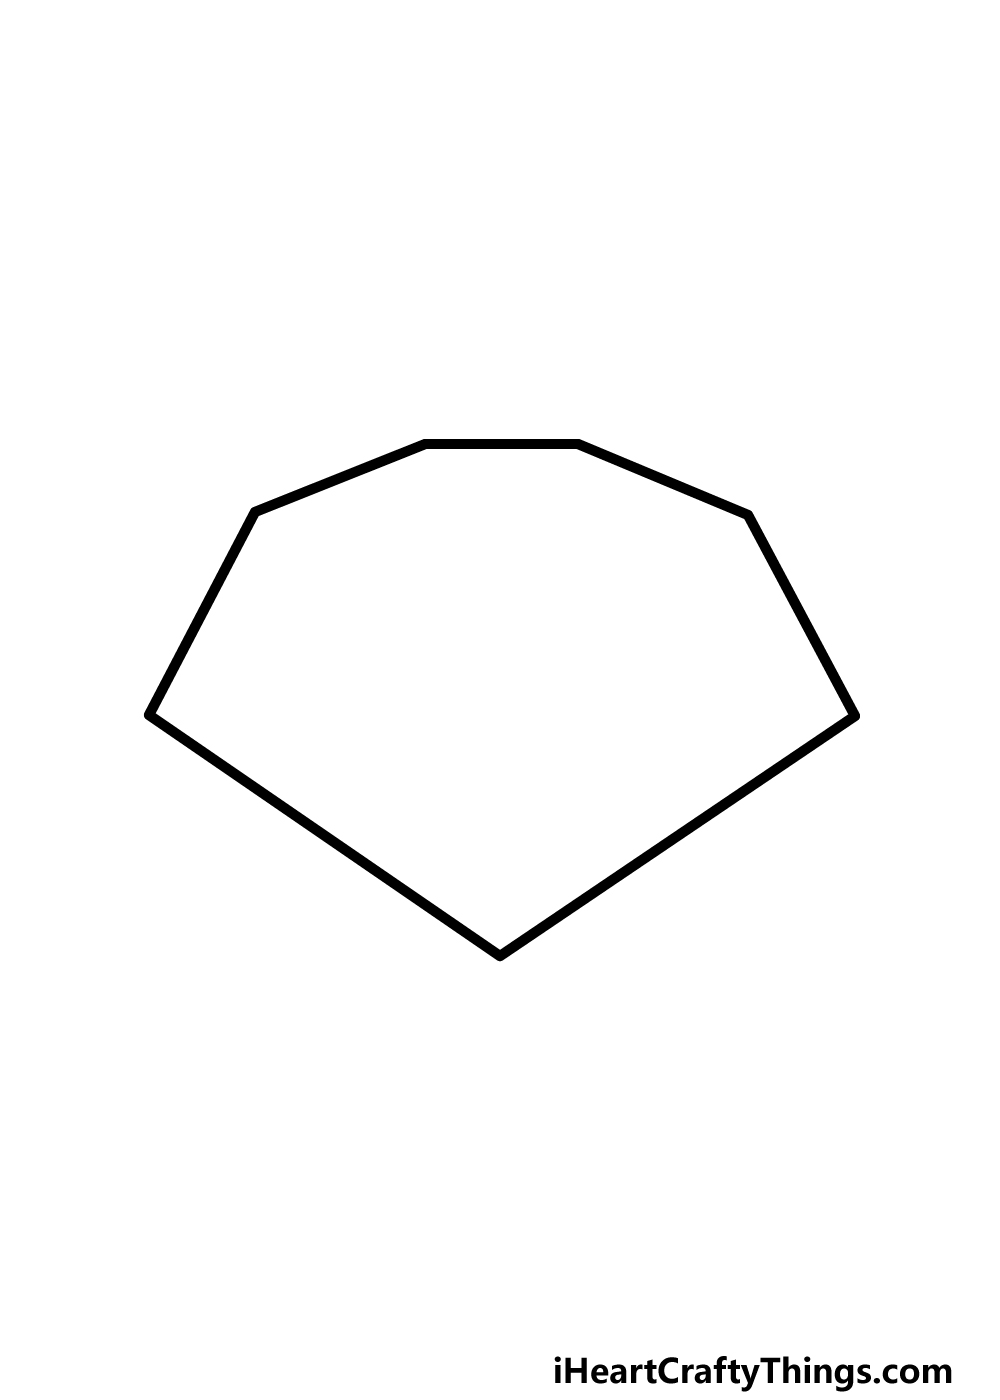
The top half of this gemstone drawing had some tricky elements to it, but this second step of the guide should be much easier to do.
For this step of the guide, we will simply be adding two more edges to the gemstone. This is yet another step where using a ruler would be very helpful indeed!
These two lines you will be drawing now will be the longest of any that you’ve drawn so far, and they will extend down from the last edges that you drew.
They will culminate in a sharp tip at the bottom of the gemstone, as shown in the reference image.
Step 3 – Start drawing some inner edges for the gemstone
You have completed the outline for your drawing, so in this step of our guide on how to draw a gemstone we will be working on some of the inner edges.
Gemstones will usually have many flat, refined surfaces, and we will start to portray these now.
First, draw a slightly diagonal line coming down from each of the top side edges of the gemstone.
Then, draw two more lines coming down from where those previous ones ended to have them meet at the bottom tip of the gemstone.
Once these new lines are drawn as they appear in our reference image, you can move on to the fourth step of the guide.
Step 4 – Next, draw some more edges for the gemstone
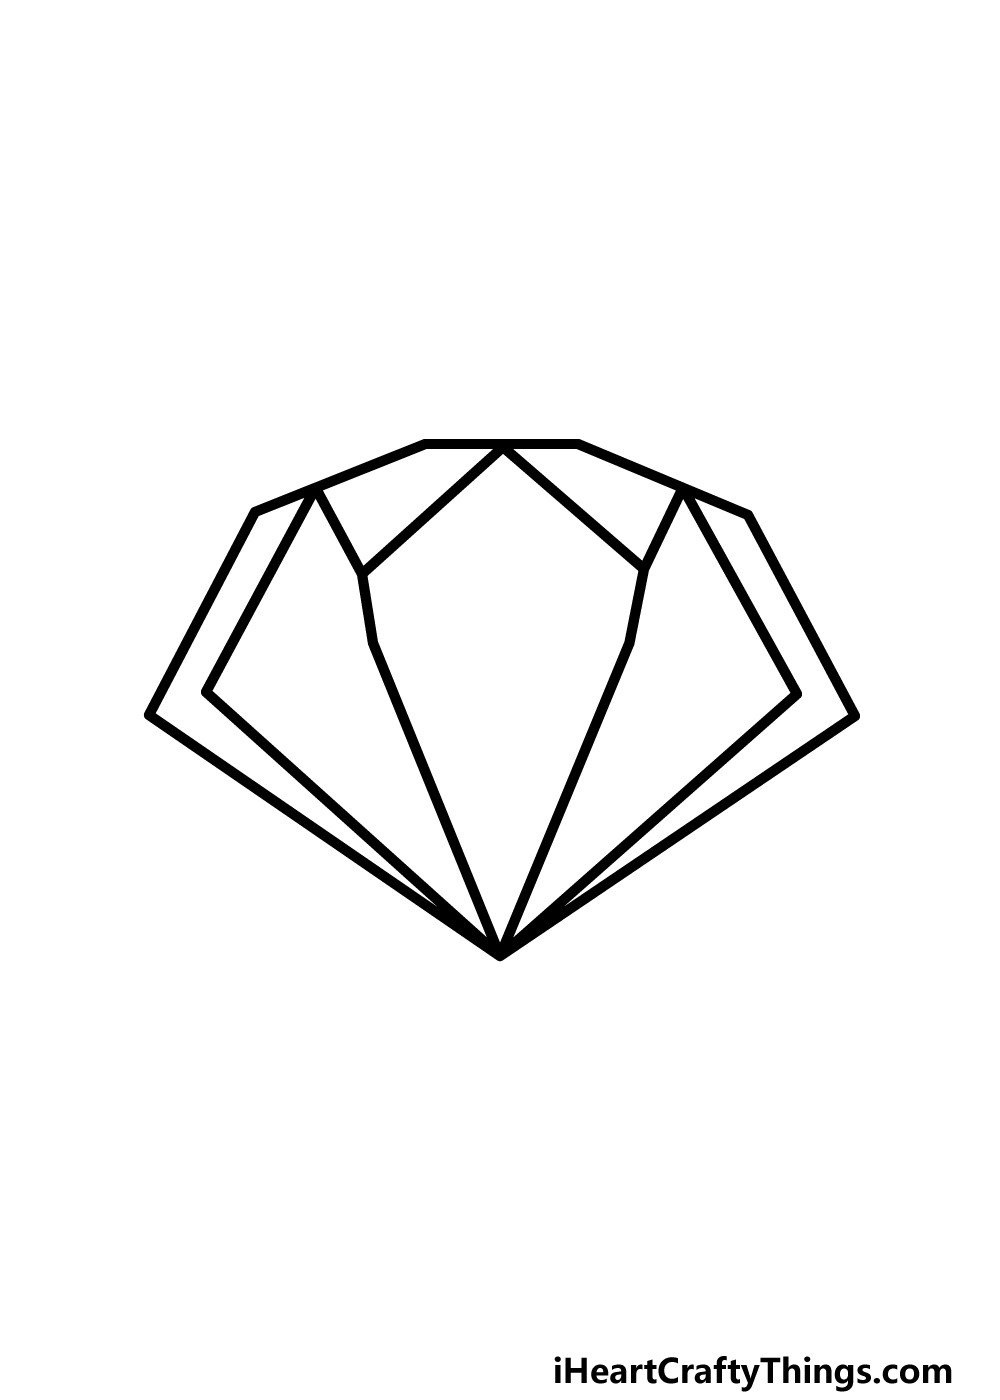
Continuing with this gemstone drawing, we will now be adding some more edges to the stone.
These edges will be front and center, and they will be some of the more complex edges that we have drawn so far.
This is a step where you will definitely want to refer closely to the reference image as you work!
The edges on the front will have two triangular edges on top, and then a six-sided shape at the very front.
Two will be diagonal and form a pointy tip on the top.
Two shorter lines will come down from these straight down, and then there will finally be two longer lines coming down to meet at the bottom tip of the gemstone.
Once these shapes are drawn, you will be ready for the final details!
Step 5 – Add the final details to your gemstone drawing
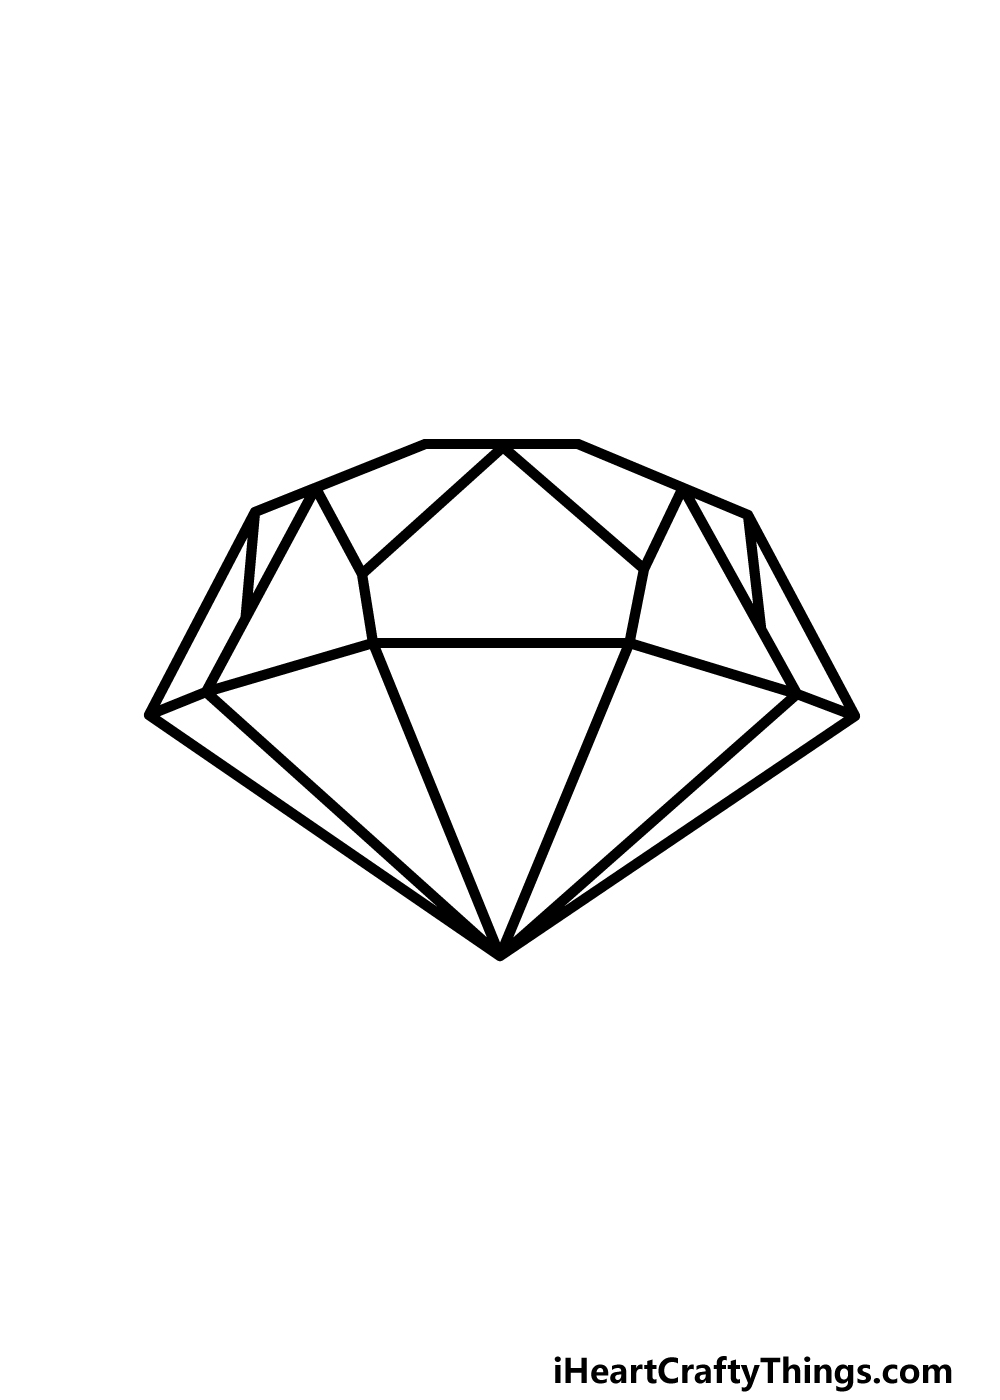
Before you add some colors in this guide on how to draw a gemstone, we must first finish off the final little details.
The lines that we will be drawing in this step will be horizontal for the most part and will go through the center of the gemstone.
Draw some straight lines going through the various vertical edges you have been drawing, and try to use the reference image to guide you as you draw the angles they’re at.
Once you have finished these final edges, you could finish off this image by adding a background or maybe some cool extra details! How would you like to finish off this pretty gemstone picture?
Step 6 – Finish off your gemstone drawing with color
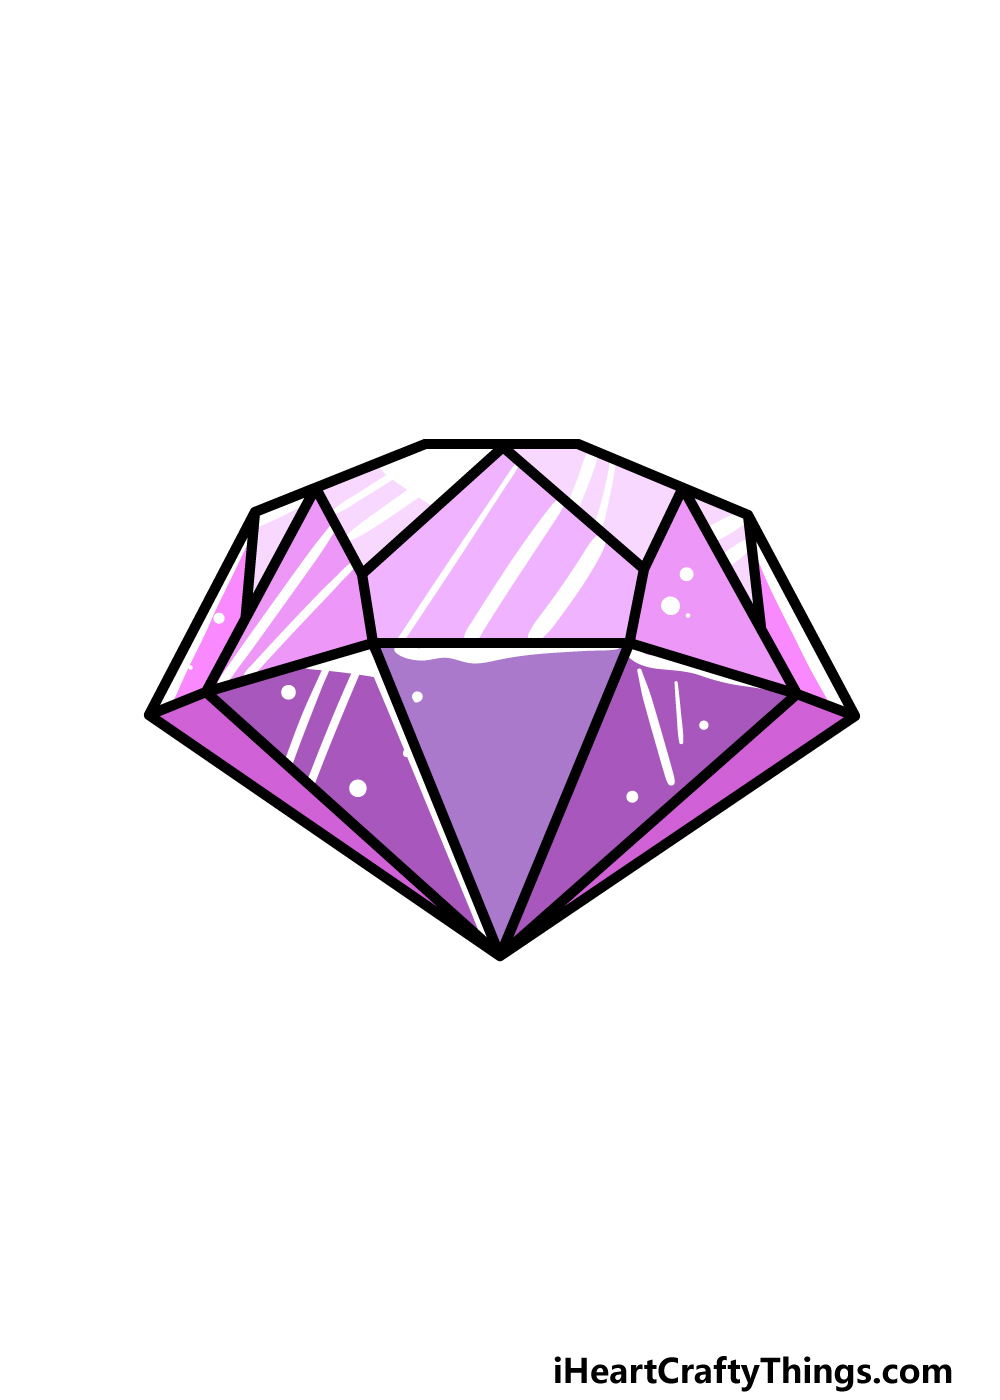
Different gemstones are known by the distinctive colors they come in, so this final step of this gemstone drawing is where you can show what kind this one is.
In our reference image, we went with some lovely purples to show that this gemstone is possibly an amethyst.
This is just one way that you could go about coloring this image, however! When finishing it off, you could look up various gemstones and then choose the color of your favorite one for this image.
What colors and mediums will you use when completing this drawing?
4 More Ways To Make Your Gemstone Drawing Unique
These tips for your gemstone sketch will prove to be very valuable!
This drawing of a gemstone shows one of these precious stones just on its own. These precious stones can be set in all kinds of jewelry, and that would be a great way to customize your drawing.
This kind of gemstone would probably be too big for a ring, but you could still have it attached to a ring for a fun show of opulence.
You could also change the size and shape of the gemstone to better suit the kind of jewelry you have in mind.
There are also a few different kinds of background settings you could use for your drawing. In this tip, we will present the idea of showing the gemstone in a natural setting.
These gemstones will be mined in real life, so you could show it half submerged in rocks. To add to the scene, you could even have a pickaxe nearby to show that someone had a very lucky day mining!
What other natural scenes could you depict?
You could also create something more fun and creative for a background to your gemstone drawing. For example, this kind of gemstone is often shown as the subject of complex heists in cartoons.
One idea would be to show the gemstone in a glass case at a museum. Maybe a thief could be lowered from the ceiling, descending through a series of lasers to nab the precious gemstone.
What are some other fun scenes you could create for this background?
Finally, it could also be fun to draw different kinds of gemstones and precious stones to go with your gemstone sketch. There are loads to choose from, and you could add any of your favorites.
If you struggle to come up with a list of precious stones, diamonds or gemstones, then you could look some up online for inspiration.
Adding these different stones would also allow you to incorporate some amazing colors to your art!
Be sure to try out different art mediums for your colors too!
Your Gemstone Drawing is Complete!
That brings you to the end of this very refined guide on how to draw a gemstone!
Drawing an object such as this can be quite tricky, as there are lots of specifically designed edges and aspects to get right.
Hopefully working through this guide helped to make it fun and easy to accomplish!
When you have finished this picture, you should go ahead and show off what you can do with your own final details, additions, background elements and color choices. Be sure to have fun getting creative with it!
You can also find some more amazing drawing guides to enjoy on our website. Be sure to check in often, as we upload new ones frequently for you to enjoy!
We would love to see how your gemstone drawing turned out, so please share your creation on our Facebook and Pinterest pages for us to see when it’s done!