Capes are a type of clothing that have fallen out of favor in recent years.
They used to be worn by the rich and noble, but now they are only usually worn for special fancy occasions or by movie superheroes or vampires.
Even though they may not be worn by everyday people these days, they’re still highly recognizable due to the fact that they are worn in so many movies and other forms of media.
Designing your own cape can be a great way to relive the elegance associated with this clothing, and learning how to draw a cape is a great way to do just that.
If you would like to do that, then you’re on the right tutorial!
Our step-by-step guide on how to draw a cape will show you how fun and easy it can be!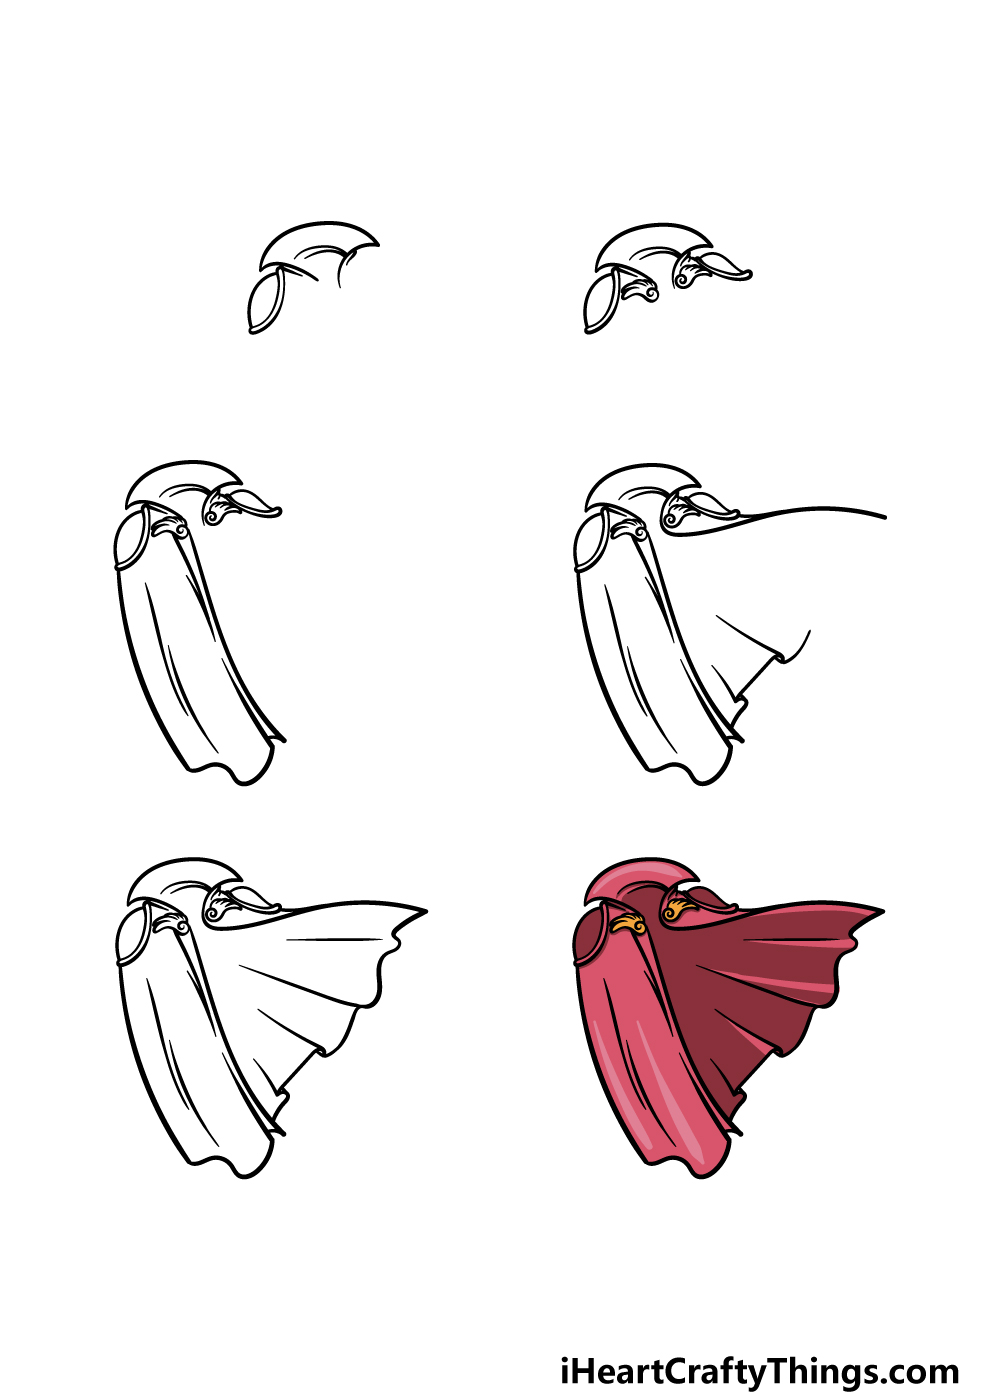
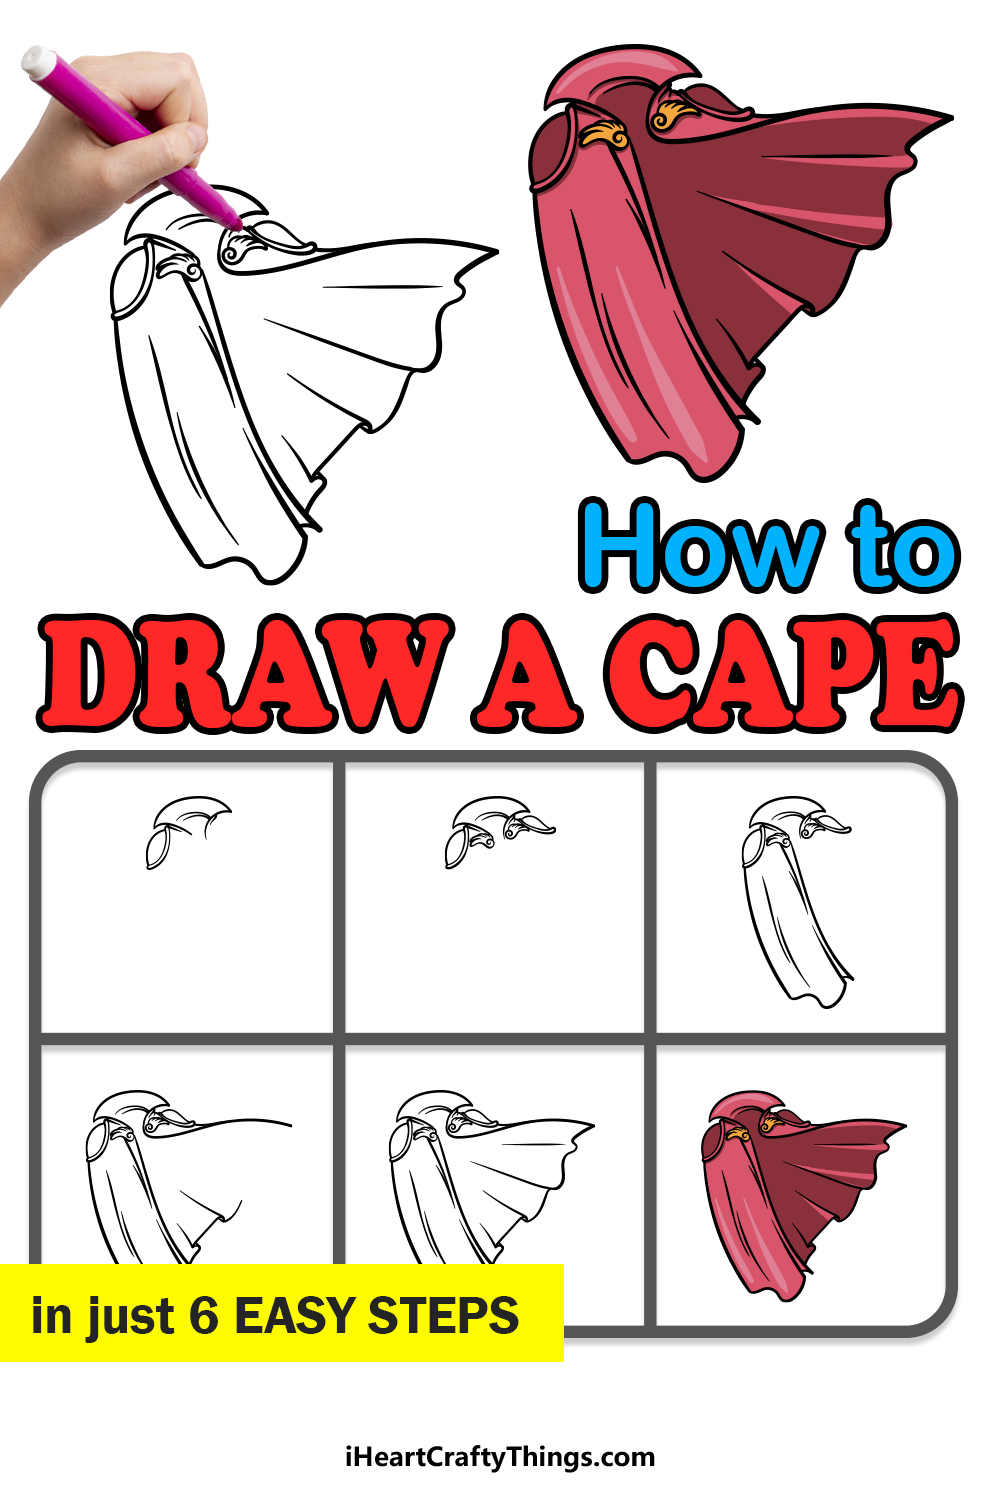
How to Draw A Cape – Let’s Get Started!
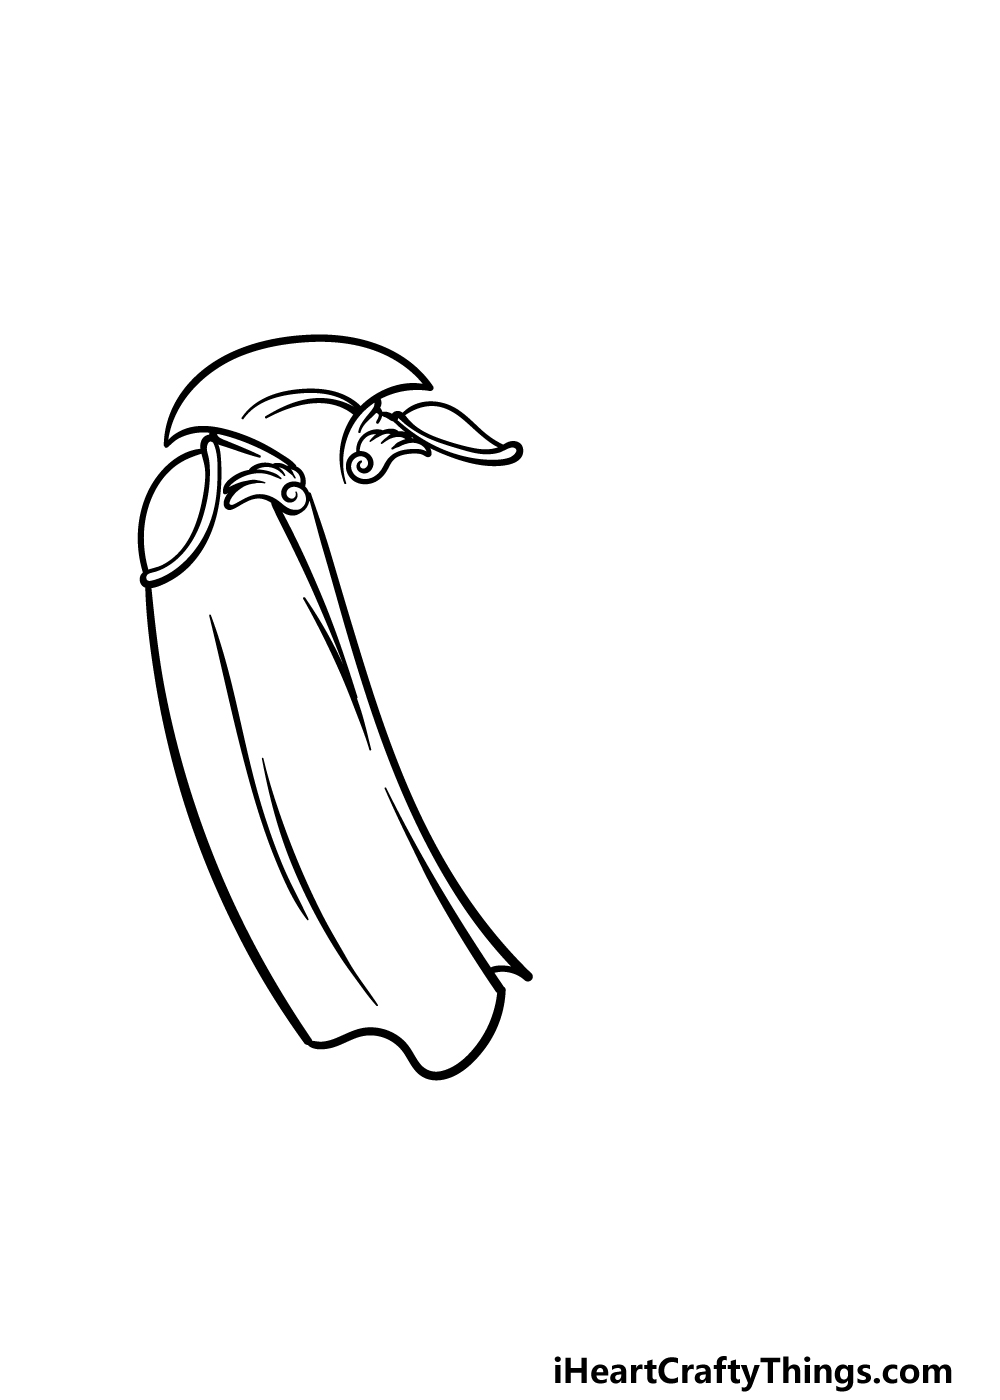
Step 1
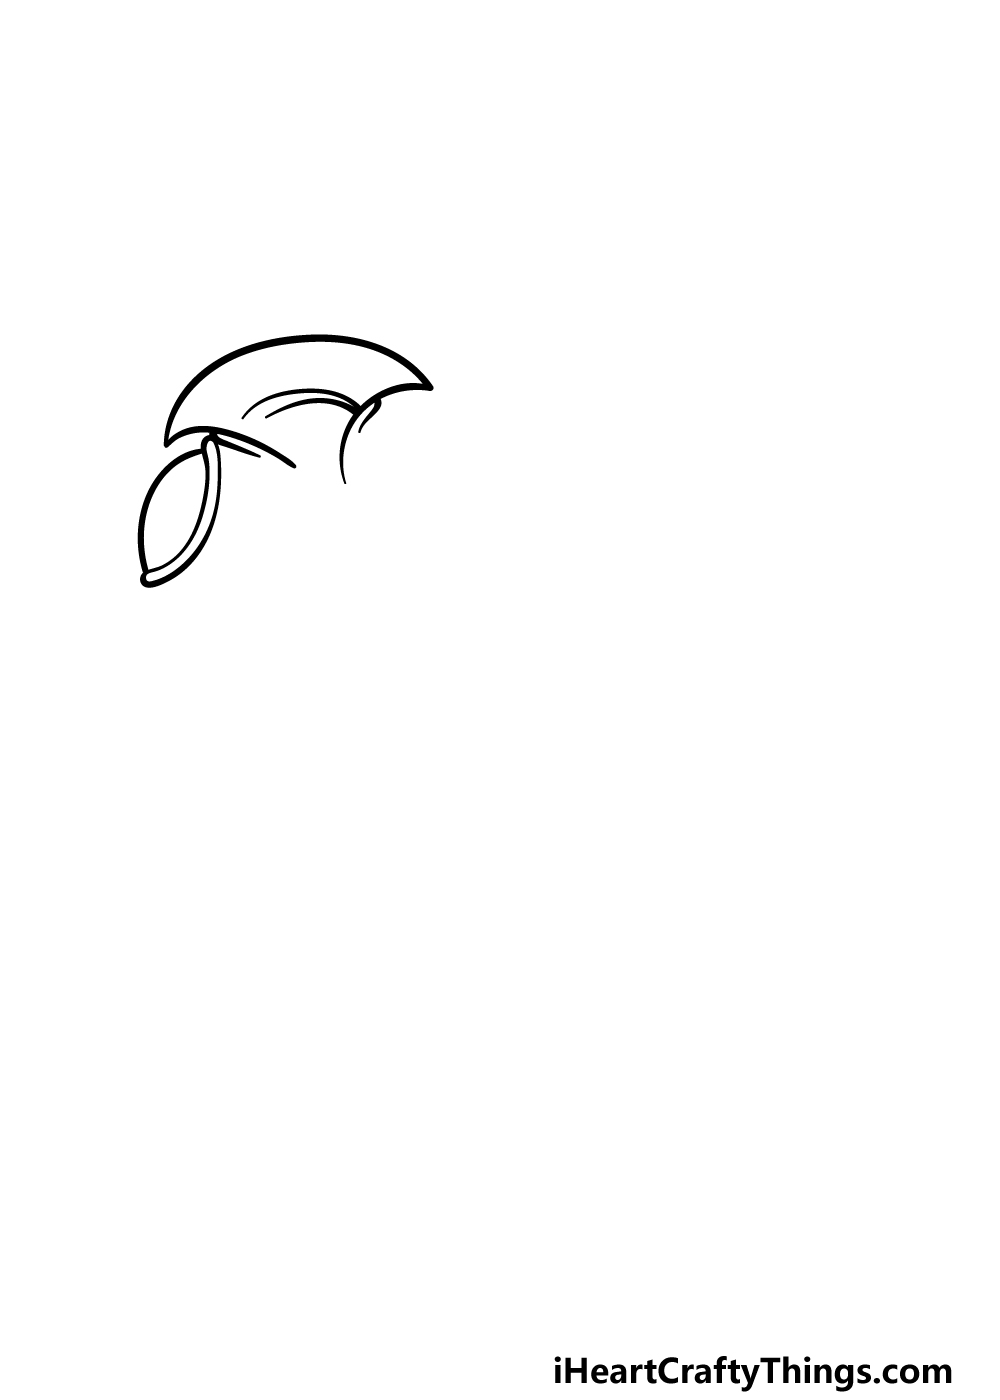
The garment we will be drawing in this guide on how to draw a cape is a really fancy one that looks as if it would be worn by a mysterious sorcerer.
The cape has a tall, wide collar and also has some rounded shoulder pads. We will be drawing the start of both of these aspects in this first step of the guide.
Use some curved lines for the sides of the tall collar fanning outward, and then add some crease lines to the inner center of the collar.
Then, you can draw the shoulder pad on the left. It will have an almost turtle shell shape to it, as it will have a thin rim and a rounded top to it. Once this is drawn, it’s on to step 2!
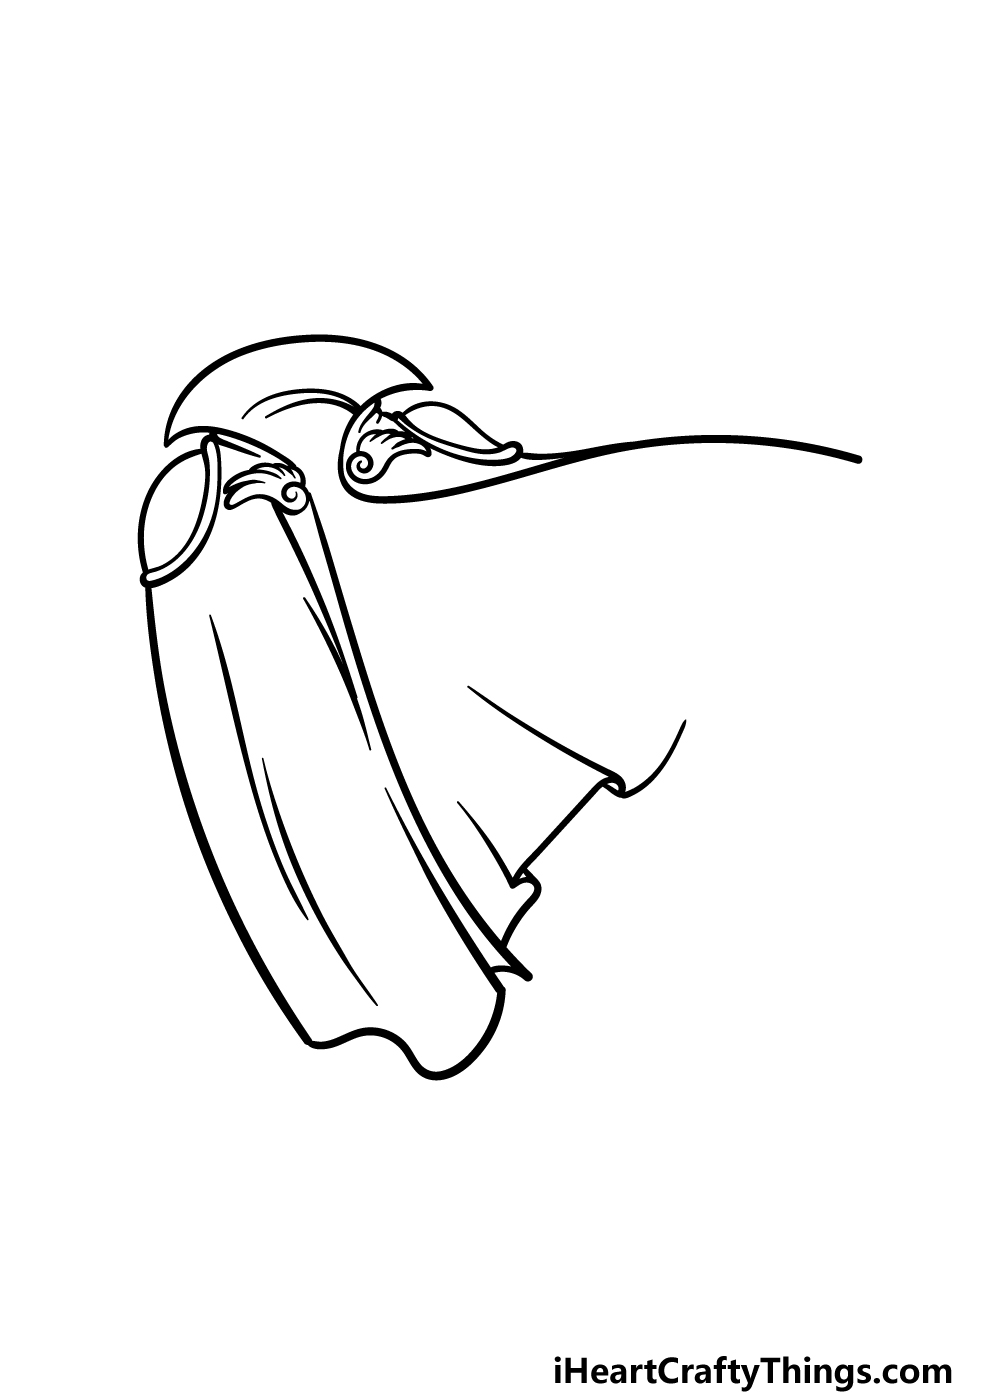
Step 2 – Now, draw another shoulder pad and the clasps
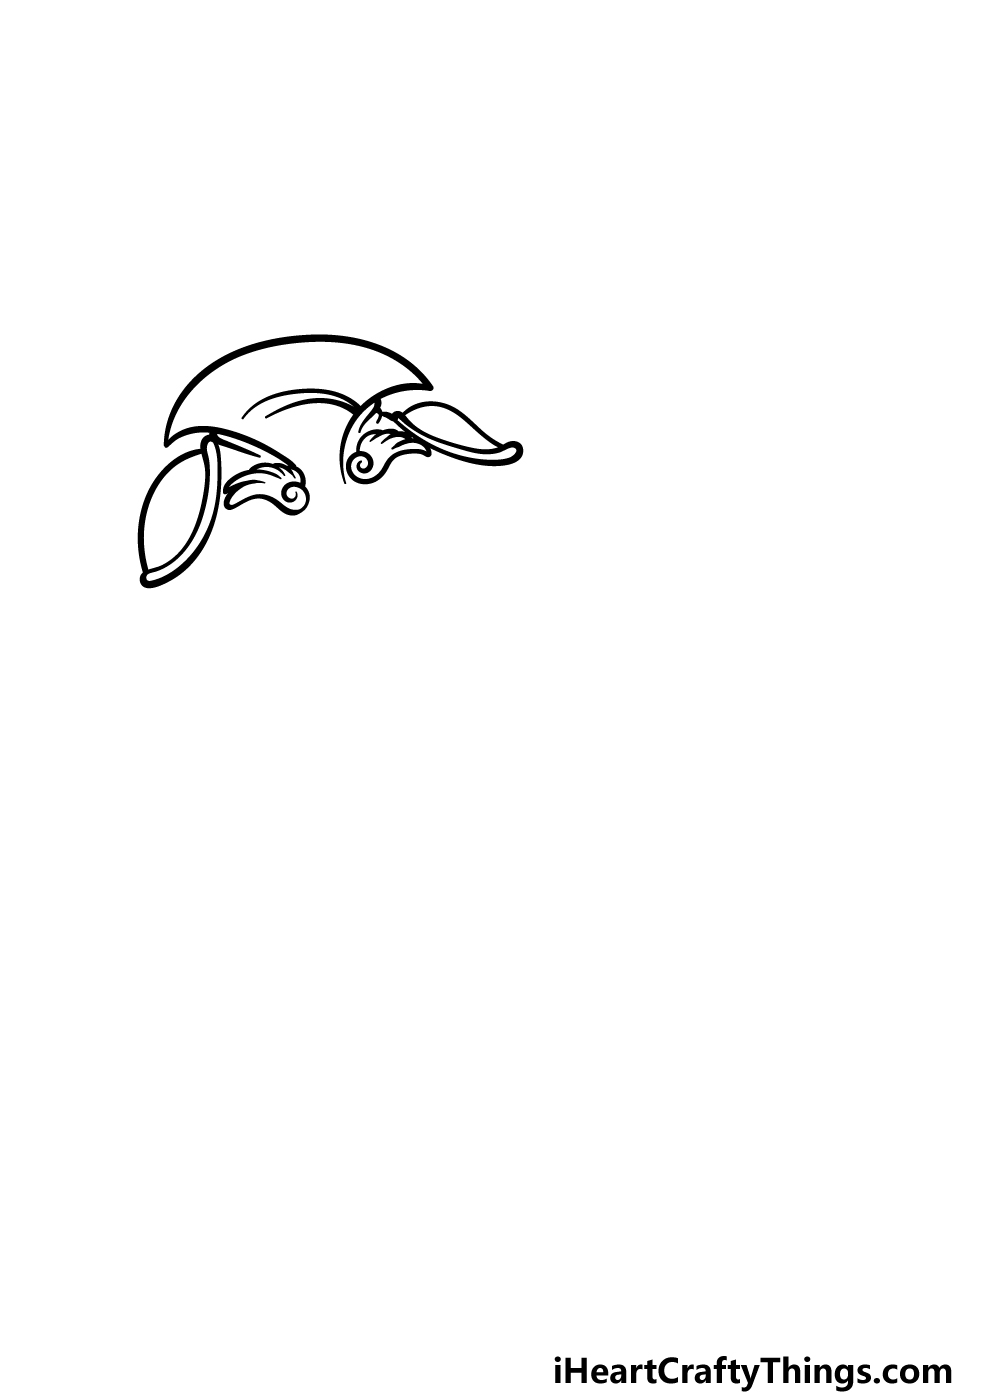
To continue this cape drawing, we will be drawing the other shoulder pad as well as the clasps at the front of the cape.
The other shoulder pad will go on the right, and to show perspective it will seem a bit smaller than the previous one did.
Then, we will be drawing the clasps. These look rather fancy with a small swirl at their inner sides and then curved lines that look like wings on the outer ones.
That’s all there is to it for now, so when you’re ready we can proceed to step 3 of the guide.
Step 3 – Draw the left-hand side of the cape
Now that you have the collar and the clasps done, we shall start adding the material of the cape itself in this step of our guide on how to draw a cape.
Draw some curved lines for the left-hand side of the cape, and try to make it look a bit wavy to give it more flow.
Then, you can further make it look like flowing fabric by adding some slightly curved lines to the interior of the fabric. You’ll then be ready to draw the other side of the cape in the next few steps.
Step 4 – Next, draw the start of the other side of the cape
The left-hand side of this cape drawing was hanging down fairly straight in a fairly static manner, and in this step we will portray the right-hand side as flowing outward.
To start this, draw a curved and wavy line coming out at a horizontal angle from the top of the cape.
Then, draw some more curved lines coming up from near the base of the left-hand side of the cape. This middle section will have a few squared sections, as shown in the reference image.
There will be a blank section left in the cape, but we will fill that in along with any final details in the next step of the guide!
Step 5 – Add the final details to your cape drawing
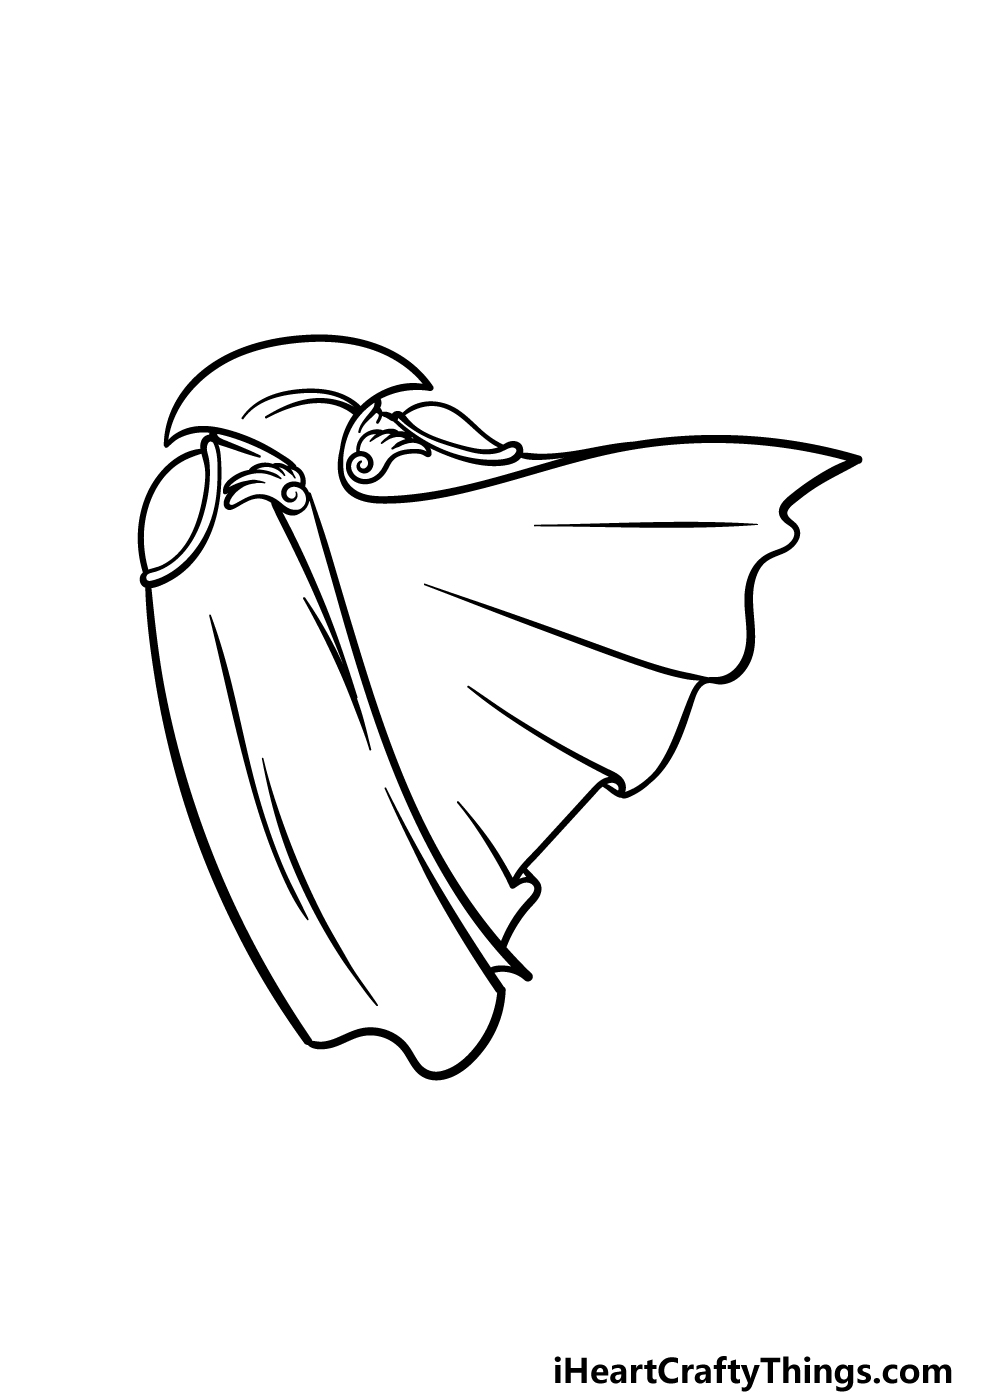
Now you’re ready to finish off the drawing in this fifth step of our guide on how to draw a cape. This step will see you adding the rest of the cape along with any final details.
Using some more curved lines, you can add the final section of the cape to connect the two sides of the cape completely.
Once these are drawn, you can then add any final details or ideas that you would like!
There are loads of cool ideas you could go for, and one of these ideas would be to draw someone wearing the cape.
What kind of person do you think this cape would suit? You could also draw a background or some more fancy garments, so how will you finish it off?
Step 6 – Finish off your cape drawing with color
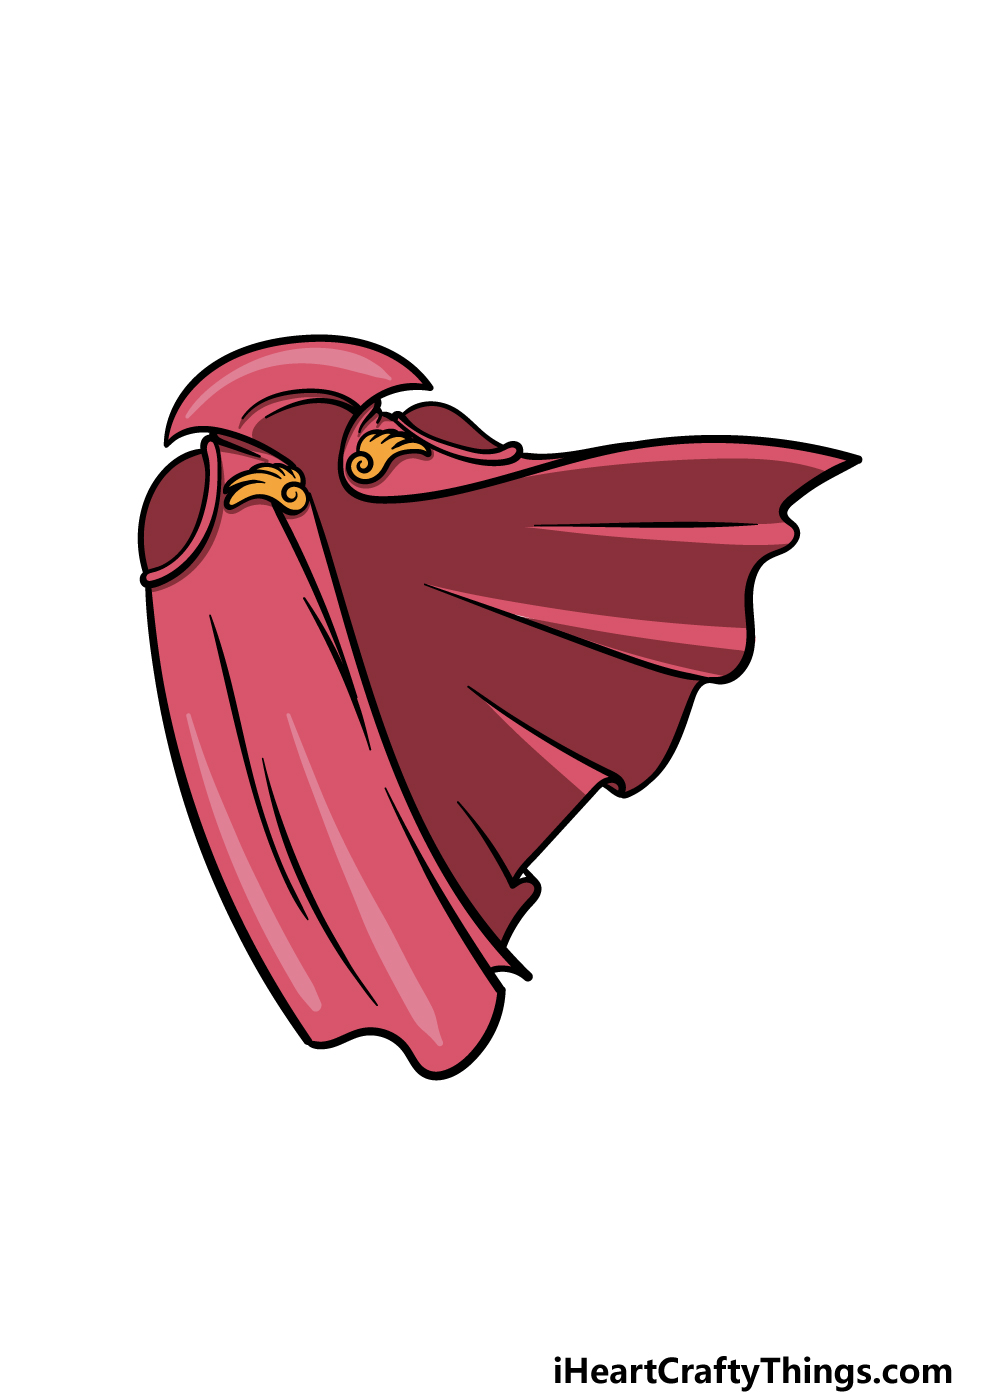
Now you’ve arrived at the final step of this cape drawing! This final step will be all about finishing off with some amazing colors.
In our reference image, we went with some lovely rich shades to finish it off. We used darker shades for the inside of the cape and then lighter ones for the outer edges and the collar.
Then, we added a bit of color contrast by coloring the clasps in with gold color.
These are the colors that we chose, but while you could go for these colors as well you should also feel free to use any other colors you would prefer!
Then, it’s only a matter of choosing the art tools and mediums you think will best suit this image.
Will you go for some paint mediums like acrylics and watercolors or will you rather choose something like colored pencils and markers?
5 Tips To Make Your Cape Drawing Even Better!
Try on these tips we have for your cape sketch to make it look even better!
The drawing of a cape has a few ornate details on it, and you could make these even more detailed or remove them. It all depends on the type of cape you wish to create!
You might want something even flashier or you may like something that draws as little attention as possible. Which approach would you like to take?
Another simple way that you can change this cape to your liking would be with the colors you choose. We used reds for the cape, but there are so many other colors you could go for.
Once again, it would depend on what you think this cape would best be used for. What are some colors you could use to make this cape more personalized?
Taking the previous tip even further, you can also make this cape drawing even more unique by changing the look of the material it’s made of.
Capes can be made of many different materials, so you have many options to choose from. Perhaps it could be made of leather or perhaps a smoother, silkier material.
Colors and small texture details would help you to portray your chosen fabric.
Next, we feel that this cape needs someone to wear it, so you could add a character to the image. Perhaps it could be a magician using this cape while performing a trick.
Or, maybe you would like to show it being worn by a sinister vampire. These are two fun ideas, but there are so many other interesting characters you could add to the image!
Finally, once you have all of the extra details and finishing touches you want for your cape sketch, you could add a background to finish it off.
This would be a fantastic way to show off where you think would be the perfect place to wear the cape you have designed. Where do you think would be a great backdrop to this artwork?
Your Cape Drawing is Complete!
You have successfully finished all 6 steps of this guide on how to draw a cape, and you have ended up with a truly fancy garment at the end of it!
We hope that this guide made designing this cool cape a fun and easy experience for you to take on. If you follow the steps we laid out then you’ll have the hang of it and no time.
Then, you can finish off by putting your own personal touches and details on the image!
When you’re ready for a new drawing challenge, you can check out our website for many more amazing drawing guides to enjoy! We upload new guides often, so make sure to keep checking in.
Please also make sure to share your finished cape drawing on our Facebook and Pinterest pages for us to admire!