In nature, there are many structures and objects that we see so often that they don’t even warrant a second look.
This is a pity, as there is a lot of beauty and detail to behold in even the most simple of objects!
A log would be an example of this, as even though we may take them for granted, there is actually a lot of detail to admire on them.
It can also make learning how to draw a log a bit of a challenging experience to get right, potentially.
This is the tutorial to have if you want to see how easy it can actually be, however!
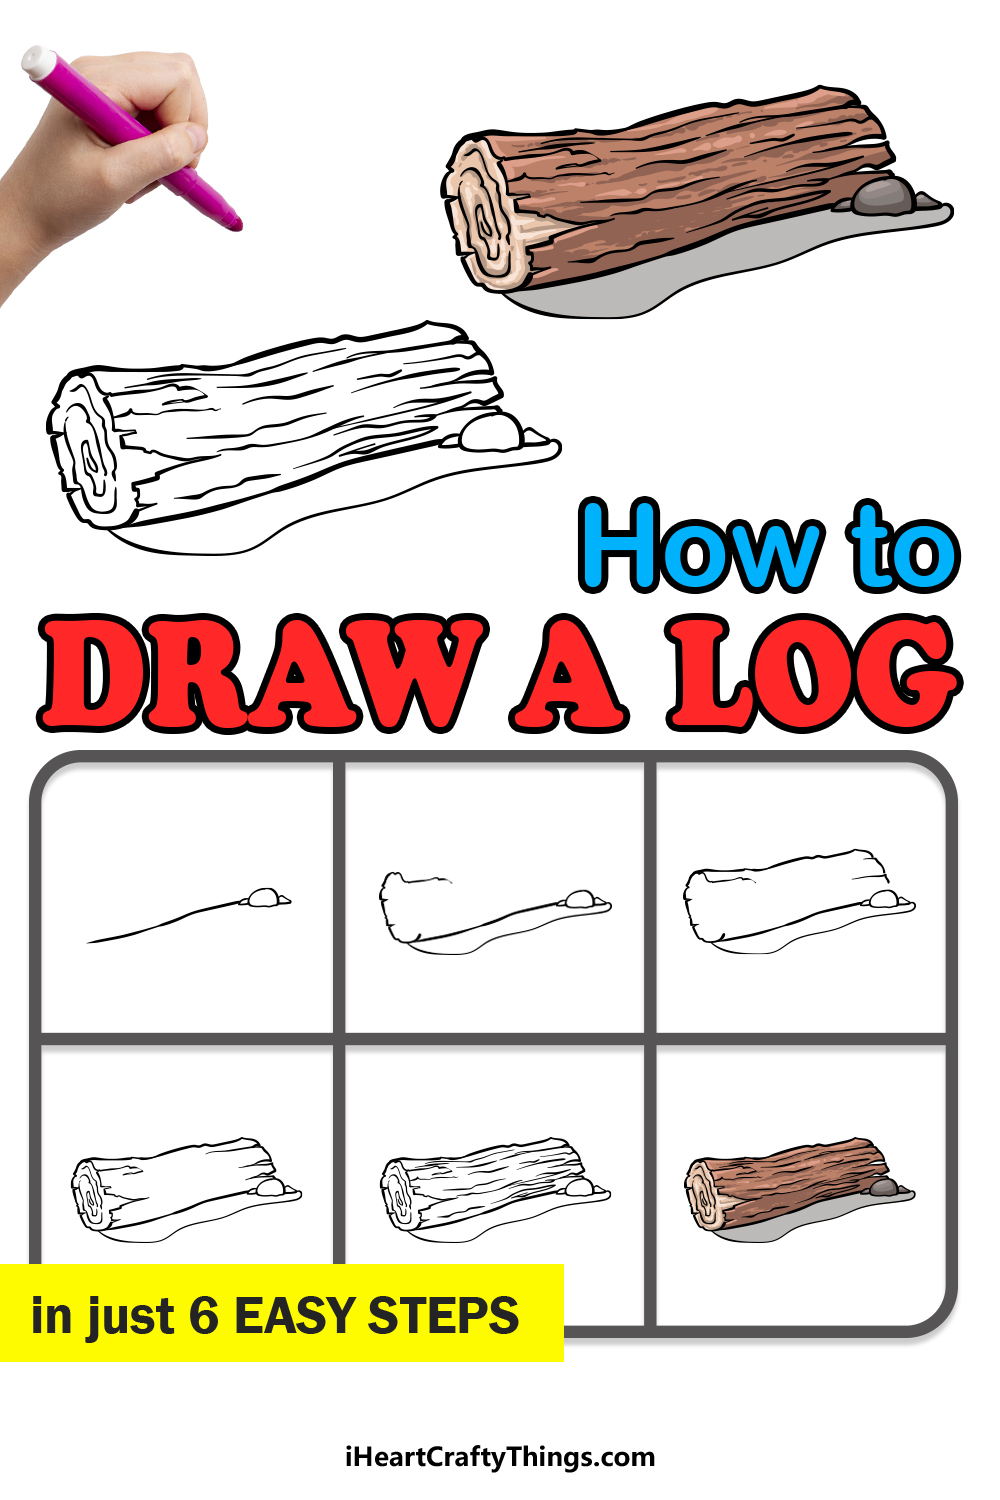
By the end of this step-by-step guide on how to draw a log in just 6 easy steps, you will know everything there is to know about drawing a great-looking log.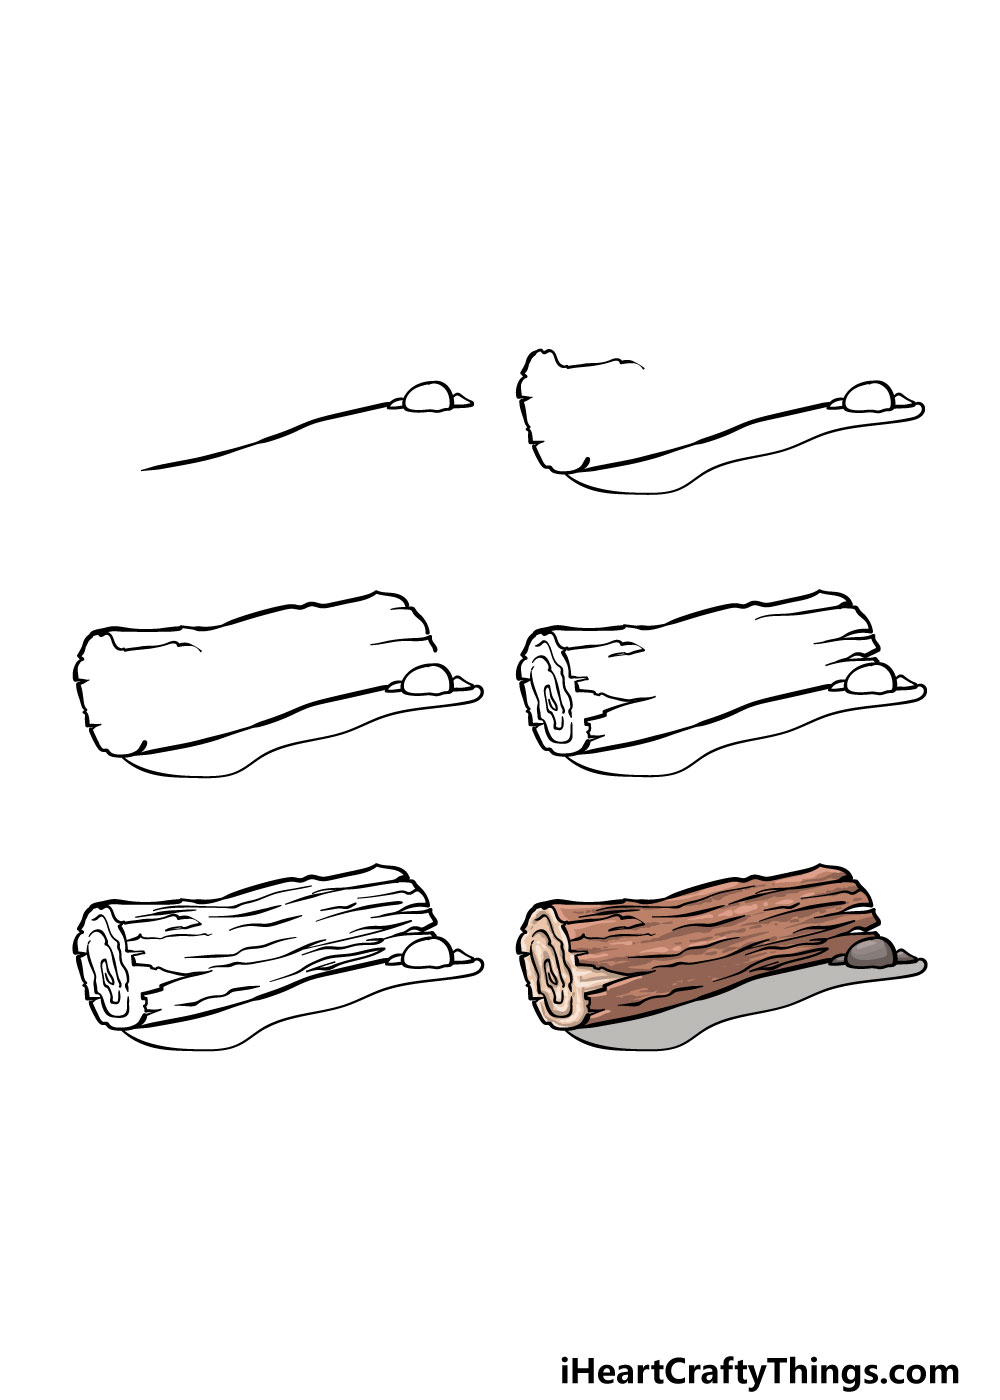
How to Draw A Log – Let’s Get Started!
Step 1

To get this guide on how to draw a log started, we will begin with the base of the log along with some smaller objects around it.
First, use a slightly curvy line for the base of the log. This is a line that you will probably want to draw freehand, as we aren’t looking to make it a perfectly straight line.
Once you have drawn this base, we can then add some small stones touching the base. These stones can be drawn as some simple rounded shapes near the right-hand edge.
Once this base and these rocks have been drawn, we can then move on to the second step of the guide!
Step 2 – Now, draw the end of the log and the shadow it’s casting
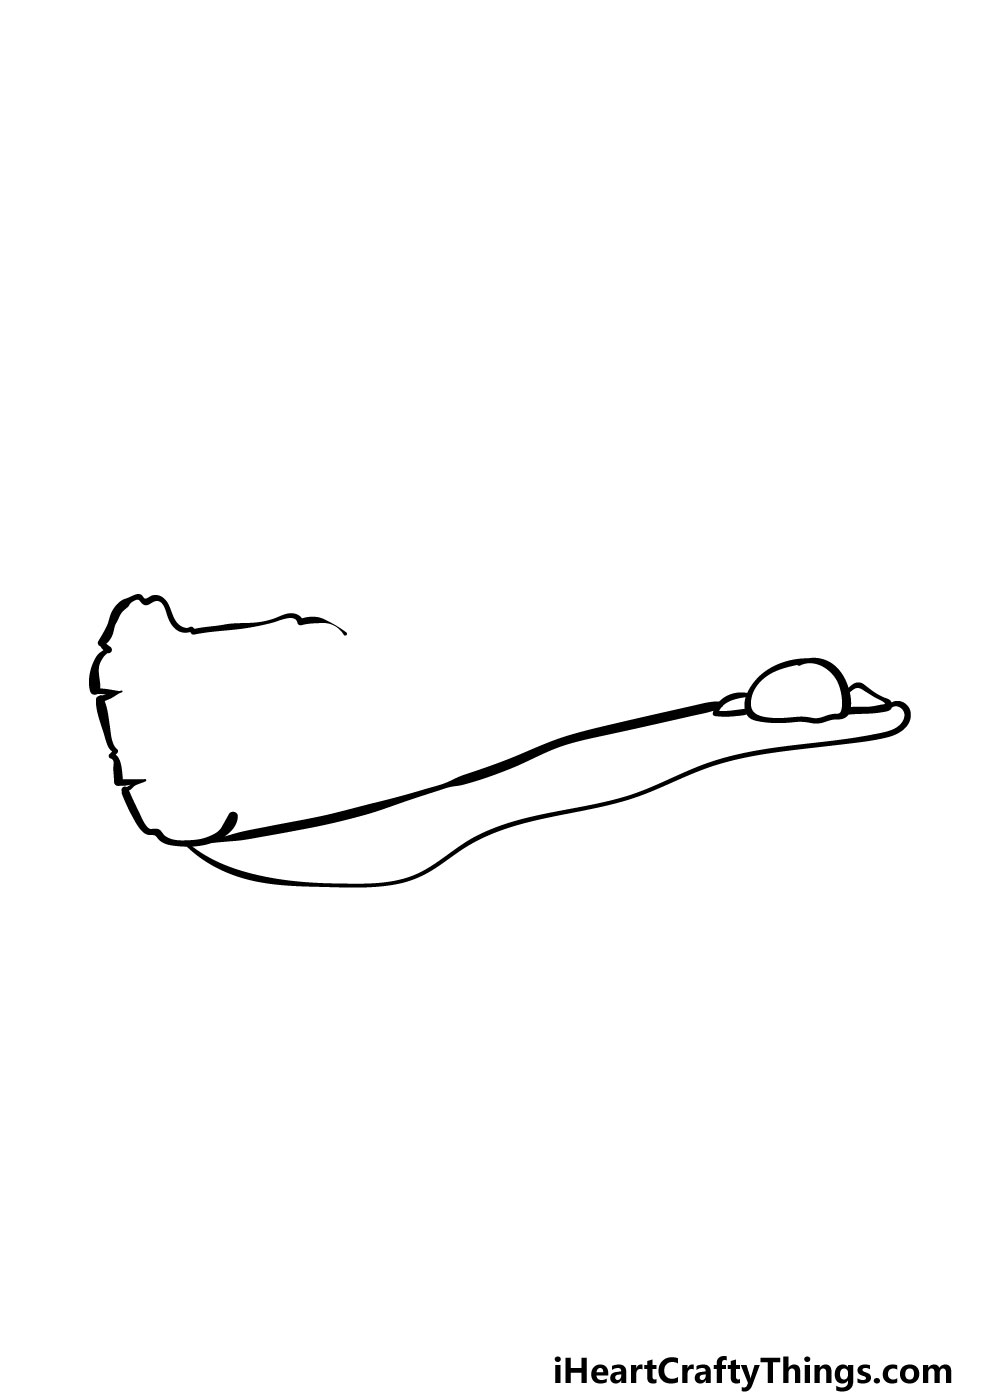
With this second step of this log drawing, we will be adding the outline for the end of the log, as well as the shadow being cast by the log.
First, let’s focus on the flat edge of the log. This will be where the log was chopped down, and it will have a roughly oval shape to it.
You can draw the outline for the left-hand edge of this flat edge by using a jagged line. This jagged line will show that the bark is a bit rough after being cut.
This edge of the log will also extend to the right into the interior of the log. Once this edge of the log has been drawn, finish off by using a rounded line for a shadow being cast underneath the log.
Step 3 – Draw some more of the log outline
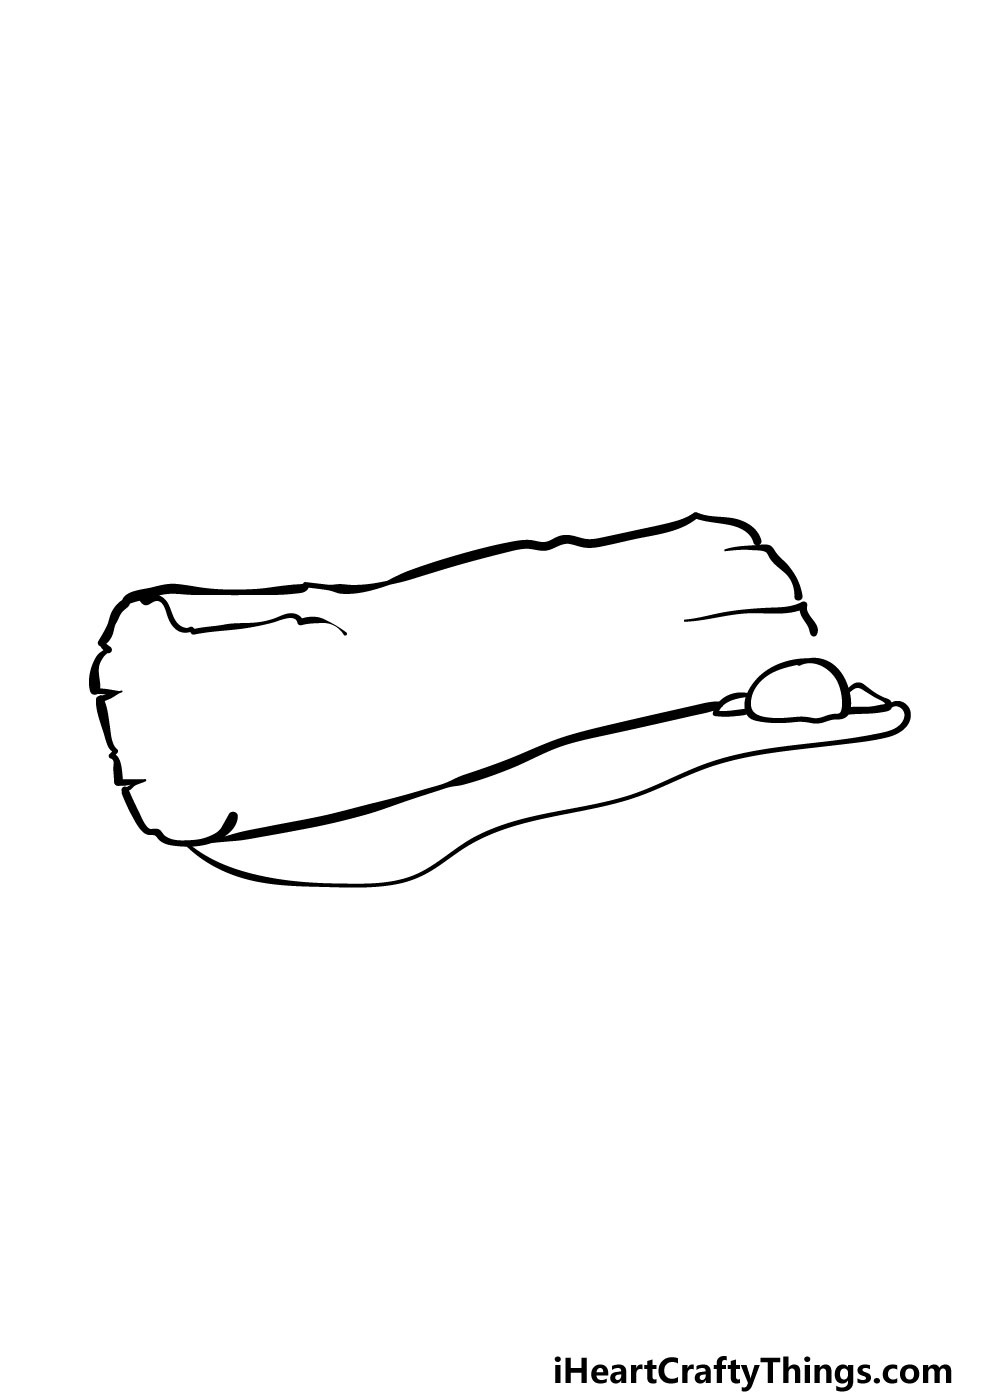
Now we can add some more of the outline in this step of our guide on how to draw a log.
This top edge will extend from just above the line that you drew extending into the interior of the log in the previous step.
The reference image will show you what we mean! This line for the top of the log will also be a bit curved, as we don’t want this one to be perfectly straight.
Then, finish off with jagged, curved line for the other edge of the log on the other side.
Step 4 – Next, draw some details for the flat edge of the log
You have the general outline of this log drawing done, and in this one we will be working on the flat edge where it was cut down.
When you see a cut-down tree, you will usually see some rings in the interior of the log, and we will be adding those details to your flat edge as well.
To do this, draw a sightly bumpy spiral line extending into the flat edge. Once again, we don’t want this line to look too smooth, as that would make it look less natural.
Then, use another jagged line for the inner edge of this flat portion. You can also extend this outline sharply into the log, as this will again make the outer bark look rougher and more natural.
Add some more line details to the other side of the log, and then we can proceed to step 5!
Step 5 – Add the final details to your log drawing

This part of our guide on how to draw a log will see you adding the final details and touches to complete it before you color in your creation.
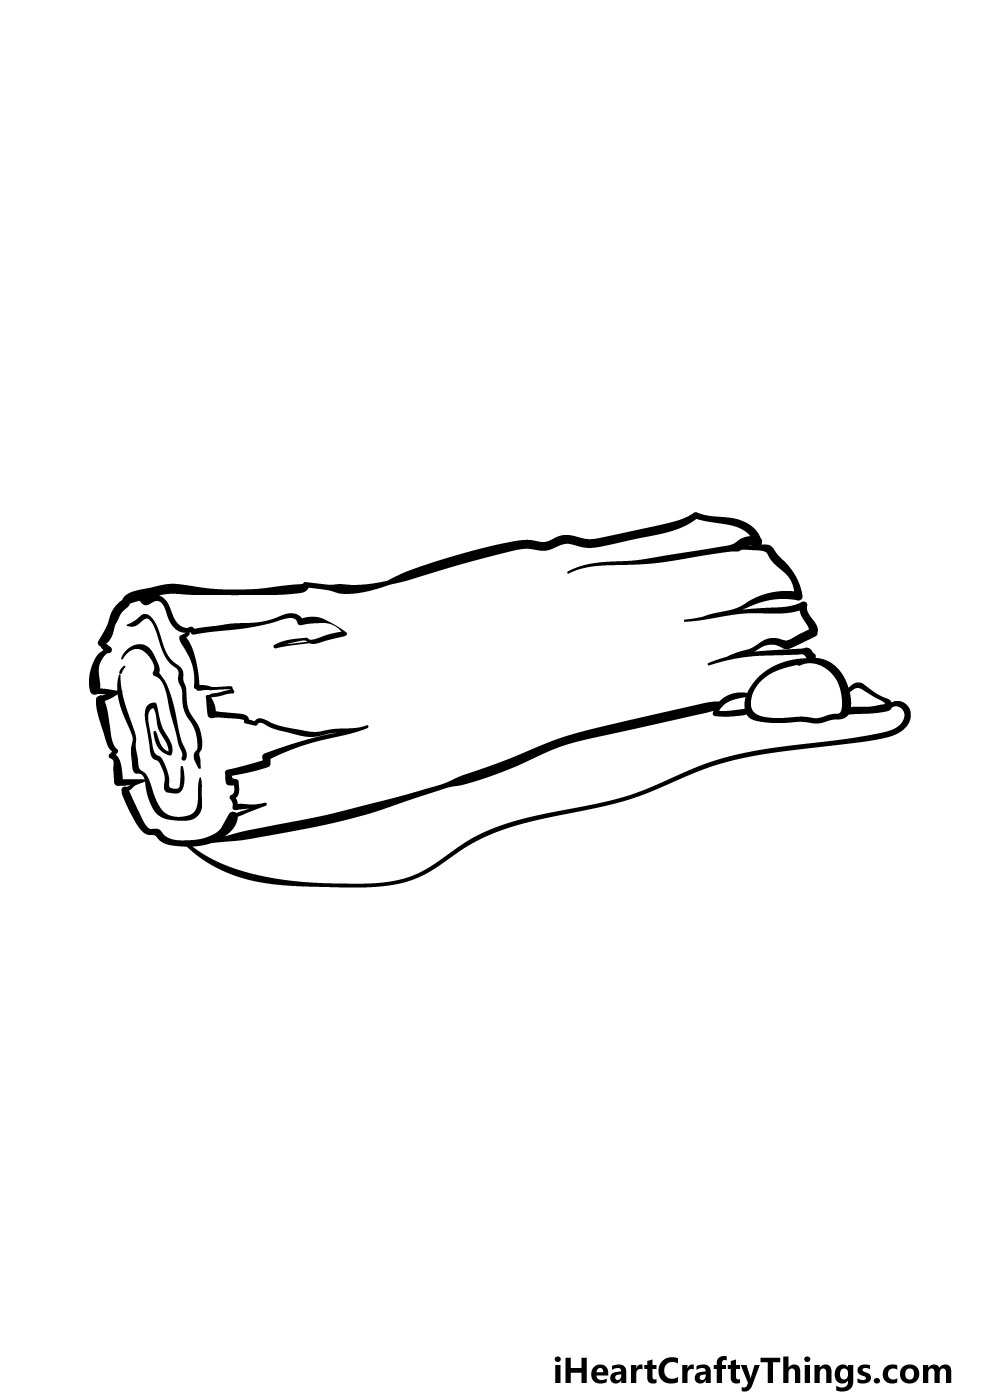
In this step, the main thing we will be focused on will be the texture details for the bark covering the log.
To do this, draw some slightly curvy lines running along the interior of the log. The reference image will show you how you can make these look natural.
When you have added these texture details, you can also add some extra additions of your own! Will you draw a background to create a scene for this log?
Step 6 – Finish off your log drawing with color
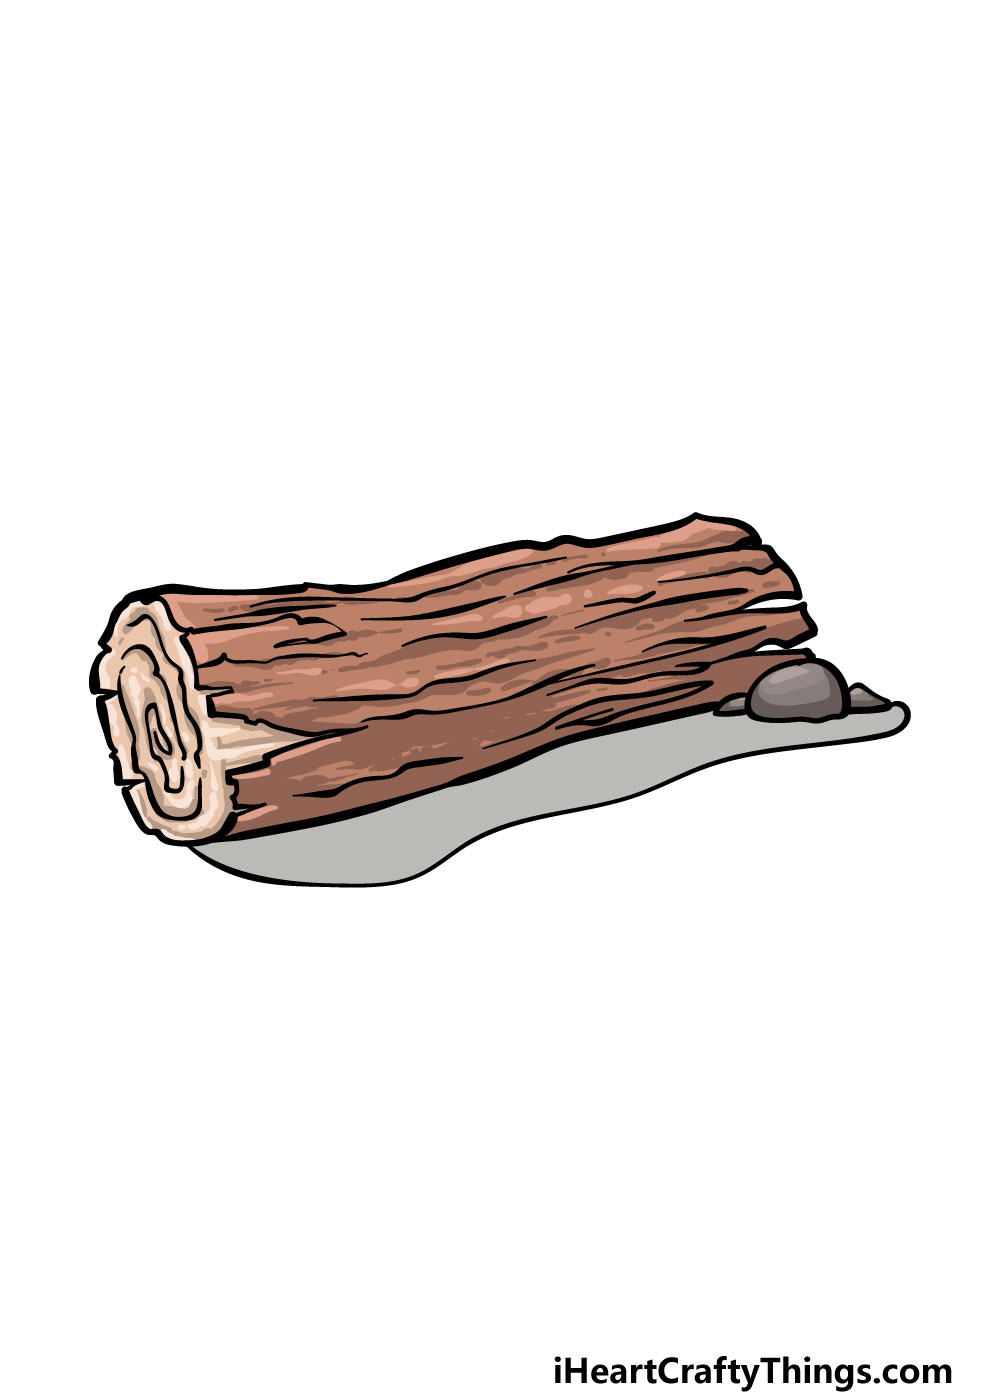
Now you’re ready to finish off this log drawing with some color! As you may imagine, we will be using a lot of brown shades for the log in our example image.
We used some darker shades for the outer bark of the log, and we incorporated some lighter shades for some texture.
Then, for the inner portion of the log seen on the flat edge we used some light browns.
These are the colors we chose, but you should feel free to use any colors and art mediums you would like when completing it!
4 More Ways To Make Your Log Drawing Unique
Make your log sketch even better with these 4 fun and creative ideas!
In our guide for creating this log drawing, we focused entirely on the log itself. Now that it is drawn, you could make it even more interesting by adding additional elements!
These could be as simple as some plants around it or just some more details of the dust on the ground it’s sitting on. The extra details you add could be as detailed or simplified as you like.
What are some details you could add to this log to make it even more unique?
Another way you could make this log even more unique would be by adding some extra details to the log itself. For example, some twigs with leaves poking off of them could be sprouting from the log.
Or, there could be some holes or bits of bark that have peeled off. These are just a few ways you could customize the log, but you may be surprised at how much you can add to and change about this object!
We mentioned adding a few extra details around the image, but you can also create an entire background to finish off this drawing of a log.
Once you have added things like plants or ground details, you could then add even bigger aspects like trees, a river or even a small house. There are no wrong ways that you could add to this image!
Adding a background would be a great way to make this artwork even more unique to you.
Lastly, you could add some little characters to the scene to really complete this log sketch. These could be something like a frog sitting on the log.
Or, if you’re feeling very creative, you could add some human characters to the scene. It’s completely up to you, and once you know which characters you would like to add, you could then choose the style.
Whether this is a cartoon style or something more realistic, we know it will look amazing!
Your Log Drawing is Complete!
You have completed this guide on how to draw a log, and you have a really great drawing to show for it!
Drawing something like this can actually be quite tricky, so we hope that this guide showed you everything you needed to achieve the details and form of this object.
Then, remember that you can keep the drawing going by adding more details and fun ideas of your own!
We mentioned drawing a background, so if you designed one then what kind of setting would you choose?
When you’d like to take on a new drawing, you can find more great guides on our website to enjoy. We have many more coming soon, so keep checking in to make sure you never miss out on the fun!
We also hope that when your log drawing is complete that you will share your creation on our Facebook and Pinterest pages for us to enjoy!