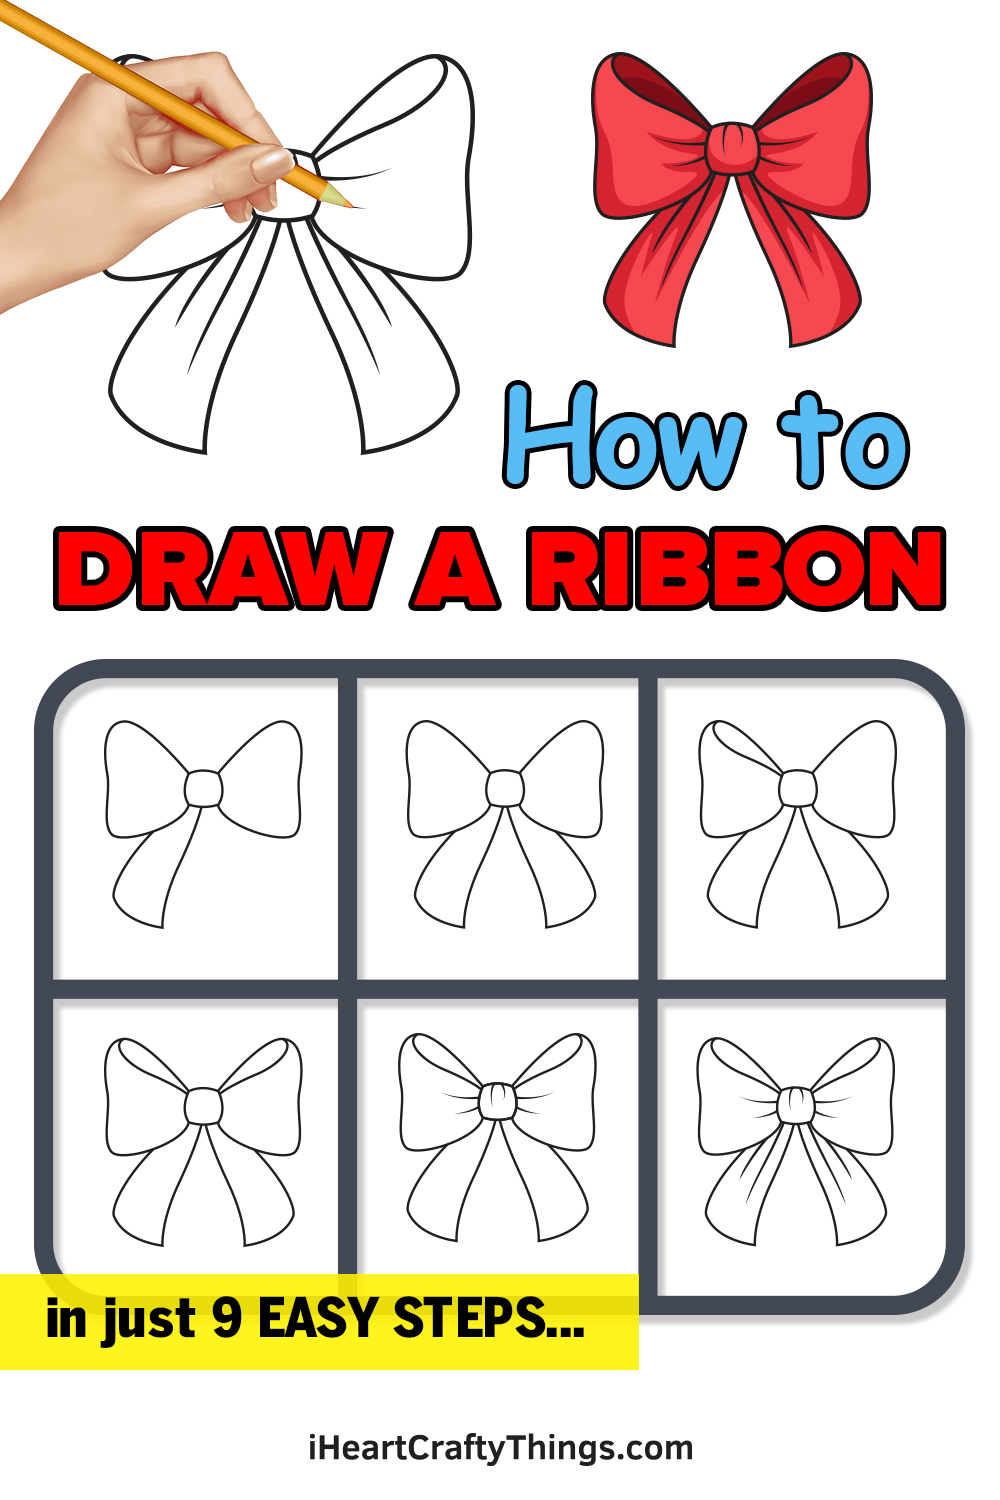
If you want to know how to draw a ribbon, then this tutorial for kids will make it so much easier! You will be able to create some gorgeous designs when you follow the steps I have for you.
Ribbons will always make a present or an award more special. Anything you put a ribbon on will automatically be fancier!
There are so many ways that you can display a ribbon, and drawing one can be a great way to plan your designs. It can be harder than you think to do that, though.
That’s why I have this guide for you, as together we will discover how to draw this stunning bow design. Whether you want to make a birthday or Christmas art piece or anything in between, this guide will get you started on the right foot!
Watch And See How To Make Your Ribbon Drawing
How to Draw a Ribbon – Let’s get started!
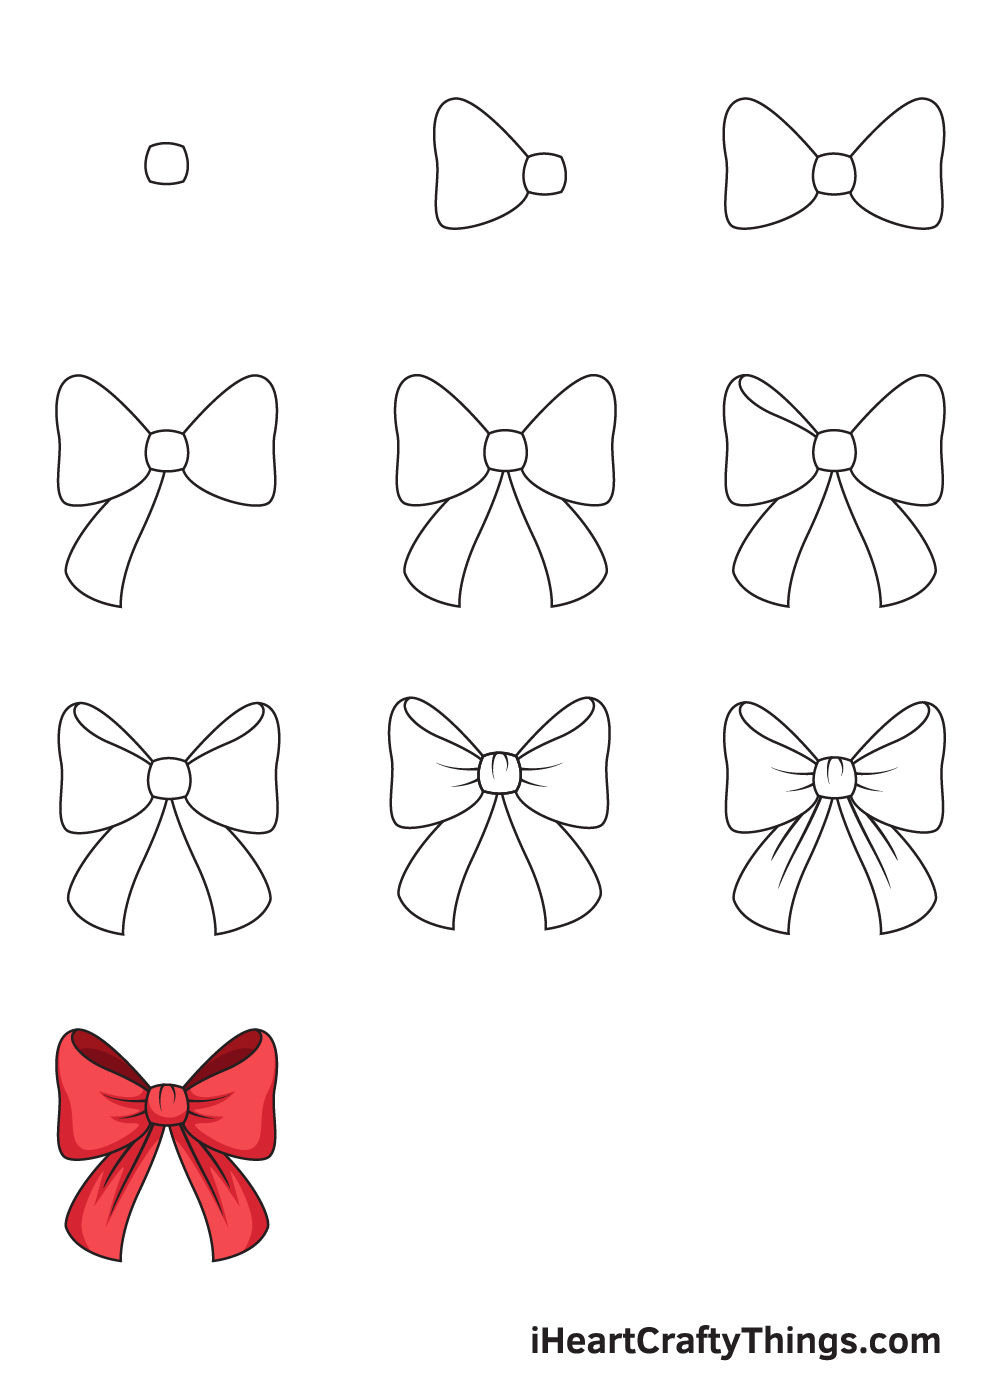
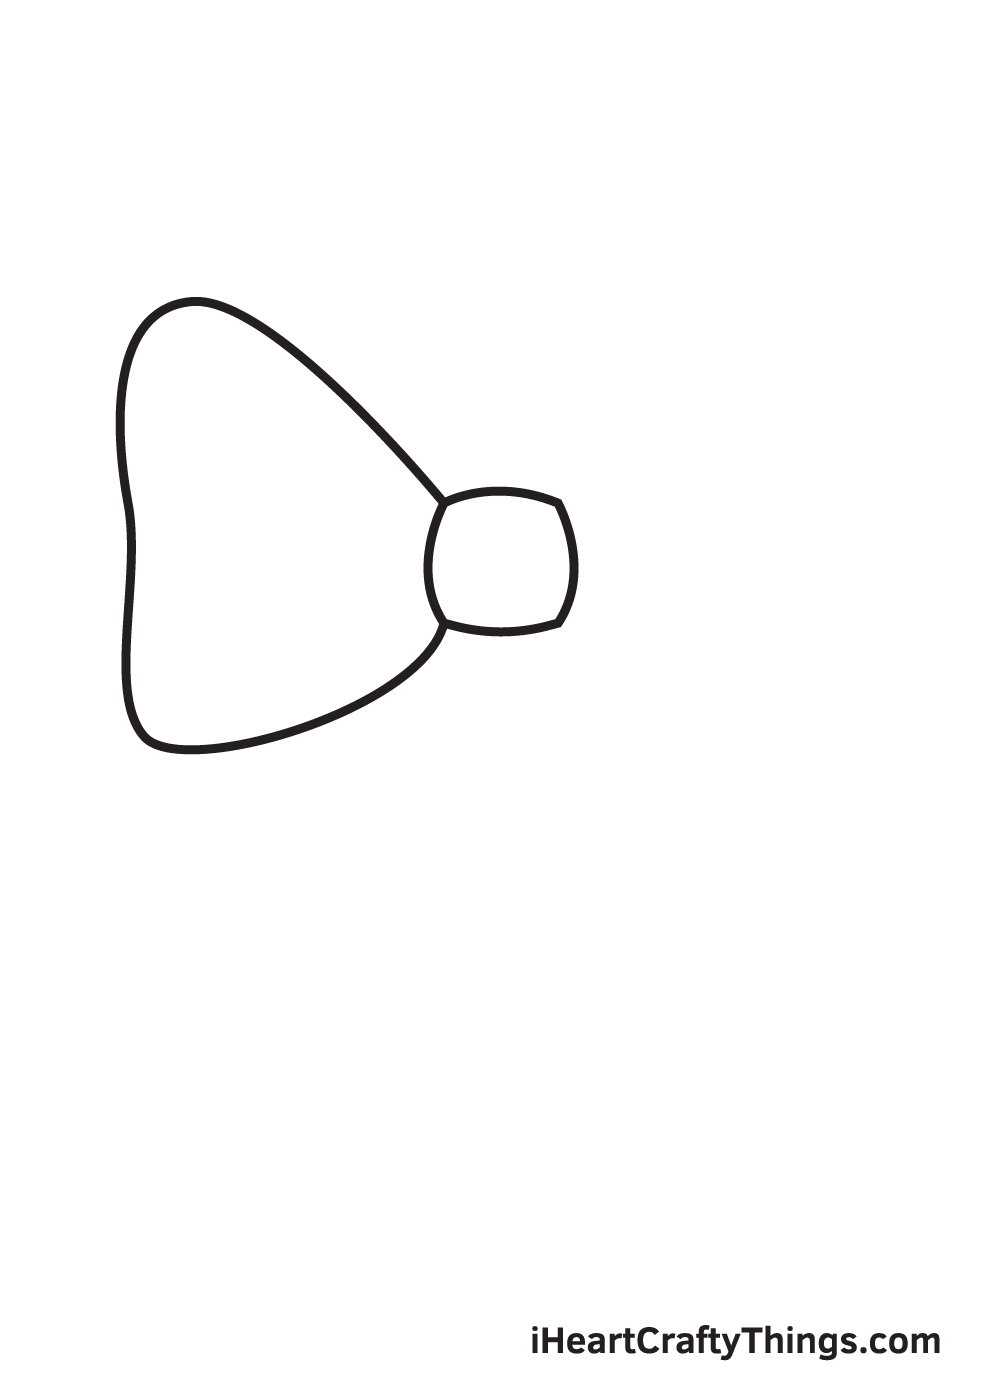
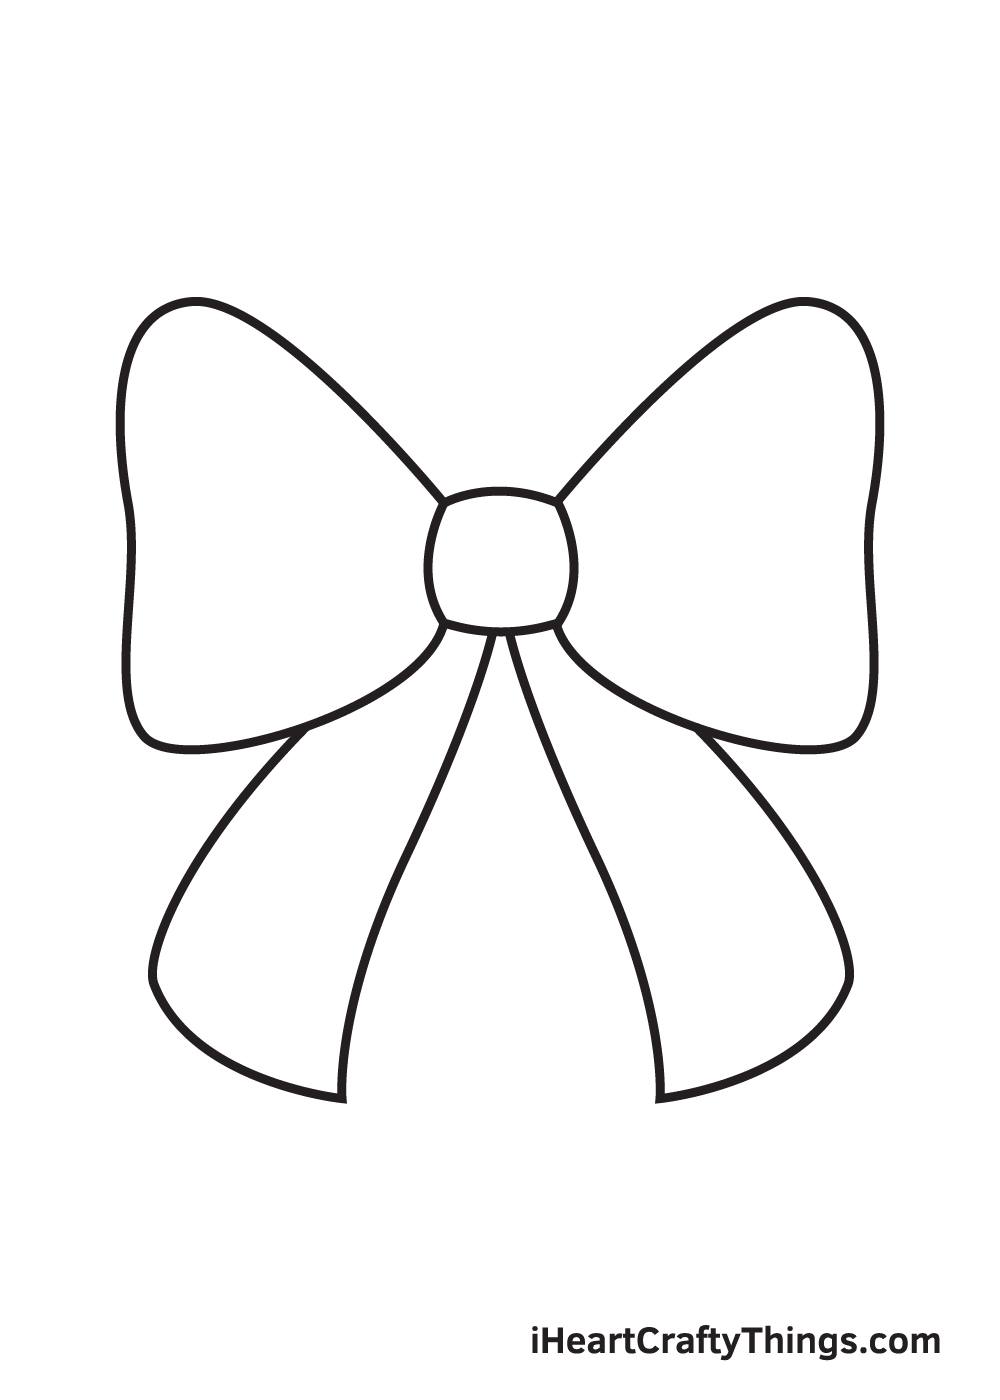
Step 1

Start drawing the ribbon by creating the middle part or the knotted part.
Create a square-ish-looking shape and this will form the knot.
Step 2 – Draw the Left Part of the Ribbon
It is time to create the left side of the ribbon.
Draw a triangle-like shape for the left part of the ribbon, like the one in the illustration.
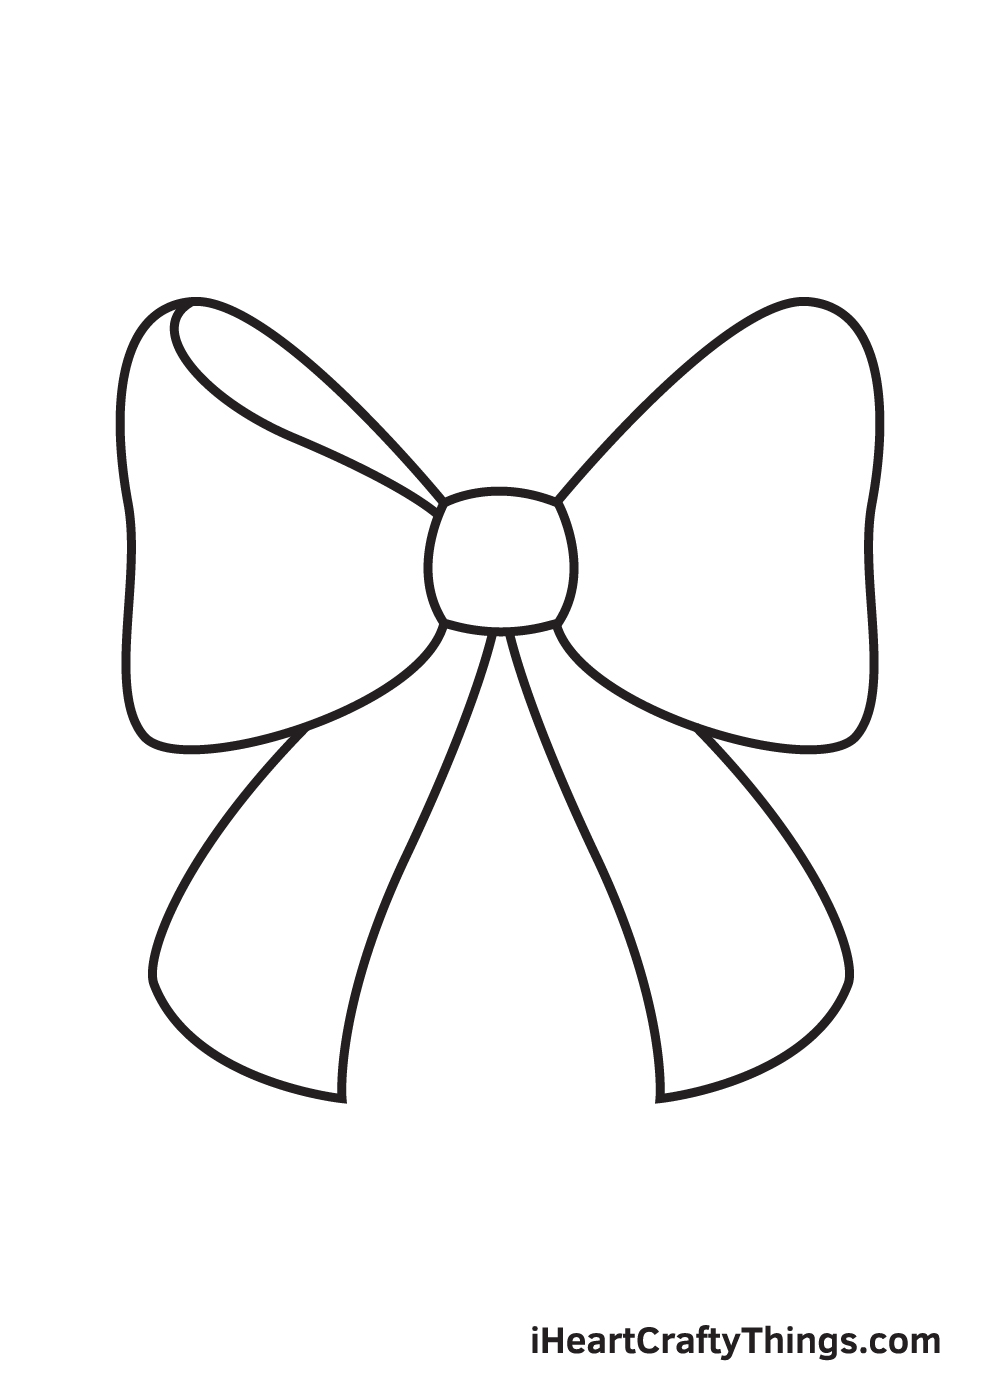
Step 3 – Draw the Right Side of the Ribbon
This is just like Step 2. But this time, you will draw the right part of the ribbon.
Again, draw a triangle-like shape.
Step 4 – Draw the Left Lace of the Ribbon

This step will form the end of the tie section of the ribbon.
This will look like another triangle-like shape just like the ones on Steps 2 and 3, except that those on Steps 2 and 3 are drawn horizontally while this new one will be drawn almost vertically.
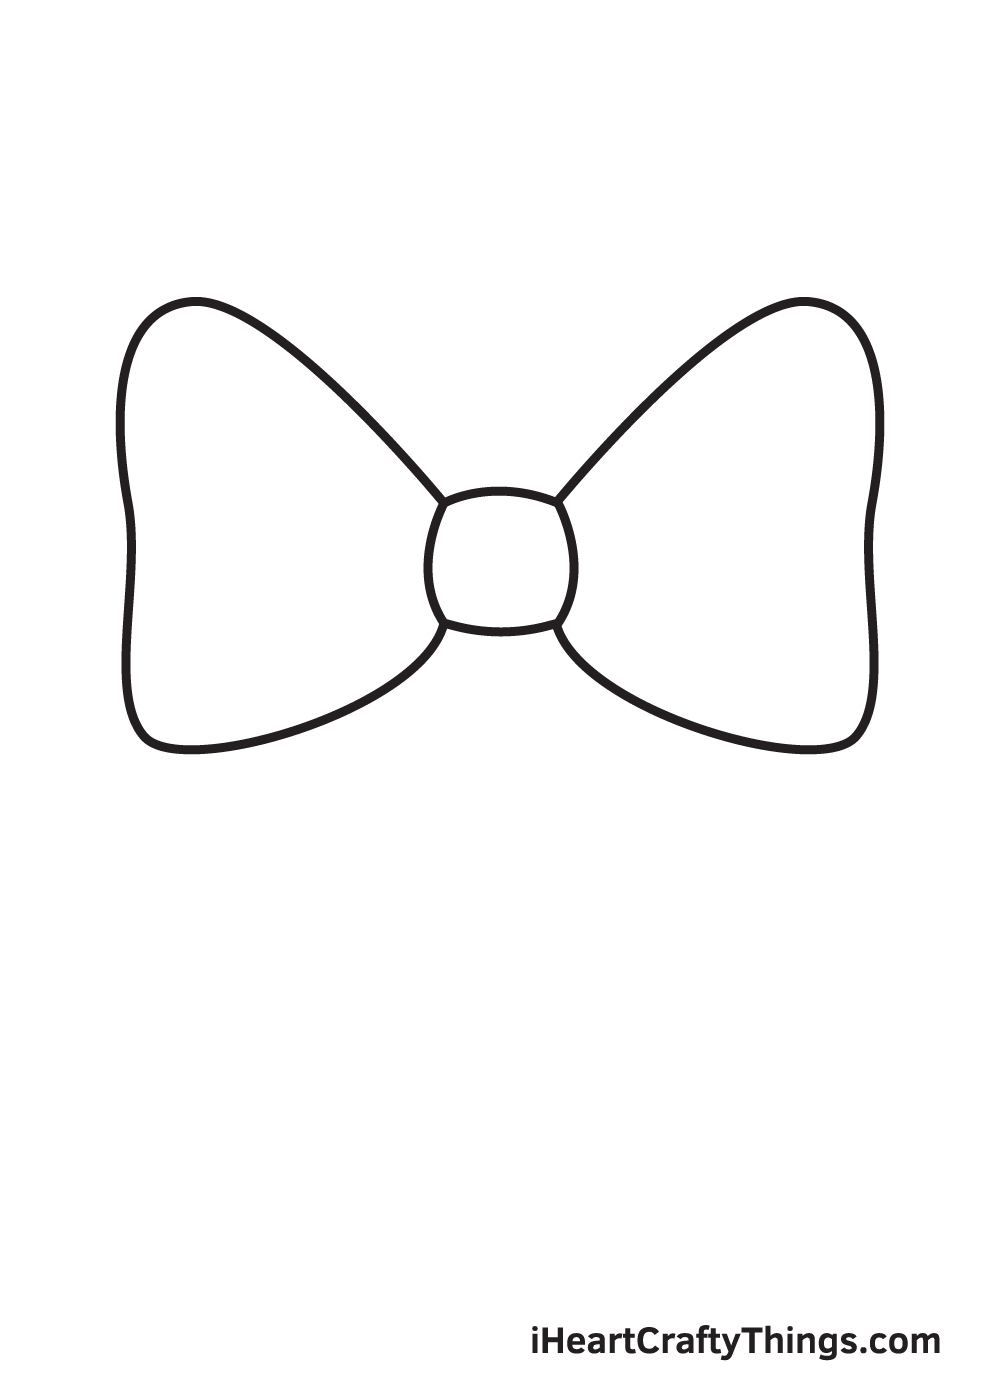
Step 5 – Complete the Form of the Ribbon
You drew the left side of the tie on Step 4. This time, you will do the same for the right side of the tie of the ribbon.
By now, you have created the main outline of the ribbon.
Step 6 – Draw the Dimensions on the Left Side
In this step, you will make your ribbon realistic by adding a fold to the top.
Draw a curved line connecting the top left of the section you drew on Step 2 to the top-left part of the section you drew on Step 1.
Step 7 – Draw the Dimensions on the Right Side
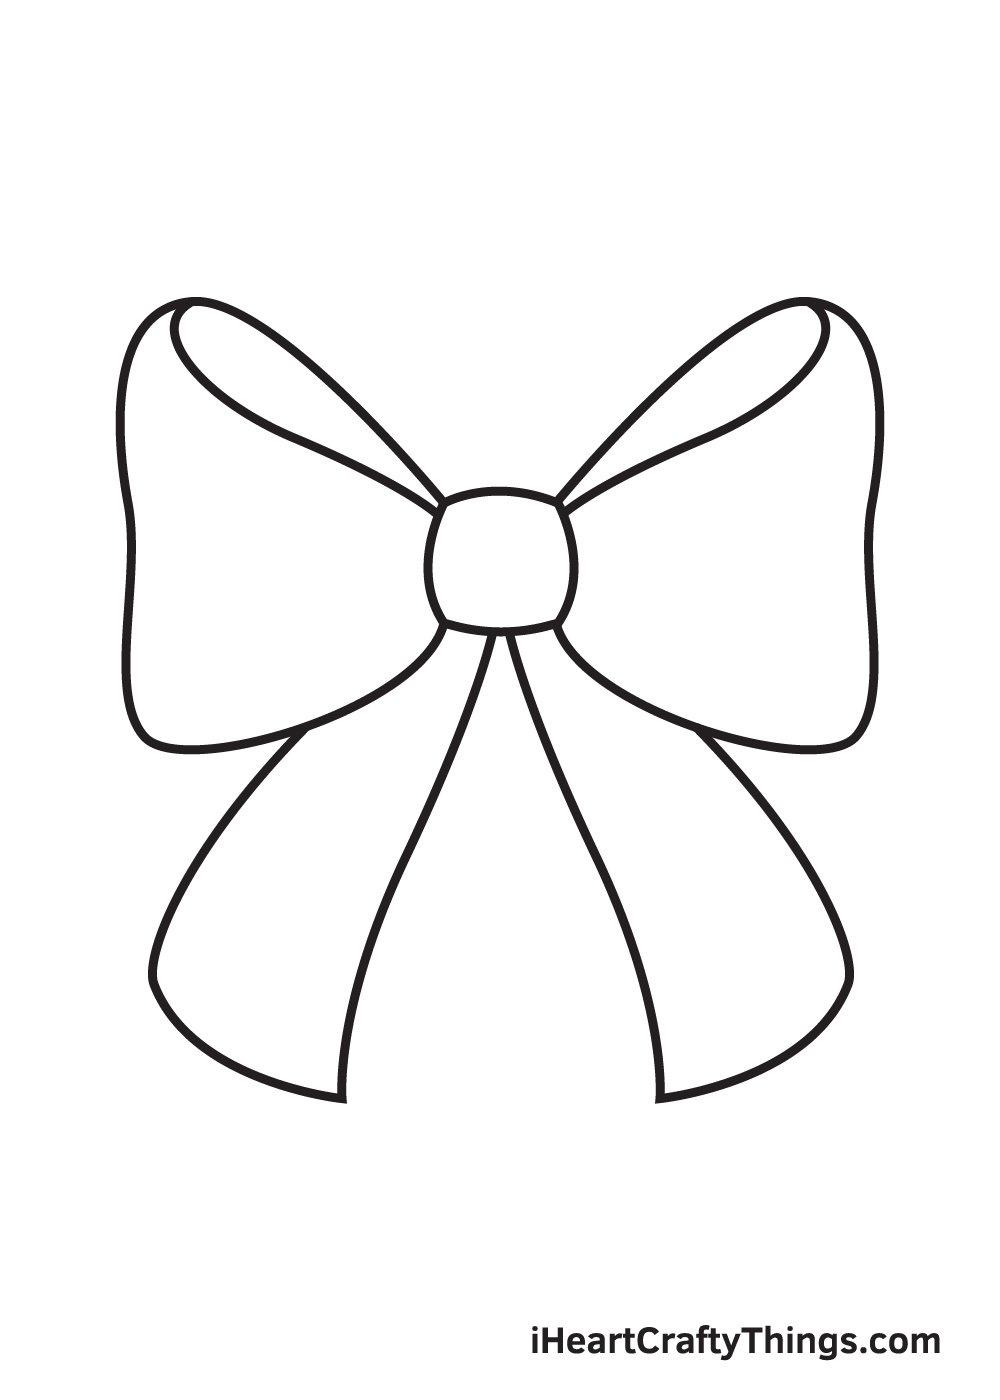
In this step, you will simply repeat what you did in Step 6.
But this time, you will do it for the right part (the one you drew on Step 3).
Step 8 – Add Some Patterns on the Bow of the Ribbon
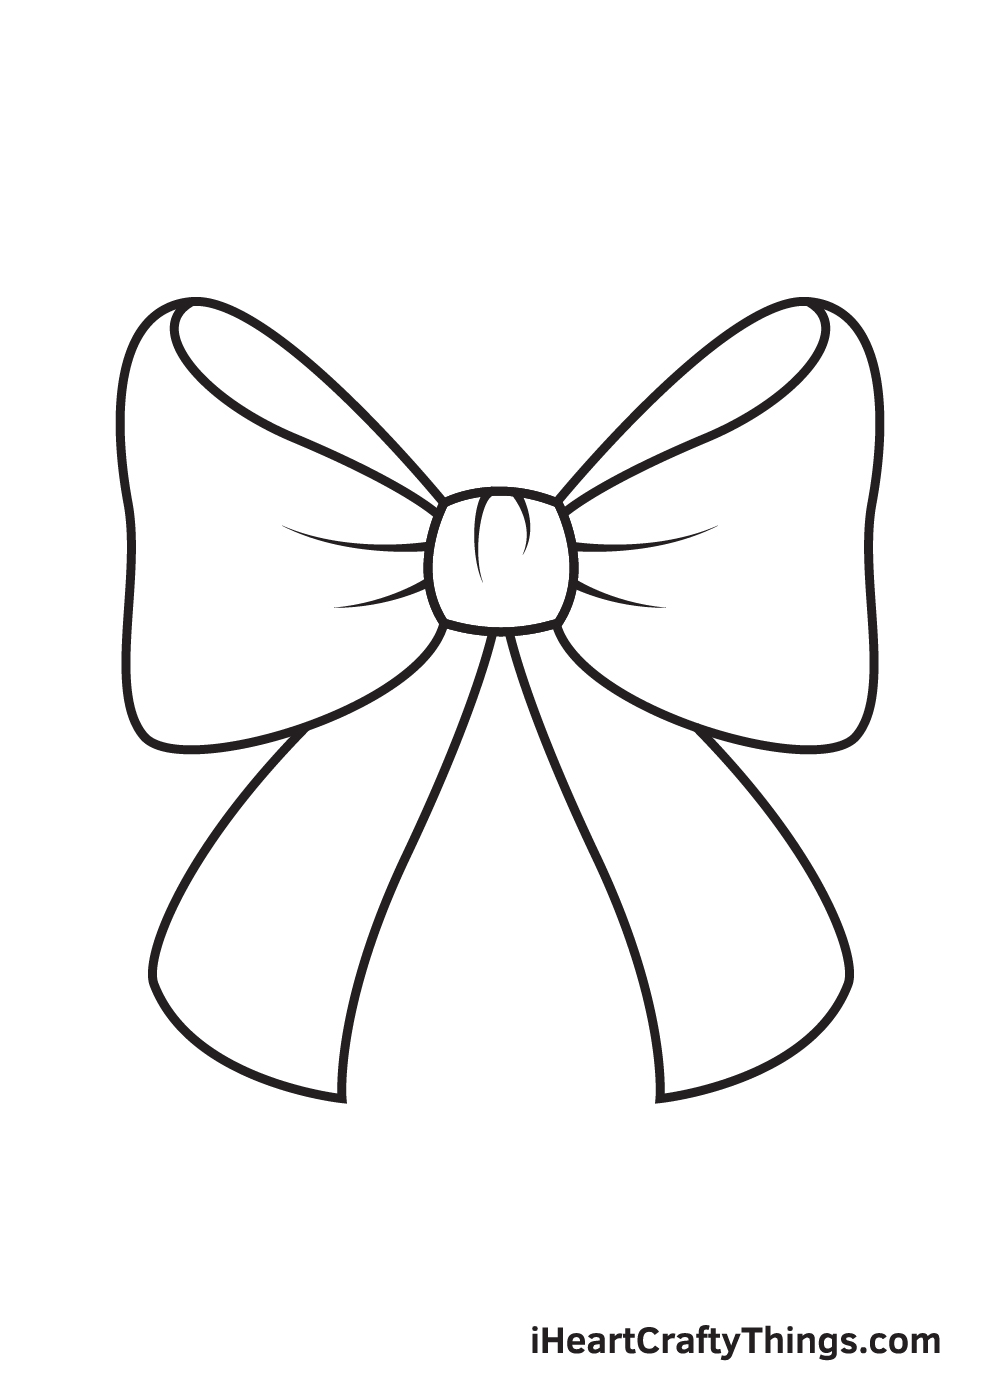
You will make the ribbon look more realistic by adding a “tight knot” effect.
You will draw short curved lines in two ways: horizontally on the outer edge of the square (Step 1) and vertically inside the same square.
Step 9 – Add Some Patterns on the Laces of the Ribbon
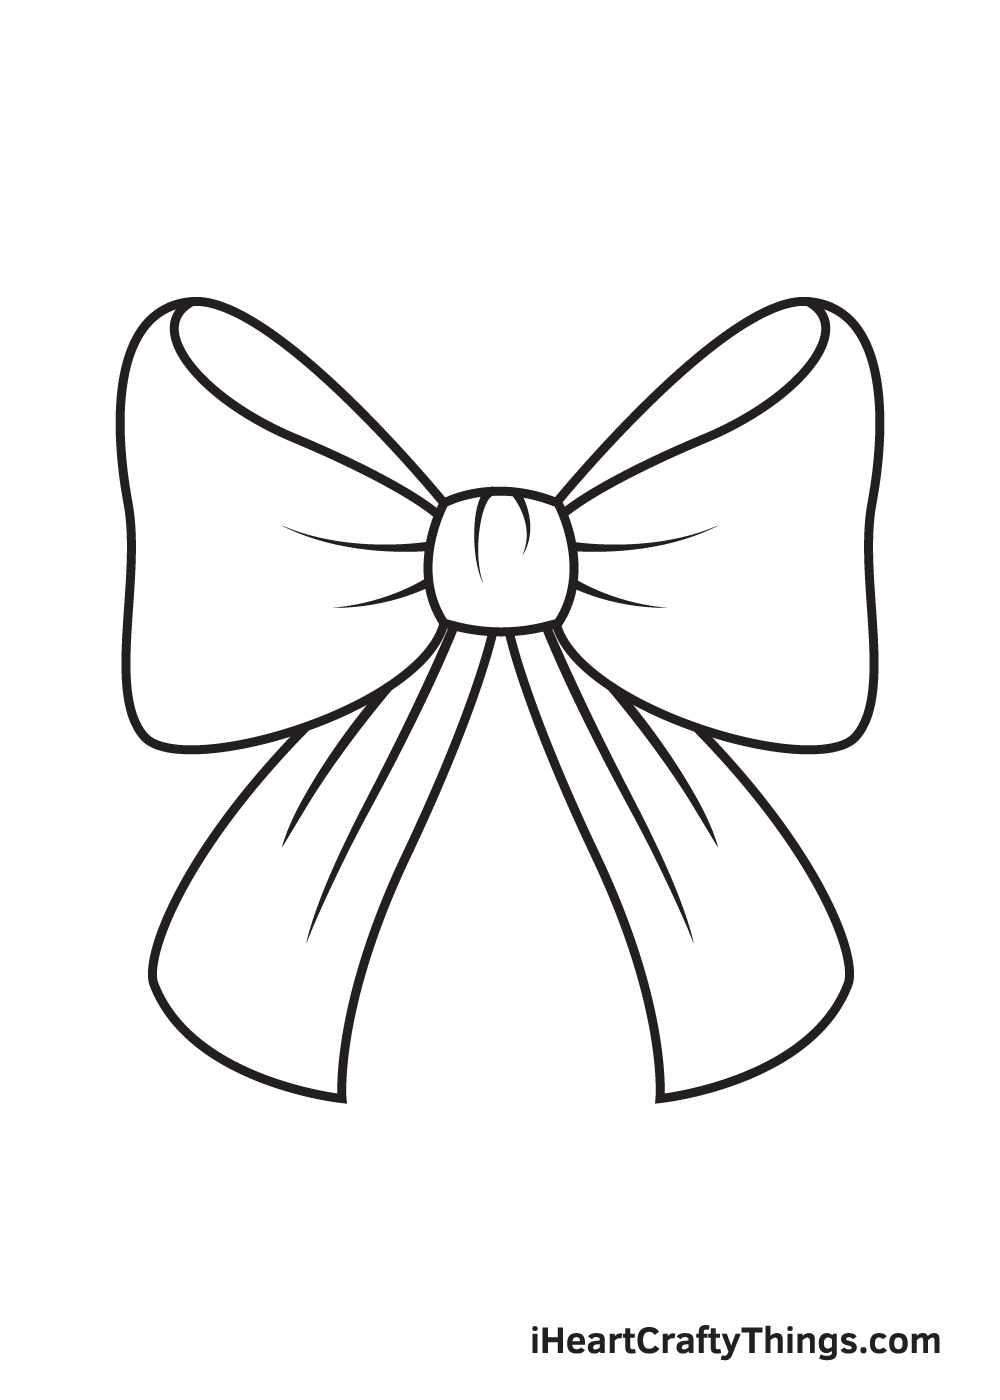
You will repeat what you did on Step 8.
But this time, you will add longer curved, diagonal lines inside the sections you drew on Steps 4 and 5, as seen in the illustration.
It’s time to make this ribbon look prettier than it currently looks by adding color! Add tints of red or pink on all sections of the ribbon.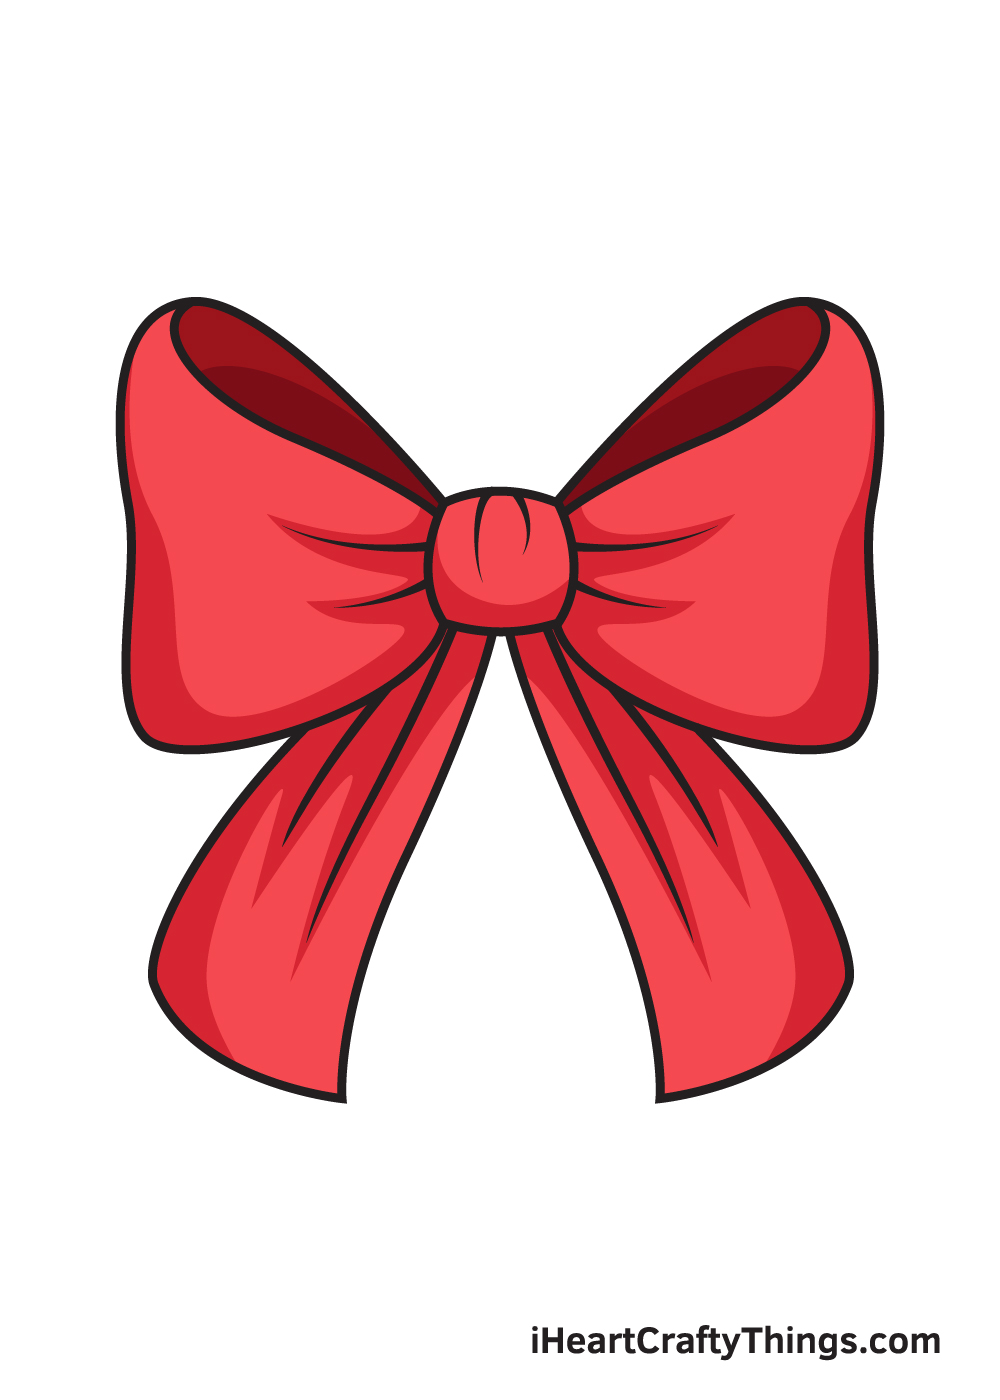
3 More tips to make your ribbon drawing easy!
Make this easy to draw ribbon even easier with these three helpful tips!
Drawing an intricate object is hard enough, but it’s even harder when dealing with fabric materials.
For this reason, you may want to use a physical piece of ribbon to help you out.
Having the material in front of you would help you to realistically create the shape and flow of this ribbon drawing. If you can find ribbon that is the same shape as our example, then that’s perfect!
Otherwise, you can buy a strip of ribbon and tie it into an approximate version of our example to help you out. Using the real thing alongside our example images will help make it so much easier.
Another way to make this ribbon drawing easy is to simplify some of the details. We added some creases in the fabric, and these details look great!
That being said, they are not completely necessary to making a great looking ribbon, and you can leave them out if you’re having a hard time.
That is one example of a change you could make, but there are many other small details you could change or remove to make it easier on yourself.
These changes may alter the design a bit, but it will still look amazing in its own way! Sometimes, making such a change can even make the design better than it was, so don’t be afraid to experiment.
Lastly, you can make things easier on yourself by using certain mediums and techniques for this ribbon sketch. Ribbon is made up of long, flowing material, and that should make you think of mediums that can create that flow.
The first choice would probably be paint. You have a few options here, and these could include watercolor paints and acrylic paints.
To create those flowing motions, you’ll need to keep the strokes going as long as possible, and try to move your wrist to match the flow of the fabric.
There are many other techniques and art tools you can use, so what will you use for this pretty picture?
Your Ribbon Drawing is Complete!
We hope you had an amazing time drawing a ribbon with this step-by-step drawing tutorial. Now that you can draw a ribbon, perhaps you can draw a girl with a ribbon at the top of her head or wearing a stylish blouse adorned with a ribbon next?
Remember, all of our drawing tutorials are 100% free for you to use as learning materials in your drawing activities.
We are regularly updating our “How to Draw” catalog, so don’t forget to keep checking back to continuously learn how to draw something new!
Drawing a ribbon successfully is a milestone, so you should feel proud of yourself for completing a masterpiece!
Take a photo of your artwork and share it on various social media platforms. And while you’re at it, we hope you take the time to like our Facebook page too!
We would love to see your realistic ribbon drawing!
Here Is A Cute Ribbon Drawing To Inspire You!
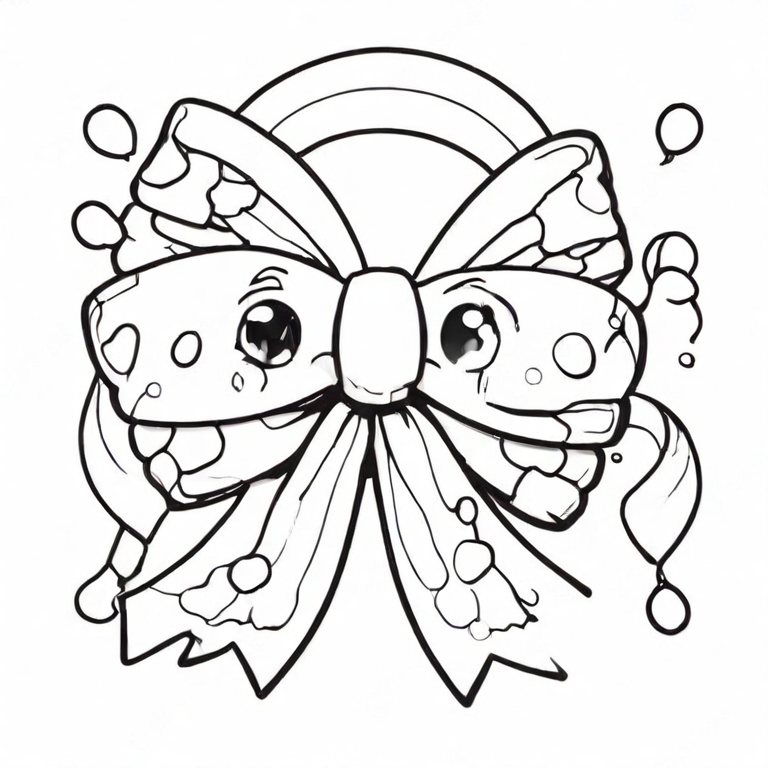
We’ve all seen ribbons in our lives, but never one like this! This cute ribbon drawing for kids was drawn by our artist Amanda to inspire your drawing.
She could have just drawn a regular ribbon and that would have been great, but she added a face to make it even more interesting.
There are so many details on the ribbon, even if you’re not looking at the face.
These details could be easily customized, and you could add some amazing colors to them as well. You could even add some more to the expression or change it up a bit.
One of the best ways to add to the drawing would be to draw a background.
That way, you could show where this ribbon is hanging, which would be a great way to make this picture even more stunning!