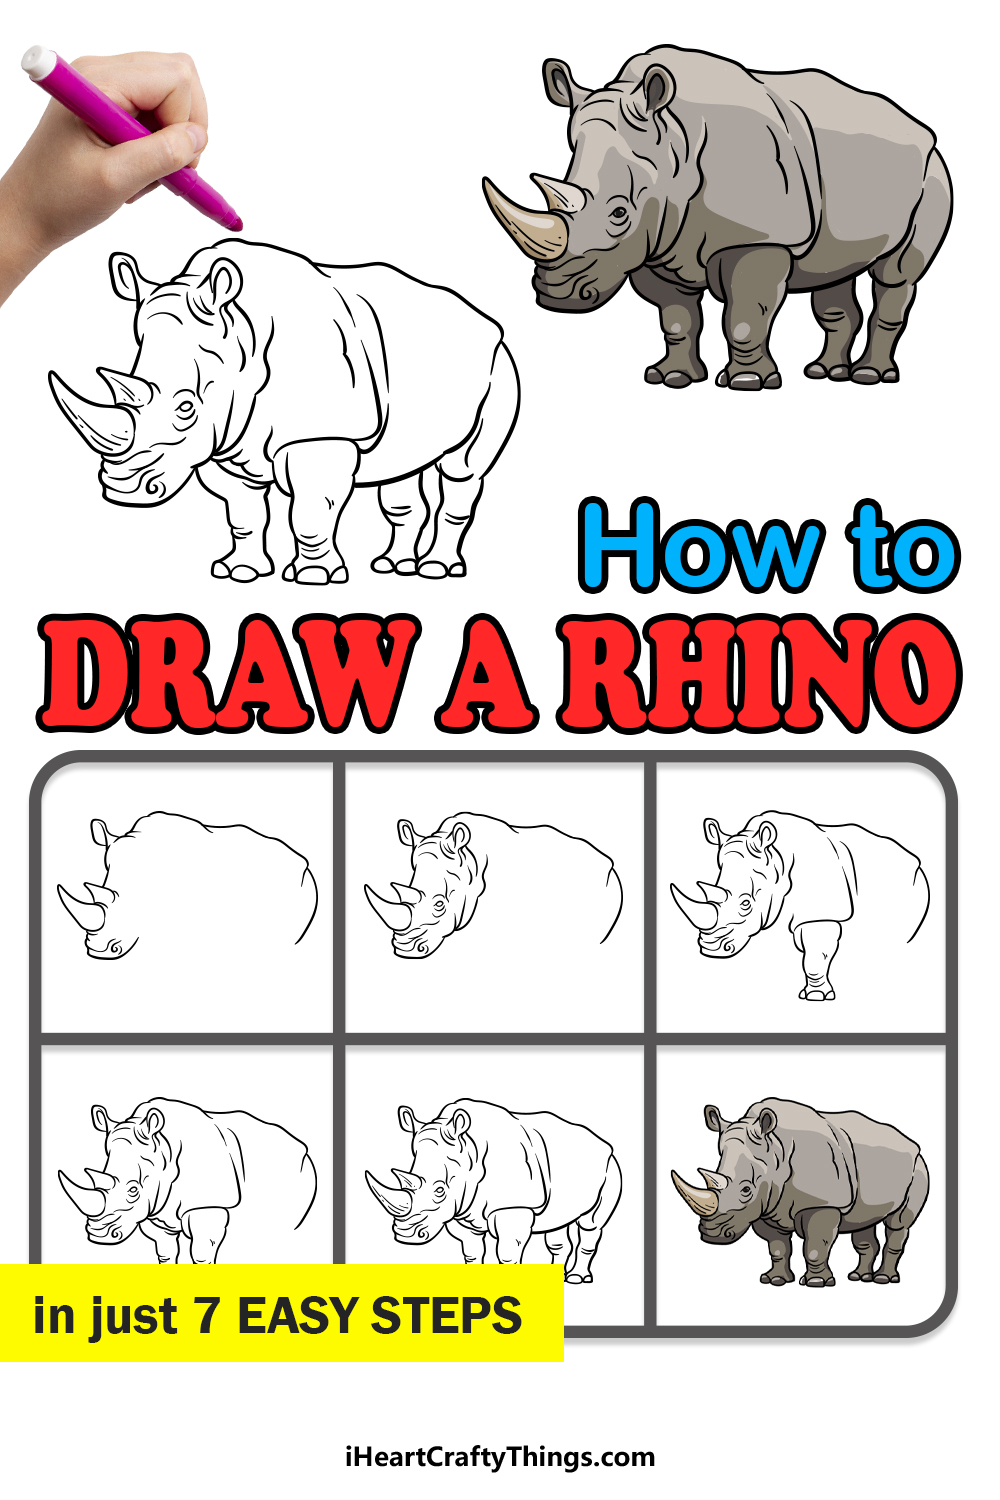
The rhino is one of the hardiest and strongest of the animal kingdom. Considered one of the “big five” in Africa, these mighty animals in their various forms certainly stand out with their strength and distinctive horns.
This distinctive look can also make it tricky for fans of this animal to learn how to draw a rhino.
If you have the right guide to follow, however, it can be made much easier!
This step-by-step guide on how to draw a rhino in just 7 easy steps will show you how easy and fun it can be to draw this incredible creature!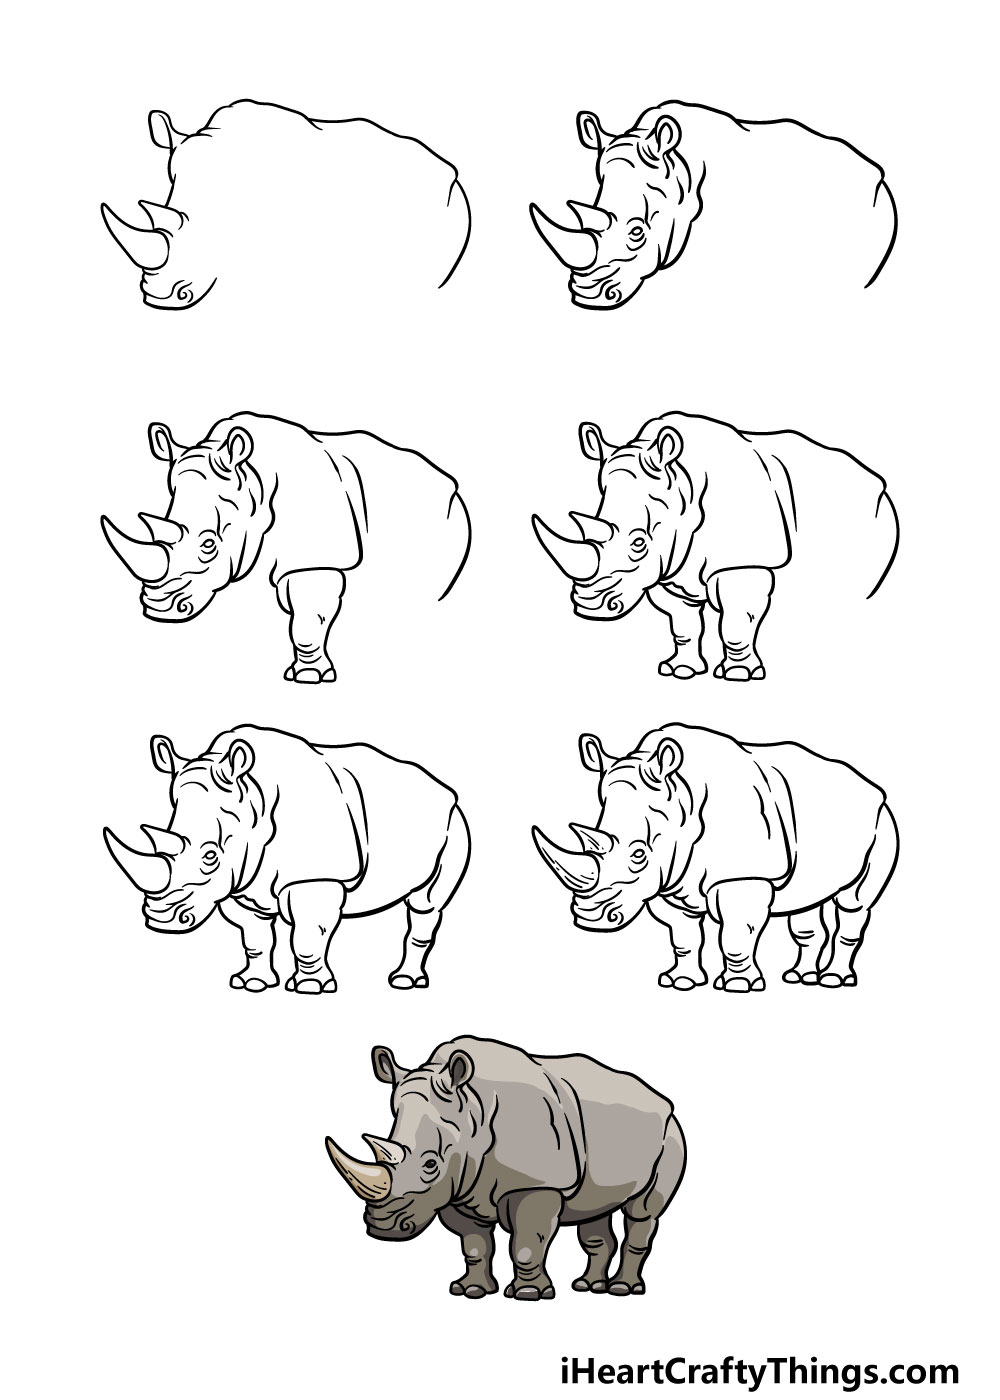
How to Draw A Rhino – Let’s get Started!
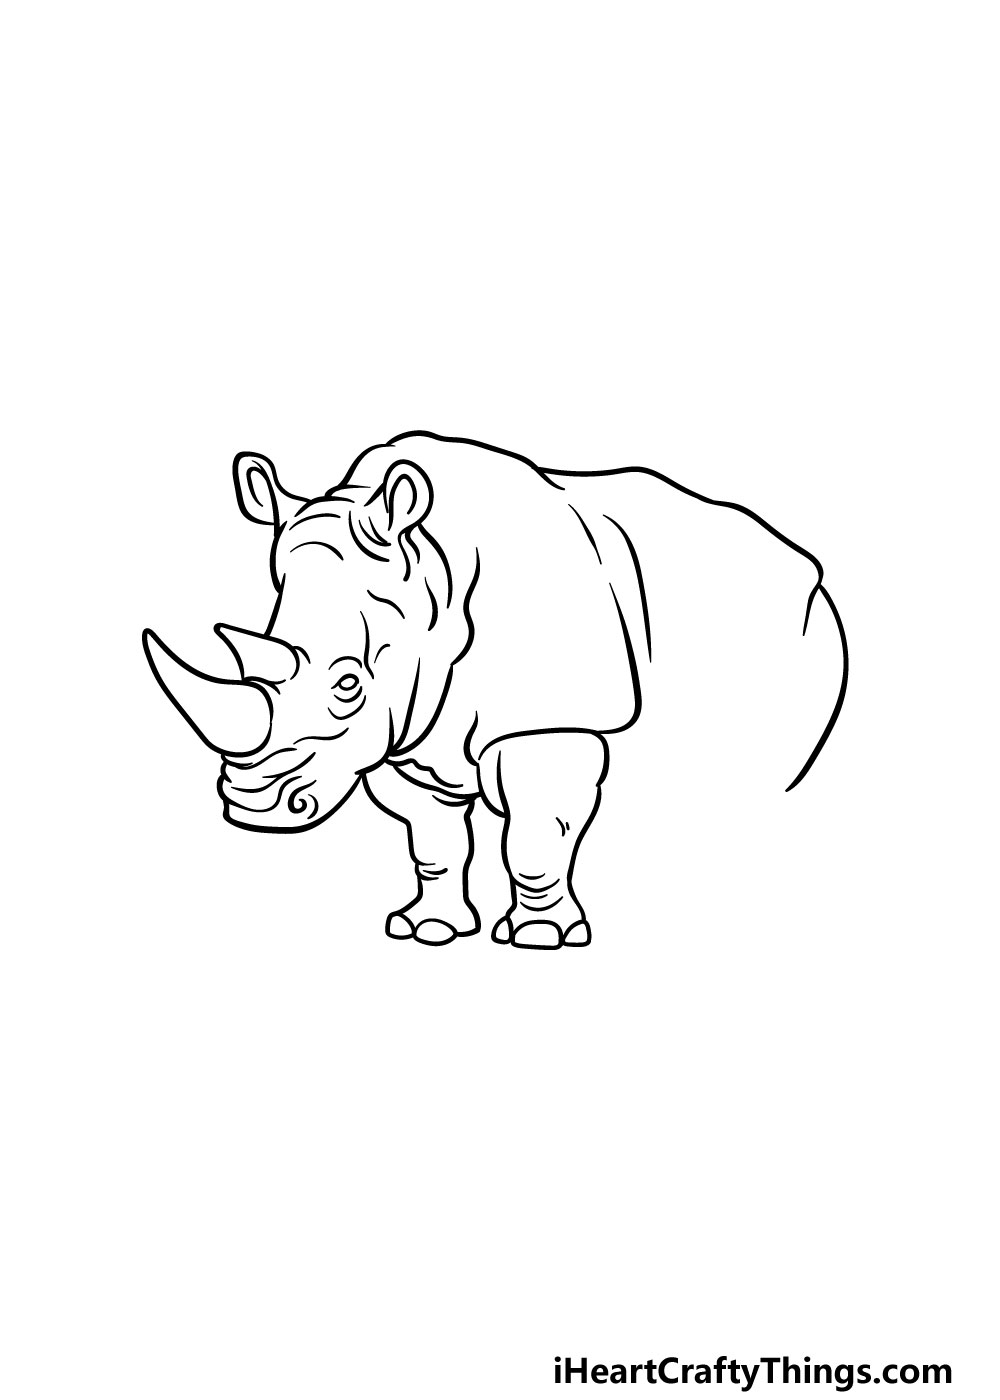
Step 1

There will be lots of smaller details that we will be covering in this guide on how to draw a rhino, so we will take it slow and go step by step.
For this first part, we will be working on the outline of the rhino as well as drawing its distinctive horns.
The horns may be the best place to start with this drawing, and you can create them with some curved lines.
The mouth will also go flat beneath them, as shown in the reference picture. Then you can draw the ears adjacent to the horn, and then the rest of the back will follow. Once you have replicated the reference image, you’re ready to proceed to the next step!
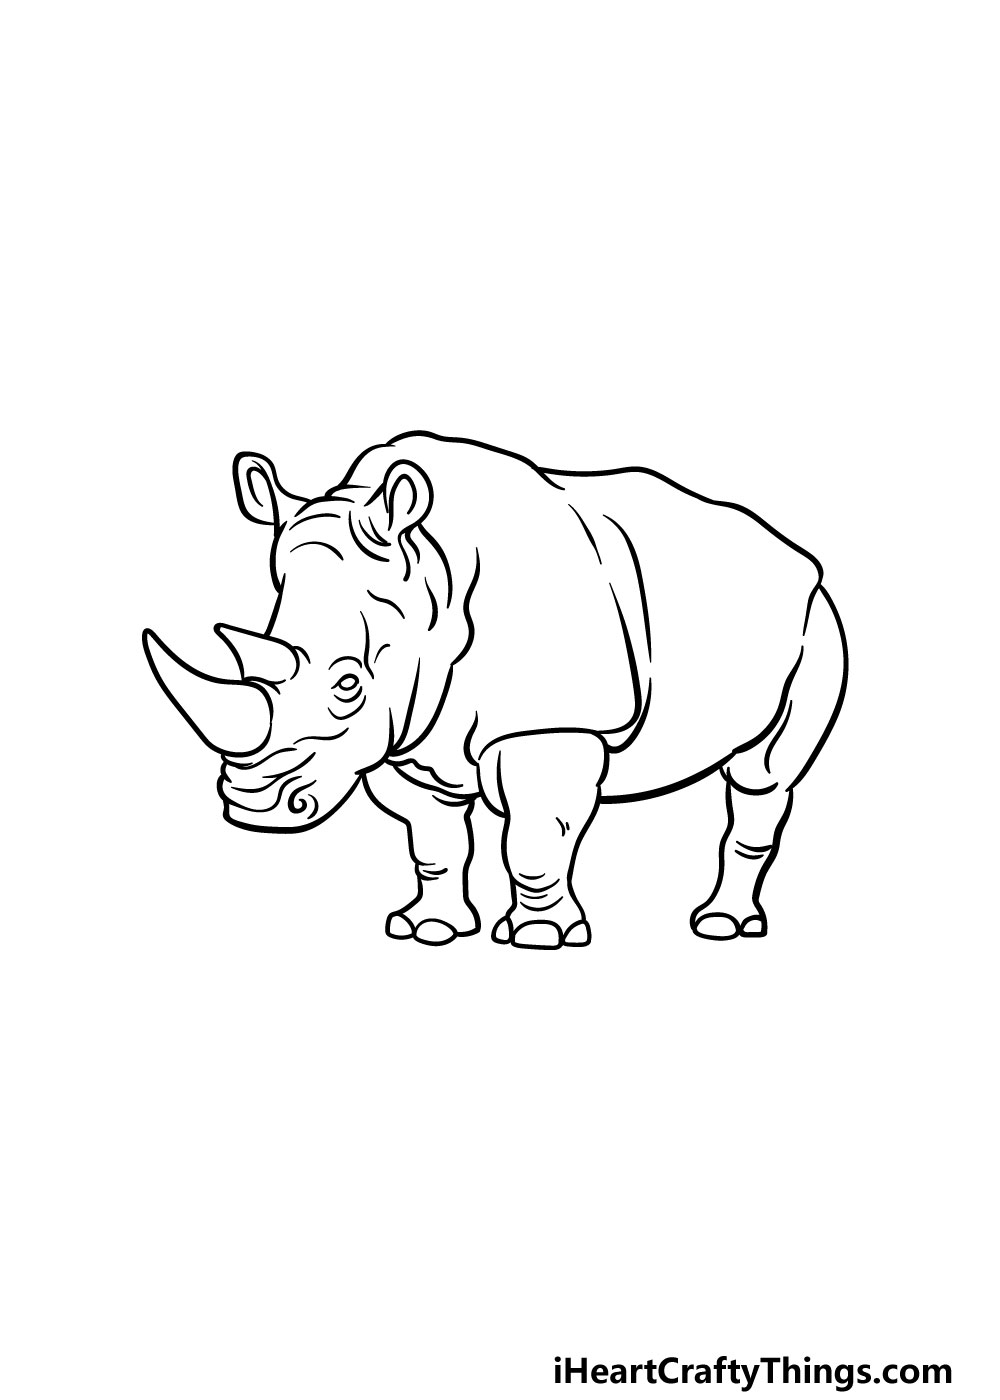
Step 2 – Draw the facial details in this step
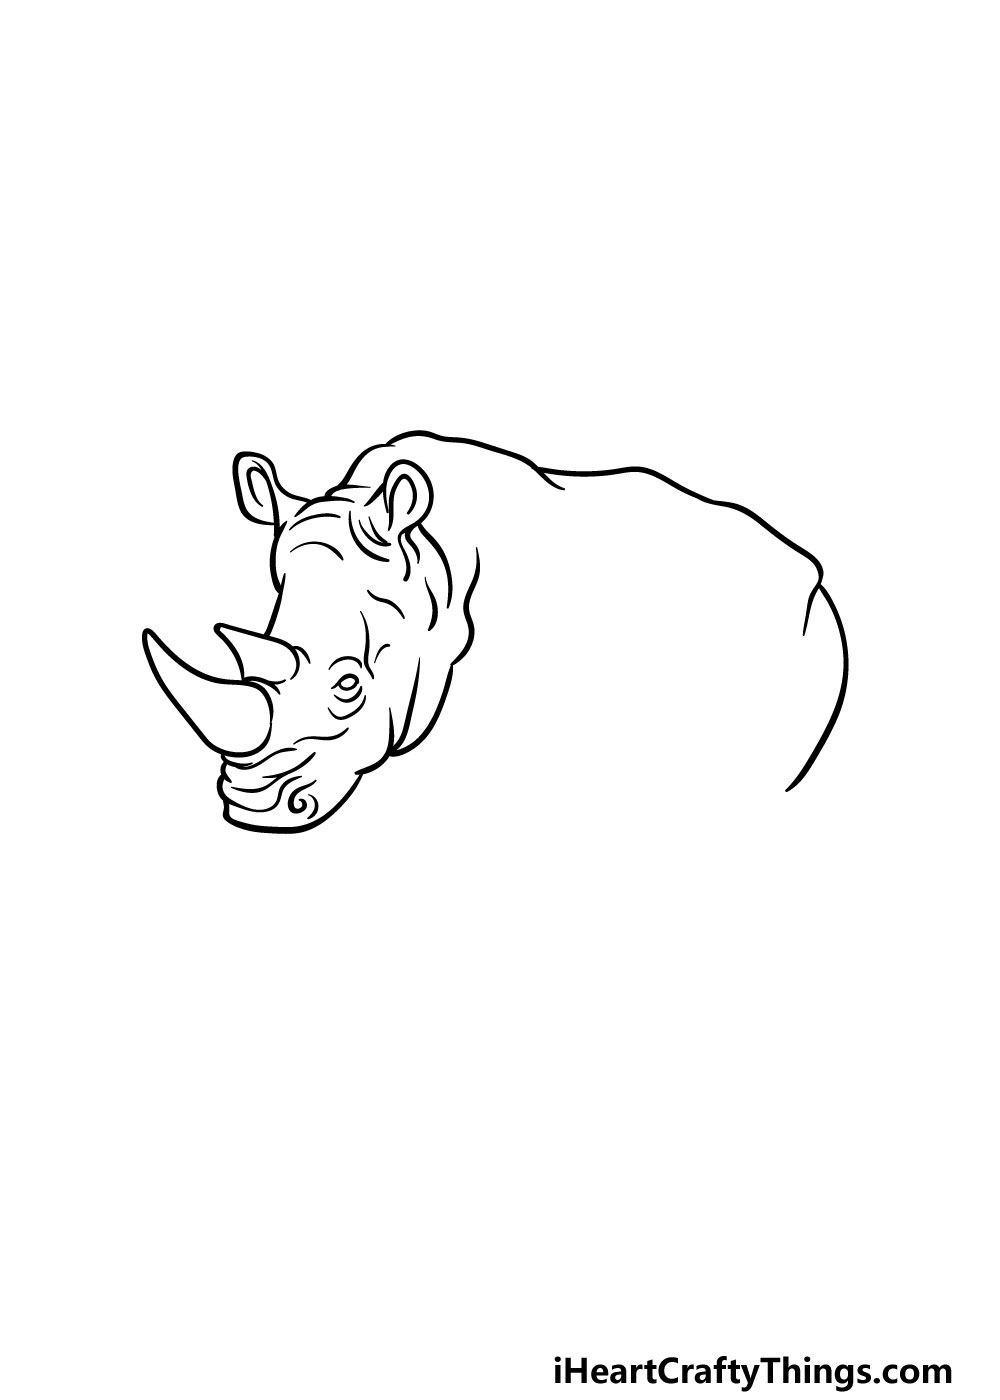
Now that you have started the outline of the rhino, we will start to work on some inner details of the face in this part of your rhino drawing.
As we mentioned in the previous step, there will be a lot of smaller details that we will be adding, so don’t feel shy about taking it slowly as you work!
These details will also include the small eyes and nostrils as they appear in our example.
Step 3 – Draw the first leg of the rhino
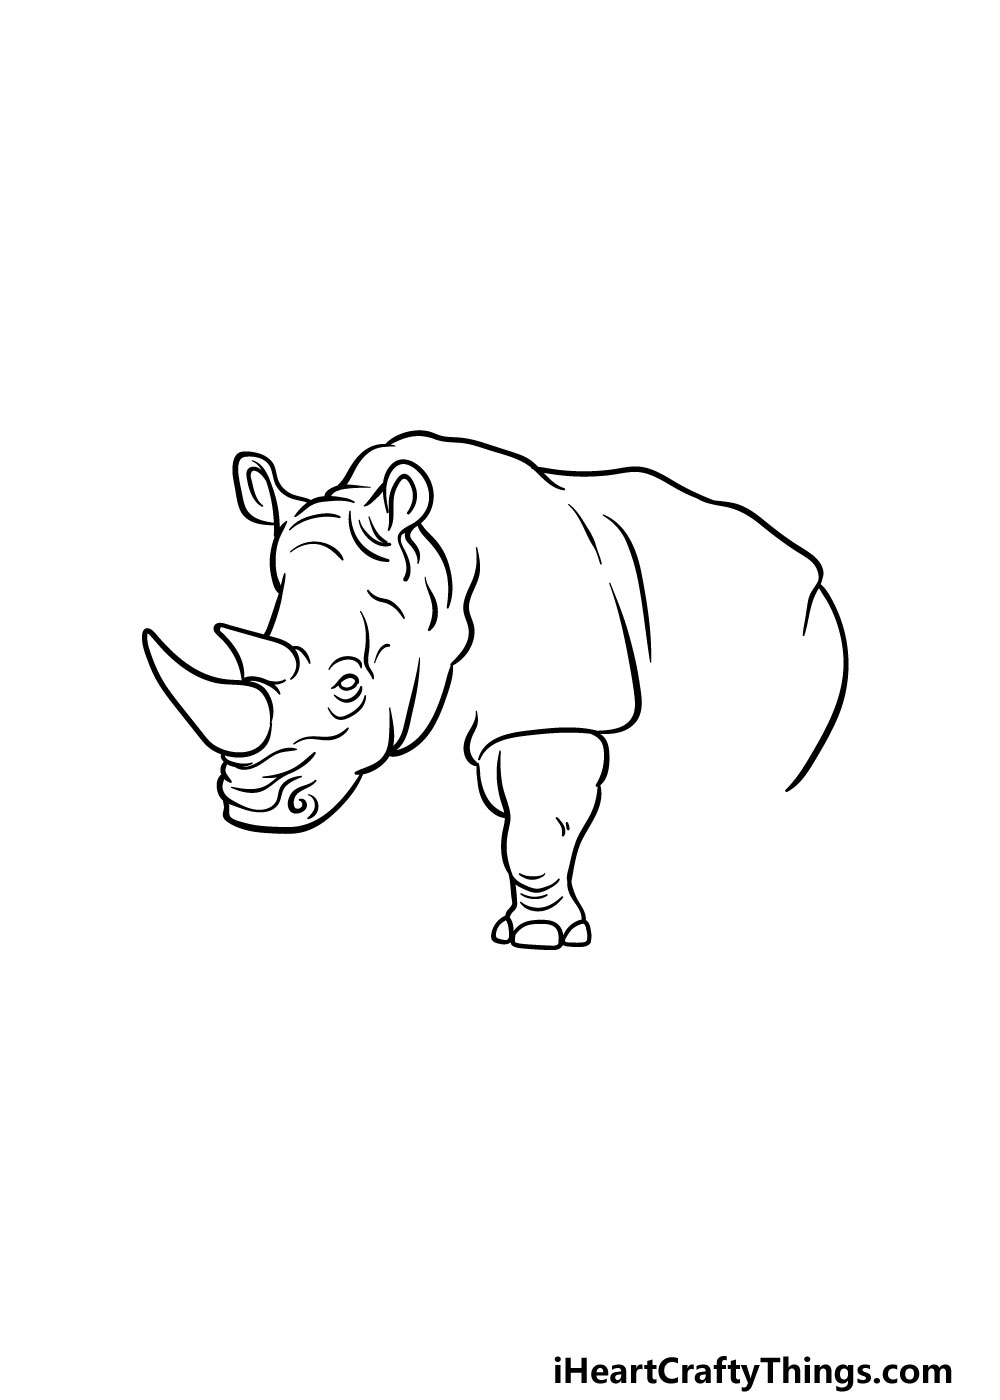
In this step of our guide on how to draw a rhino, we will be drawing the first leg. The legs of the rhino are quite curious-looking, as they seem to be made up of different layers.
That may sound strange, but you’ll see what we mean in the reference image. Once you’ve come to grips with how this leg looks, you can start to draw it using some curved lines to create the fold that the leg emerges from.
We will be adding some more legs in the next few steps, so let’s move on!
Step 4 – Now draw another leg
We will be adding another leg to your rhino drawing in this step of the guide.
Because this leg will be a bit further away from us as the viewer, it will be a bit smaller than the first one that you drew. Despite this, it will look very similar otherwise.
Step 5 – Next, draw the first back leg
You’re making great progress in this guide on how to draw a rhino! In this step, we will be adding the first back leg of the rhino.
Seeing as you’ve already drawn two legs, this shouldn’t be too hard for you! This first back leg will look quite similar to the others, except it will also be quite thin and a bit smaller.
While you’re on this step, you can also use a curved line for the belly of the rhino.
After this step, we will start to add some final details in the next part!
Step 6 – Now, add the last leg and final details
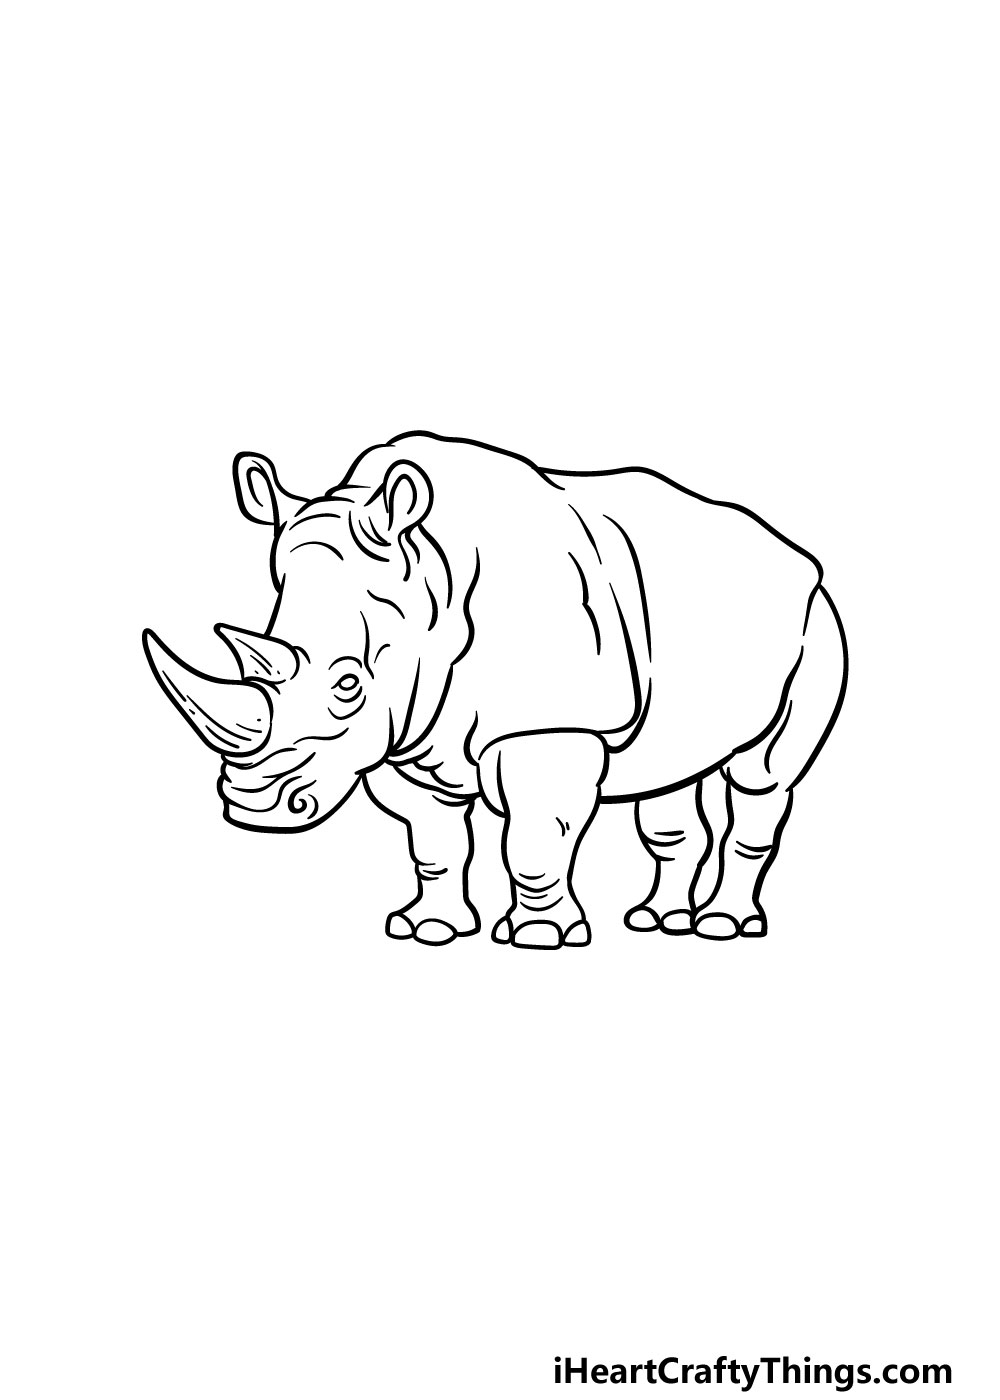
Before you start adding some amazing colors to your rhino drawing, you can first draw the last leg and final details.
For this last leg, it will look very similar to the other back leg but will be at a bit of a different angle. Once this is drawn, there will just be a few smaller details to add throughout the rhino.
These will include some lines on the horns for texture detail as well as some lines throughout the body.
Once you have added these details, you are ready to move on to the final step! Before you do, you could also add some details and extras of your own to finish off this drawing.
One of the best ways to add to a drawing is to add a background, and this is something you can get very creative with.
By drawing a background, you can show what kind of environment this rhino is currently in. you could also draw some more animals around it to add to the variety!
How will you finish off this rhino drawing before coloring it in?
Step 7 – Finish off your rhino drawing with some color
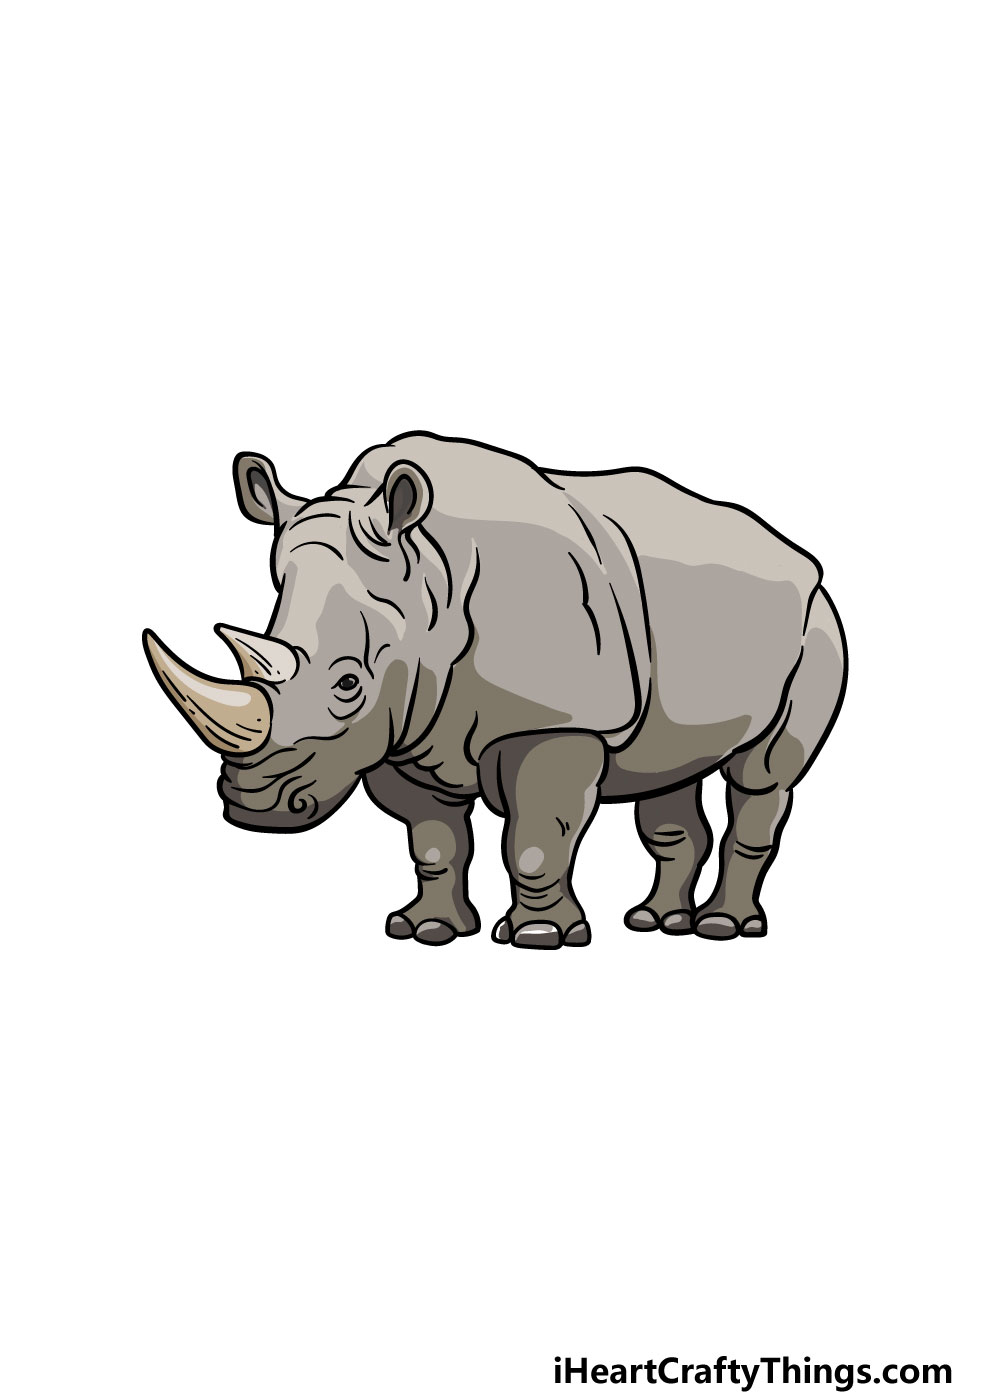
Rhinos typically have quite a dull and muted color scheme, but that won’t be limiting you as much as you may think in this final step of our guide on how to draw a rhino!
Even if you keep the rhino to more muted colors as we did in the reference image, there are ways that you could bring some incredible colors to the picture.
One of the best ways to do this is by adding some colors to the background. If you drew any extra details and elements, then you can add colors to these as well.
You can also get some color variation by experimenting with your favorite art mediums and tools, so how will you finish off this amazing drawing with your colors?
Do this to take your rhino drawing to the next level
Travel to Africa as we work on making your rhino sketch even better!
Rhinos may not live in huge herds, but they will often socialize with other rhinos. For that reason, we think it would be great to add some more to this drawing of a rhino!
After completing this guide, you have everything you need to add some more rhinos to this scene. They could be posed similarly to this first rhino, or they could look really different to it.
It would depend on you, but you can make any kind of scene you like for this artwork! What kinds of poses can you imagine for this herd?
You could also look into adding different animals to the scene instead. Just with African wildlife alone you would have tons of options!
For example, you could stick to herbivores and include elephants, giraffes, gazelles or many other options. Or you could go with some predators such as lions or leopards instead.
Which animals would you like to have with this rhino?
Seeing a rhino on safari is a great way to witness these incredible creatures. We think it would be awesome to add a safari element to this rhino drawing!
You could start off by drawing a jeep. This could be looked up online to help you as you draw. Then, there could be some guests looking at the rhino while a game ranger drives the vehicle.
You could even include details such as guests taking photos or using binoculars!
Lastly, you could finish it all off with some background details to bring this rhino sketch to life. The African wilderness is filled with tons of variety, so you could create a stunning portrayal.
We would recommend looking up photos of the African savannah to help you as you draw.
This would also show off the variety you have on offer, so you can begin crafting a stunning background worthy of the mighty rhino.
What kind of background setting would best suit this rhino?
Your Rhino Drawing is Complete!
You have finished this guide on how to draw a rhino, and you should be proud of completing this drawing!
There were lots of small and tricky details in this guide, so we hope that by breaking it down we made it easier and even more fun for you to do.
Don’t forget that you can add some of your own creative elements and ideas, perhaps by drawing more animals or a background. Be sure to get creative and have fun!
Your drawing journey continues on our website, where we have many incredible drawing guides waiting for you. There are even more on the way soon, so be sure to visit us often!
Once your incredible rhino drawing is complete, we would love it if you would share it on our Facebook and Pinterest pages for us to enjoy!