


The living dead may be terrifying, but learning how to draw a zombie isn’t! This guide will show you how to make your very own cartoon zombie.
Zombies have existed in literature and films for hundreds of years, and they also appeared in some cultures. There is something inherently disturbing about a corpse raising to attack the living!
These days, zombies are very popular thanks to series like The Walking Dead and the Resident Evil games. People can’t get enough of these things, and that’s why you may want to draw one of your own!
The zombie we will draw in this guide is about as cute as it’s possible for one to be. I will show you how to make the vacant expression, tattered clothes and other features you would expect.
There is even a hatchet in its head for an extra morbid touch! You can get really creative with this design, so let’s begin without further ado!
Watch These Steps To See How To Make A Zombie Drawing
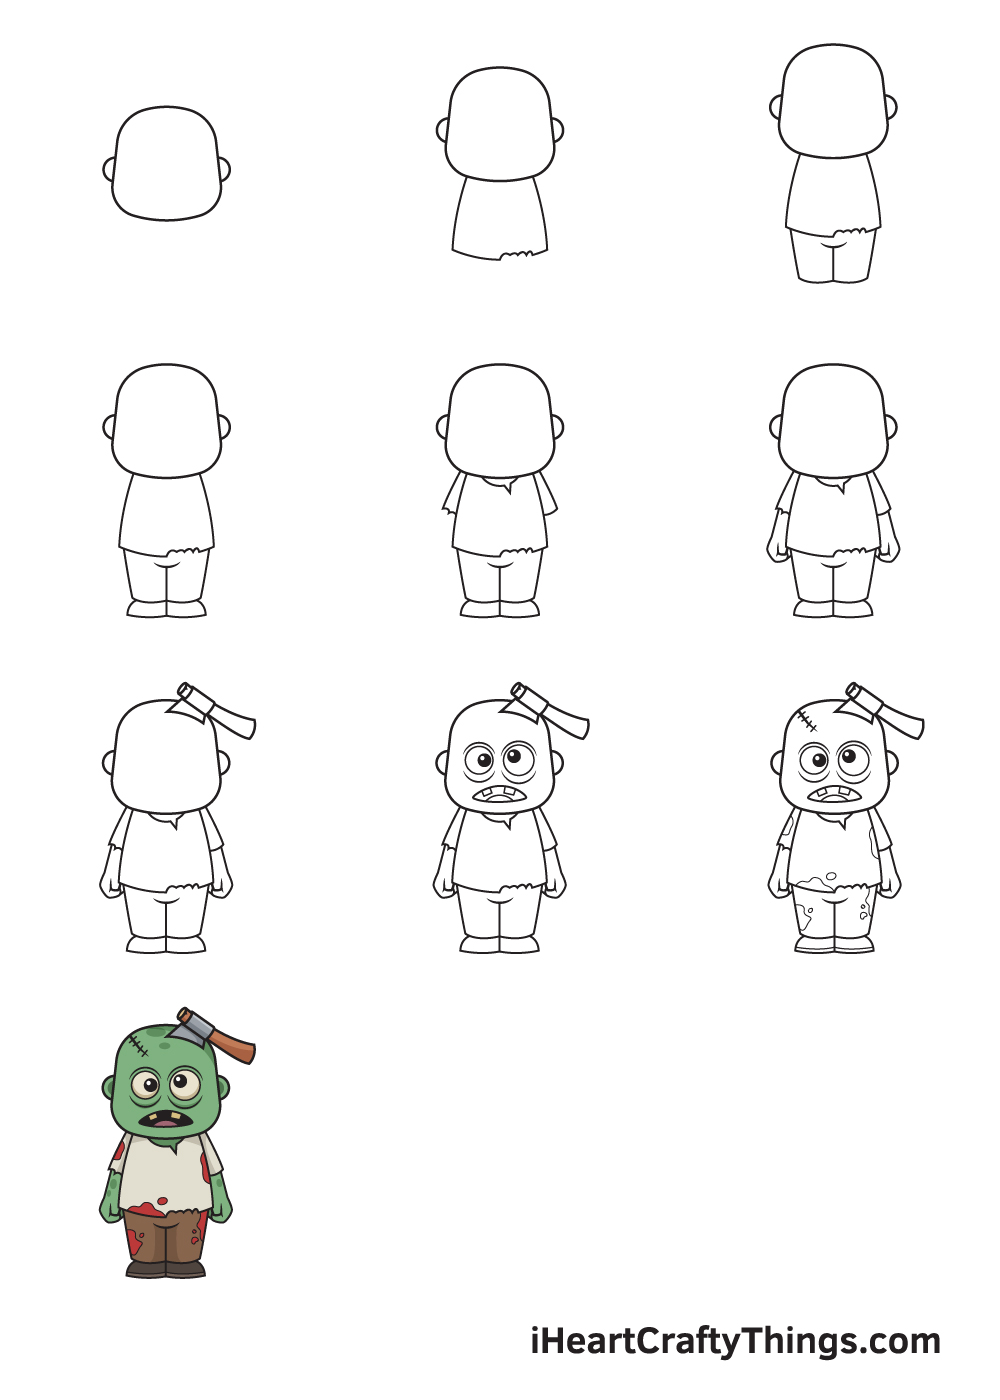
How to Draw a Zombie – Let’s get started!
Step 1
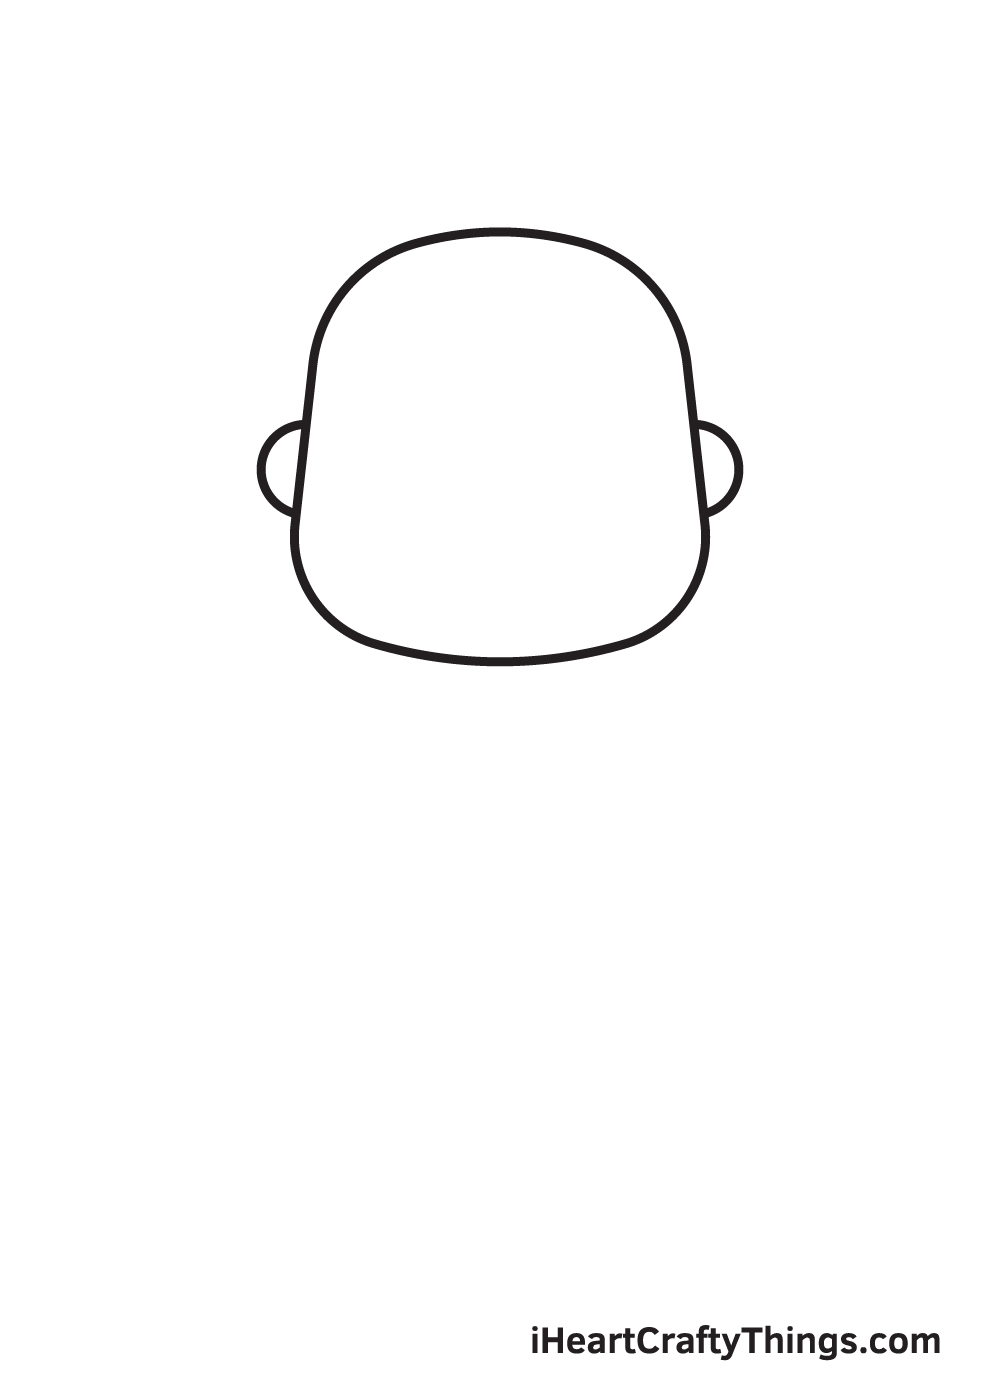
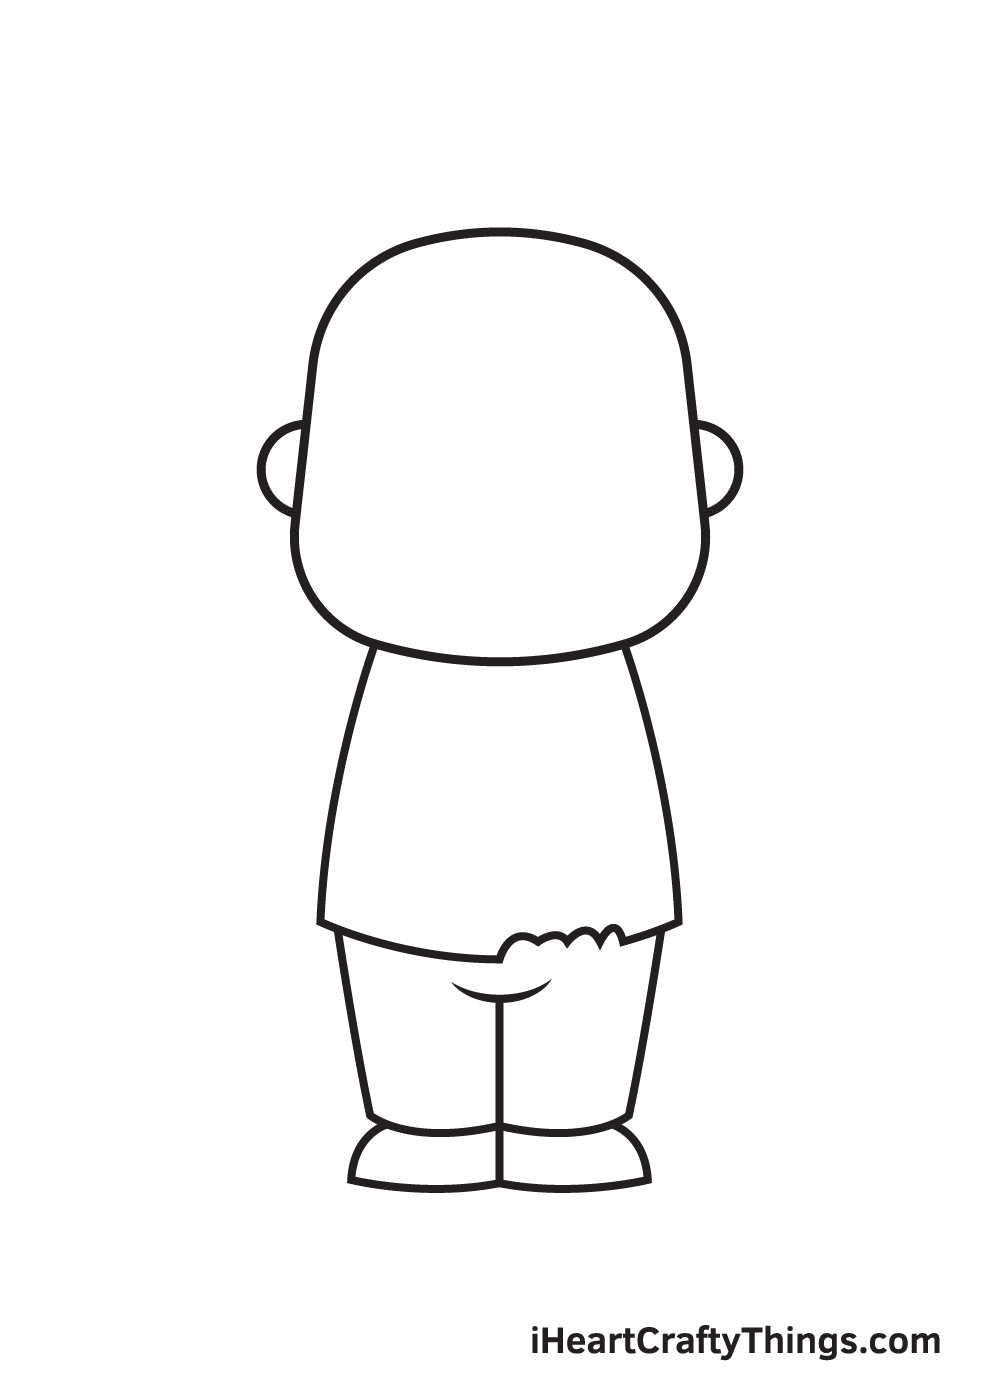
Starting on the upper portion of your paper, draw a square with curved edges to create the head of the zombie. Afterwards, draw a semicircle on each side of the zombie’s head to form its left and right ear.
To ensure that the zombie will be drawn in the center, you can create reference lines by drawing an intersecting horizontal and vertical line.
The vertical line above the horizontal line is where you should draw the outline of the head.
By drawing the head at the top, there will be enough space for the entire body of the zombie at the bottom of the paper.
Step 2 – Outline of the Zombie’s Head and Body
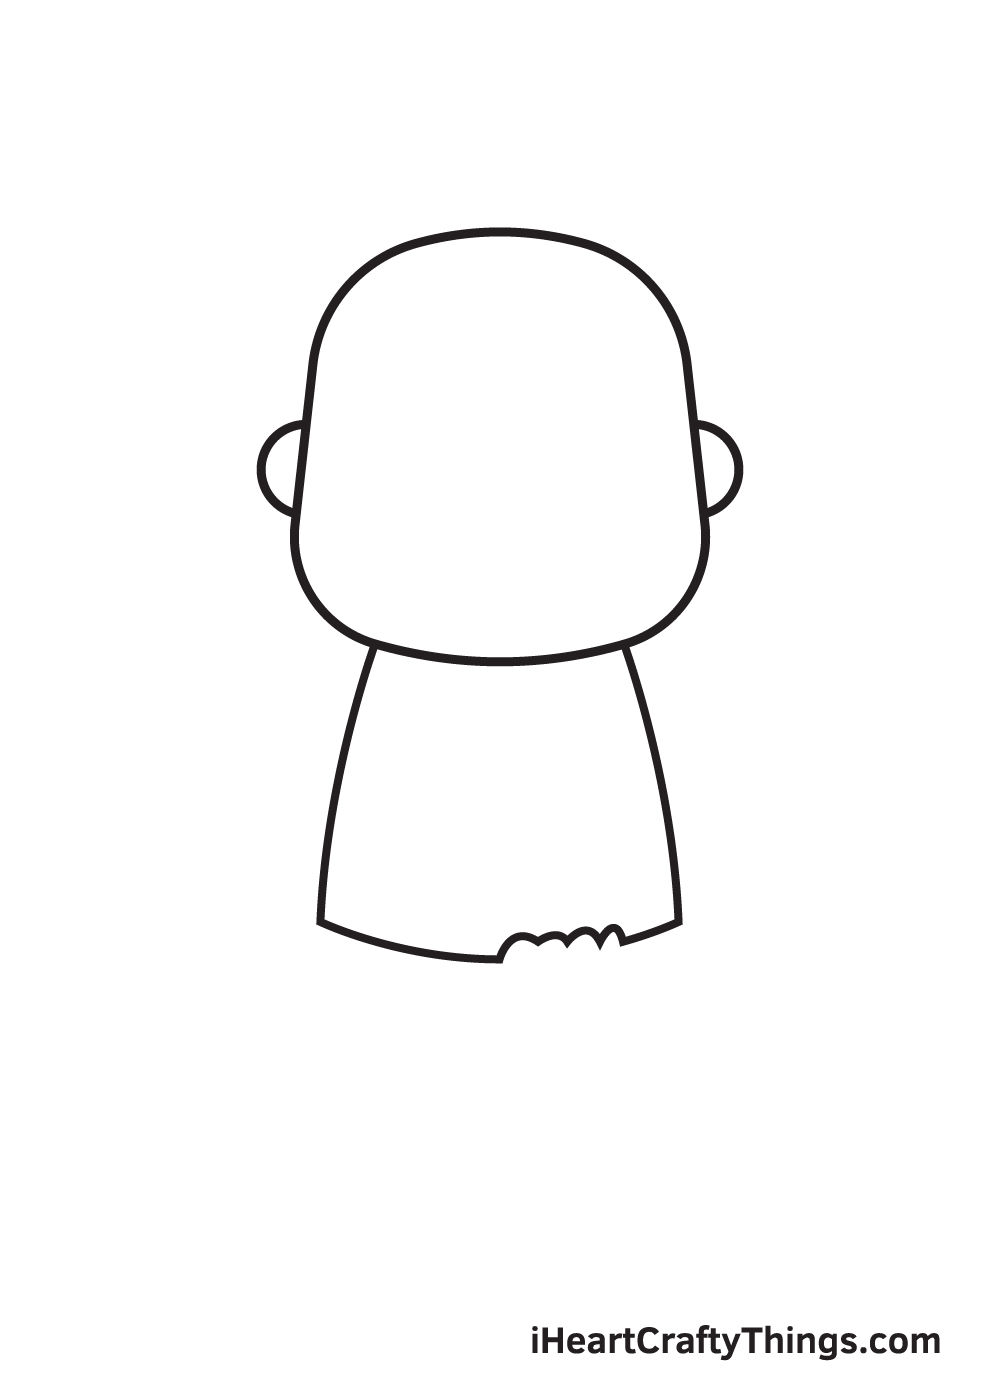
Draw two horizontal lines right underneath the head of the zombie. The gap in between the lines depends on how thick you want the zombie’s torso to be. The wider the gap, the beefier the zombie will look.
Afterwards, draw a horizontal line at the bottom, connecting both endpoints of the vertical line. This outlines the shirt the zombie is wearing.
Zombies typically wear damaged and dirty clothes, so don’t forget to add multiple curved lines to create tears on the bottom hem of the shirt!
Step 3 – Next, Draw Both Legs of the Zombie
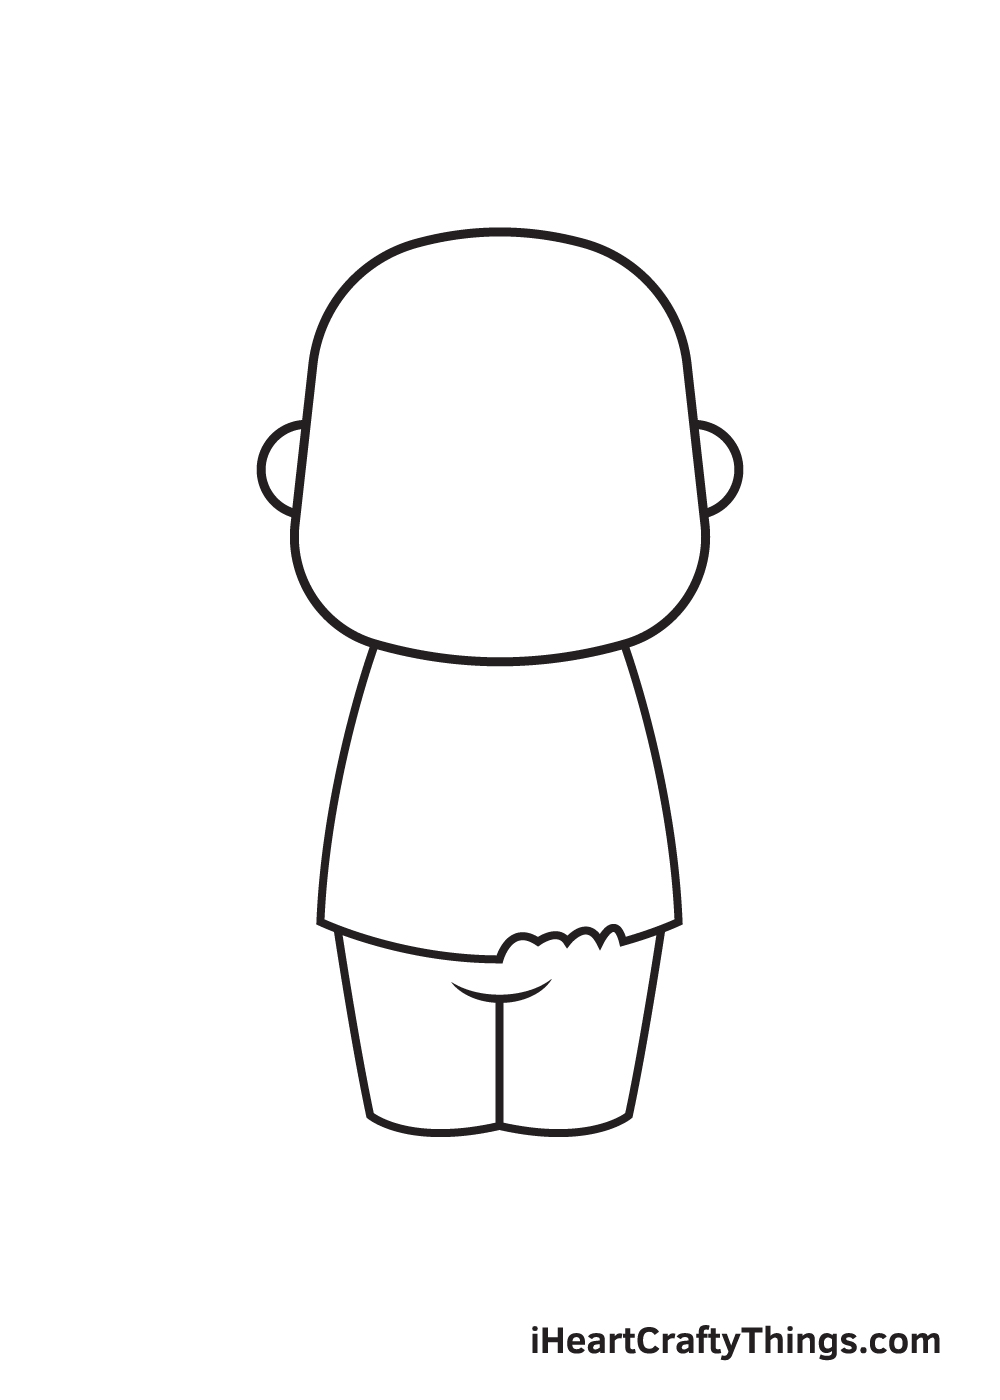
Draw two diagonal lines beneath the zombie’s shirt. Then, draw a slightly curved horizontal line connecting both endpoints together. This forms the lower body of the zombie.
Afterwards, add a short vertical line beginning from the bottom in the middle of the lower body. Then, draw an upward curve at the top of the vertical line. This creates a division between the left and the right leg.
Step 4 – Then, Draw a Pair of Shoes for the Zombie
Right underneath each leg in the trousers, draw a curved line with a horizontal line at the bottom to create a pair of shoes.
As you can see in the illustration, the feet of the zombie are facing opposite directions.
Step 5 – Draw the Sleeves of the Zombie’s Shirt
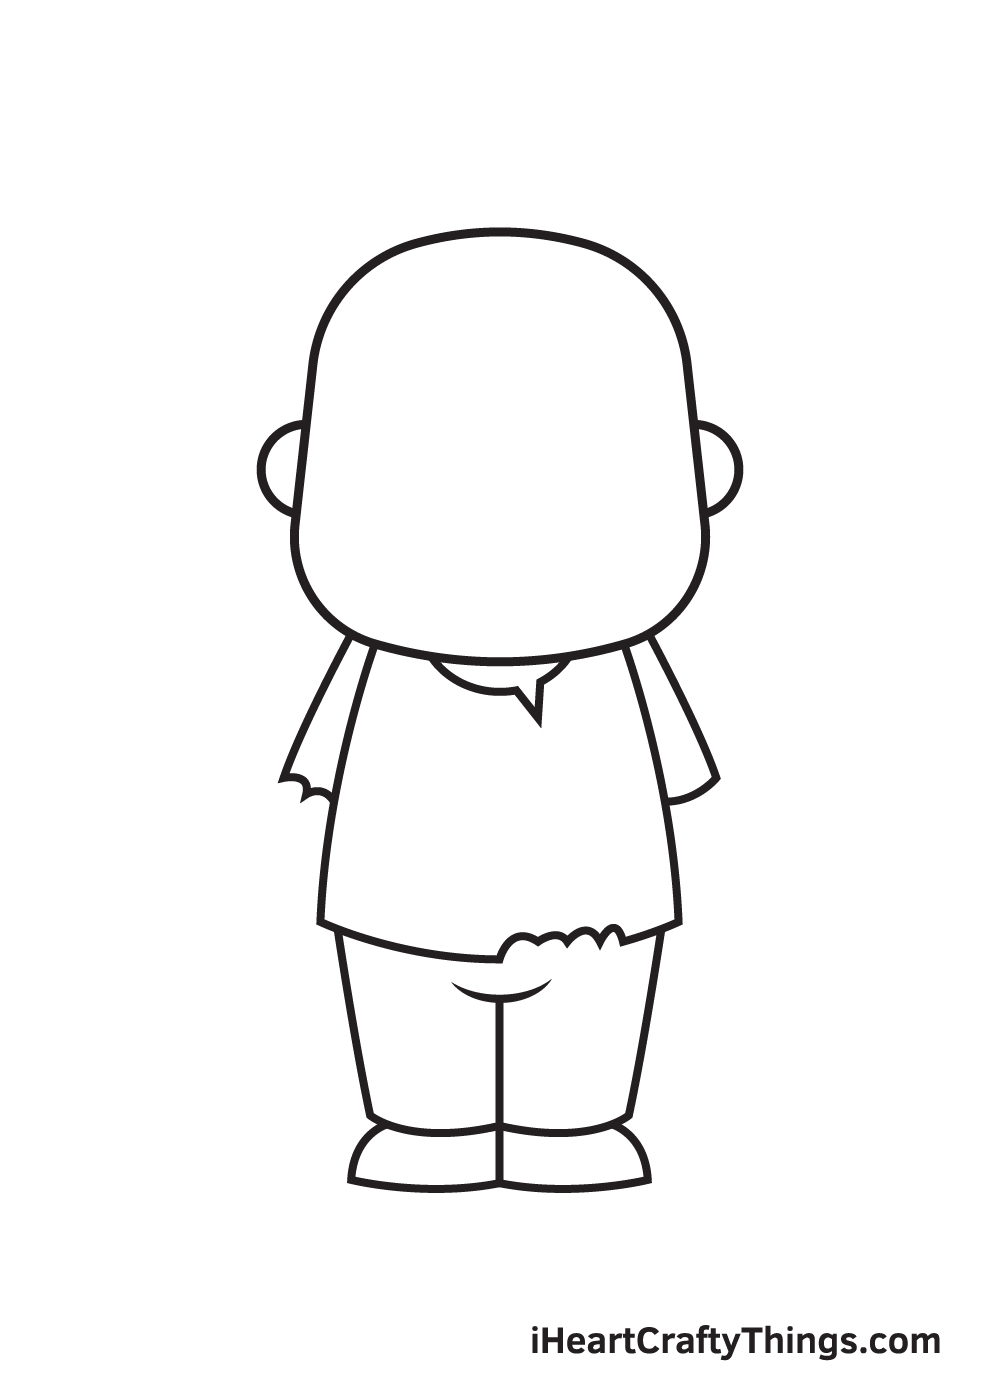
Complete the zombie’s shirt by drawing a curved line on its neck forming the collar.
Afterwards, draw a diagonal line with a horizontal line at the bottom on each side of the zombie’s body to create the sleeves of the shirt that the zombie is wearing.
Don’t forget to add some tears on the hem of the collar and the sleeves too! This creates the illusion of damaged clothing, making your drawing appear more realistic!
Step 6 – Draw the Zombie’s Left and Right Arm
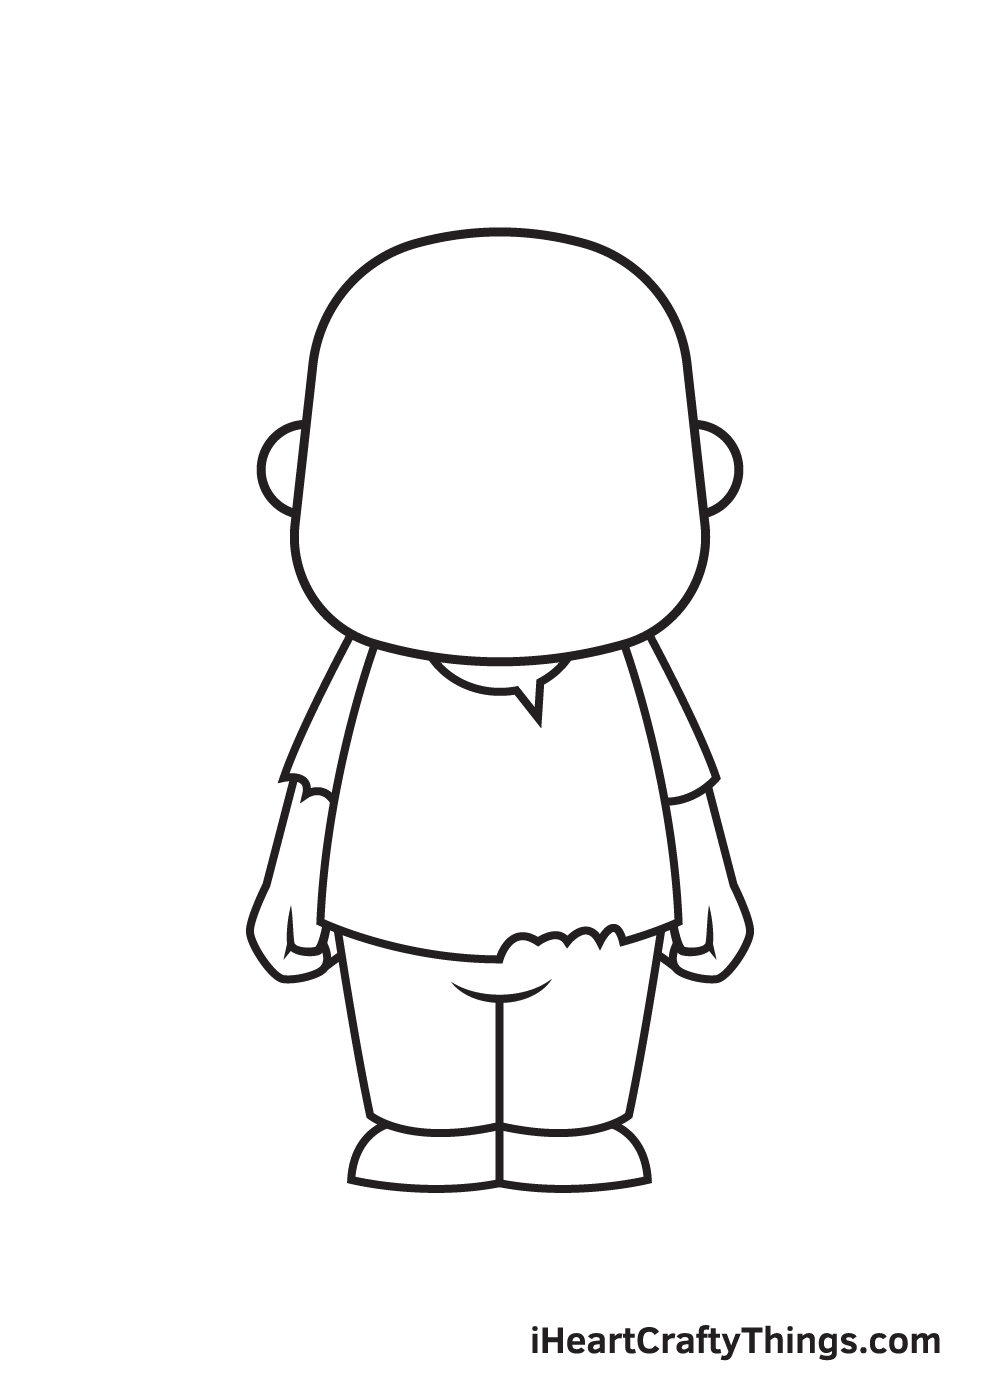
Draw an arm with a hand underneath each sleeve. We think the easiest way to draw a hand is to draw it in the form of a fist, so that’s exactly what we’ve done in this step.
Simply draw an irregular circle shape with edges then draw some lines inside forming the thumb.
Step 7 – Draw the Axe Struck on the Zombie’s Head
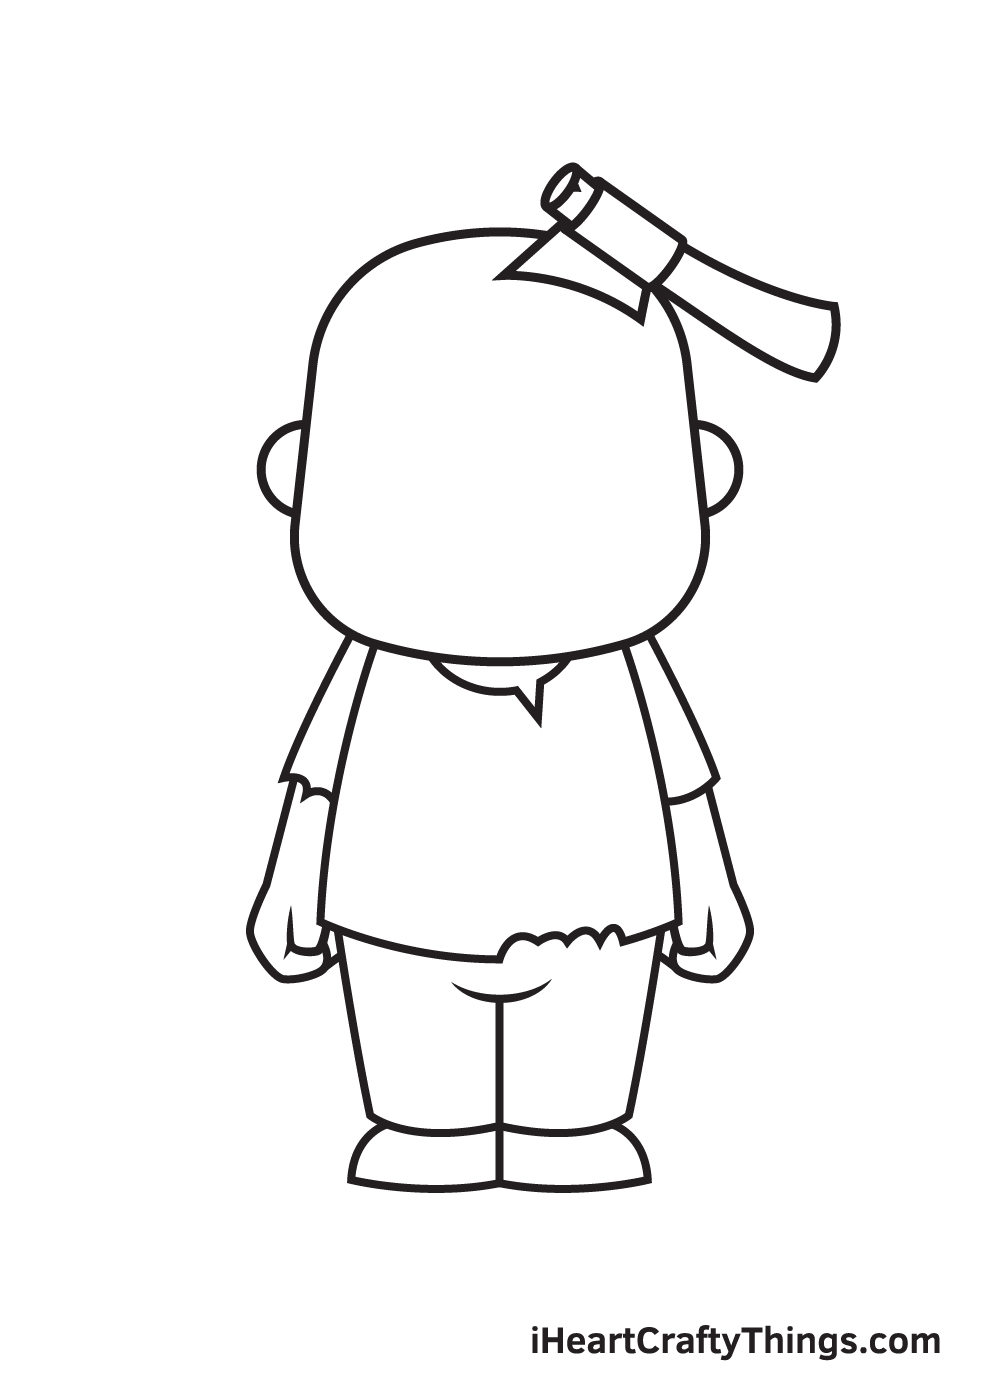
For an extra dramatic effect, draw an axe struck at the top of the zombie’s head. Since the axe was struck into its skull, the blade wouldn’t be completely visible.
Zombies are basically people that have risen from the dead. That means, the cause of their death remains conspicuous.
In this case, this zombie was attacked in the head with a sharp axe. It’s quite brutal, isn’t it? Nevertheless, it’s what makes the zombie look more scary!
Step 8 – Afterwards, Draw the Facial Features
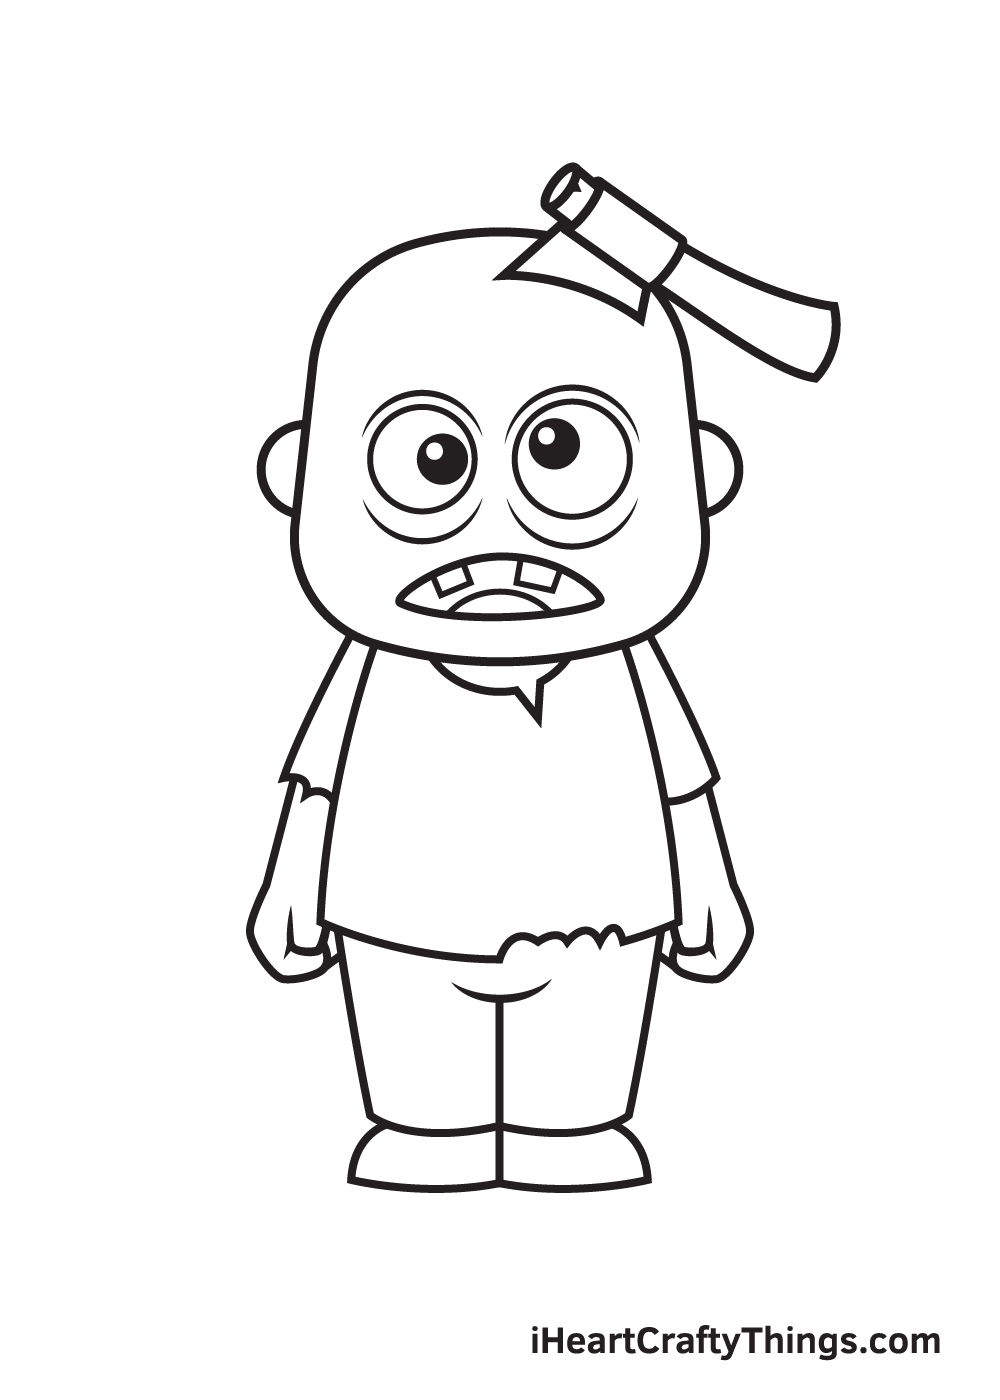
Moving on to the facial features, proceed by drawing two circle shapes to create the eyes. Then, inside each eye, draw a smaller circle shape in different positions.
This creates the pupil of the eyes. Shade the entire pupil while leaving out a tiny circle inside unshaded. Don’t forget to add some lines surrounding the eyes to create the appearance of wrinkles!
Afterwards, draw a shape forming the zombie’s mouth. Within the mouth, draw a curved line at the bottom for the tongue and square shapes at the top for a few visible teeth.
Don’t worry if the shape of the eyes aren’t completely identical! As a matter of fact, the more uneven they are, the more terrifying the zombie’s facial expression will look.
Step 9 – Now, Add Details and Texture on the Zombie
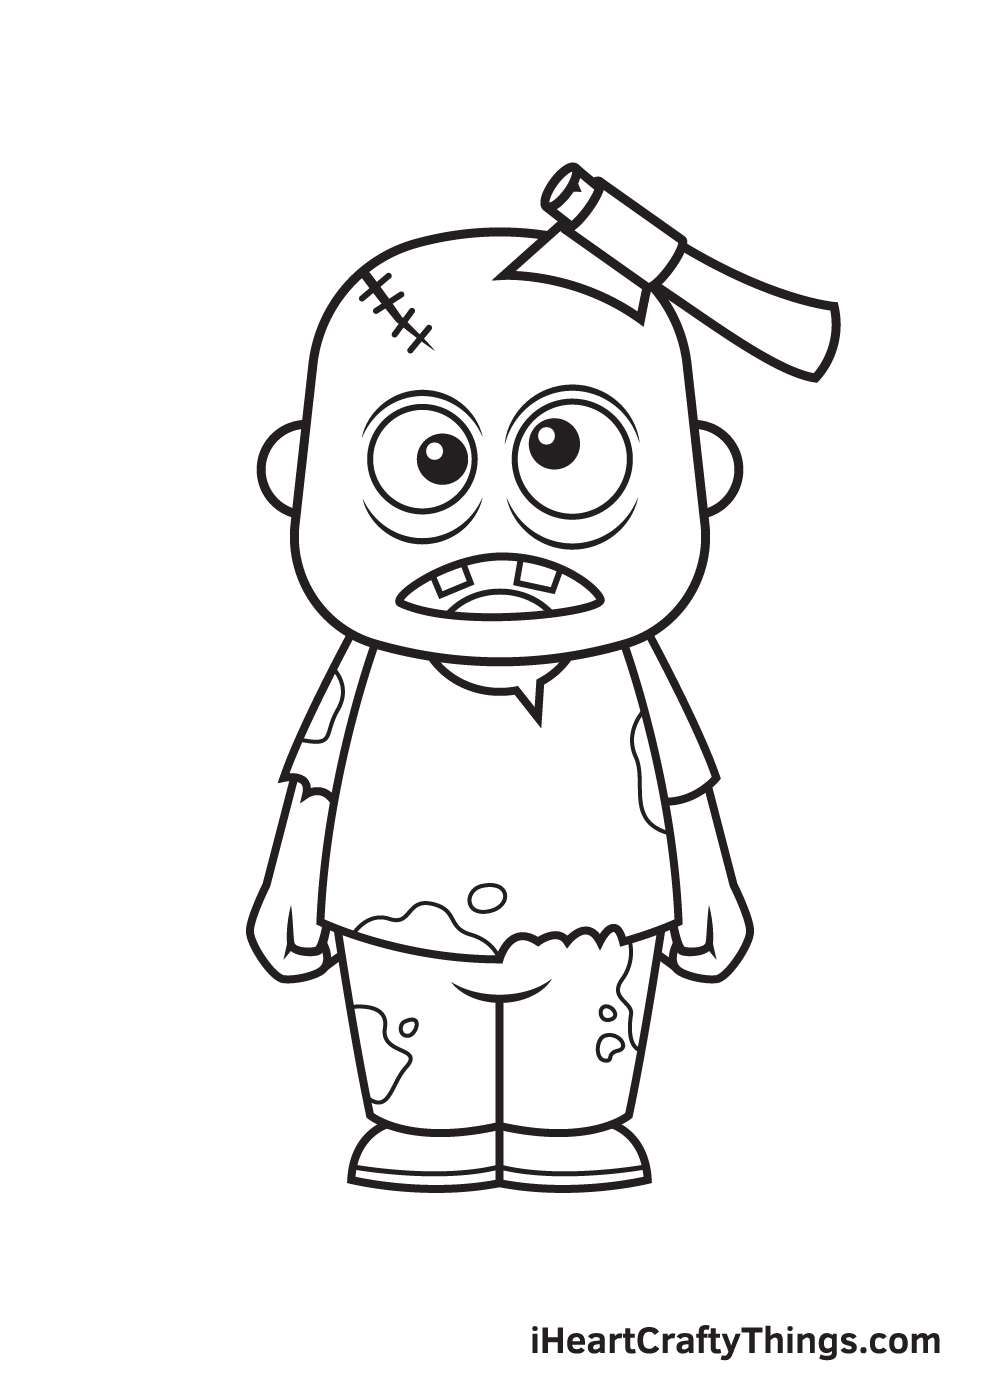
Make your drawing look more dramatic by adding a few more patterns and details here and there.
Draw a line at the top of the head with multiple short lines across it to create the illusion of a stitched wound.
Then, add a few shapes in various uneven forms all over the shirt and the trousers. This creates the appearance of blood stains on the zombie’s clothing, making it even more sinister!
There you have it—you have successfully drawn a horrifying zombie. Now, it’s time for the long-awaited part, which is coloring your drawing.
Zombies are typically depicted to have greenish skin, mainly because of their rotting skin since they are basically dead people. Their clothes, on the other hand, are just like any other clothes a human would wear.
Feel free to use any color you like for the clothing, but make sure to make it appear as dirty as possible. Don’t forget to color the blood stains with a dark shade of red too!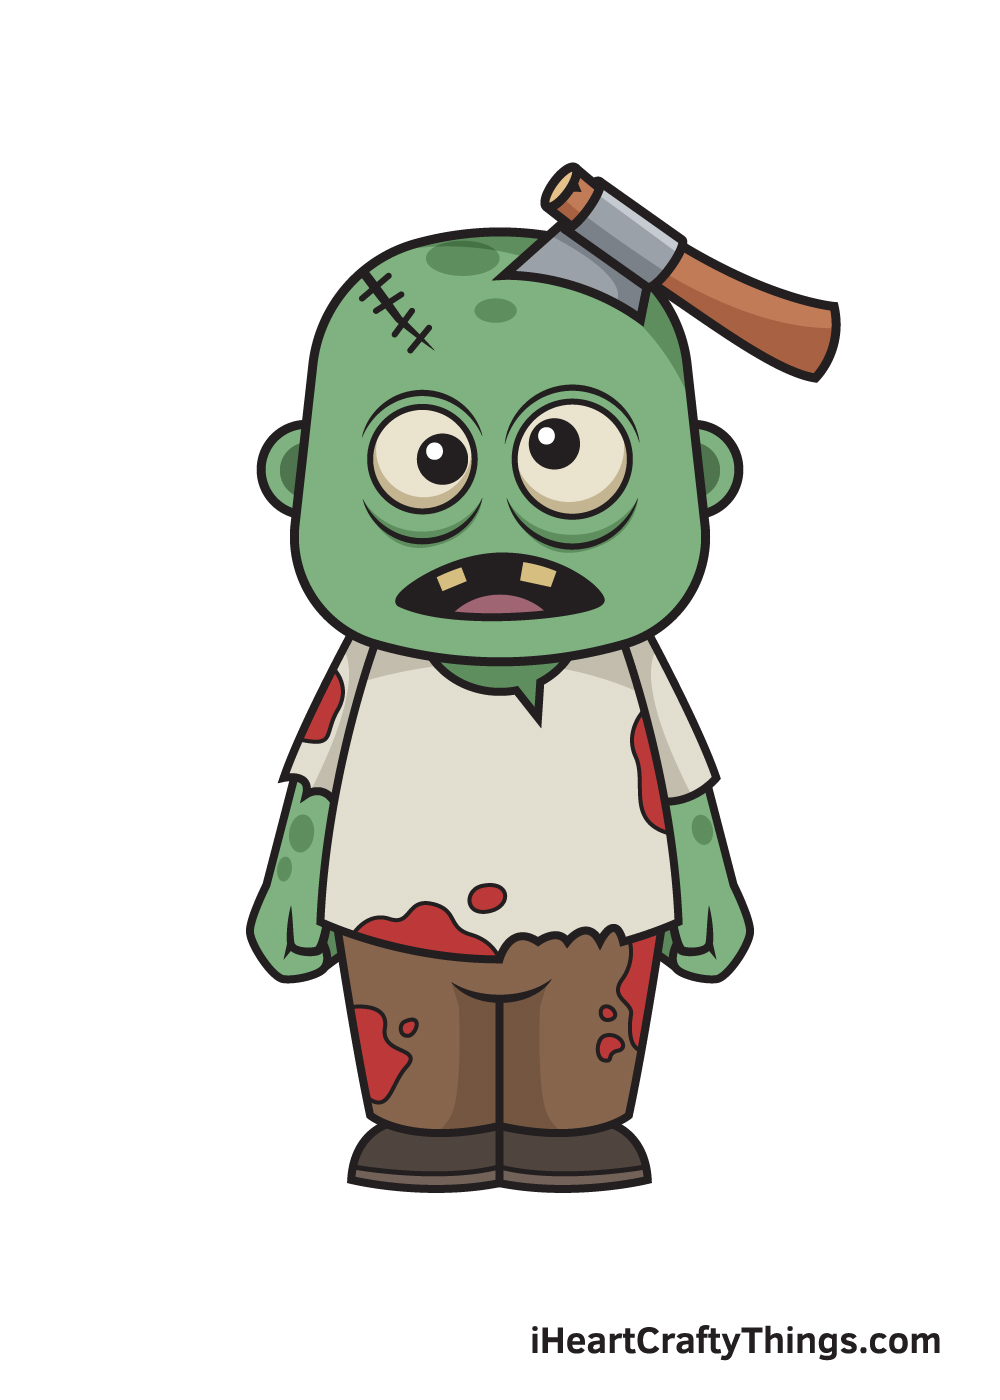
Here’s how you can make your zombie drawing even better…
Rise to the occasion as we make your zombie sketch all that it can be with these fun tips!
For this zombie drawing, we kept the pose pretty simple in order to make it easier for you to do. Now that you have finished the design, you could change up the pose a bit to make it more dynamic!
For example, zombies are often portrayed walking with their arms stretched out in front of them.
This would be easy enough for you to portray on this one.
That is one example, but what other fun poses do you think you may want to add to this picture?
We also kept the details on this drawing of a zombie a bit simpler, but you could add some more!
For instance, you may want to add some more facial features and details to make it more expressive.
You could even portray this zombie in a whole different art style! This would all depend on your preferences and what you like to draw, so have fun experimenting.
Now that you have mastered this particular zombie sketch, you could use what you have learned to create more characters. You could make it a swarm of zombies by adding many more friends for him!
To do this, you could go through the steps of the guide again and then add various details and unique features. Or, you could draw some terrified living characters running from the zombie.
They could even be drawn in the same style as the zombie we created. What kinds of situations would you like to create?
When you have changed and added all of the details you would like, you could then finish off with a background. There are a few settings that would be perfect for this zombie drawing!
For a few examples, you could show a spooky graveyard that the zombie has just emerged from. Or maybe it is venturing into an unsuspecting city.
These are a few examples, but there are so many fun backgrounds you could create!
Your Zombie Drawing is Complete!
If you enjoyed this drawing tutorial, then you might enjoy drawing a fairy, leprechaun, and other mythical creatures too!
Go ahead and check out our “How to Draw” catalog to explore many more fun drawing tutorials like this. Which legendary creature would you like to draw next?
Once you’ve finished drawing and coloring a zombie, don’t forget to show off your masterpiece!
Take a picture of your artwork and share it on our Facebook page and on Pinterest. Don’t be shy—you’ve worked hard for it, so we’re sure it looks impressive!
We can’t wait to see your frightening zombie drawing!
Here Is A Fun Zombie Drawing To Inspire You!
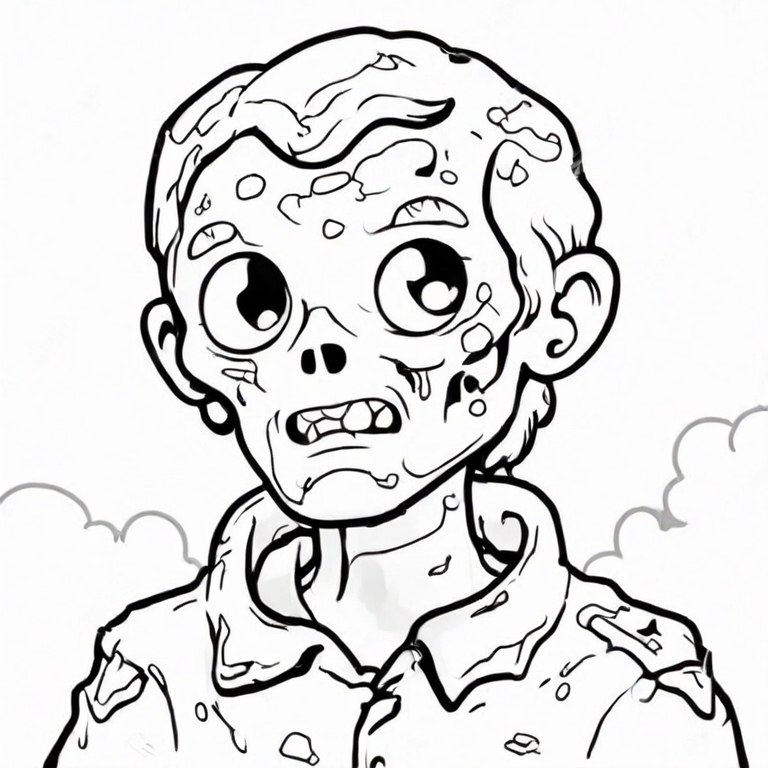
Zombies have become very popular to feature in movies, video games and TV shows in recent years. There are so many different designs, and now you get to create one of your own.
This guide has shown you how to create a fun zombie drawing for kids, but now you have an extra example drawn by our artist Freddy. He has certainly not spared any grisly details for this zombie.
There are so many textures on the face that display the rotting that such a creature would have. These can be added to and customized with your own version as well.
Then, when it comes to coloring the picture, you could add a lot of different colors to really make this zombie look grotesque and nasty. What colors and additional details would you use for this zombie?
