There are a few questions that have weighed heavy on the minds of humans since the dawn of time. What is the purpose of life? Which came first, the chicken or the egg?
What is the best video game console? This last one is a hotly debated topic among gamers, as some would swear it’s the Xbox while others pledge their allegiance to the PS4.
No matter what you think, there’s no denying that the PS4 and its controller are excellent pieces of hardware, and learning how to draw a PS4 controller is a great way to honor its legacy!
If you have spent many hours playing on a PS4, then this should be the perfect guide for you!
We hope that you have a great time working on this step-by-step guide on how to draw a PS4 controller!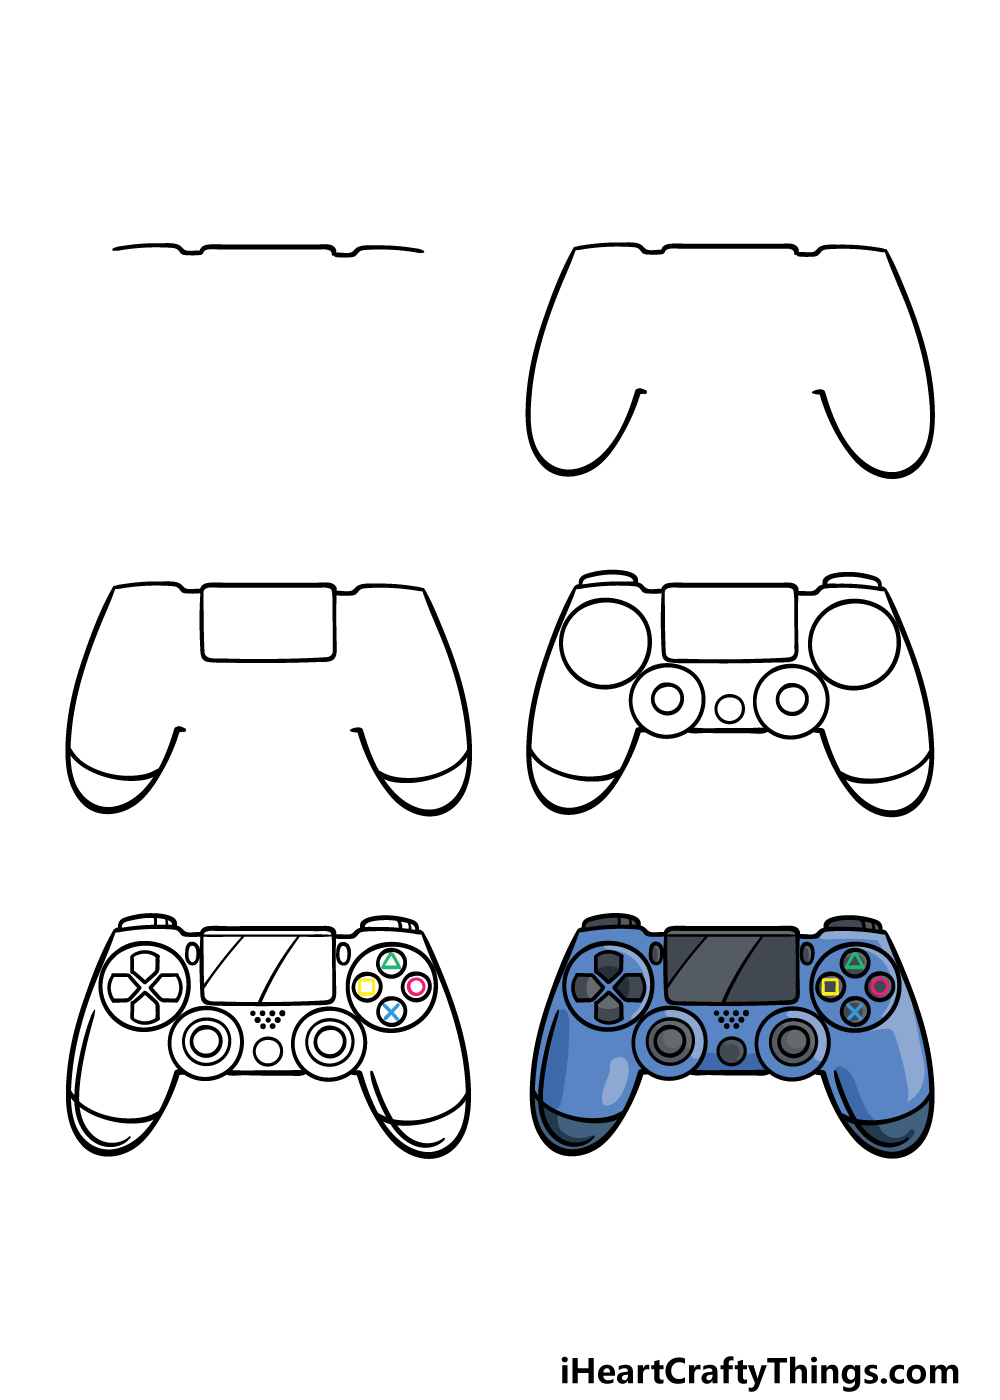
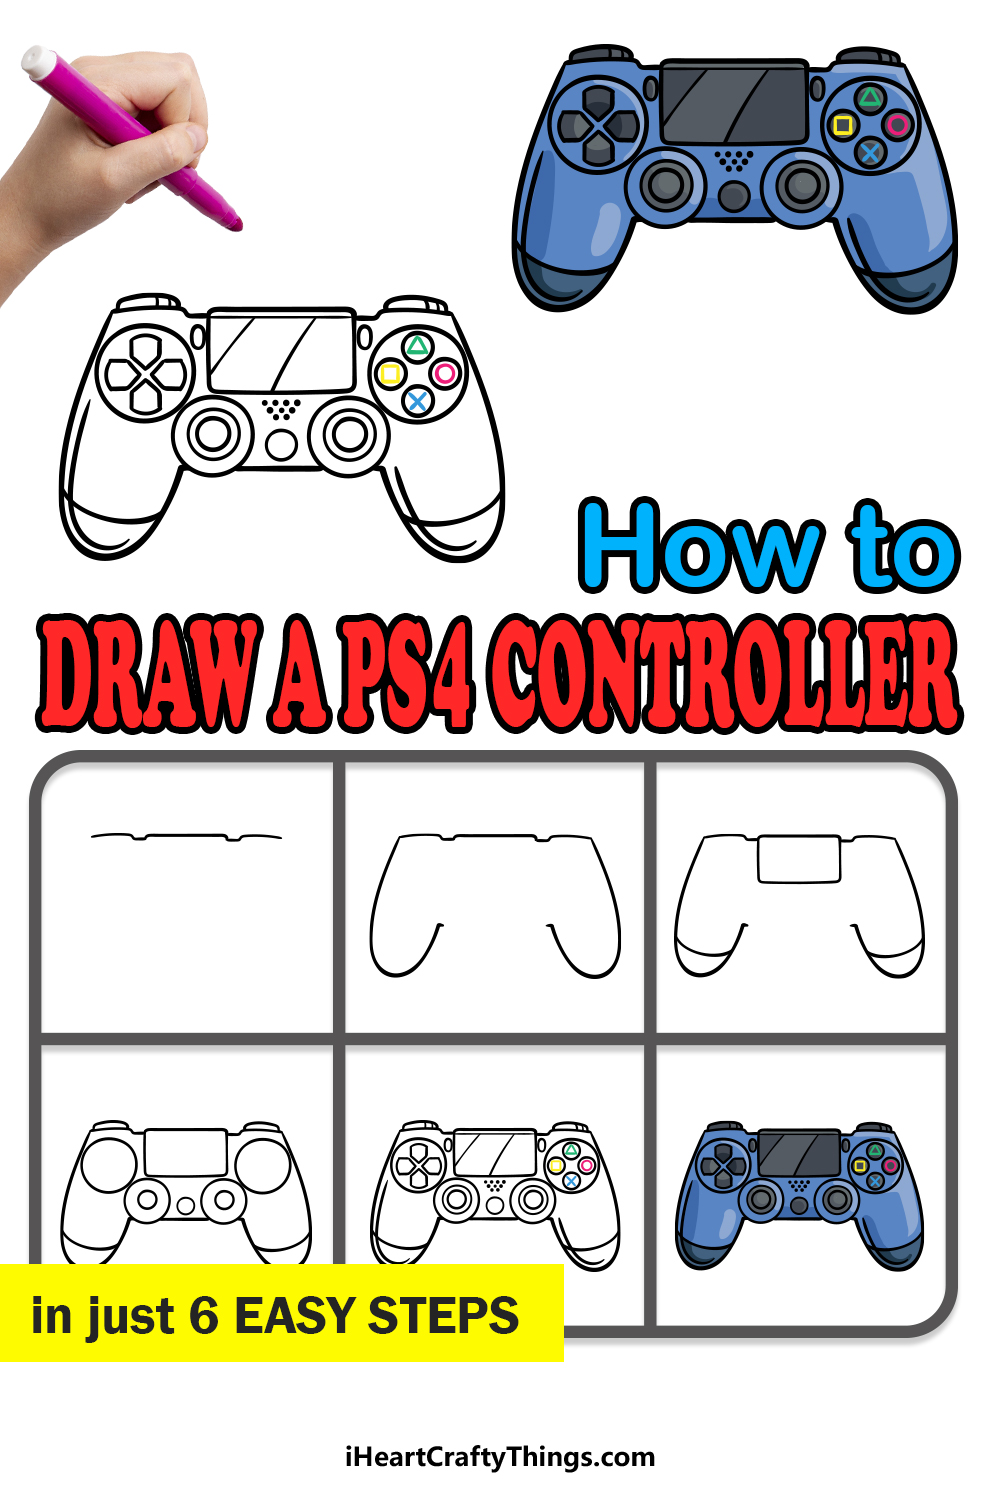
How to Draw A PS4 Controller – Let’s Get Started!
Step 1
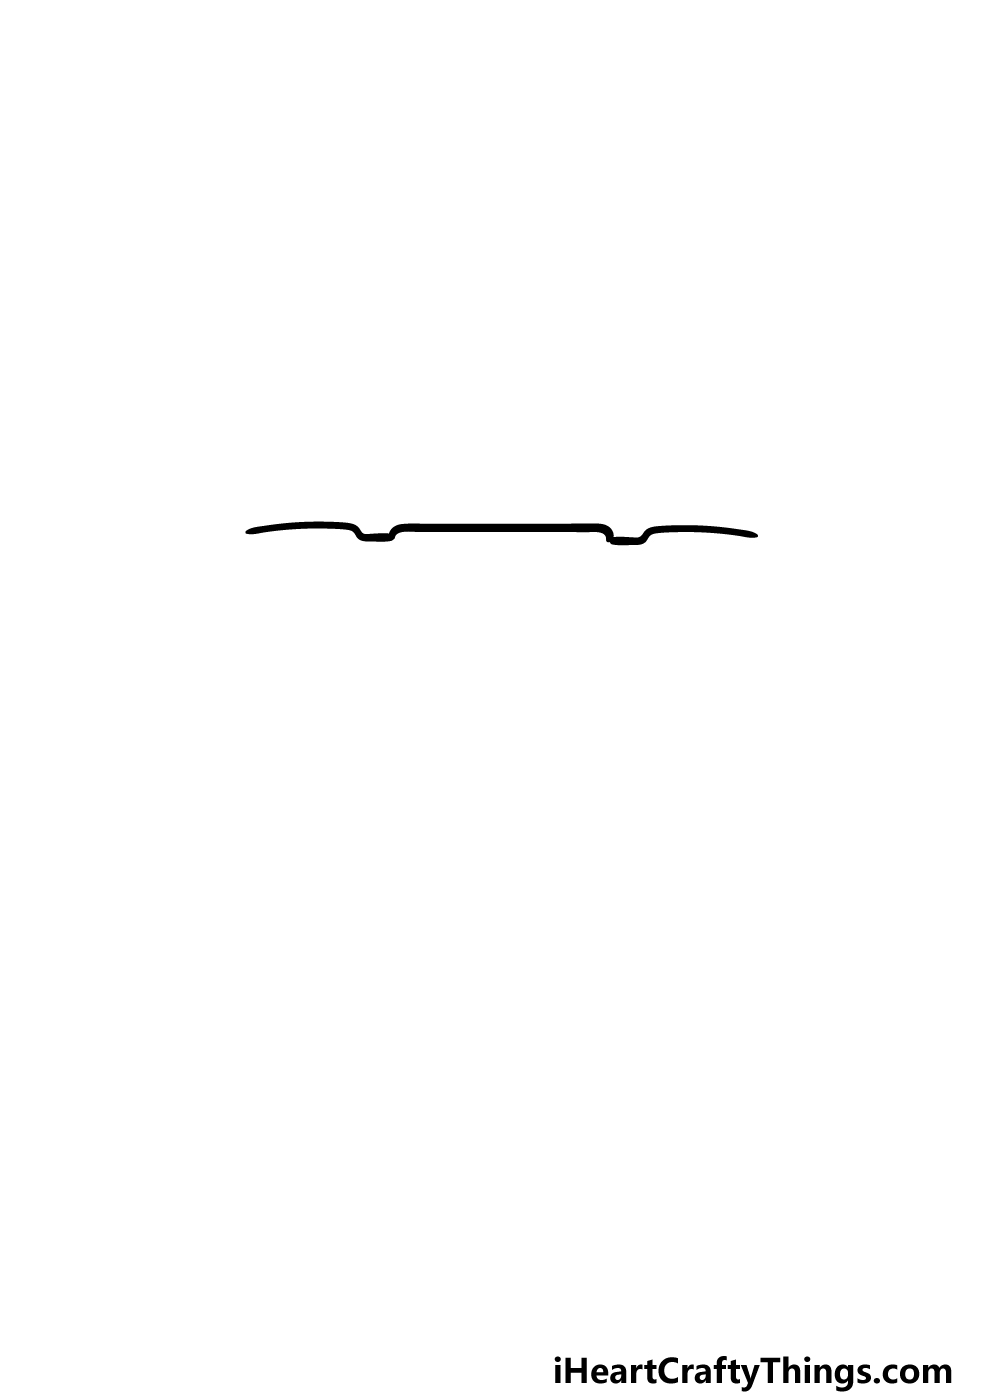
We will keep things simple in this first step of our guide on how to draw a PS4 controller. To get it started, we will be drawing the very top of the controller.
This will be one single line, but it won’t be a straight one for reasons you will see in the next few steps.
Using the reference image as your guide, you can draw a line that has two dips in it with some slightly curved ends.
Once this line is drawn, we will add more to the image in the next few steps.
Step 2 – Keep drawing the outline for the controller
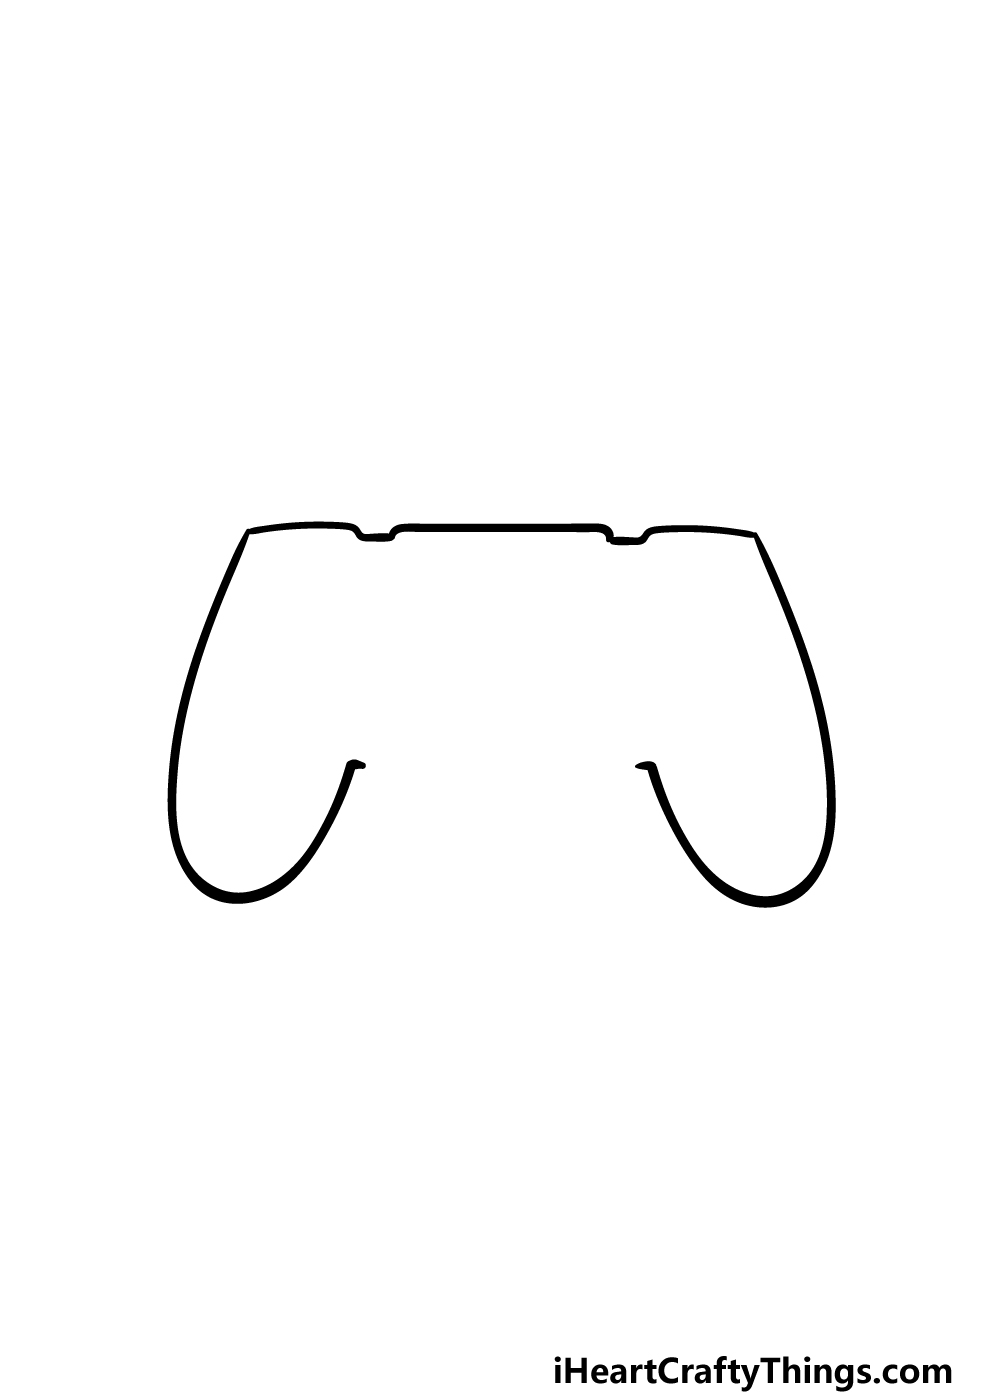
With the top of your PS4 controller drawing complete, we are now ready to add more to it in this step.
Once again, we shall be keeping things pretty simple for this step. All we will be doing is adding two lines to create the parts of the controller that rest against the palms.
To do this, simply draw a rounded line that curves inward at the bottom coming down from each edge of the top of the controller. That’s all there is to it for this step, and now we’re ready to proceed.
Step 3 – Next, draw some more details for the PS4 controller
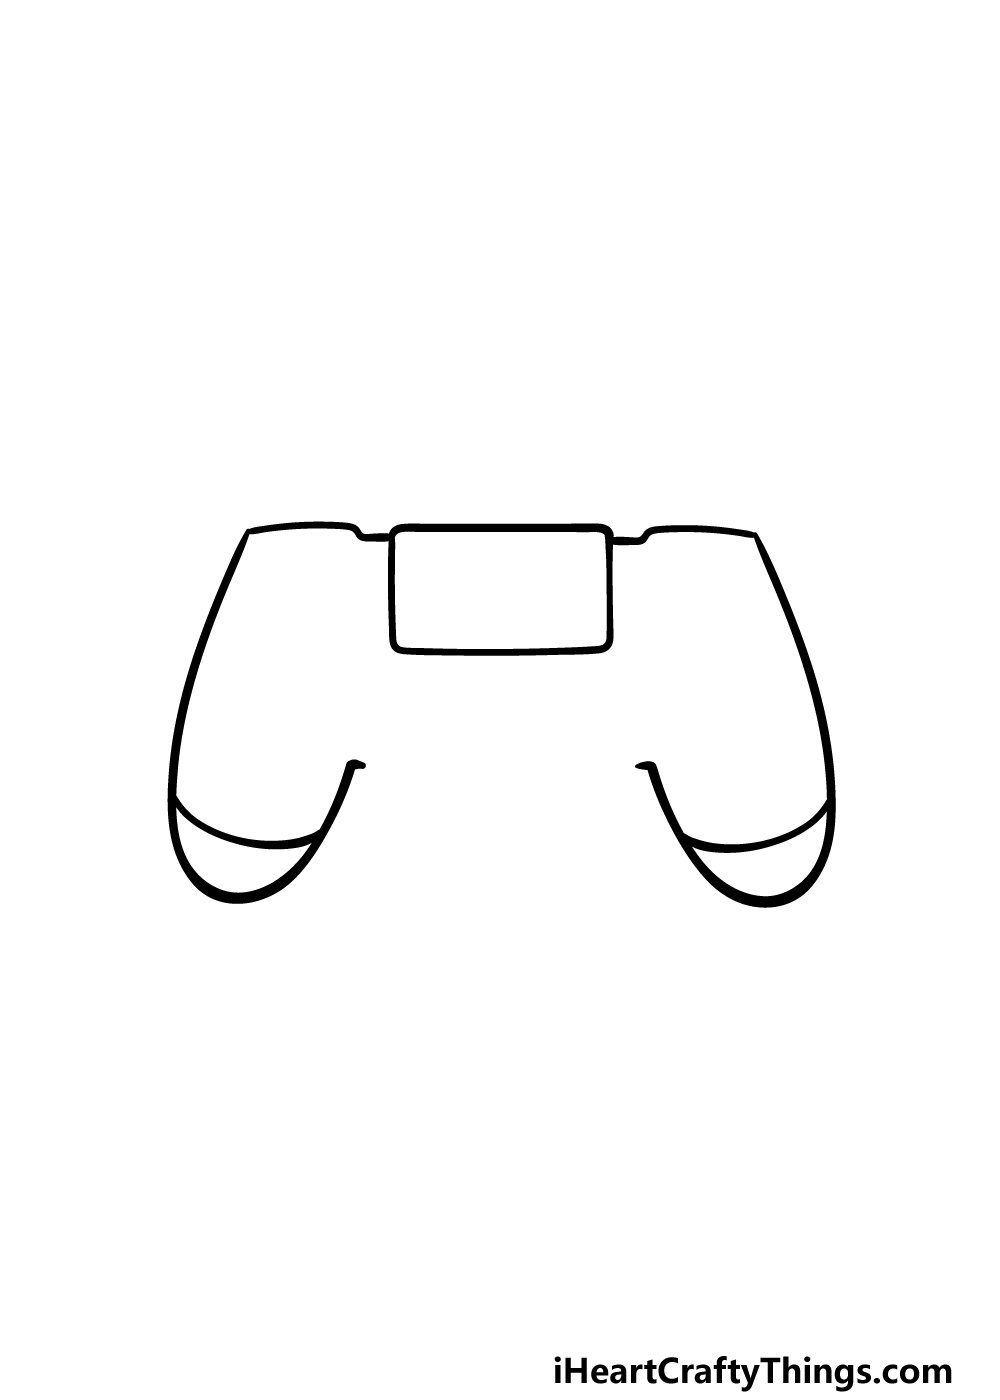
This third step of our guide on how to draw a PS4 controller will see you adding some details to the controller.
First, we will be adding some curved lines near the bottom of the two pointy sides of the controller that you drew in the previous step.
Then, once you have drawn those lines we will then add a rectangular shape to the center top of the controller.
This rectangle will form the touchpad of the controller, and this piece serves many functions when playing games.
Step 4 – Now, finish the outline and add some elements
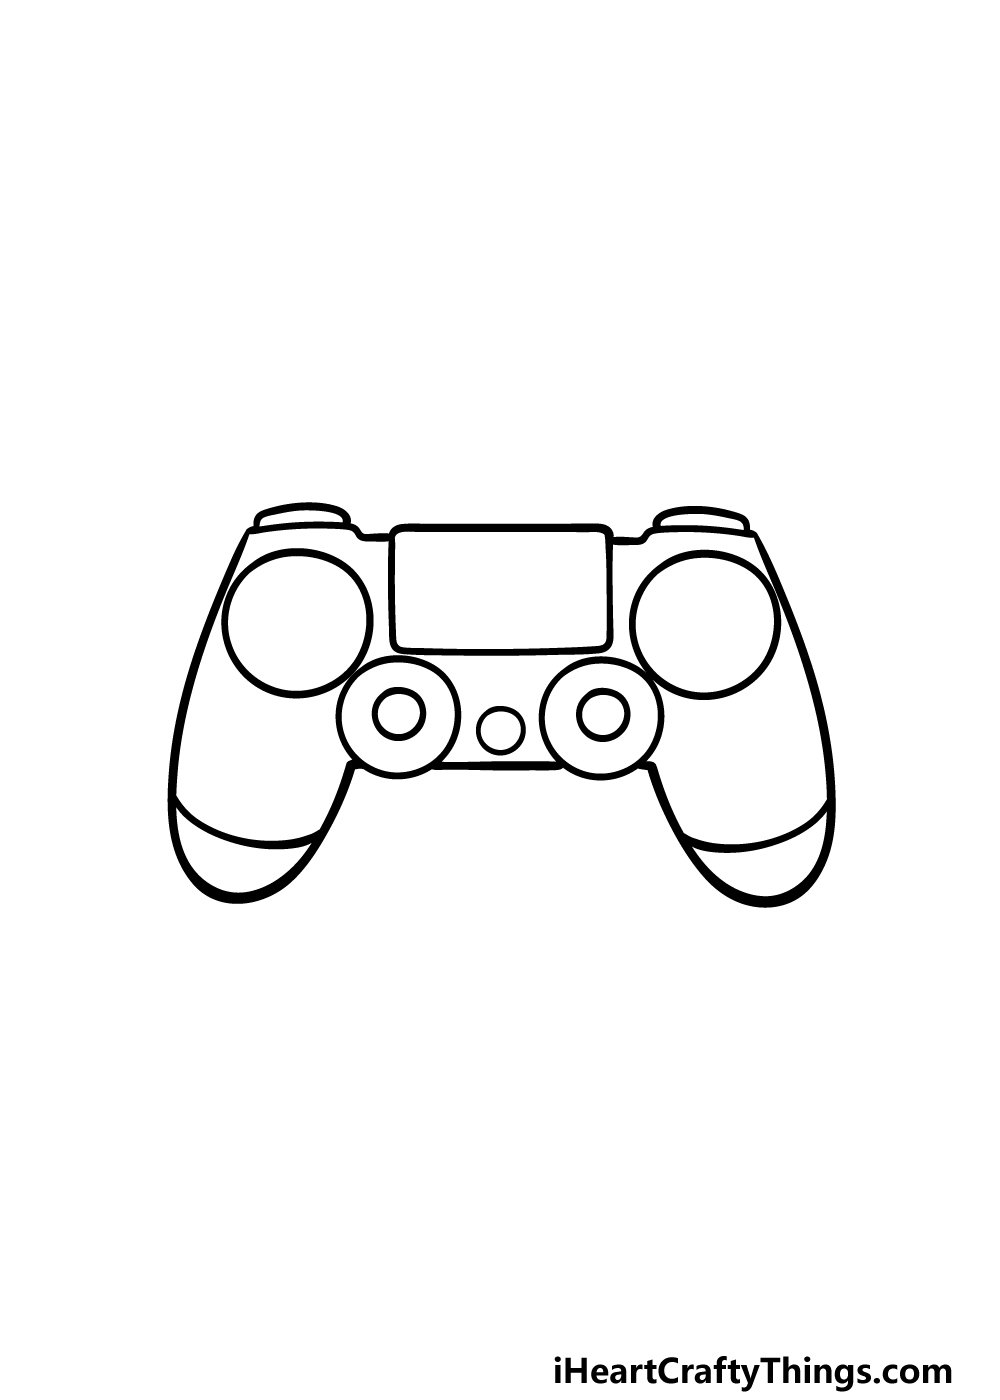
Now we can finish off the outline of your PS4 controller drawing and also add some of the buttons and other parts for it.
First, draw a medium-sized circle at the base of the controller between the two handles.
There should also be a small space between these circles, but you can fill that space in by drawing a straight line between them.
Then you can draw a smaller circle inside each of those circles, and these will form the analog sticks of the PS4 controller.
Then, draw a small circle between the analog sticks. Once that is done, the final things we will add to the controller will be two larger circles near the top corners of the controller.
Finally, add the shoulder buttons by drawing a small, flat shape on either side of the very top of the PS4 controller.
Step 5 – Add some final details to your PS4 controller drawing
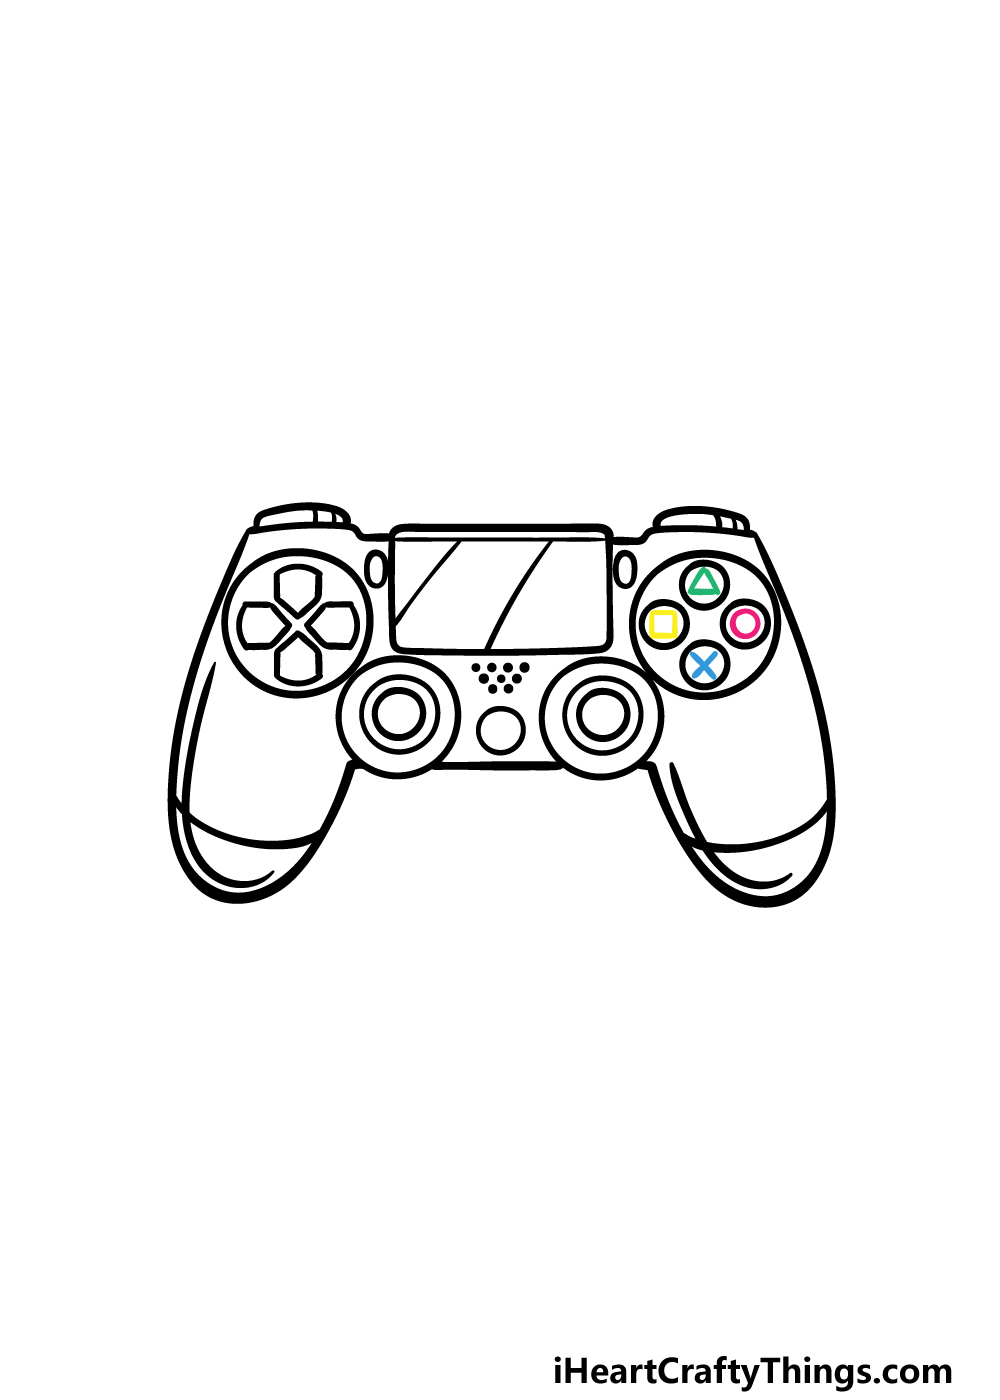
We can now finish off the final details in this step of our guide on how to draw a PS4 controller. First, draw four small circles into the circle that you drew at the top right.
For the circle in the top left, you can draw four angular buttons for the d-pad of the controller.
The remainder of the details that we will add shall be pretty minor. You can start by drawing two lines vertically across the touchpad.
Then, draw another circle around each of the analog stick inner circles. You can also draw some lines along each handle of the PS4 controller to show the curvature of each one. Finally, draw a small, vertical oval shape on either side of the touchpad.
The last thing will be to draw the symbols inside each of the round buttons on the top right. If you’re going to color in your drawing then you can use colors for these, otherwise you can simply draw them in.
There will be a green triangle on top, a red circle on the right, a yellow square on the left and finally a blue X for the bottom button.
Step 6 – Finish off your PS4 controller drawing with some color
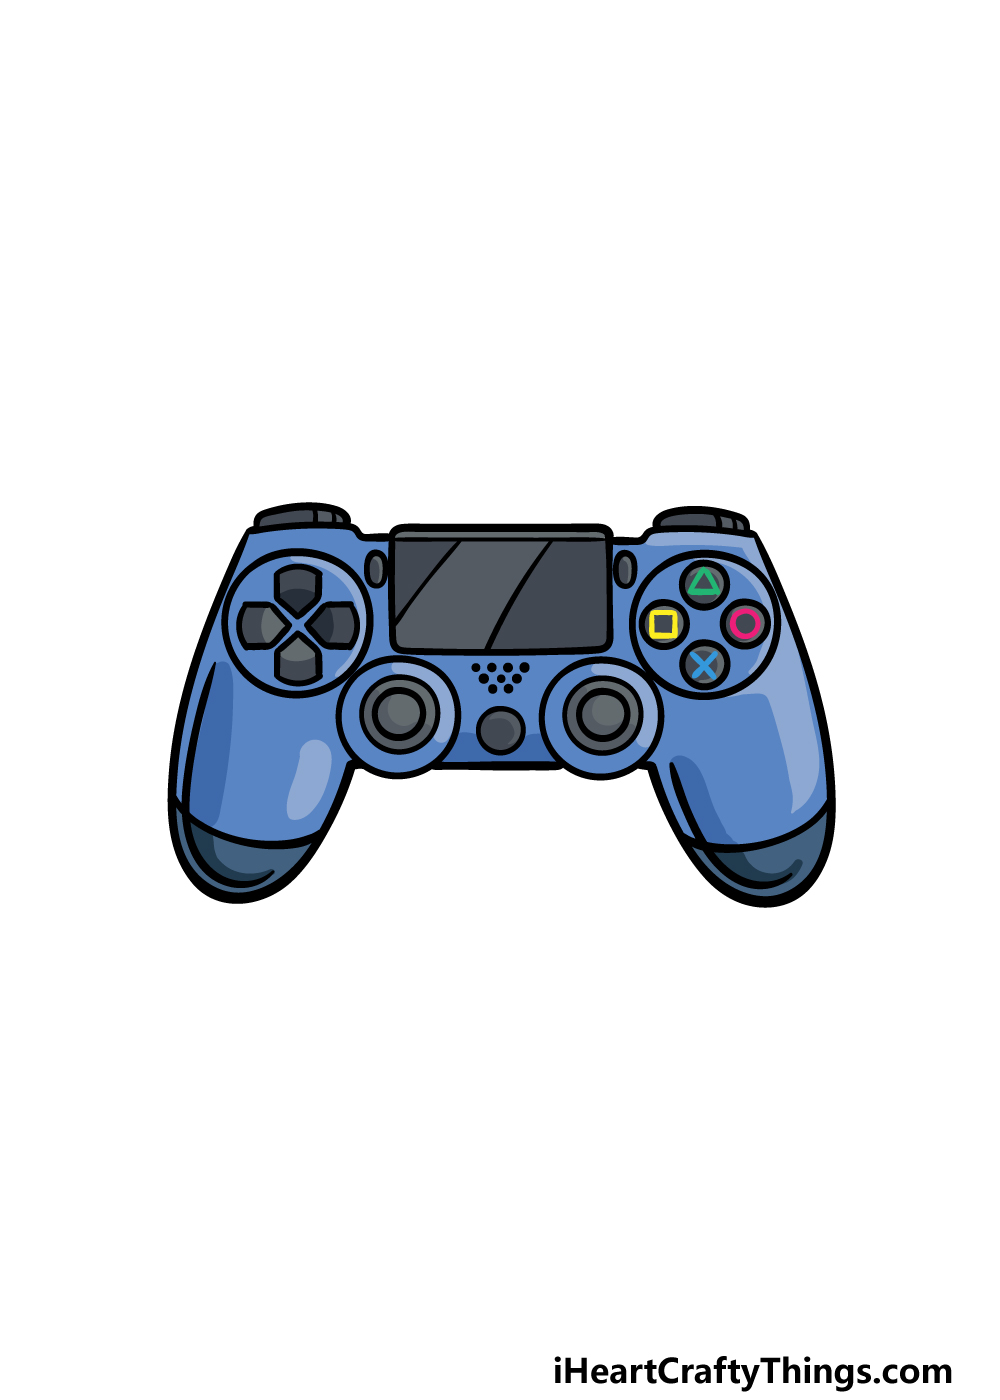
This is the final step of your PS4 controller drawing, and in it we shall finish it off with some color.
PS4 controllers can come in a wide variety of color schemes and designs, and you can even find ones themed to certain game releases.
In our reference image we went for a dark blue and black color scheme, but you actually have a lot of freedom for how you could color this in.
Will you go for one of the classic color schemes or will you maybe design your very own PS4 controller variation? We look forward to seeing what you do!
5 Tips To Make Your PS4 Controller Drawing Even Better!
Get your head in the game as we make this PS4 controller sketch even better!
Having a PS4 controller is all well and good, but you also need a console to attach it to. You could make this PS4 controller drawing more complete by adding the console!
The PS4 had a few different variations in its lifespan, so you would have a few different forms to choose from. Which PS4 variant would you choose to add to this drawing?
Of course, you also need a TV if you want to play some games. You could add one to further build on the background of this drawing of a PS4 controller!
If you were to do this, you could use the TV in your own house as a model. Or, you could show off what your dream gaming TV would be!
Once you have the console and TV sorted for this drawing, you could then draw some more of the background. This would be a great way to show what your ideal gaming den would look like.
You could use your real living room as inspiration, but it could also be a great chance to really use your imagination to design the setting.
With real PS4 controllers, you can get skins to put on them to customize them. That would be a great way to customize this PS4 controller sketch!
These skins can change the colors of the controllers, but they will sometimes also be themed to certain games.
You may want to base these skins on real existing ones, but you could also design some unique ones.
Lastly, you need some games if you’re to get the most out of this PS4 controller drawing! There are a few ways you could show what games you would like to play with this controller.
If you added a TV, then you could draw a scene from one of your favorite games on the screen. If not, then maybe you could draw some game cases around it.
What games would you choose?
Your PS4 Controller Drawing is Complete!
That brings us to the end of this guide on how to draw a PS4 controller!
We hope that you had a lot of fun designing your own PS4 controller, and we also hope that it was made a lot easier because of the steps we laid out.
Now that you have completed this guide, there are lots of ways you can put your own spin on it.
Whether you draw a background, add some fun details, use some unique colors or experiment with some art mediums, we know it will look great!
We have some amazing drawing guides for you to enjoy on our website, so be sure to visit us there for more fun! There are more on the way as well, so stay tuned for those.
Please also share your finished PS4 controller drawing on our Facebook and Pinterest pages, as we would love to see your gaming artwork!