Life can get pretty busy and stressful at times, so sometimes it can be very therapeutic to slow down and relax by a glistening pond.
There’s a sense of calmness around a pond that can have a lovely calming effect on you, and often they will even have some fish to admire in them!
One doesn’t always get to visit a pond when it would be most needed, so learning how to draw a pond can be the next best thing.
This tutorial in front of you will show you how you can create your very own tranquil pond with no frustration!
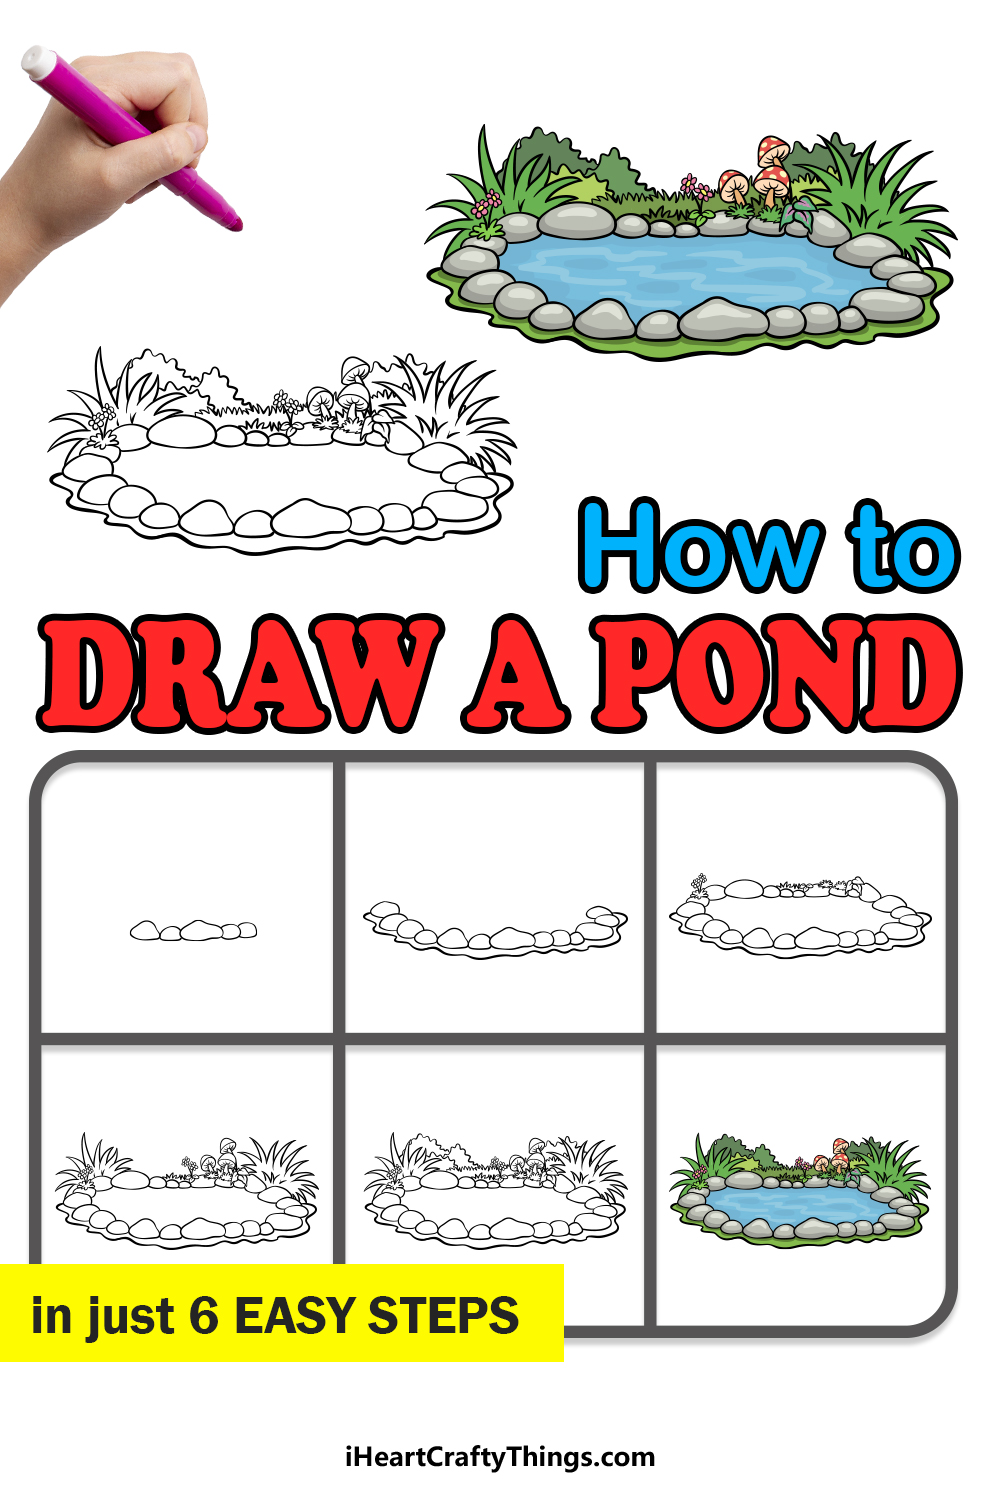
Sit back, relax and enjoy this step-by-step guide on how to draw a pond in 6 steps that we have prepared for you.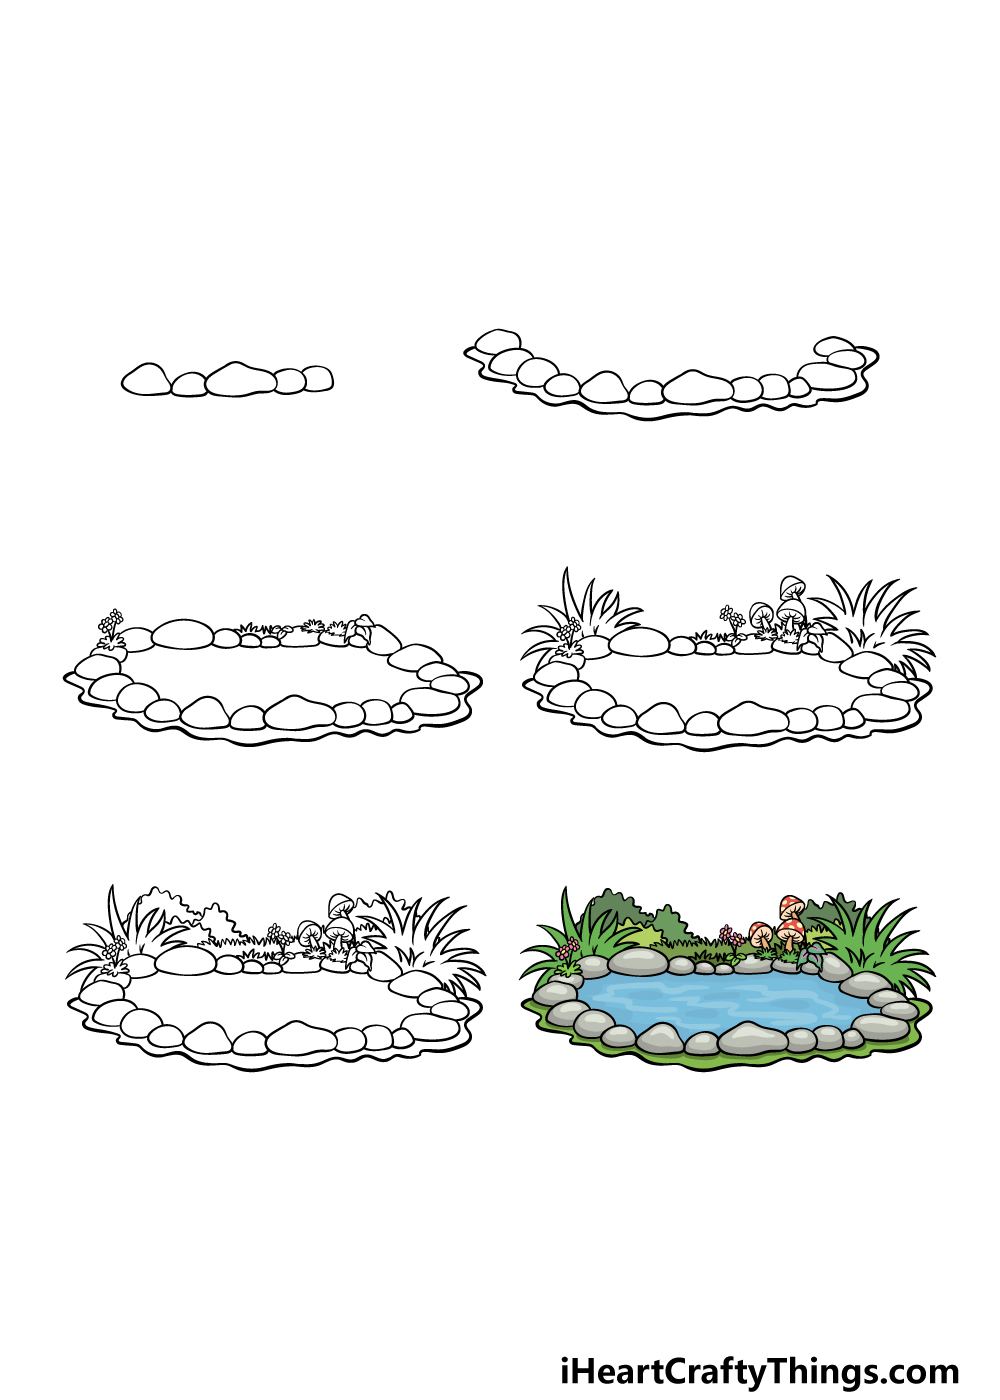
How to Draw A Pond – Let’s Get Started!
Step 1

The pond that we will be drawing today will have a nice little row of stones around it to add to the calming atmosphere of the scene.
These stones are what we will start with in this first step of our guide on how to draw a pond.
We will keep it rather simple as we start on this aspect, and all you need to do is draw five rounded, fairly flat shapes of varying sizes.
Once you have drawn these stones, you will be ready to move on to the second step!
Step 2 – Next, draw some more stones for the perimeter of the pond

Now that you have started the outline of your pond drawing, we can keep adding to it in this step. First, we will be adding some more stones to the perimeter of the pond.
For this image, you can add four to the left-hand side of the row that you started previously, and then four more on the right.
The stones should be positioned in such a way that they curve upward a bit, and the stones you’re drawing on the right will be a bit bunched up.
Finally, to finish off this step you can draw a wavy line going underneath the rows of stones to create a sort of grassy base for them.
Step 3 – Draw the top of the side of the pond in this step
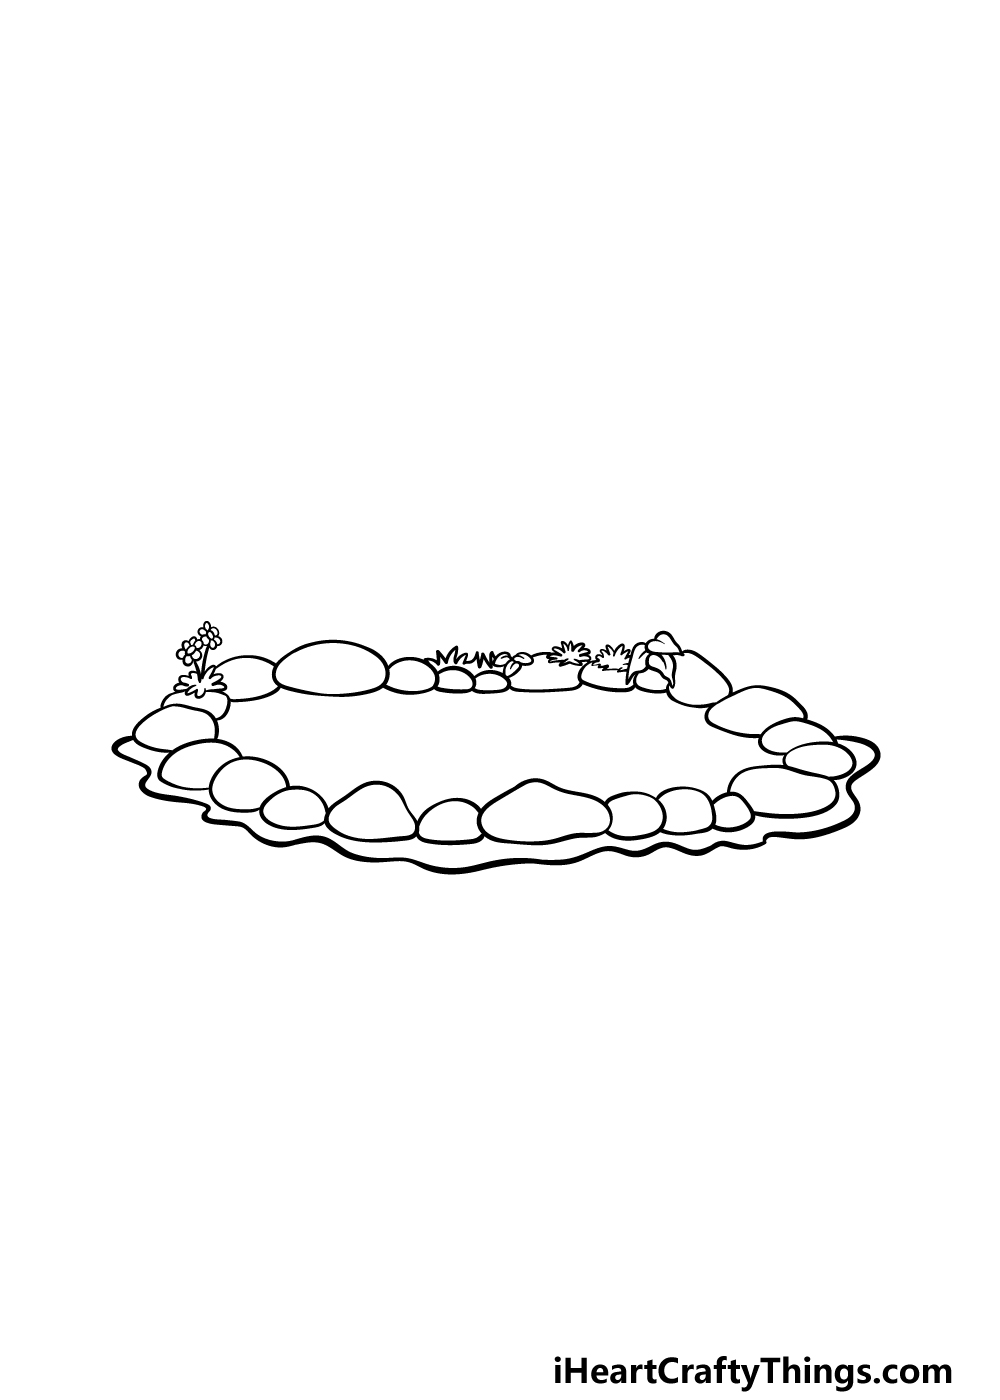
We will continue adding to the perimeter outline in this third step of our guide on how to draw a pond.
To do this, we will be following a similar plan as we have been for the previous two steps, and that means drawing more rocks. These rocks will help to create the complete outline of the pond, as shown in the reference image.
These rocks will have a little more detail to them, however, and you can do this by drawing some clumps of grass and flowers onto them.
These details are small, but they really add a lot to the image as a whole!
In the next step, we will add even more of these plant details, so when you are ready we shall proceed!
Step 4 – Now, draw some more plant life around the pond
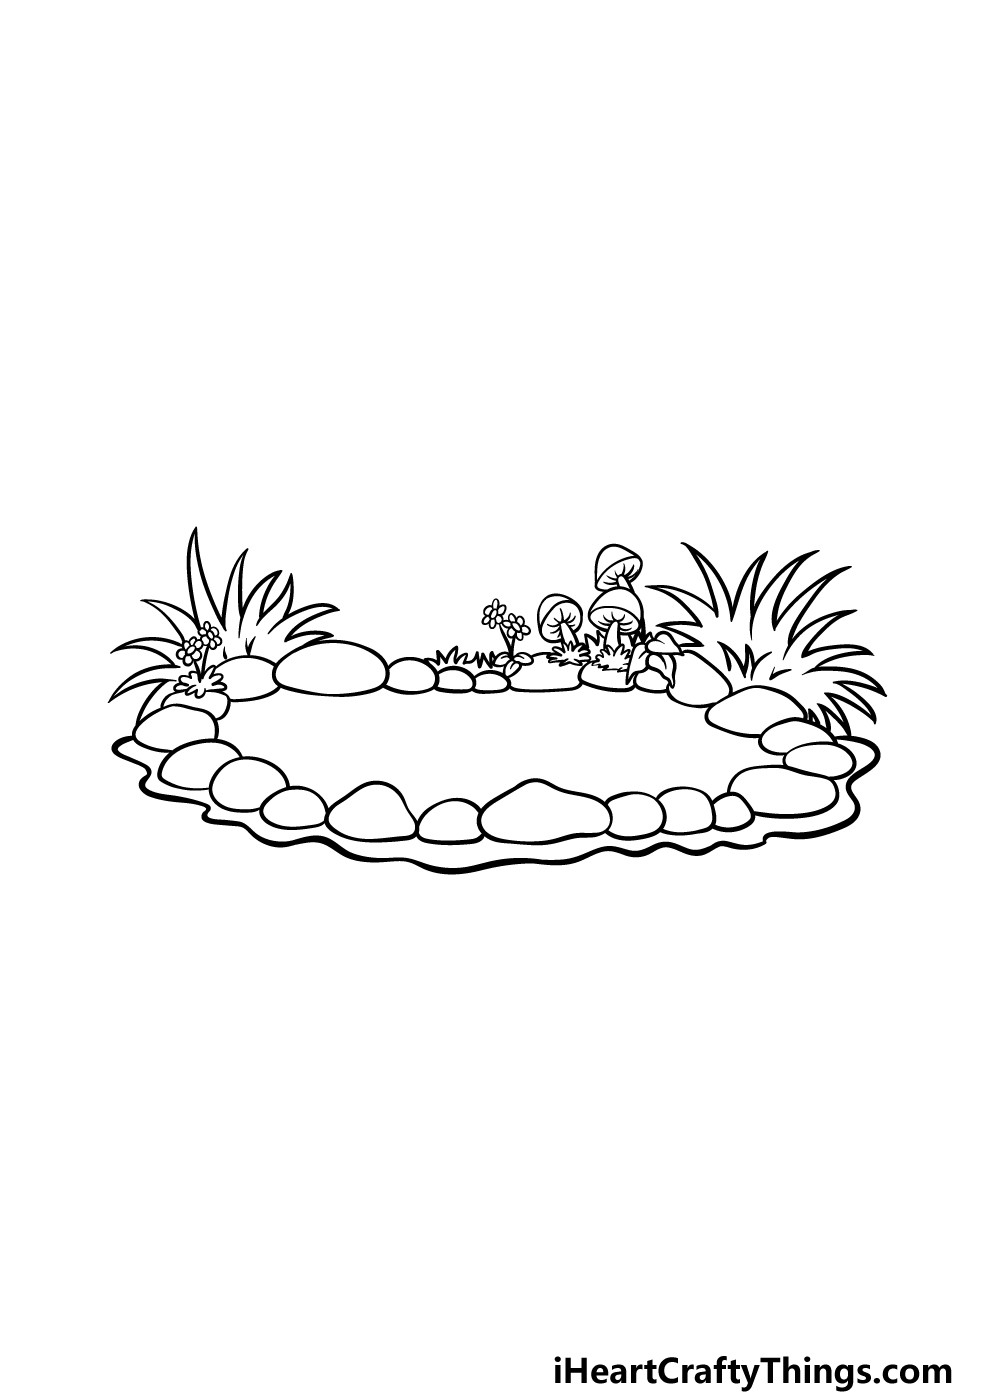
As promised in the previous part of your pond drawing, we will be adding some more plant details to the picture in this part.
For our reference image, we added some more little flowers along with some larger bushes by using some sharply curved lines.
We also added some more clumps of grass and then drew some large mushrooms for an extra fun detail.
Feel free to add even more little plants and details before we move on to the final details and touches in the next part!
Step 5 – Draw some final touches for the pond
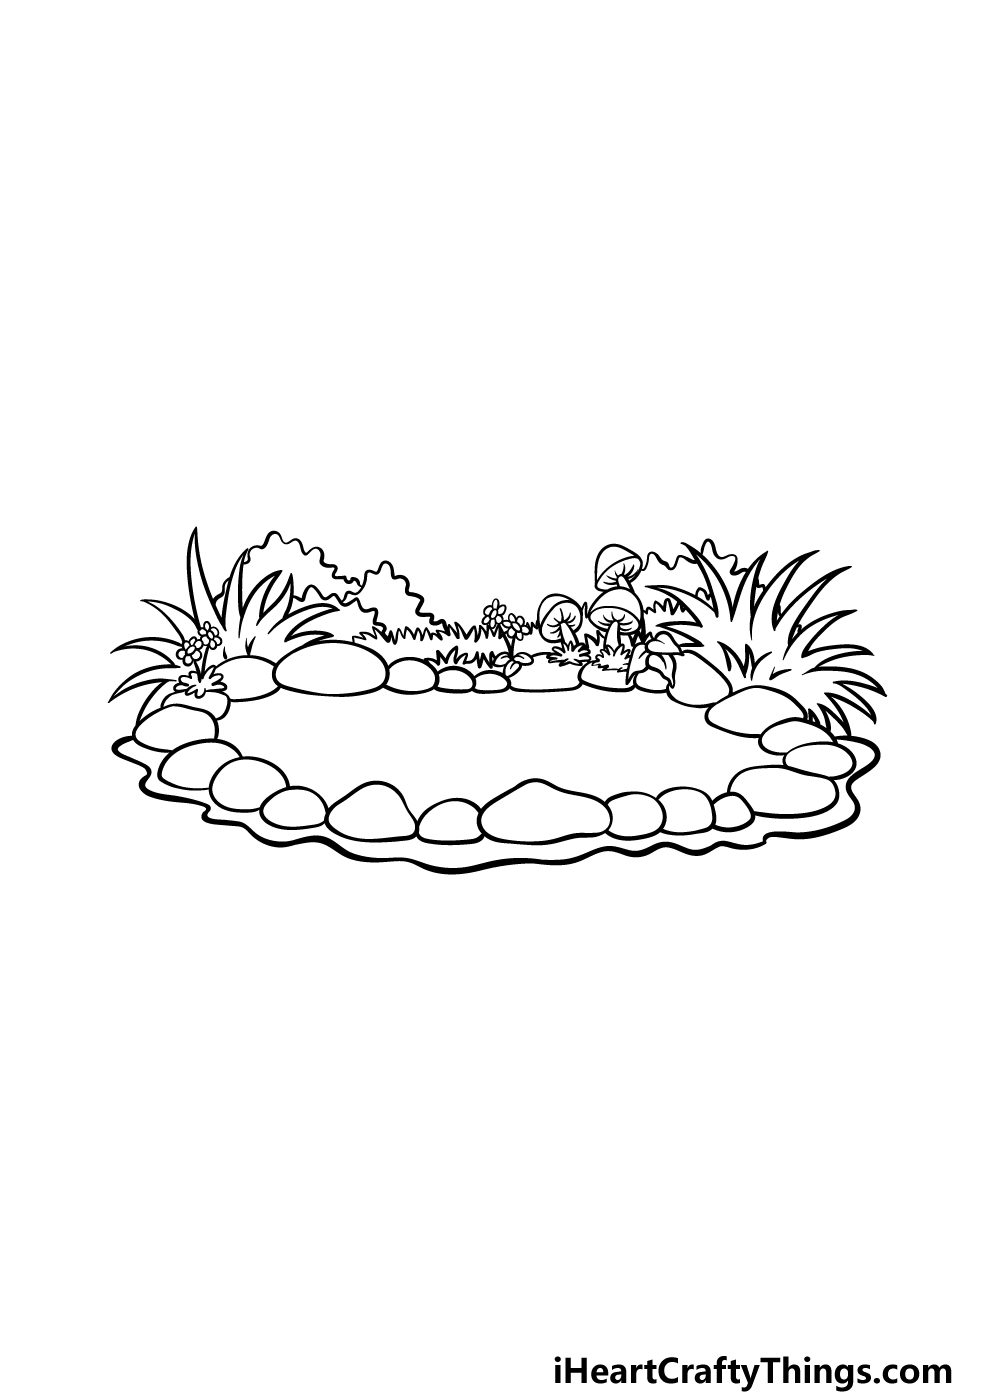
This fifth step of our guide on how to draw a pond will see you adding some final touches and details. You will also have a chance to add some extra details of your own!
Before that, let’s finish off the final details that we have in our image. You can use some wavy lines to create the shapes of some bushes in the background.
That will finish off the detailing that we set out for you, but as we mentioned you can also add some of your own!
It could be a fun touch to draw some cute fish inside the pond, or you could even have a duck floating on it. These are just a few simple ideas, but what would you add to this pond to finish it off?
Step 6 – Finish off your pond drawing with some color
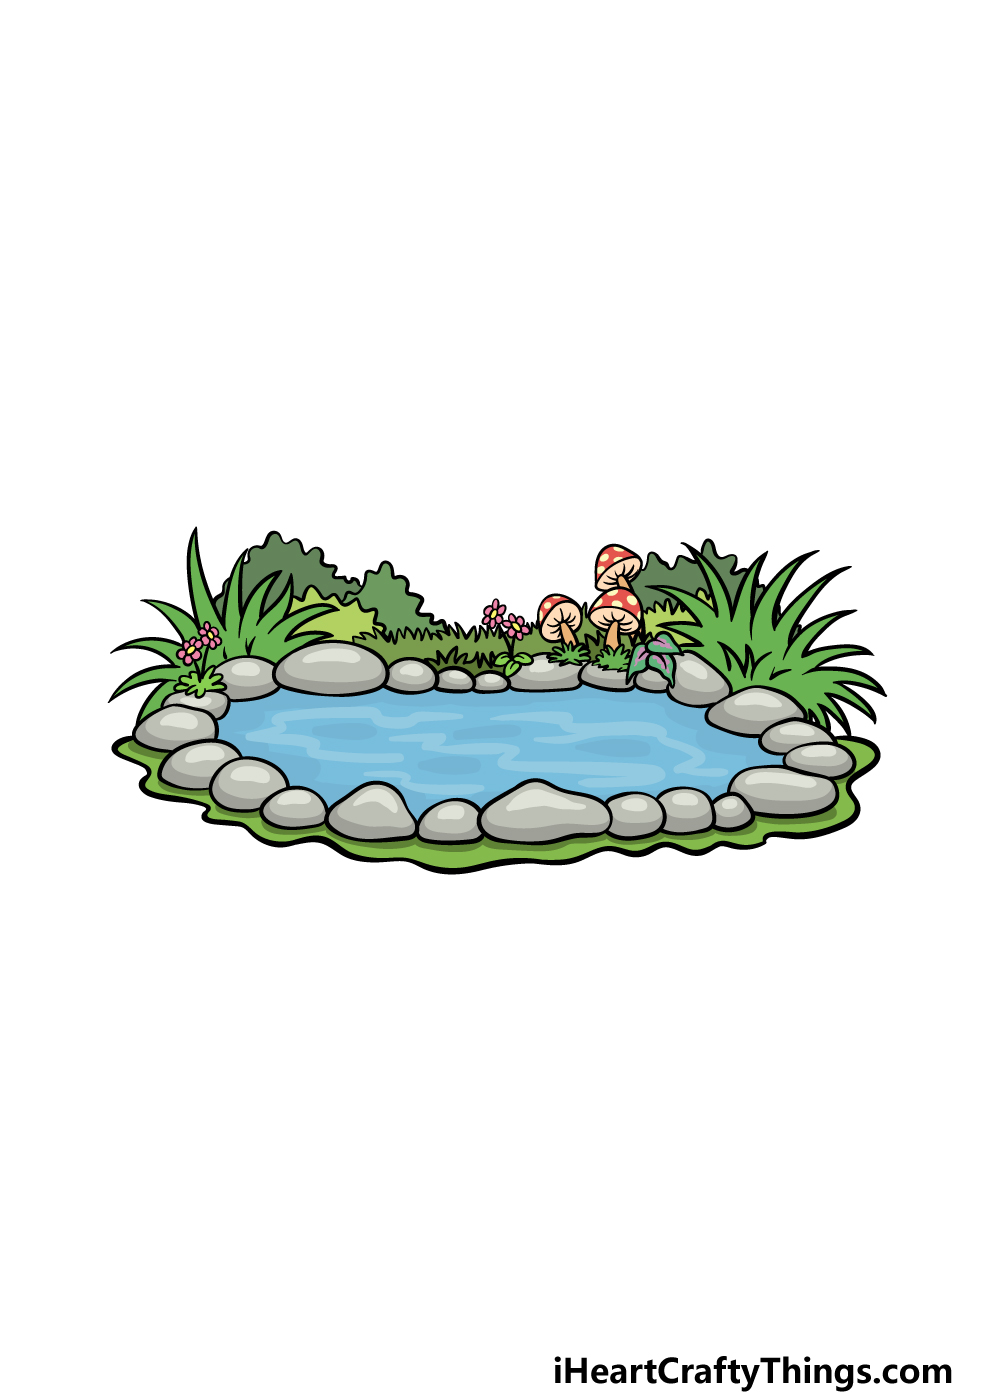
For the final part of your pond drawing, we shall finish it off with some pretty colors!
We used a large variety of bright and cheerful colors in our reference image, and these included blues for the water, greys for the stones and lots of green and red for the grass and plants.
These are some color suggestions that you could use for your own image, but you should also feel free to use any other colors that you would like for it!
Then, once you have picked your colors you can then pick which art mediums you will use to bring them to life.
For tranquil scenes like this, watercolor paints can be great for a more mellow feeling to the picture.
Alternatively, brighter mediums like colored markers and acrylics can help for colors that pop off the page. Either approach will look great, so what will you choose?
Here’s how you can make your pond drawing even better…
Create a lovely pond getaway as we show you how to make your pond sketch even better!
When you’re relaxing near a pond, you’re likely to see all sorts of small animals. You could add some of these animals to your pond drawing to make it even more dynamic!
There are so many examples of what you could add. For instance, you could show a fish jumping from the water or maybe have a few rabbits at the edge.
You could also go larger by having some bigger animals such as deer drinking from the water. What are some animals you would like to add?
Adding animals is one approach you can take, but you could also add a human character sitting at the water’s edge. If you were to add that element to your drawing of a pond you could go with all sorts of different styles.
The person could be drawn in a cartoon style or maybe you could go for something more realistic. Who would you like to show besides this pond?
Once you have decided whether you will add some humans or animals next to the pond, you could also extend the background. You can really create an interesting scene to enjoy by doing this!
Adding some trees or plants around the pond would be a great way to get started with this. We started you off with a few details surrounding the pond, but there is so much you could add.
These could be man-made as well, such as a small cottage or maybe a fountain statue!
Experimenting with colors is the best way to take a drawing to new heights, so you should really have fun with it for this pond sketch! We showed you how you can color this pond in the guide, but you’re in charge now.
You should definitely feel free to use any colors, mediums and techniques that feel right to you, even if they may be unconventional. Where do you think your color creativity will lead you?
Your Pond Drawing is Complete!
We hope that this guide on how to draw a pond was as fun and relaxing as sitting by a pond in real life!
In this guide, our aim was to eliminate a lot of frustration by giving you some simple steps to follow, and that hopefully resulted in lots of fun!
Once you have finished this drawing, we hope that you will add even more of your own personal touches and details to it. There is a lot of room to get creative, so be sure to have fun!
This is certainly not the only guide we have in store for you, so be sure to visit our website for many more awesome drawing guides. We have more on the way as well, so definitely keep checking in!
It’s always a thrill to see how you complete these guides, so please share your finished pond drawing to our Facebook and Pinterest pages for us to look at.