The police form an important part of modern life. Every day the men and women of the police put on their uniforms and work hard to protect the community.
They wouldn’t get very far on foot, however, making their distinctive police cars an essential tool that they use every day.
These vehicles may be important for the police, but it can also be a fun activity to learn how to draw a police car!
This can prove to be harder than expected, however, unless you have the right guide to help.
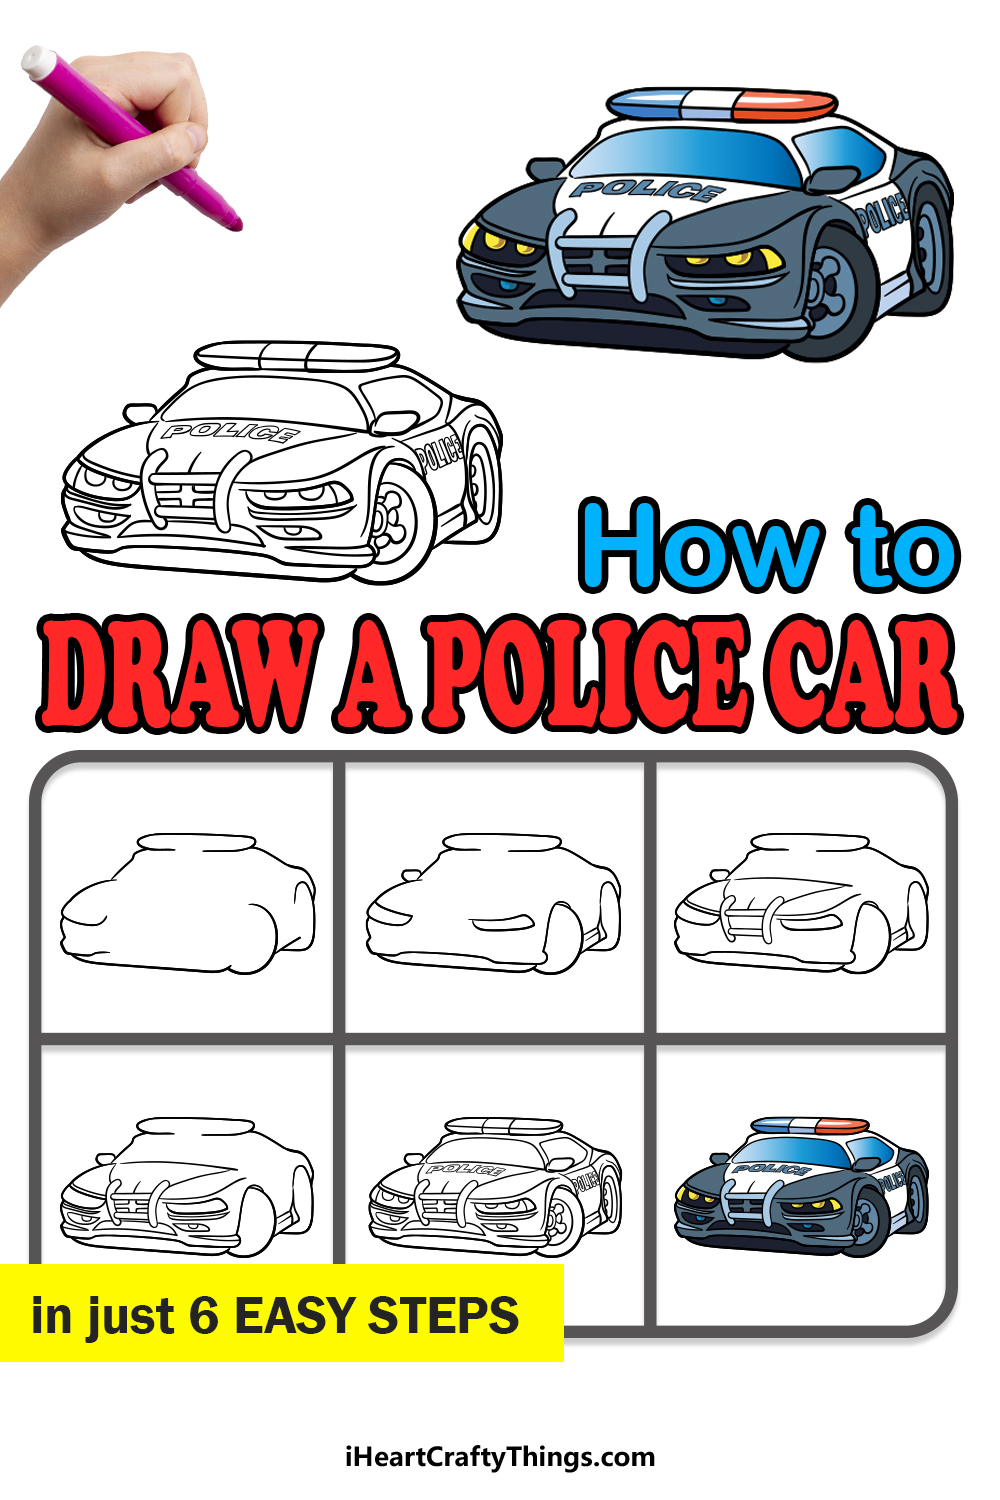
This step-by-step guide on how to draw a police car will show you how easy and fun it can be!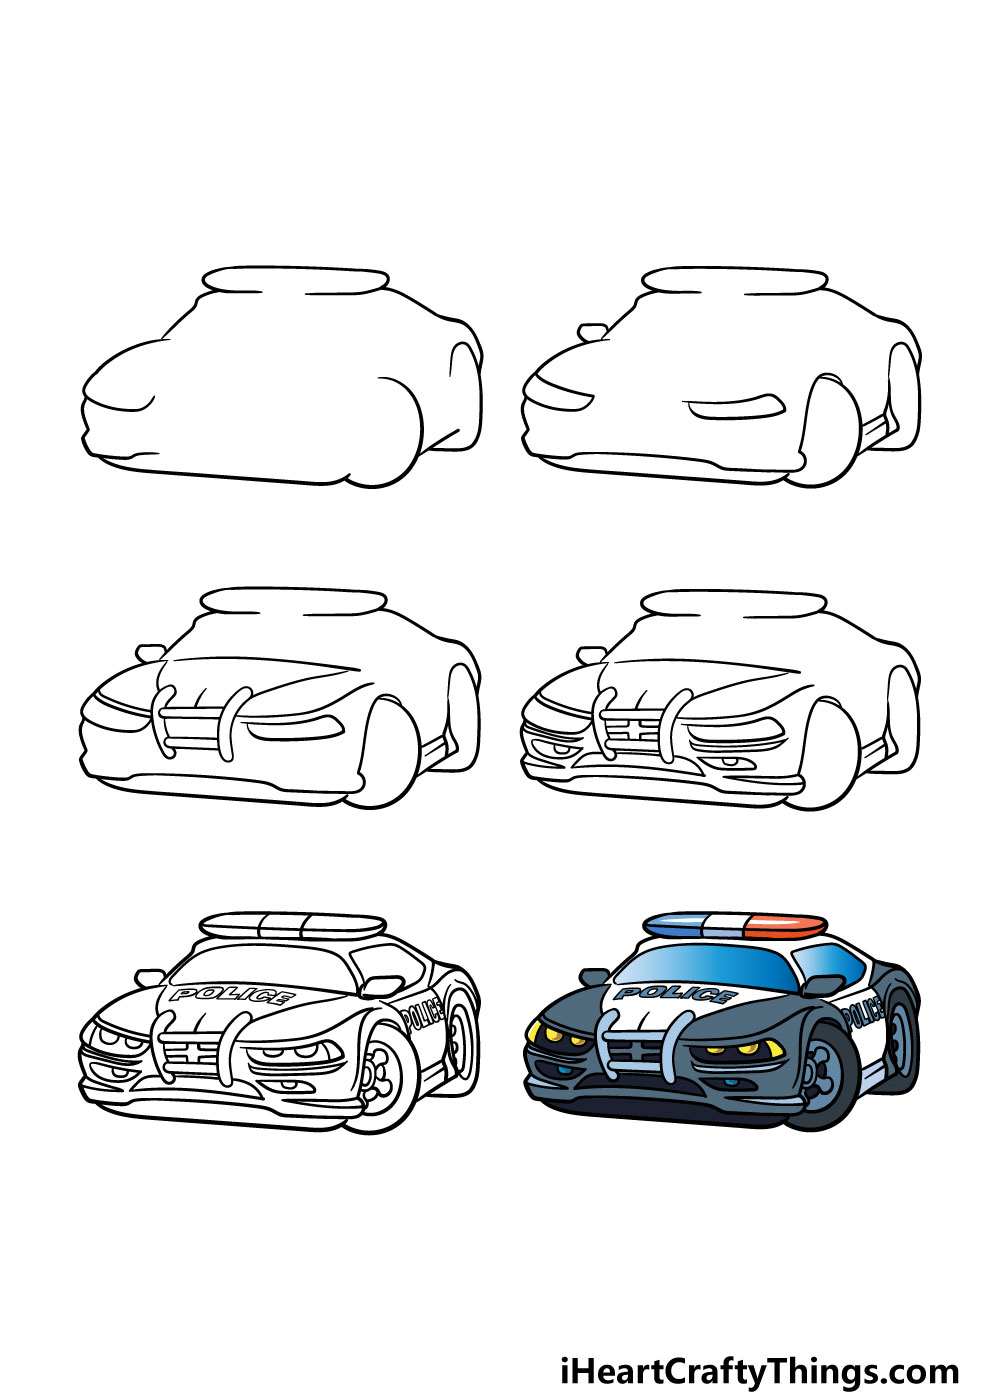
How to Draw A Police Car – Let’s Get Started!
Step 1
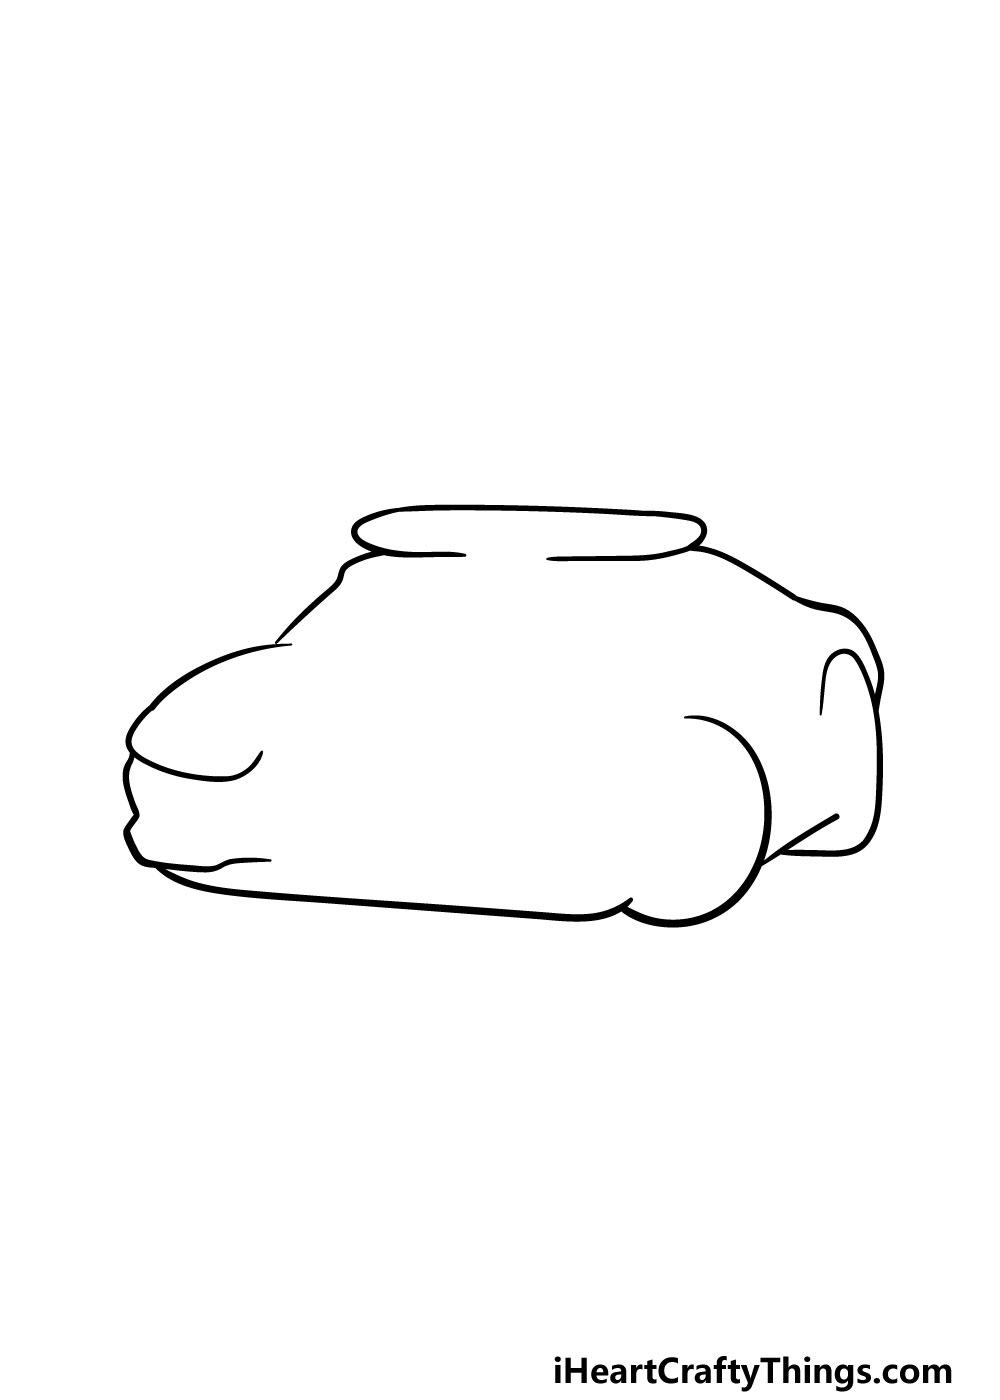
In this first step of our guide on how to draw a police car, we will be working on the outline of the car.
Drawing a vehicle is almost always a challenge, so by starting with the outline and adding detail inwards we will make it much easier for you.
For now, we will be drawing the outline of the body of the car along with the wheels and the lights on top of it. Once you’re happy with how it looks then you’re ready to proceed!
Step 2 – Start drawing the details of the police car

Now that you have the outline of your police car drawn, we can start to add some details to your police car drawing.
For now, you can draw some shapes at the front of the car for the headlights. Then, you can add some detail to the bumper of the car as well as to the sides.
These are just a few of the details that we will be adding, though, so once you are happy with how it looks then we can proceed to the next ones!
Step 3 – Next, draw some details for the hood and the front of the car
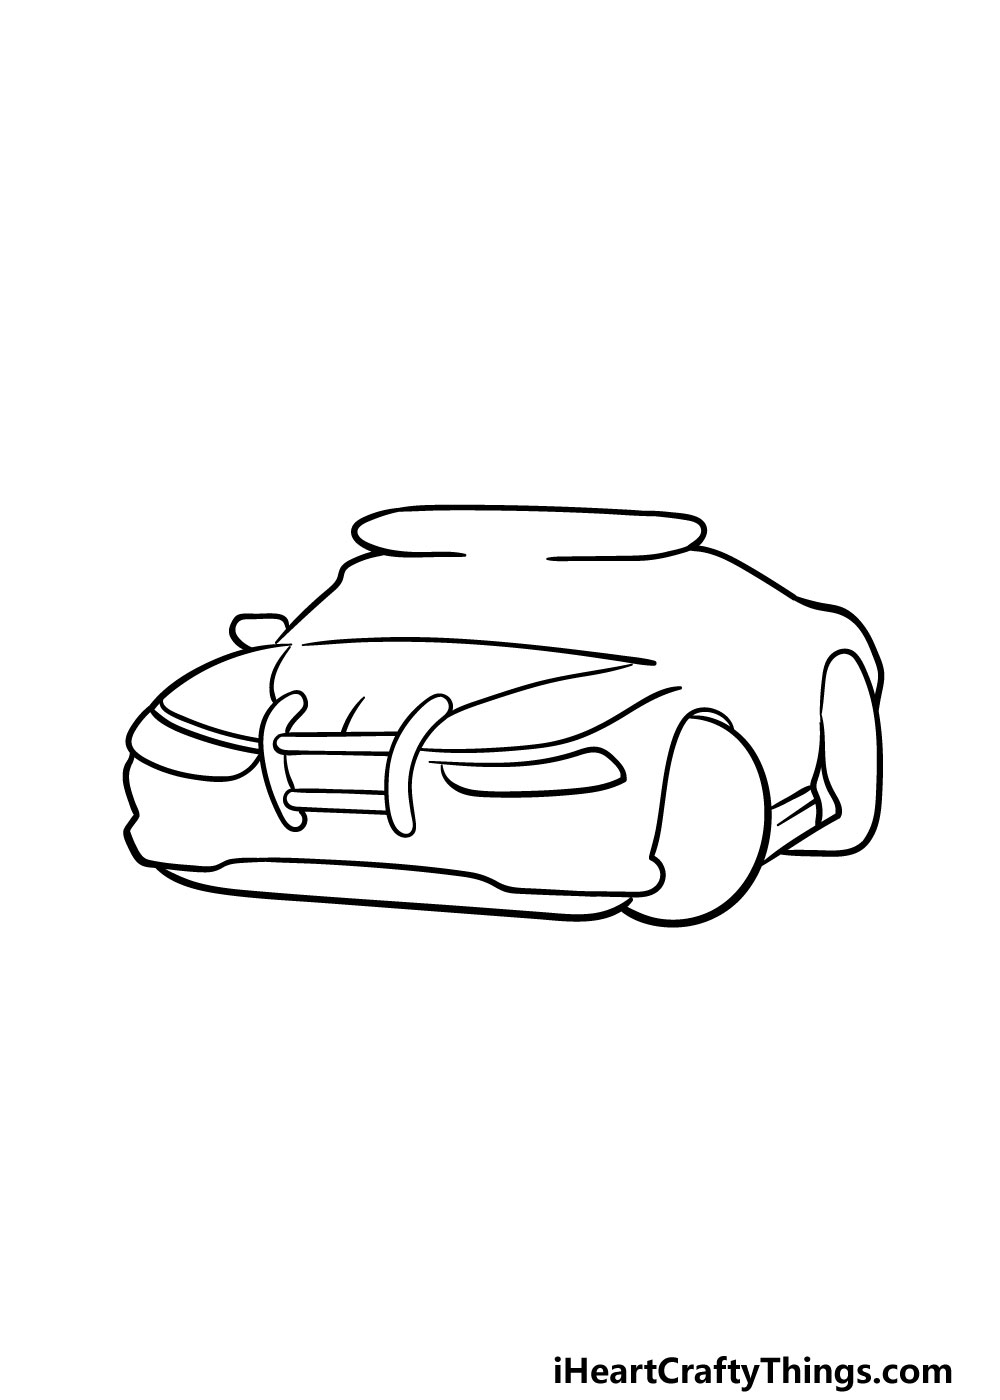
In this next step of our guide on how to draw a police car, we will be focusing on the hood and the front of the car.
First, draw some curved shapes at the front of the car for the area around the grill. Then, you can extend some curved lines up from this for the hood of the car.
Step 4 – Draw some details around the bumper of the car
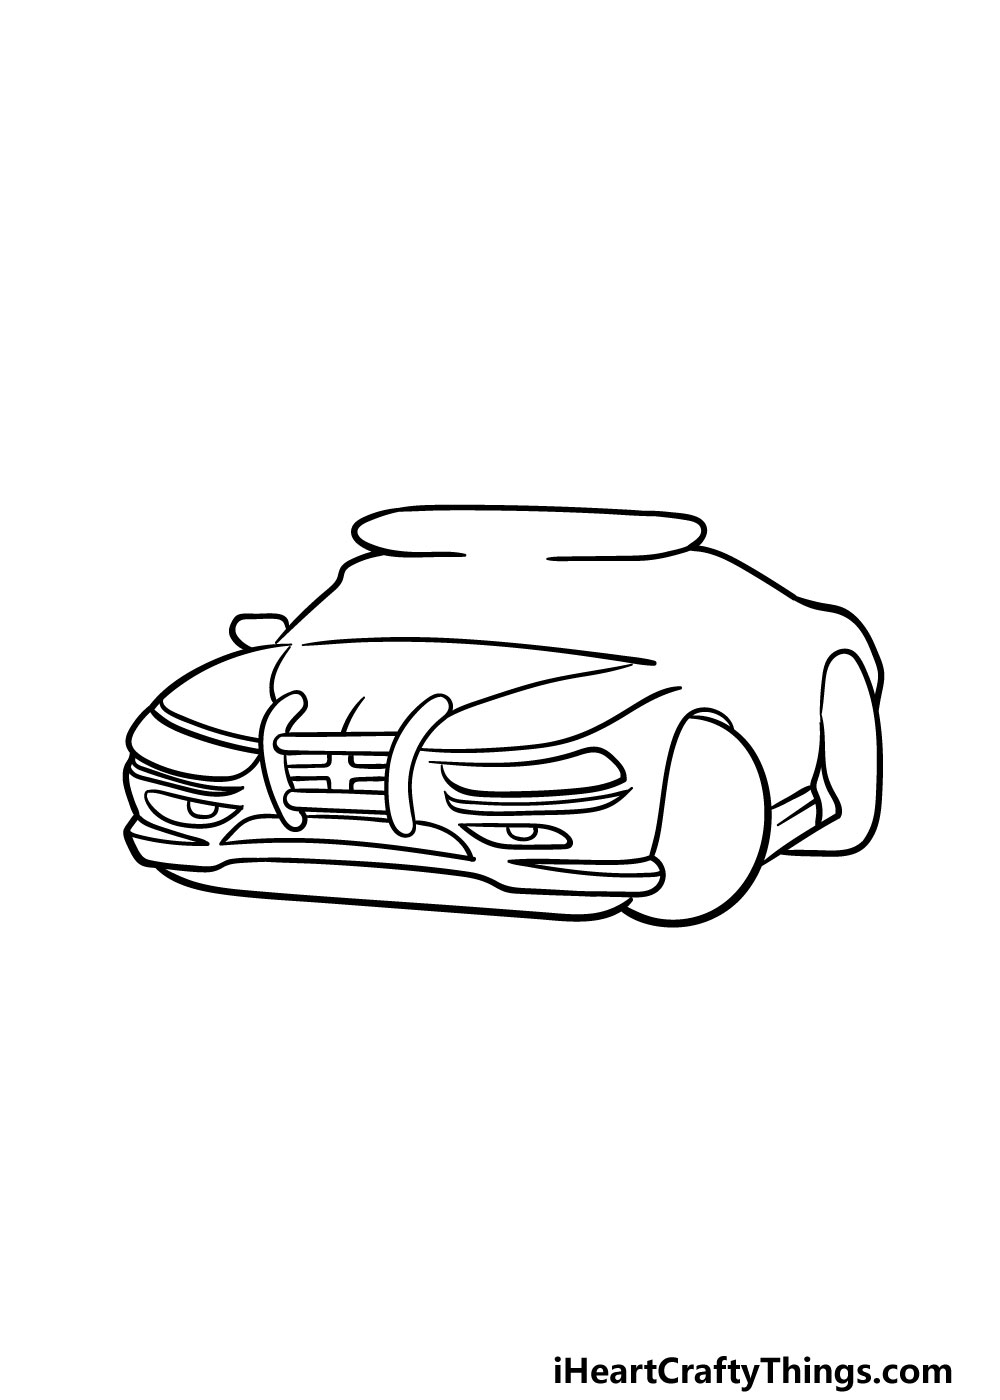
Your police car drawing is really starting to take shape! For this next part, we will be focusing on the bumper of the car.
You can draw these details with more lines underneath the grill, and you can also add some more rounded shapes there for more detail.
This is definitely a step where you’ll want to follow the guide closely as you draw, as some of these details can be a bit tricky!
Step 5 – Now, you can finish off the final details of your police car drawing
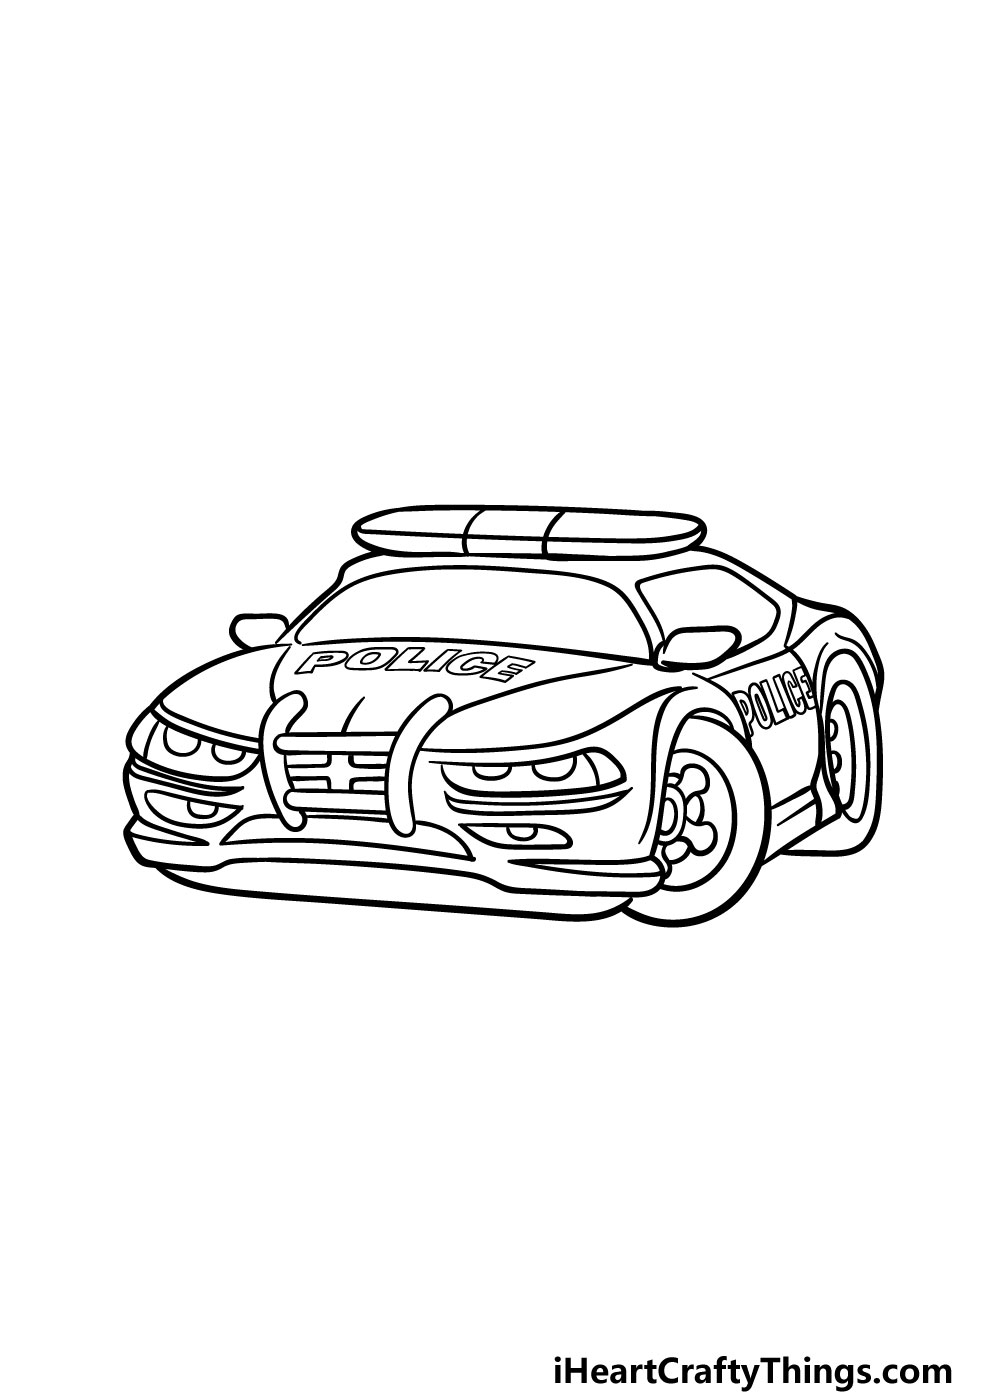
This fifth step of our guide on how to draw a police car will be centered on adding all of the final details before you color it in.
There will be quite a lot of details that you will be adding, so this is a step where you will want to take it slow and follow the guide closely!
First, you can write the word police on the hood and door of the car. Then, we will be adding some details throughout the rest of the car.
First, you can add some subtle details to the headlights of the car. There will also be some small line details on the lights on top of the car!
You can also draw the side mirror and other windows of the car. The last details will be on the wheels, which you can draw with some curved and rounded lines. If you have a hard time with these details, you could simplify them a bit as well.
Once you have added these details, you’re ready for the final step! Before you go on, feel free to add any details of your own that you may like!
You could draw a background to show where this car is, or you could draw a policeman or policewoman standing next to it. Be sure to get creative as you add the final details!
Step 6 – Finish off your police car drawing with some color
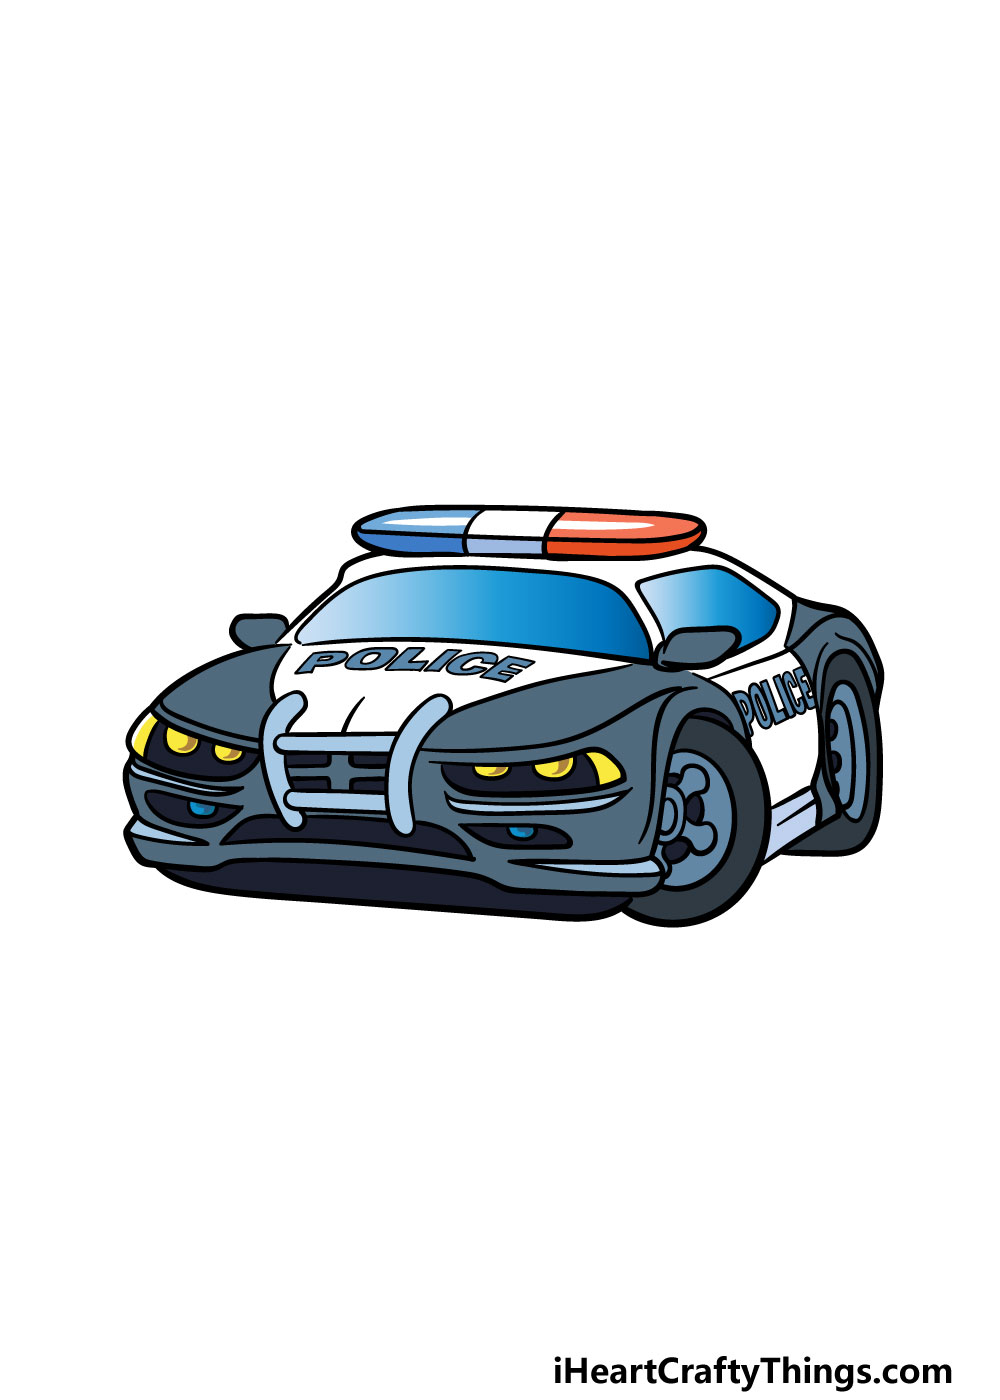
You have reached the final step of this police car drawing, and this is where you get to have lots of fun adding some amazing colors to your picture.
In our reference image, we showed you just one of the many ways that you can color in this image. We used colors like grey, blue, red and yellow to color in the police car, but as we mentioned this is just a suggestion!
You could use any colors that you love for this image to really bring it to life. Even if you do keep the colors more muted and realistic, there are ways that you could bring some color variation to the image.
One of the easiest ways that you could do this would be by coloring in the background or any other elements that you may have added.
Which favorite colors, art mediums and tools will you use to bring this police car drawing to life?
3 More tips to make your police car drawing easy!
These tips for your police car sketch will make it so easy it’s criminal!
This drawing of a police car is really detailed, which creates a more realistic look for the drawing. This can also make it significantly more difficult to draw, however.
Removing or changing some of these details could be a great way to make it easier. The details do look great, so you should try your best to retain as many as you can.
You could do this by trying to work through the guide and then taking note of the parts you are struggling the most with. These are the details you could focus on changing or omitting.
What parts of the police car do you think you may want to change?
Another way you could make this police car drawing easier would be by adapting it to a style you find easier. If there is a style of drawing you find comfortable, then it would be great to use it here!
For example, you may like to draw in a cartoon or a comic book style. If you do find a style like that easier, then you could follow through the guide and change it to look more like your chosen style.
This would not only make it easier, but it could also make the police car look more pleasing to your tastes!
Finally, looking at some real cars would really help to make this police car easier to draw. Using a real police car to help with your police car sketch would be best, but any car would work.
You could start by finding a car that has a relatively similar build to the one in the guide. This car would help you as you draw some of the smaller details and proportions of the police car.
Even if it’s not identical, it can be super helpful. If all else fails, you could look up photos of real police cars to help you as you work on this one.
Your Police Car Drawing is Complete!
With those final details drawn and the colors added, that means that you have reached the end of this guide on how to draw a police car!
We mentioned that drawing a vehicle is always tricky, so you should be very proud of yourself for completing this awesome drawing.
Now that you have mastered this police car, you can keep the fun going in a number of ways. You could draw a background, more details or add elements such as some police standing by the vehicle.
These are just a few ideas, however, and this is where you can show us how creative and imaginative you can be!
When you’re ready to take on your next drawing challenge, you can find more amazing guides on our website! We upload new ones frequently as well, so be sure to check in often to never miss out.
Once your police car drawing is finished, we would love to see it! You can share it on our Facebook and Pinterest pages so we can admire your artwork.