Medical science has come a long way in recent years. In centuries gone by, even a mild illness could prove to be fatal, and plagues would ravage the land unchecked.
Plague doctors were often the first line of defense against such plague outbreaks, but they had a rather intimidating and arguably scary look to them.
This distinctive attire they would wear does make it quite fun to learn how to draw a plague doctor, however!
If you’re wondering how you can learn to draw one of these incredible plague doctors, then this will be the perfect guide for you to take on.
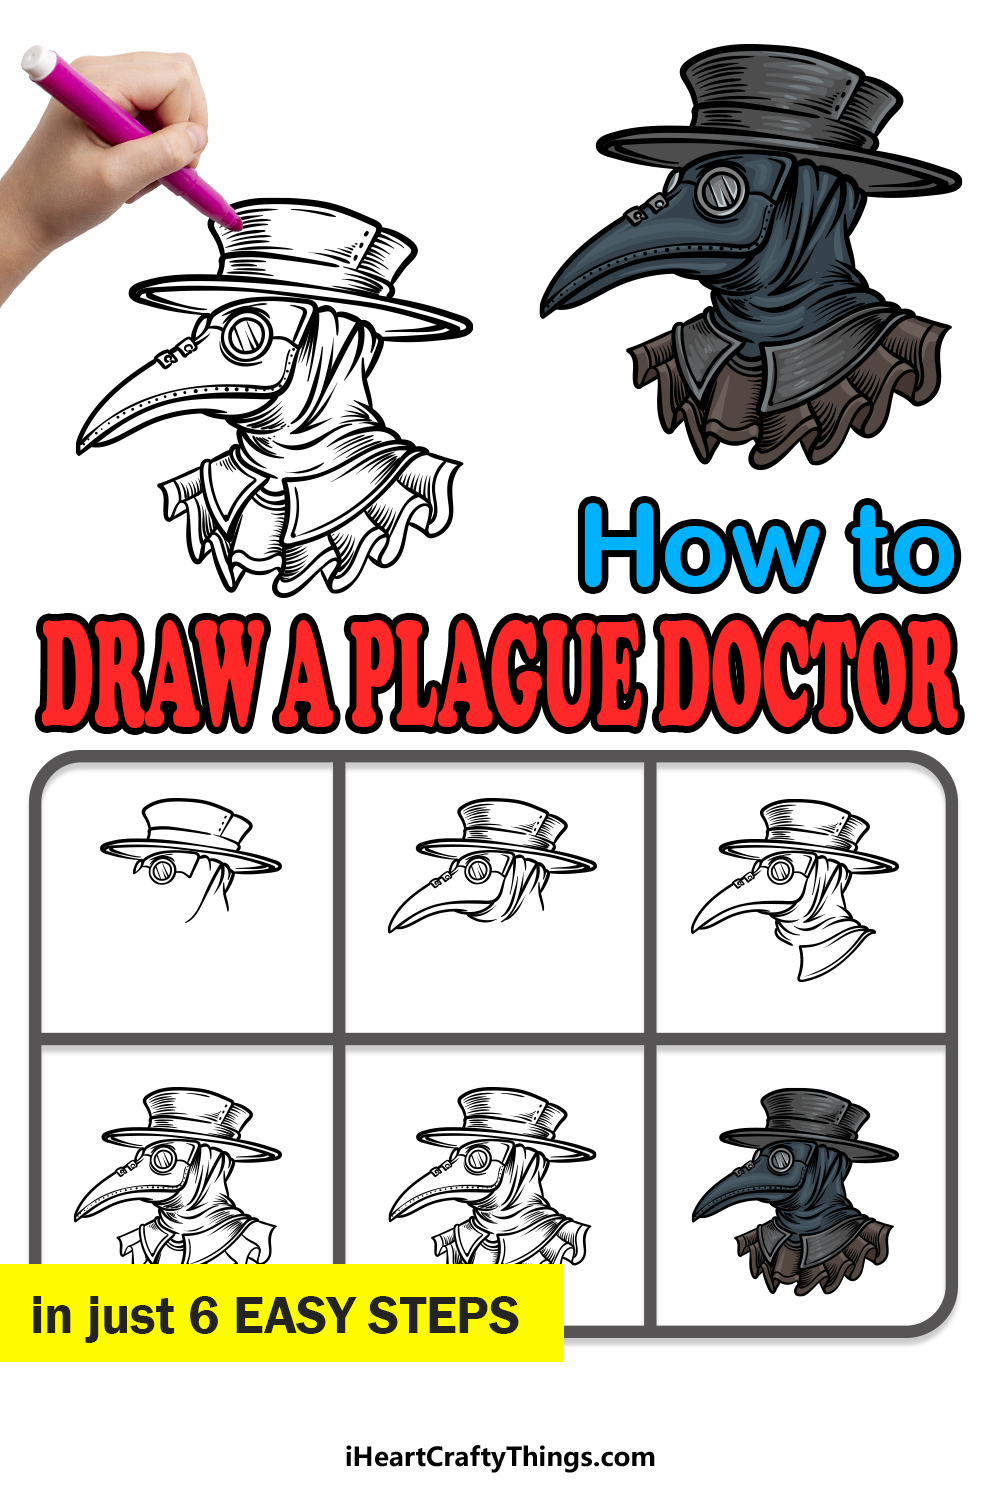
We hope you enjoy recreating one of these eerie doctors in our step-by-step guide on how to draw a plague doctor in just 6 steps.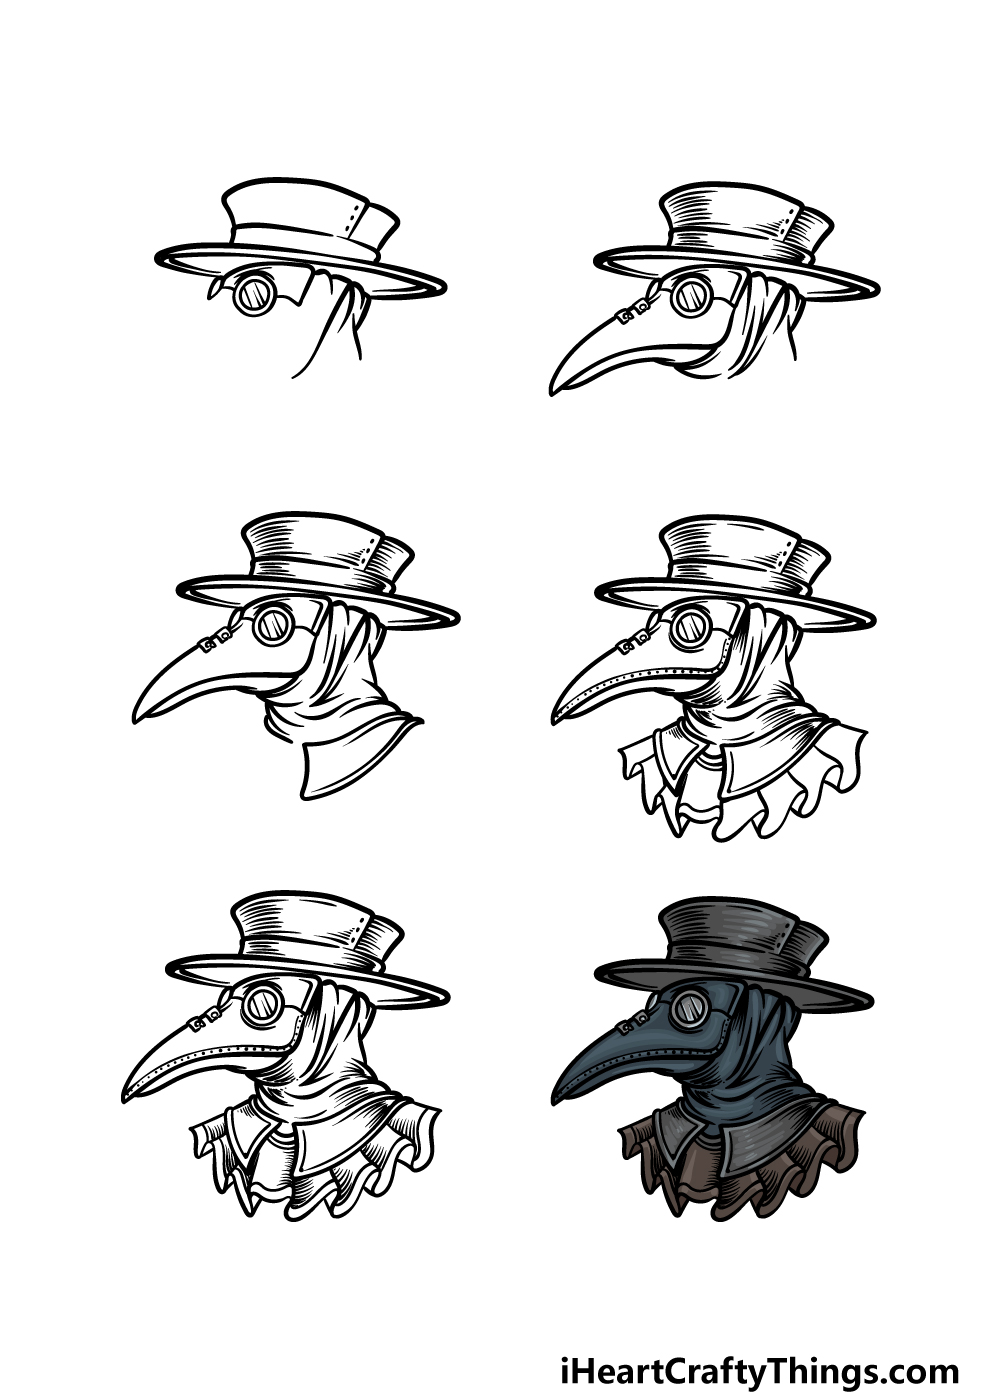
How to Draw A Plague Doctor – Let’s Get Started!
Step 1
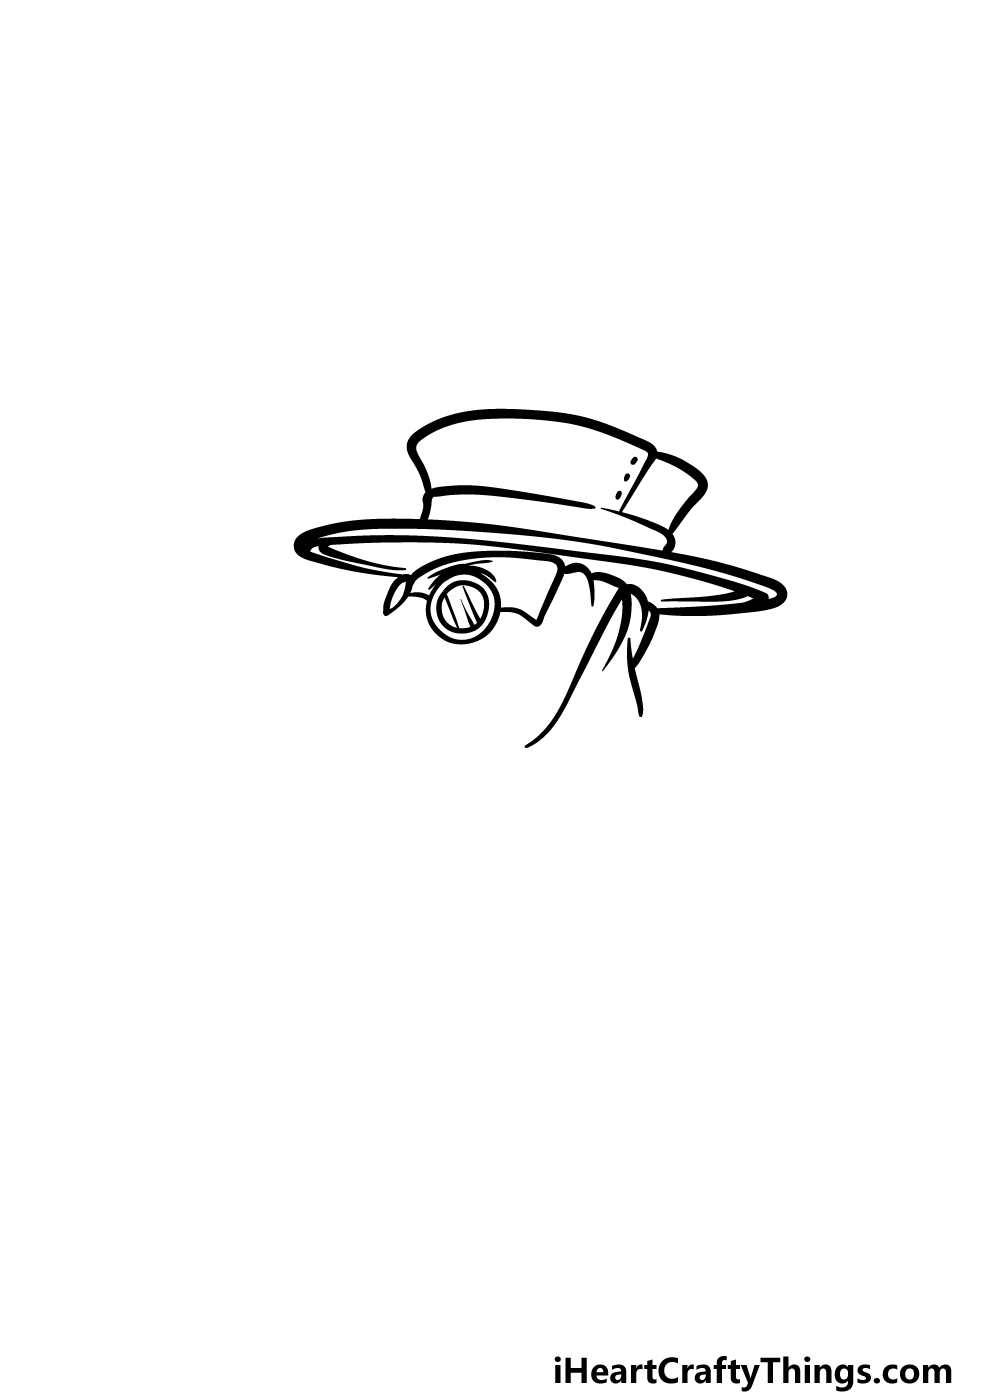
In this guide on how to draw a plague doctor, we will be focusing on the head, and specifically the mask, of the plague doctor.
This close-up does mean that we can really get in there with some finer details, but worry not as we will take it nice and slowly.
You can start by drawing a small circle, and then add another one along the inner perimeter of it. Then, add some straight lines inside the inner circle to show that it is a glass lens.
We will then use some curved lines to create the leathery, soft part of the mask that will cover most of the plague doctor’s face. Then, we will finish off by drawing the signature hat.
You can use a rounded line for the flat rim of it and then add the flat top for the hat, as it appears in the reference image.
There will be some dots and other line details added to it, and then we’re ready for step 2!
Step 2 – Now, draw the beak of his mask and add details to the hat
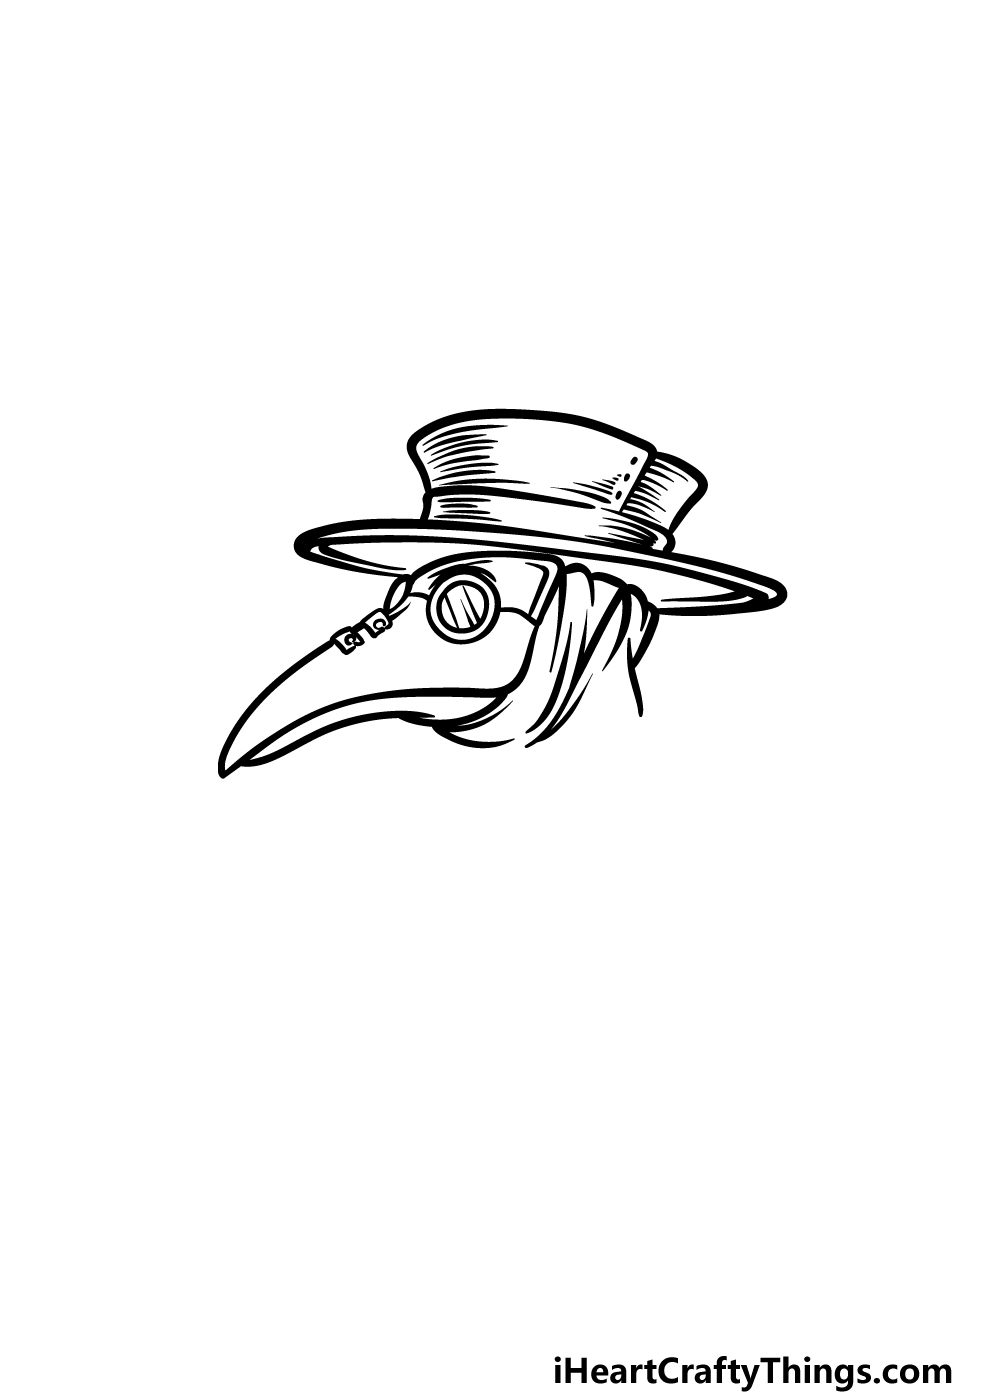
Plague doctors would often wear a beak-like mask, and it is believed that these beaks would be filled with herbs and dried flowers that were believed to prevent plague.
We will be adding this beak to your plague doctor drawing in this step. Use some curved, long lines coming out from near the lenses of the mask to draw the top half of the beak.
Then we will be drawing the bottom half of the beak to finish that off, and then you can draw some curved lines in the leathery part around it to give some crease texture.
Finally, add some horizontal lines to the hat to add some texture detail for it as well.
Step 3 – Next, draw some more of the neck of the mask
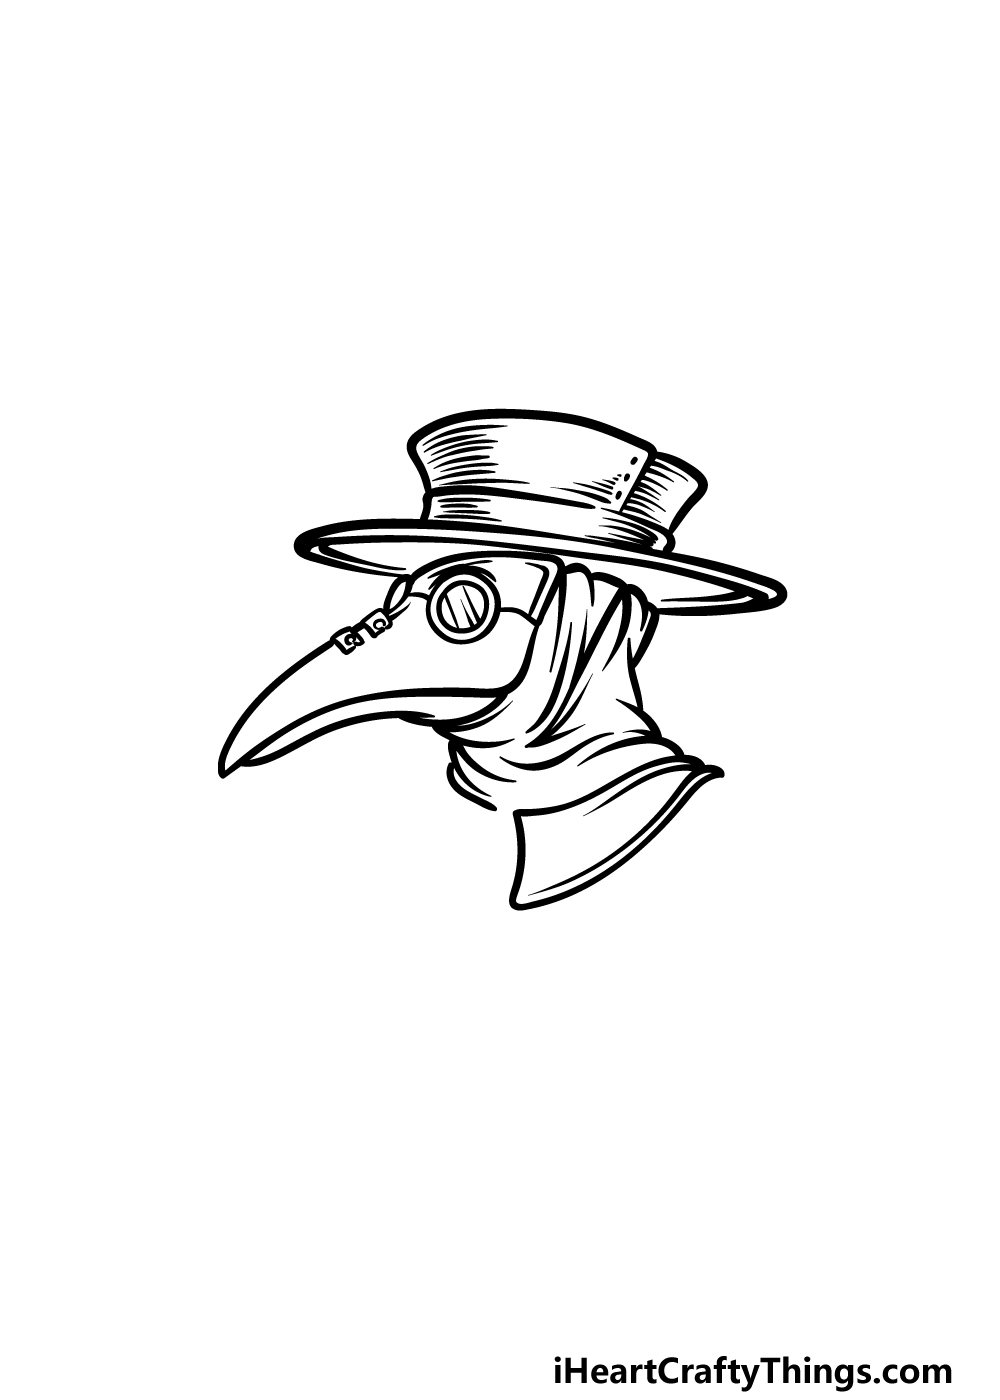
Continuing on with this guide on how to draw a plague doctor, we will now be extending the mask further down a bit.
Add some more wavy, curled lines for some leathery detail, and then you can draw what will be the collar for his mask. This is a part that we will be adding some more detail to in a later step.
Once you have these parts looking as they do in our reference image, we will be ready for step 4!
Step 4 – Now, draw the ruffles of his collar and add some detail
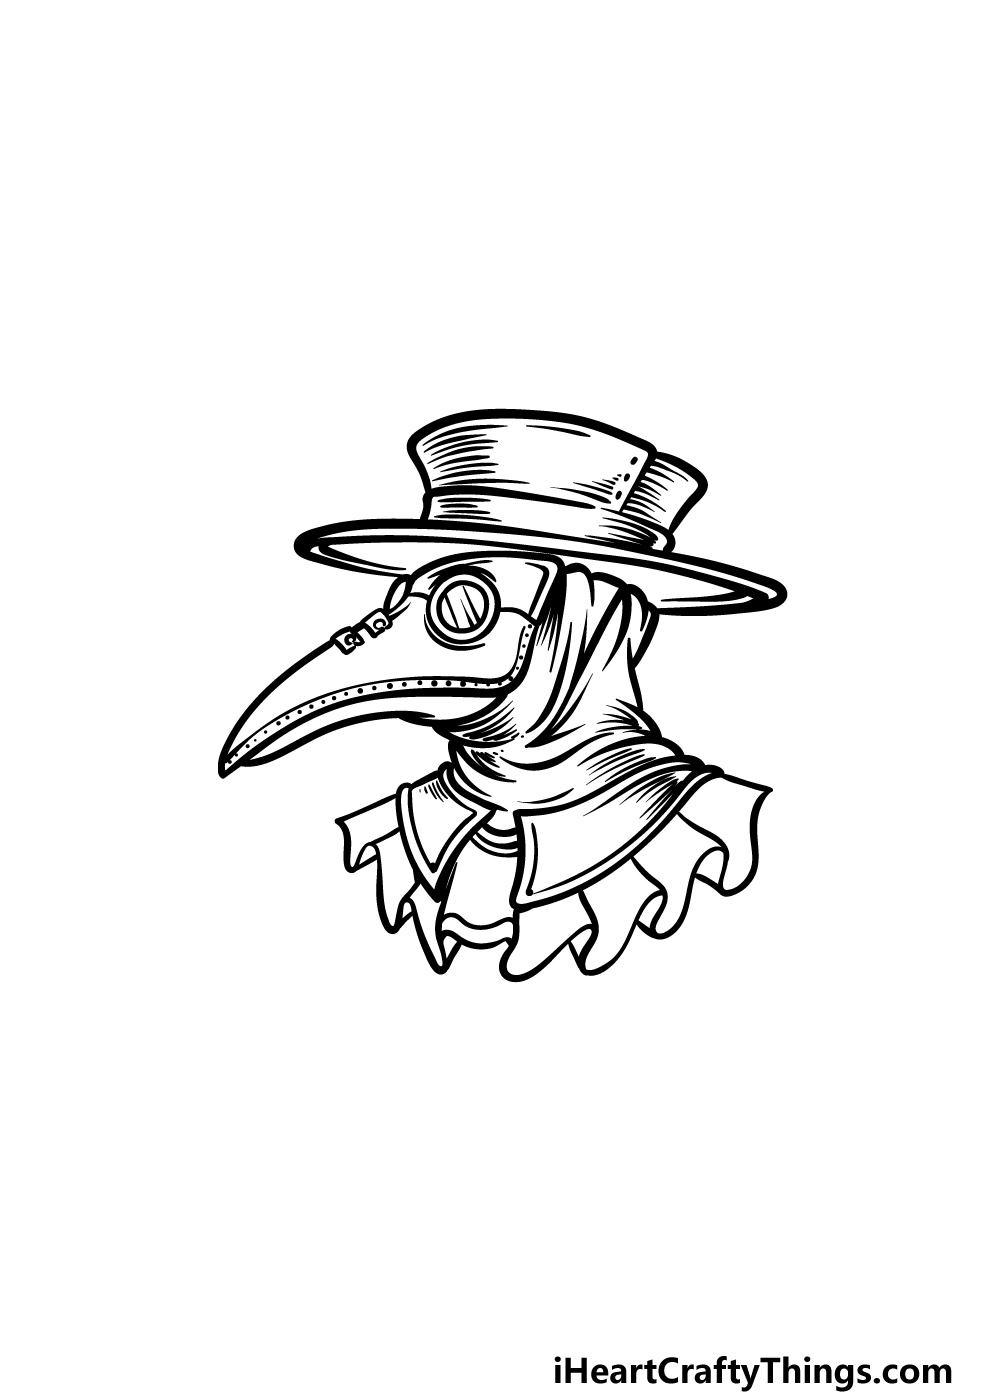
For this and the next step of your plague doctor drawing, we will be finishing him off with the final details and elements. In this one, we will complete the outline for the mask and collar.
Using some more curved lines, draw the sleeve of the collar on the left-hand side. Then, use some more curved lines to create the various folds of the ruffles poking out beneath this mask.
Once these are drawn, we will also add some details to the opening of the mask. You can draw a line along it and then add some dots inside of this area to show the seam of where the mask is constructed.
Then, you will be ready to add some final touches in the next step!
Step 5 – Add some final details to your plague doctor drawing
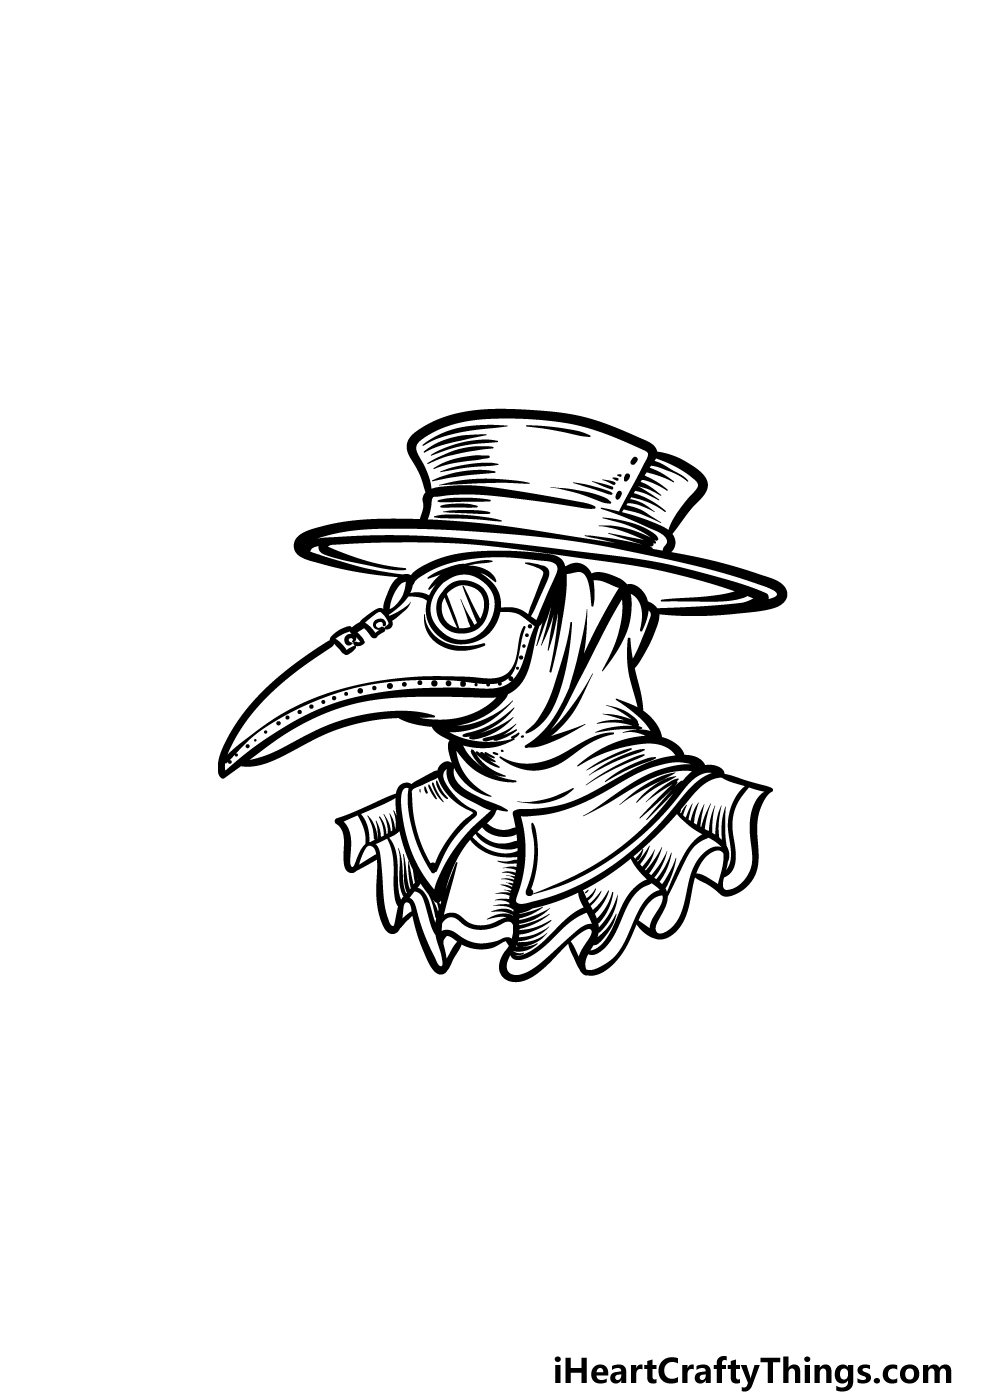
In this fifth part of our guide on how to draw a plague doctor, we will be adding the final little touches and details to really finish it off.
In our example image, we added some curved lines along the folds of the ruffles beneath his mask. These help to provide a bit of shading and folding detail.
Once you have drawn these details, it’s up to you to add any more that you may want!
There is a lot that you could do to do this, and some examples would be to add some more to the outfit or to create a background behind him.
What would you like to add to this drawing?
Step 6 – Finish off your plague doctor drawing with some color
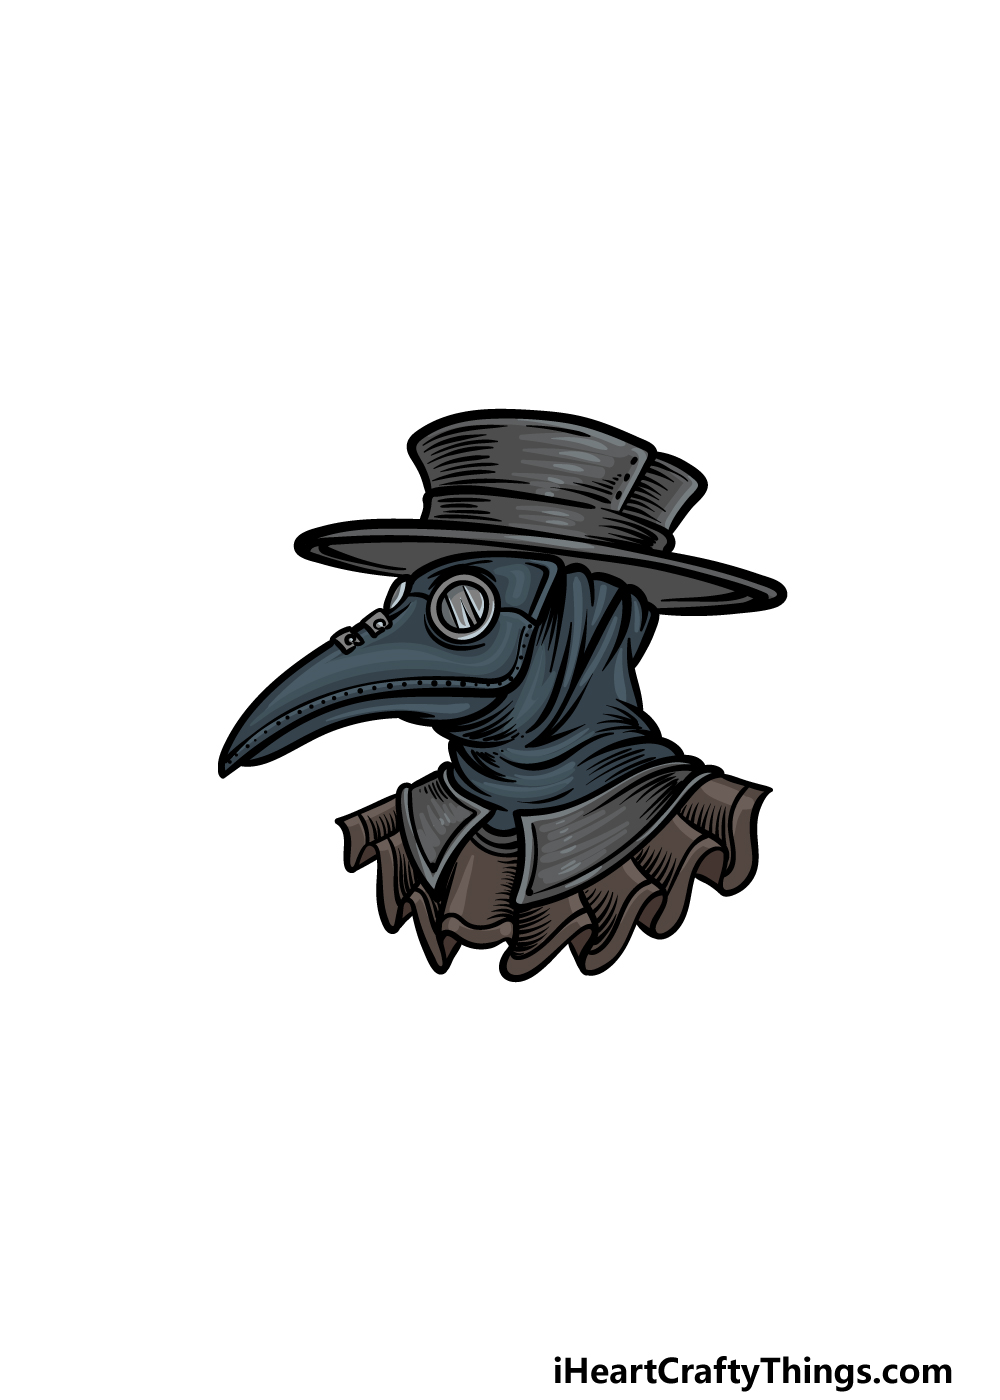
Now it’s time to finish off your plague doctor drawing by adding some color to the image. In our reference image, you’ll notice that we employed a rather dark color palette.
We used blacks and dark greys to complete the dark look of this outfit, but we kept it interesting by using different shades for texture and shading detail.
Do you think that you will go for a similar set of colors, or will you change it up a bit? Also, which art mediums will you use for your colors? We can’t wait to see!
Here’s how you can make your plague doctor drawing even better…
Make this plague doctor sketch even more awesome with these 4 fun ideas to try!
This drawing of a plague doctor we created is armed with a scalpel and a staff. These are a good start, but it would also be cool to add some more tools for the doctor to be holding.
You could have him holding some herbs, bandages, medical supplies or maybe even some weapons for a few ideas.
It could be a realistic set of tools or more fantasy inspired depending on what you fancy!
A plague doctor would typically work alone, but it could still be fun to add a partner for this one. It would be a good challenge to go through the guide again and change some details to make it unique.
The outfit could be different or you could also change the pose or equipment this second plague doctor is sporting.
You could also add other non-plague doctor characters if you wanted to have even more variety!
Next, you could really take this plague doctor drawing even further with a background to finish it off. Plague doctors would operate in all sorts of places, so you could really have fun with the setting.
A good one to start with would be a dingy medieval town. For the subject matter, we think making it look as unpleasant as possible would actually suit the theme well!
Of course, you don’t have to go for such a dismal setting. What are some other places you could use as a background?
If you have finished this plague doctor sketch a few times and have the hang of it, then maybe you could try to depict it in a different style. One idea would be to take this design and then translate it into a cartoon style.
That is just one example, but you could do anything from a comic book style to something anime-inspired. There are so many ways to play around with this, so what styles could you use?
Your Plague Doctor Drawing is Complete
We hope that you had an enjoyable time working on this curious medieval outfit in this step-by-step guide on how to draw a plague doctor!
We did add a lot of details to this composition, but we aimed to make them easy to achieve by breaking it all down into smaller steps for you to follow.
Now that you have finished it, what other details, elements or colors will you add to it?
Don’t forget to visit our website for more drawing fun! We have a huge collection of drawing guides and we upload new ones frequently, so be sure to keep checking in.
Please also be sure to share your completed plague doctor drawing on our Facebook and Pinterest pages!
We always love to see your brilliant artwork and can’t wait to see how you finished this one off.