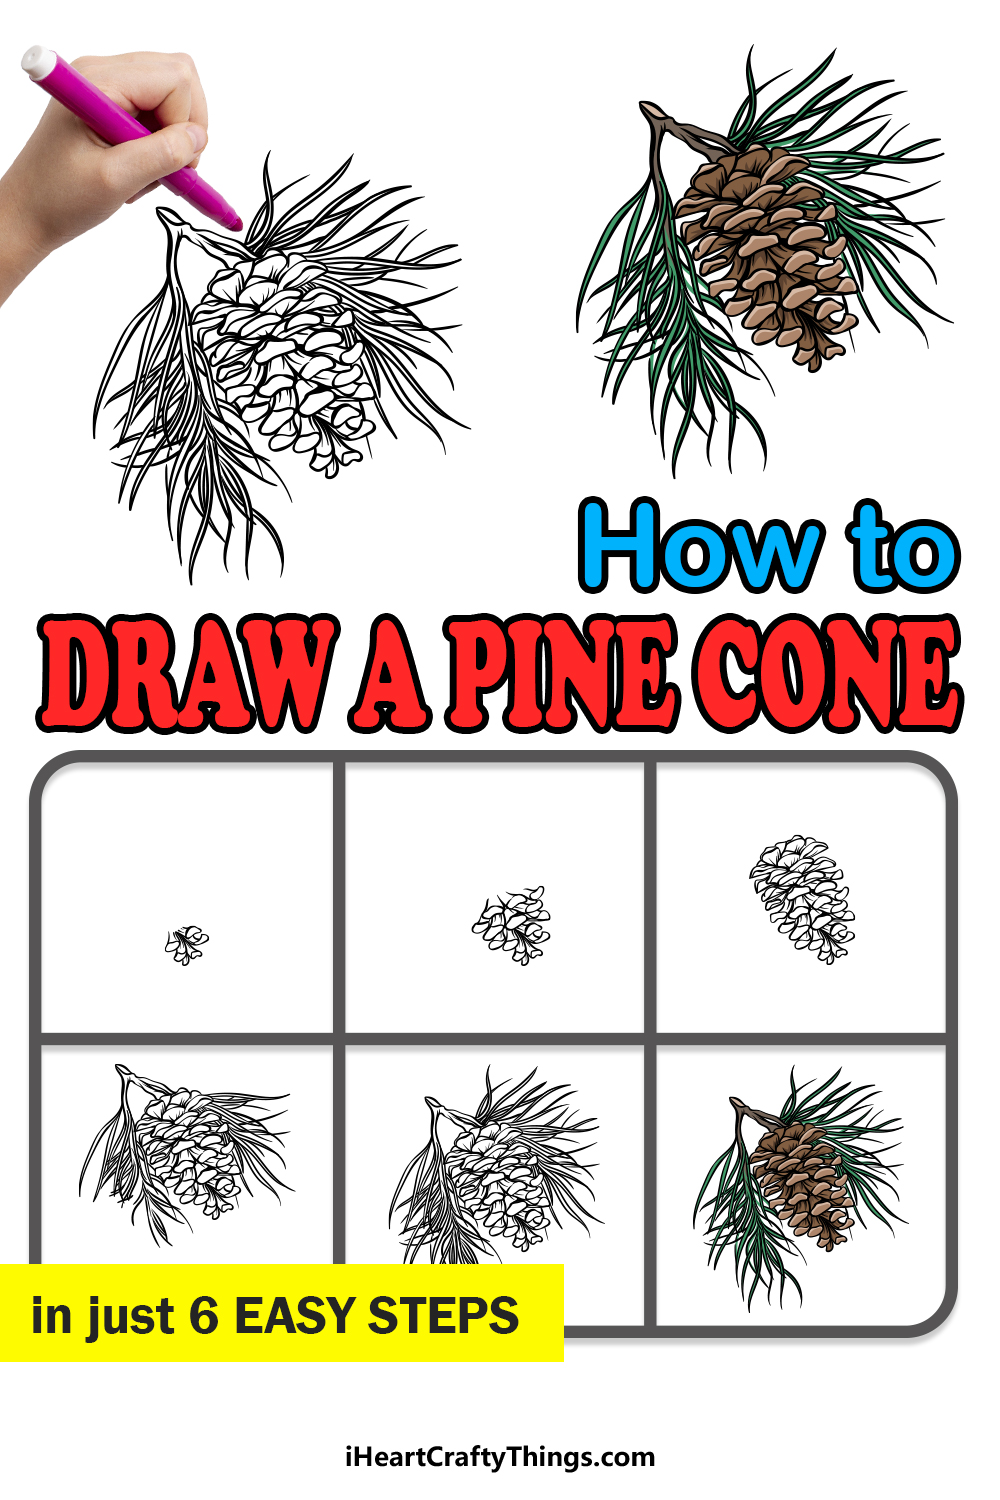
Pinecones are always a pleasant natural artifact that can be enjoyed when exploring the great outdoors!
They may not be very fun to step on, but seeing them hanging from trees or lying on leaf-covered forest floors is always a delight.
They are actually quite complex structures when viewed up close, and that can make it tricky to learn how to draw a pinecone.
Worry not, as it can be much easier than expected once you know what to do!
Our step-by-step guide on how to draw a pinecone will show you how it can be easy and fun at the same time.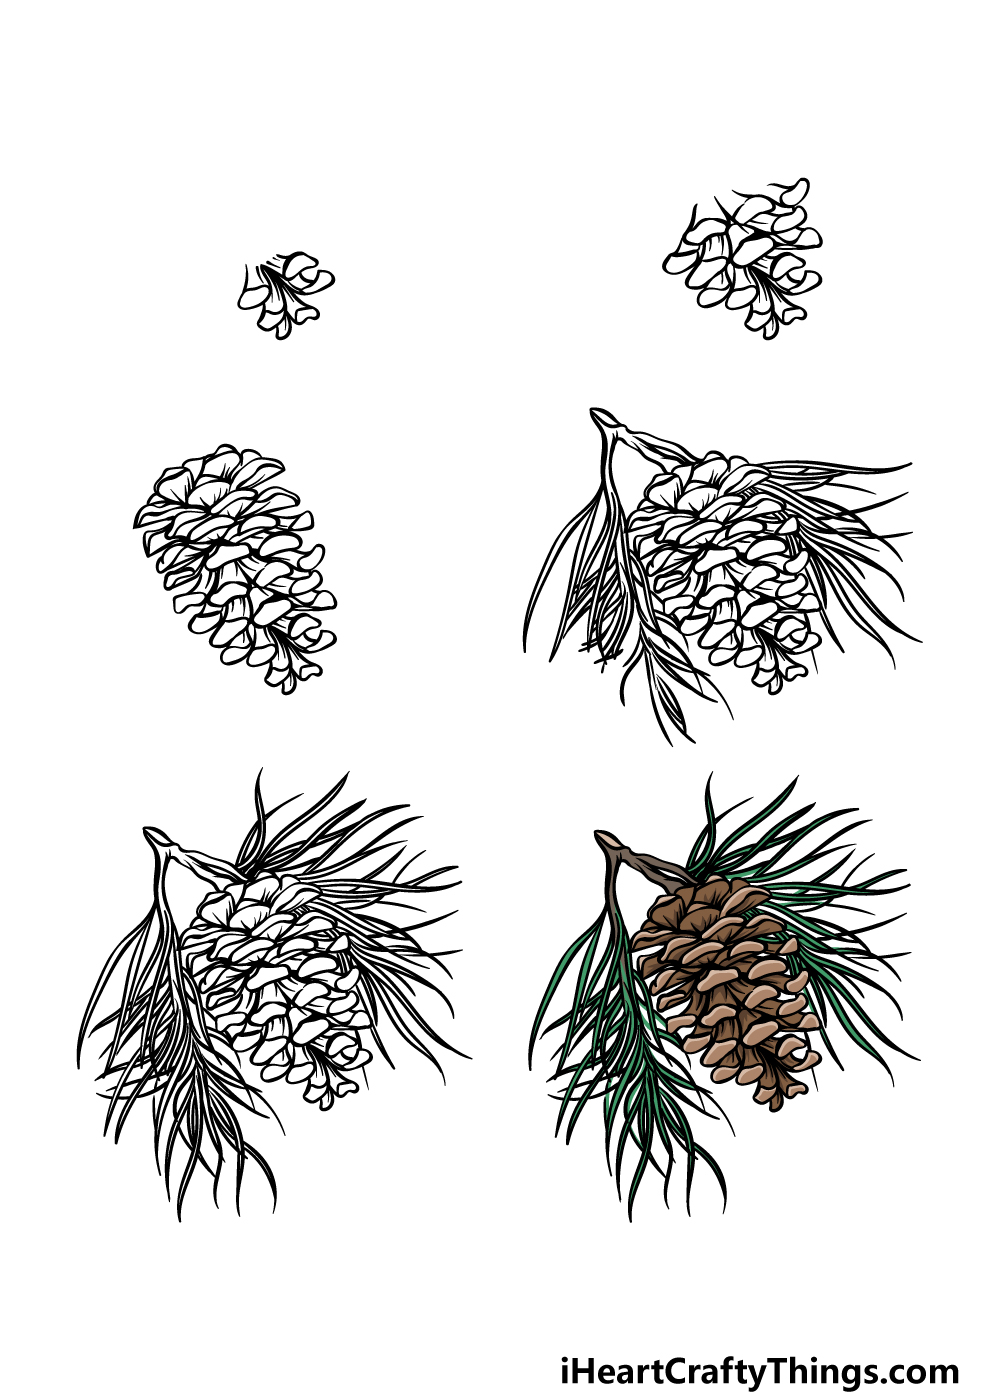
How to Draw A Pinecone – Let’s Get Started!
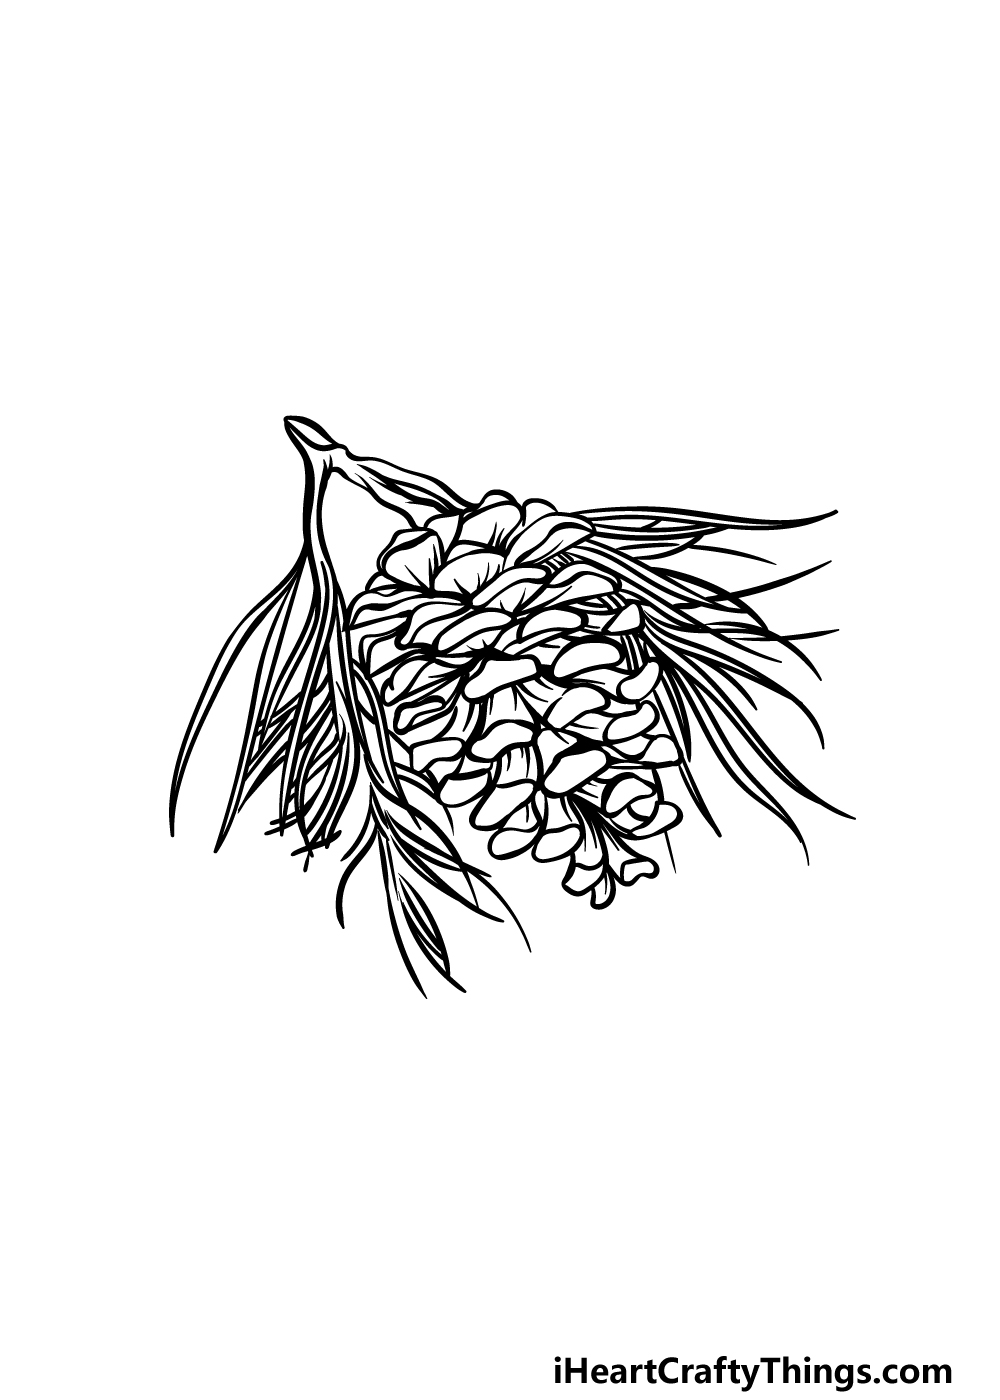
Step 1
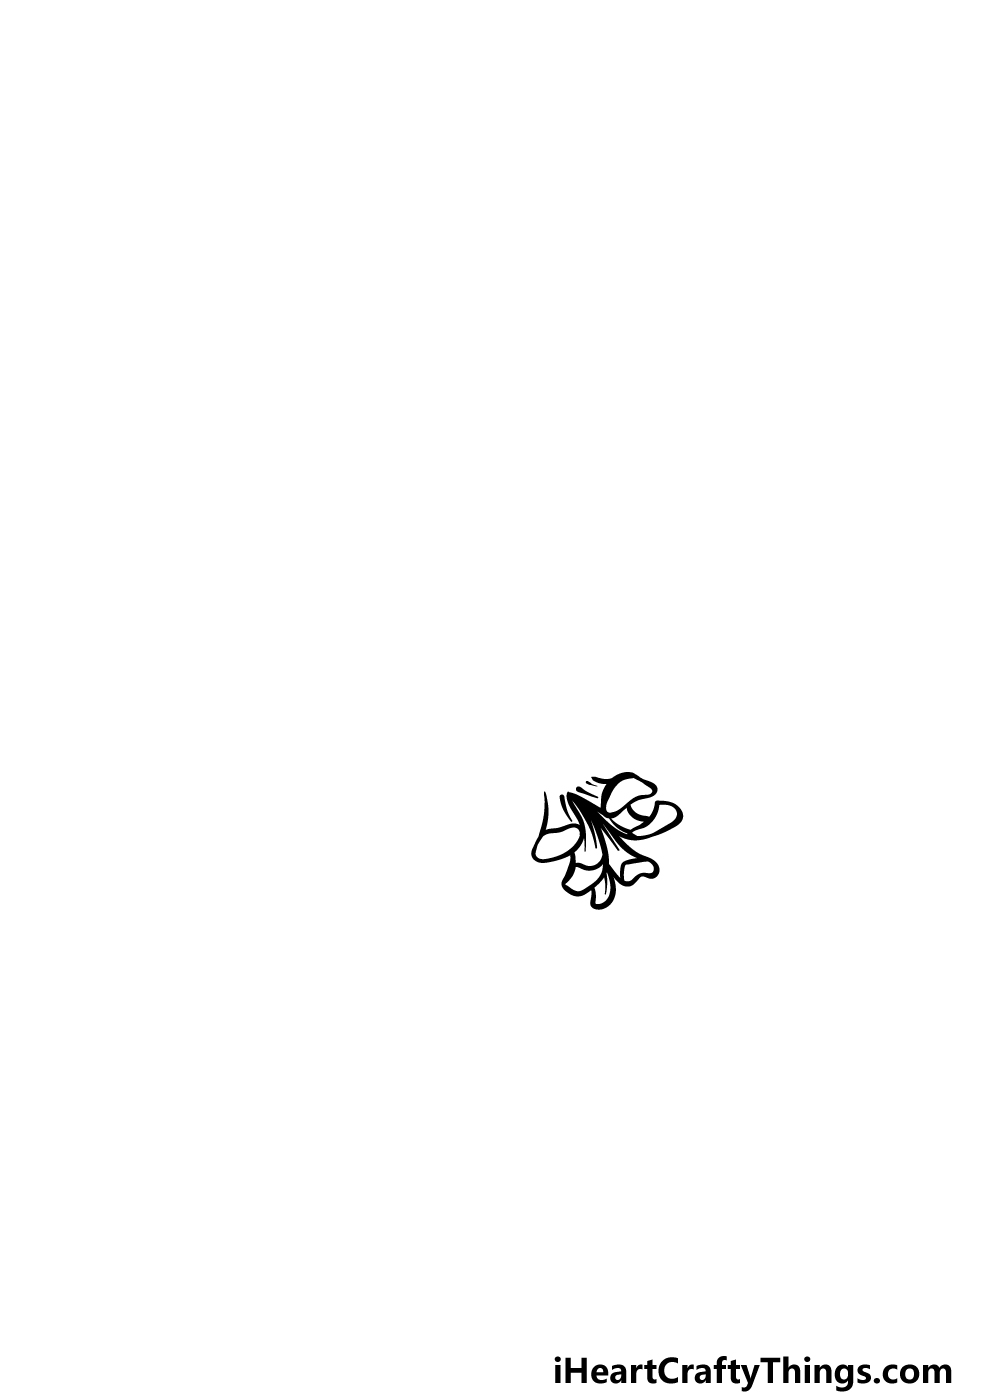
When learning how to draw a pinecone, the best way to do it is to take it section by section.
Pinecones are made up of many separate scales, and this can make it a bit intimidating to draw a pinecone.
This drawing can require a little bit of patience, but it will be worth it in the end! We shall start with the base of the pinecone in this first step.
Once again, we will be drawing each scale individually, and each one will be drawn with curved lines that curl up at the bottom. For now, we will be drawing 5 scales connecting to one another to form the base.
When you have drawn these first scales so that they appear as they do in our reference image, you’ll be ready to move on!
Step 2 – Next, draw some more scales for your pinecone

In this next part of your pinecone drawing, we will be adding some more scales to the pinecone.
Essentially, these scales will be drawn in exactly the same way that you drew the previous ones, with the main difference being that they will be larger.
The idea for this pinecone is that it will be narrow at the bottom of it but wider the further up you go. As you add this section of scales, try to size them so that the pinecone gets thicker as you move up.
Step 3 – Draw the rest of the pinecone’s body
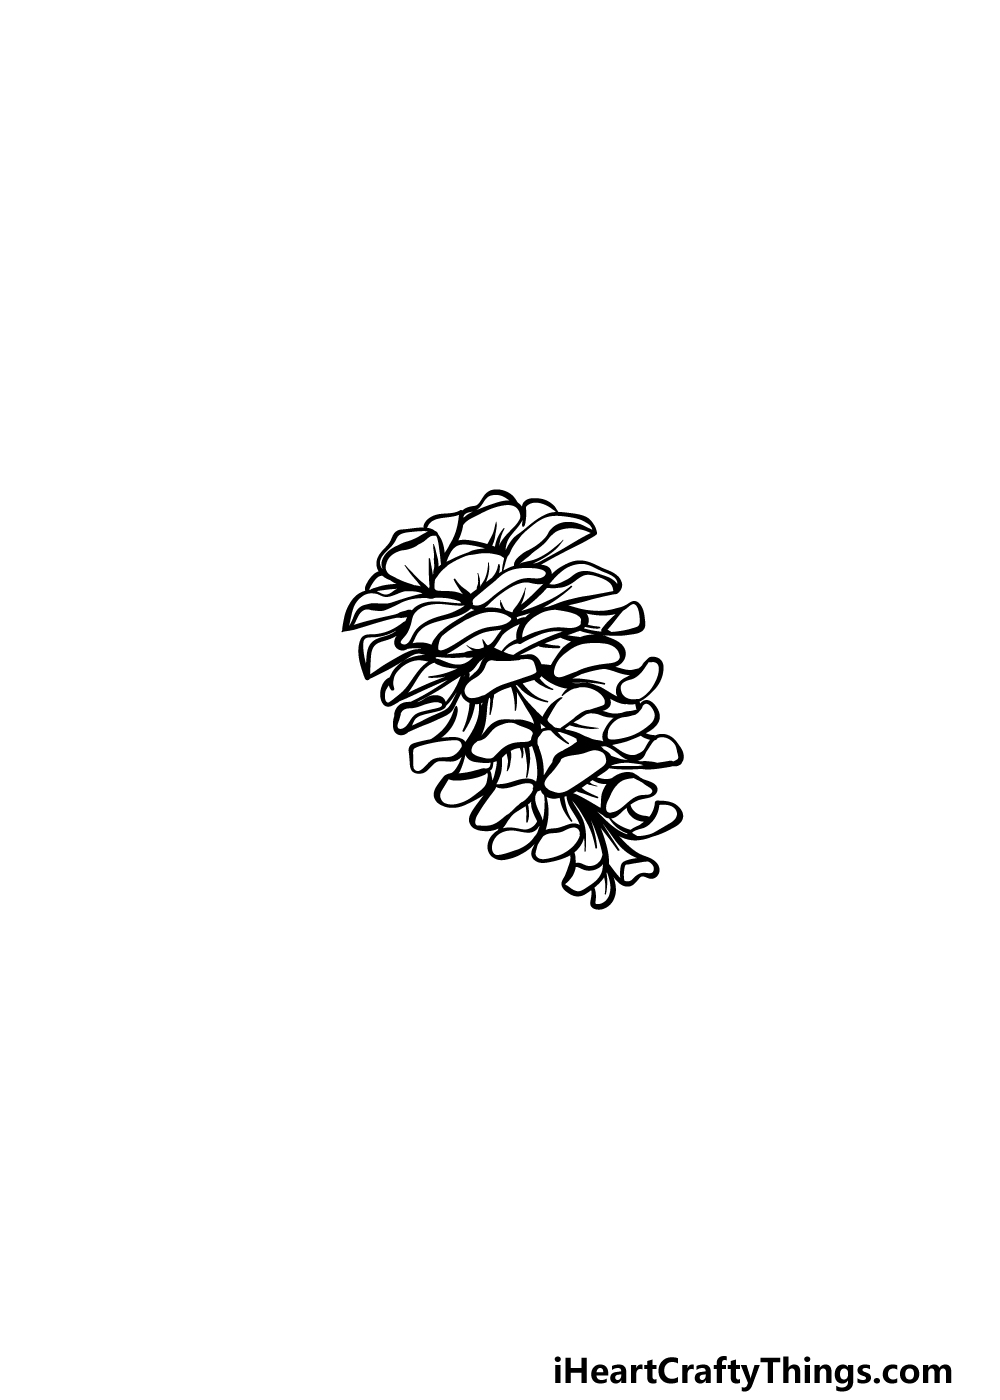
The third part of this guide on how to draw a pinecone will be focused on finishing off the body of the pinecone.
To do this, you can simply keep adding the individual scales as you have been doing for the last few steps.
Remember to make it so that it gets thicker as it goes up! It can be a bit tricky to get this right, so be sure to refer closely to the reference image as you draw.
Then it’s on to step 4!
Step 4 – Now, draw the branch and leaves
You’re finished with the body of your pinecone drawing itself, so for the next few steps of the guide we will be finishing off with the branch and leaves that it is attached to.
The branch starts at a single point and then branches out into two sections. Use some curved lines for these branches so that they look as they do in our example.
Then we will finish off this step by adding the leaves for the pinecone. These leaves are long, thin and numerous, so start drawing them coming out from the ends of the branches. Then we can finish off some final details in the next part!
Step 5 – Finish off your pinecone drawing
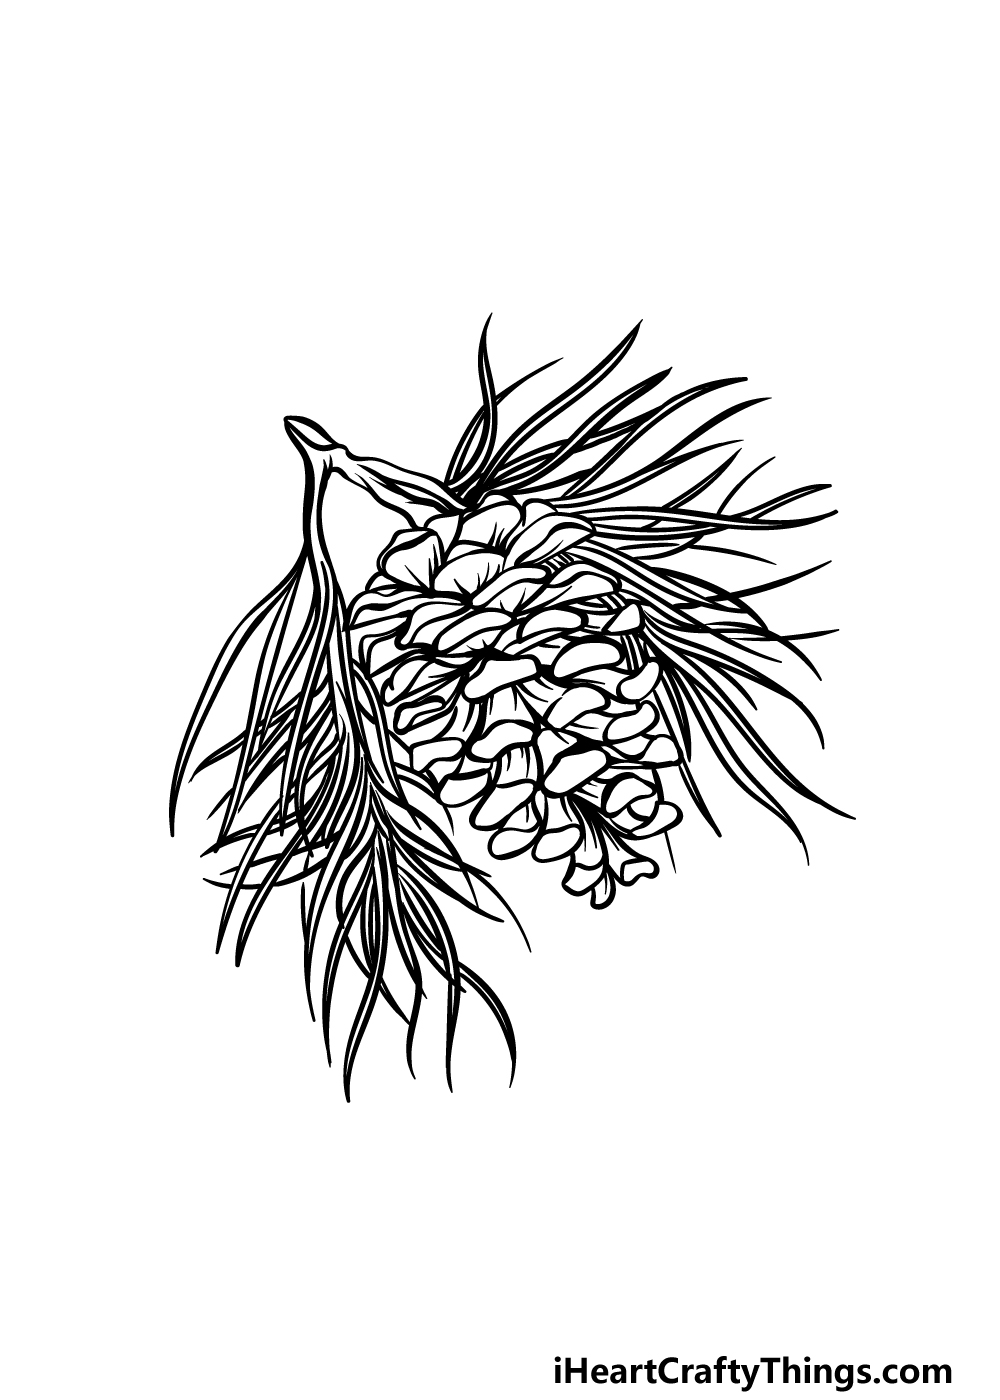
Before you start to color in your picture, we have some final details and touches to add in this step of our guide on how to draw a pinecone.
As mentioned before, there will be many leaves on this pinecone to give it more volume, so to finish off we will add even more to it now!
Simply add some more of the long and thin leaves, and you can add even more than the amount we did if you wish!
Then you’re ready to move on, but you can also add some details of your very own. You could draw some more pinecones hanging nearby, or you could create a nice forest background.
These are just a few ideas, but there are lots of details that you could add! How will you finish off this beautiful drawing?
Step 6 – Finish off your pinecone drawing with some color
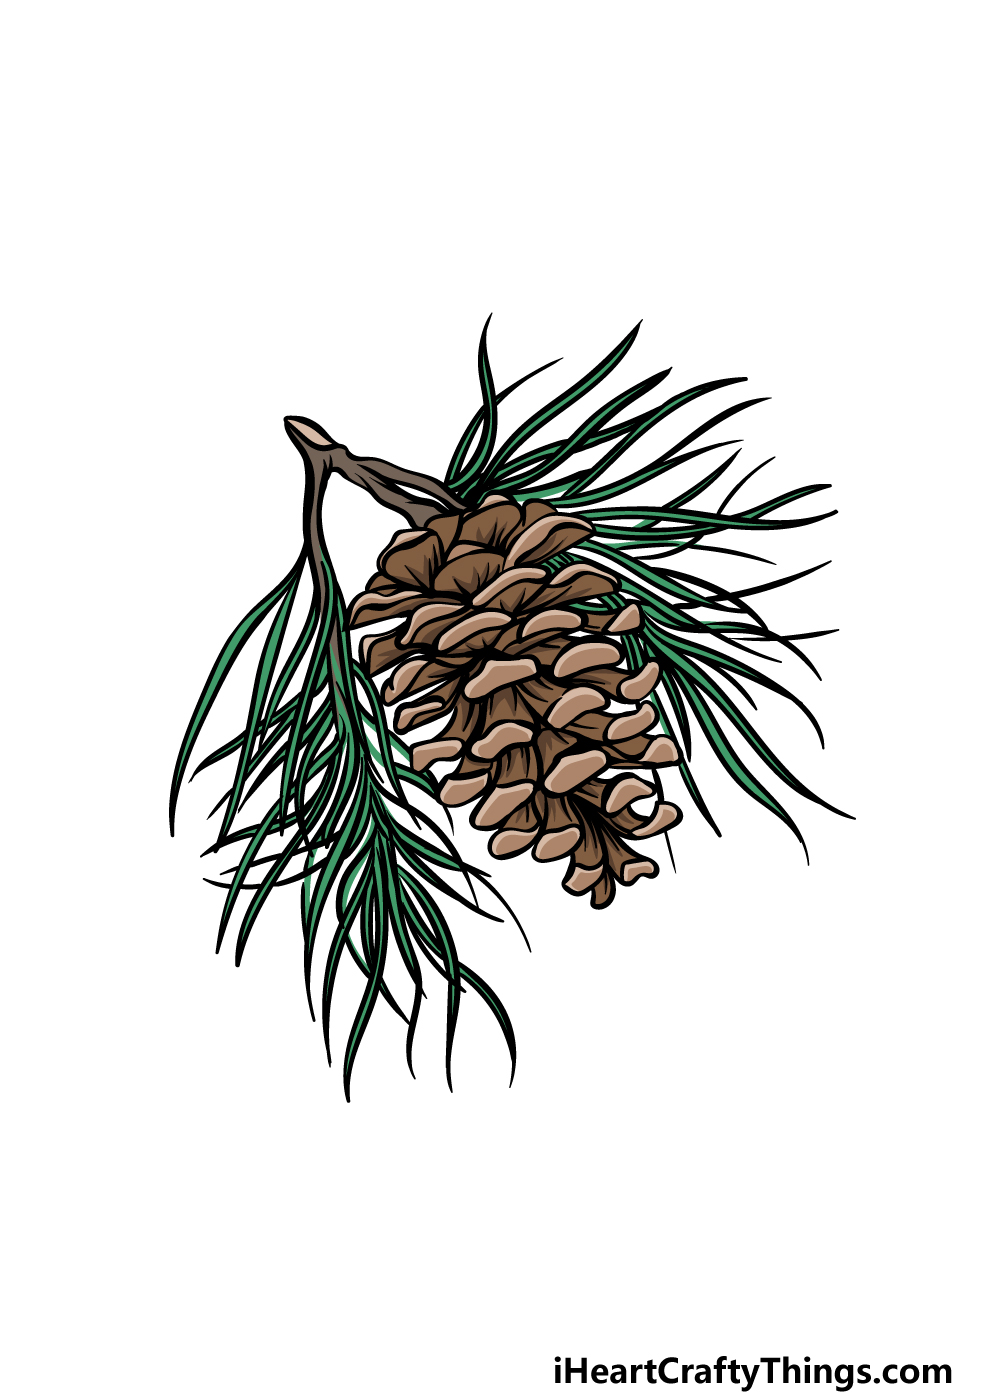
This is the final step of your pinecone drawing, and in this one we shall finish it off with some amazing colors! In our reference image, we went with various shades of brown for the scales, and then we used a slightly darker shade of brown for the branch that it is attached to.
Then we finished off with some darker greens for the leaves coming down from the pinecone.
These are the colors that we chose, but you don’t have to go with these exact colors! You could change up the shades a bit or use some colors of your own choosing. Once you know the colors that you would like for it, you can then have some fun choosing the art mediums that you would like.
You can go bright and bold with colored markers and acrylic paints, or keep it more subdued with some watercolors paints and colored pencils.
The choice is up to you, and we know that whatever you choose will look amazing!
Do this to take your pinecone drawing to the next level
Find out how you can make your pinecone sketch even more amazing with these fun tips!
Now that you have drawn one pinecone, you know everything you need to draw some more! Pinecones will often grow in clumps, so you could have two, three or maybe even more together.
If you were to do this, simply follow the steps of the guide again and then change a few details. You might need to remove some of the leaves that you worked on in the guide in order to make room for the additional pinecones.
How many would you add to this drawing?
Even if you stick to just one for this pinecone drawing, you could also create a really cool background for the image! This would be a great way to show where you think the pinecone could be growing.
It could be a pretty garden or maybe a big forest for just two ideas. There are many places that pinecones can grow, so you could create any environment you please!
What are some locations you could use?
Sometimes it can also be fun to experiment with the style of an image, and you could do that for this drawing of a pinecone. We went with a rather detailed design for this pinecone, but it could also be fun to make it more cartoony!
That’s one alternate style, but you should feel free to go with any styles you like. Maybe you could even create a few different versions each done in a unique style.
This is the kind of drawing where you could use some really interesting colors and mediums. The drawing has lots of small areas to color, so you would probably be best off using colored pens or thin brushes.
You could even get really creative and gut small strips of real leaves from the yard and then stick them onto the pinecone sketch.
That’s one idea for a creative approach to adding colors, but what are some other craft ideas you have?
Your Pinecone Drawing is Complete!
That brings you to the end of this guide on how to draw a pinecone. At the beginning of this guide, we spoke a bit about how a drawing like this can be a bit intimidating due to the many small parts.
Hopefully by using this guide and taking it slowly you found it to be an easy and fun experience!
Now you get to take charge as you add your own finishing touches and details to the image.
We mentioned a few ideas that you could go for such as adding a background or more plant life, but it’s up to you! We can’t wait to see what details, colors and mediums you choose for this image.
Please be sure to remember to check out our website for more awesome drawing guides! We upload new ones all the time, so you’ll want to keep checking in often.
Once your pinecone drawing is complete, we would love it if you would share your picture on our Facebook and Pinterest pages. We can’t wait to see it!