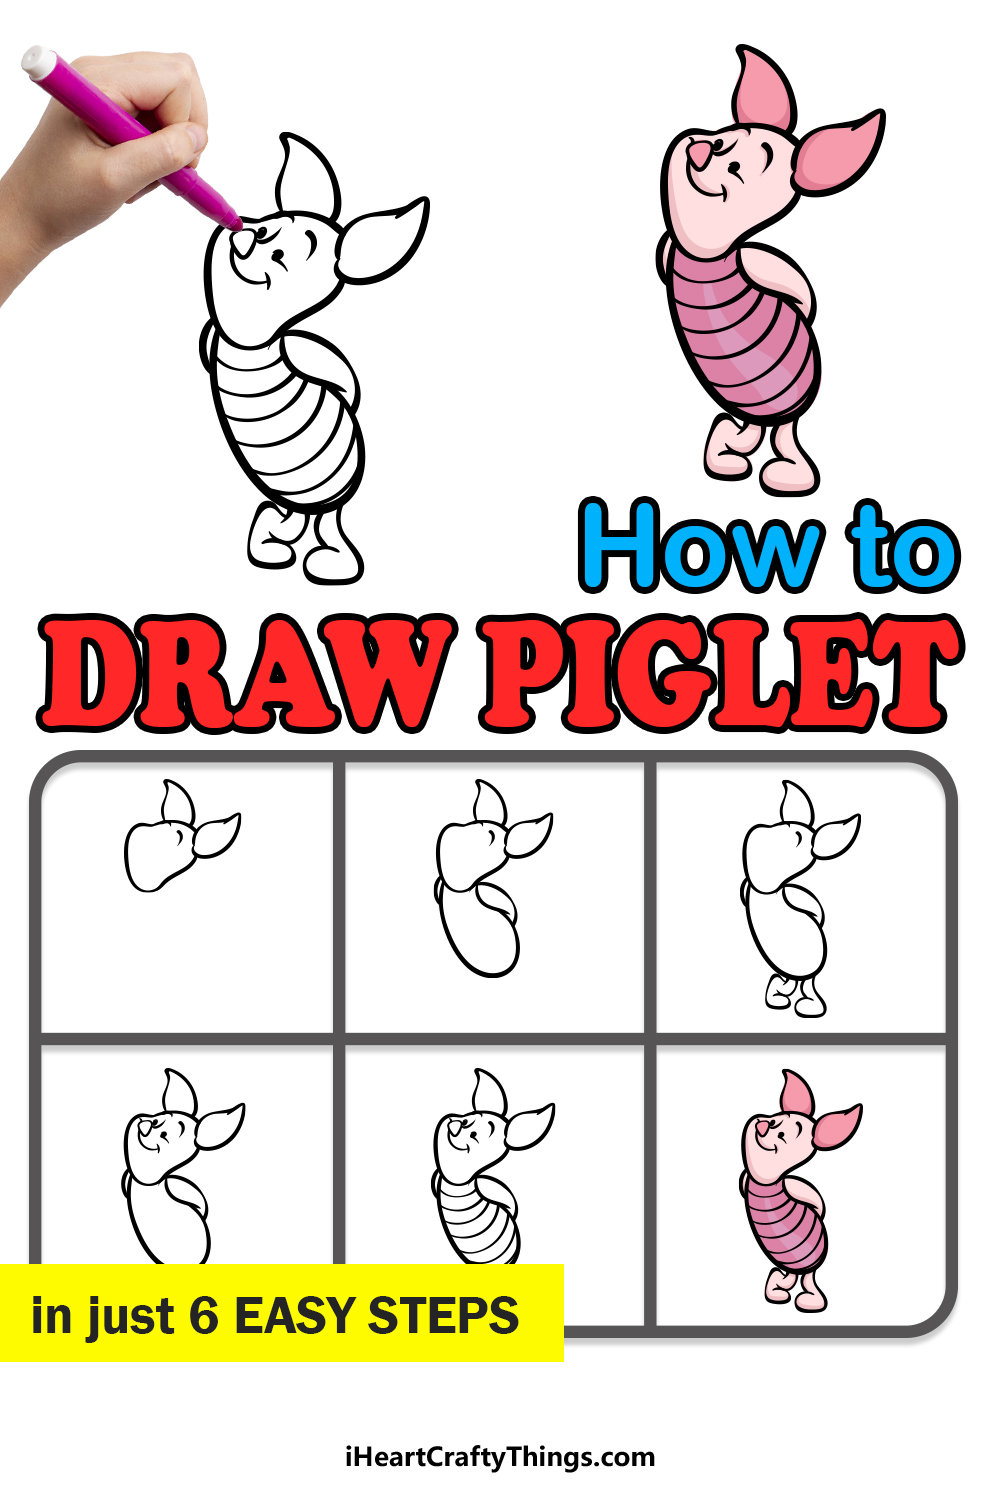
Fans of this classic character will love learning how to draw Piglet with this guide for kids! Fans young and old can recreate this adorable little guide with ease.
Piglet may be small, but he makes a big impact whenever he is involved in the adventures of Winnie The Pooh. He has tons and tons of fans, and many of them will try to learn how to draw him.
They may run into frustration, as his design can be surprisingly tricky to draw unless you know what to do. Luckily, I will take you through all of the steps you will need to see how to draw him in the easiest way possible.
You won’t believe how fun and simple it can be when you know how! Then, you could even draw in characters like Pooh, Tigger and other members of the Hundred Acre Wood to join him. Join me as we recreate this famous little pig together!
Watch And See How To Create Your Own Piglet Drawing
How to Draw Piglet – Let’s Get Started!
Step 1
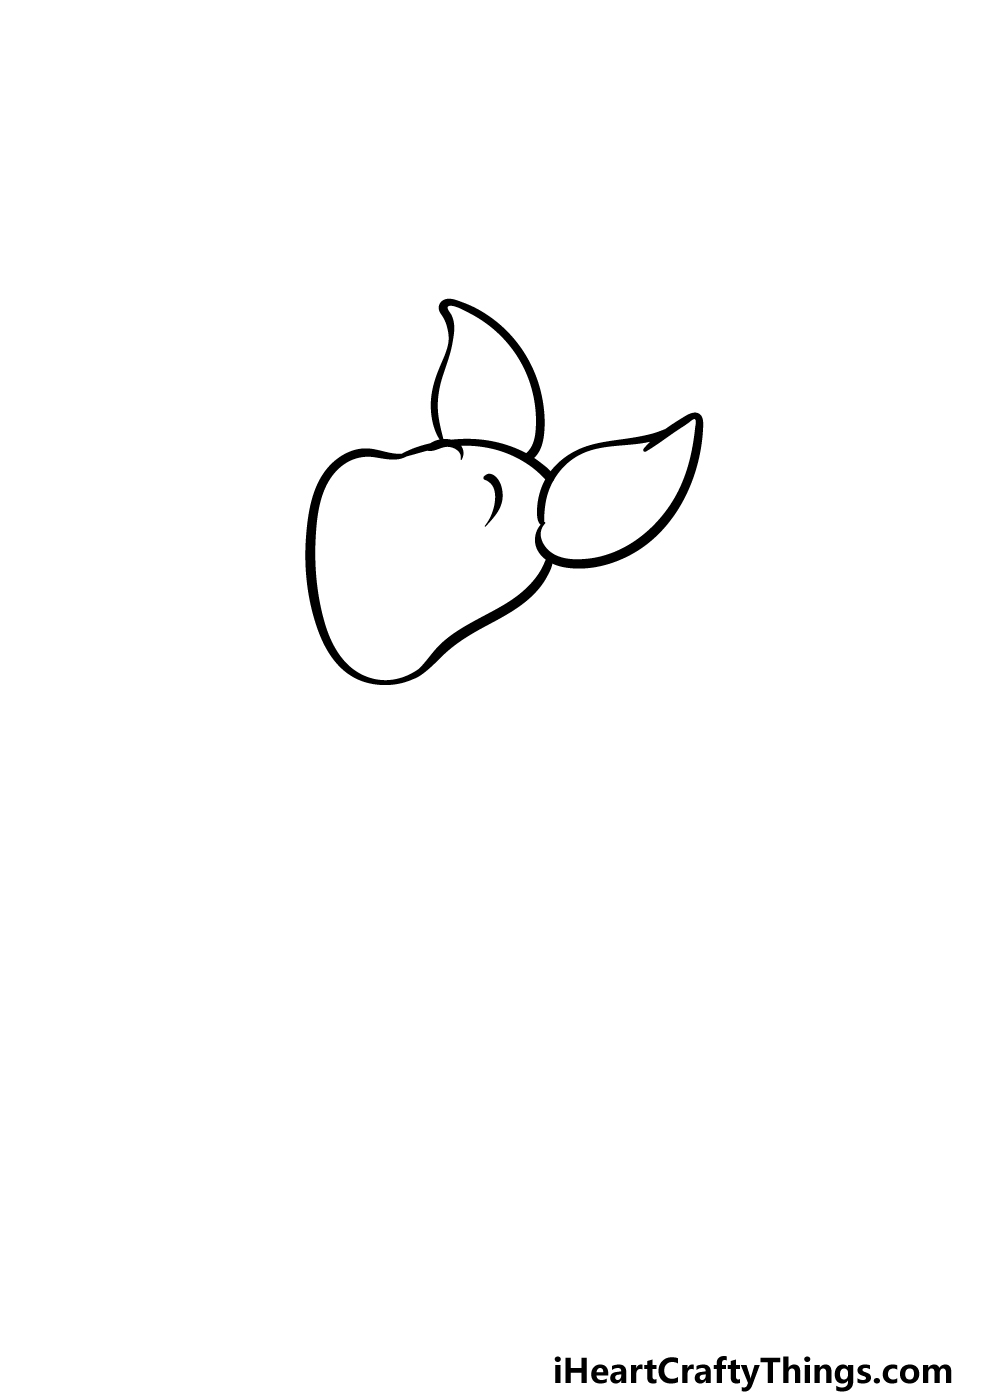
We will be starting with Piglet’s head and ears in this first step of our guide on how to draw Piglet. His head will be drawn as a rounded shape that has two sections to it.
Try your best to replicate the shape of his head as we show it in our reference picture!
Then, we will be adding his ears onto his head. Each ear will have a rounded base, and then will end in a sharper tip.
Before you move on to the second step of the guide, you can also add two curved lines near the top of his face, and these will be his eyebrows. Once all of these aspects are drawn, we shall then move on to the next part!
Step 2 – Now, draw his body and arms
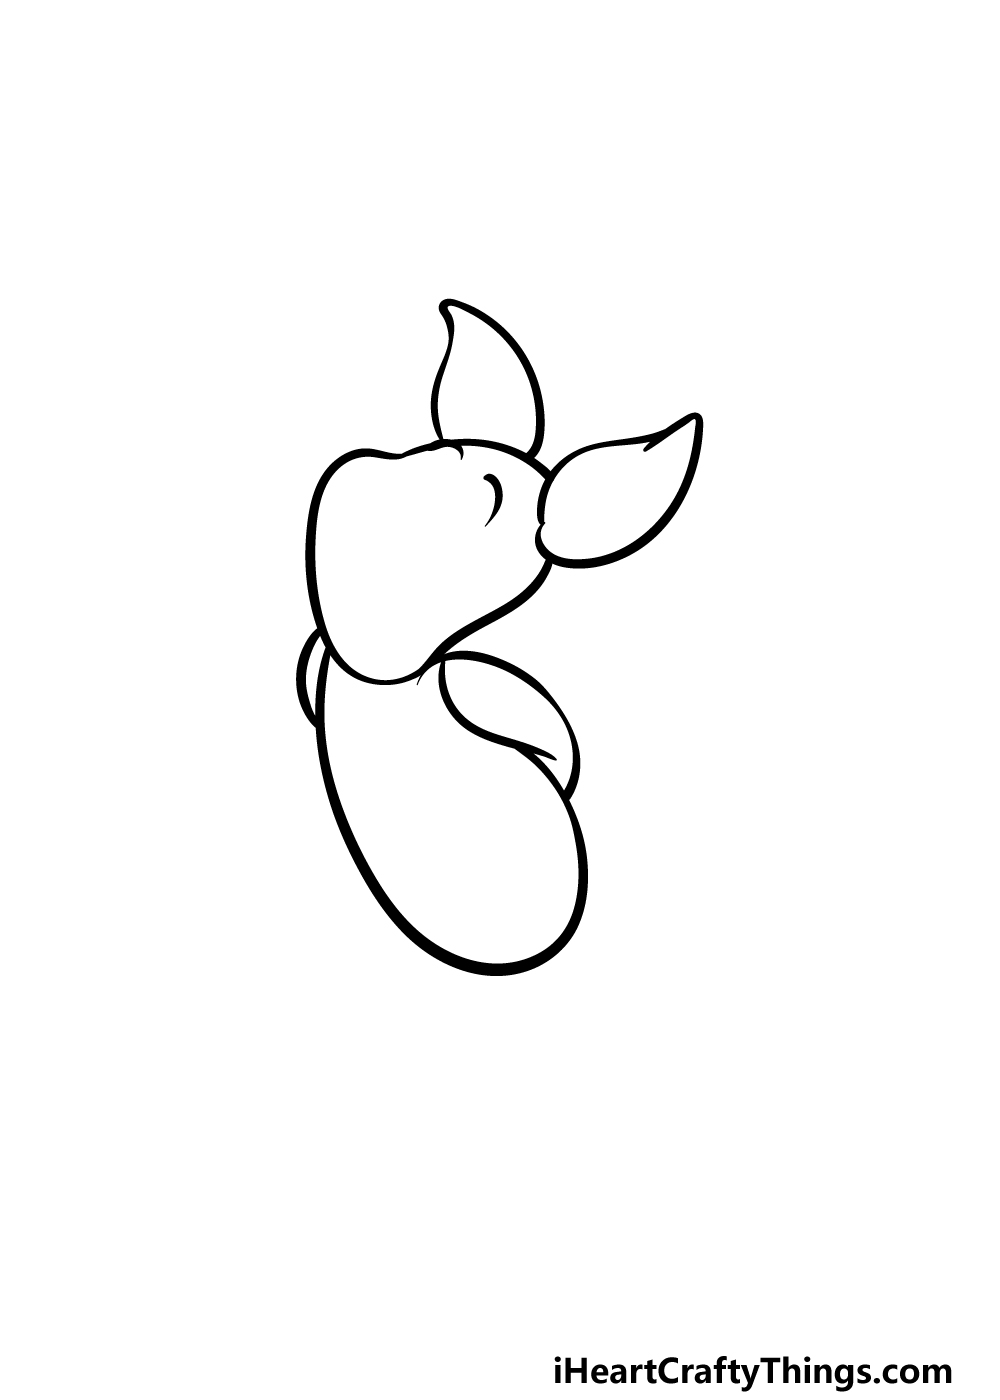
In this second step of your Piglet drawing, we will be adding a body and a pair of arms to the little guy.
Piglet is often shown looking a bit bashful, and we will be reflecting this in the pose that we will be drawing him in.
His body will be drawn with a curved line to show it extending backward. The reference image will show you how you can angle his head in relation to his body to create this bashful pose.
Then, you can finish off this step by drawing his rounded arms going behind his back.
Step 3 – Next, draw his two legs
Continuing on with this guide on how to draw Piglet, we shall be adding his legs in this part.
We mentioned in the previous part that he is posed to look a bit bashful, and this will be reflected in the way that we position his legs.
His legs will be drawn as thin shapes with rounded ends, and they will be angled so that his knees are inverted towards each other.
That’s all there is to it, so when you’re ready we can then move on to the next part!
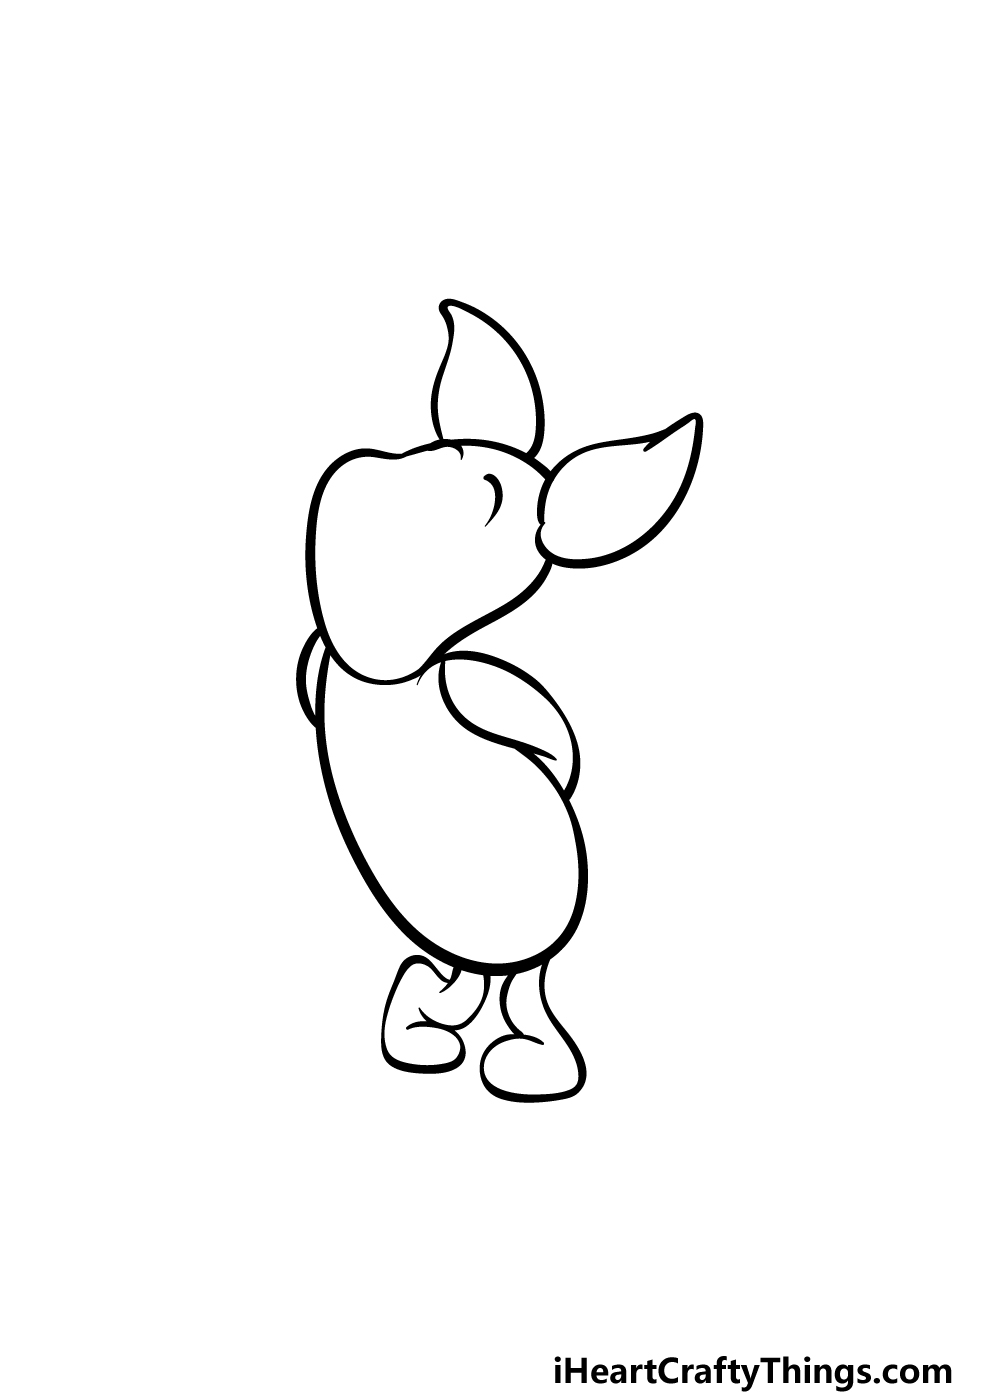
Step 4 – Now, draw his facial features
It wouldn’t be a complete Piglet drawing without his adorable face, so we shall add it in this step.
You can start by drawing two small, black dots for his eyes, and they will be quite close together. Then, add a curved line between them and draw his rounded nose attached to that line.
Next, extend some more curved lines out from the base of his nose to draw his smiling mouth.
Before you move on to the final details in the next part, you can also add some slightly curved horizontal lines underneath his eyes to further create his facial expression.
Then you will be ready to move on to those final details that we mentioned earlier!
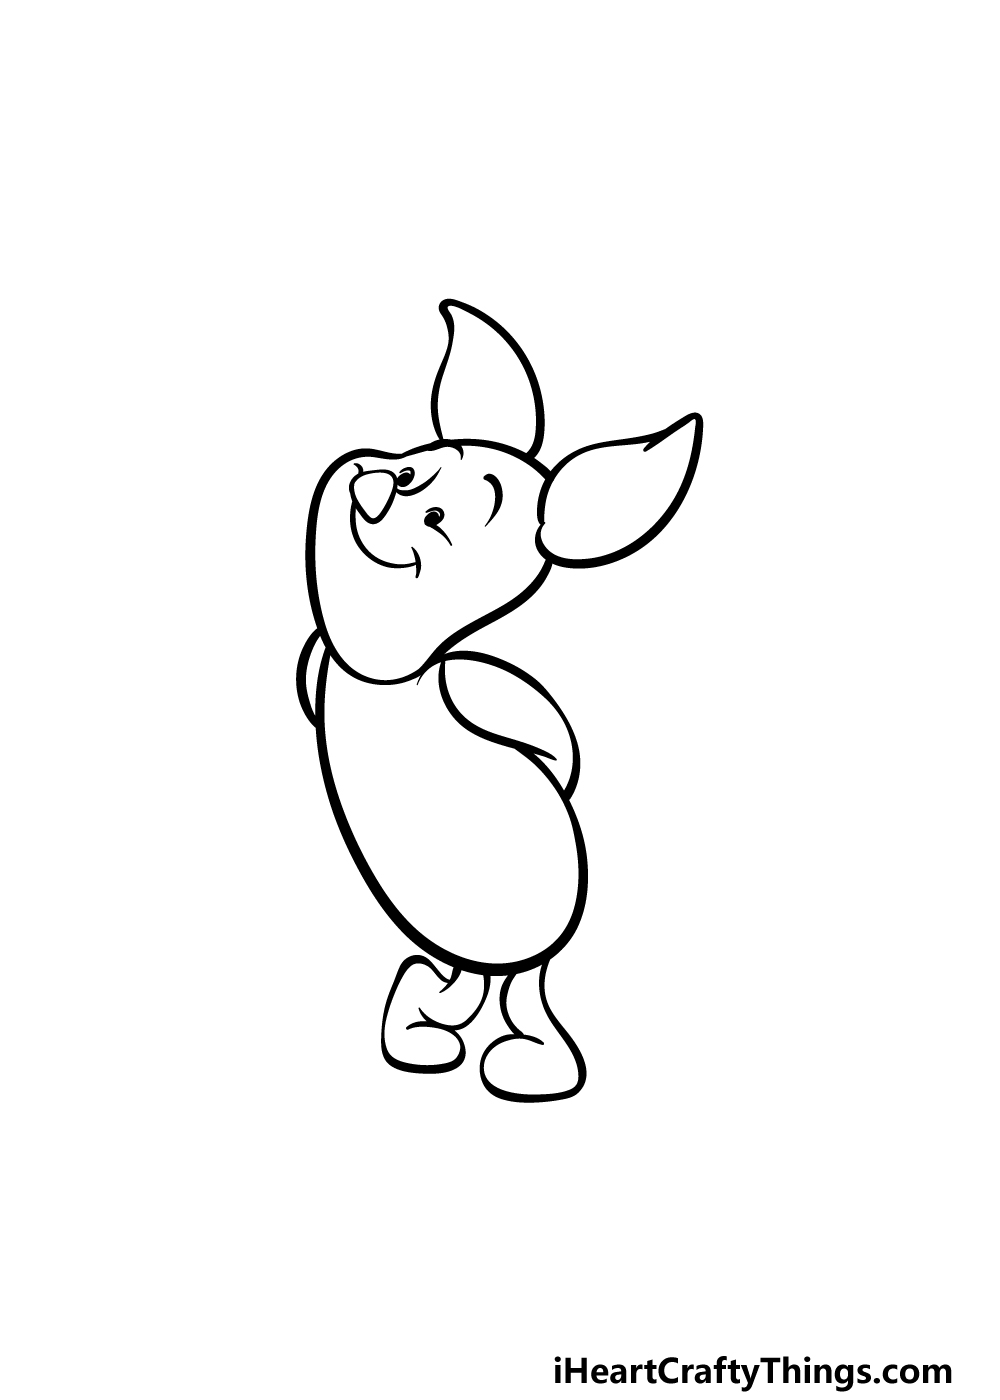
Step 5 – Add the final details to your Piglet drawing

This fifth step of our guide on how to draw Piglet will see you adding the final touches before you move on to the final step of the guide.
These should be pretty easy to add, as all you need to do is draw some curved horizontal lines across his body. Once you have drawn these, you are ready to color him in for the next step!
Before you move to that final part, you should also feel free to add any details of your own. Perhaps you could add a nice background or draw some more Winnie The Pooh characters to go with Piglet.
What extra details can you think of to add to this adorable drawing of yours?
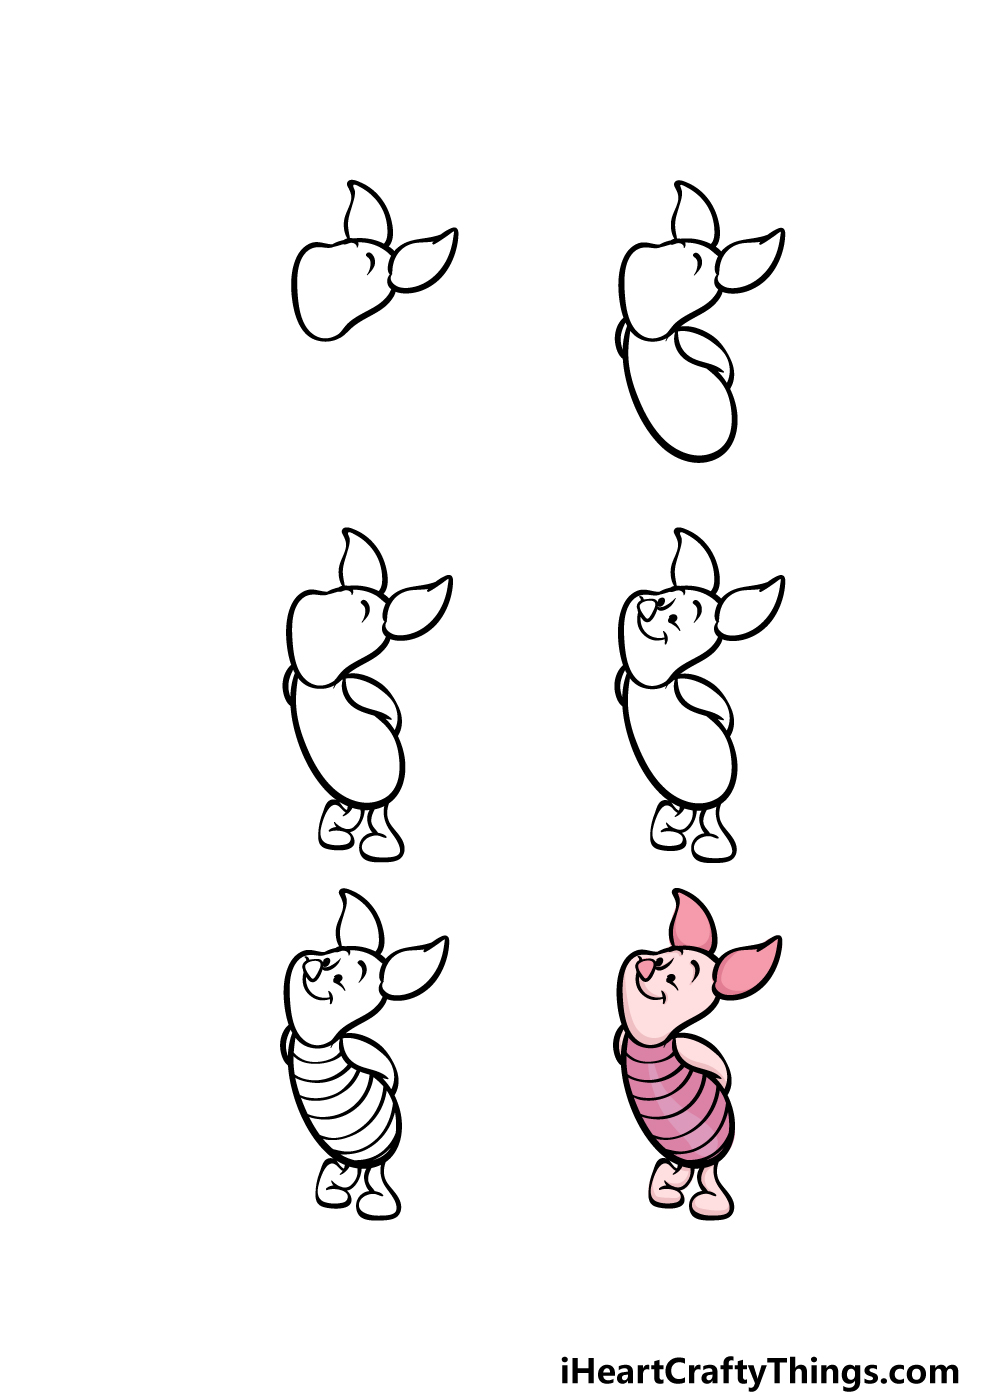
Step 6 – Finish off your Piglet drawing with some color
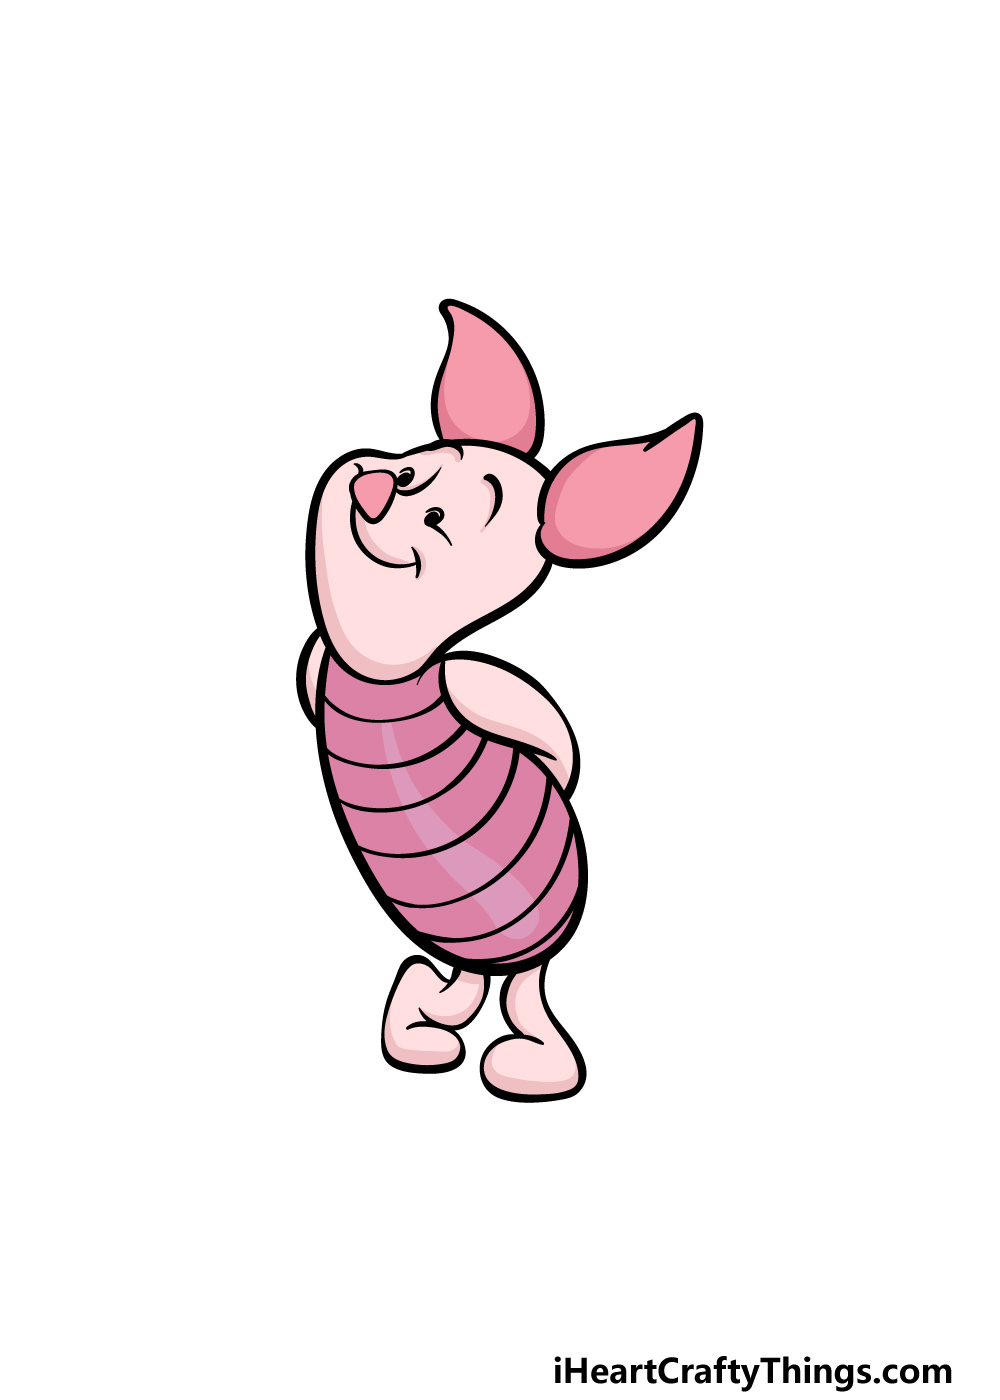
For the final step of your Piglet drawing, we shall be finishing him off with some lovely colors.
Piglet isn’t known for having lots of colors for his design, but his color scheme is still rather specific regardless! He is colored in various shades of pink, and that is what we went for in this guide.
You can refer to our example image if you would like him to look accurate to how he looks in the films, or you could use some colors of your own for a unique Piglet variation.
Once you know which colors you would like to use, you can also have some fun choosing the art mediums.
Watercolor paints would be great to recreate the look of the movies, but you could also use some bright mediums like acrylics and colored markers if you prefer.
How will you color in this adorable picture?
4 More Ways To Make Your Piglet Drawing Unique
Spend time with this adorable character with these tips for your Piglet sketch!
This drawing of Piglet shows him in a simple yet typical pose for this shy character. Once you have the hang of this drawing, you could show him in all sorts of poses!
If you need some help with this, you could look up images online to help you as you draw these additional poses. He could look more excited or possibly even more nervous.
What sorts of poses would you like to create for Piglet to create some variety?
Piglet loves to spend time with his friends in the stories he appears in, and these could be added to this drawing as well! The obvious first choice would be to add Winnie the Pooh.
He would be the perfect addition, but there are many other characters you could also add. These could include Tigger, Eeyore or maybe Owl.
These are a few examples, but who else could you add to hang out with Piglet in this image?
The Piglet drawing we created in this guide is styled after the classic Disney version. This is a great version, but you could also draw the version of Piglet that appears in the original books.
This design by illustrator E.H. Shepard is a lot simpler in its design, and it would make a great contrast to the more detailed Disney version.
You could either use the books or look up some images of this alternative take on Piglet to help you as you draw.
Finally, no matter which style you choose for Piglet, you could finish off this Piglet sketch with a background.
You would have many famous locations from the stories to choose if you wanted to do this!
Not only could you represent your favorite locations, but you could also replicate your favorite scenes and moments.
This is something you could do whether you added additional characters or not.
It could also be fun to create a brand new setting for Piglet to be in!
Your Piglet Drawing is Complete!
That brings you to the end of this guide on how to draw Piglet! We hope that this experience was rewarding and lots of fun for you to take on!
We aimed to make recreating this beloved character much easier by breaking it down into smaller steps for you to take on.
That way you can focus on the fun of this drawing without getting frustrated!
Now that you can draw the adorable Piglet, how will you finish off this drawing? Will you go with our ideas of adding a background and more characters or will you add some ideas of your own? We can’t wait to see what you do!
Please remember to head over to our website where you can find many more drawing guides to enjoy. We upload new ones often, so be sure to keep checking in!
We hope that you will also share this completed Piglet drawing on our Facebook and Pinterest pages as we would be thrilled to see it!