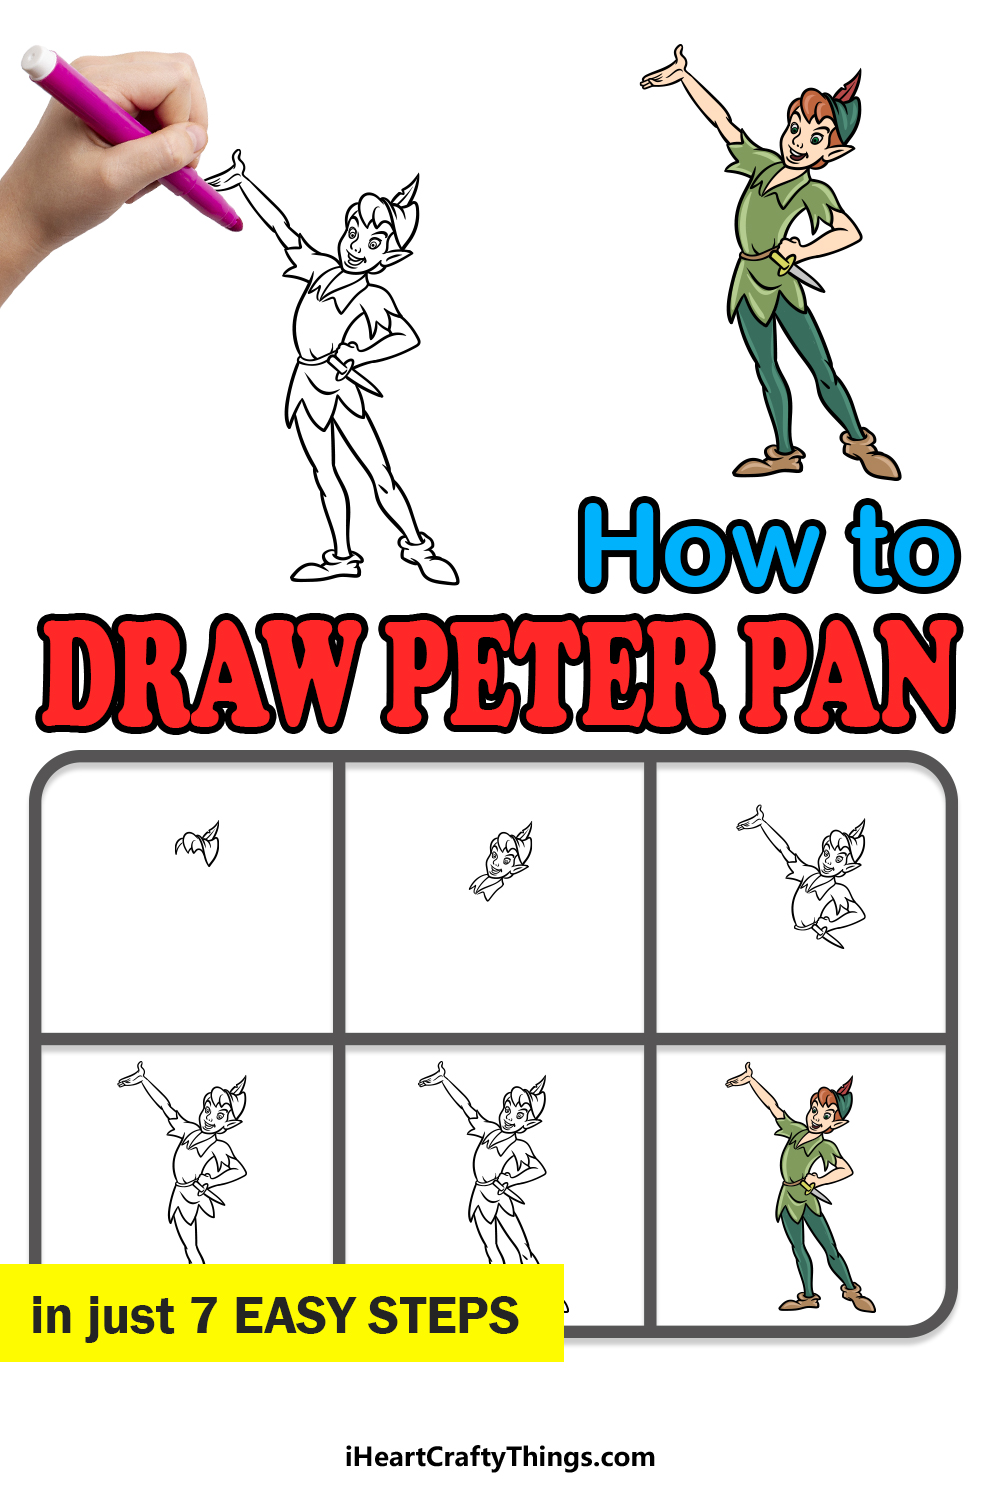
Peter Pan is one of the most iconic and recognizable characters of all time.
He was an incredibly popular character after his book introduction in the early 1900s, and he received a resurgence of popularity after a successful Disney adaptation.
This Disney version is probably the most well-known of all the iterations, and many fans want to know how they can learn how to draw Peter Pan.
If you love this version of this character, then you’re in the right place!
Our step-by-step guide on how to draw Peter Pan in just 6 easy steps will show you how to recreate this iconic lost boy.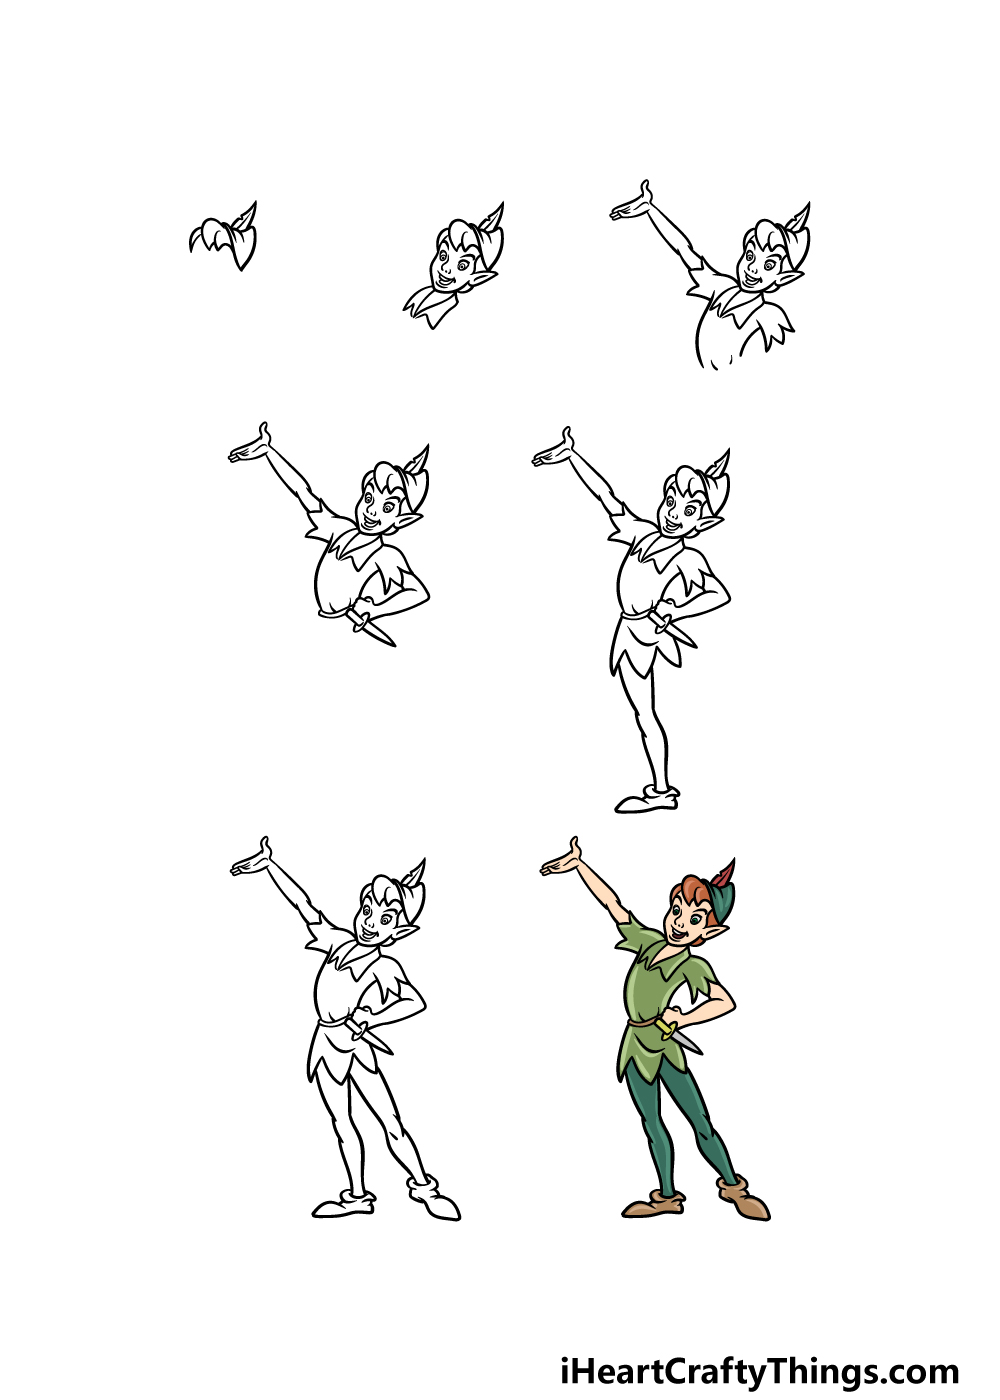
How to Draw Peter Pan – Let’s get Started!
Step 1
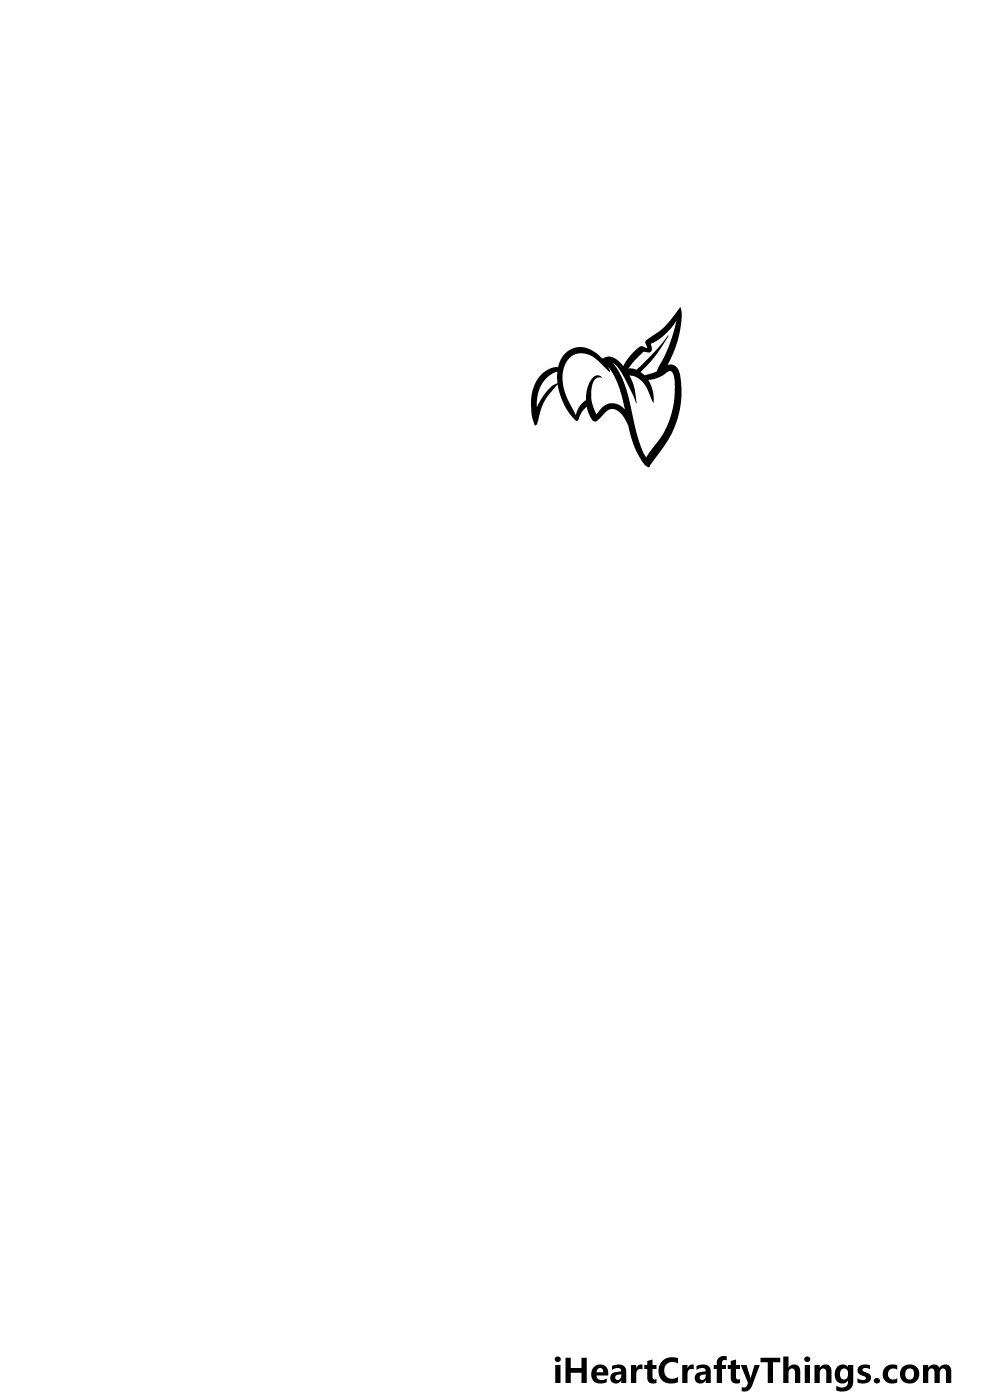
In this first step of our guide on how to draw Peter Pan, we will start with his signature hat as well as the start of his hairstyle.
First, use some curved lines with pointy sections on them for his hair dropping over his face. Then, we will use some wavy lines to draw the floppy hat sitting atop his head.
This hat will also have a rounded tip on top, and you can finish it off by adding the feather attached to it.
Once these have been drawn, we can then proceed to step 2 of the guide!
Step 2 – Draw Peter’s face and collar outline
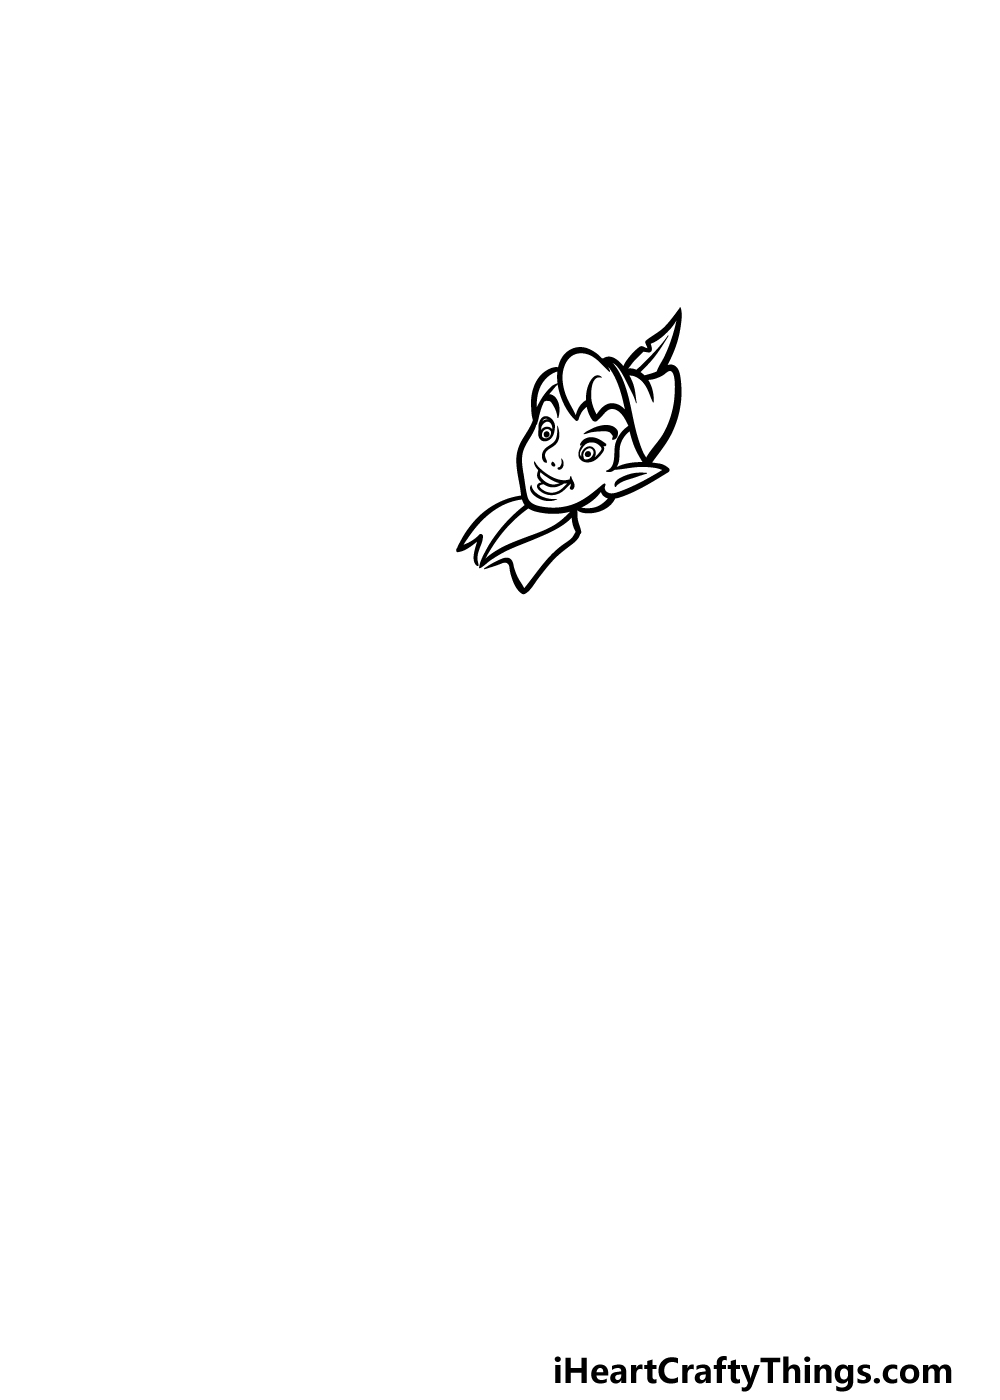
Now that you’ve drawn the hat for your Peter Pan drawing, we can start drawing more of his face as well as the start of his chest.
Use some curved lines to draw his facial outline, and be sure to add his pointy ears as well.
For his face, he has rather small, rounded eyes with some thick eyebrows above them. His nose and grinning mouth are made up of some simple lines that will give him his mischievous expression.
Finish off by drawing his neck and the outline of his collar before we move to the next step.
Step 3 – Add his first arm and some more of his chest
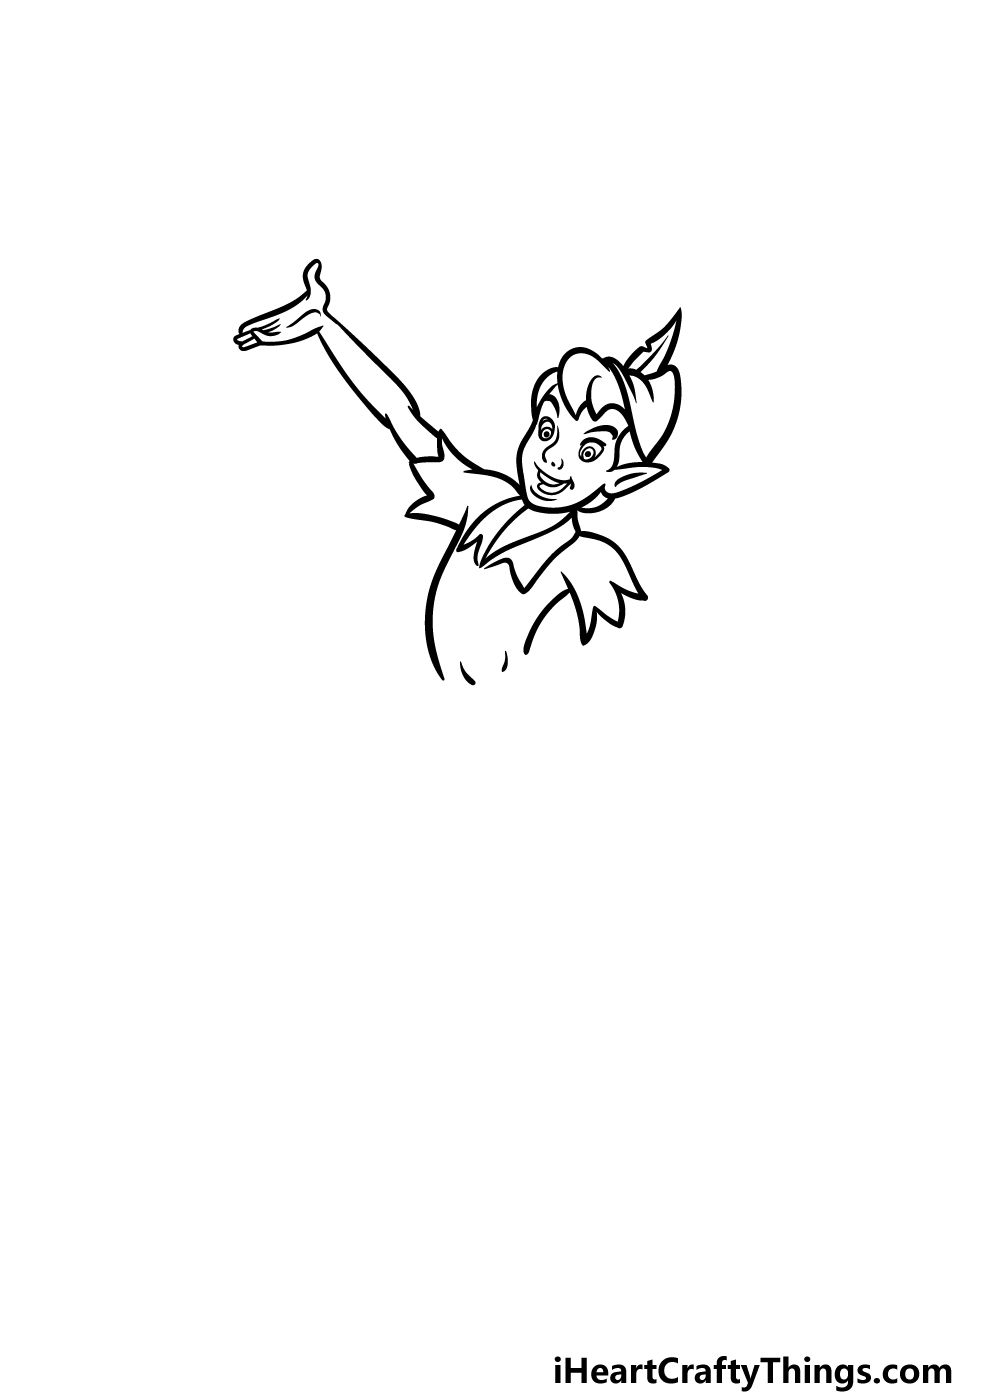
The first thing we shall do in this third step of our guide on how to draw Peter Pan will be to add some more of his shirt.
Use some curvy lines for his short shirt sleeves, and then use some straight, jagged lines for the edges of the sleeves.
Use some more rounded lines for his chest and his back, and then draw his long, thin arm extending from the sleeve on the left.
That’s all there is to it for now, and then we can tackle step 4.
Step 4 – Now draw his other arm
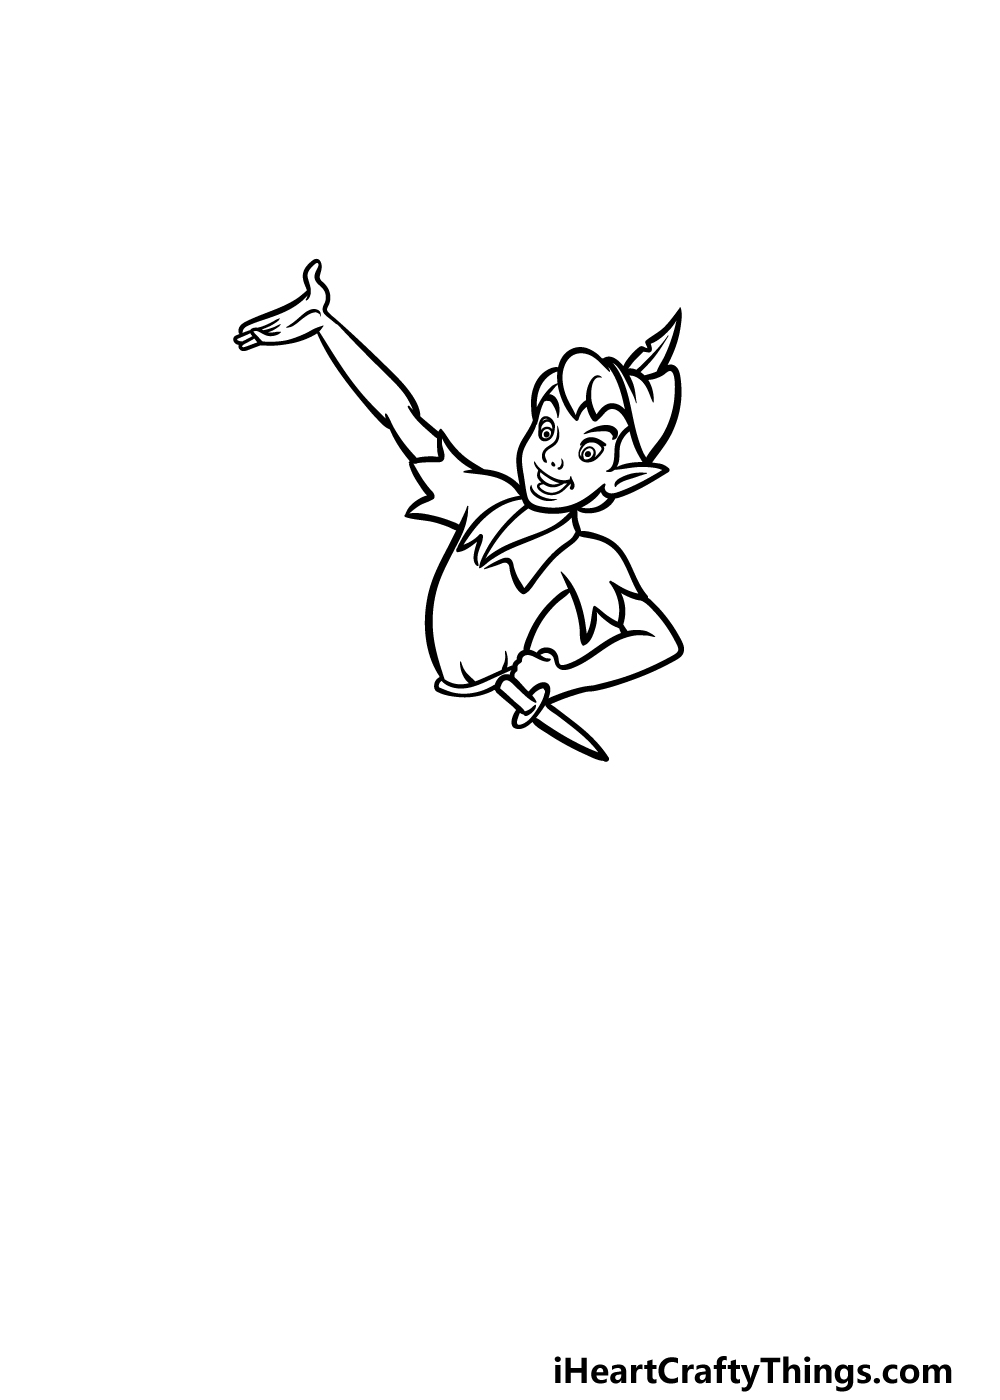
In the previous part of your Peter Pan drawing, we added the arm on the left extending straight out, but the one on the right will be positioned differently.
This one will be bent over to have his fist at his waist, and once that is drawn you can also add his small dagger onto his belt.
Finish off with a thin, curved shape at his waist for his belt before we move to step 5.
Step 5 – Draw his first leg and more of his shirt
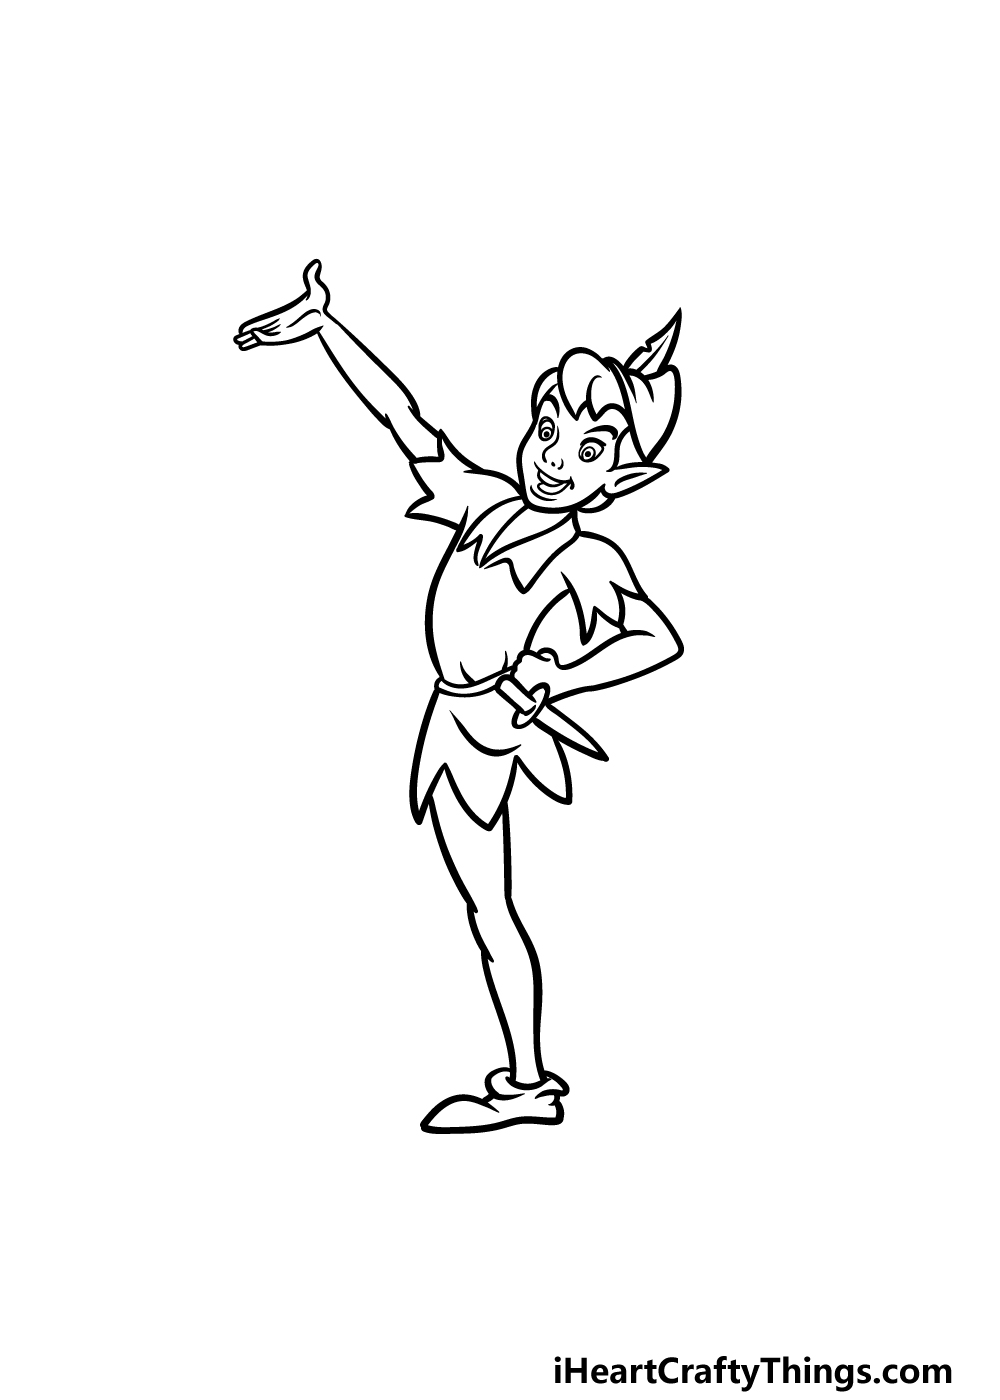
Now you are ready to finish off his shirt and add the first leg in this fifth step of our guide on how to draw Peter Pan.
The bottom of his shirt will look similar to his shirt sleeves in that it will have three sharp pointy sections.
Once the shirt is drawn, you can then draw his leg on the left. Use some curved lines for the shape of his leg, and then add his fairly pointy shoe at the base of it.
With these elements drawn, we have just a few more final details and elements to add in the next step of the guide!
Step 6 – Now, add the other leg and final details for your image
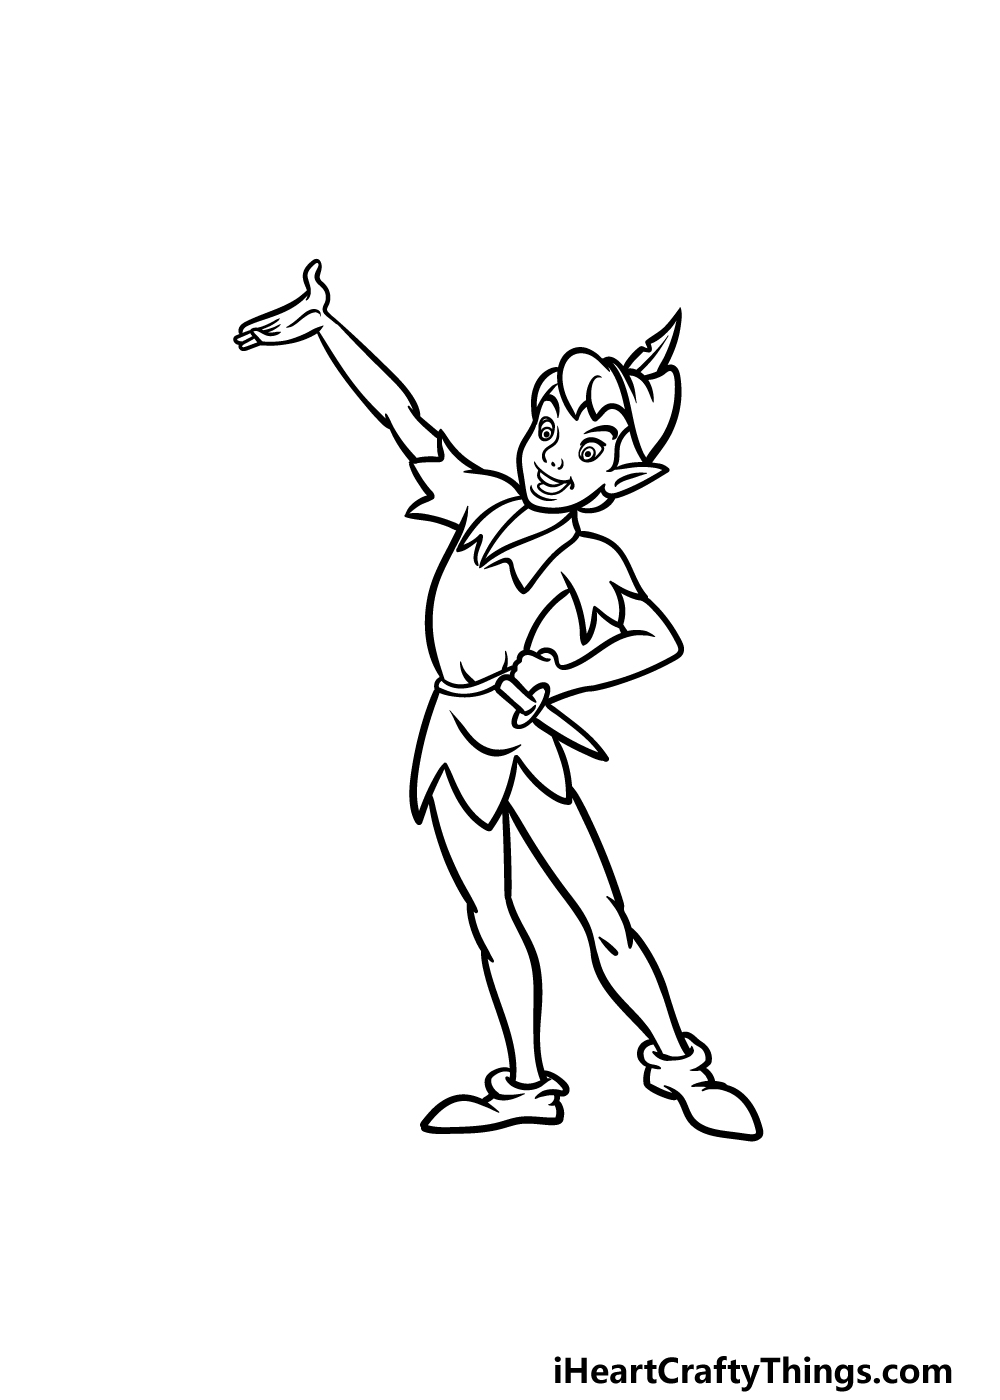
Before you add some color to your Peter Pan drawing, we have just a few more details to add. The main thing to add will be his other leg, and this one will extend outward.
Other than the fact that that it is positioned differently, it will otherwise look identical to the previous leg.
Once both legs are done, you can also add any extra details or ideas that you may want. One idea would be to draw a background for the image.
If you did that, then you could draw the setting of your favorite scene from the movie or create a unique scenario for Peter Pan to be in!
This is just one idea, but what else can you think of to really finish off this amazing drawing of yours?
Step 7 – Finish off your Peter Pan drawing with some color
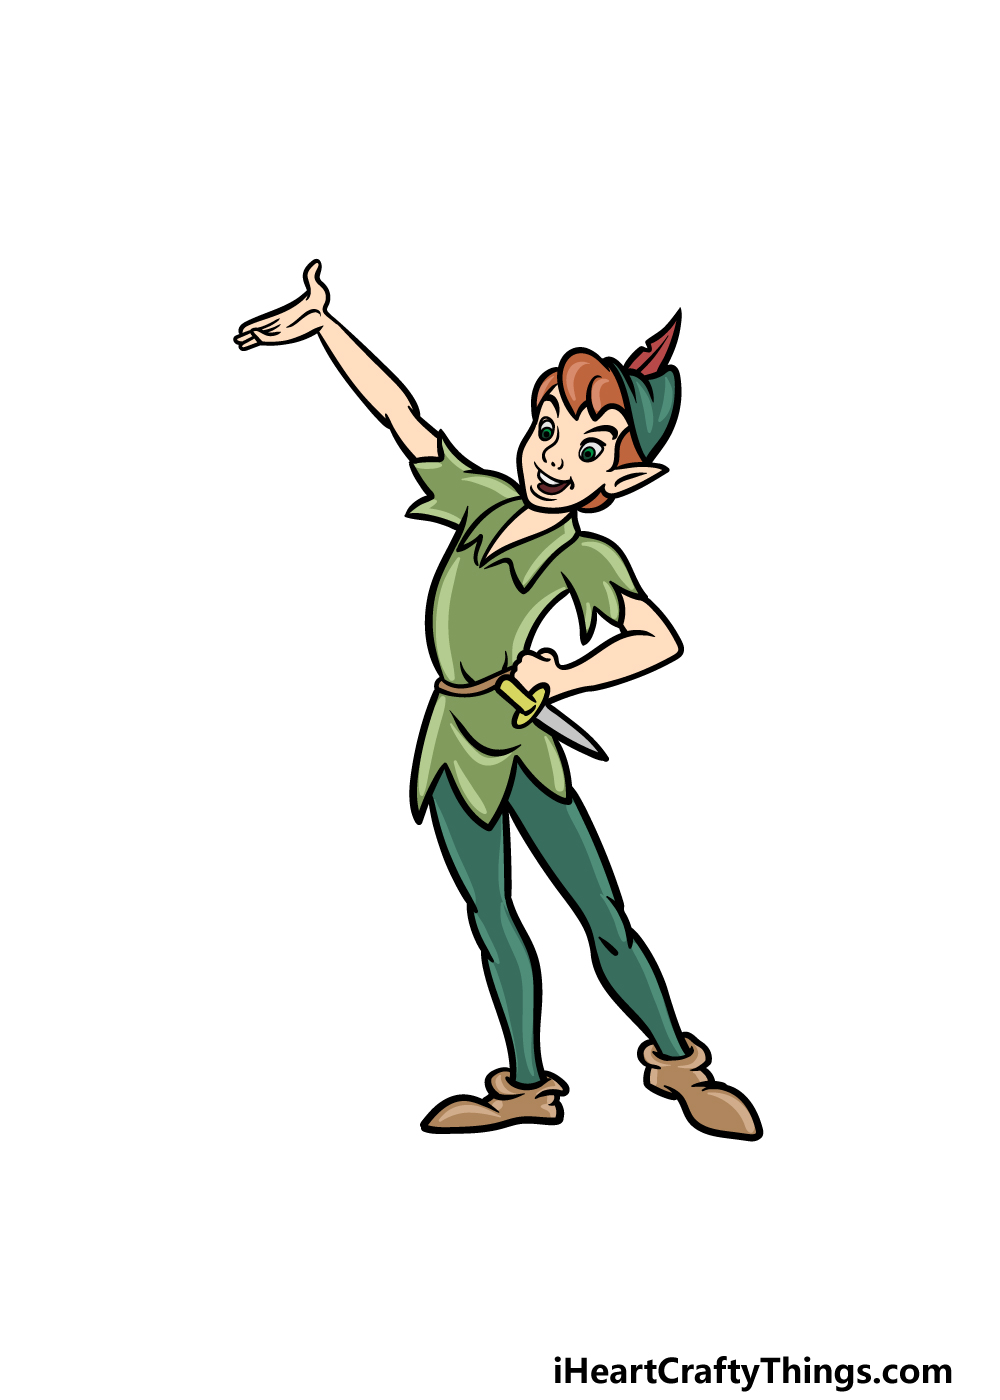
This final step of our guide on how to draw Peter Pan will see you finishing it off with some color. In our reference image, we went with the classic colors that he is seen in during his film appearances.
This means that his clothing is almost entirely colored with shades of light and dark greens. There are a few exceptions such as his red feather and yellow dagger, but otherwise he is all green.
His hair is a reddish-brown color, and this will finish off his classic look. You could use these same colors, but you could also create some unique color choices of your own if you prefer!
What colors, art mediums and techniques are you thinking of using for this image?
4 More Ways To Make Your Peter Pan Drawing Unique
Recapture your childhood with these tips for your Peter Pan sketch!
This drawing of Peter Pan shows him in a pose that captures his confidence and personality brilliantly!
Once you have the hang of drawing this particular pose, you could draw him in some other poses.
One great pose would be to show him soaring through the sky. If you need help with drawing different poses, then you could look up some pictures online or even use the film itself.
What are some cool poses you could use when drawing Peter Pan in your artwork?
In the story, Peter Pan is joined by many allies that help him in his adventures. These would be great to add to your drawing, and you could recreate your favorite moments.
Wendy Darling and her brothers would be great additions to the picture, for instance. Or, you could add any of the Lost Boys that Peter Pan leads in the story.
There are so many characters to choose from, so be sure to include all of your favorites!
Every hero needs a villain to face off against, and you could add these bad guys to your Peter Pan drawing. Of course, the perfect choice would be Captain Hook.
This villainous pirate has made it his life’s mission to capture Peter Pan, and he is joined by many other colorful Pirate villains that you could add.
Adding these additional characters could help you if you want to make this portrayal more action-packed with peril for Peter Pan to face!
Finally, you could finish off your Peter Pan sketch by showing off your favorite settings from the story.
If you have a specific scene or moment from the films, then you could use the backgrounds of these scenes for your drawing.
That would be one way of doing it, but you could also take Peter Pan on some new adventures by creating some new locations for him to be in.
It’s up to you, so what adventures will you create for Peter Pan?
Your Peter Pan Drawing is Complete!
You have finished all of the steps in this guide on how to draw Peter Pan! We hope that the steps in this guide made recreating this classic character a fun and easy experience for you to work through.
Now that you have mastered how to draw this mischievous character, remember that you can also add any extra ideas you may have for it.
Will you add a background, more characters, experiment with colors or add even more ideas to the image?
Remember to check out our website for more awesome drawing guides such as this one! We upload new guides often for you to enjoy, so be sure to check in regularly.
We would really love to see your finished Peter Pan drawing, so please share it on our Facebook and Pinterest pages so that we can see how it came out!