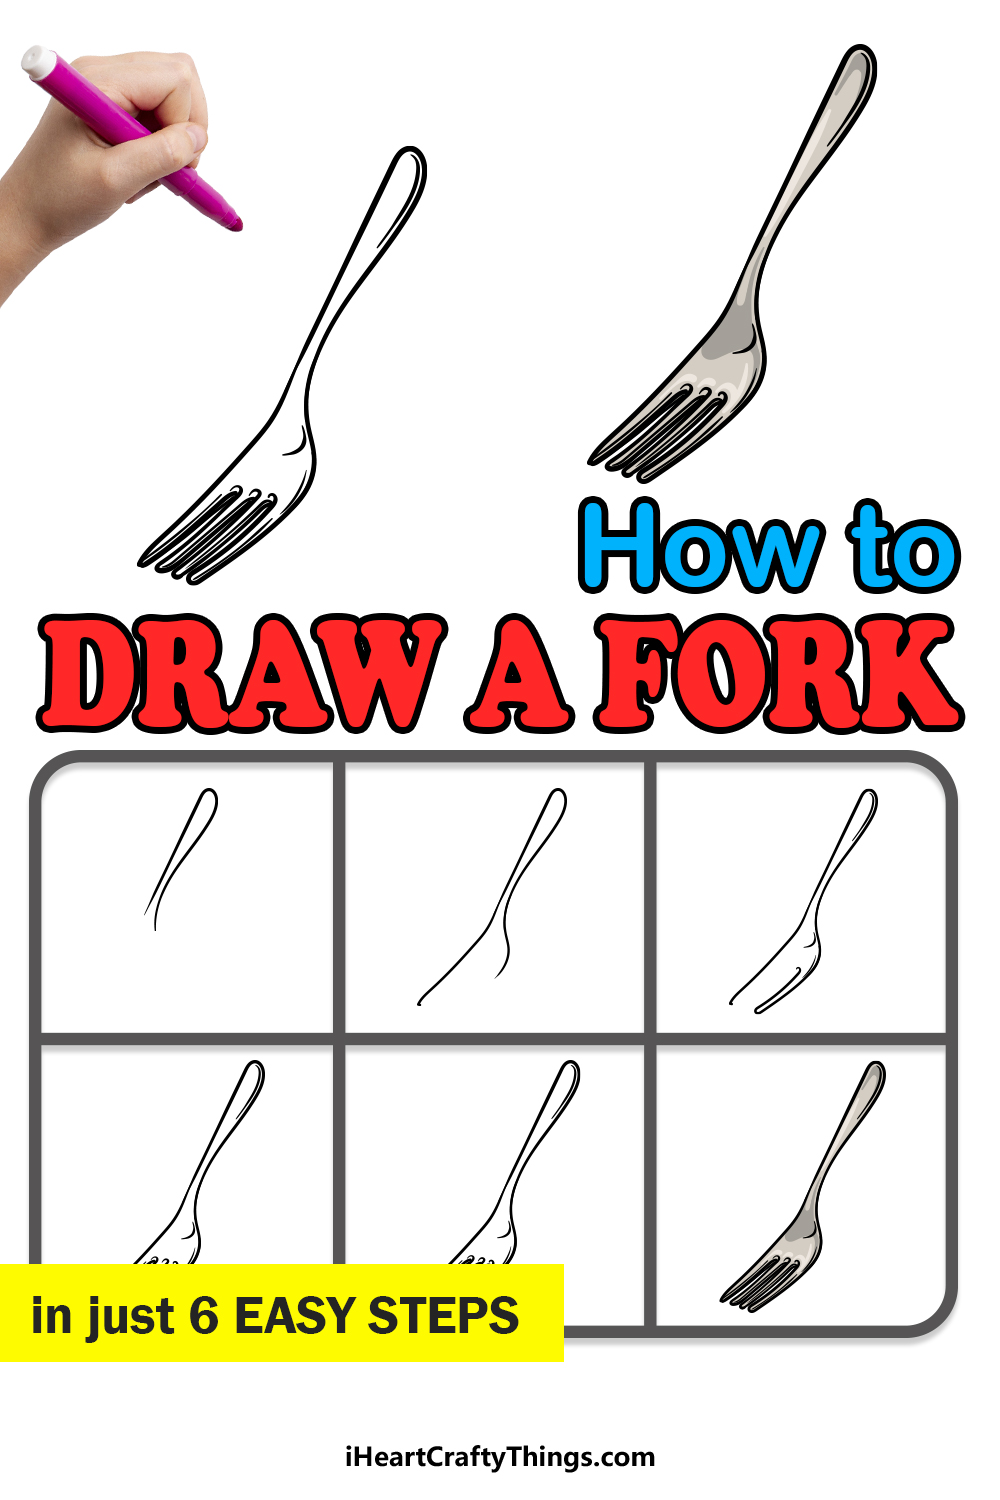
When it comes to the many different foods you can enjoy, there is a seemingly infinite variety to enjoy! With so many different kinds of food, you need the right utensil for the job.
Knives will help you cut to the chase, spoons will help you to get the scoop and forks will help you make sure the next mouthful will find its way!
Forks can come in many different types and varieties, and while we have all used many forks in our time, it can still be hard to learn how to draw a fork.
Once you know how it’s done, it will seem as easy as enjoying a delicious meal, however!
This step-by-step guide on how to draw a fork will show you just how you can draw this famous utensil.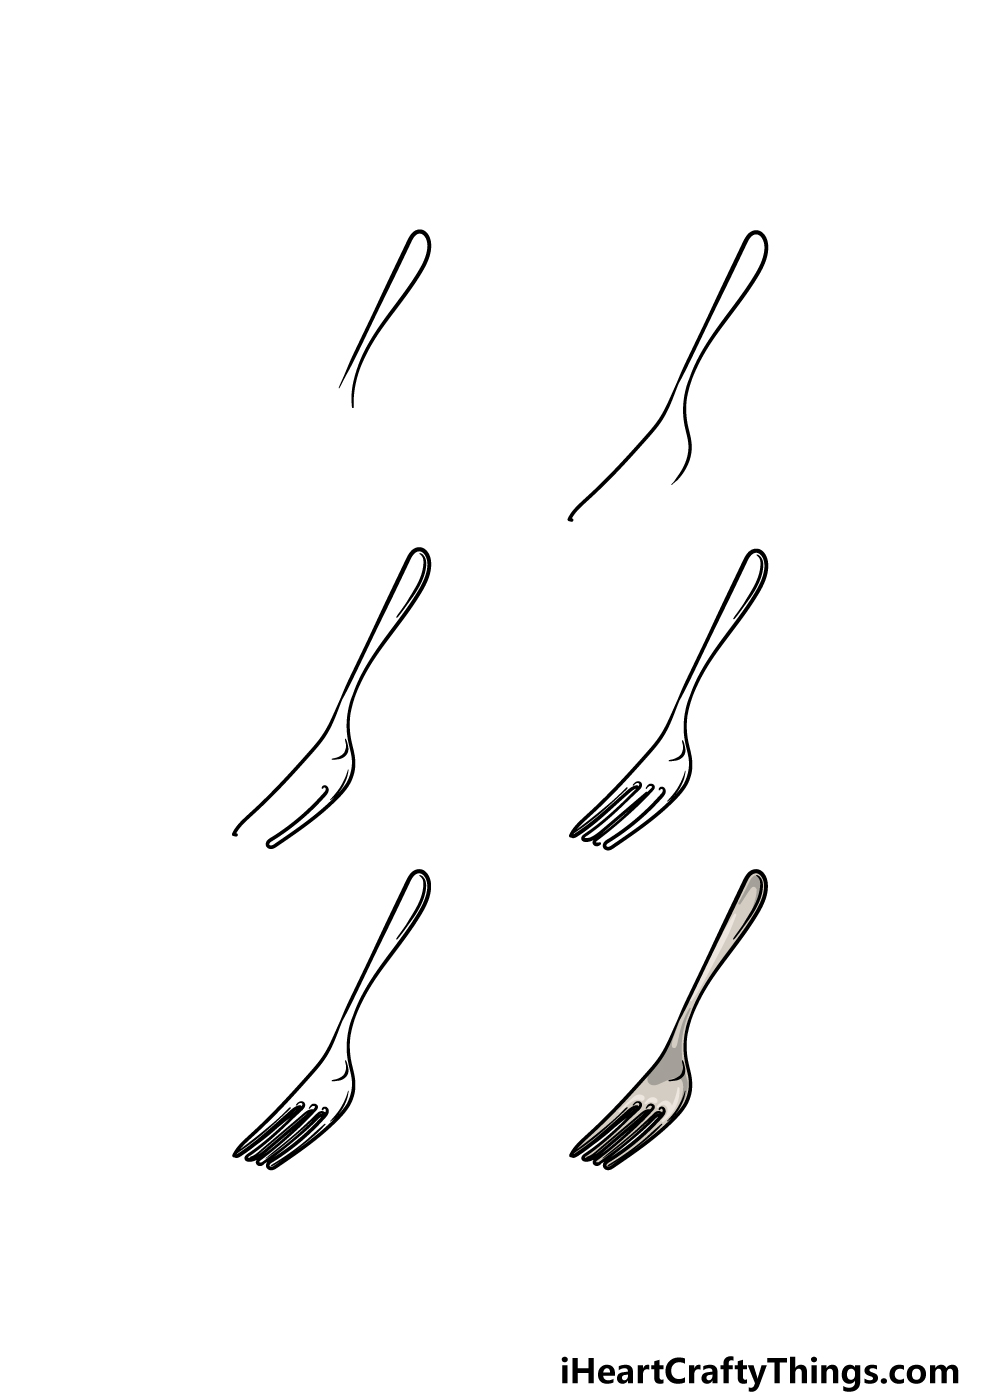
How to Draw A Fork – Let’s Get Started!
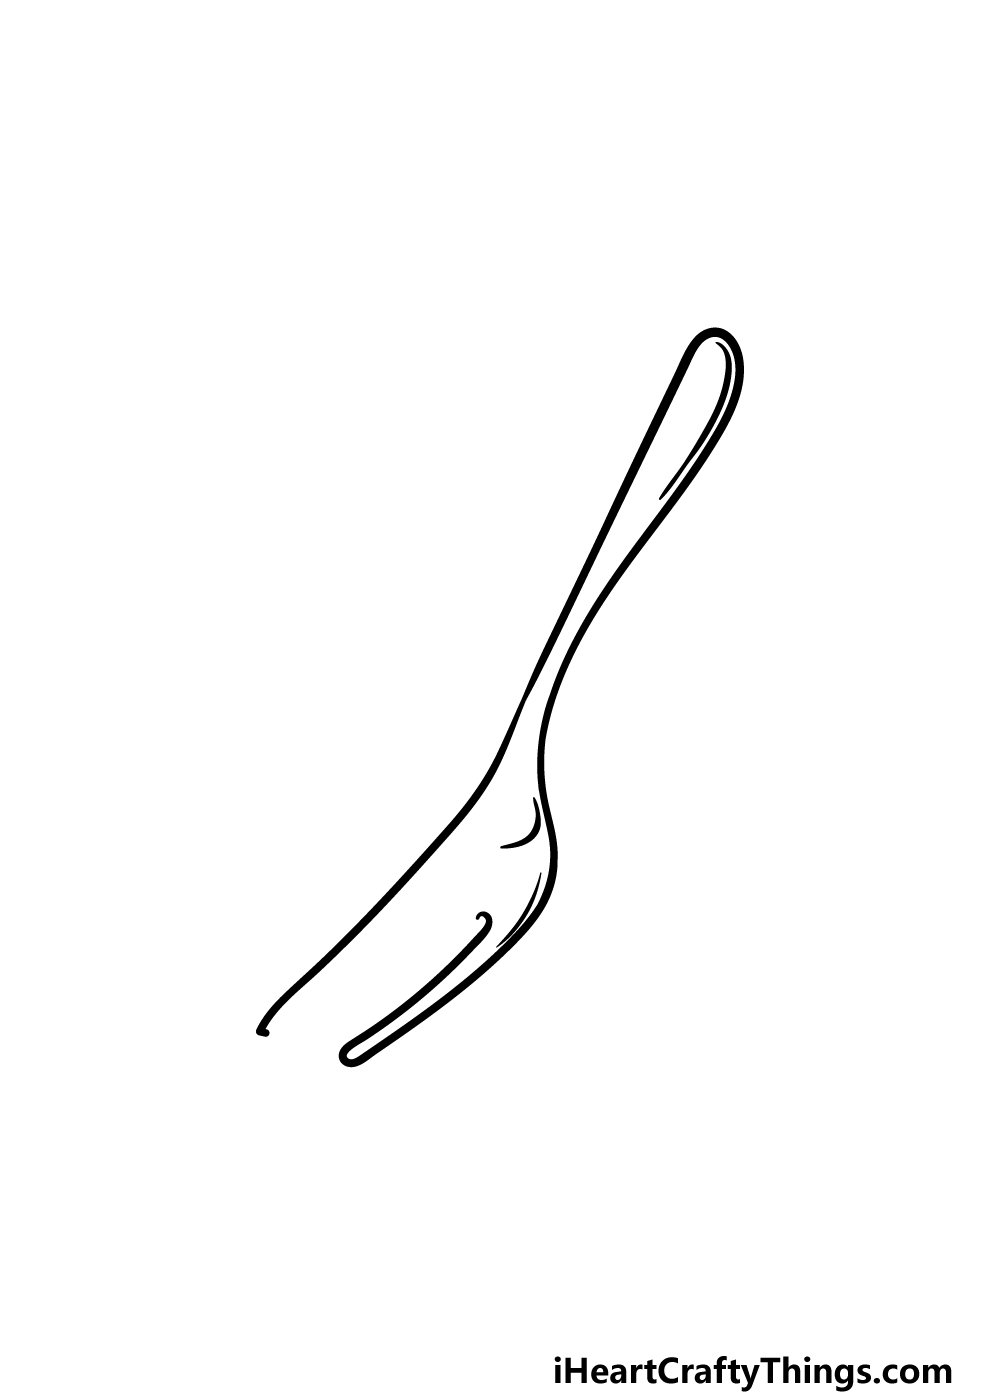
Step 1
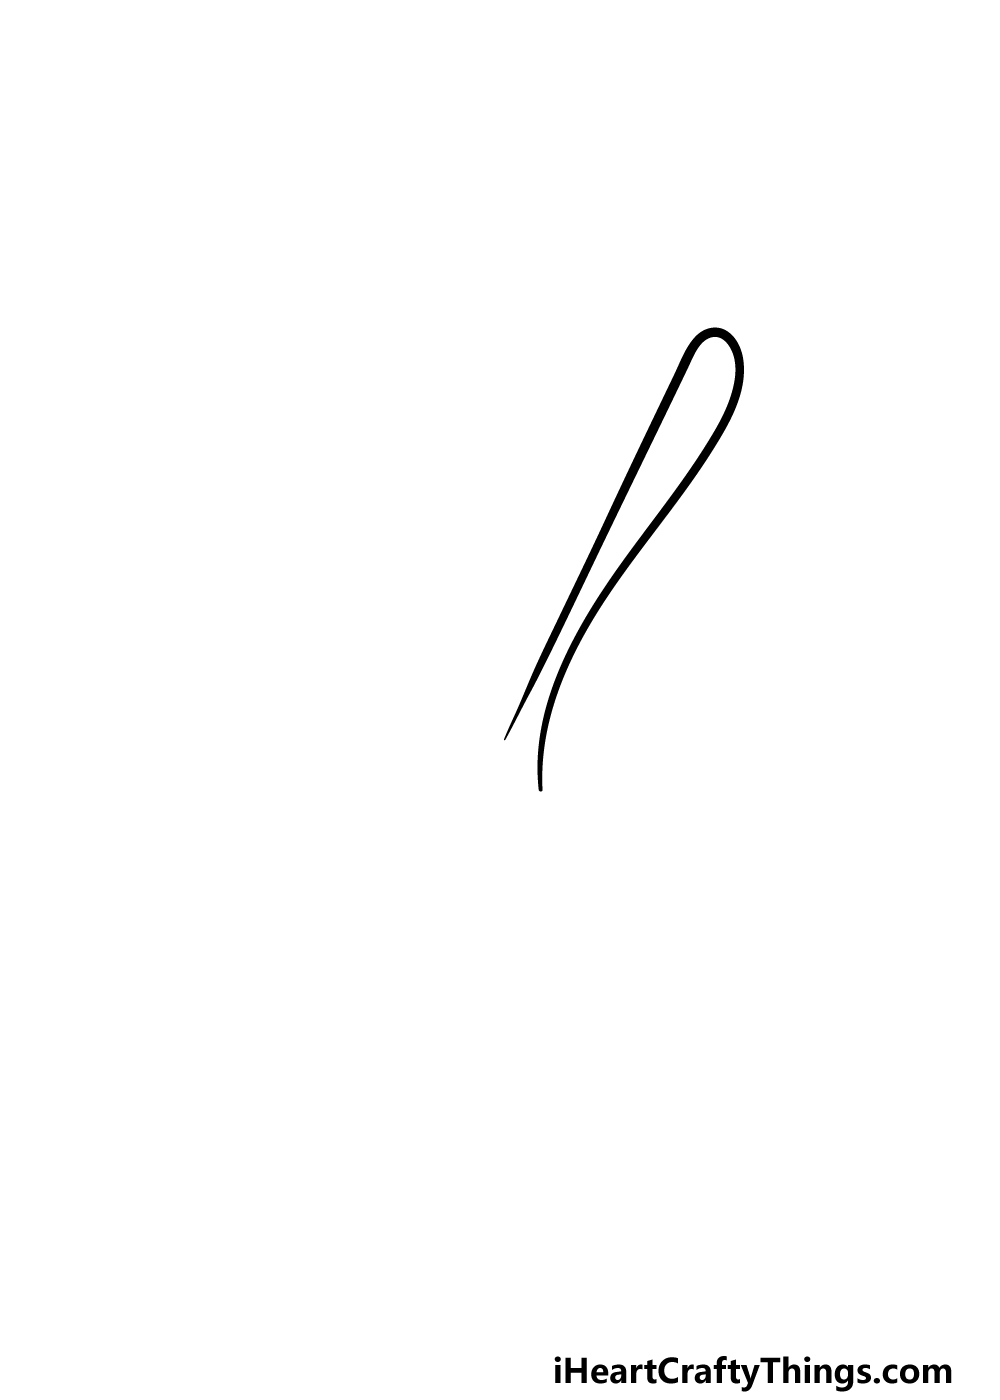
To start this guide on how to draw a fork, we will focus on the handle of the fork. The base of the handle will be attached to the main part of the fork, and it will have a relatively wide gap at that area.
As you move further up the handle, the handle will get thinner and then a bit wider as it moves up until it culminates at the rounded end of the fork.
Once this section of the handle is drawn, we can move on to the second step where we shall continue drawing more of the fork.
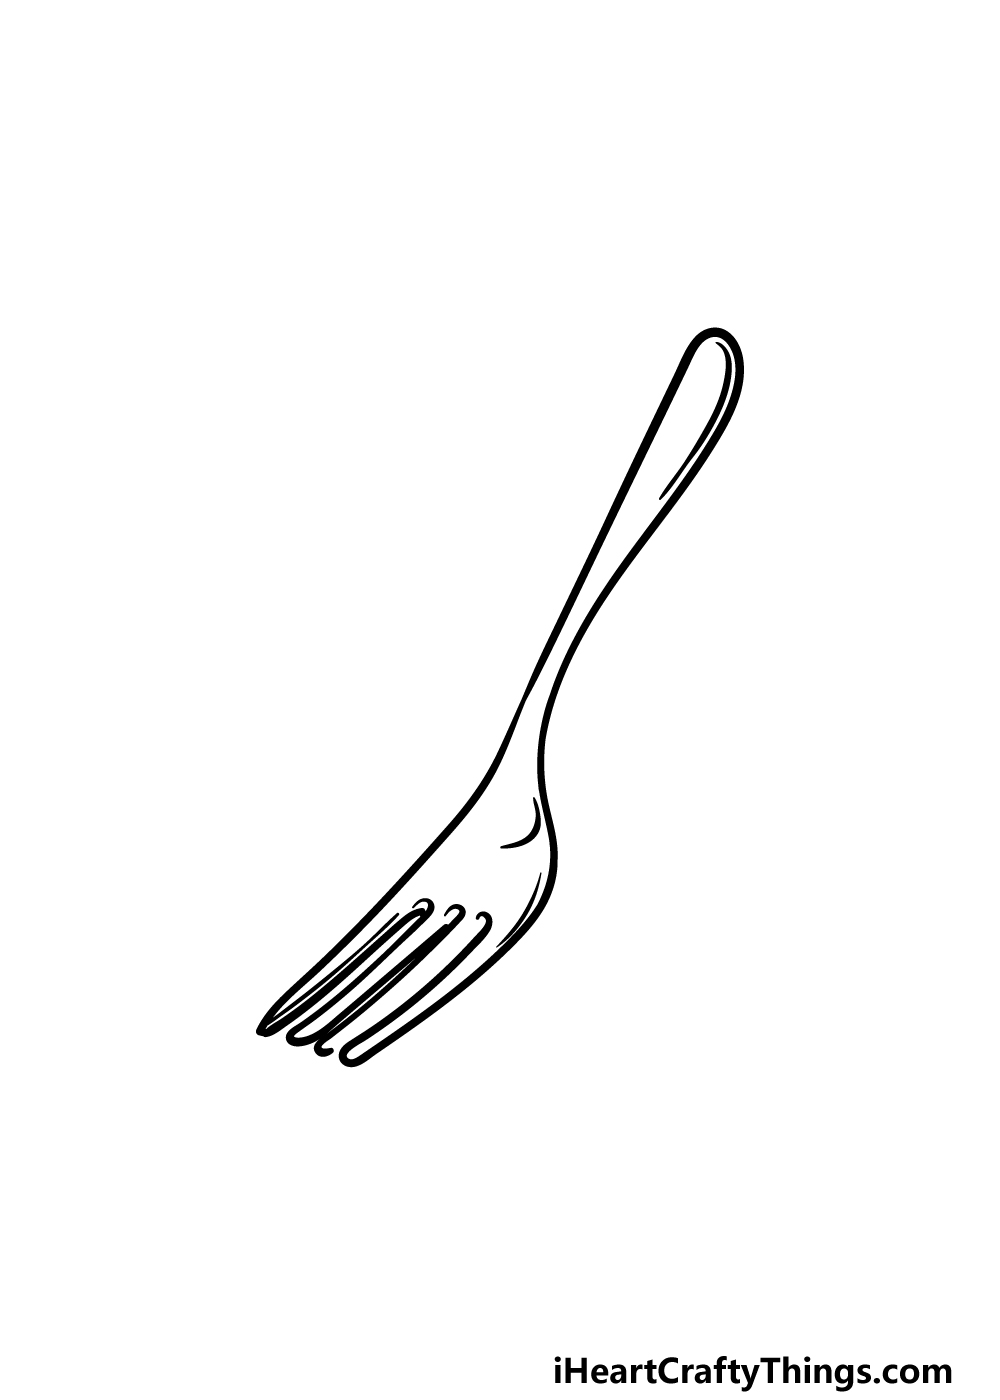
Step 2 – Draw the first of the fork prongs
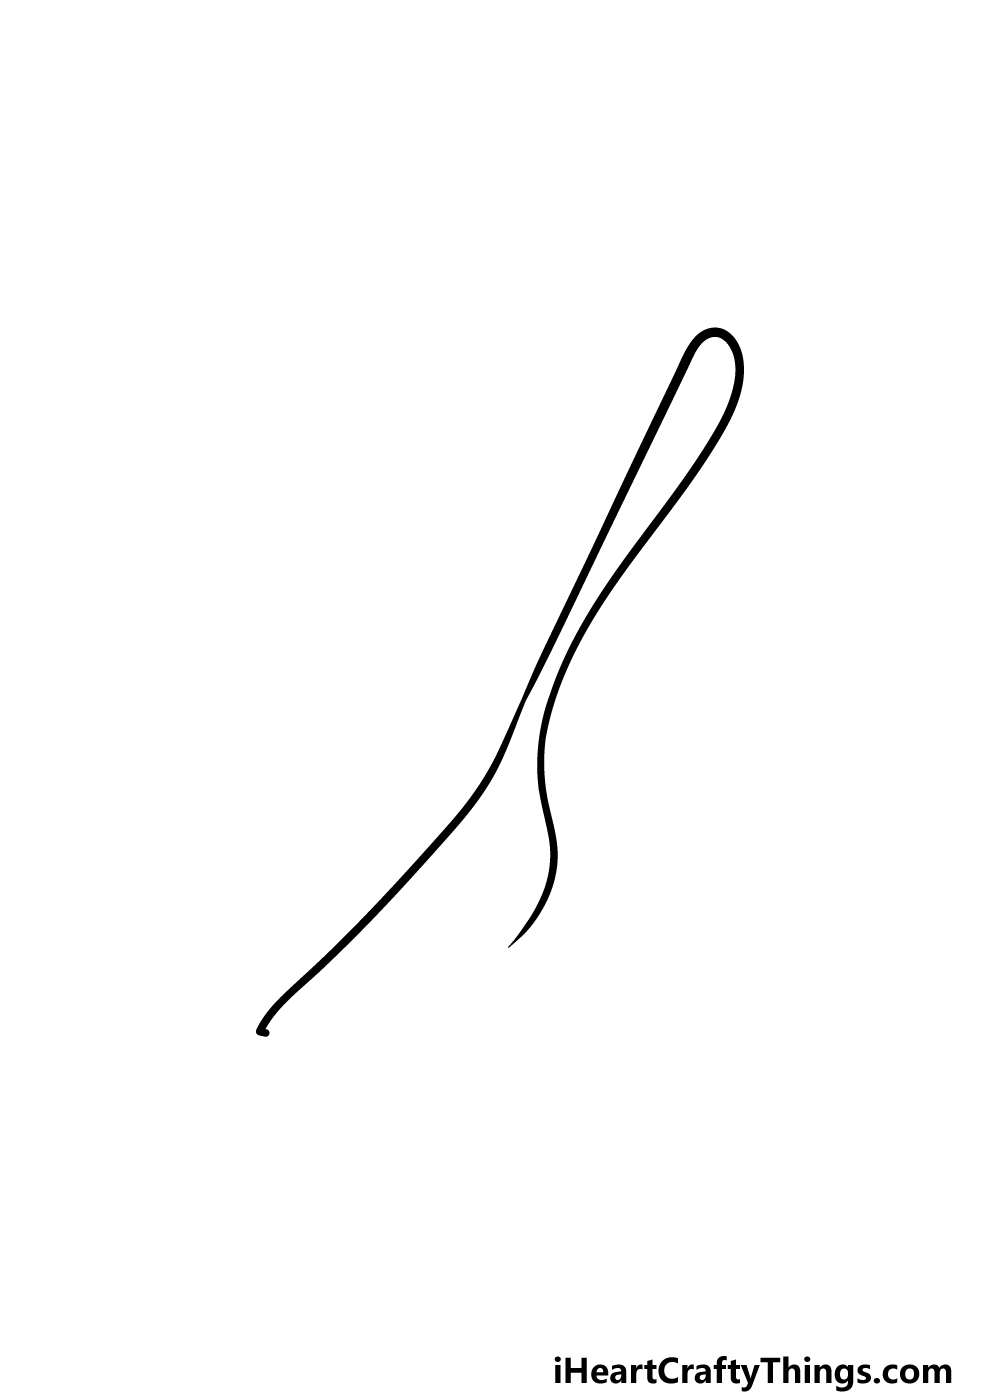
Now that you have the handle of your fork drawing done, we shall start drawing the end of the fork that has the pointy prongs.
Extend the line on the left side of the handle down at a very slight curve, and you can bend it over very slightly at the end.
Then, we shall be extending the other side of the handle down as well. This line will extend outward at a sharper curve than the other side did, however.
If any of this sounds confusing, it will become very clear when you see the reference image!
When you’re ready, we will then proceed to step 3.
Step 3 – Now, draw another prong on the right side of the fork
Continuing with this guide on how to draw a fork, we shall now be adding another pointy prong to the fork.
This one will go on the right-hand side of the fork and will extend from the outline on that slide.
Keep the slightly curved line of that side of the fork going a little further, and then curl it over in on itself so that it can head back towards the handle. This will take care of the first prong, and then we can add some more small details.
Add some small, curved lines to the main section of the fork and also inside of the handle. This will help to give the fork a bit more dimension.
Step 4 – Next, draw the rest of the prongs
You are now ready to draw the rest of the prongs of your fork drawing in this next step. To do this, you will pretty much be repeating what you did in the previous step a few more times.
That means drawing some straight lines that have little points at the ends. There will be a small gap left on the right-hand side of the prongs, but we shall fix that very soon.
When you’re ready to move on, we shall finish up the final details and elements in the next step of the guide.
Step 5 – Add the final details to your fork drawing
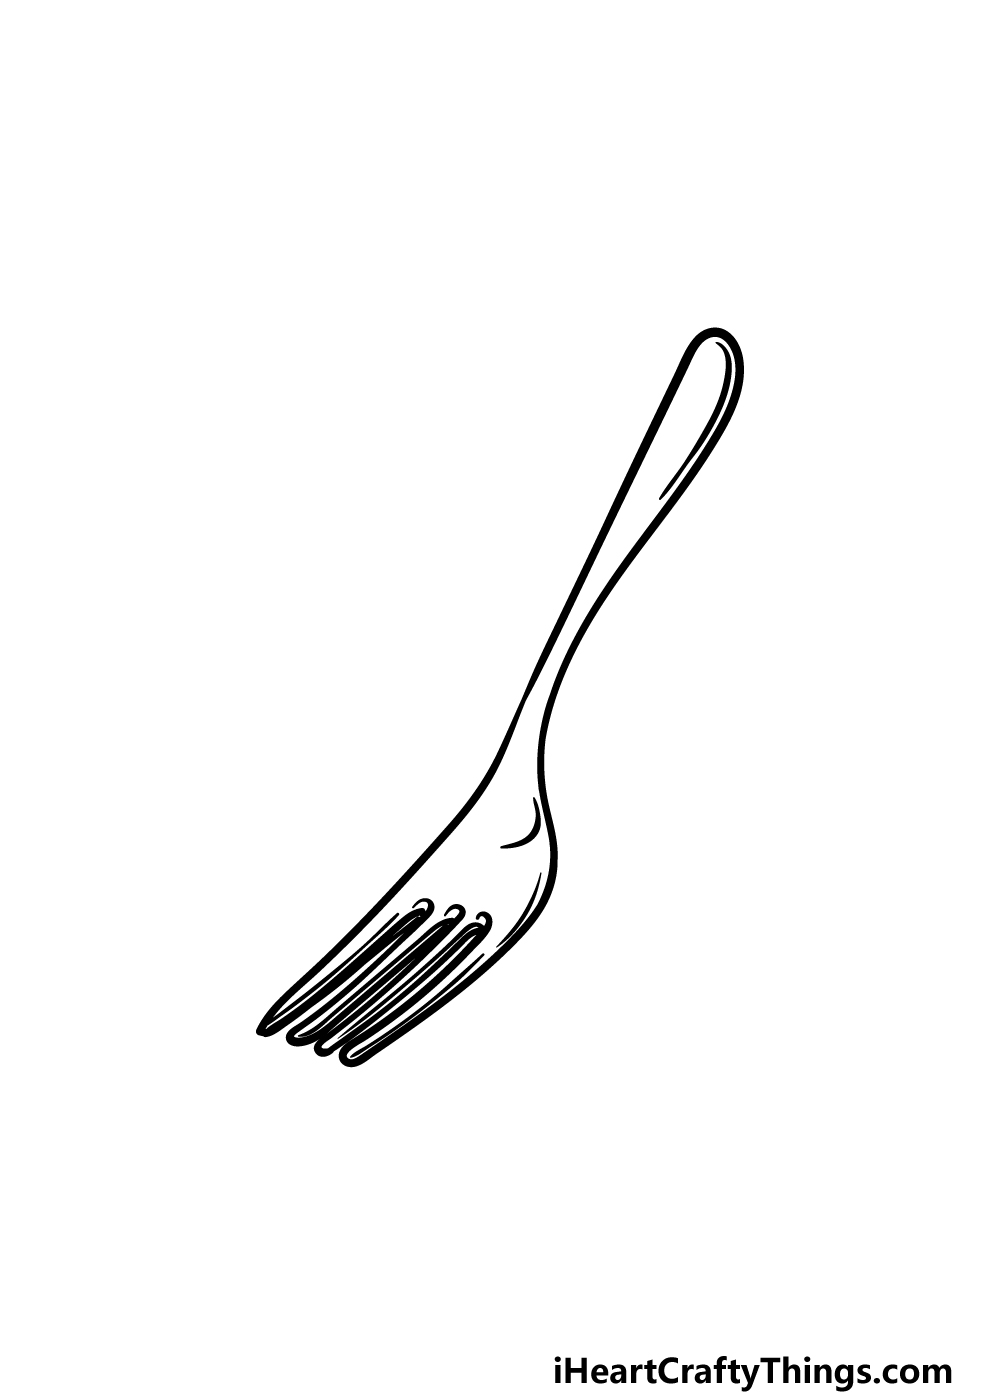
This step of our guide on how to draw a fork will be all about finishing it up before you add some colors to it.
The main aspect we will be focusing on will be finishing off the prongs of the fork, and you can do this by drawing some more lines between the ones that you have already drawn.
Then, you can finish off with some small line details around the area of the prongs.
Once these are done, you will be ready for the final step! Before you proceed, you could also add some extra details.
Some ideas could be to add some engravings or other details onto the fork, or you could add some more pieces of cutlery.
Another idea would be to draw a background, and if you did that then you could draw a picture of the kinds of food you would potentially eat with this fork.
Have fun getting creative with it and see what you can do!
Step 6 – Finish off your fork drawing with color
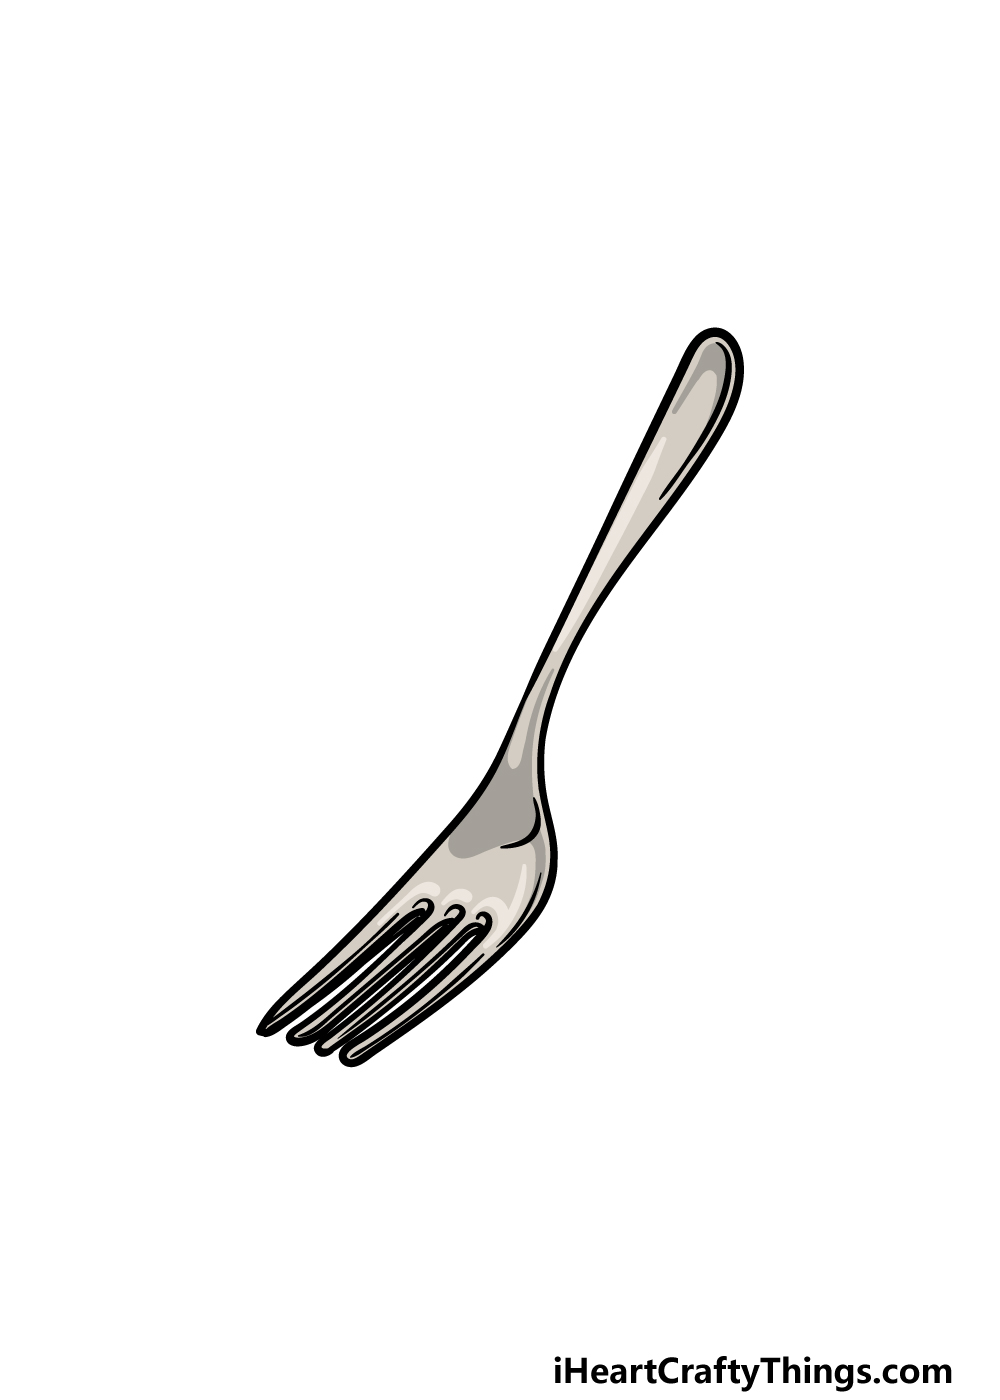
Now you’re ready to finish off this fork drawing with some colors. In our example image, we went for a standard metallic look for the fork.
That means using a lot of greys, but even though the color scheme is a bit more muted there are ways you can make it more vibrant.
As shown in our reference picture, you can vary the shades from light to dark to make it look like the metal is a bit shinier.
You could also use some different colors to make it look like the fork is made of different materials.
There are lots of different ways that you could go about it, so this is your chance to really let your creativity shine!
3 More tips to make your fork drawing easy!
Take a bite out of these tips we have for making your fork sketch much easier!
This drawing of a fork shows a regular example of this utensil, one we use in our every day lives. While it is a fairly simple portrayal, it could be simplified even more if you’re having a tough time.
There are a few ways you could simplify the design. One would be by portraying a different type of fork that could be simpler.
You could also change the angle of the fork so that some of the trickier aspects would be hidden.
Tricks like these can be small, but they can help you overcome any parts you are having a hard time with.
Another way you could make this fork drawing easy would be by adding other utensils and kitchen objects.
This may seem like it would be making the drawing harder, but that doesn’t have to be the case!
For example, many would find a knife much easier to draw than a fork. If you were to add one to the image, then you could use the knife to cross over the fork and cover a part you’re struggling with.
Also, if the fork is a part of a larger scene with more objects then it will have less attention drawn to it.
Finally, the best way to make your fork sketch easier would be by using a real fork to help you as you draw. Chances are you would have plenty of different models to use in your kitchen already.
If you take out an average fork, it could be used to make working through this guide much easier. Try to focus on the parts of the drawing you find hardest and then examine these on the real fork.
Using a real one to help you will also help you if you want to portray it at different angles and positions.
If the fork you use is different to the one in our example then you could adapt the drawing to look more like the real one.
Your Fork Drawing is Complete!
That brings you to the end of this guide on how to draw a fork! As we mentioned earlier, objects like this can sometimes prove to be much harder to draw than expected.
We designed these steps to show you that it can be way easier when you know what to do!
Now is your chance to show off all of the creative ideas that you have for this image. We gave you a few ideas that you could try, but there is also a lot of room for you to add some ideas of your own!
Then, you should definitely head to our website to check out the many drawing guides we have in store for you. We have more on the way soon, so be sure to visit often!
We always love to see your finished artwork, so please go ahead and share your fork drawing on our Facebook and Pinterest pages for us to enjoy.