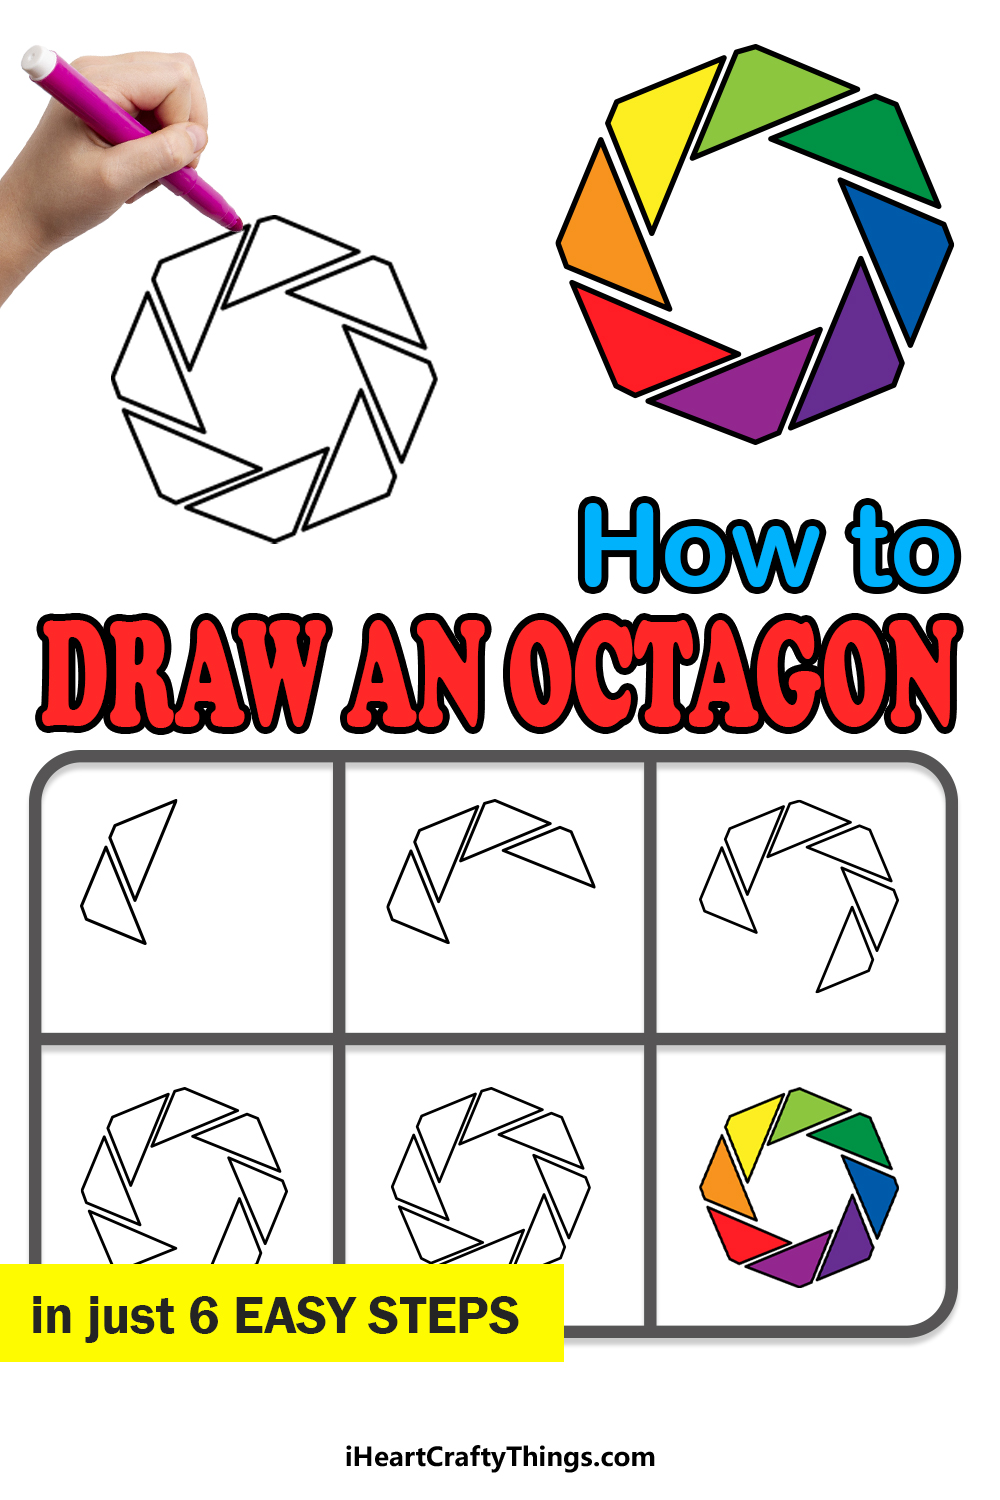
There are many different kinds of shapes that you can find, and they are all characterized by the size and number of their edges.
There are certain shapes that we see every day like squares, rectangles and circles, but some are a lot more uncommon.
For example, the octagon with its eight sides is one not often seen. Because it’s not as well known, it can be tricky to learn how to draw an octagon!
Luckily, if you would like to learn how it’s done then you’re on the right guide.
With the help of this step-by-step guide on how to draw an octagon, however, you will find out how easy it can be!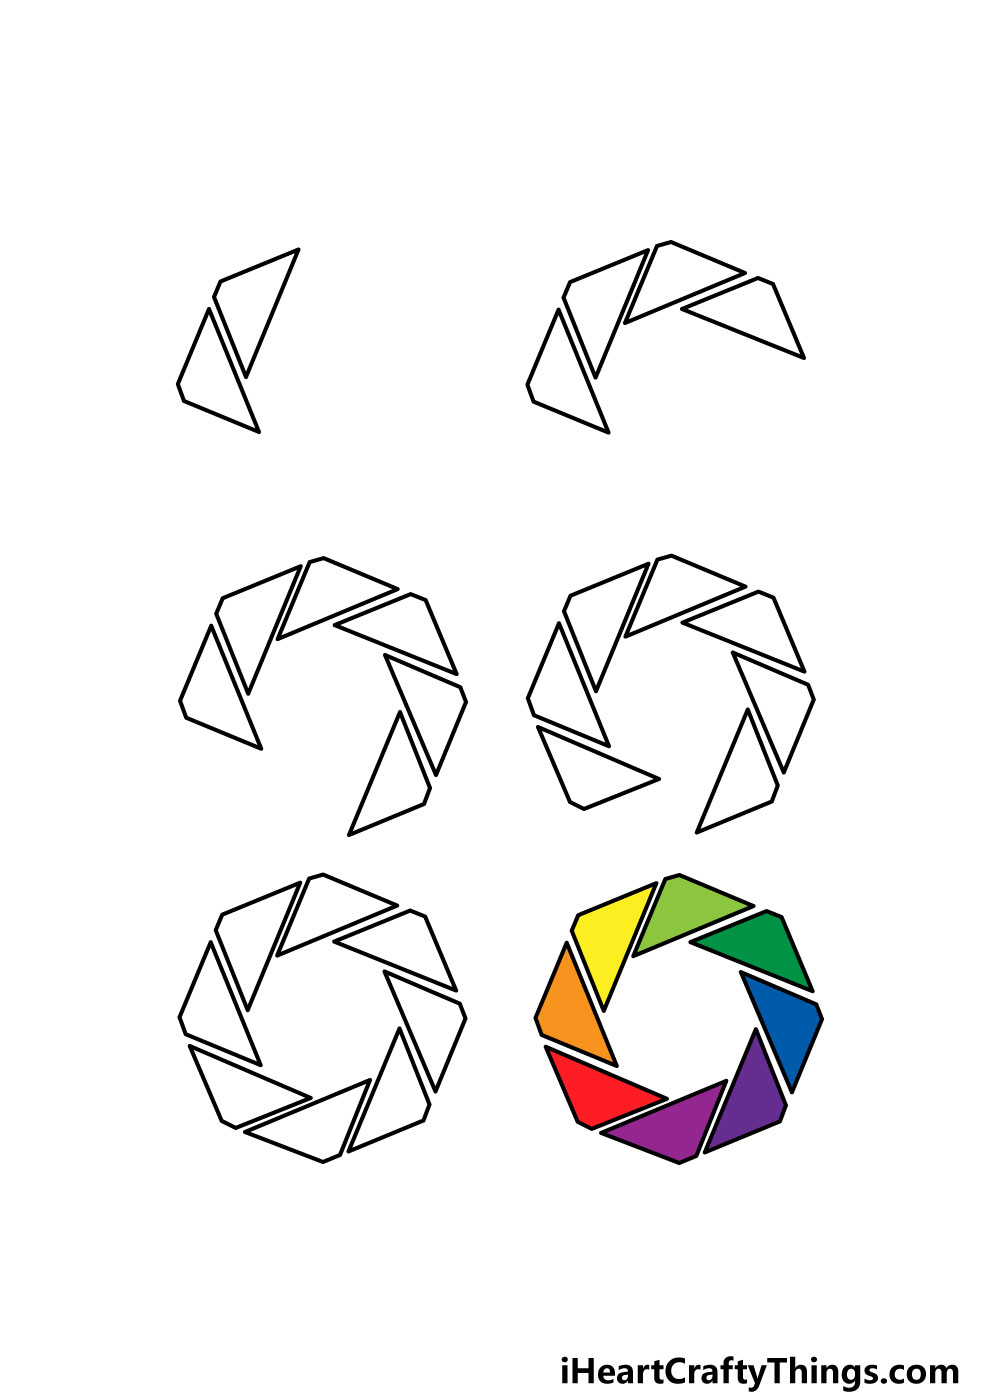
How to Draw An Octagon – Let’s get Started!
Step 1
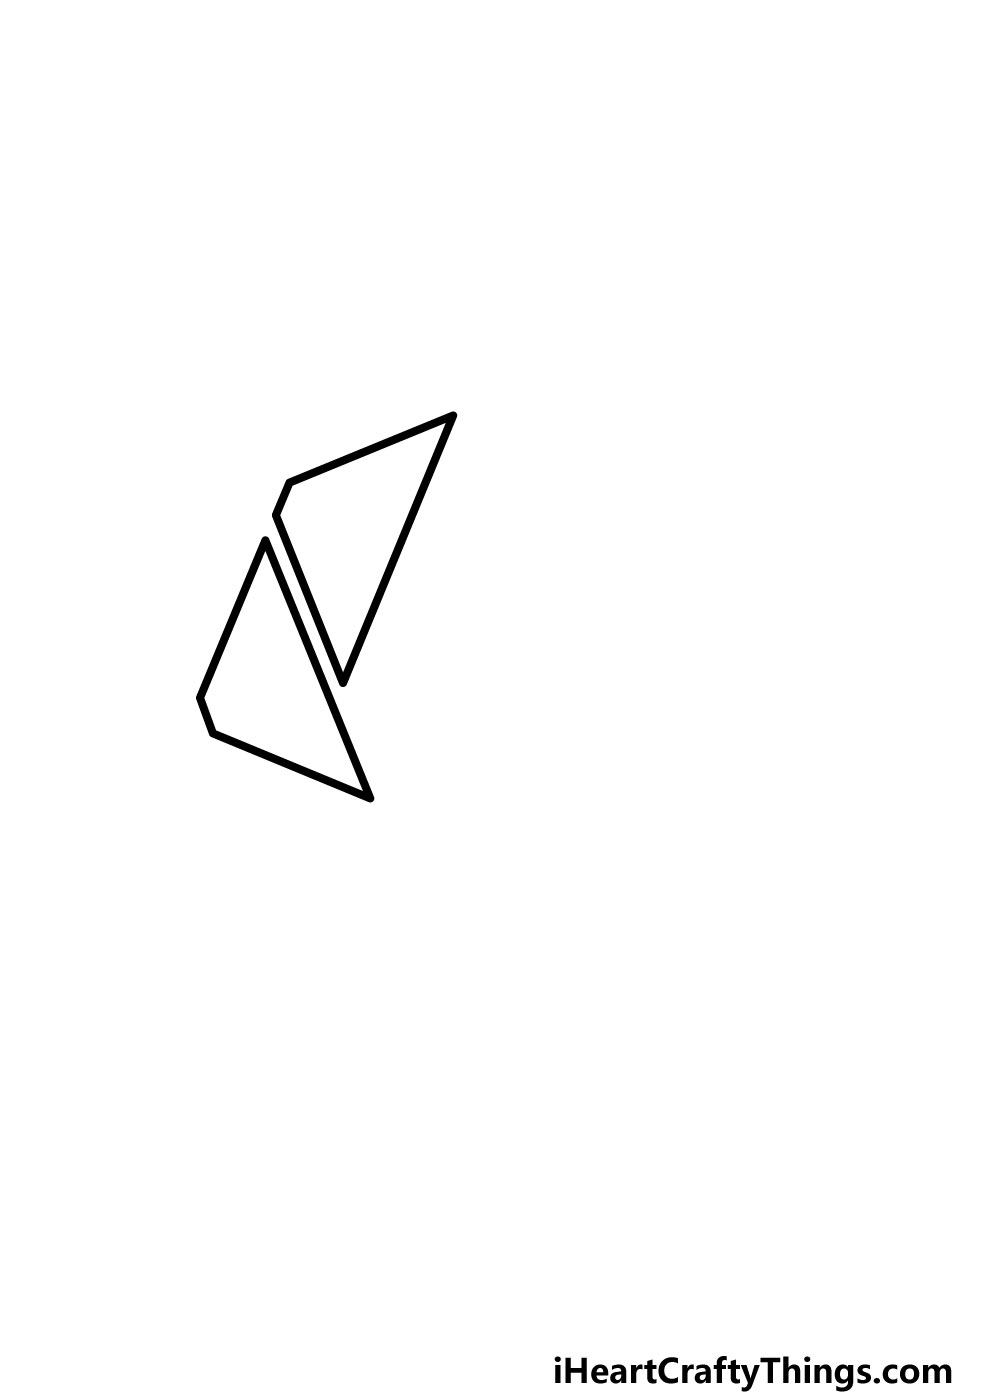
For this guide on how to draw an octagon, you will need a ruler and a bit of patience! Instead of drawing a simple octagon shape, we will instead be building it up from several smaller triangular shapes.
That is why your life will be made much easier if you have a ruler handy for this guide. To get this first step going, you will be drawing the first two of these eight smaller shapes.
Getting the positioning of all these triangular shapes can be a challenge, so you could also use a pencil first and then go over with a pen once you’re happy with how it looks.
If you’re really struggling with it, you can also use a tool such as a set square to draw equally sized triangles each time.
Also, the tip of the top of each triangle should be ‘cut off’ to form a small flat edge at the top.
This may all sound confusing, but the reference image will show you how it should look!
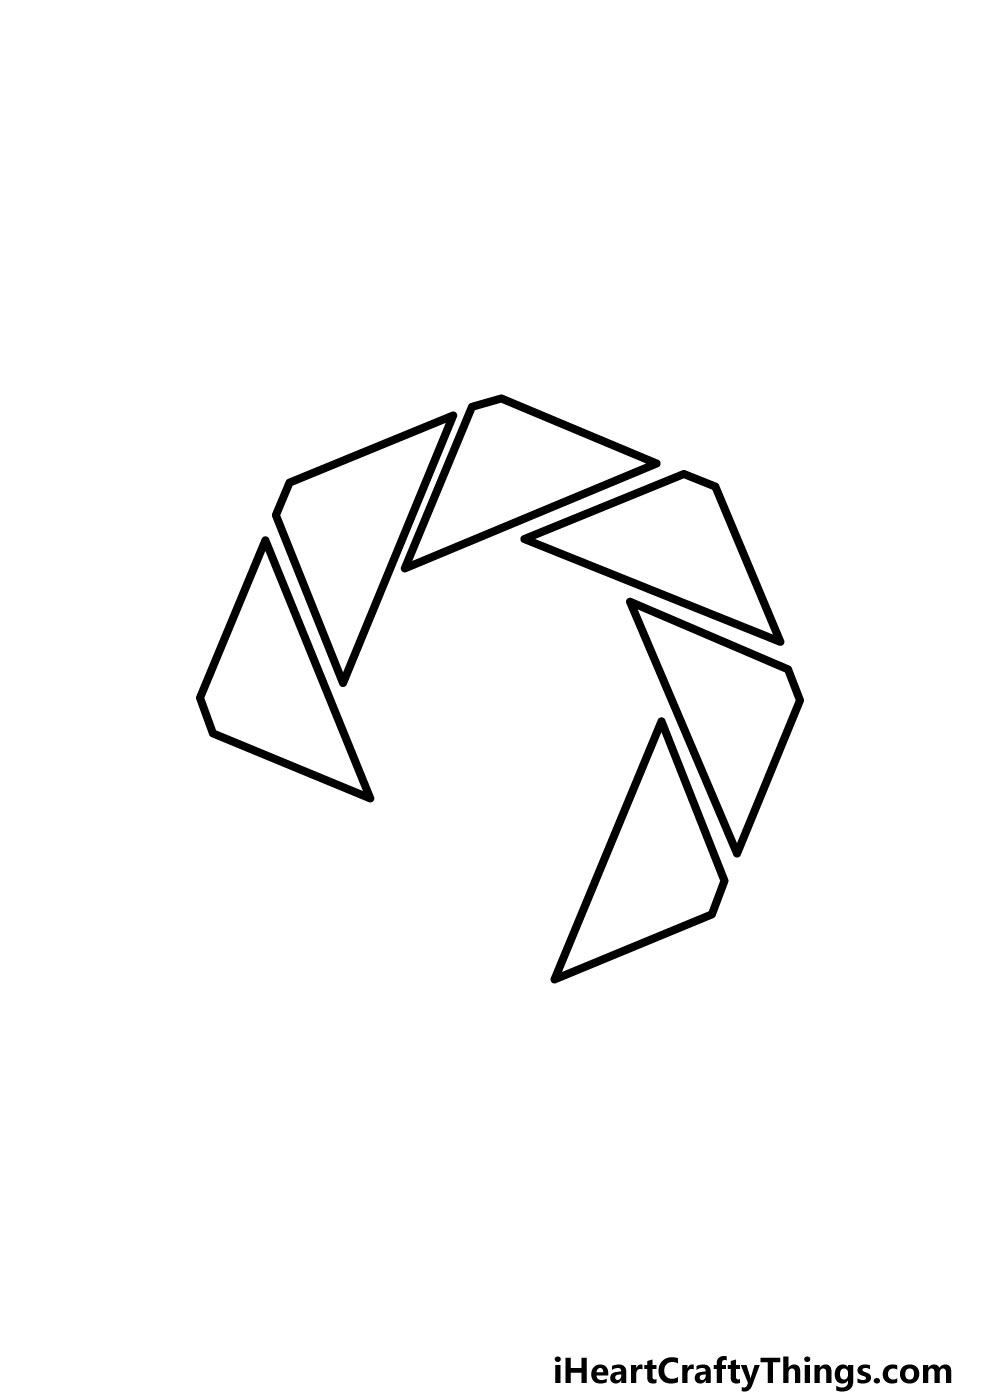
Step 2 – Next, add two more triangles to the octagon shape
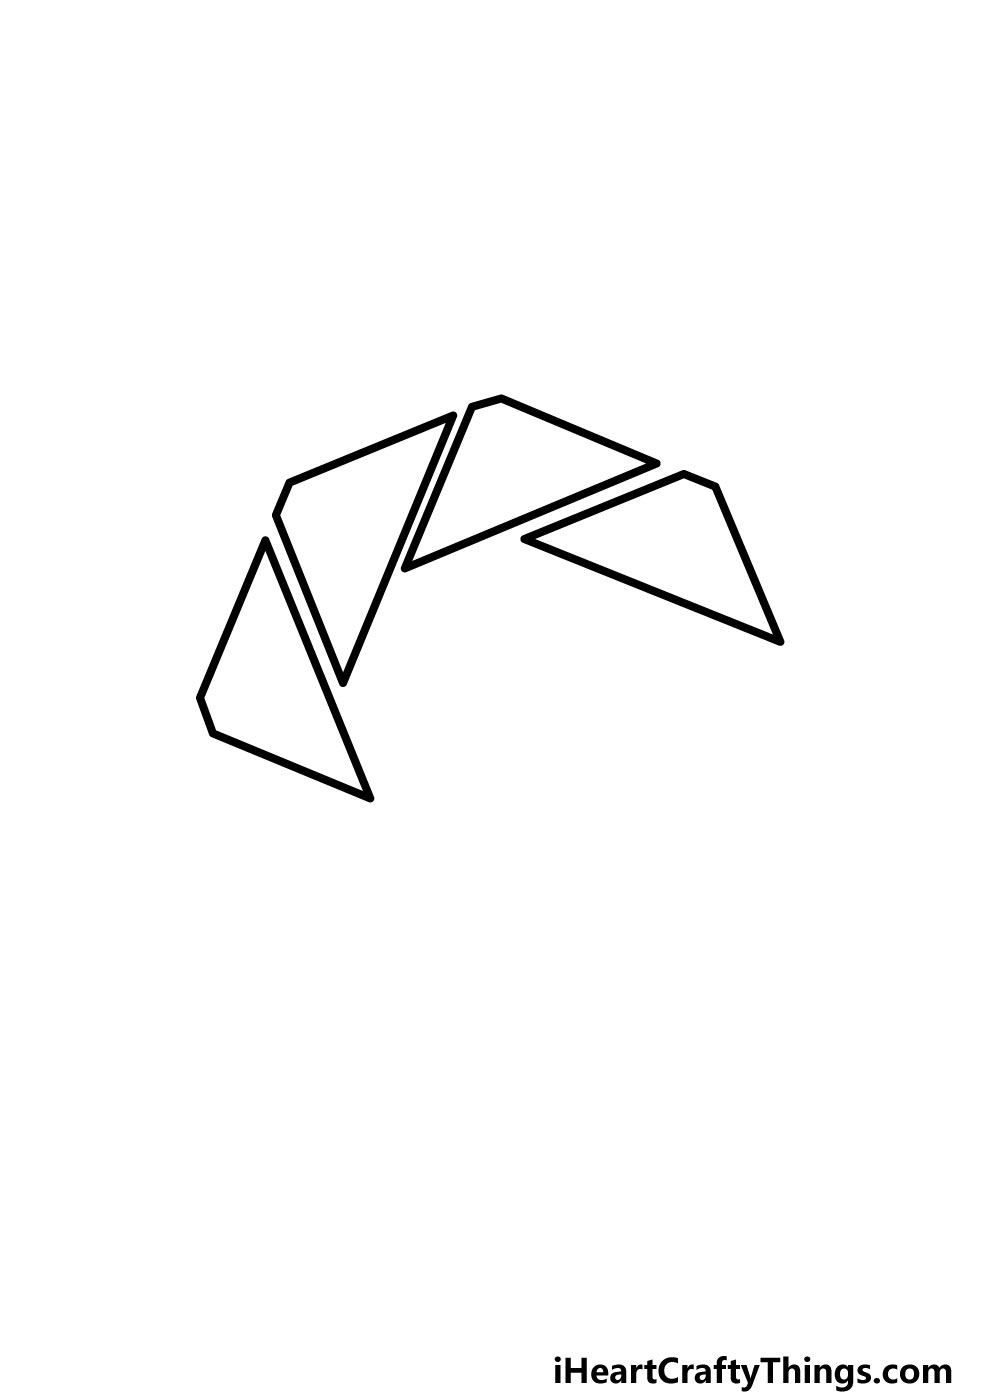
The second part of your octagon drawing will see you adding two more of the triangular shapes you added in the previous step.
We mentioned that this drawing will require some patience, and you’ll see why in this step!
The trickiest part of this whole drawing is positioning the triangles in the correct way, so remember that you can always use a pencil for now!
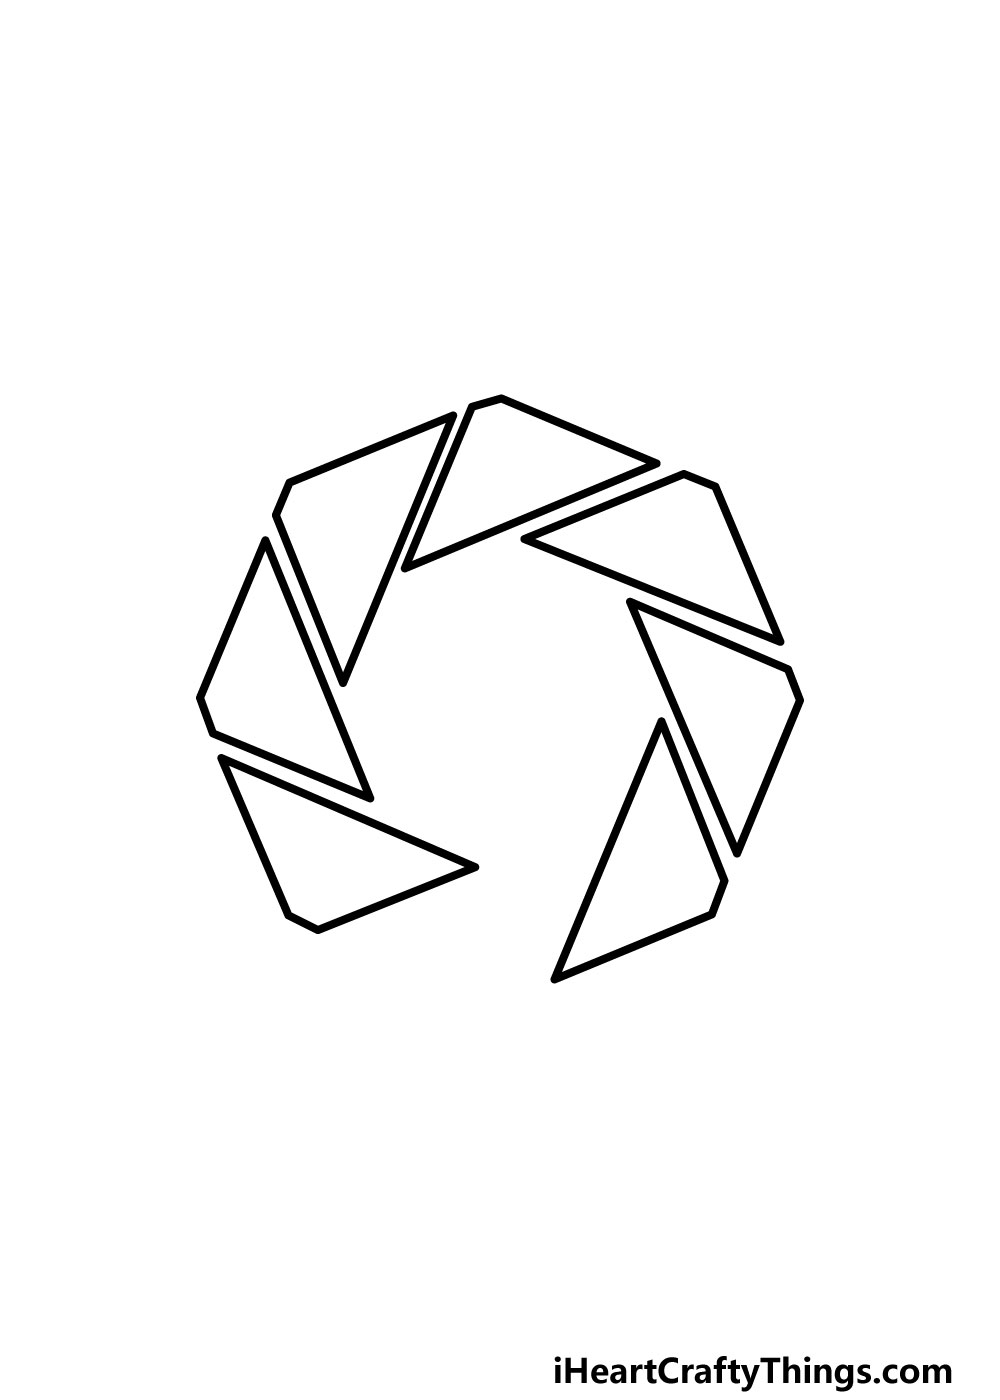
Step 3 – Now, draw some more triangles
You’re really getting the hang of this guide on how to draw an octagon!
For this third step, you will continue on from what you started in the previous two steps and add two more triangles to the shape.
The reference image will guide you in how you can position these next two triangles. That’s all there is to it for this step and you’re ready to move on!
Step 4 – Next, draw two more triangles
You probably know what’s coming next for your octagon drawing! In this step, we will continue building on to the shape by adding another triangle.
This is where this step differs from the previous few, as instead of adding two triangles we will be adding one. This one will be going on the left-hand side of the octagon into the top of the gap there.
That will just leave a tiny gap, but we will take care of that gap in the next step!
Step 5 – Draw the final triangle shape
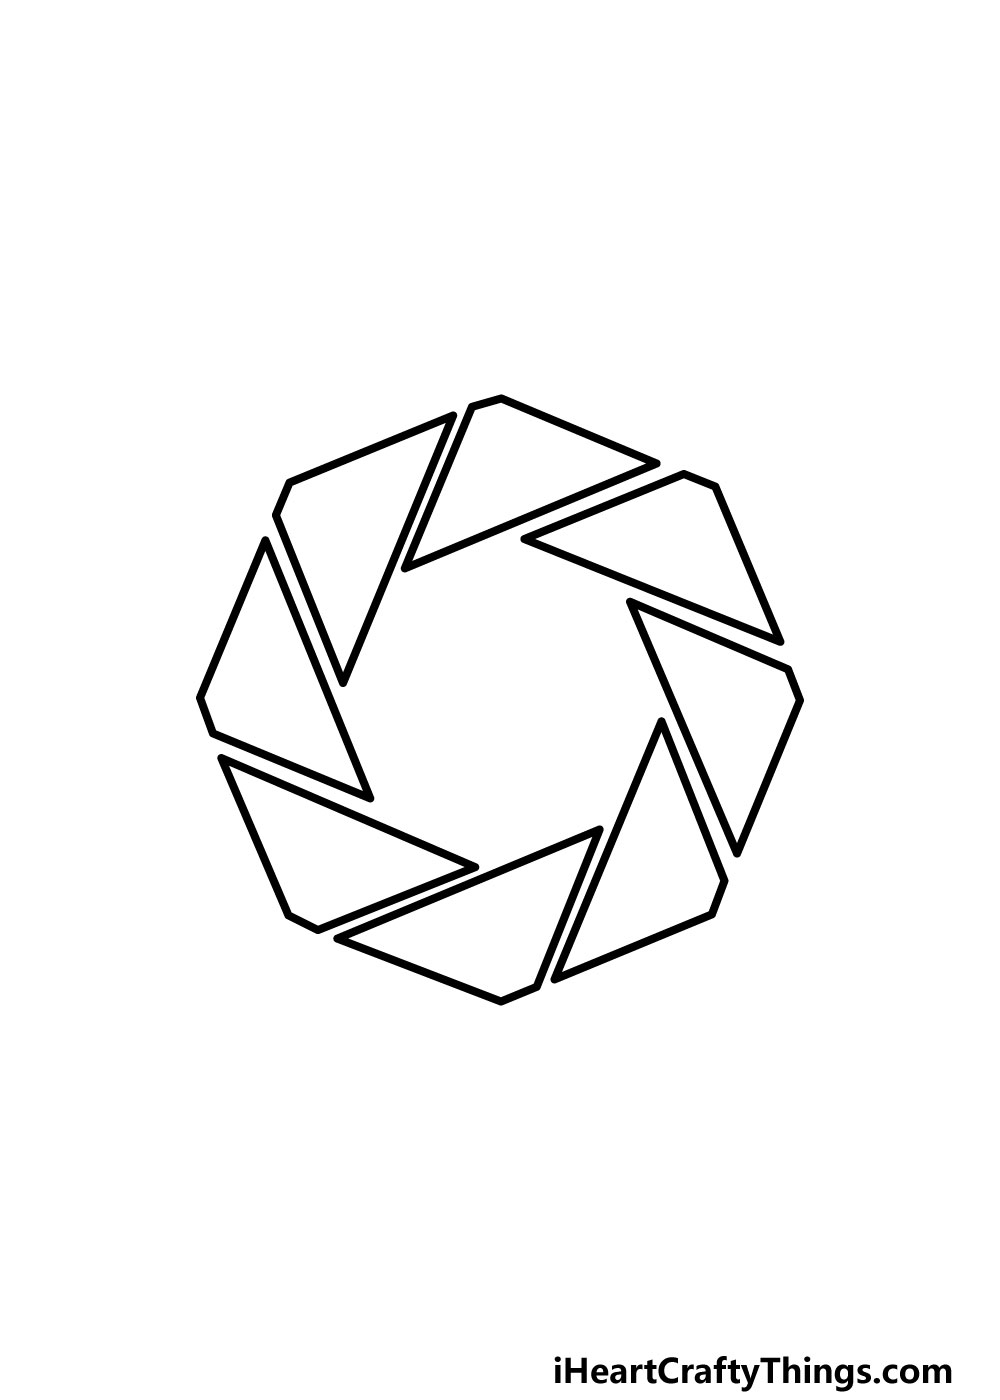
We mentioned a final gap in the previous step of our guide on how to draw an octagon, and we will take care of it now! All you need to do is draw one final triangular shape to fill that gap.
With that final triangle added, you have successfully completed your octagon! Before you move on to the final step, however, there are a few things that you could do to add your own touches to this image.
If you prefer, you could draw a few extra lines between the triangles to make it one large shape instead of eight individual ones.
You could also add on more lines and shapes to make a giant collection of shapes and patterns!
Maybe you could even incorporate this octagon shape into a cool logo or draw some texture marks onto it.
That second idea could help to make it look like the shapes making up the octagon are made of wood or another material. These are just a few ideas, so be sure to get creative with it and see what you come up with!
Step 6 – Now finish off your octagon drawing with some color
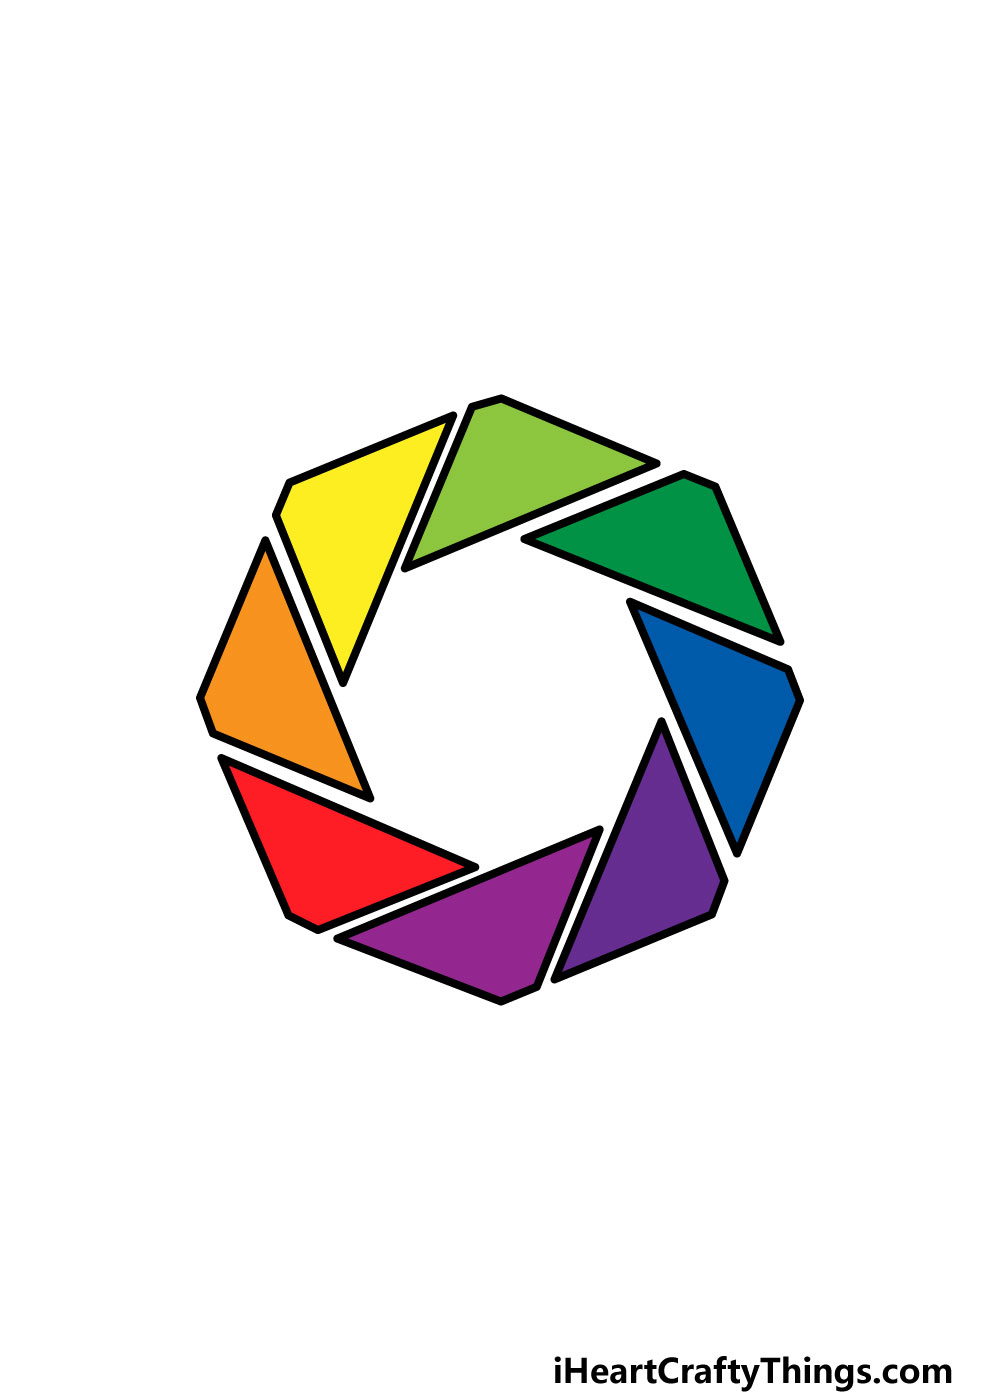
That brings you to the end of your octagon drawing! Now that you have added all of the shapes, lines, extra details and elements that you want it’s now time to finish it off with some amazing colors.
In our reference image, we used a different bright color for each shape. This is just one way that you could go about coloring in your image, however, so this is a step where you can really let your creativity flow!
You could also use various art tools and mediums to really bring the colors to life. You could use some paints, colored pens or markers depending on what kind of colors you would like for your image.
Your Octagon Drawing is Complete!
You have successfully reached the end of this guide on how to draw an octagon!
This shape could have proved trickier than expected without a guide to follow, so we hope that with it helping you that you found it to be helpful.
Above all, we hope that it was a lot of fun to work through as well!
Now that you have mastered this guide, there are lots of ways that you can take it even further with your own details.
We mentioned a few ideas you could use such as drawing some patterns or texture details onto it.
You could also add some more shapes to the octagon to make it even larger or draw more shapes in and around it.
The possibilities are endless, and we can’t wait to see what you come up with to make this image your own!
We have plenty of amazing guides for you to enjoy on our website, so we hope to see you there! We upload new guides frequently as well, so be sure to check in often.
Once your octagon drawing is complete, then we hope that you will share it on our Facebook and Pinterest pages!