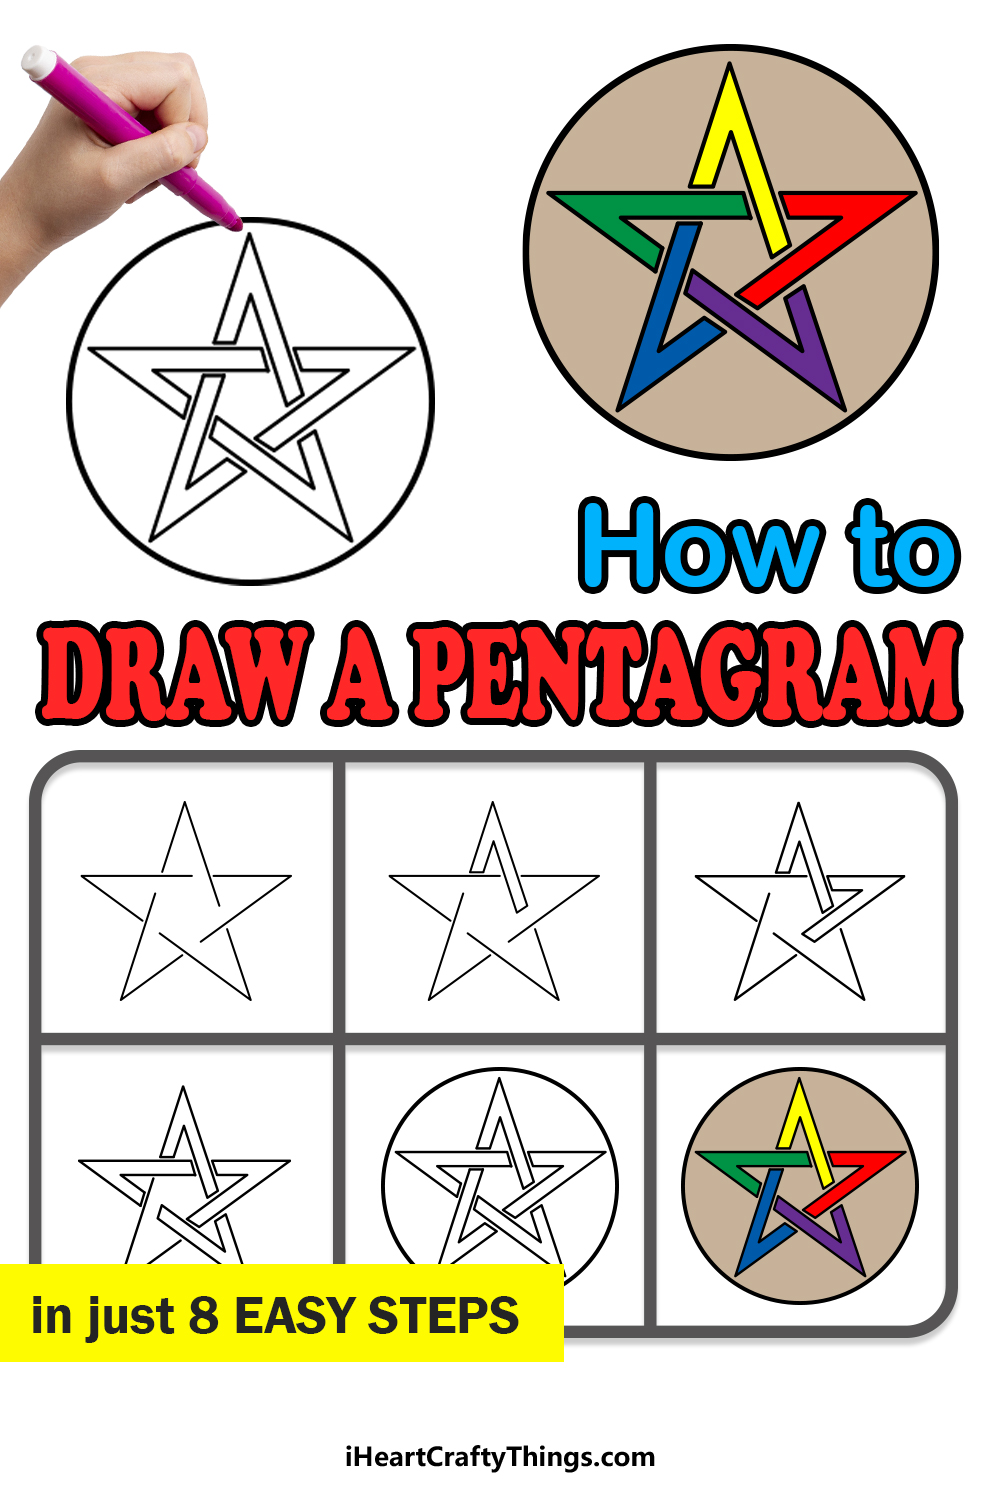
The pentagram is a shape that has many different associations. It has been common in many cultures and religions around the world.
Even in modern times, pentagrams are used as the symbol of many groups and organizations. Despite the fact that it is used by many groups, learning how to draw a pentagram is no easy task!
That is, it’s not easy unless you have the right guide to follow, and that very guide is right in front of you!
This step-by-step guide on how to draw a pentagram in just 8 easy steps will show you how easy it can be!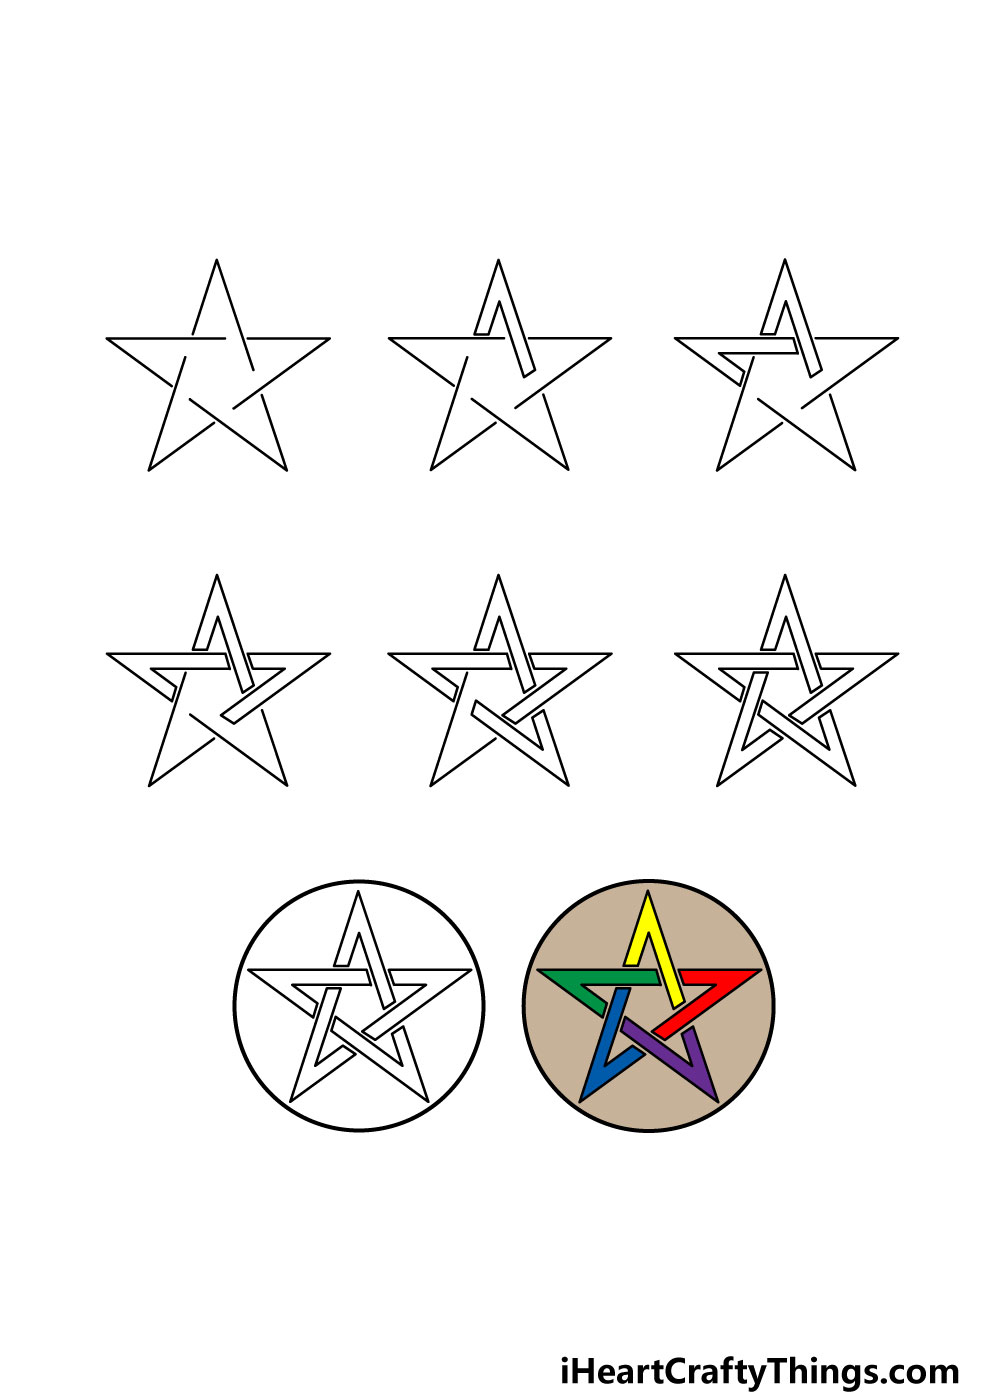
How to Draw A Pentagram – Let’s get Started!
Step 1
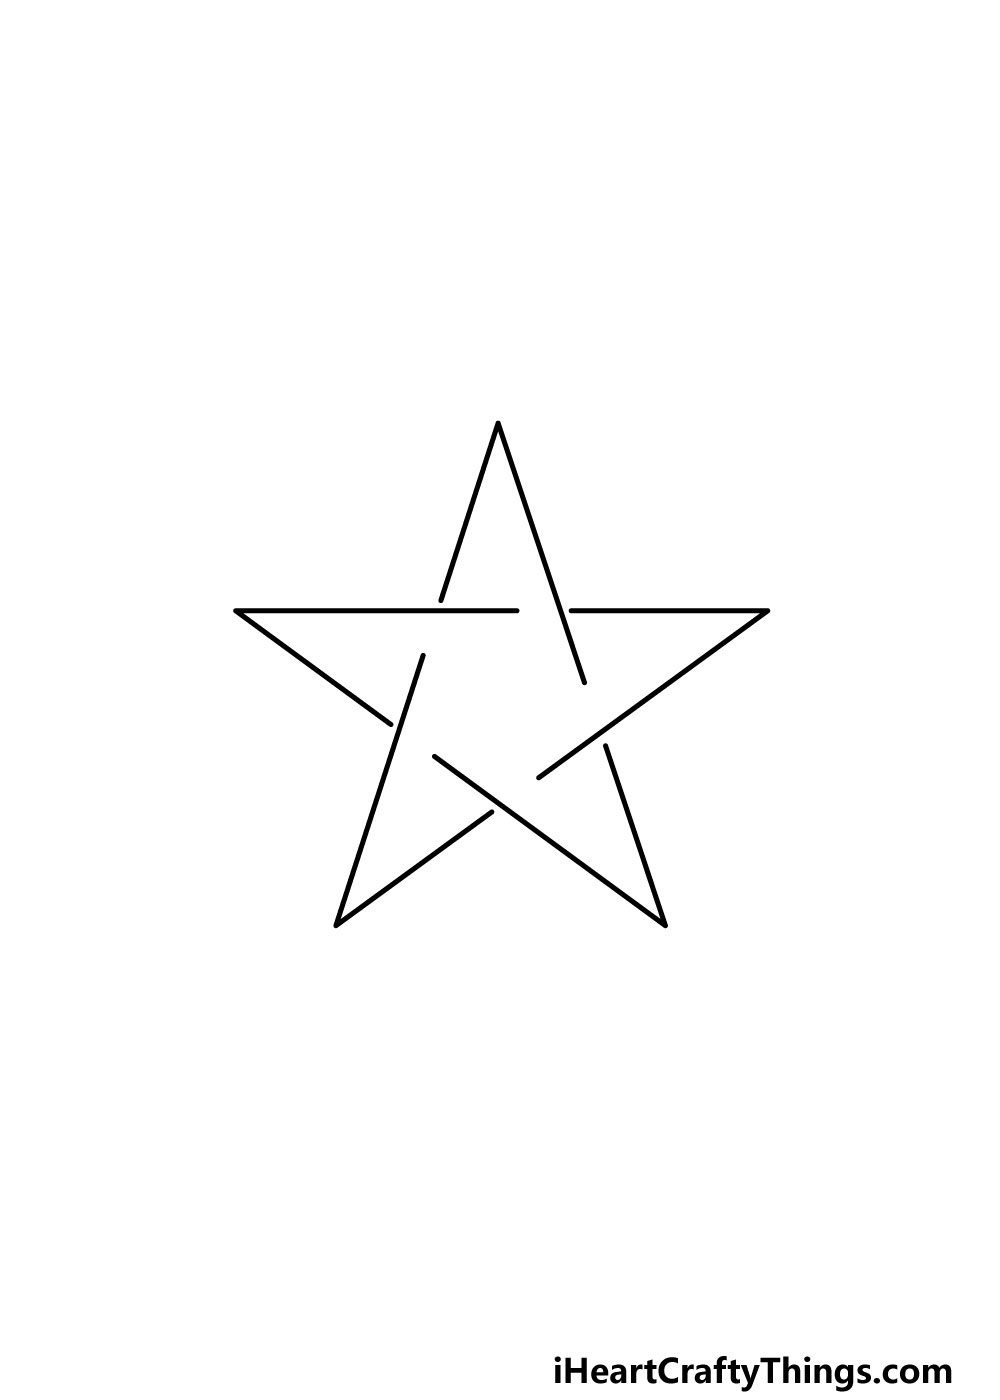
This first step of our guide on how to draw a pentagram may look quite complex and confusing at first, but it’s not as bad as it looks!
You will find this step much easier if you use a ruler and a pencil to draw. Using your ruler, you will be drawing a series of lines that will almost look like various triangles laid over one another.
Using the reference image as your guide, however, you will see that there will be gaps between some of the lines.
Once again, it may seem complicated but if you follow the guide closely as you draw then you should have no problems!
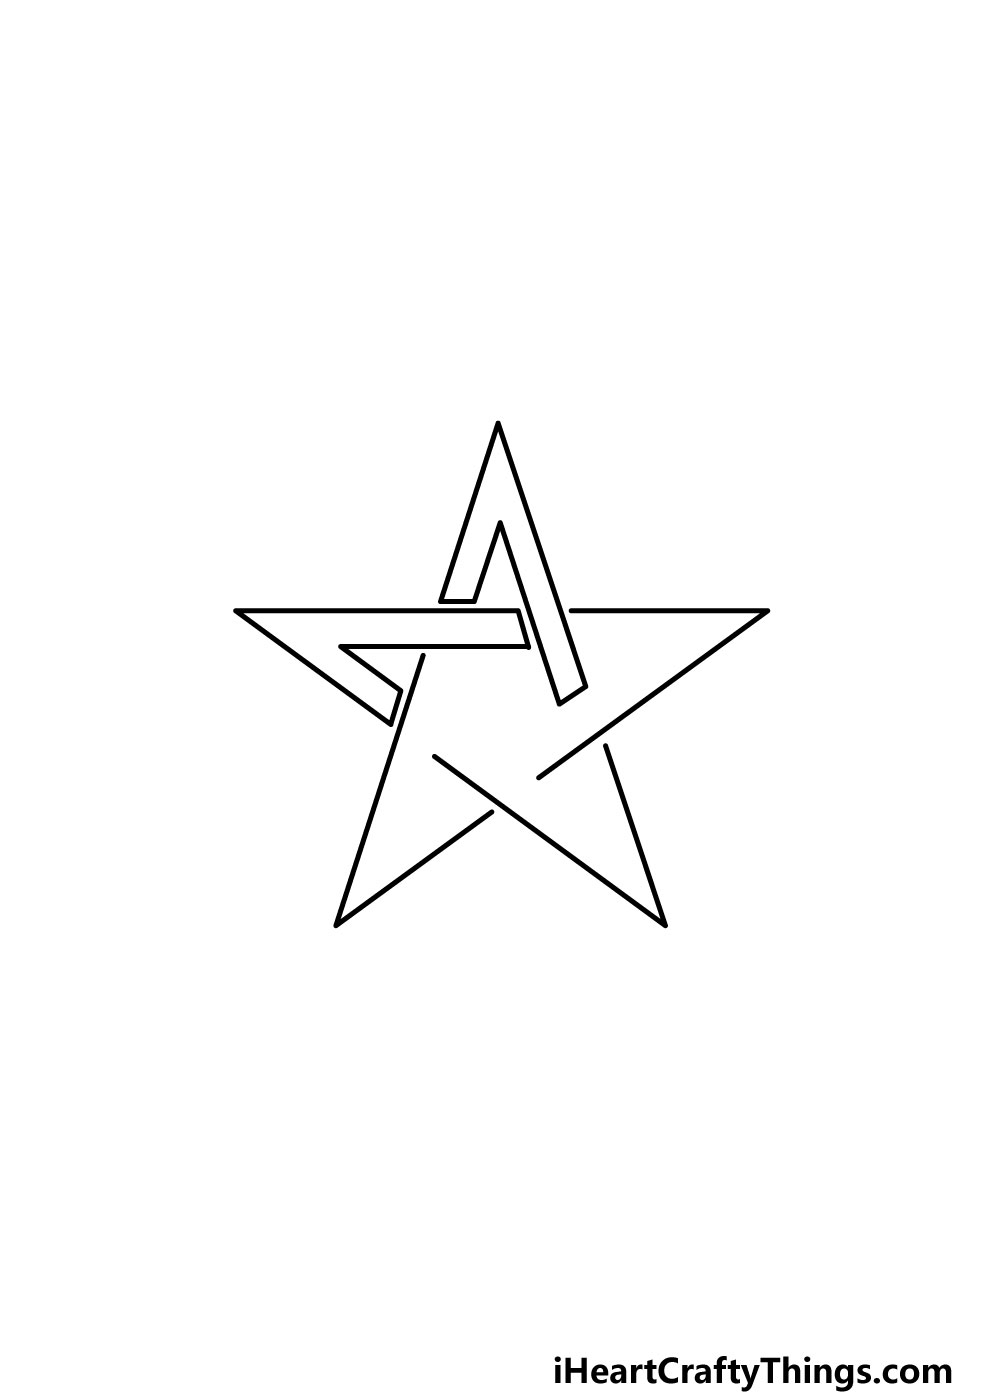
Step 2 – Next, add some lines to create the inner shapes of the pentagram
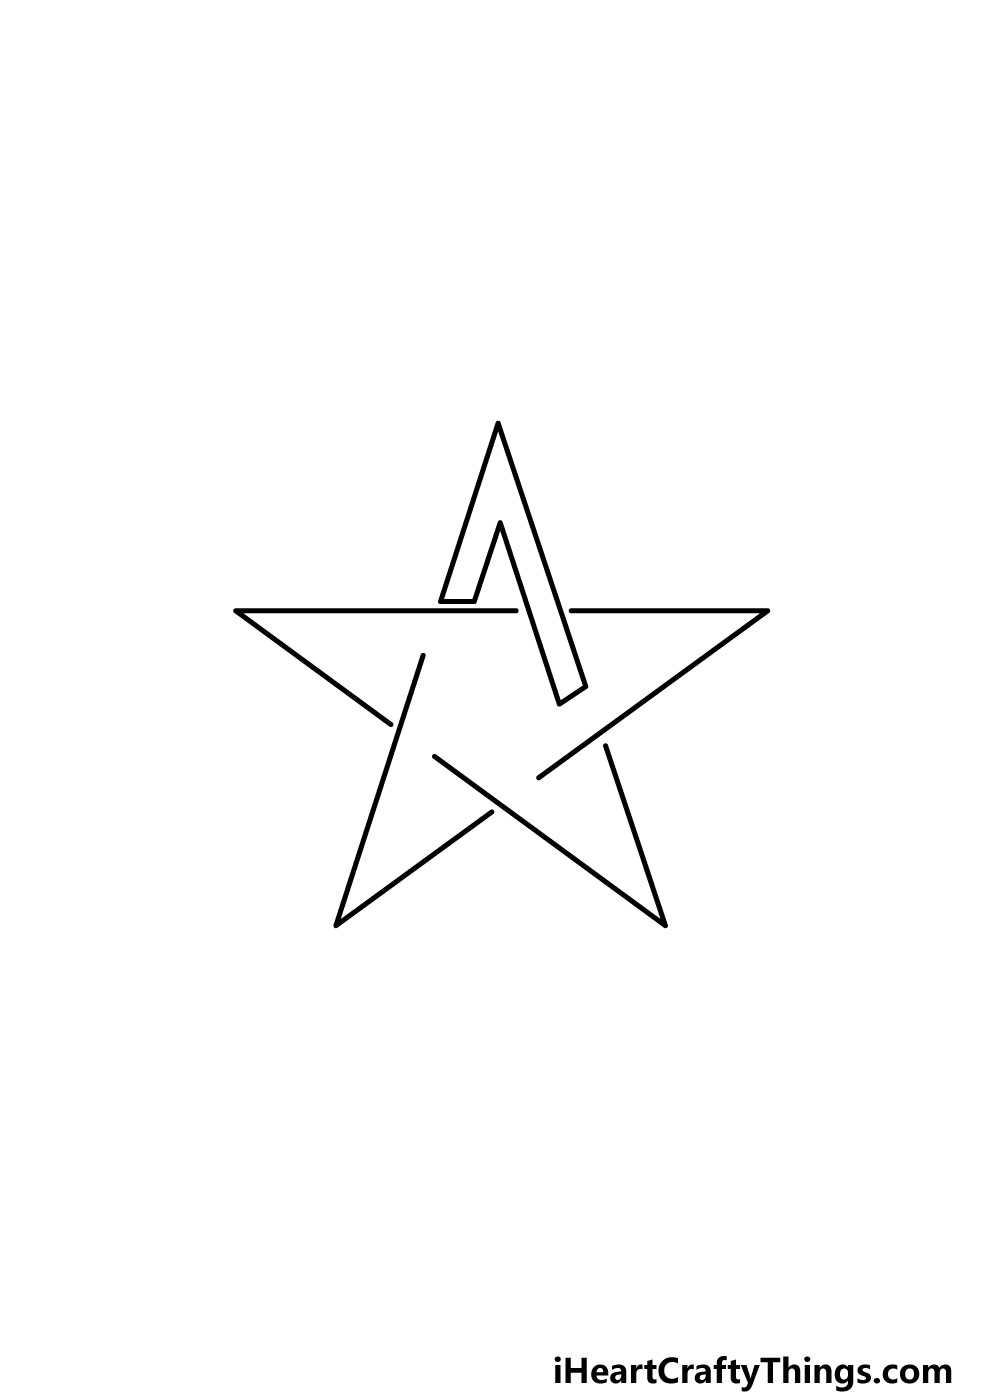
In this step of your pentagram drawing, you will be using some straight lines to create a sharp shape at the top of the pentagram.
As you can see in the reference image, it will look almost a bit like an arrowhead that’s missing a side. We will be adding a few more of these shapes in the next few steps, so let’s move on to step 3!
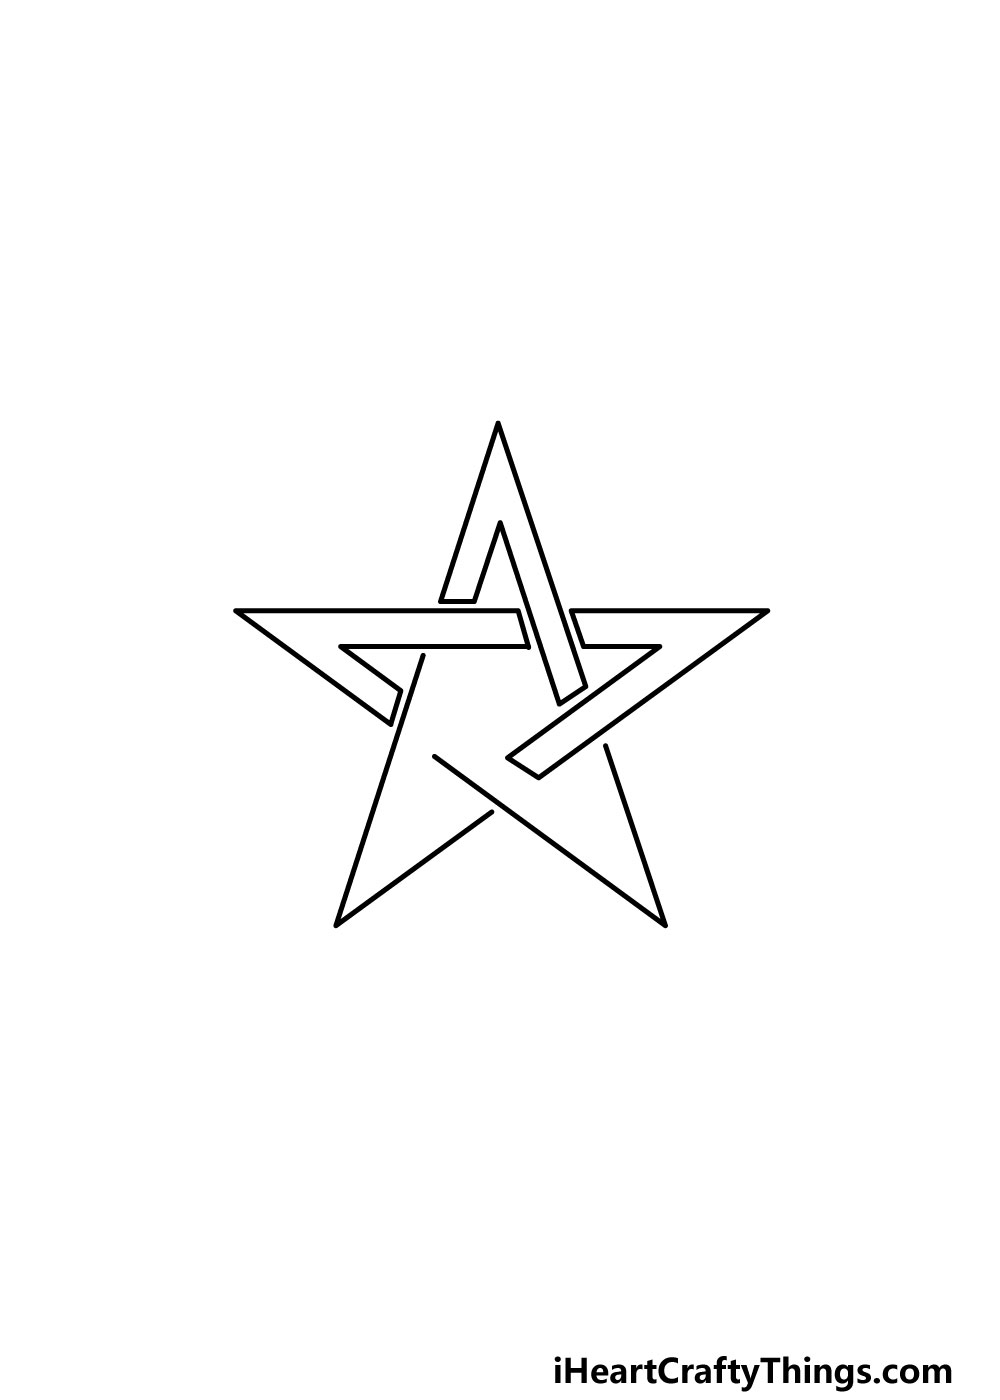
Step 3 – Now, draw another pointy shape
You will be drawing another pointy shape like the one in the previous step for this part of our guide on how to draw a pentagram.
This one will be pointing to the left, and it will look very similar to the first one you drew other than the positioning of it.
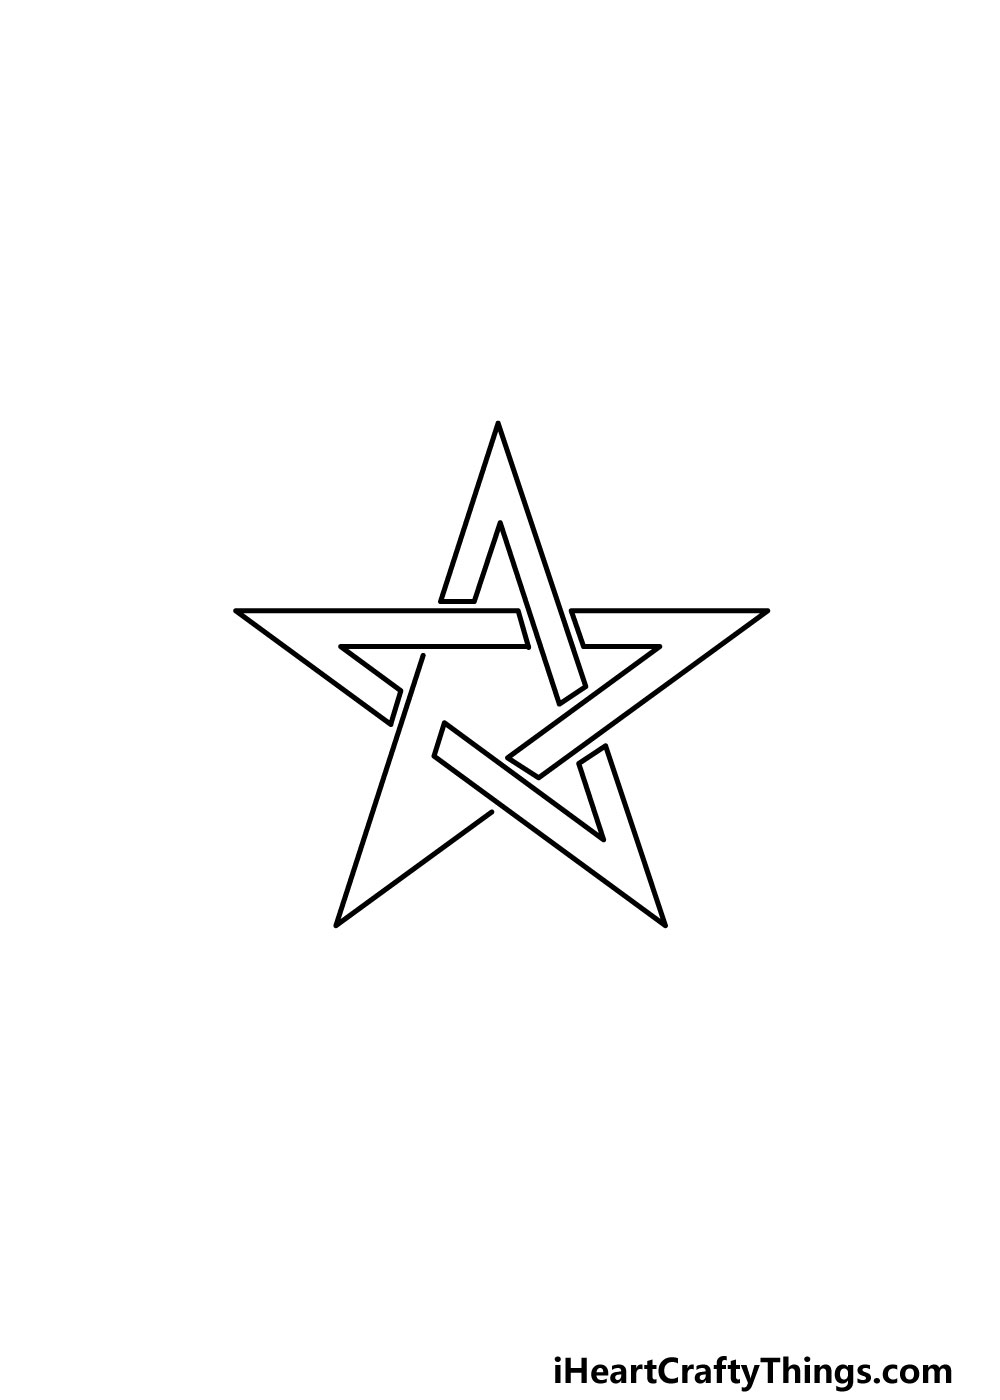
Step 4 – Next, draw another pointy shape
Now that you have the hang of drawing these pointy shapes, you should have no problems making a few more for the next steps of your pentagram drawing!
This one will go on the right-hand side of the pentagram. The reference image will show you how these shapes will be looping under and over one another and some will look like they’re connecting.
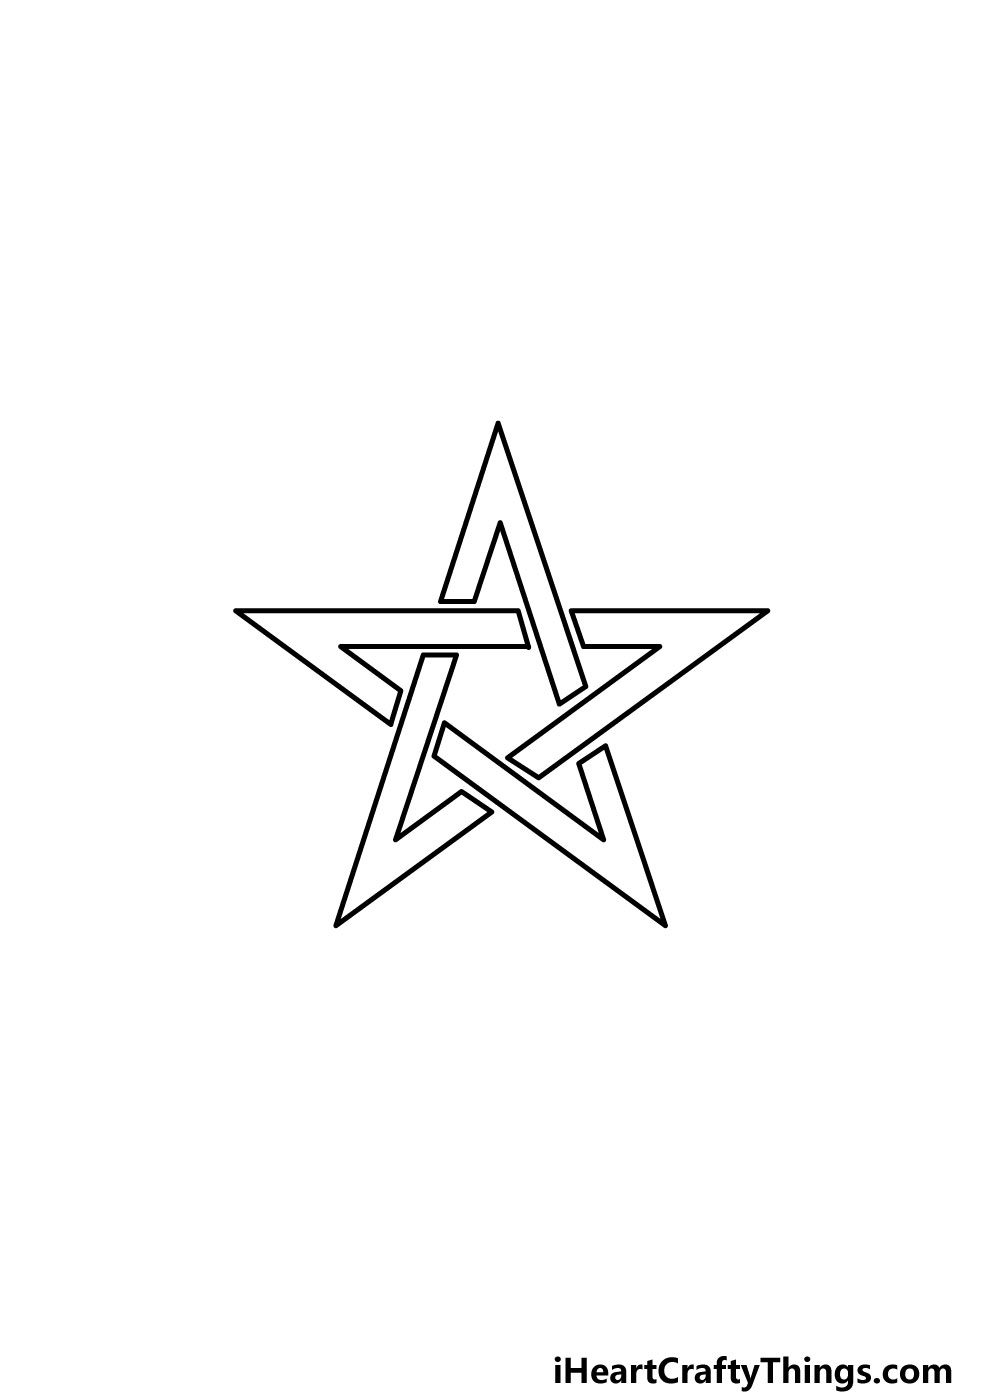
Step 5 – Next, draw one more pointy shape
You’re almost done with the pointy shapes you’ve been drawing, but there are still a few more to add in this guide on how to draw a pentagram!
This next one will go at the bottom right of the pentagram as seen in our reference picture. With that, we have just one more to add in this guide.
Step 6 – Draw the final pointy shape
You’ve been drawing many of these pointed shapes for your pentagram drawing so far, and you will be drawing the final one in this step of the guide.
That will do it for the interior of the pentagram and you’ll be ready for the final elements in the next step. Before you move on, be sure to go over the lines with your pen if you haven’t done so already!
Step 7 – Next, draw the final details of your pentagram drawing
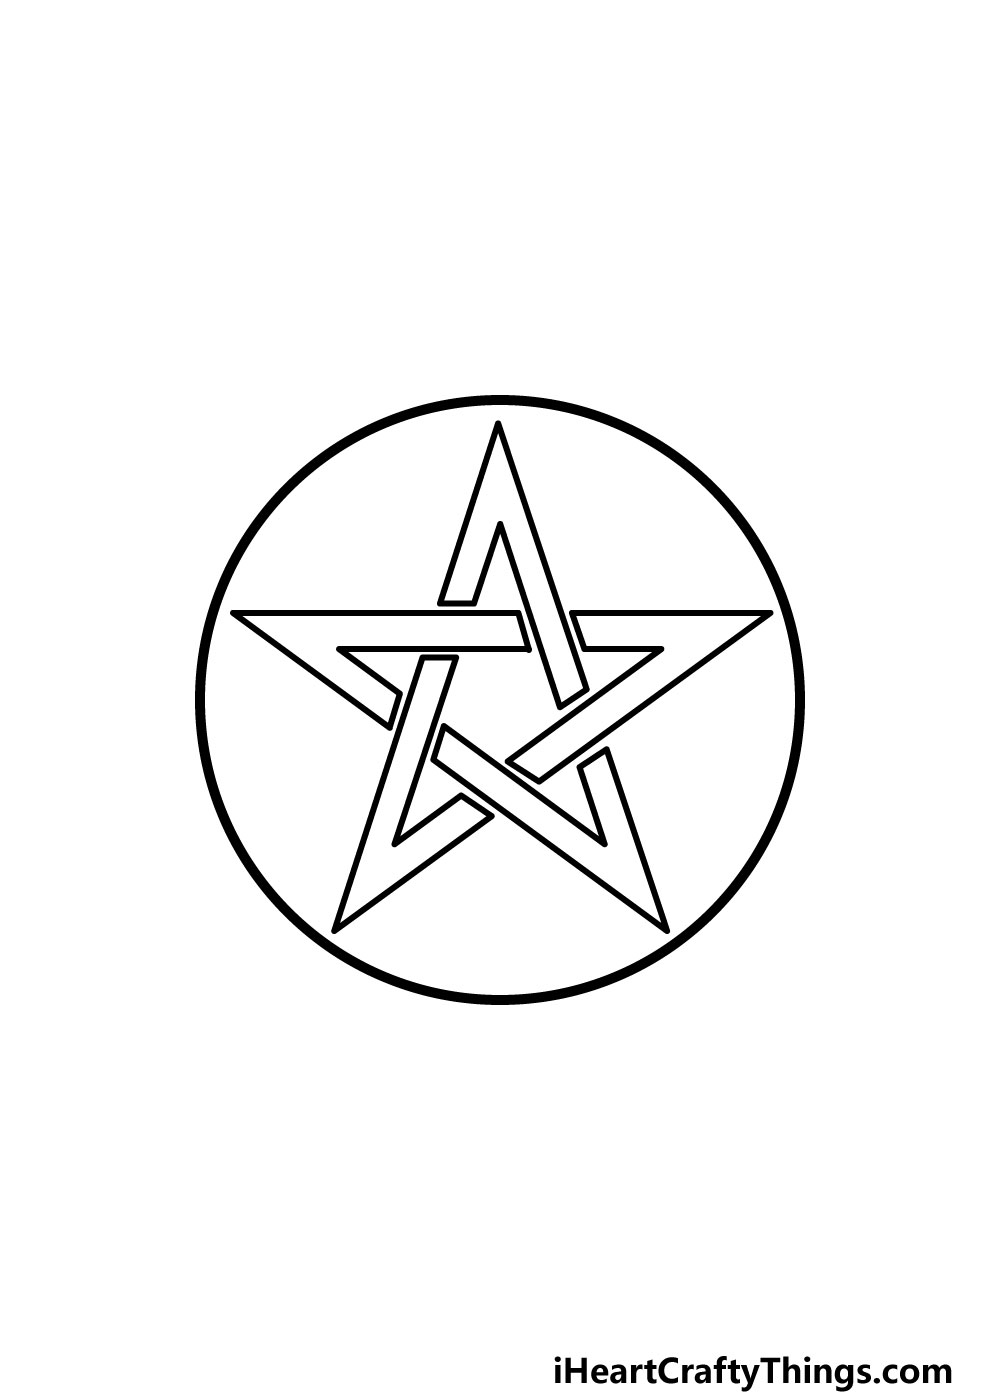
Now that you have drawn the star section of the pentagram, you can add the final elements and touches in this step of our guide on how to draw a pentagram.
The main element to add is a circle going around the star shape that you have been working on. When drawing a circle, it can be much easier for you if you use a tool such as a drawing compass. This can make it possible to create a perfect circle easily.
Once you’ve drawn this circle, your pentagram is pretty much done! Before you move on, however, you can also add some details of your own that you may want.
You could draw some texture details onto it, change the design or draw some symbols onto the shape to make it look even cooler!
It’s completely up to you, so be sure to get creative with it and have fun as you personalize this drawing.
Step 8 – Now finish off your pentagram drawing with some color
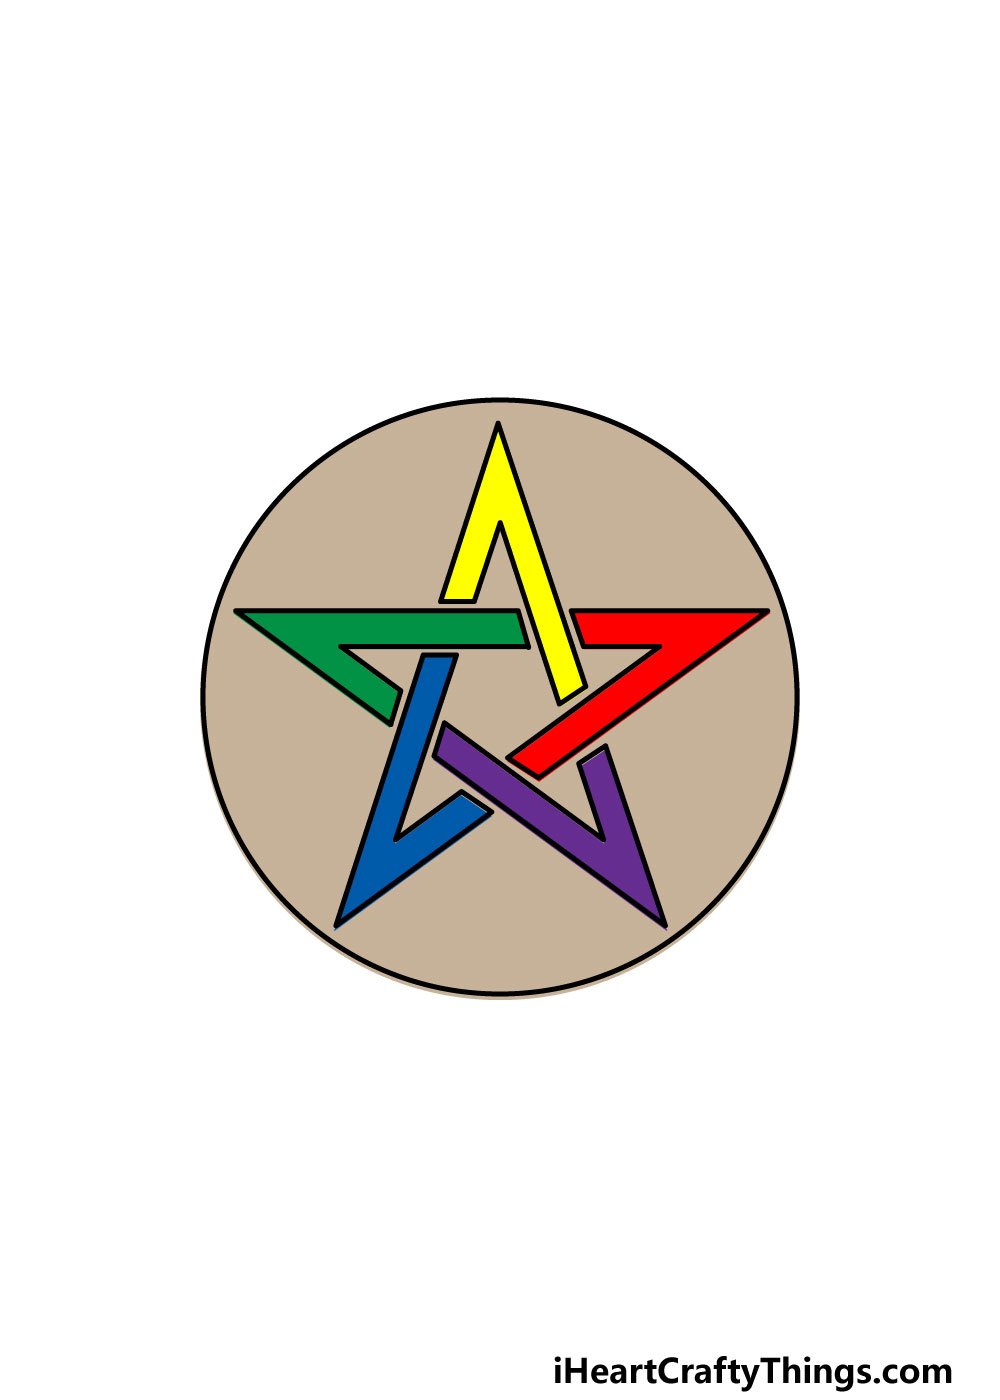
That brings you to the final step of your pentagram drawing! With this step, you can bring your drawing to life by adding some incredible colors to it.
In our reference image, we used a different bright color for each of the pointy shapes that make up the inner star. Then, we used a more muted brown for the empty space around it.
This is just an example of one of the many ways that you could color this in, so you should be sure to let your creativity flow and color it in with your favorite colors!
Once you know how you would like to color in this image, you can also play around with your favorite art mediums and tools.
You could use mediums such as paints, watercolors, pens, colored pencils and markers to get any kind of color shades you want!
We can’t wait to see how you bring this image to life with your colors.
Here’s how you can make your pentagram drawing even better…
Find out how you can make your pentagram sketch even more interesting with these tips.
The pentagram is a shape that can take on many different forms. We showed you how to make a really cool one in this pentagram drawing, but you could also change the style!
There are many ways to do this, and it all depends on your preference! You could use some thicker lines or draw the outlines with a bit of bumpiness.
These are a few ideas, but how else could you draw this pentagram?
Another way to make your drawing of a pentagram even more interesting would be by surrounding it with some other complex shapes and symbols.
These could include some cool star shapes or maybe something more standard like an octagon. Whatever you may add to the drawing, you could also make each shape take on a different style and color scheme.
There are lots of ways to have fun with shapes, so be sure to experiment and see what happens!
The pentagram has many different associations, and you could create a background scene to bring this pentagram sketch to life. Sometimes the pentagram can have some darker connotations.
You could emphasize this by creating a spooky scene involving some scary demon designs! That is one example of a scene you could create for this artwork.
They can also sometimes be used by witches and Wiccans, so you could use this shape in a fun witch scene. What are some other ideas you have for this pentagram?
Finally, you can really experiment with the colors and art mediums you use for this picture. We showed you that it can look great with some brighter colors in our example, but that is one of many color schemes.
You could make it as dark or as bright as you like, and this could also depend on the theme you want for the image.
When trying out your various art tools and mediums, don’t be afraid of mixing different kinds together!
Your Pentagram Drawing is Complete!
We really hope that you had a great time working through this guide on how to draw a pentagram alongside us!
This guide was made to show you how easy a new drawing can be when you break it down into smaller, more manageable steps. Hopefully it helped to make this picture not only easier but also more fun to do!
When you’re ready for more drawing challenges we hope to see you on our website! We have plenty of guides for you to enjoy there and we upload new ones all the time!
Once your pentagram drawing is complete, we would love to see the creative ways that you used to finish it off! You can share it on our Facebook and Pinterest pages to let us see what you’ve done.