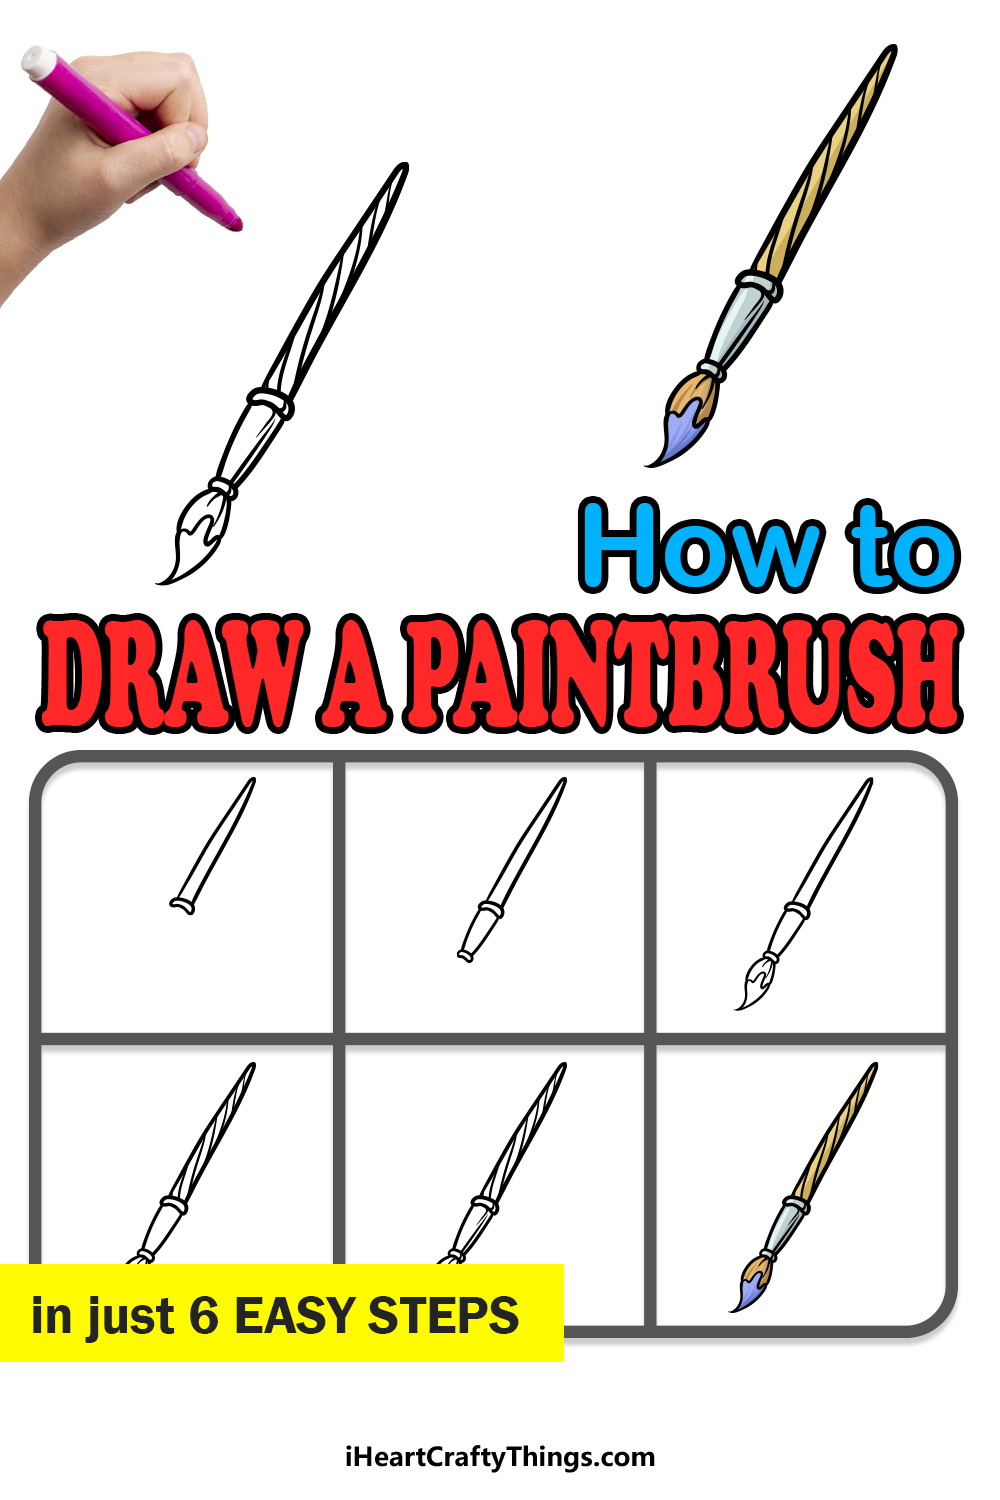
This guide on how to draw a paintbrush will help you to make a great picture of this helpful art tool! Then, you can use the design to create all sorts of amazing art.
Paintbrushes have been around for thousands and thousands of years, and they have been used to create anything from masterpieces that hang in the Louvre to charming pictures hung up on the fridge.
They come in all manner of shapes and sizes depending on what the artist needs for their picture. Normally we use them to make pictures, but what about making the paintbrush the star of the show?
If you have ever tried to draw one, then you may discover that it’s not as easy as all that. Once you have been through this guide, you will see that it can be easier than you think.
I’ll show you exactly how it’s done, so let’s begin!
See How To Make Your Paintbrush Drawing By Watching This
How to Draw A Paintbrush – Let’s get Started!
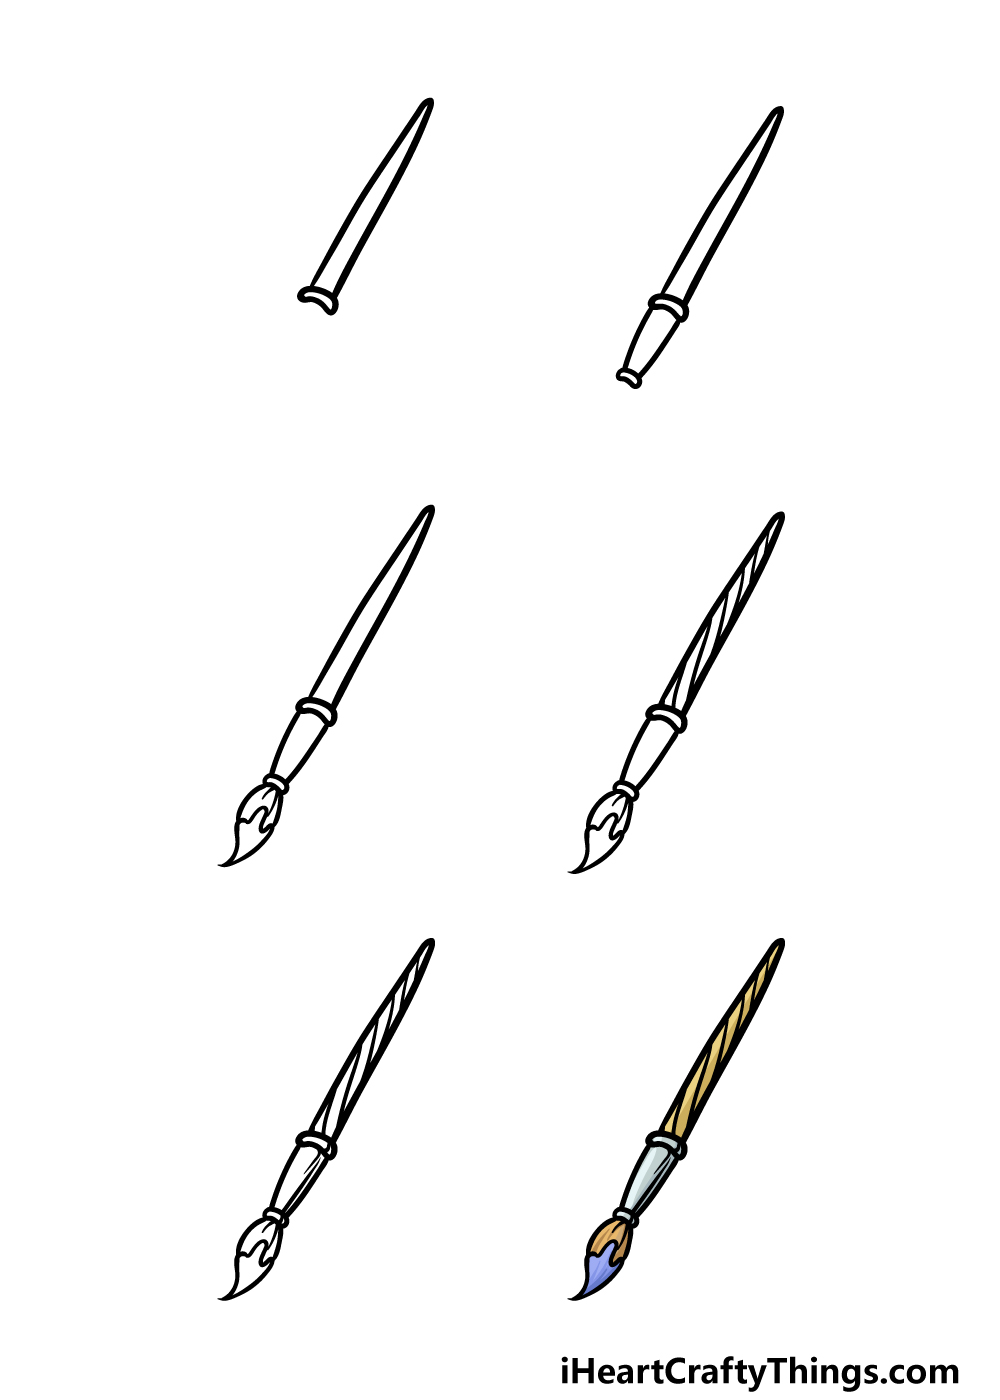
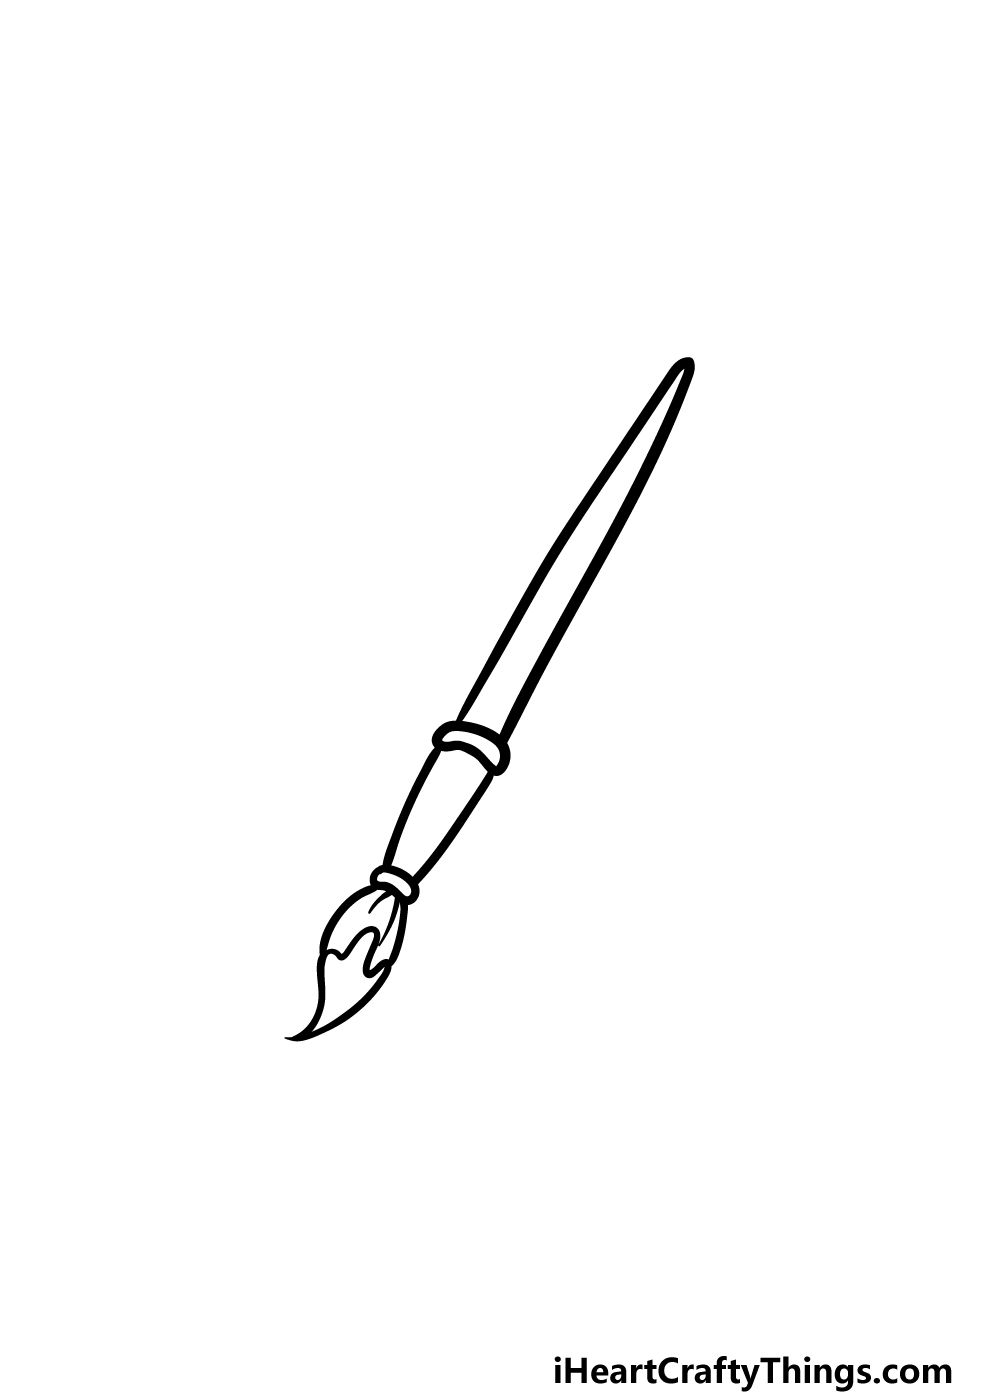
Step 1
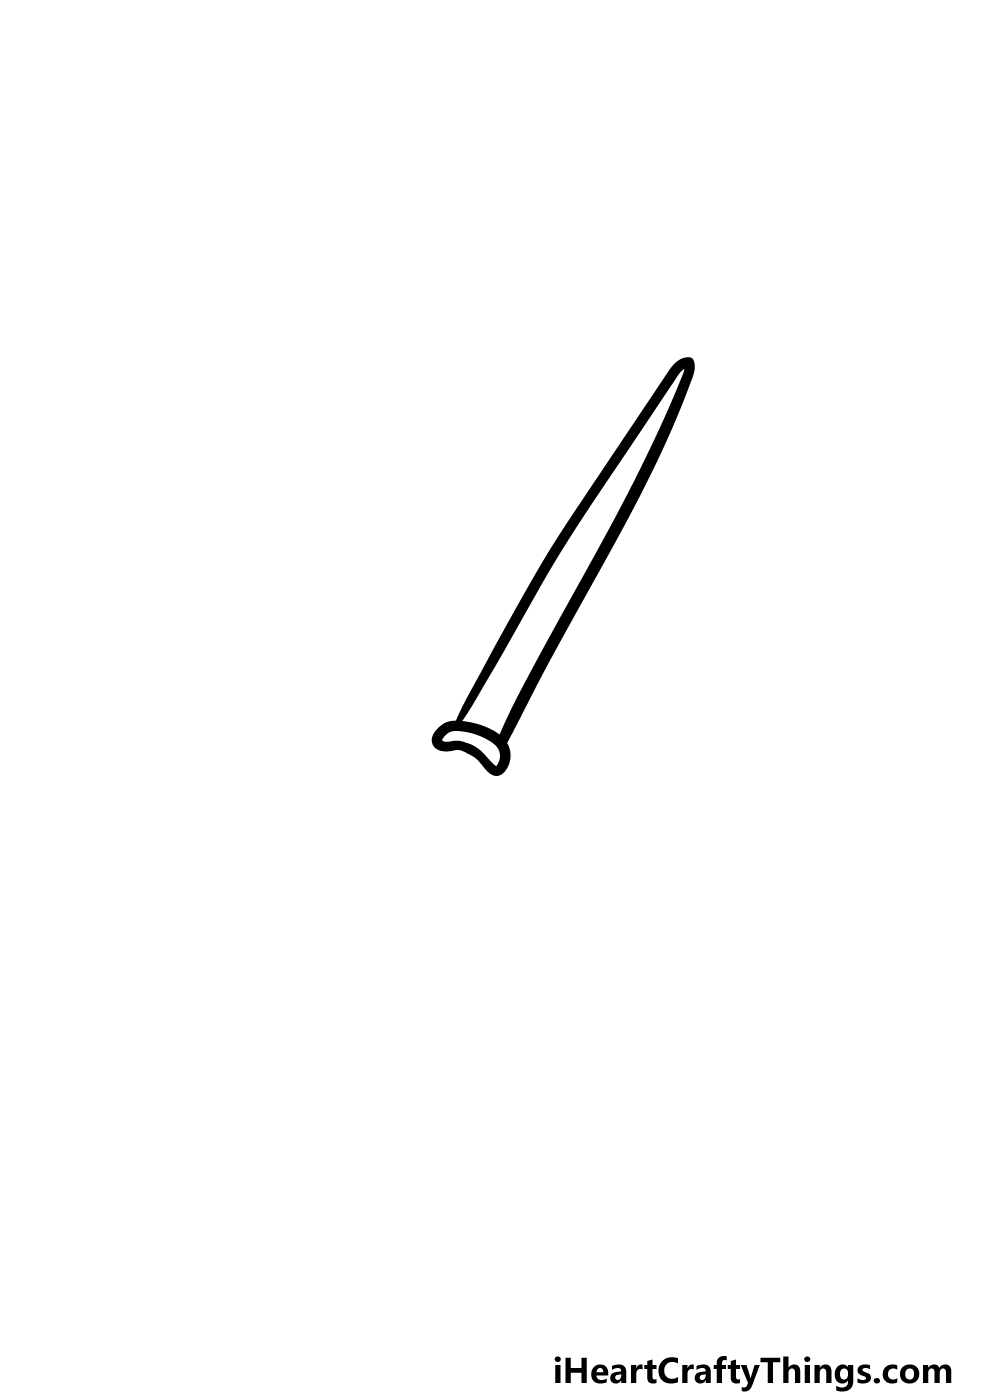
To kick off this guide on how to draw a paintbrush, we will be starting with the handle of the brush.
This part of the handle will be the wooden part that you will actually hold in your fingers as you paint. There will also be a ridge at the base of it that you can draw with a thin, rounded shape.
The handle itself will be drawn with some very slightly curved lines that culminate at a point on the end.
Once you have drawn this wooden part of the handle, you can move on to the next step so we can continue with this drawing.
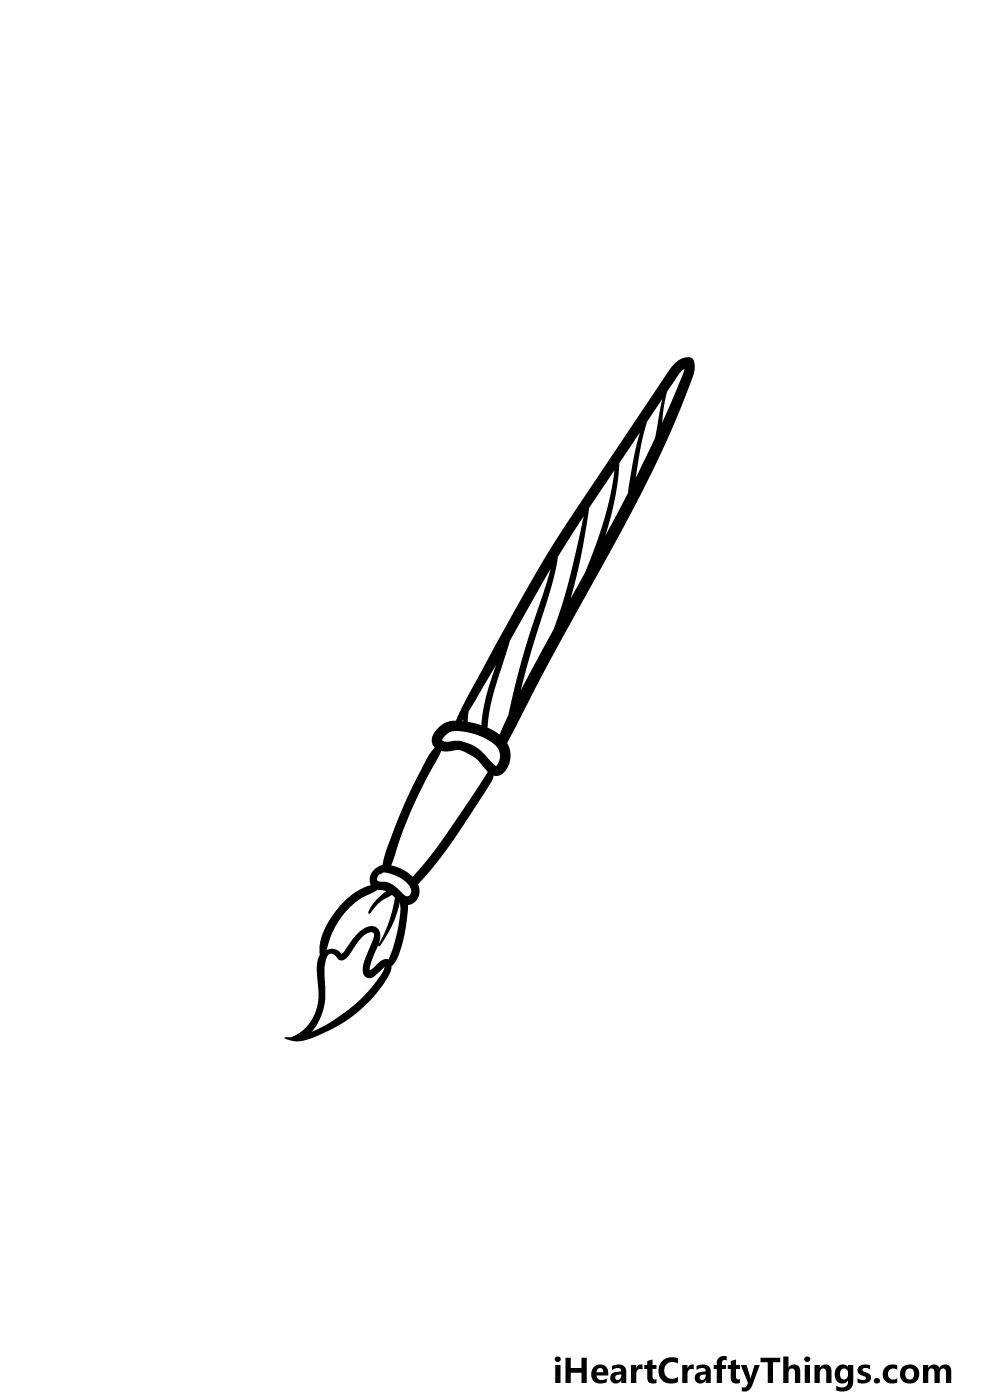
Step 2 – Next, draw some more of the handle
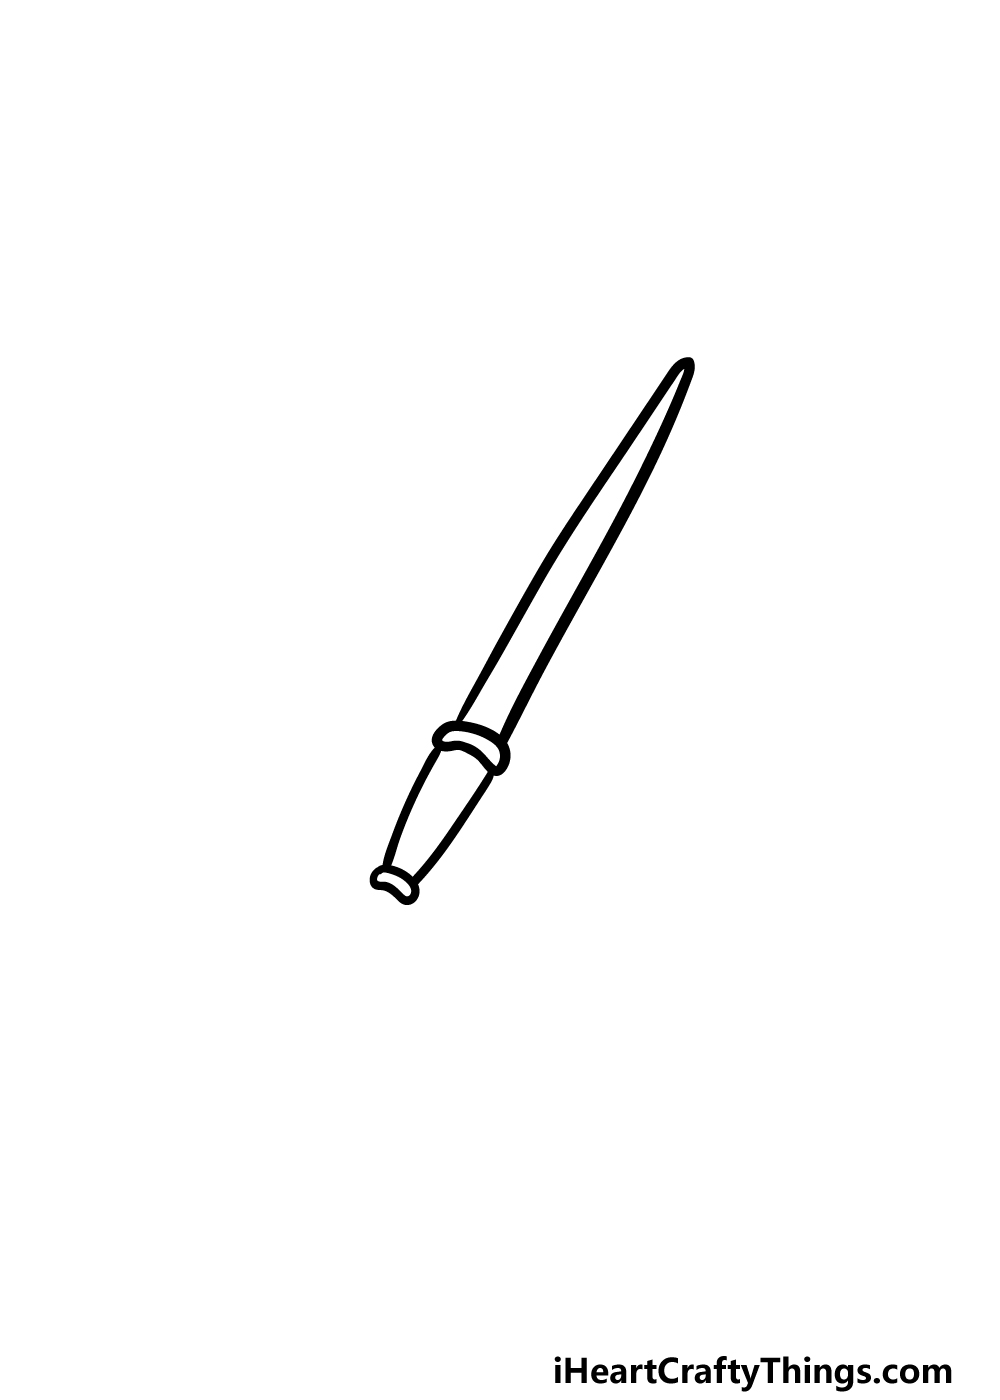
You’ve drawn the wooden part of the handle, and now we will be adding the shorter metallic portion of your paintbrush drawing.
This metallic section will generally connect the handle to the actual bristles of the brush. To draw this part, simply draw some more slightly curved lines that culminate in another one of those small, thin shapes that you drew at the base of the wooden part of the brush’s handle.
That will take care of the outline for the handle, and in the next part we will work on the bristles of the brush.
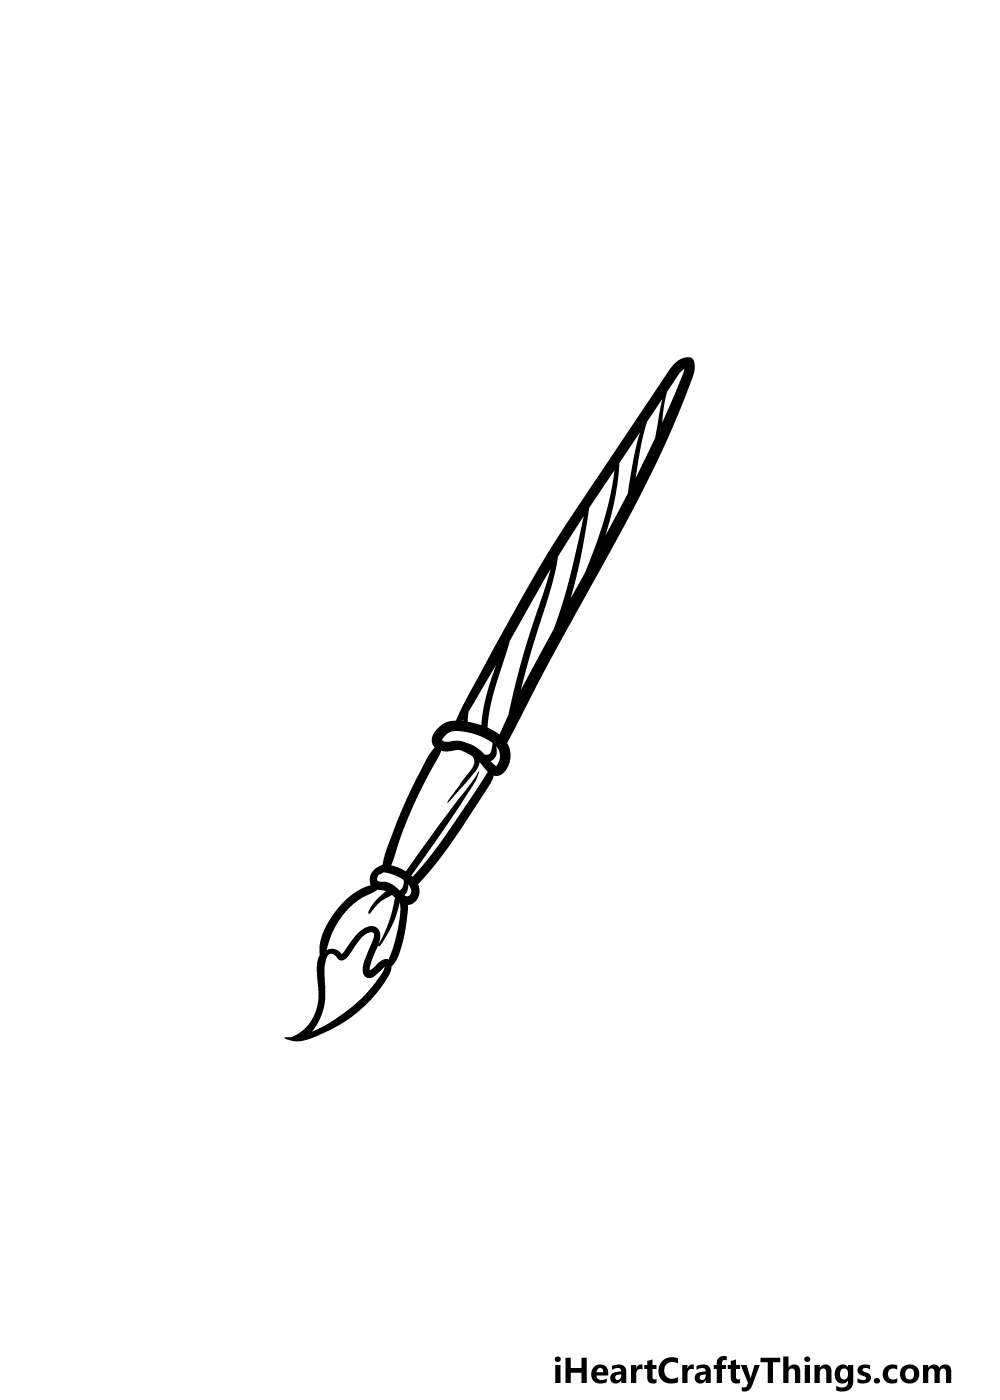
Step 3 – Now, draw the tip of the brush
Having a brush handle is all well and good, but it wouldn’t be a very good brush without some bristles.
We will add these in this thirst step of our guide on how to draw a paintbrush. This part of the brush will connect to the end of the metallic part that you drew in the previous step.
The base of it will be drawn with some curved lines that lead to some paint gathered at the end of the bristles.
You can draw this paint with some more rounded lines, and you can distinguish the bristles from the paint by adding some lines onto the bristles.
Then we can start to add some final texture details in the next few steps, so let’s proceed!
Step 4 – Next, draw some wooden texture details for the brush
For the next few parts of your paintbrush drawing, we will be going back to the previous elements that you drew and add some details to them.
For now, we will be focusing on the wooden portion of the handle to make it look more like wood. To do this, you can draw some lines going diagonally along the handle to give it that look of wood grain.
That’s all there is to it for this part, so we shall move on to some final details for the brush in the next step.
Step 5 – Now, finish off your paintbrush drawing
The details that you will be adding in this step of our guide on how to draw a paintbrush will be small, yet they will also finish it off nicely.
You will also be able to add some details and additions of your own in this step, so there’s lots of fun to be had in this part!
As for our details, we will be adding some thin lines to the metallic part of the brush to give it a look of being made of shiny metal. Once you have drawn these lines, you have technically finished this step.
Before you move on to the final one, you could add some of your own elements and details to it.
You could draw some different-sized paintbrushes lying beside it, add some more painting tools or even give a glimpse of the picture that this paintbrush is working on.
These are just a few ideas, but what else can you think of to finish off this picture before the final step?
Step 6 – Finish off your paintbrush drawing with some color
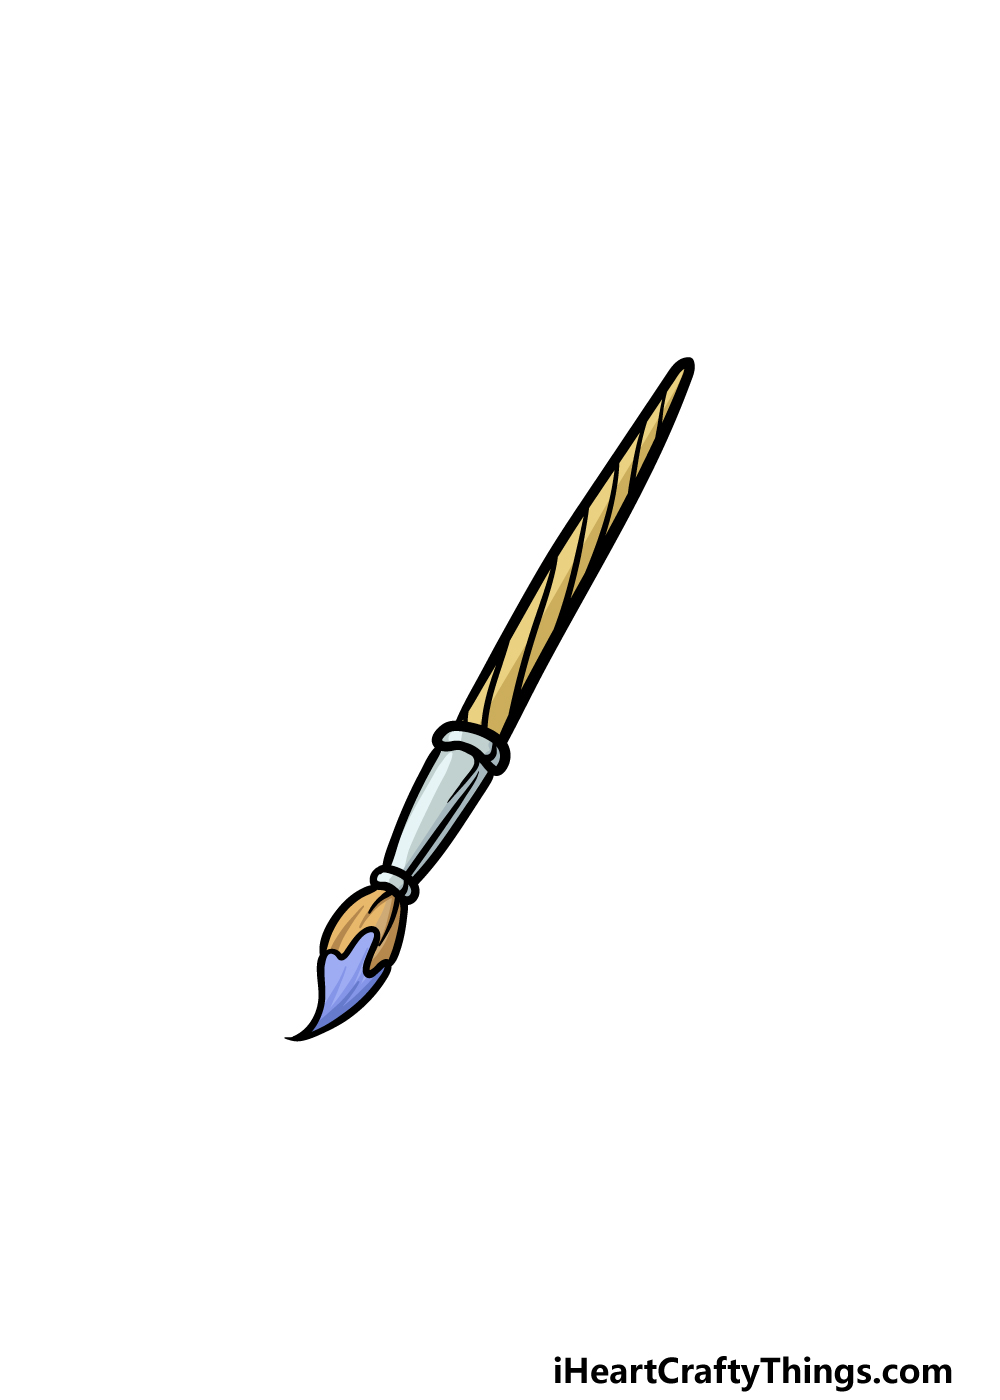
This is the final step of your paintbrush drawing, and this is the one where you can bring your picture to life with some amazing colors!
We used some browns and greys for the brush while using some purple for the paint at the end of it. This is just one example of the colors that you could use for it, however.
Seeing as this picture has to do with paint, that gives you a lot of options for the colors that you could go for!
The colors are just part of the process, however. You could also experiment with different mediums, and perhaps even use some thick paint for the paint on the brush for a cool touch.
We can’t wait to see what colors and mediums you use to finish off this image!
Here’s how you can make your paintbrush drawing even better…
Create some beautiful art as we show you how you can improve this drawing even more!
Paintbrushes are used to paint pictures and many other things, and it could be fun to show what this one is painting!
One way of doing this would be to draw a rectangle behind the paintbrush to show the canvas or piece of paper it’s being used on.
Then, you could create a half-done picture that it is being used to paint. What kinds of pictures do you think it could be used for?
Any painter will tell you that you need to have many different paintbrushes to create your masterpiece.
We think this paintbrush drawing could be made to look even better if you add some more paintbrushes to go with it.
These can be big, small, fat or thin, and there are so many variations to choose from. If you own any paintbrushes, you can use them as models as you draw!
You could also add any other art tools you would use with a paintbrush.
If you’re feeling creative, you may want to draw a hand holding this paintbrush. This can be difficult, because hands are notoriously difficult to draw!
You can make it easier by taking a photo of your hand holding a paintbrush or even something similar to one. Use this as a model to show this brush being held as it is used.
It may be a challenge but it will make this drawing of a paintbrush even more interesting to look at!
Lastly, we think you can make this paintbrush sketch look even better with creative art mediums.
One idea we had was to use a thick drop of acrylic paint on the tip of this paintbrush to make it look like it has just been dipped in paint.
It may take a bit longer to dry, but if you use a thick drop then it will give the image an almost 3D element. What other colors and art mediums will you use on this masterpiece?
Your Paintbrush Drawing is Complete!
We hope that this guide on how to draw a paintbrush was a fun ad rewarding experience for you to take on!
By following the steps in the guide and taking it slowly, you can use your own art tools to create some creative depictions of this particular art tool.
There are many ways that you can have fun getting creative with some extra details, colors and art mediums.
We mentioned a few ideas in this guide, but this is your chance to show us how creative you can be with how you finish off the picture!
Once this guide is complete, we have many more for you to enjoy on our website. We have guides covering a huge variety of topics, and we upload many more often for you to enjoy!
We would be very interested to see how you completed this paintbrush drawing, so please be sure to share it on our Facebook and Pinterest pages once it’s done.