


One of the best ways to unwind is to get away from it all with a fun trip camping in the great outdoors!
When the chill of the night air starts creeping in, the best way to combat it is to create a roaring campfire to sit around.
They can also be great for activities like telling ghost stories and roasting marshmallows! It can also be fun to relive some camping memories by learning how to draw a campfire.
If you would like to learn how to do just that, then you have chosen the perfect tutorial!
This step-by-step guide on how to draw a campfire will show you how it’s done and provide lots of fun for you!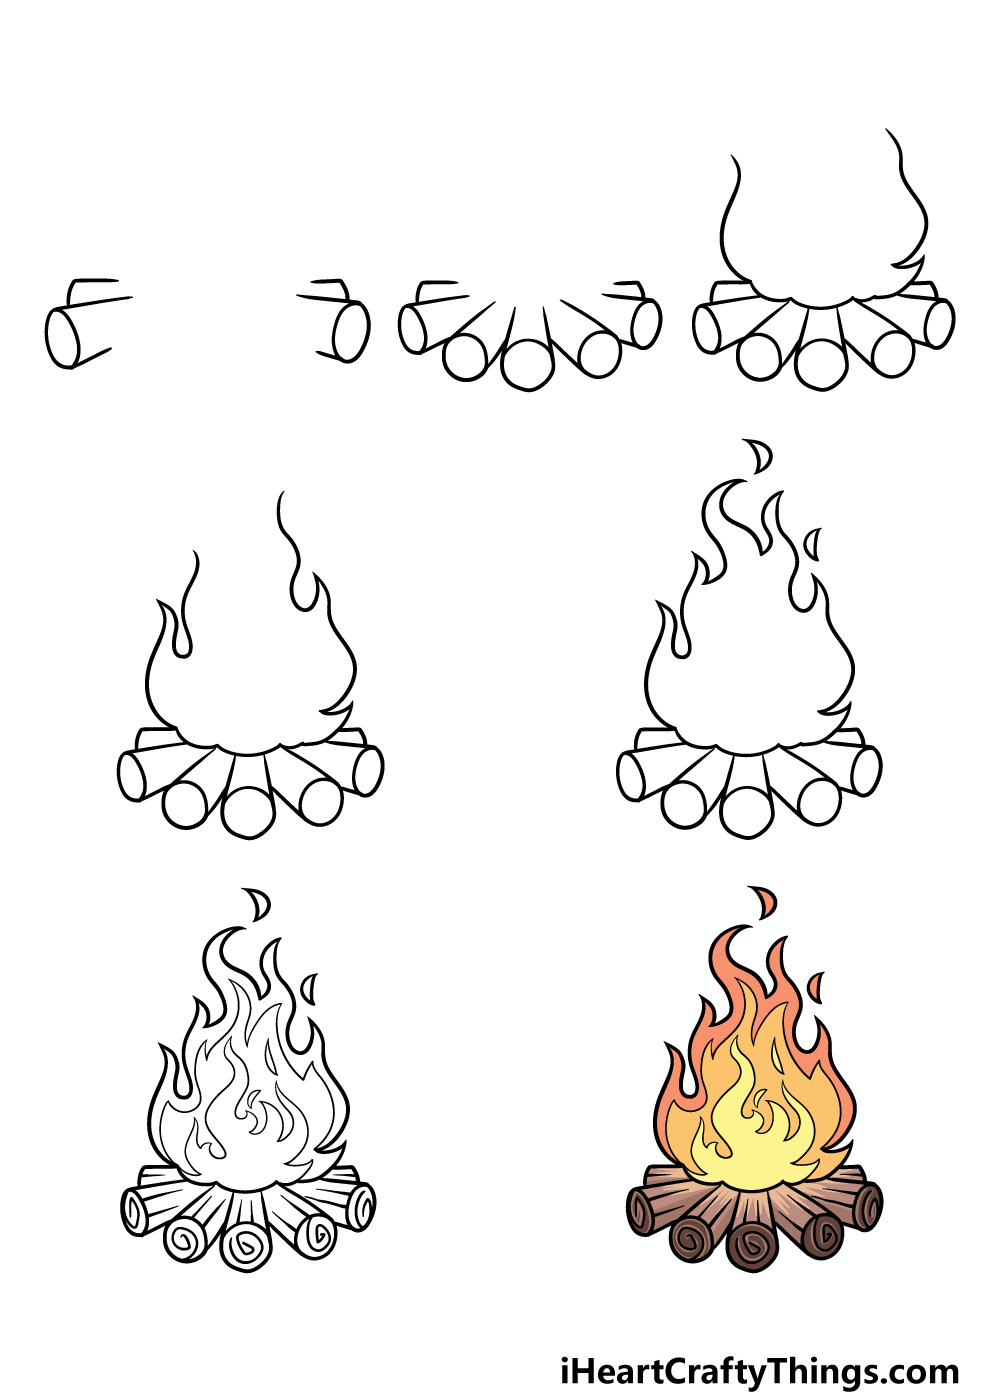
How to Draw A Campfire – Let’s get Started!
Step 1

Every campfire will have wood at the base to burn, and that will be reflected in this first step of our guide on how to draw a campfire.
To start this aspect, you can draw two vertical oval shapes for the ends of two pieces of wood.
Then, you can extend two straighter lines inward from these ovals. Then, you can draw two more angular shapes onto these outlines for more pieces of wood.
We will be adding more wood to the pile in the next step, so we’re ready to proceed!
Step 2 – Draw some more of the woodpile of the campfire next
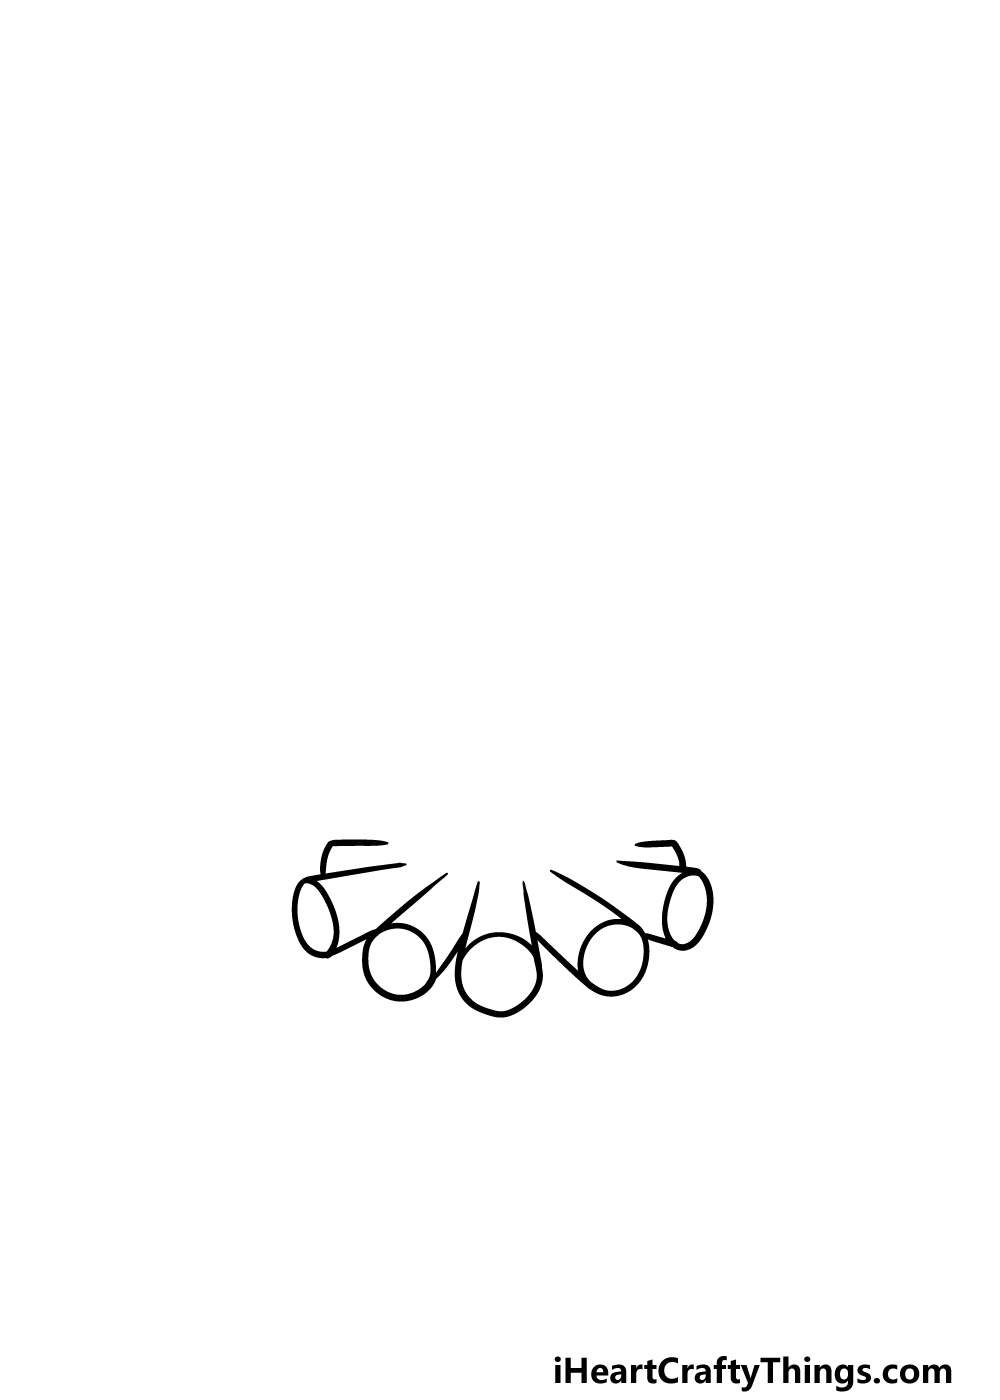
We will be adding some more logs to the woodpile in this step of your campfire drawing. We want to draw a nice strong fire, after all, so we will need plenty of wood to do that!
To get more wood on the pile, you can draw three more circle shapes between the other two. Then, extend some more lines inward from those circles as you did with the other ones.
Then we can move on to drawing the actual fire of this campfire!
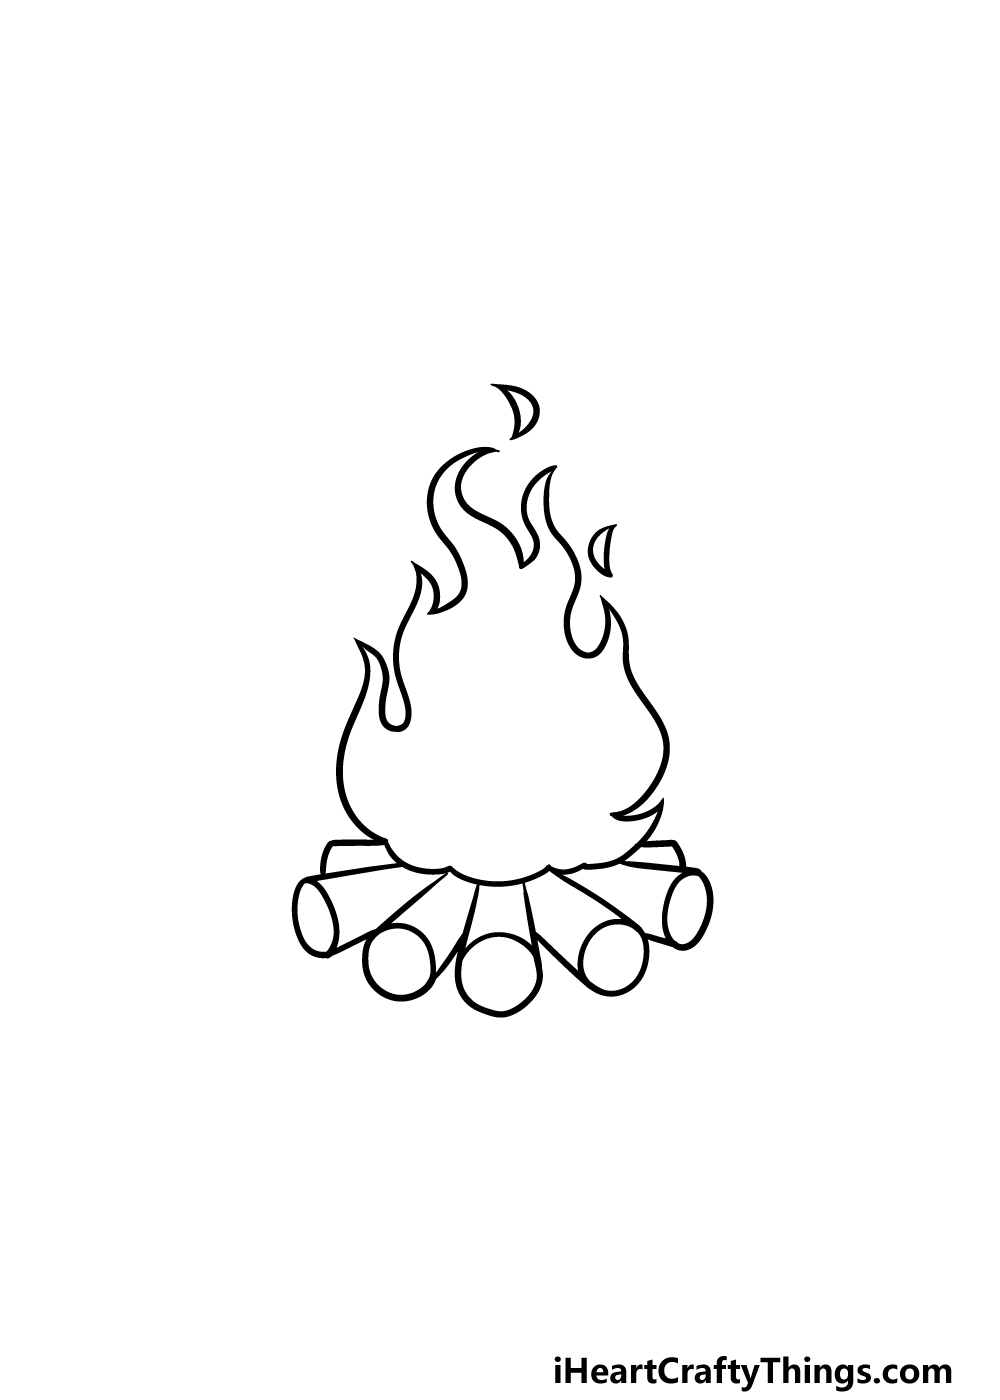
Step 3 – Start drawing the fire for this campfire
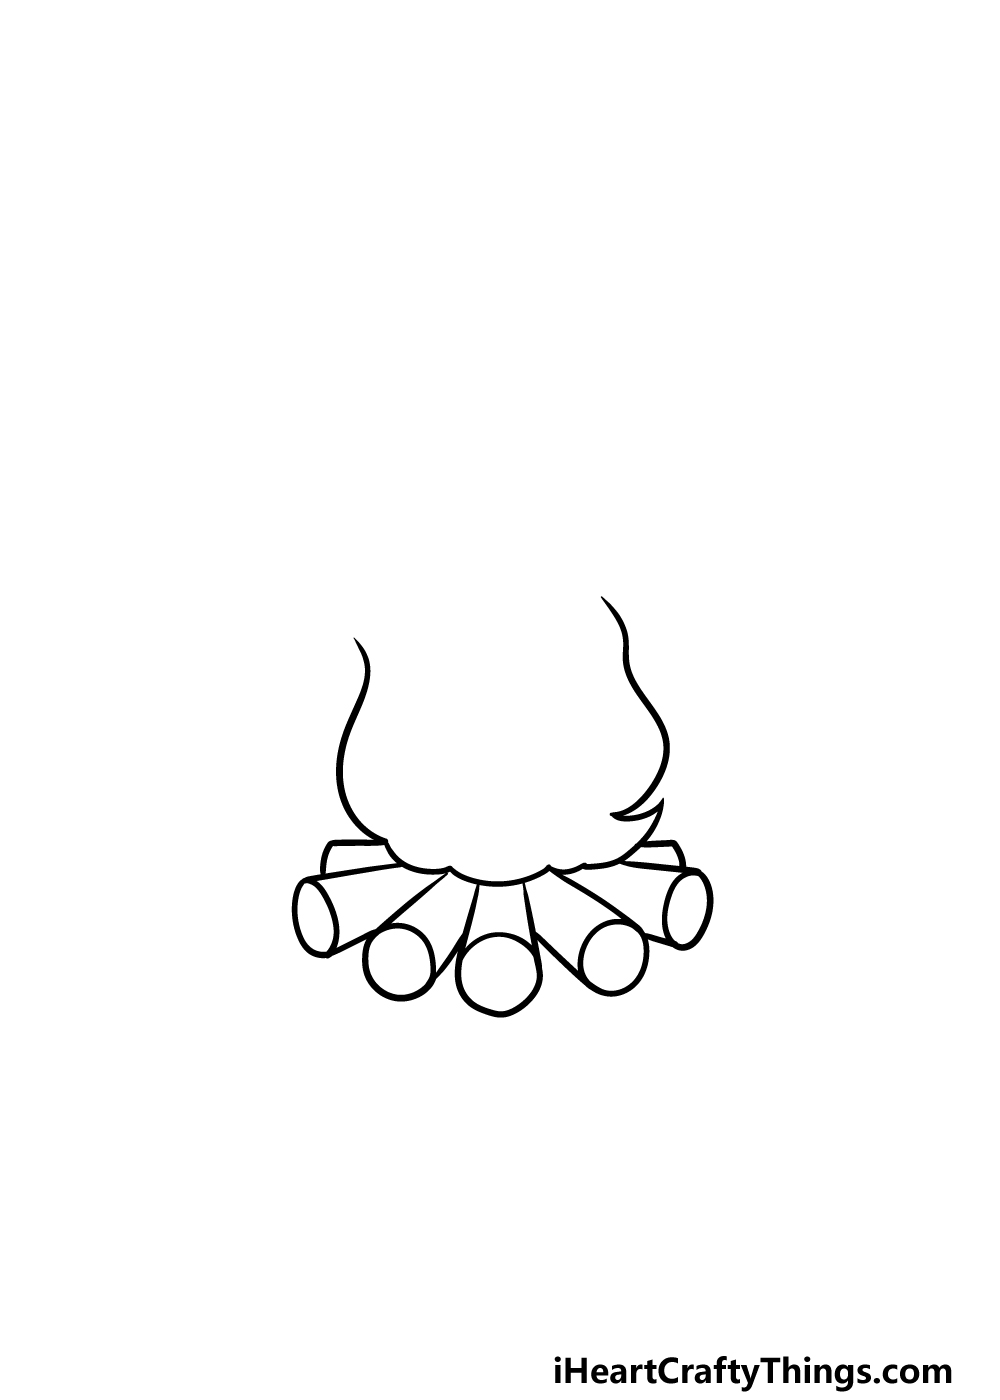
It’s time to start drawing the fire for this part of our guide on how to draw a campfire. For now, we shall be drawing the base of the outline for the fire.
You will be drawing this by using some curved liens forming the rounded base of the fire. There will also be some slightly sharper lines on the sides for where the flames are licking outward a bit.
Step 4 – Add some more of the fire outline now
This fourth part of your campfire drawing will see you adding more to the outline of the fire that you started in the previous step.
Unlike the base which had more round lines than jagged ones, we will be using more jagged and sharp lines for the upper portion of the fire.
Then, we can finish off the outline of the fire and take care of some final touches in the next few steps.
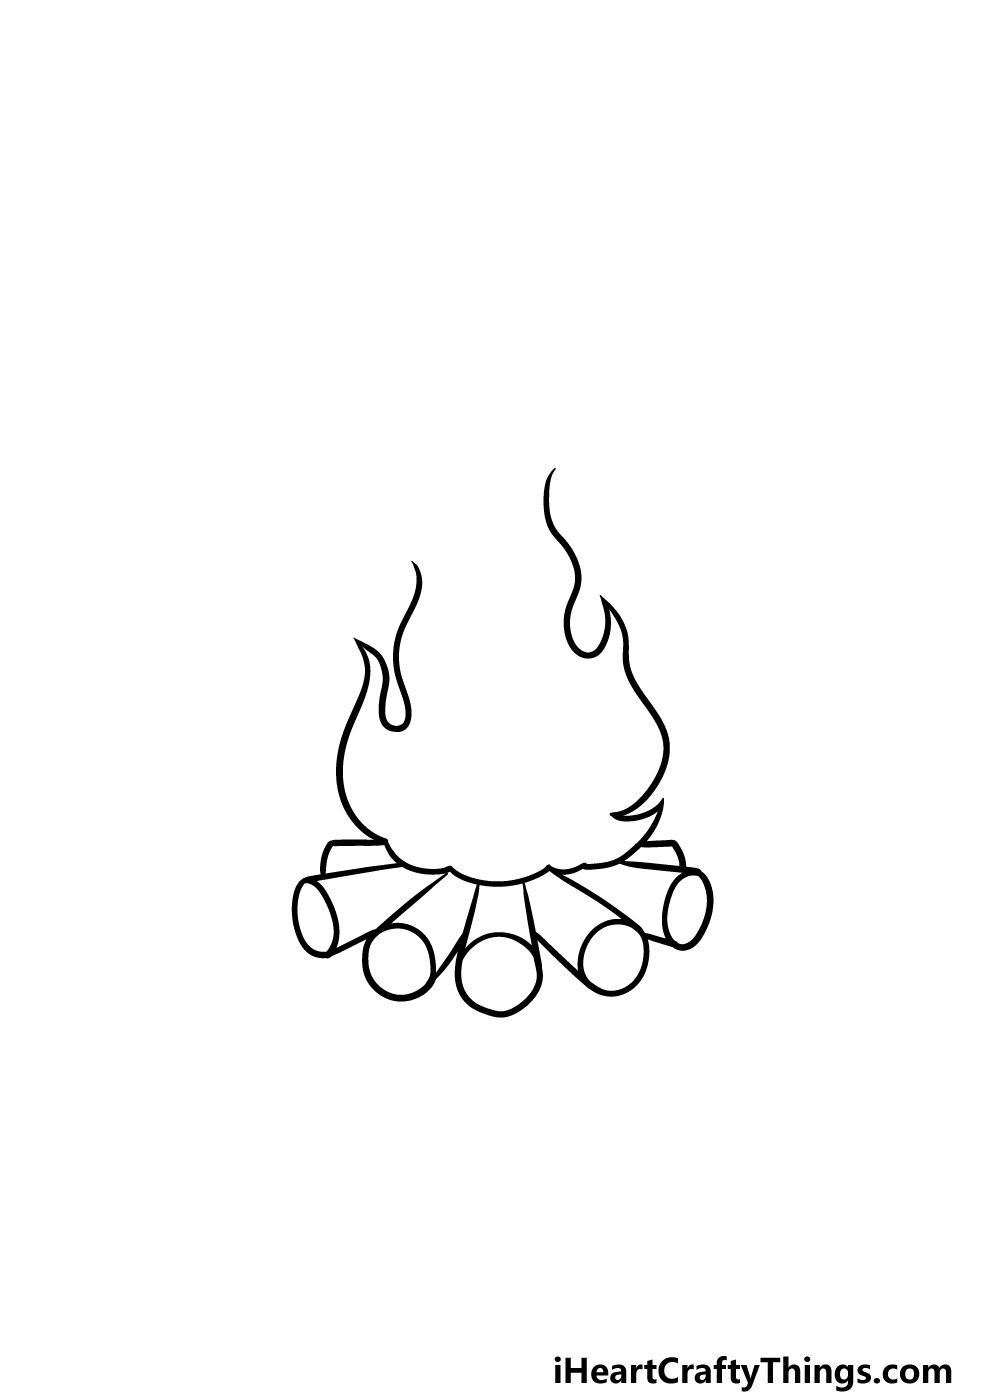
Step 5 – Next, finish off the outline of the fire
We can finish off the outline of the fire in this next step of our guide on how to draw a campfire.
We mentioned in the previous step that we will be using sharper lines for the upper section of the fire, and that is certainly the case here.
To finish off the fire outline, simply draw some more curved and sharp lines to form the thinner tip of the fire.
You could also change the orientation and size of these shapes to create your own unique fire shape variation if you’d like!
Then we just have some final details and colors to add before you are finished, so let’s move on to the final two parts.
Step 6 – Now, add the final details of your campfire drawing
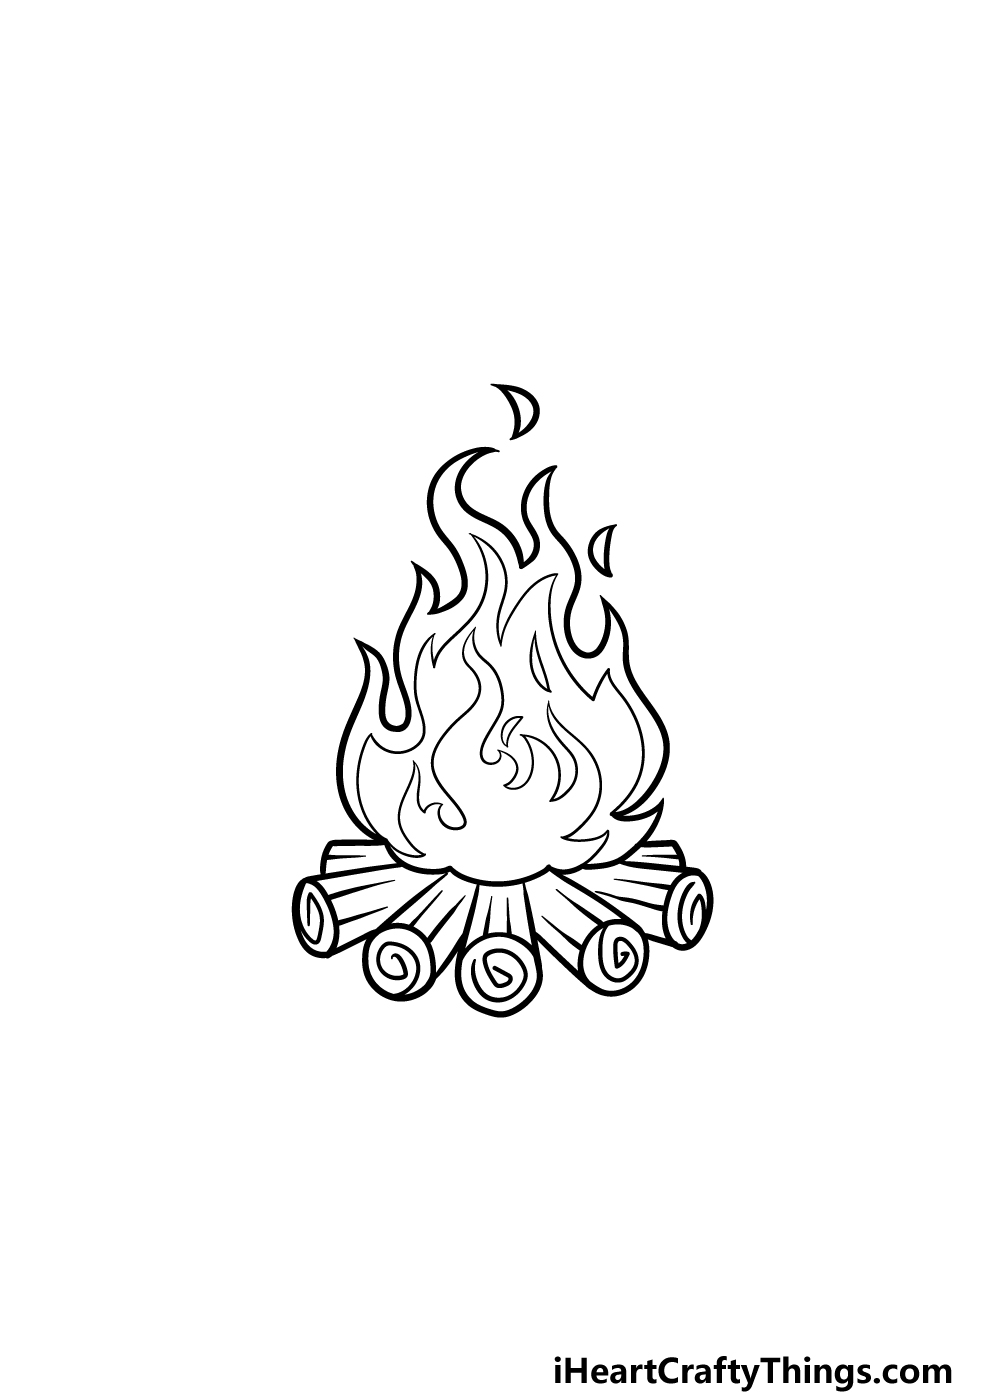
This step of your campfire drawing will be all about adding some final touches to the picture.
These details will go on both the fire and the logs, plus you will be able to add some extra details and elements of your own that you may like!
For the fire, you can use some more sharp lines to create some shapes layering into each other in the interior of the flame outline. These are more details that you could change up a bit as you please.
Then, for the logs you can draw a spiral shape into the circular end of each piece of wood. Then you can finish it off by drawing some lines along the lengths of the wood.
That will finish off the details in this guide, but you could also add some more of your own! You could draw a background showing the rest of the campsite or even draw some people sitting around it.
These are just a few ideas, but what else can you think of to finish off this awesome campfire drawing?
Step 7 – Finish off your campfire drawing with some color
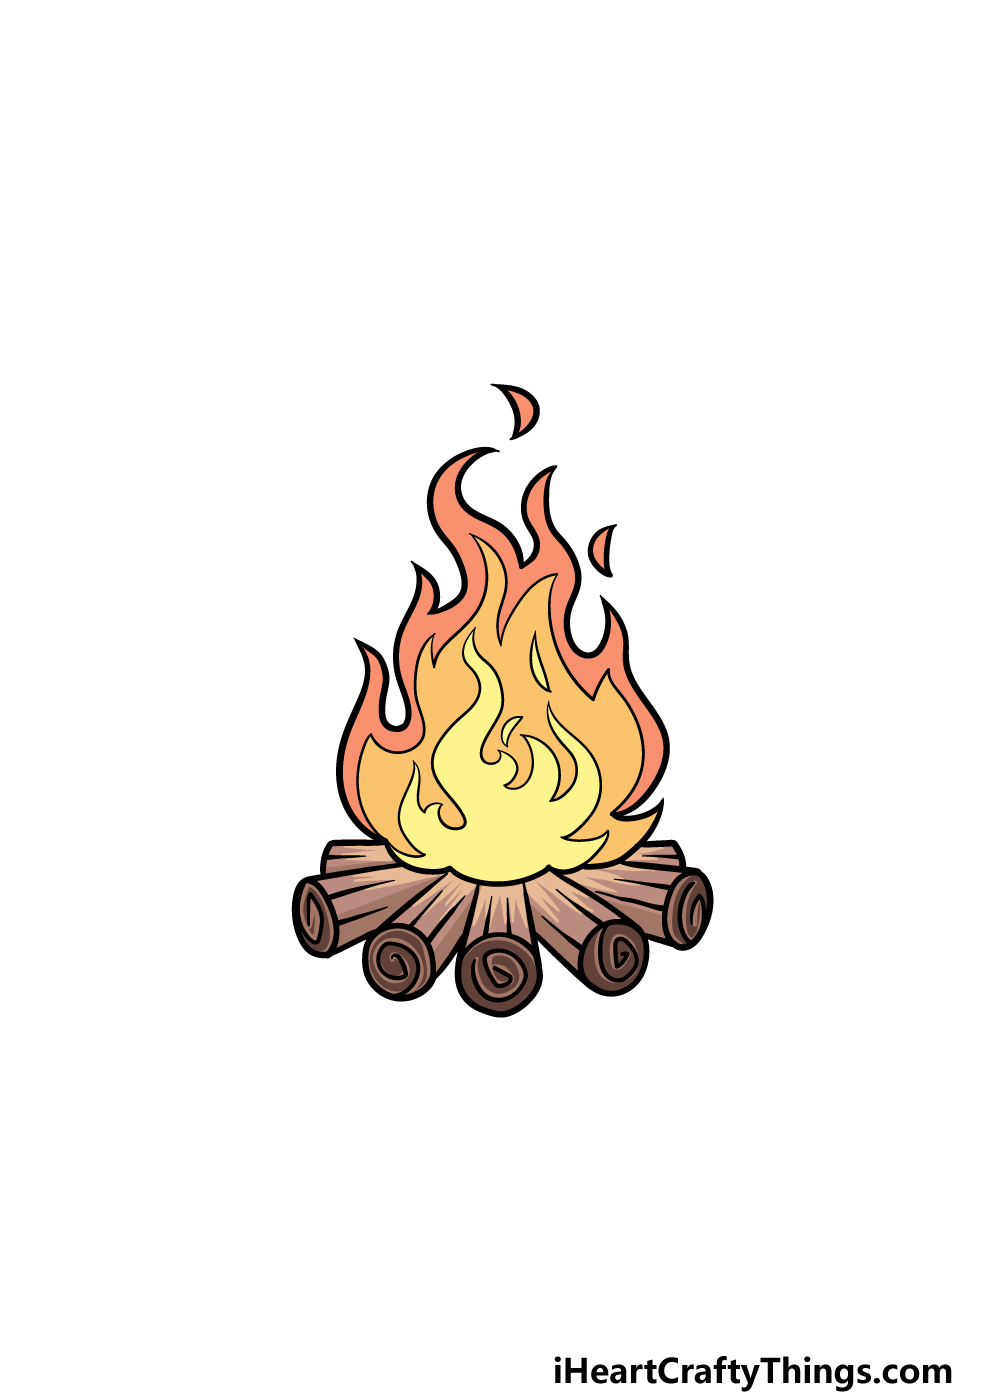
That brings you to the seventh and final step of this guide on how to draw a campfire! This is the one where you get to add your favorite beautiful colors to really finish it off.
In our picture, we used yellows and oranges for the fire with shades of brown for the wood. These are just our suggestions, however, and you should feel free to use any colors you love!
You could also experiment with different art mediums. For example, watercolors could work nicely for the softer look of the fire, but anything you choose will look great!
3 More tips to make your campfire drawing easy!
Enjoy some relaxing and fun tips on how to make this campfire drawing even easier! Fire doesn’t take on physical form in real life, and we can show that in this campfire sketch. It will also help to make the drawing easier!
One way that you can do this is by using some watercolor paints. Using this medium with colors like orange, red and yellow, you can create some soft flame effects for this picture.
This is easy to do when you have the hang of it, and it will even make the drawing look more realistic.
There are other mediums you could use as well, and each will look incredible in its own way. If you were to use acrylic paints, for example, you could create a light wash of the paint to make it look softer.
Another way to make this campfire drawing a bit easier is by taking away a few of the details. Some of the details for the flames and logs can be a bit tricky, and that can lead to frustration. There’s no harm in simplifying the details that you are struggling with.
Sometimes, it can also change the dynamic of the picture to something you may even prefer! You can also change the design a bit to make it something you feel more comfortable drawing.
This is all about having fun creating your artwork, so don’t feel bad about altering things to make it more enjoyable!
Perseverance is important whenever taking on a new drawing challenge. If you find yourself struggling with this drawing of a campfire, it’s important to not give up.
Keep going slowly through the steps in this guide, and don’t be shy about starting again. If you get frustrated, then a small break can also make a big difference!
As long as you keep on trying, you will find it getting easier and easier as you go. If you do this alongside our other tips, you will find yourself finishing the drawing with ease.
Your Campfire Drawing is Complete!
You have successfully completed all 7 steps of this guide on how to draw a campfire! We hope that you had a fun and relaxing time creating this tranquil campfire scene, and we also hope that this guide made it much easier for you to do.
Don’t forget that you can also add your own details and elements. We look forward to seeing what kinds of cool backgrounds and extra objects you can think of to finish off this picture!
Then, when you have finished this guide and are ready for more, there are plenty of guides for you to enjoy on our website! We upload new ones frequently as well, so be sure to visit us often for plenty of drawing fun.
When you have completed your campfire drawing, we hope you will share it on our Facebook and Pinterest pages for us to admire!