Caps are quite versatile as items of clothing. They can serve a practical purpose such as shielding eyes from the sun or can be part of a work uniform.
In addition, they can also be a fashion item that can help to make the wearer look even cooler! No matter the use, caps can certainly come in all manner of different looks and styles.
If you’ve ever wanted to design your own cap, then learning how to draw a cap will be essential!
Luckily, this very guide will show you how to do just that.
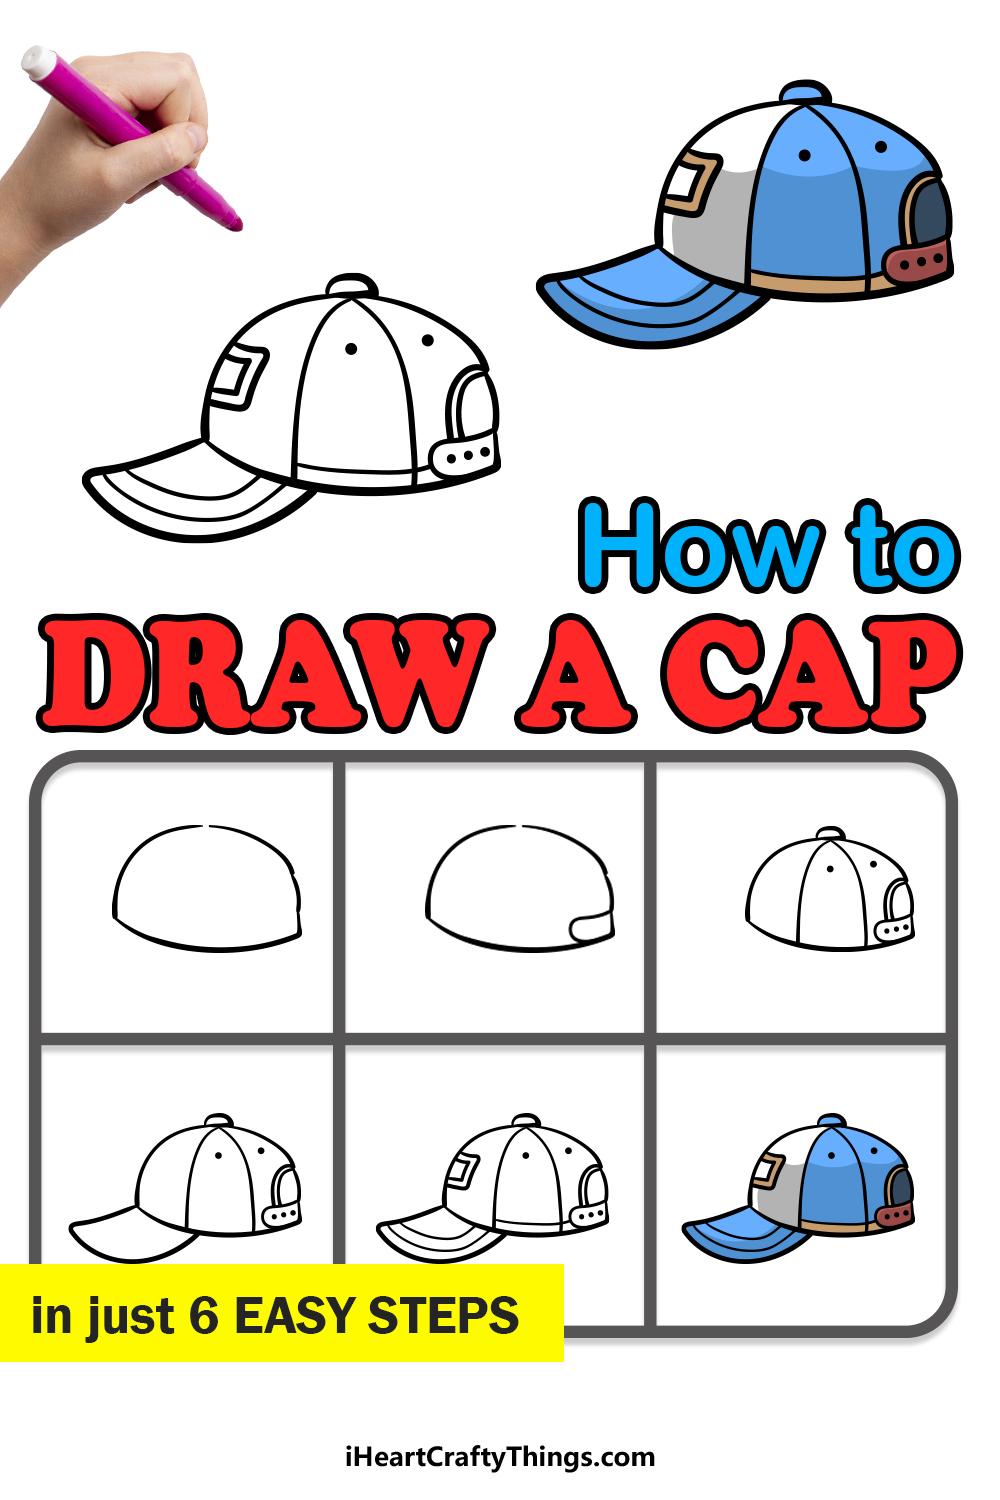
Our step-by-step guide on how to draw a cap will show you how easy and fun it can be.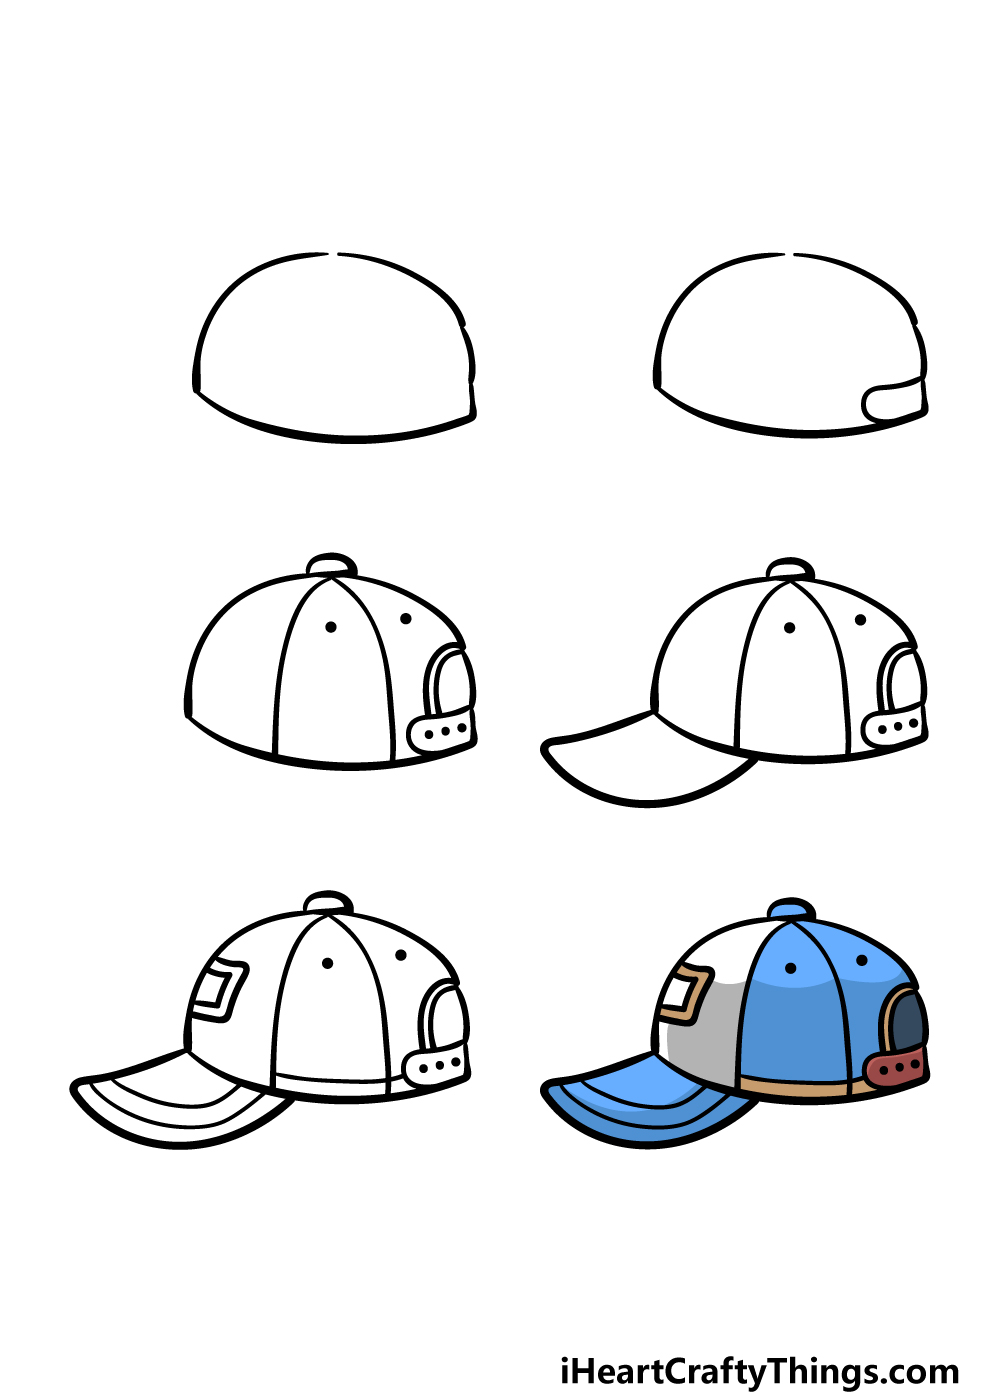
How to Draw A Cap – Let’s get Started!
Step 1
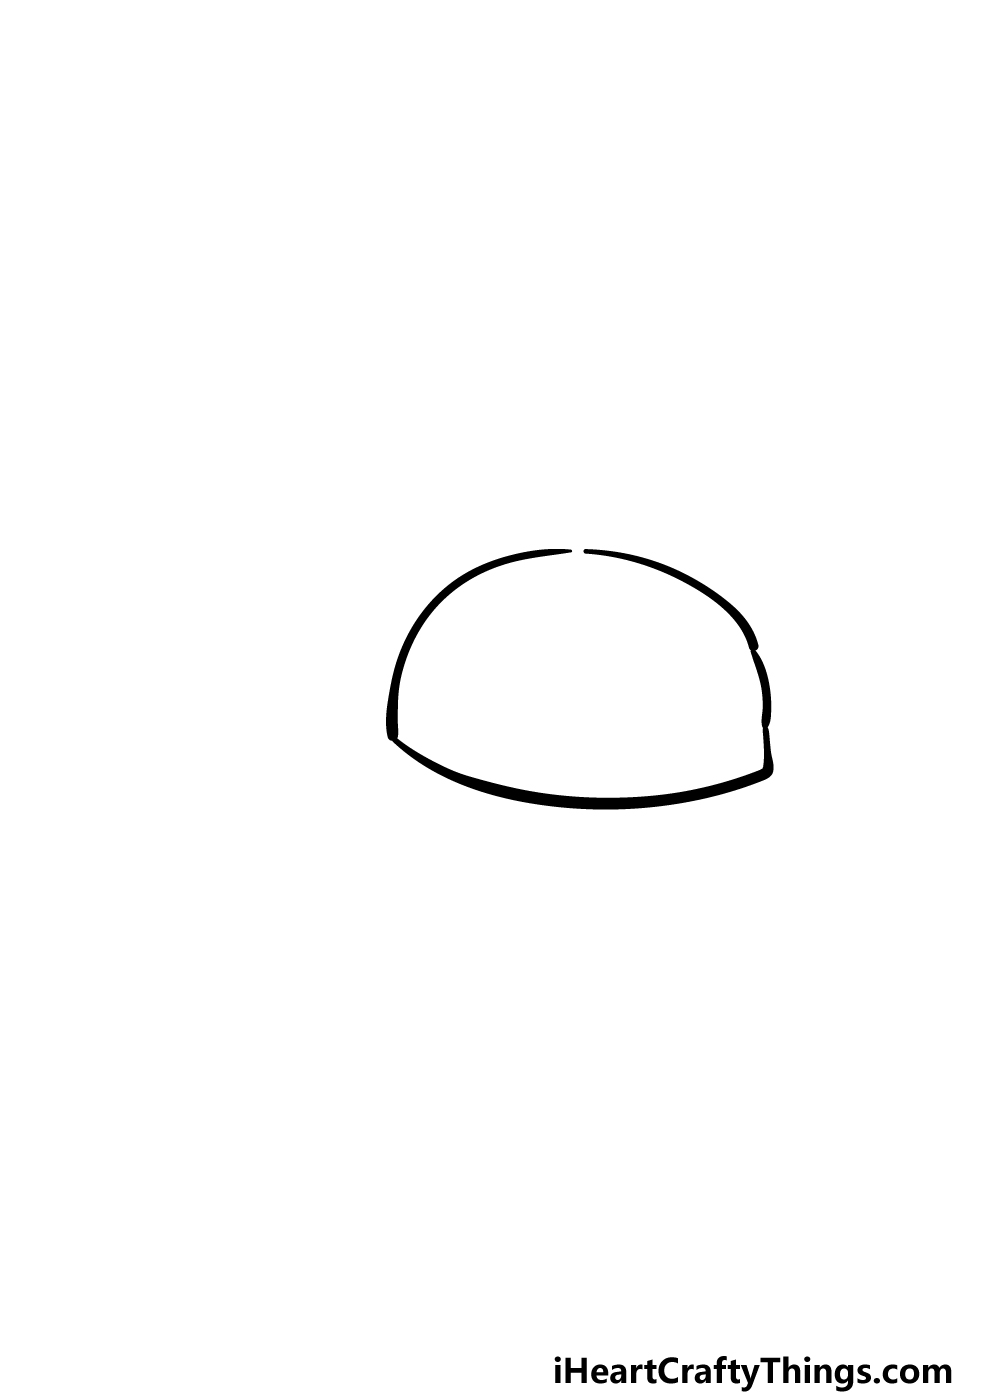
For this first step of the guide on how to draw a cap, we will start with the outline of the body of the cap. To do this, we will be using a curved line for the base of the cap.
Then we shall be using another round line for the top of the cap, and this will connect to the base that you just drew.
It may not look like much at the moment, however we will be adding some more details to it in the following steps, so now you are ready to move on.
Step 2 – Start drawing the strap of the cap
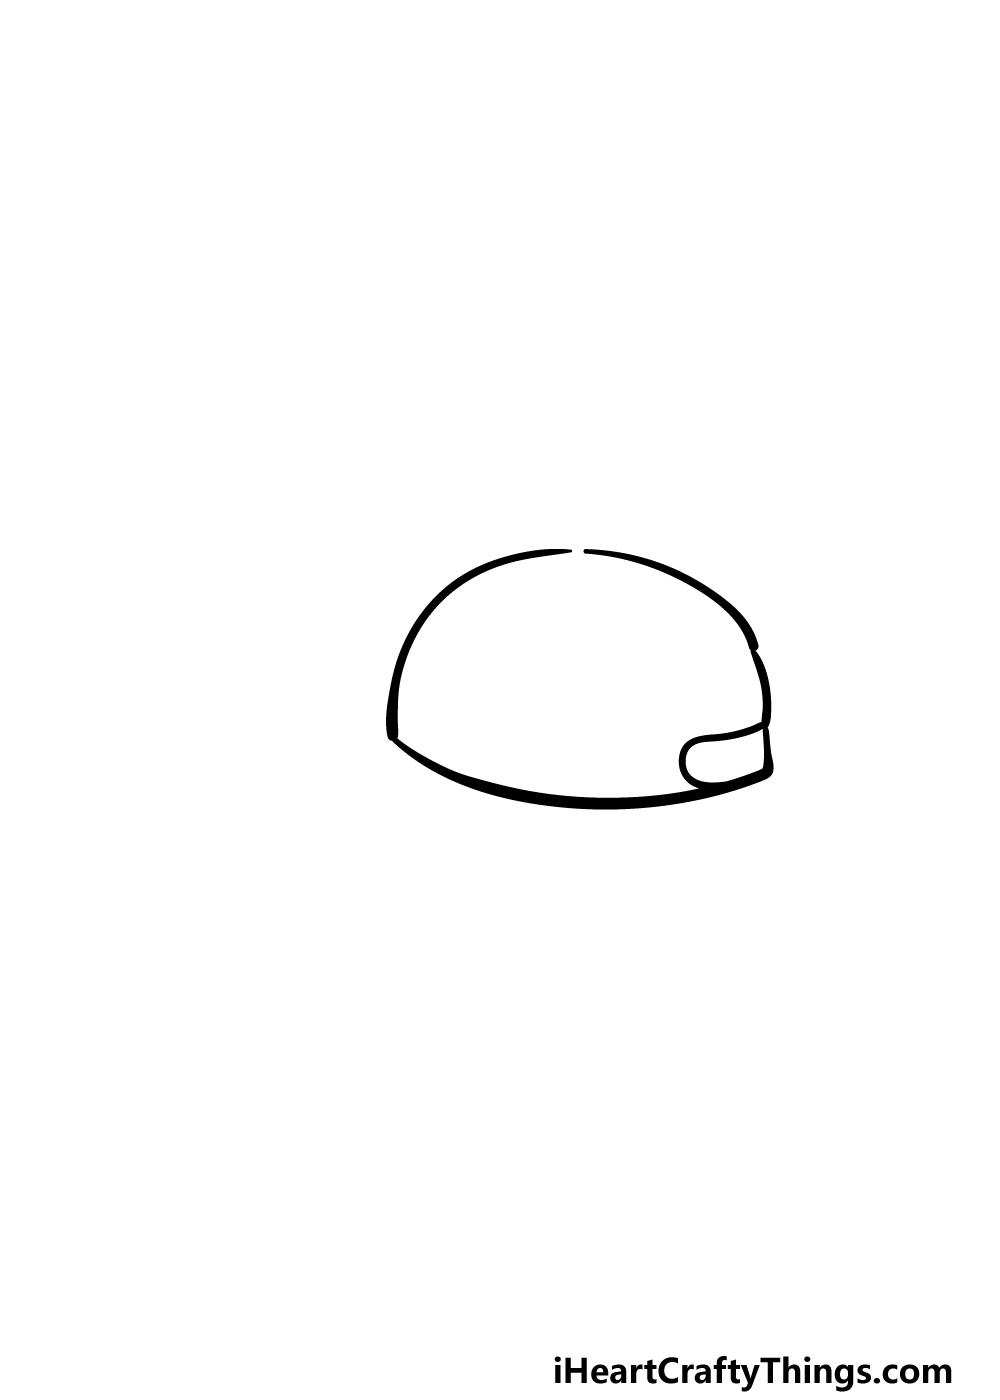
A cap will usually have a strap at the back that lets you adjust the size of it so it will fit you better, and that is what we will be drawing in this step of your cap drawing.
To do this we will be drawing a small round shape at the back of the cap. The shape will be fairly long horizontally but quite short vertically.
Once you have drawn this shape as it appears in the reference image then you’re ready to move on to step 3!
Step 3 – Now, draw some details for the cap
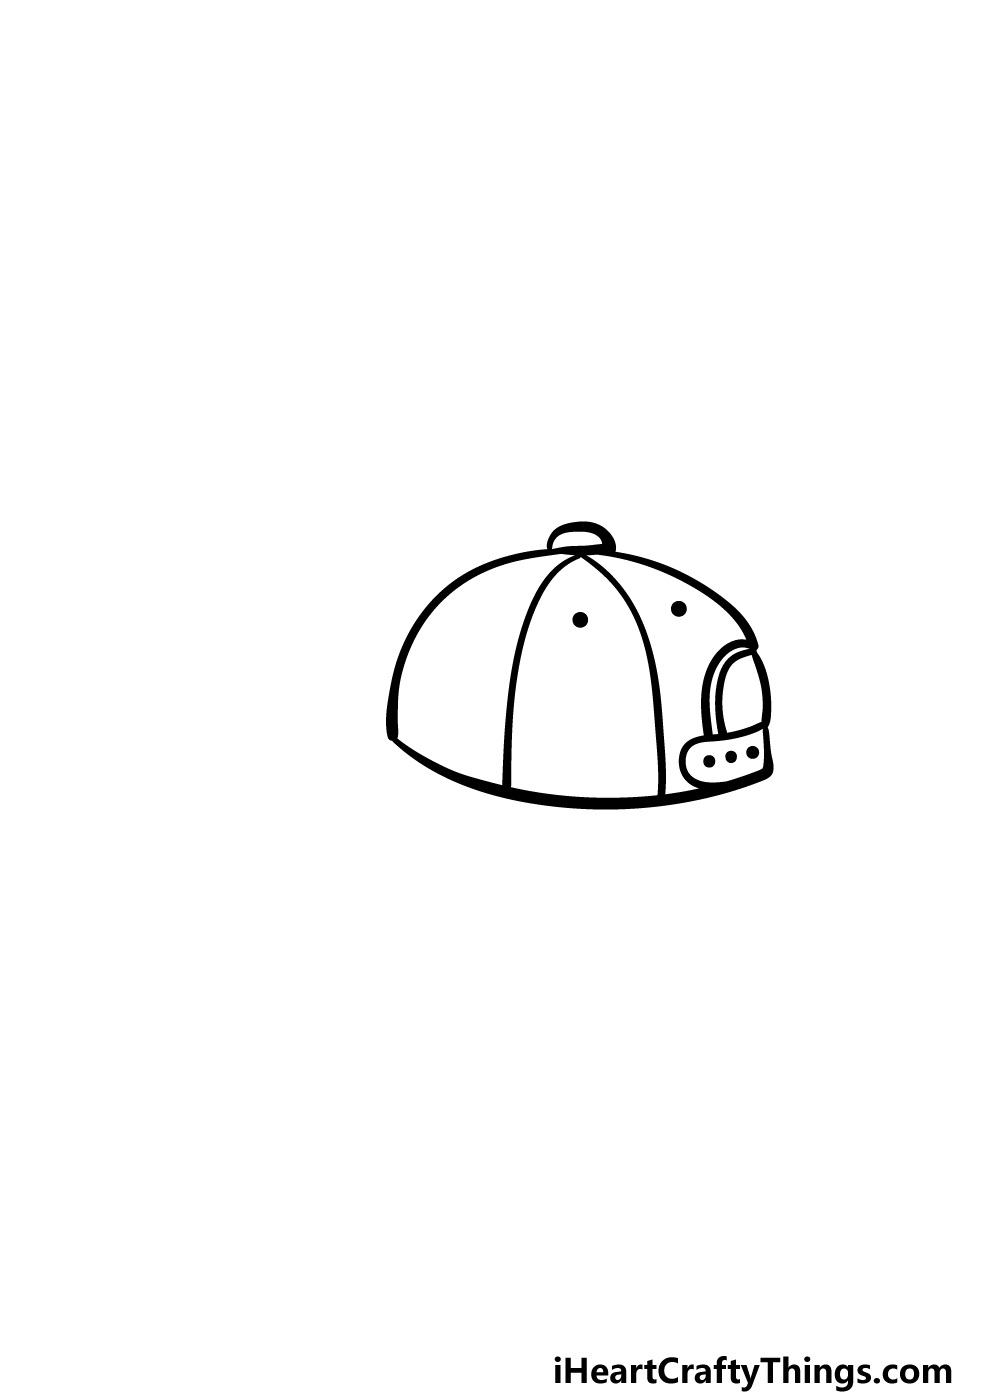
Next in our guide on how to draw a cap, we shall start adding some details to the cap. We will start with some simple details for the strap that you drew in the previous part.
All you need to do is add some dots to it to show where it would be adjusted. Then, draw curved lines close to one another up from the strap and to the side of the hat. This will form the hole at the back of the cap.
Next, draw a small, rounded shape at the top of the cap. Then, we shall extend some lines done from that shape for the different segments of the cap.
Then, you can finish off this step with some dots in the upper sections of the cap. These will serve as some ventilation holes in the cap.
Step 4 – Next, draw a visor for the cap
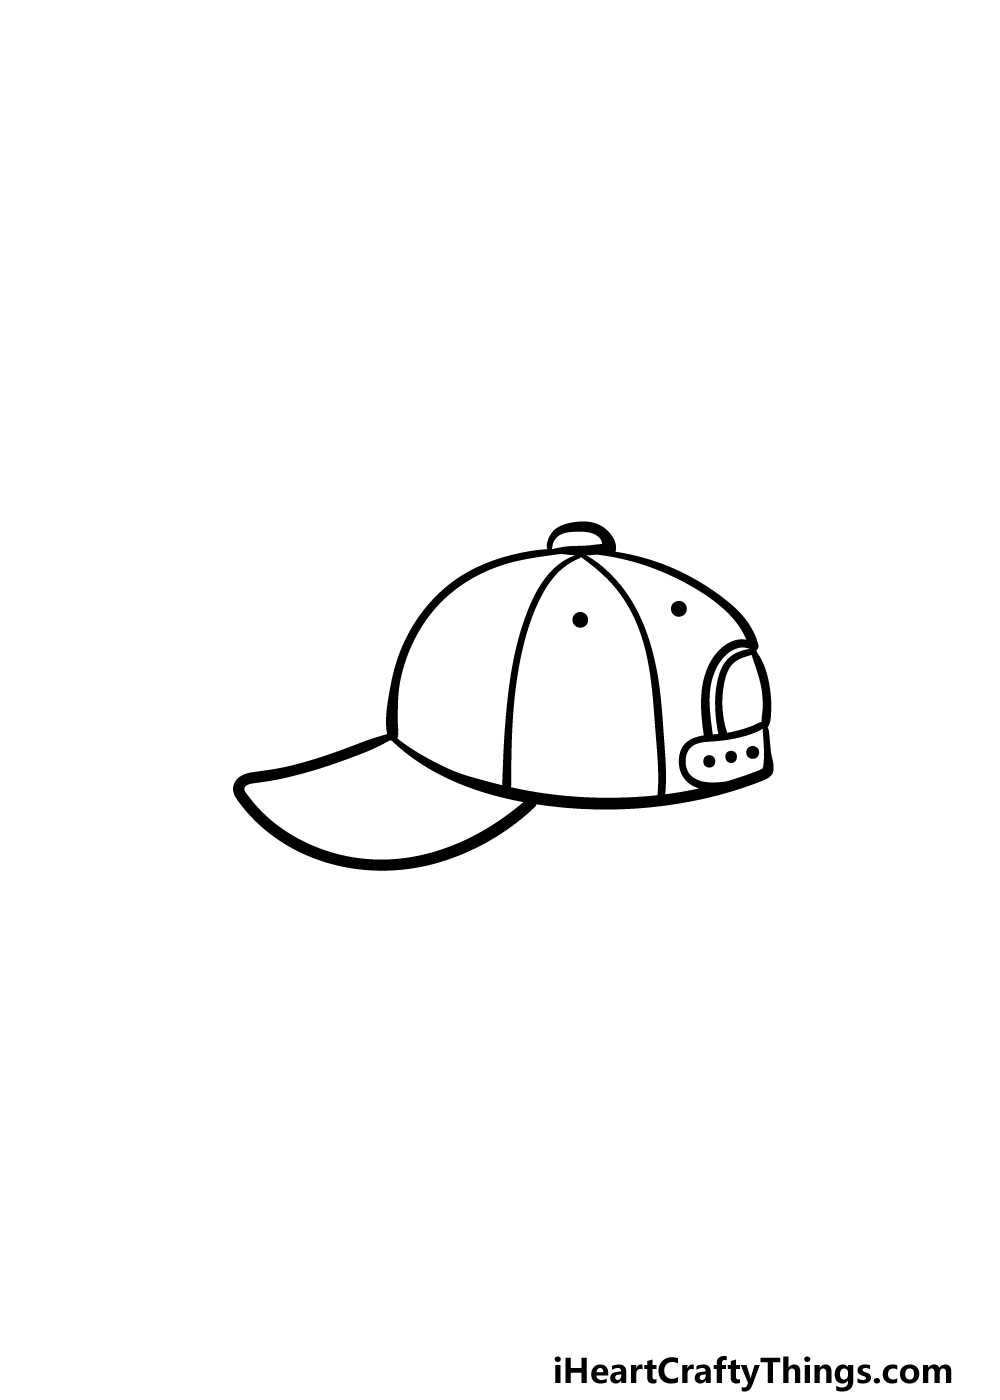
Without a visor, a cap would not exactly be very useful or helpful! For that reason, we will be drawing a visor in this next step.
For such an important part of the cap, this should be one of the easier parts of the cap to draw.
Simply extend a curved line from the left-hand side of the cap, as shown in the reverence image. The top of the visor will be less curved, whereas the bottom of it will be more rounded.
Once you have drawn this visor, we just have a few more final details to add in the next step before you color in your drawing!
Step 5 – Now, you can finish off the final details of your cap drawing
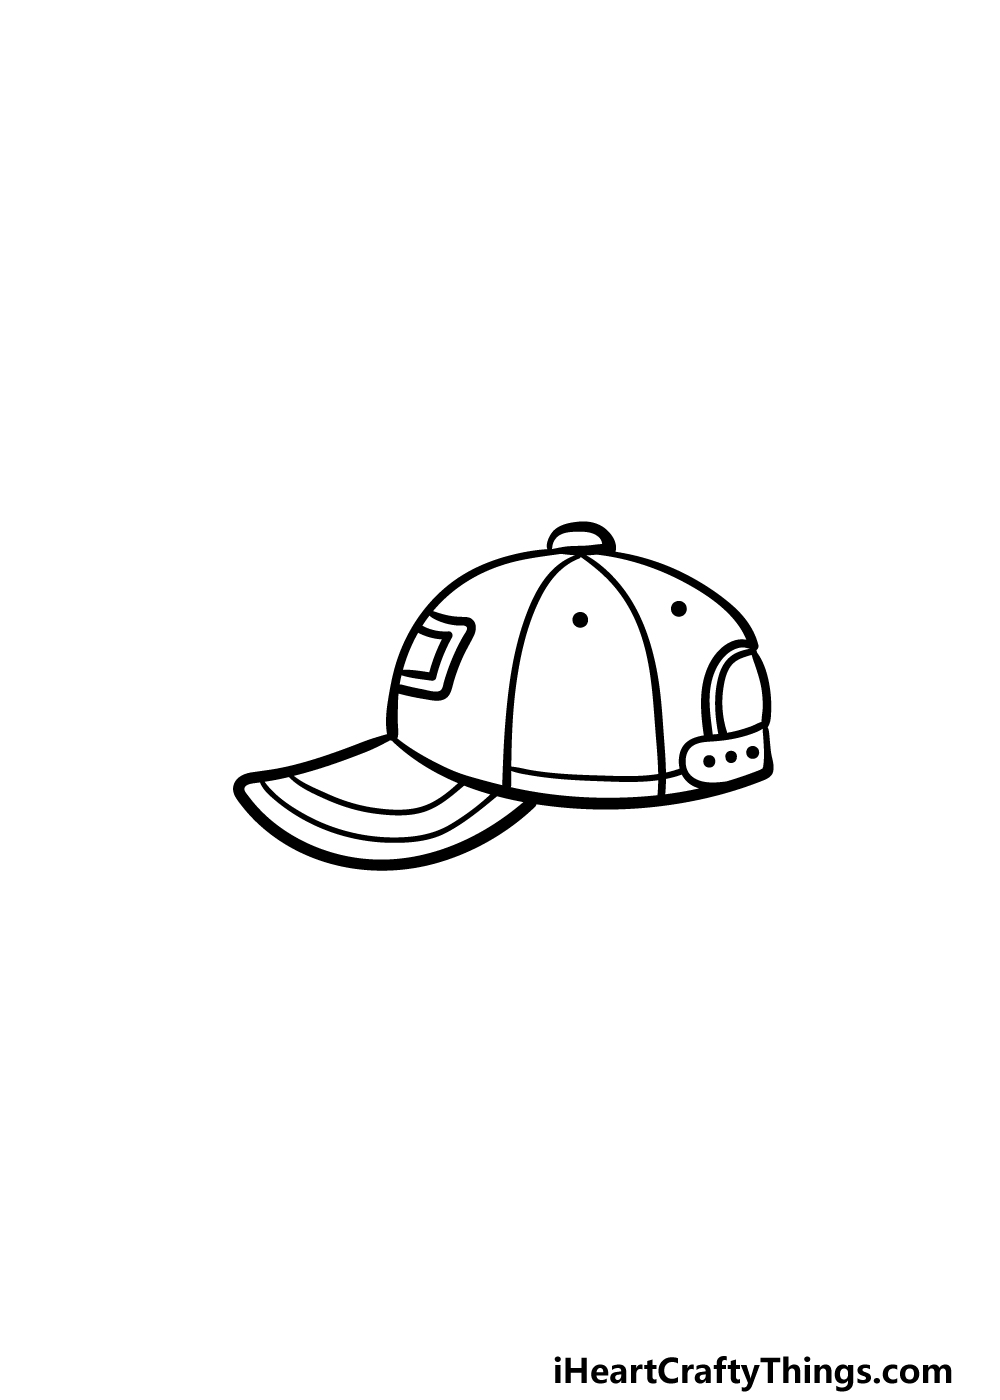
We will be coloring in your picture soon, but first we have some smaller details to add in this step of our guide on how to draw a cap.
First, you can draw some more rounded lines into the visor of the cap that you drew in the prior step.
Then, we will be adding some square shapes to the front of the cap for a badge or a logo there. With a few more lines at the base, you will have finished all the details in this guide!
Before you move on, you should feel free to add any details of your own that you may want. This is all about creating your perfect cap, so you should decorate it however you please.
You could draw some cool logos, badges or other accessories for a few ideas. You could also draw yourself wearing the cap if you’re feeling creative! What cool details and extra elements can you think of to finish off this drawing?
Step 6 – Finish off your cap drawing with some color
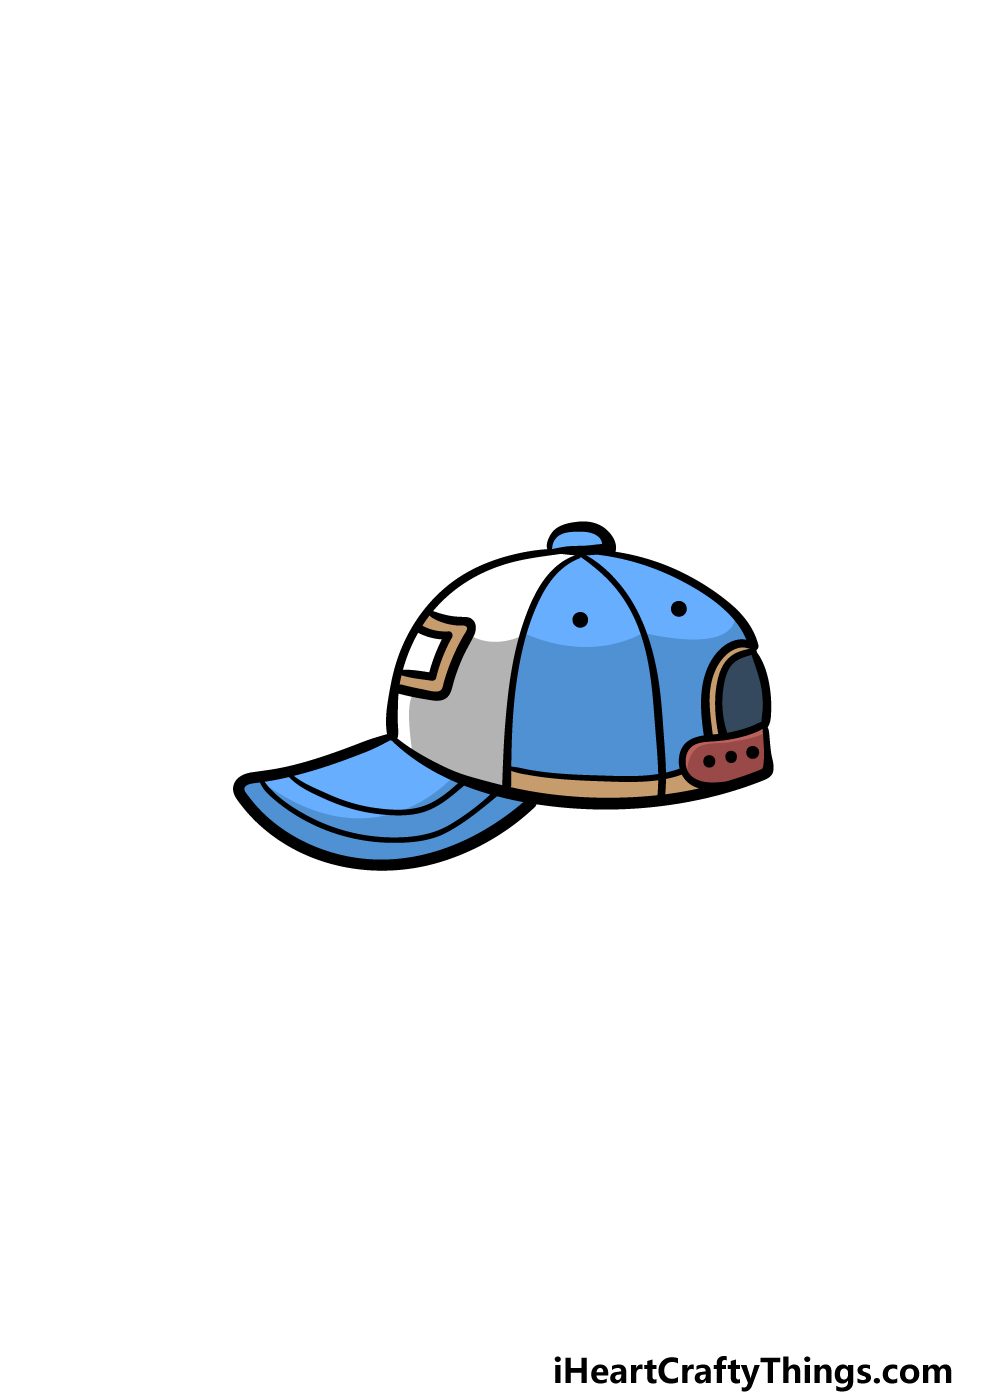
This sixth and final step of your cap drawing will be all about finishing it off with some amazing colors!
In our reference image, we showed you the colors that we would choose for this picture, but you should feel free to use any colors that you love to bring this image to life!
Caps can come in any colors you can imagine, so you have a lot of freedom with how you can color in this awesome drawing.
You can also experiment with various art mediums and tools to help bring your color choices to brilliant life. What mediums and colors will you choose to finish off this image?
3 More tips to make your cap drawing easy!
Try on these 3 tips we have for making your cap sketch even easier!
Caps can come in many styles, shapes and sizes. This drawing of a cap shows just one of the possible designs, but this may be a style that you find tricky to draw.
For example, the cap has some smaller details and sections in its design. If these kinds of details are proving tricky to draw, then you could change the style of the cap.
This could be as simple as removing the sections on the side of the cap to make the top part look more solid.
Or, you could make the cap design look simpler and more cartoony as a whale.
This could also result in a cap design that you prefer!
Next, you could also make this cap drawing easier by drawing it at a different angle. This is another tip that could not only make it easier but could also result in a style that you prefer.
For example, some people like to wear caps sideways or backward. You could draw this cap in one of those positions.
This could not only make it look even cooler, but could also be used as a way to get around drawing a part of the cap design that you are finding tricky.
What position would you like to draw this cap in?
Finally, you can take our previous tip even further by using a real-life cap to make your cap sketch even easier. Most houses have at least one cap lying around, and they can be bought cheaply if not.
Once you have a cap to use as a model, you can study the structure and details of the cap to use alongside our images in this guide. Even if the real cap isn’t a complete match to the one in the guide, it will still help.
This will be especially helpful if you do want to try and draw the cap from a different angle, as you can look at it from your chosen angle.
Your Cap Drawing is Complete!
Those final details and colors will conclude this guide on how to draw a cap!
Drawing common objects like caps can be harder than expected sometimes, so we hope that this guide made it easy and fun for you to do.
Whenever taking on a new drawing, it’s always a good idea to take it slowly and break it down into more manageable steps.
Now you can take it even further by adding some details to the cap, drawing a background or perhaps by drawing someone wearing the cap.
These are just a few ideas, so this is your chance to show us how creative you can be with it!
Then, be sure to visit us on our website as we have plenty of amazing guides for you to enjoy there! Make sure to visit often to never miss out on the new guides we upload frequently.
We would love to see how you finished off this cap drawing, so please remember to share your artwork on our Facebook and Pinterest pages.