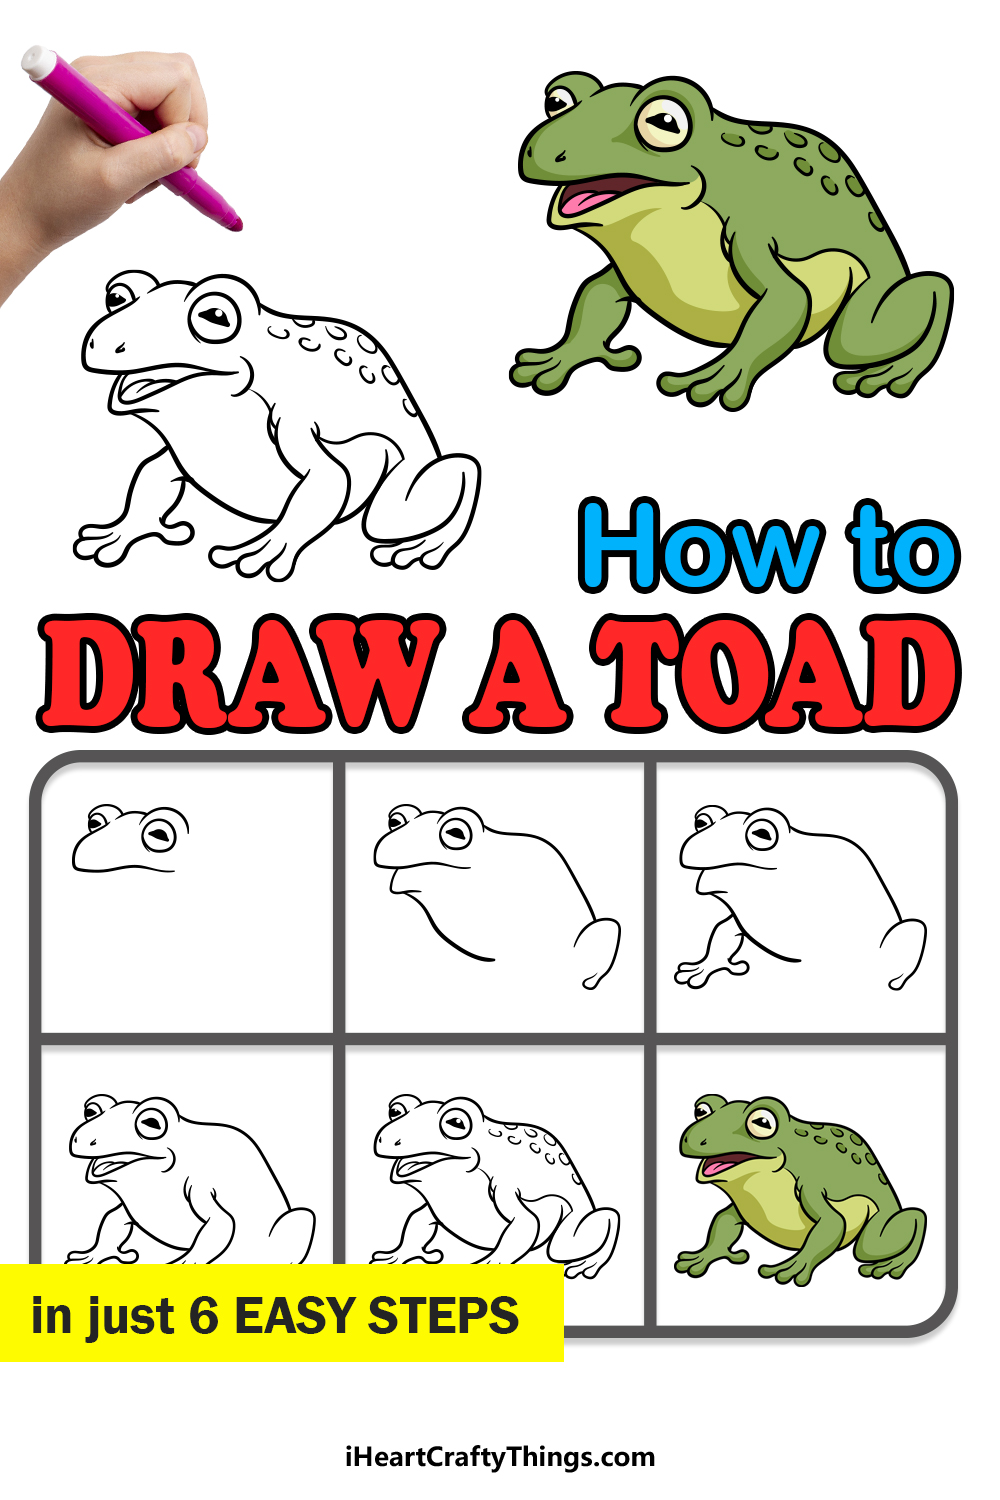
If you want to know how to draw a toad, then this guide was made for you! It’s about to become a lot easier to depict one of these fascinating creatures.
Some people think that toads are gross, but I’ve always thought they’re weirdly cute! I know I’m not alone in this, as many people love these little guys.
It’s easy to see this love, as lots of people like to try and learn to draw them. However, they may find that it’s easier said than done!
That’s why I wanted to make this guide, as it will make it simple and fun for anyone to follow. You can move through all the steps and then add your own details and background elements for the drawing.
It could be fun to draw some insects for this toad to snack on. It’s all up to you, so let’s begin.
Watch How To Make Your Toad Drawing
How to Draw A Toad – Let’s Get Started!
Step 1
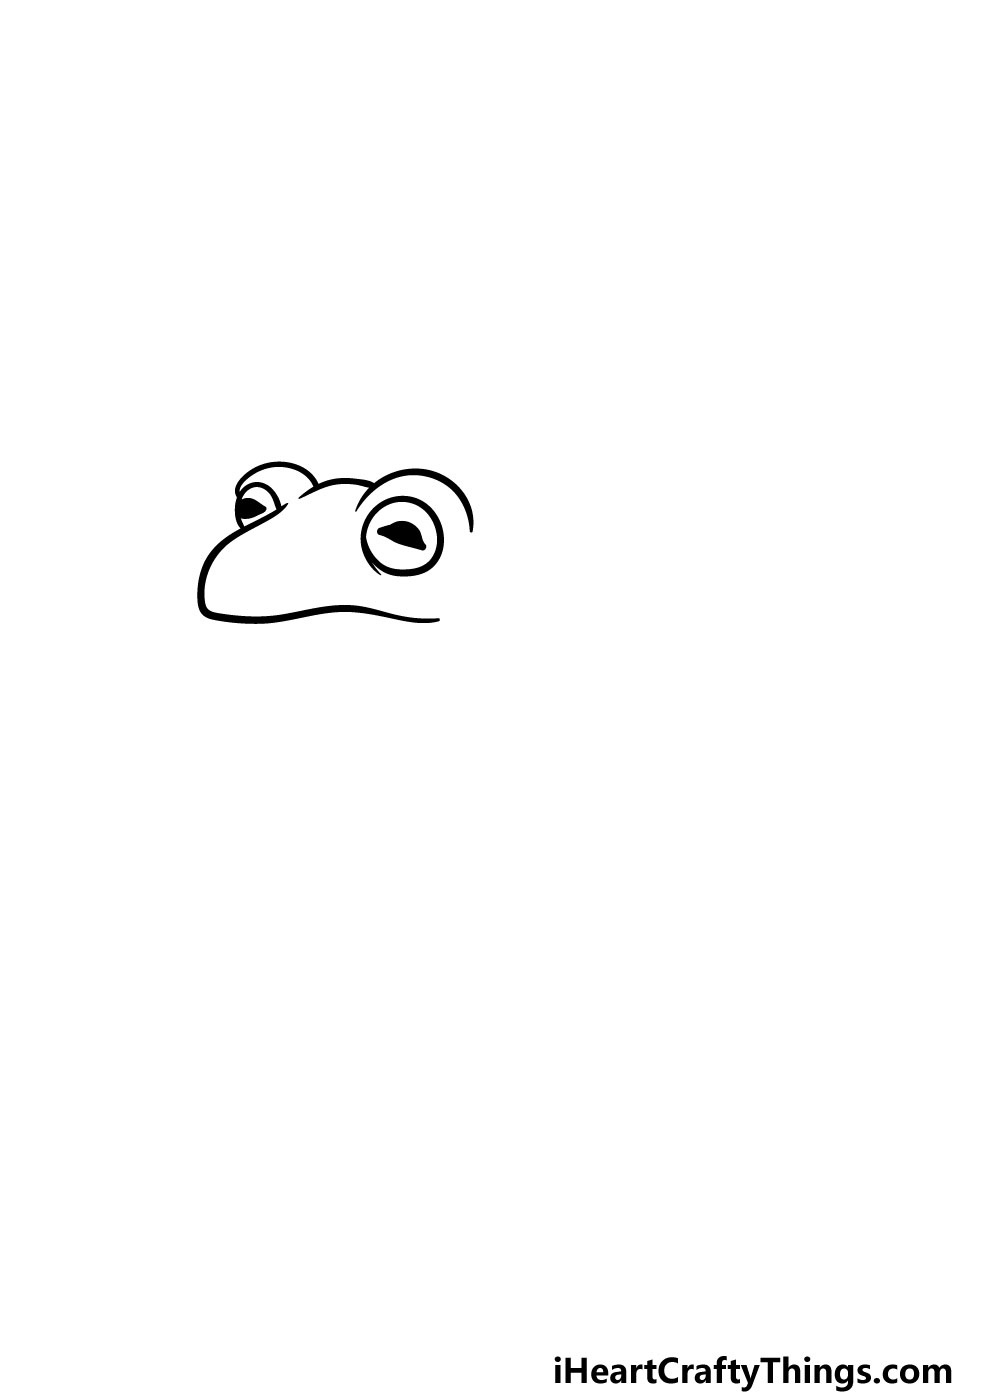
In this first step of our guide on how to draw a toad, we will be starting with the head of the toad. First, you will start with the eyes of the toad.
The one on the right will be an almost perfect circle, and there will be a shape within it that has a flat base with a rounded part in the middle.
Then, there will be a curved line over it. The other eye will be a slightly flatter circle with a similar shape within it.
This one will also have a round line around it as the first one did. Finally, you can use a curved line extending down to form the mouth of the frog.
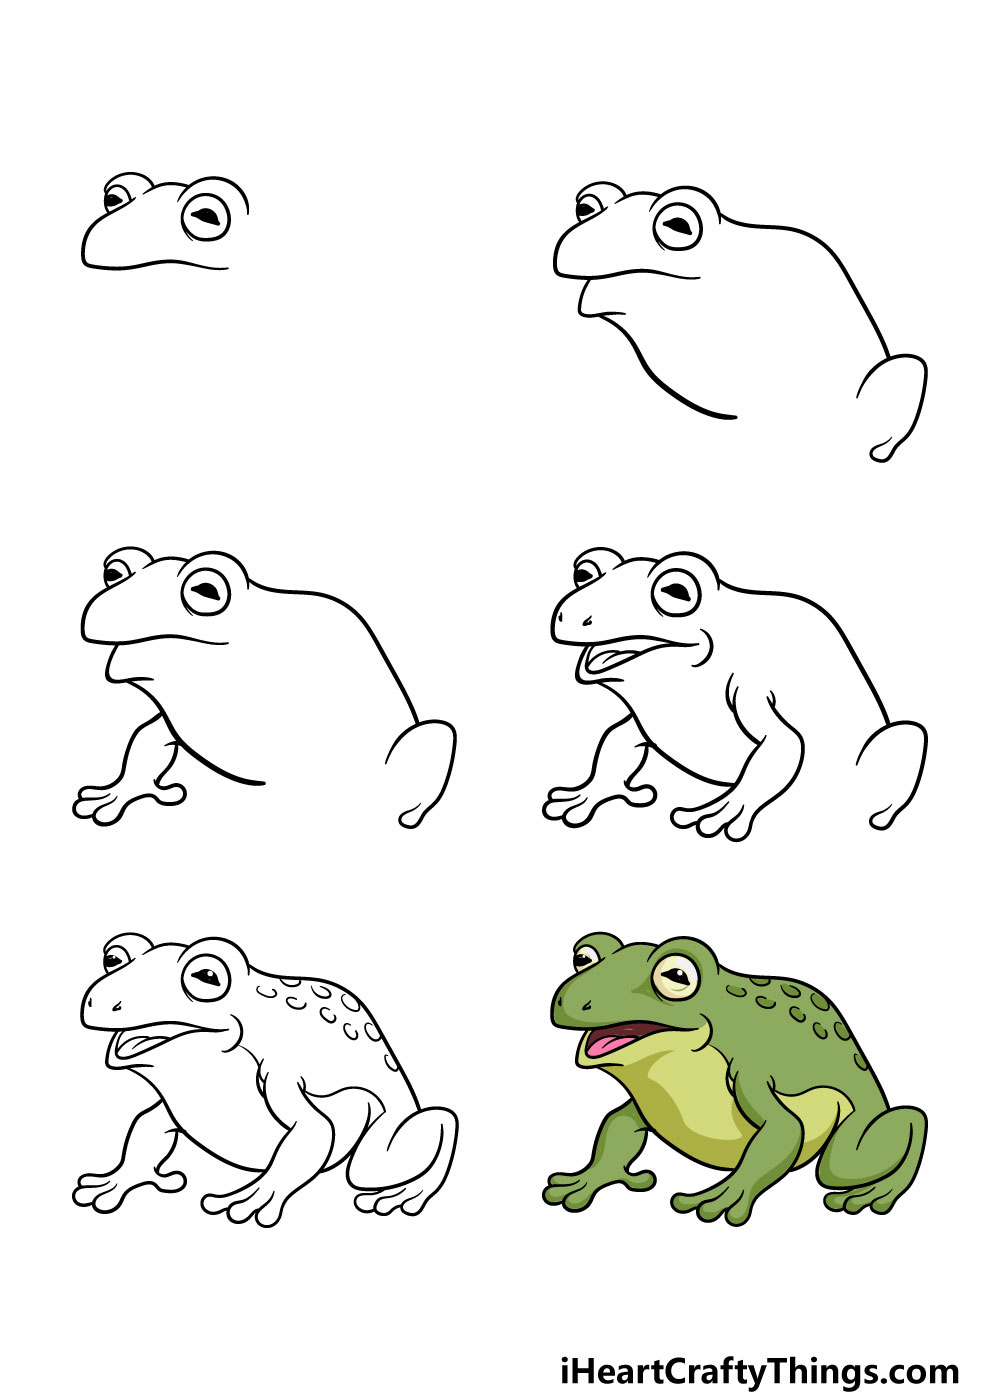
Step 2 – Continue drawing the body outline
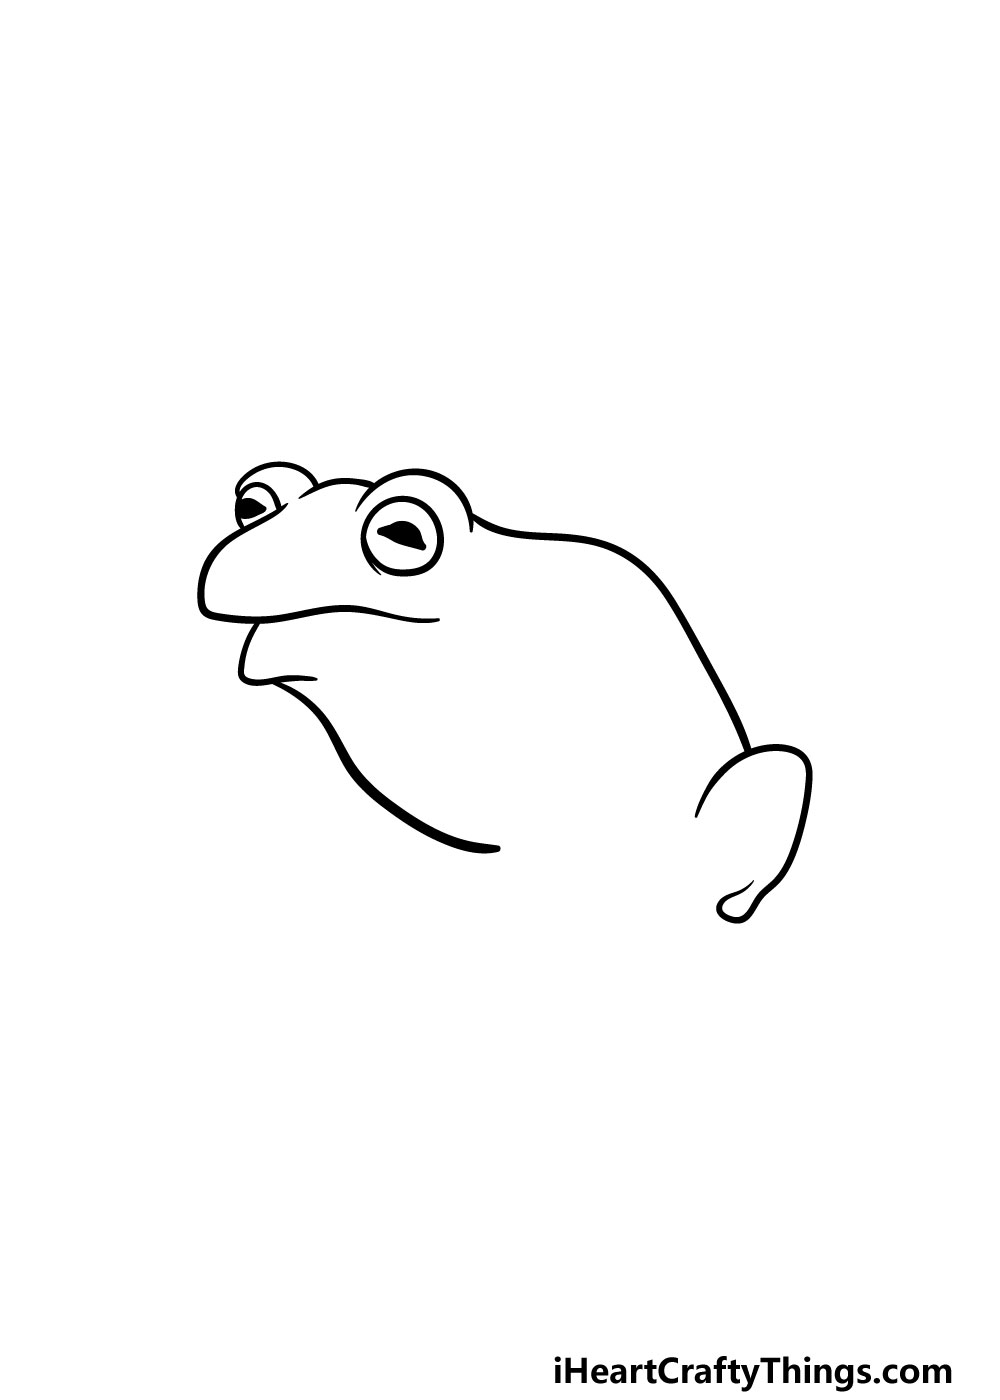
Now that you’ve started the outline of the toad’s body, you can continue to draw the body outline.
First, you can draw the bottom of the head with a sharply curved line. Then, there will be a rounded line for the belly of the toad.
Finally, you can use another curved line for the back of the toad to finish off this step.
Step 3 – Draw the first leg of the toad
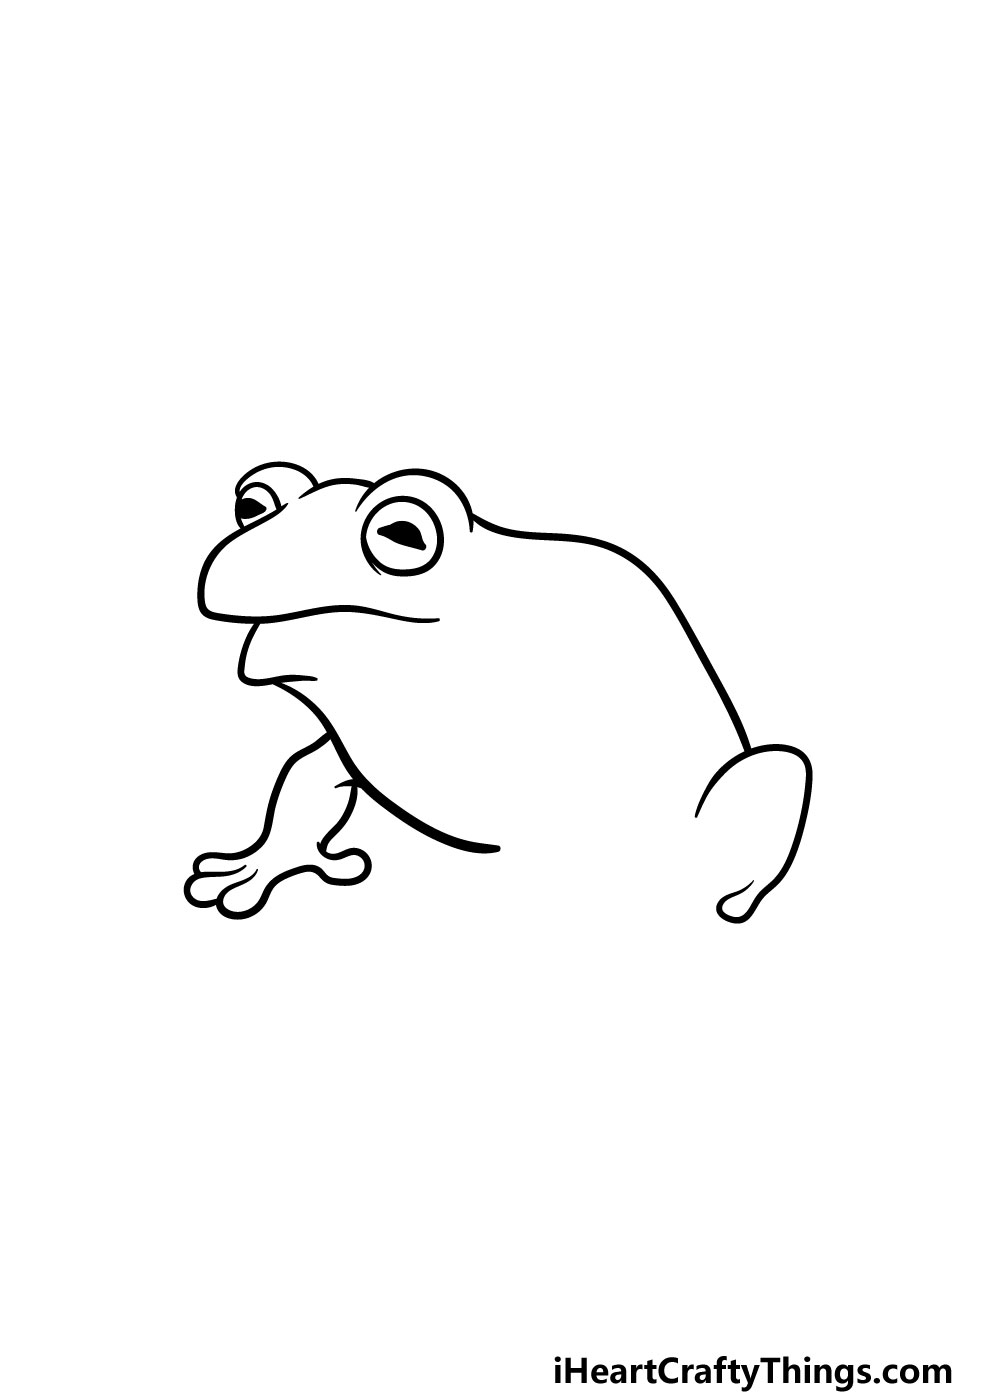
Toads have little webbed feet and legs, and we will draw the first one in this step of our guide on how to draw a toad.
This first leg will go on our left, and the leg portion will be drawn with some angular lines. Then, the feet will be drawn with three short toes with a rounded shape at the end of each one.
That’s all there is to it for that step and you’re ready to move on!
Step 4 – Now, draw the toad’s mouth and other details

In this part of your toad drawing, we will be adding several elements. First, you can draw another leg that will be on our right this time. It will look very similar to the other one, except it will be a bit thinner due to the angle.
Then, draw a curved line underneath the mouth of the frog to show that the mouth is open. You can also add a tongue there. Finally, finish off this step with some dots for the nose. With these added, we have just a few final details to add in the next step!
Step 5 – Finish off the final details
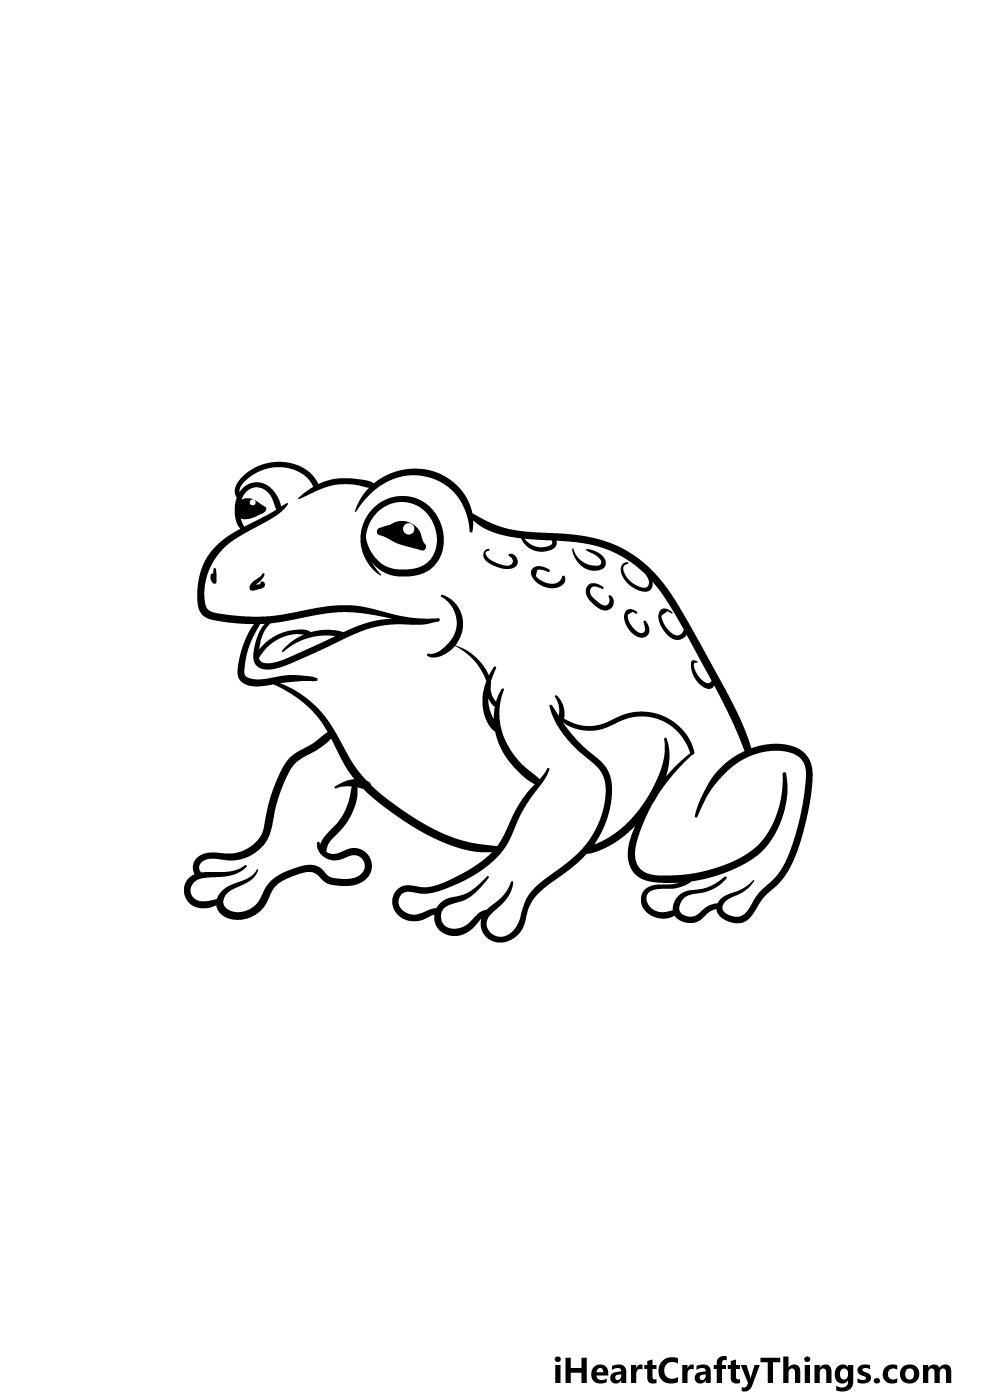
We will be adding some final details in this step of our guide on how to draw a toad! These final details will have you ready to color in your drawing for the next step.
First, you can use a curved line along the belly, as shown in our reference picture. Then, you can finish off drawing the curve of the back leg. Finally, you can then draw some spots on the back of the frog for even more detail.
That will do it for the details in this guide, but before you move on be sure to add any of your own that you may want!
Perhaps you could draw a background or add some more forest creatures that are hanging out with your toad. What creative ideas can you think of that would finish off this toad drawing nicely?
Step 6 – Finish off your toad drawing with some color
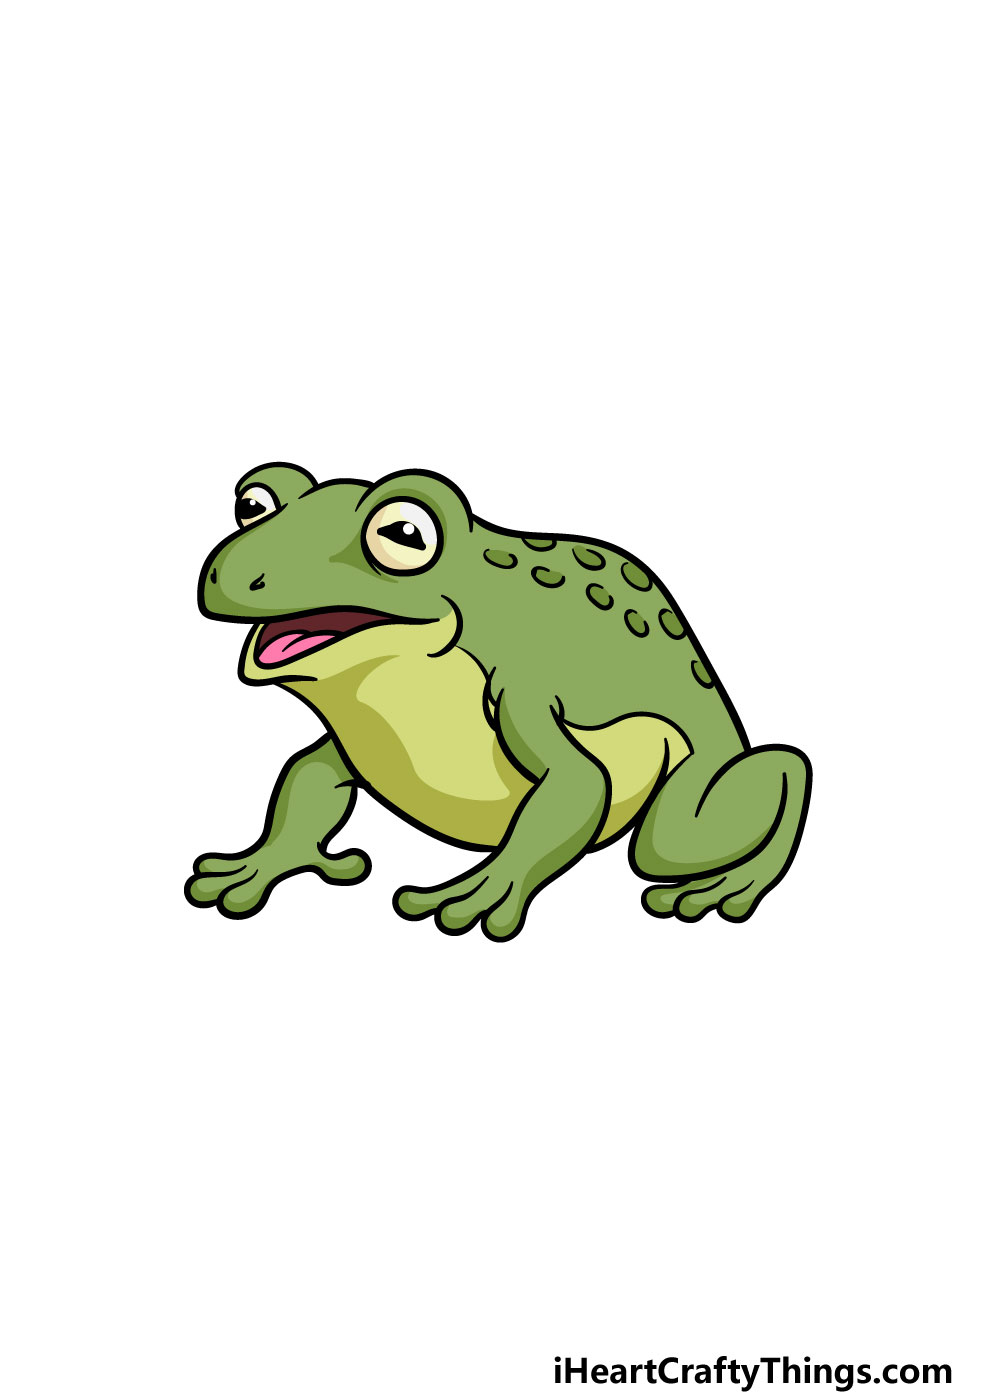
This is the final step of your toad drawing! You’ve worked hard on this picture, and now you get to relax with some coloring fun. In our example picture, we used shades of green and yellow for our toad, but these colors are just a suggestion.
Toads can come in many different colors and patterns, so you have the chance to use any colors you love to finish off this drawing.
You could keep the colors darker and more muted for one approach, or you could make this toad burst with color! Don’t forget that you can also add some color by filling in the background.
Once you know which kinds of colors you would like to go for, you can also play around with your favorite art mediums and tools!
If you’re thinking that you would like a brighter image, then you could use colored pens, markers or acrylic paints for that kind of look.
If you’re thinking of a darker color scheme, then you could use watercolors, colored pencils and crayons, for a few suggestions.
What colors and mediums will you pick to finish off this amazing drawing?
4 More Ways To Make Your Toad Drawing Unique
Hop on over for drawing fun as we show you how to make your toad drawing even better!
With this toad sketch we created together, we kept it in a fairly basic pose. You could create all kinds of fun poses for this toad to be in once you have the hang of it!
One of the more obvious poses you could portray would be to show the toad leaping. Or you could draw it shooting its tongue out to catch an unsuspecting bug.
These are just a few suggestions, but how else could you portray this toad?
A toad can come in many different shapes, sizes and patterns, so you could customize this drawing of a toad as you wish. This could include changing up the facial features, or it could be some of the patterns on its back.
Looking up photos of different toads online could give you some inspiration with creating different variations. You may even already have some favorite toad species that you could use to help you!
What are some changes you could make to this toad design?
One of the best ways to make a drawing even more unique is by adding a background. That way, even if the design of your toad drawing is identical to ours, you can make it completely unique to you.
These backgrounds could be something like a swamp or a lake, and the toad could be sitting on a lilypad. There are so many great small details you could create for this background, so what sort of setting will you use?
Then, when you have added all of your changes and extras you could bring it all together with some colors. Toads come in all sorts of different colors, so you could use any colors you like.
They typically have darker, earthier colors, but you don’t have to stick to that. Even if the colors you choose for this toad sketch are quite extravagant, they will still look cool in their own way!
Your Toad Drawing is Complete!
We really hope that this guide on how to draw a toad provided you with a lot of drawing fun! This guide was also designed to make this drawing challenge much easier, so hopefully it achieved that as well for you.
When taking on a new drawing, the best approach is always to take it step by step and have fun with it!
When you have finished this guide, the fun doesn’t have to end! We mentioned a few ways that you can take this drawing even further with your own details, so you have a lot of options.
You could draw a background, add some more details or other animals or play around with your colors and art mediums. These are just a few ideas, so have fun with it and see what happens!
You can also keep the fun going on our website, where we have tons of amazing guides for you to enjoy. Don’t forget to check in often, as we upload new ones all the time!
We would love to see your toad drawing, so once it’s finished you can share your artwork on our Facebook and Pinterest pages for us to enjoy.