The pie is one of the most varied and versatile foods you can make and enjoy! They can come in many different types, and if you have a favorite food then chances are it can be put into a pie.
Everyone has a favorite kind of pie, with some of the most popular being ones like cherry, apple or blueberry. While it can be fun to eat your favorite pie, it can also be fun to learn how to draw a pie!
By the end of this guide, you will be able to create your very own pie!
We hope that you have fun with this step-by-step guide on how to draw a pie!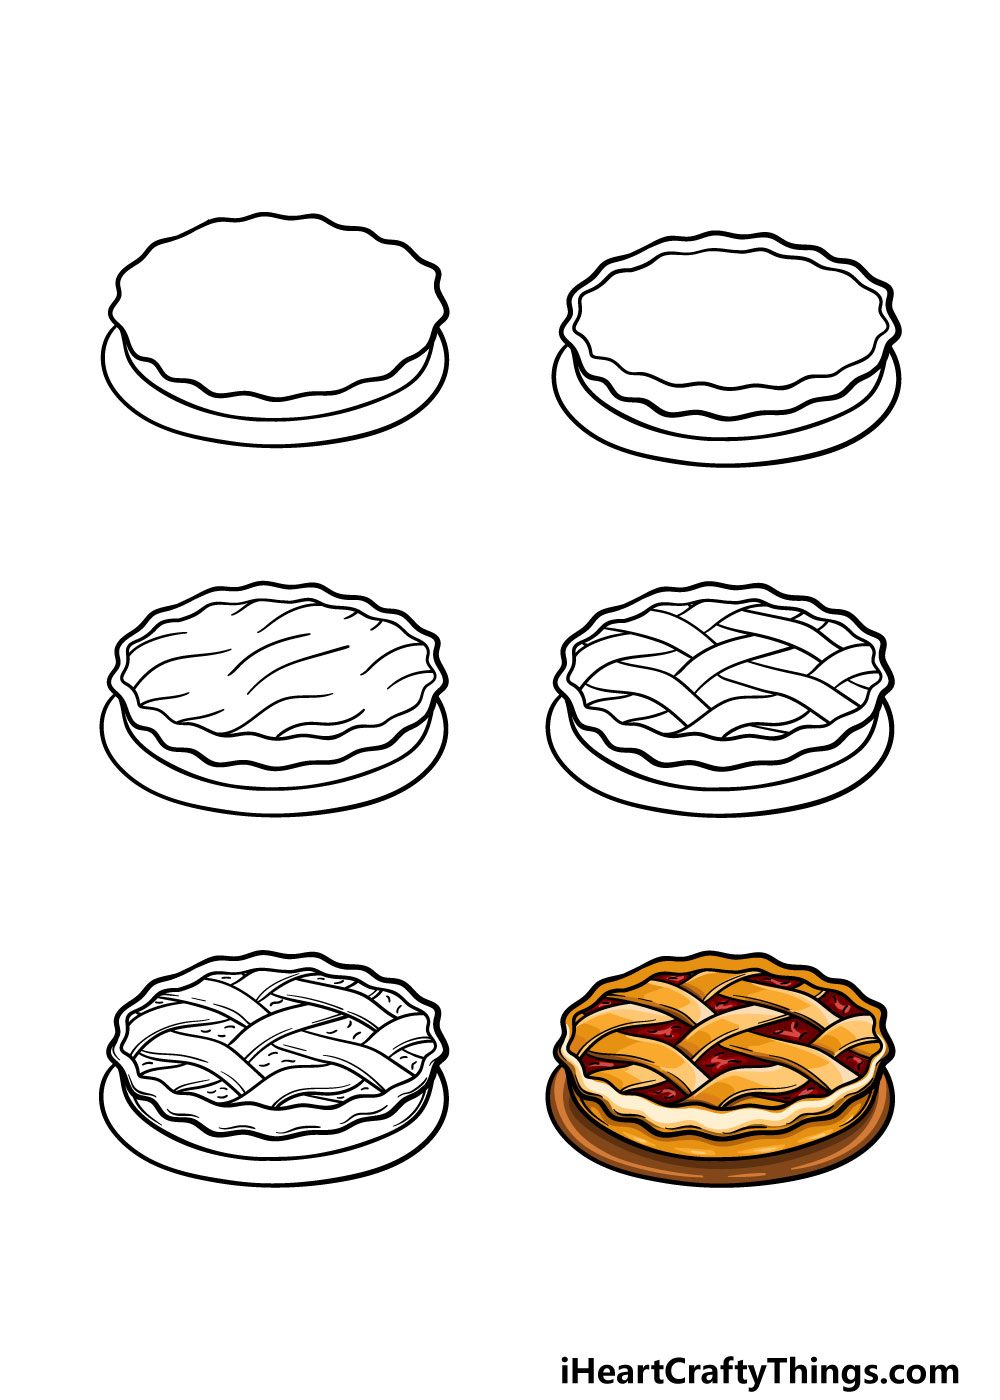
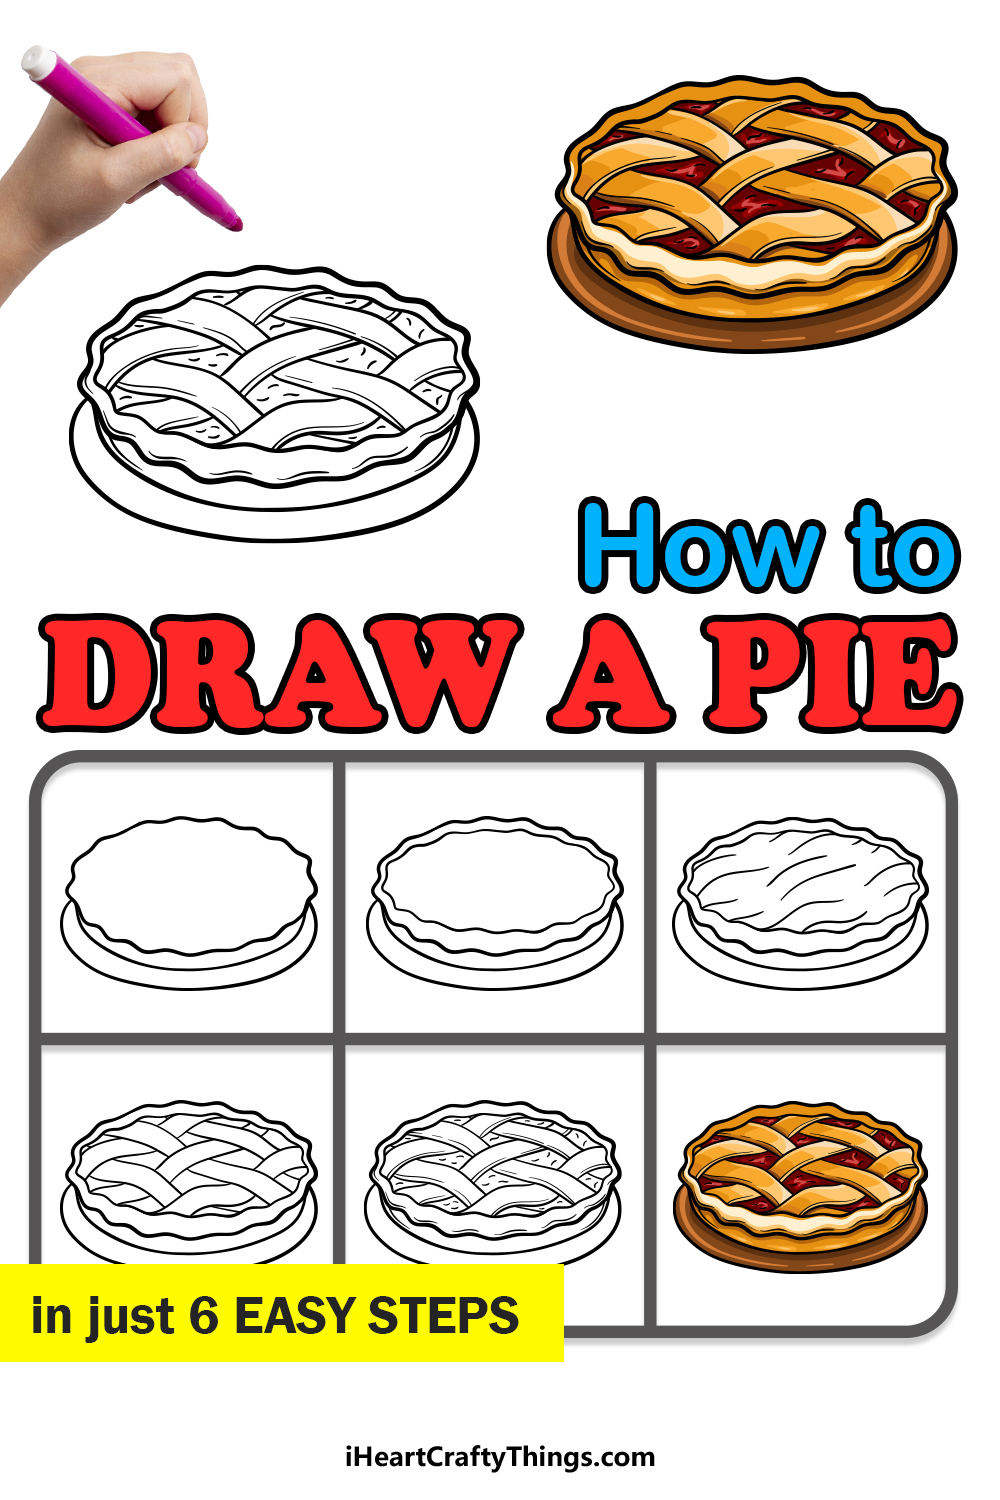
How to Draw A Pie – Let’s Get Started!
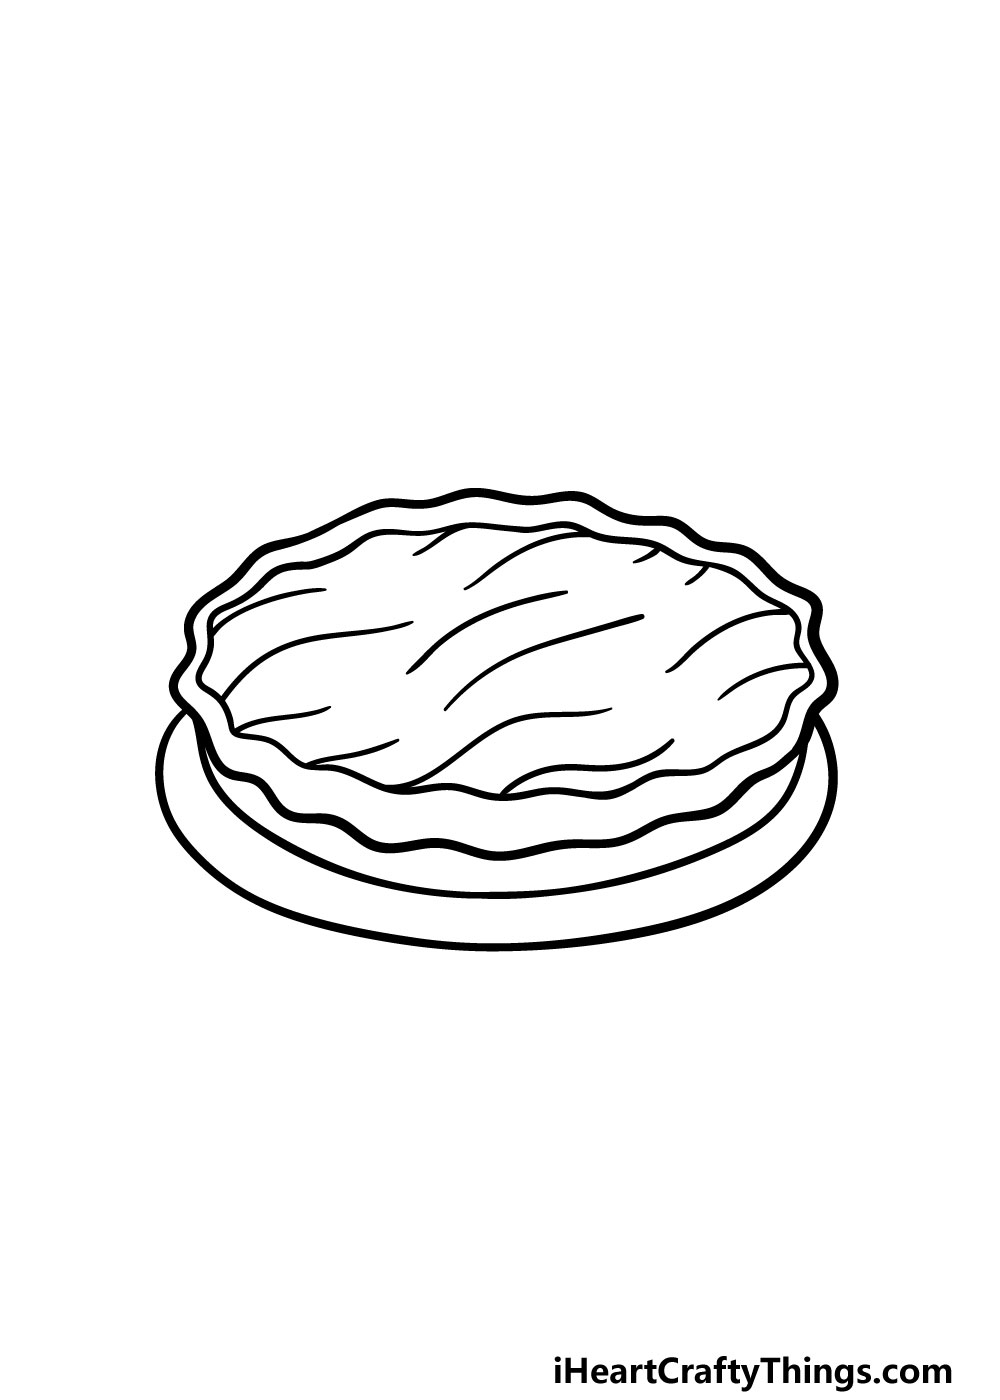
Step 1
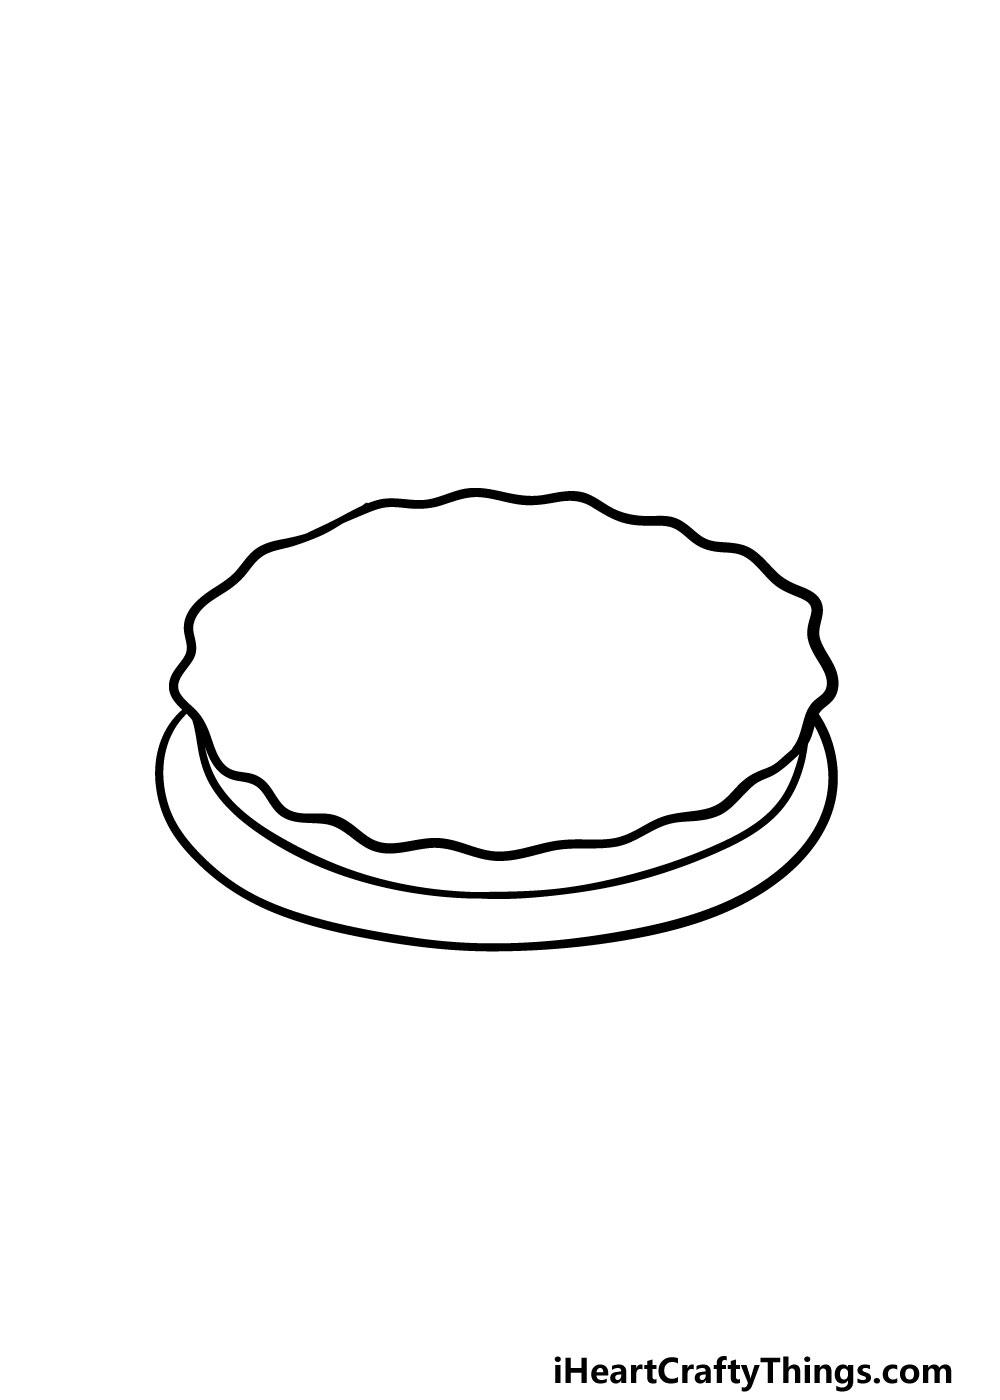
To start this guide on how to draw a pie, we will start with the outline of it. The rim of the pie will be drawn with a wavy line that forms a horizontal oval shape.
Once you have this rim, you can use a smoother curved line underneath the rim of the pie. Then, simply draw another curved line beneath that one for the plate that the pie is sitting on.
That’s all there is to it for this step, and you’re ready to proceed!
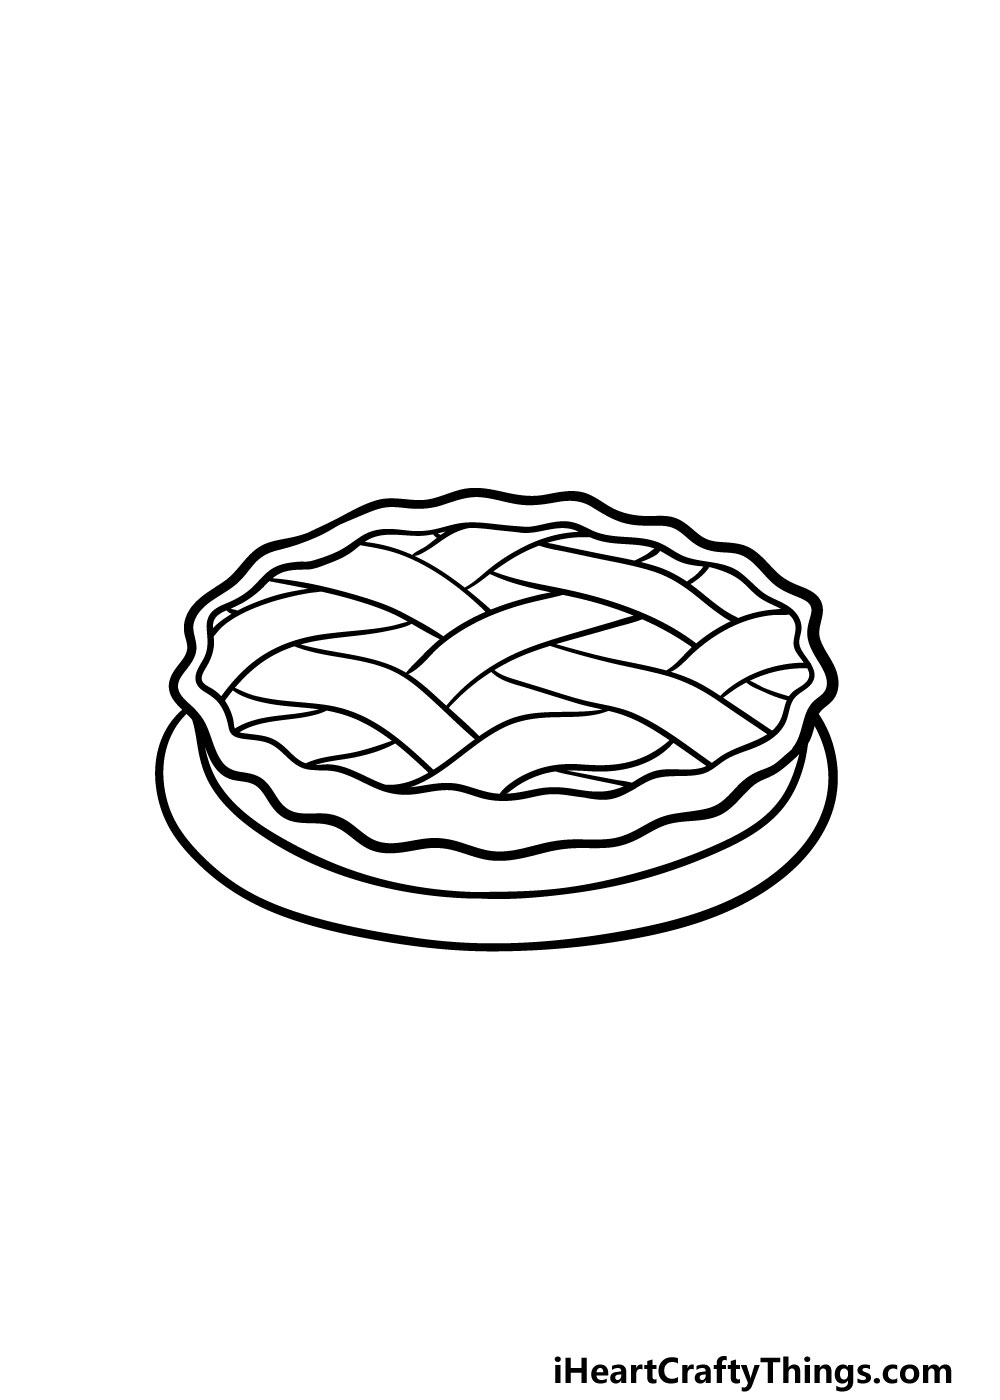
Step 2 – Draw another line inside the rim of the pie
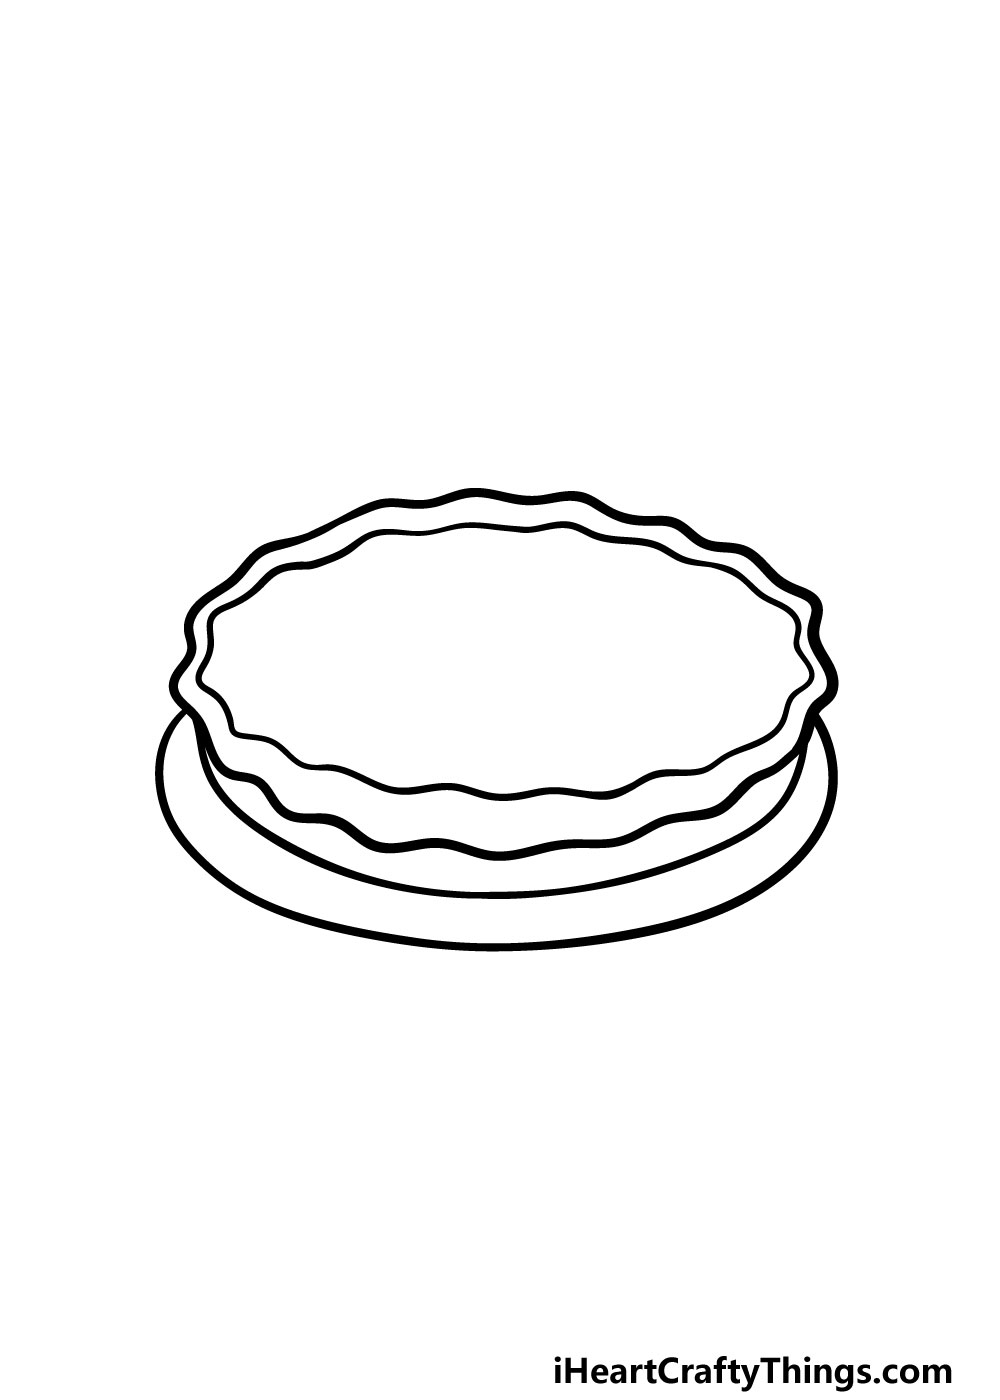
Now that you have the outline of the pie drawing done, you can draw some more of the rim to give it more depth.
To do this, simply draw a line along the perimeter of the wavy line of the rim of the pie that you drew in the previous step.
Step 3 – Next, draw some details inside of the pie
Often, pies will have a crisscrossing pattern made up of strips of dough over the top of the pie. That is what we will be drawing in this step of our guide on how to draw a pie.
To do this, we will be adding some curved lines going diagonally across the pie. For this step and the next one, you may want to draw with a pencil first, as the pattern can be a bit tricky to draw!
Drawing with a pencil can make it easier, as you don’t have to worry about making mistakes or getting it right the first time. We will be finishing off the pattern in the next step.
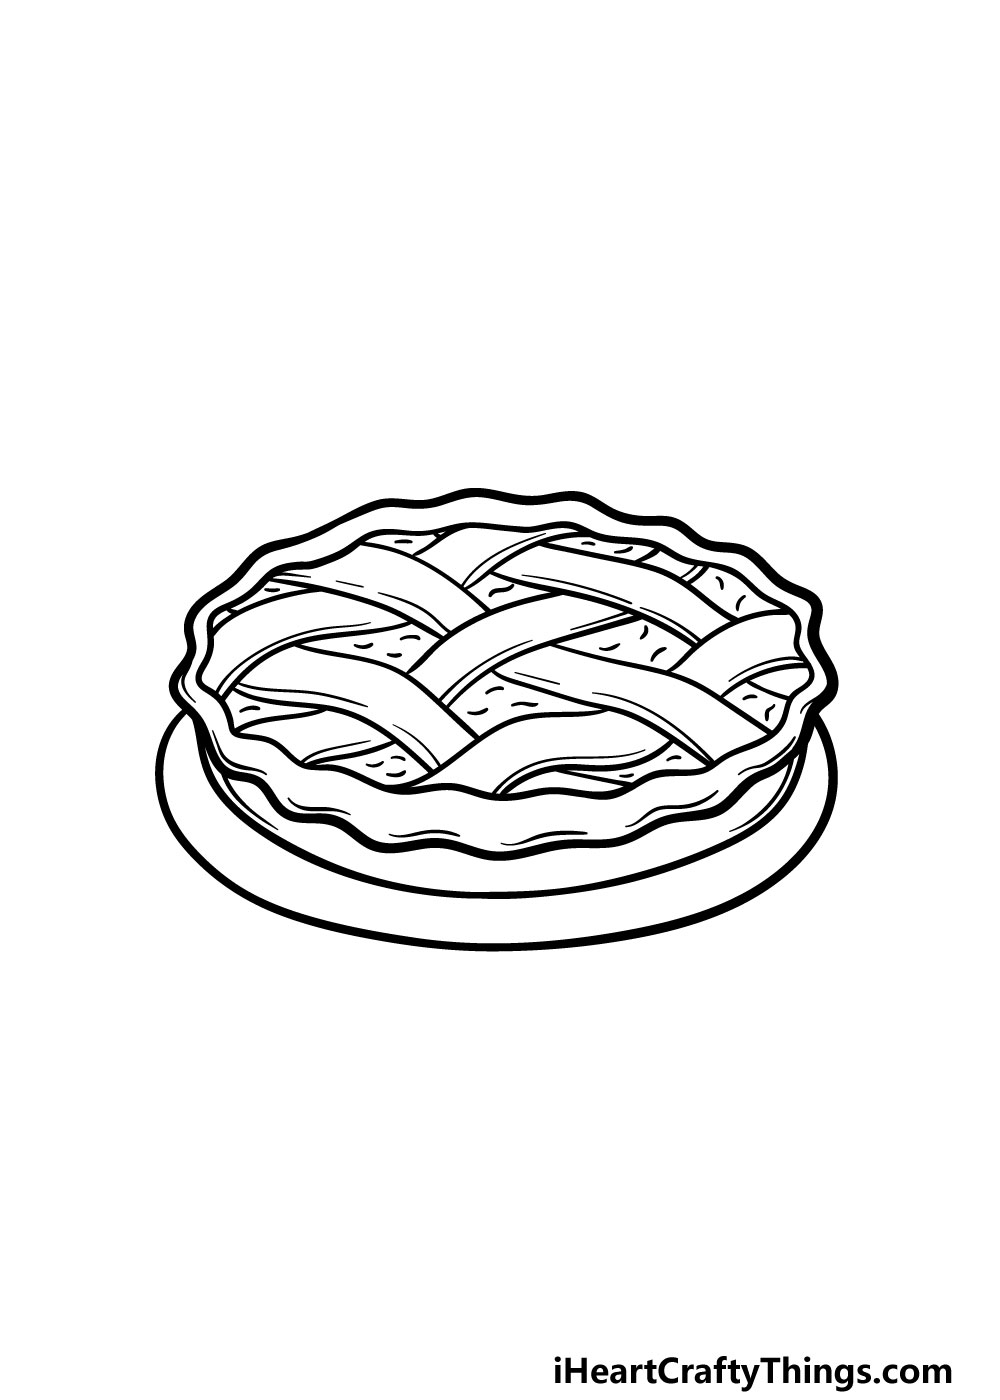
Step 4 – Finish off the pattern on top of the pie
This step of your pie drawing will see you finishing off the crisscross pattern that you started in the previous step.
To finish off this pattern, you will use some wavy horizontal lines across the pie to close the gaps of the pattern.
Once you have finished these lines, there are a few more details to add before the final step.
Step 5 – Now, you can finish off the final details of your pie drawing
You’re almost ready to finish off this guide on how to draw a pie with some amazing colors, but first we have a few final details to draw.
You will be drawing some lines throughout the pie in order to give it some more detail. First, add some lines along the outline of the rim. Then, you can draw some lines across the dough patterns that are on top of the pie.
Then, you can finish off the details by adding some small lines between the lines of dough for texture on the filling of the pie.
That will do it for the details in this guide, but you should feel free to add any details of your own that you may like!
There are many ideas that you could go for in order to personalize this drawing. You could draw your favorite beverage next to the pie in order to show what you would be enjoying with this delicious pie!
You could also add some toppings onto it, or maybe even draw it so that it looks like a slice has been taken out of it.
These are just a few of many ideas that you could do, so what else can you think of to put your own spin on this drawing?
Step 6 – Finish off your pie drawing with some color
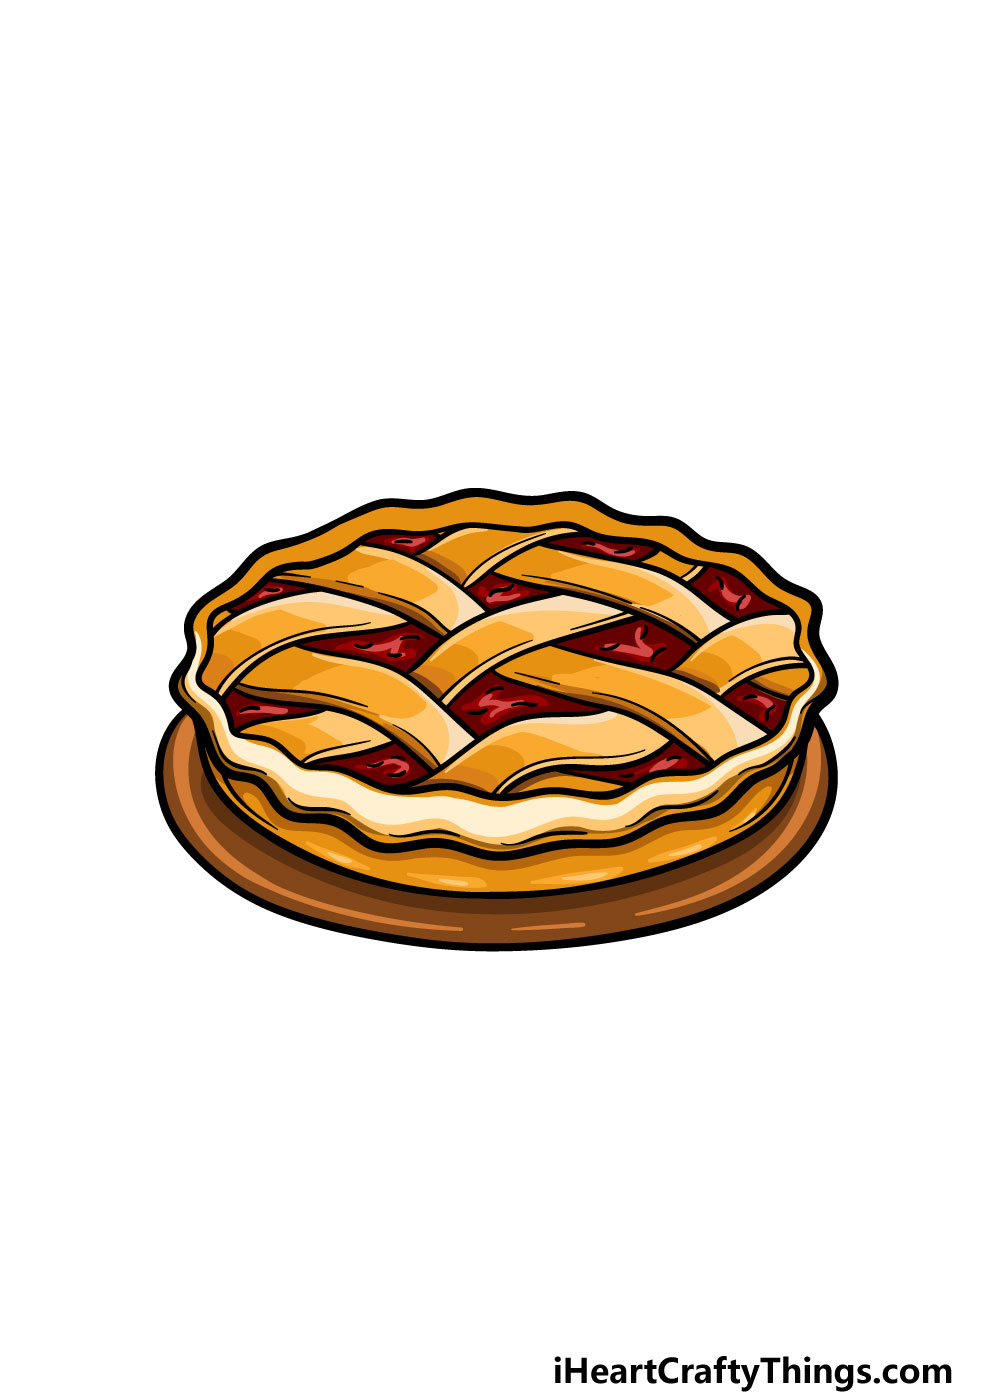
In this final step of your pie drawing, we will be finishing off your amazing drawing with some colors! In our reference image, we showed you one way that you could color in this pie.
We used some orange and yellow for the pastry of the pie and used some shades of red for the filling.
This would suggest that this is maybe something like a cherry pie, but as we mentioned earlier there are many different kinds of pie that it could be!
Using just your colors, you could create a different kind of pie with how you do the filling. For example, you could use blue and purple for a blueberry pie or some brown for a pecan pie.
It’s completely up to you, and you can try to make this drawing look like your own favorite pie.
Once you know what colors you would like to use, you can also have fun choosing which art mediums and tools would be best for bringing the colors to life.
We can’t wait to see what colors and mediums you choose for your image!
5 Tips To Make Your Pie Drawing Even Better!
Make a tasty artwork with these tips for this pie sketch!
We all love to enjoy a delicious pie, but they can come in so many different forms! The one we drew in this pie drawing shows one of these forms.
The pie has several layers of dough crisscrossed over the top to create a distinctive look for the top.
Some pies have solid tops instead, and it all depends on what pie you would like.
What kind of pie form will you show off?
The way a pie looks is just one way that it can be different. The flavor of the pie is another, and you could show what that could be in this drawing of a pie!
We can’t see inside of the pie, but you could show a hint by having the fruit next to it. For example, you could have some blueberries or maybe cherries sitting beside the pie.
What flavor do you think this pie could be?
You can tell a bit of a story visually with just a few small details added to the pie. For example, you could show that several people have been enjoying the pie by having a few slices cut out.
This is just one idea for how you could give this pie some more character!
Another thing that would make this pie sketch even better would be if you added different treats next to it. There are many types of food and beverages that people like to enjoy with pie!
This could be a bowl of ice cream, a plate of cookies or maybe a glass of warm milk. What else would you like to have with this pie?
To finish it all off, you could then draw a background to cap off this pie drawing. This could be someone’s kitchen or maybe on a blanket for a nice picnic.
You may have some other places you would like to enjoy a pie occasion, so you could show us where that would be in this image!
Your Pie Drawing is Complete!
With the final details and colors added, you have reached the end of this guide on how to draw a pie! We hope that this guide showed you that it can be not only easy but also fun to draw a pie.
The pattern on top of the pie can be a bit tricky, but by following the guide we know you will be able to do it.
Now you can take this drawing even further with your own details and elements. We mentioned a few ideas that you could try earlier in the guide, but we look forward to seeing what creative ideas you can come up with!
Our website is full of incredible drawing guides covering many different topics and subjects! Be sure to visit us there for your next drawing challenge, and we upload new ones frequently as well.
We would love to see your delicious pie drawing once it’s done! When it’s ready, we hope that you will share it on our Facebook and Pinterest pages for us to enjoy.