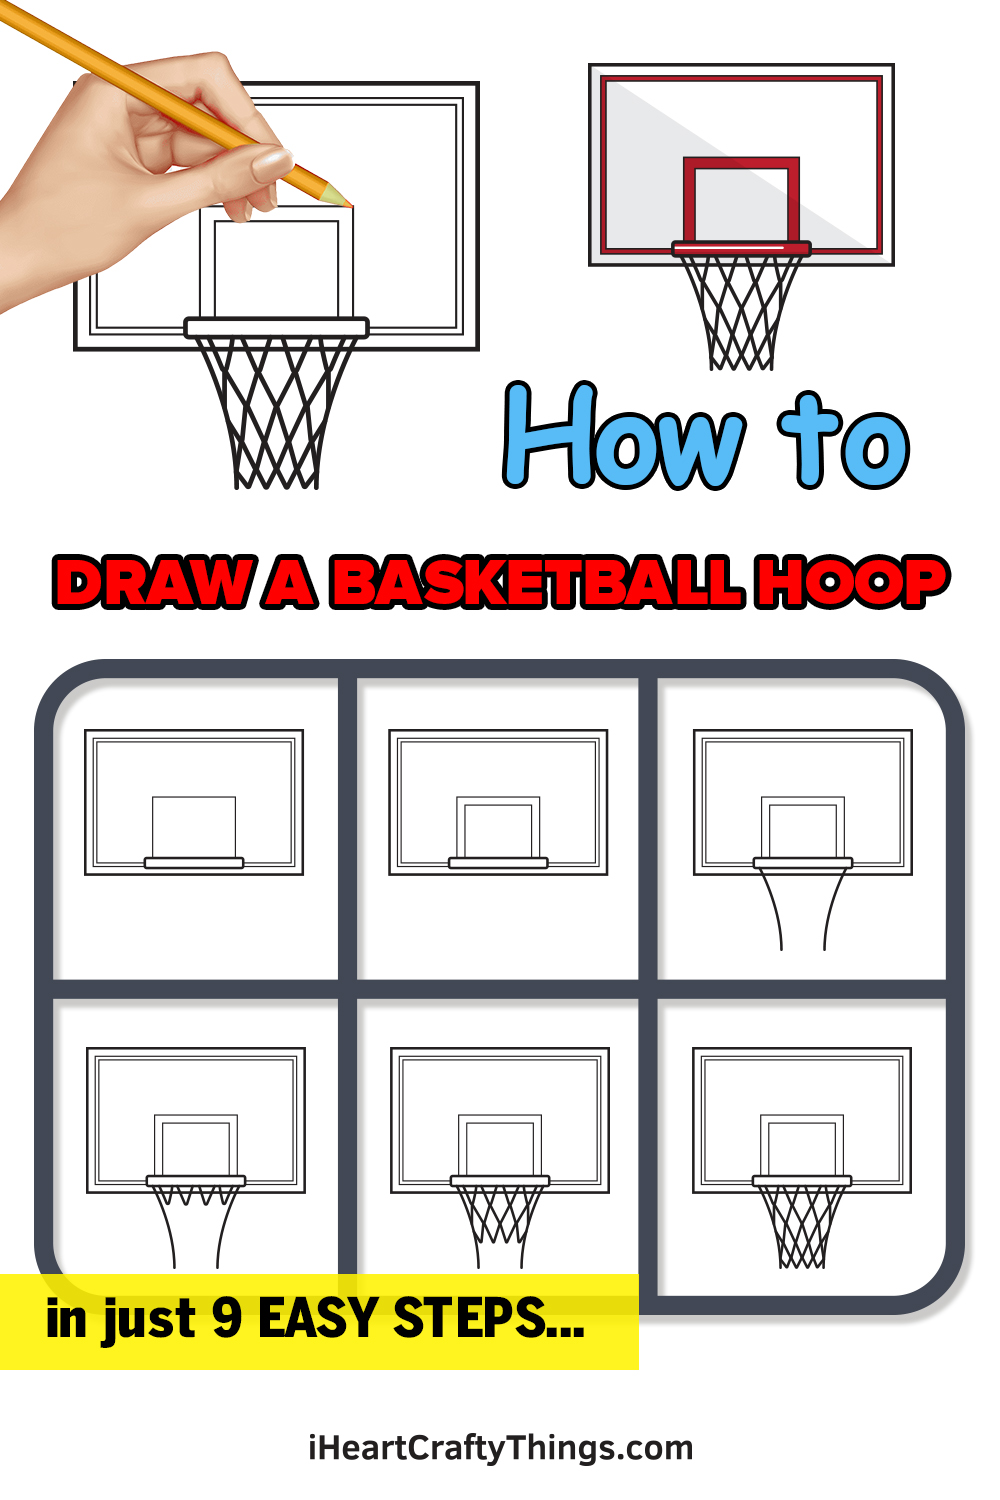
Discover the easiest way to learn how to draw a basketball hoop! You can really get your head in the game when you follow this tutorial for kids.
Basketball is one of the most popular sports in the world. People love to watch and play it, but in order to do either of those things you will need some basketball hoops.
If you don’t have access to one right now, then you can always draw your own! Even if you’re very familiar with the sport, you may find that it’s harder than you thought to draw this famous hoop.
Worry not though, as that’s why I made this guide! I will show you the best and easiest way to make your drawing in a way that’s intuitive.
So grab your favorite drawing tools, as we’re about to begin.
See How To Make Your Basketball Hoop Drawing
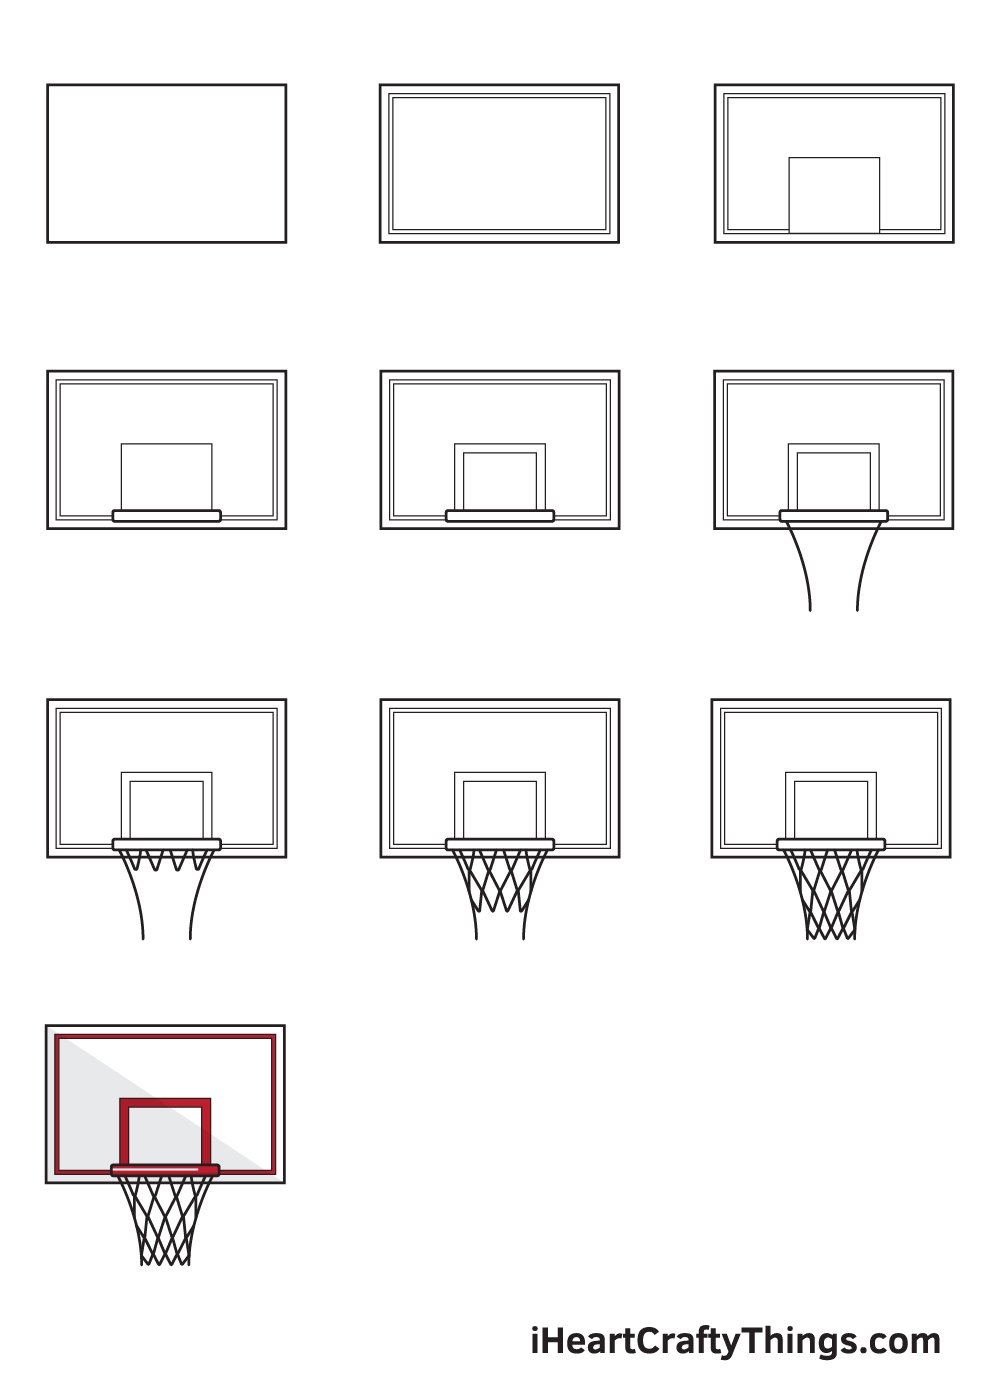
How to Draw a Basketball Hoop – Let’s get started!
Step 1
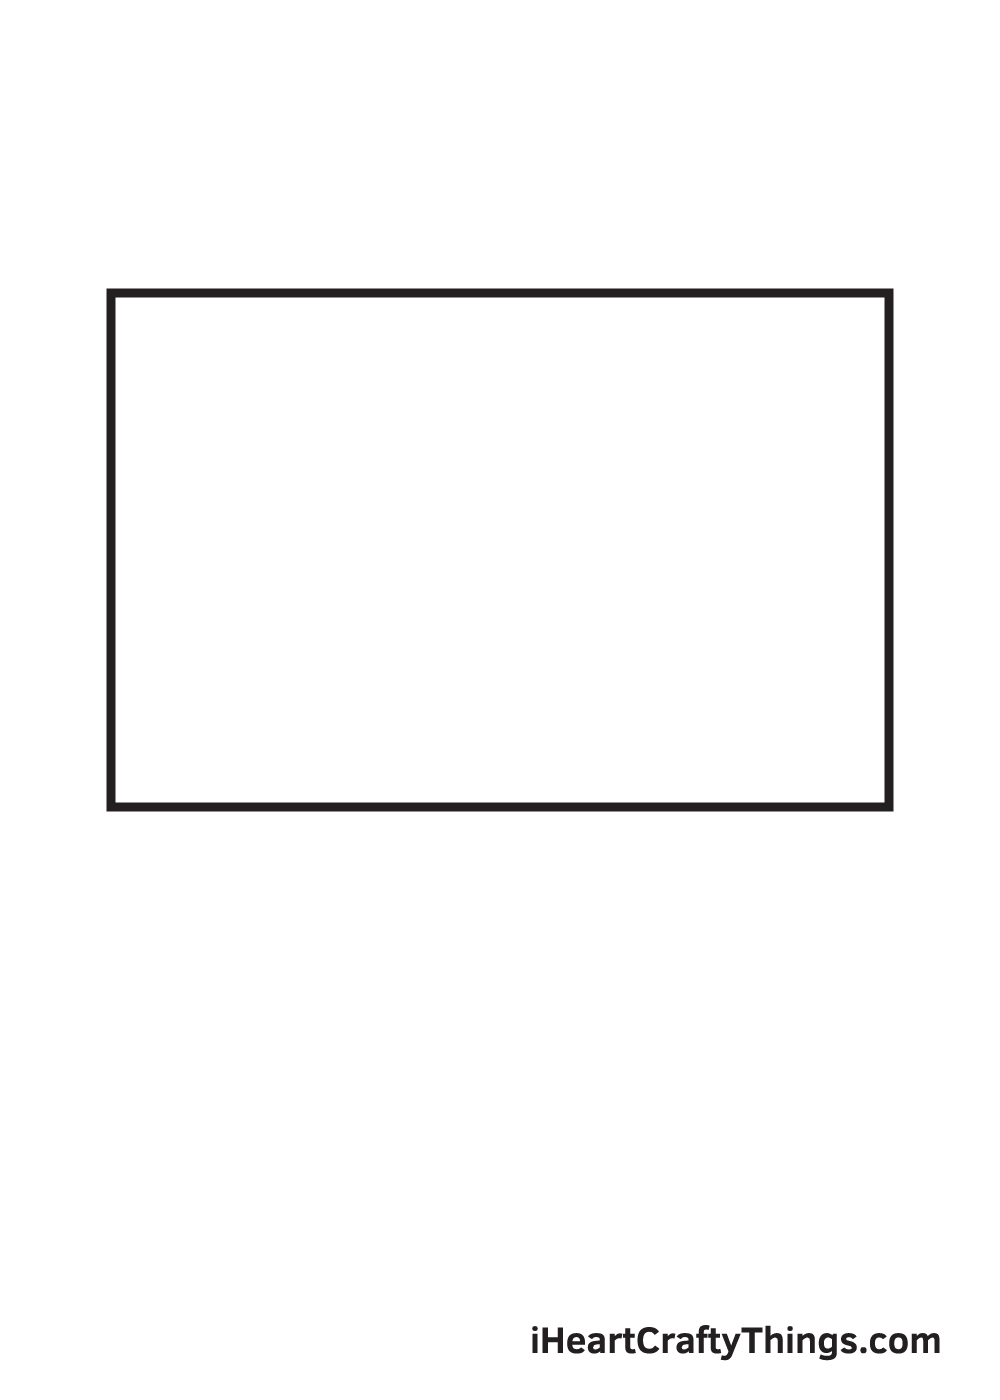
Begin by drawing a rectangular shape. This creates an outline of the backboard’s shape.
A basketball hoop primarily consists of straight lines. So, you may need to use a ruler to help you draw straight lines quickly and easily.
Step 2 – Create the Backboard
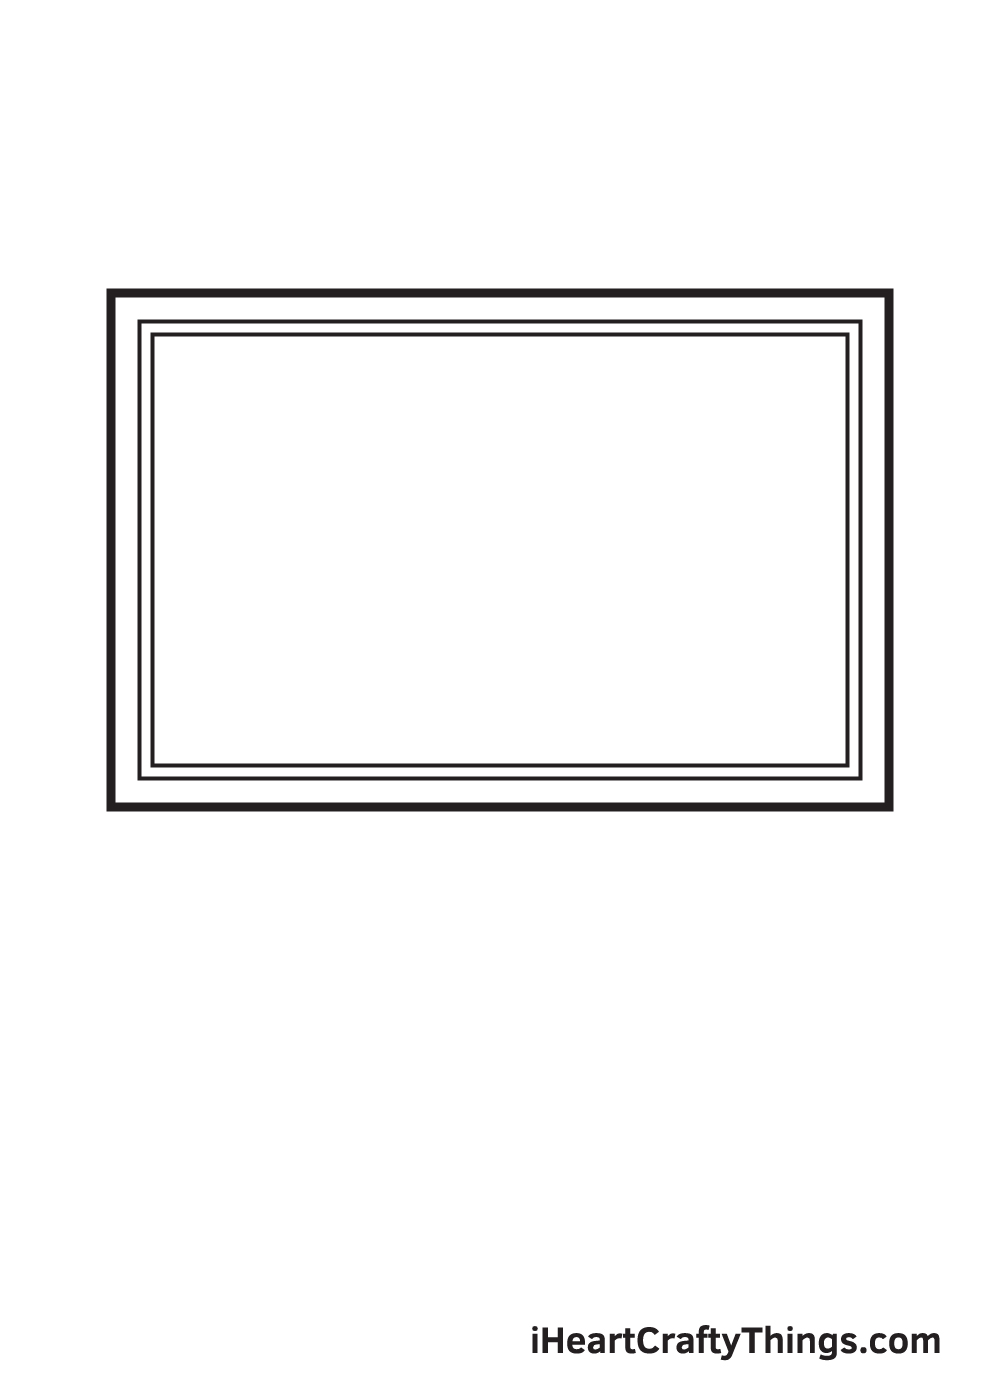
Draw an outline inside the backboard following its rectangular shape. Then, inside the outline, draw a smaller outline with a similar form.
When drawn correctly, this should form a parallel rectangle shape within the backboard. This adds an extra detail on the backboard.
Step 3 – Draw the Backboard’s Details
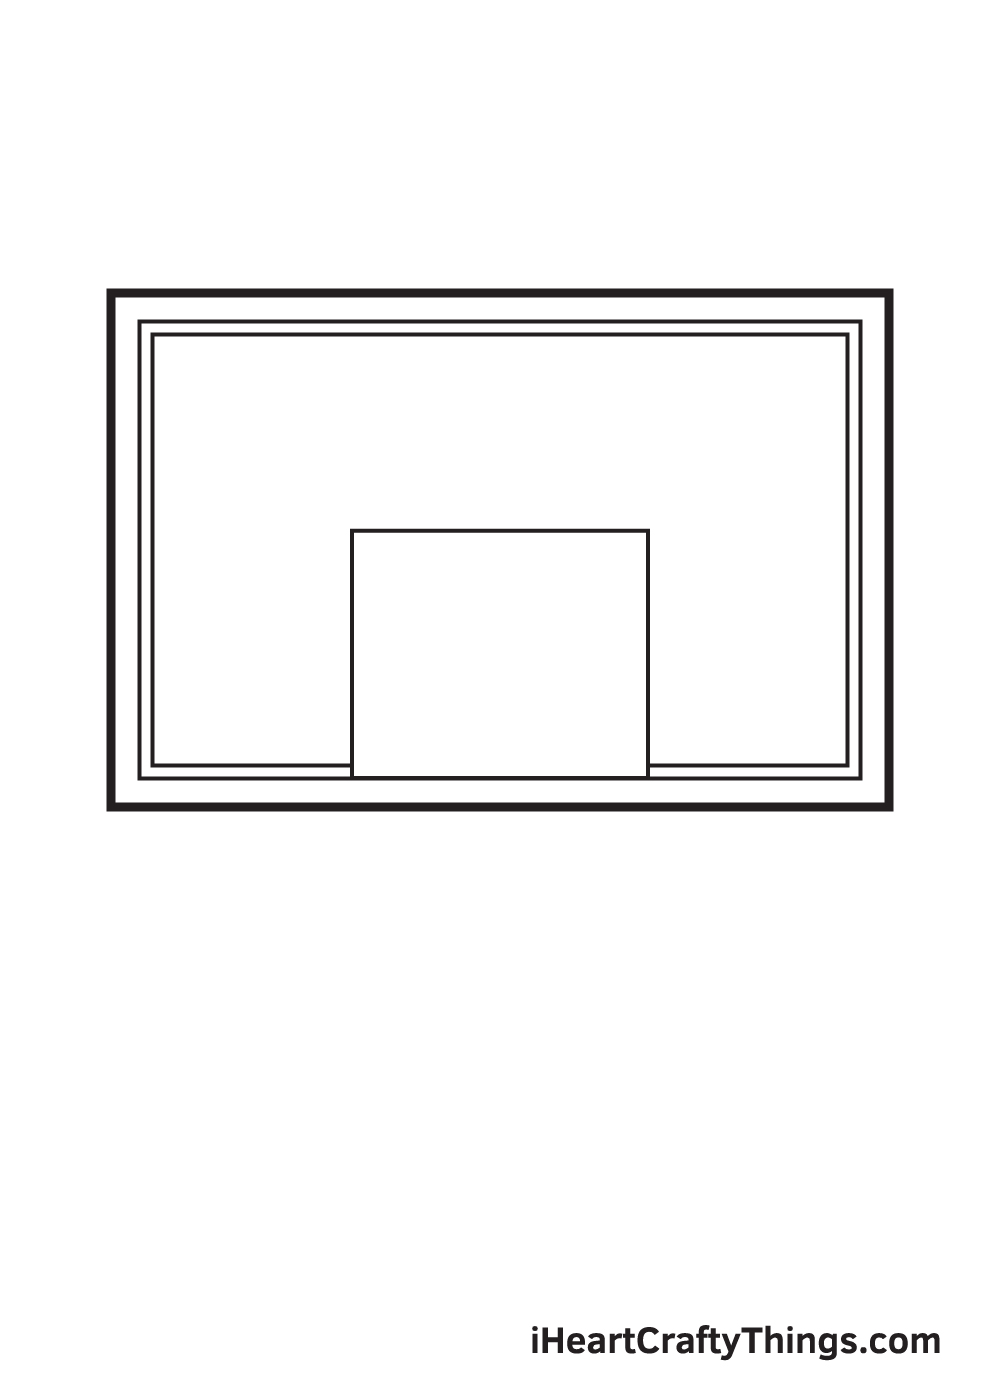
Draw a symmetrical square shape on the bottom middle of the backboard. This outlines the square-shaped opening right above the hoop, which we will be drawing later on.
Don’t forget to erase the part of the outline that overlaps inside the square shape! This helps keep your drawing polished and refined.
Step 4 – Draw the Hoop or the Rim
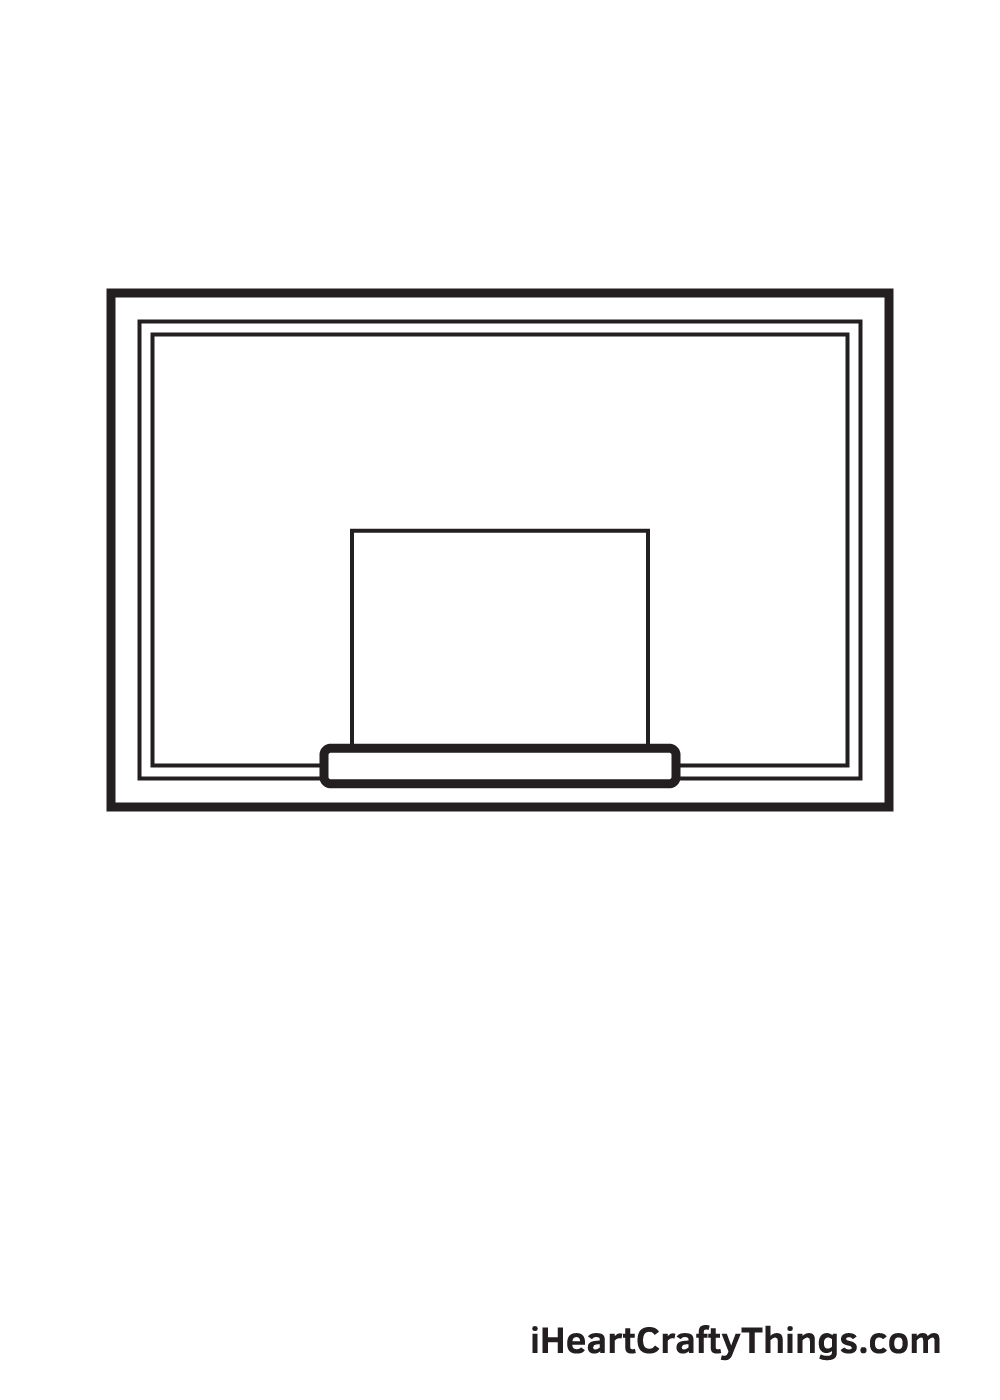
Draw an elongated sideways rectangular shape at the bottom of the square that we drew in the previous step.
This forms the hoop or the rim, which is where basketball players try to shoot the ball through.
Make sure that the rectangle is a bit wider than the width of the square shape.
Step 5 – Draw a Space on the Backboard
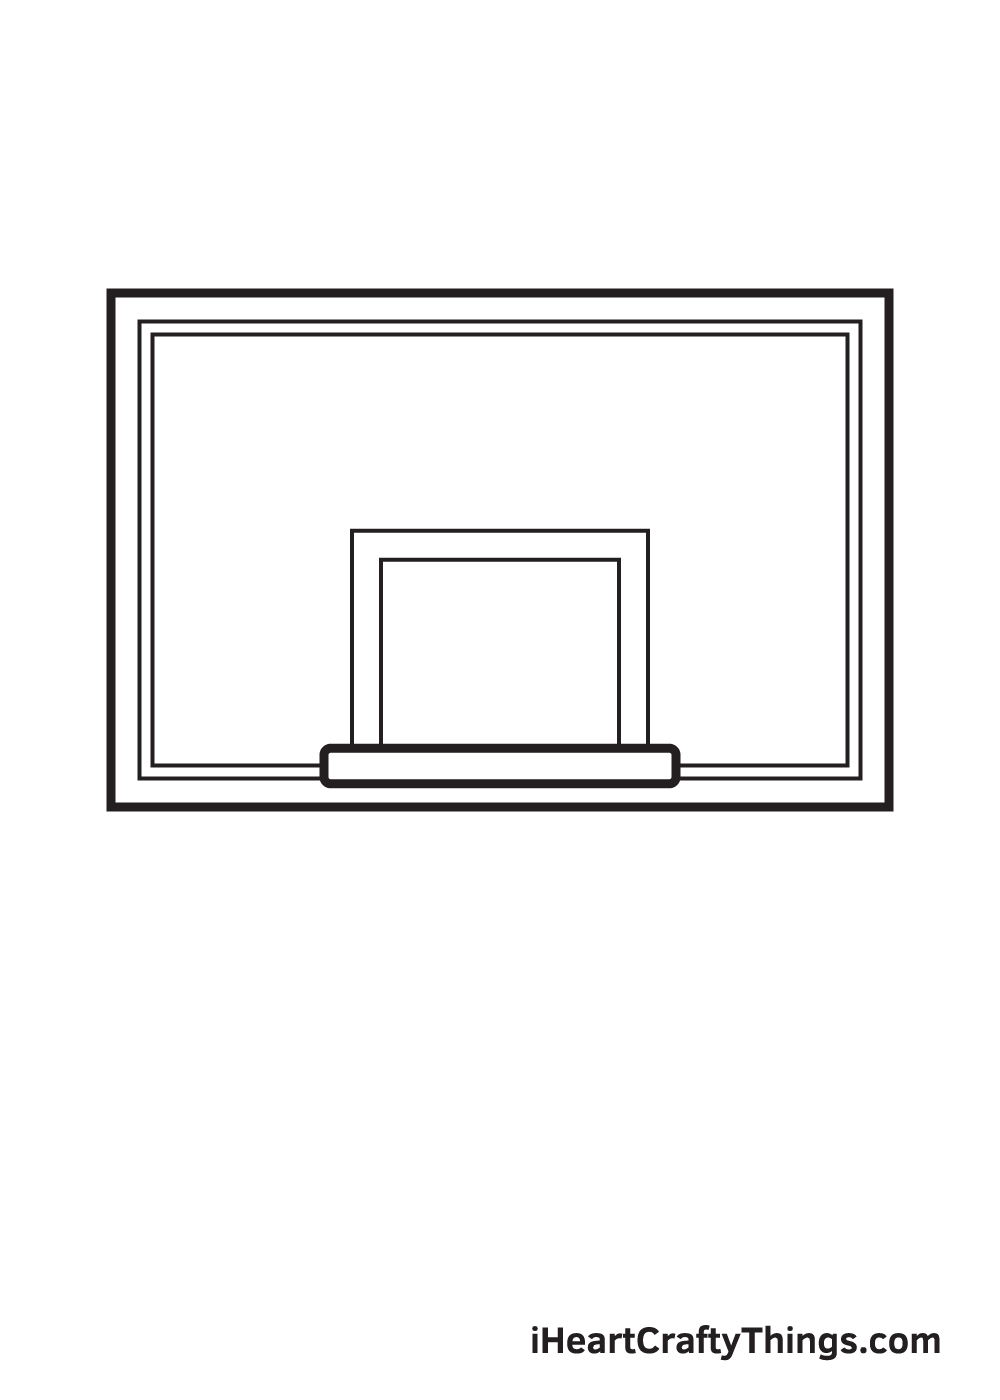
Draw an open-bottom square inside the square shape that we drew previously in the third step. When drawn correctly, you should now be seeing two parallel square shapes.
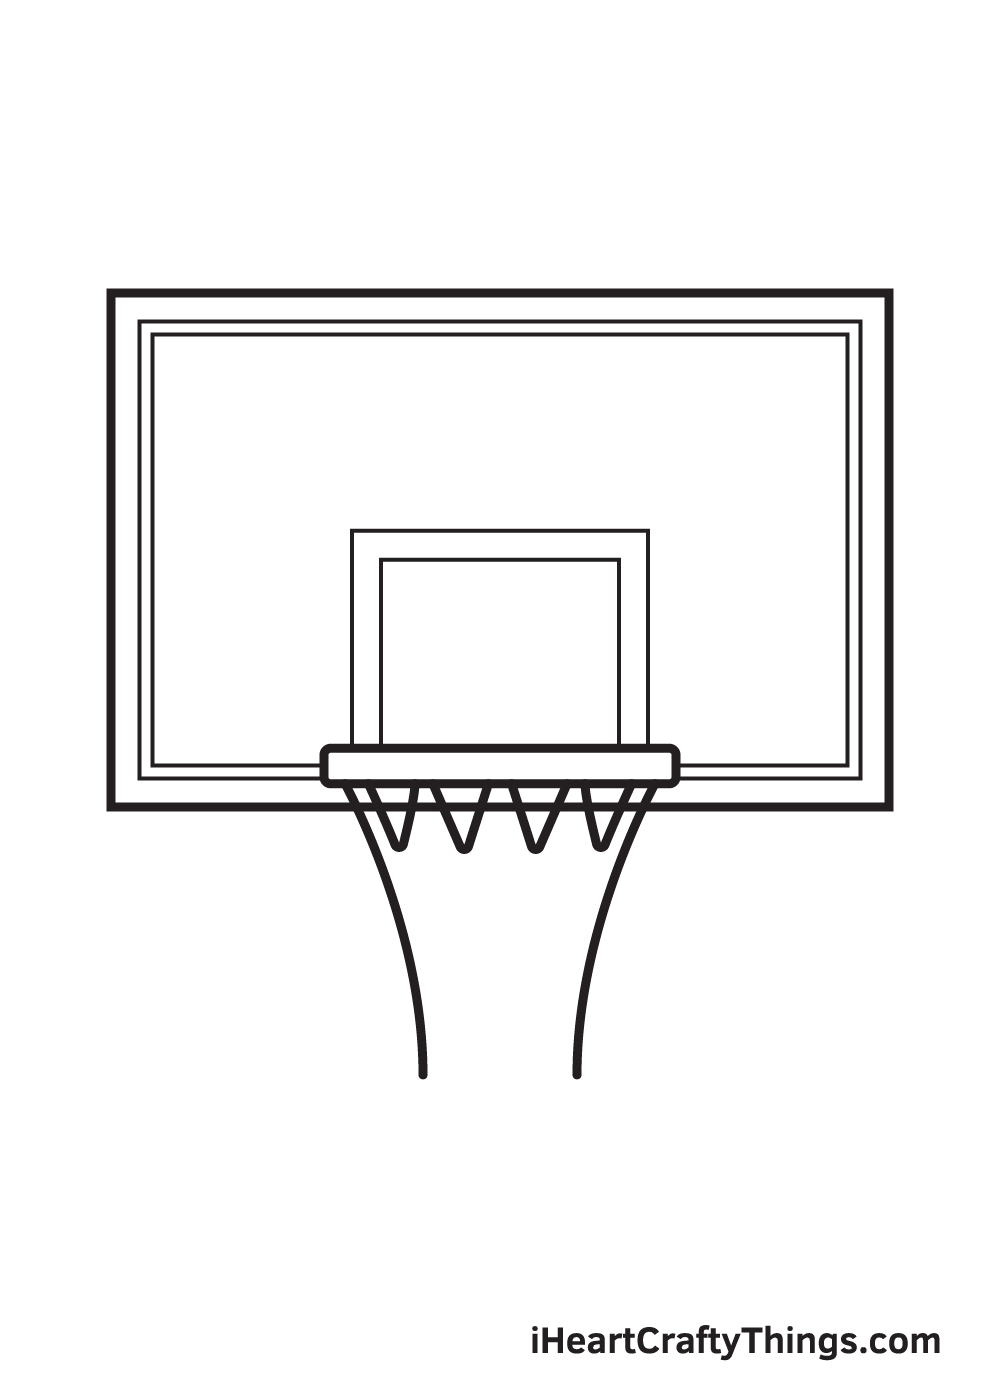
Step 6 – Outline the Net of the Hoop
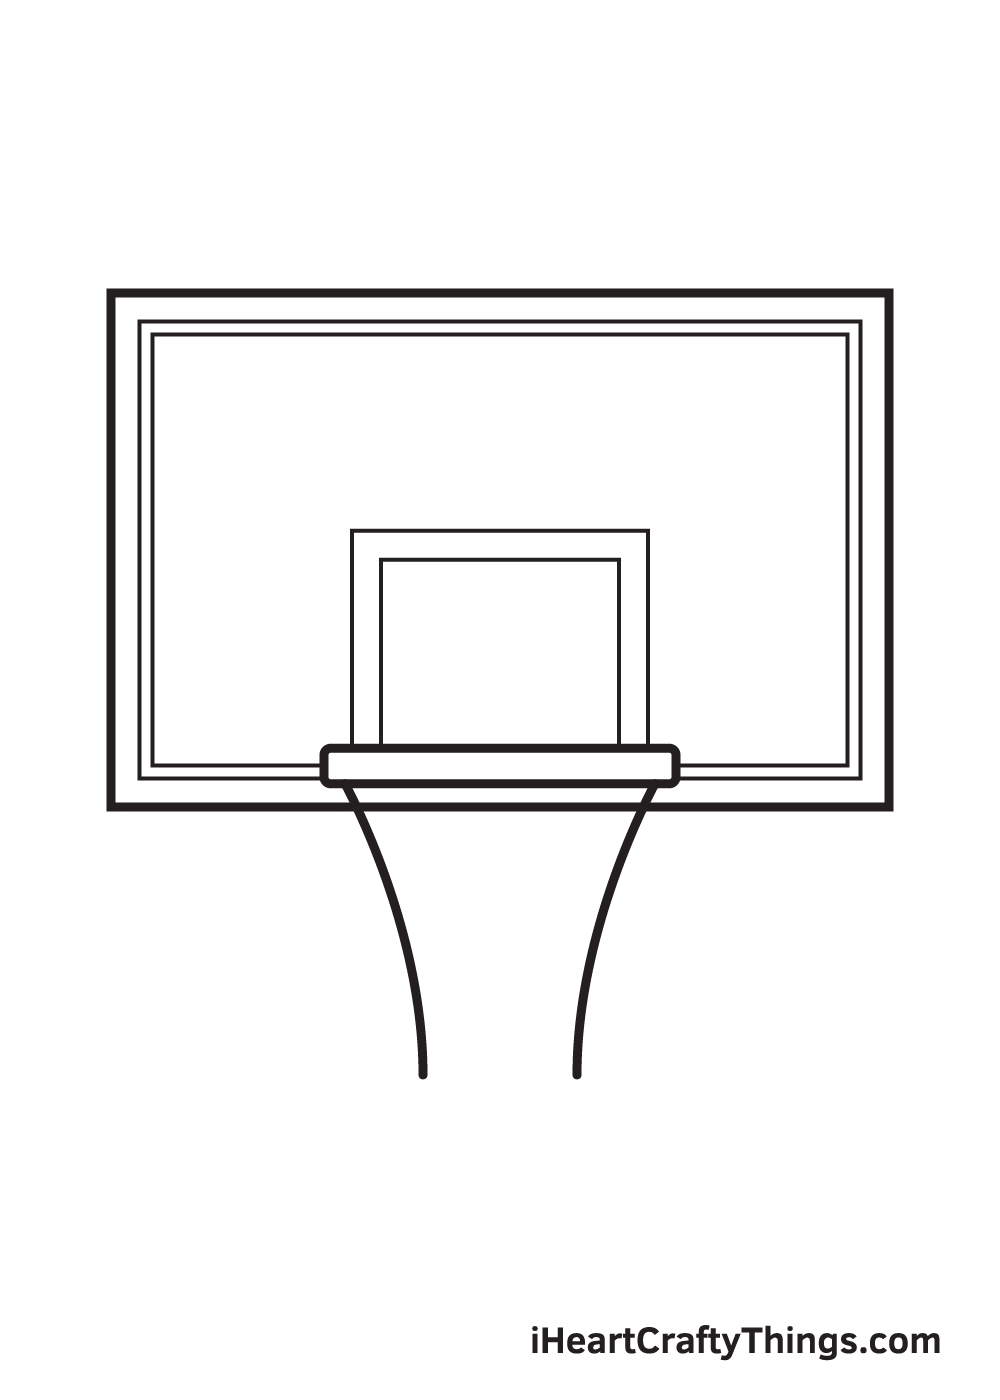
Right underneath the rim or the hoop, draw two curved lines leaning towards each other. This should form a figure that is wide at the top and gradually goes narrower at the bottom.
This creates the outline of the net attached beneath the rim or the hoop.
Step 7 – Add the Patterns of the Net
After drawing the outline of the net, we will now be drawing the distinct criss-cross patterns that nets typically have.
Proceed by drawing V-shaped lines right underneath the rim or the hoop.
Step 8 – Add More Criss-Cross Details
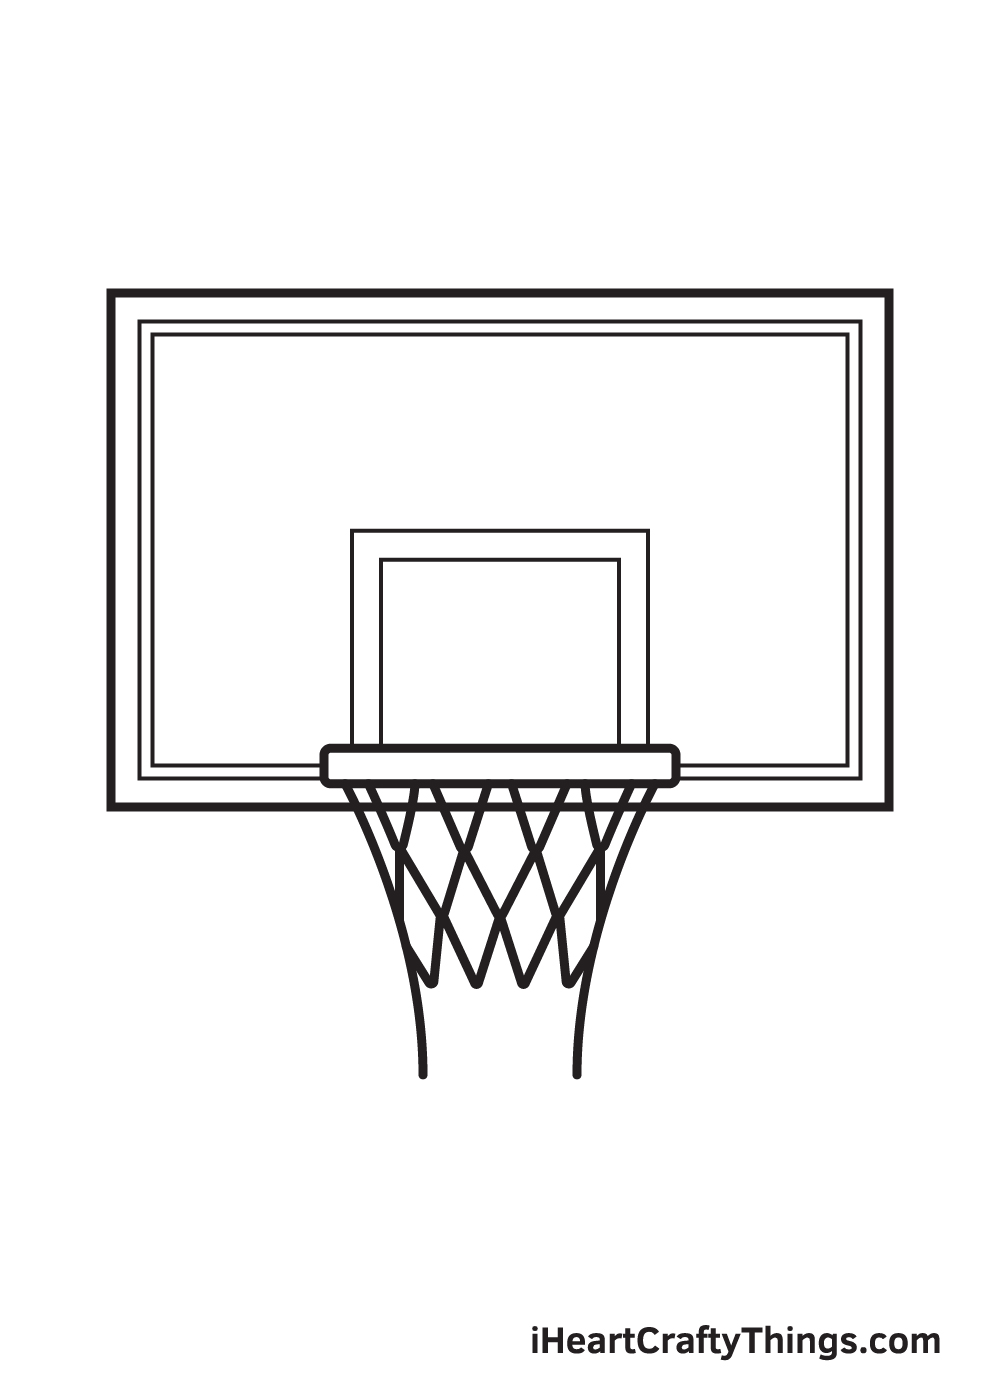
Draw a second layer of V-shaped lines right underneath the ones that we drew in the previous step.
This time, however, the V shapes should align with the gaps on the first layer. This should form a diamond shape on the net, as shown in the illustration above.
Repeat the same step underneath the second layer to create the third layer of the same pattern. Remember, the V shapes should align with the upside down V shapes to form diamond figures all over the net.
Step 9 – Finalize the Basketball Hoop
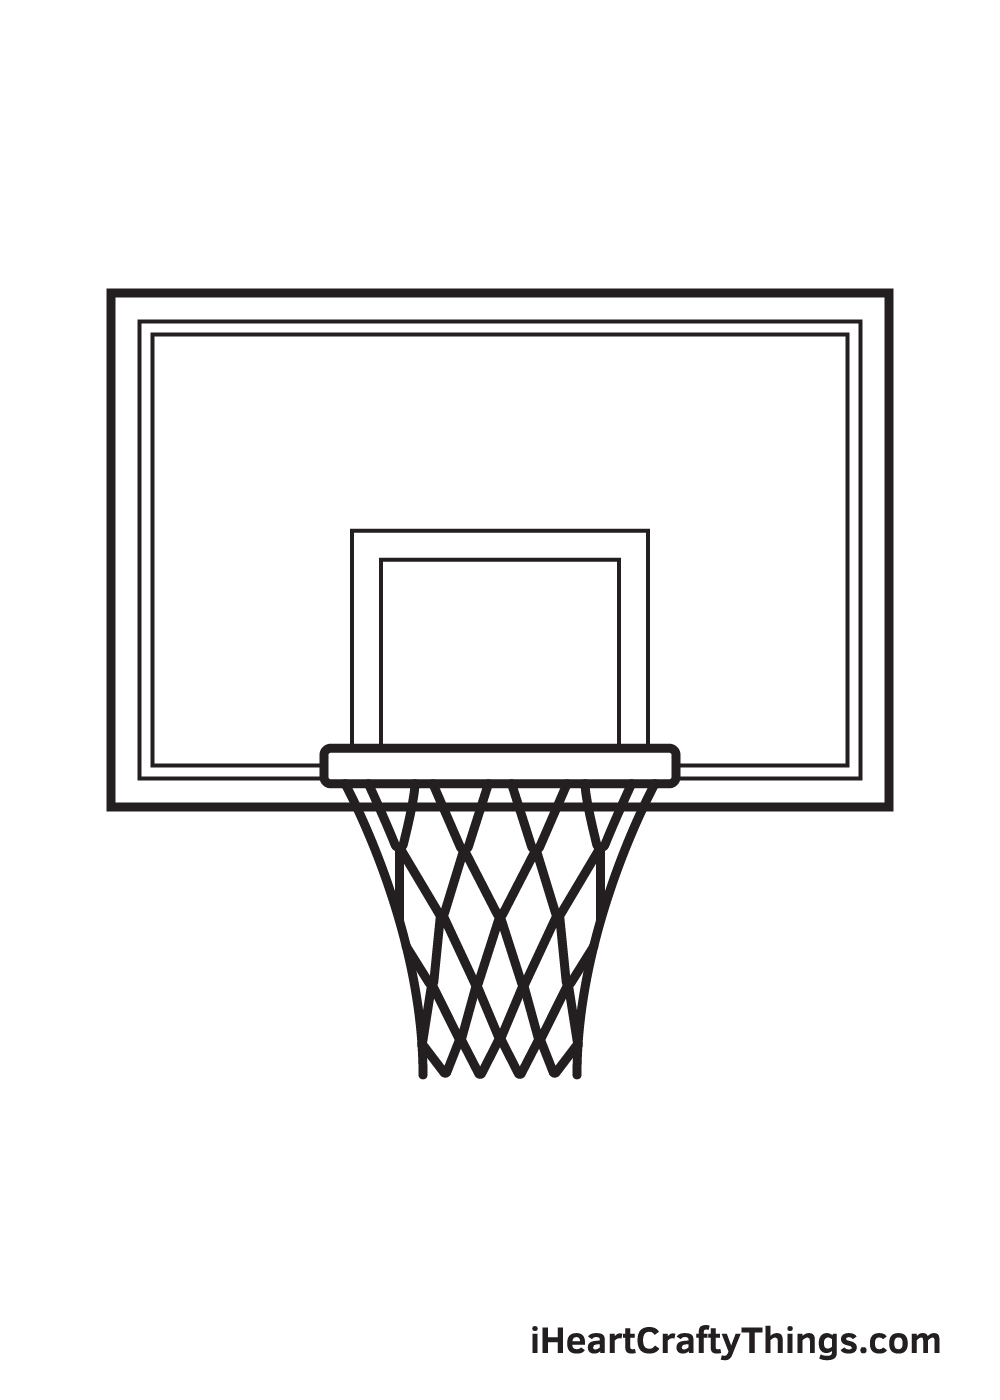
Complete the basketball hoop by drawing the last two layers of V shapes pattern right underneath the last layer we drew in the previous.
At this point, you should have a total of 5 layers of the similar pattern forming the entire net.
Bear in mind that the shapes at the bottom layer should be relatively smaller than the ones at the top. This ensures that the shapes are consistent with the figure of the net.
Now that we’ve successfully drawn a basketball hoop, it’s finally time for the most exciting part. In this final step, we’ll be coloring the basketball hoop to make the artwork vibrant and colorful.
This step is optional but we recommend doing so to make the most out of your experience.
Backboards come in a wide range of colors while the hoop or the rim is primarily orange in color, similar to the basketball. The color of the backboard mostly depends on which team is currently playing on the court.
Feel free to use whichever color you like! You can even use more than one color to create a multi-colored basketball hoop! How fun is that?!
Do this to take your basketball hoop drawing to the next level
You have a great basketball hoop drawing, now let’s see how we can make it better! It’s great to have a basketball hoop, but it’s not much use without a basketball!
That is why we would recommend adding one to this basketball hoop sketch. Basketballs seem simple, but they can also be more challenging than you think to draw!
If you have one of your own, then you have the perfect model to use. Otherwise, you can find many pictures online to use as a reference.
You can draw it as it’s about to go inside of the basket or in any other position you like!
Adding a basketball is one thing you could do, but you could also draw some players beneath it. If you were to do this, then you would have lots of options.
You could draw yourself and your friends, or maybe use some of your favorite basketball players.
These could be added in a realistic or a cartoon style, and it all depends on what you’re comfortable with! Will you add some players to this basketball hoop drawing?
We’ve spoken about adding a ball and some players, but there are other ways to add to the background as well.
You could draw more of the surroundings of this basketball hoop, and this could include the crowd in the background.
There are many fun and creative settings you could go for, and you could make it anything you wish!
This leads us to our final suggestion for this drawing of a basketball hoop, and it involves color. This is something we spoke about in the guide, but there is so much you can do here.
We would suggest mediums like colored pens and markers for many of the details, as they can get quite fiddly.
Mediums such as these can help with these more intricate details. Even if you want to use some paints, you can get paintbrushes with small tips for more precision.
Be sure to get creative with your colors and see what you can do!
Your Basketball Hoop Drawing is Complete!
Hopefully, you enjoy this step-by-step basketball hoop drawing tutorial. If you had fun drawing a basketball hoop, then you might be interested in drawing a baseball or any other sports objects.
Check out our “How to Draw” catalog to enjoy many more fun drawing tutorials like this!
After you finish drawing and coloring a basketball hoop, don’t forget to show off your masterpiece! Take a photo of your artwork and share it on our Facebook page and on Pinterest.
Don’t be embarrassed. We’re sure your drawing looks impressive!
We would love to see your colorful basketball hoop drawing!