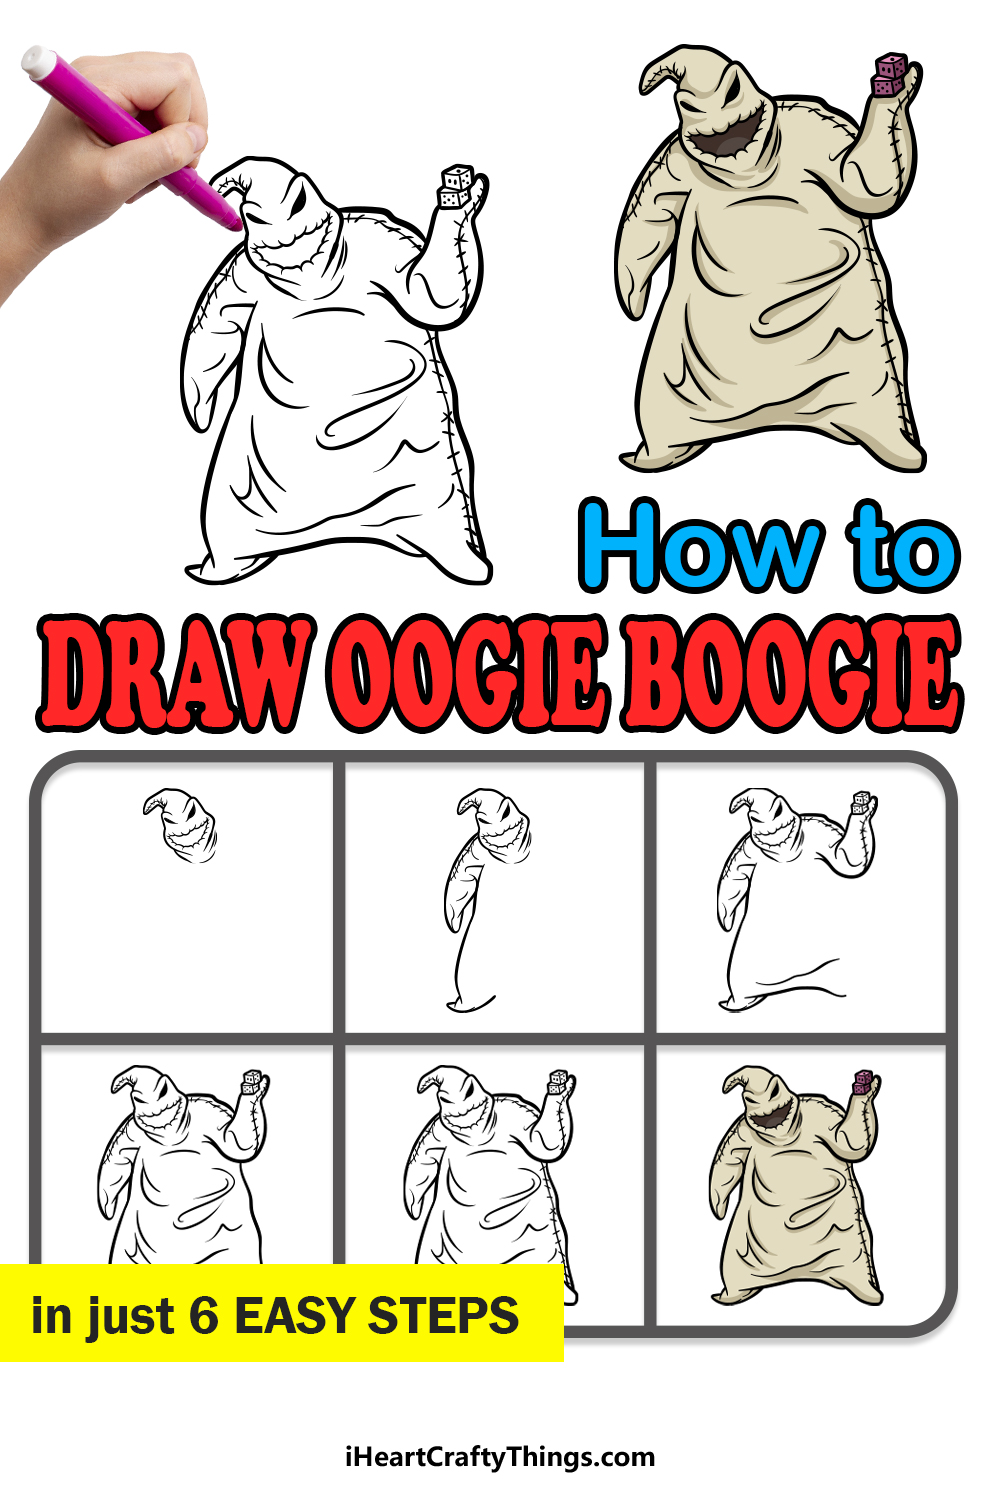
The film The Nightmare Before Christmas is full of many weird and wonderful characters, and most of them have a bit of a dark and macabre twist to them.
One of the vilest characters in the film also happens to be its main villain: the boogeyman himself, Oogie Boogie!
This disgusting character inspires fear throughout the land, and he has a rather unique appearance and character to match his reputation.
Despite his grotesque look, it can be lots of fun to learn how to draw Oogie Boogie thanks to his unique appearance.
If you are a fan of the film or the character, then this should be a fun guide for you to do!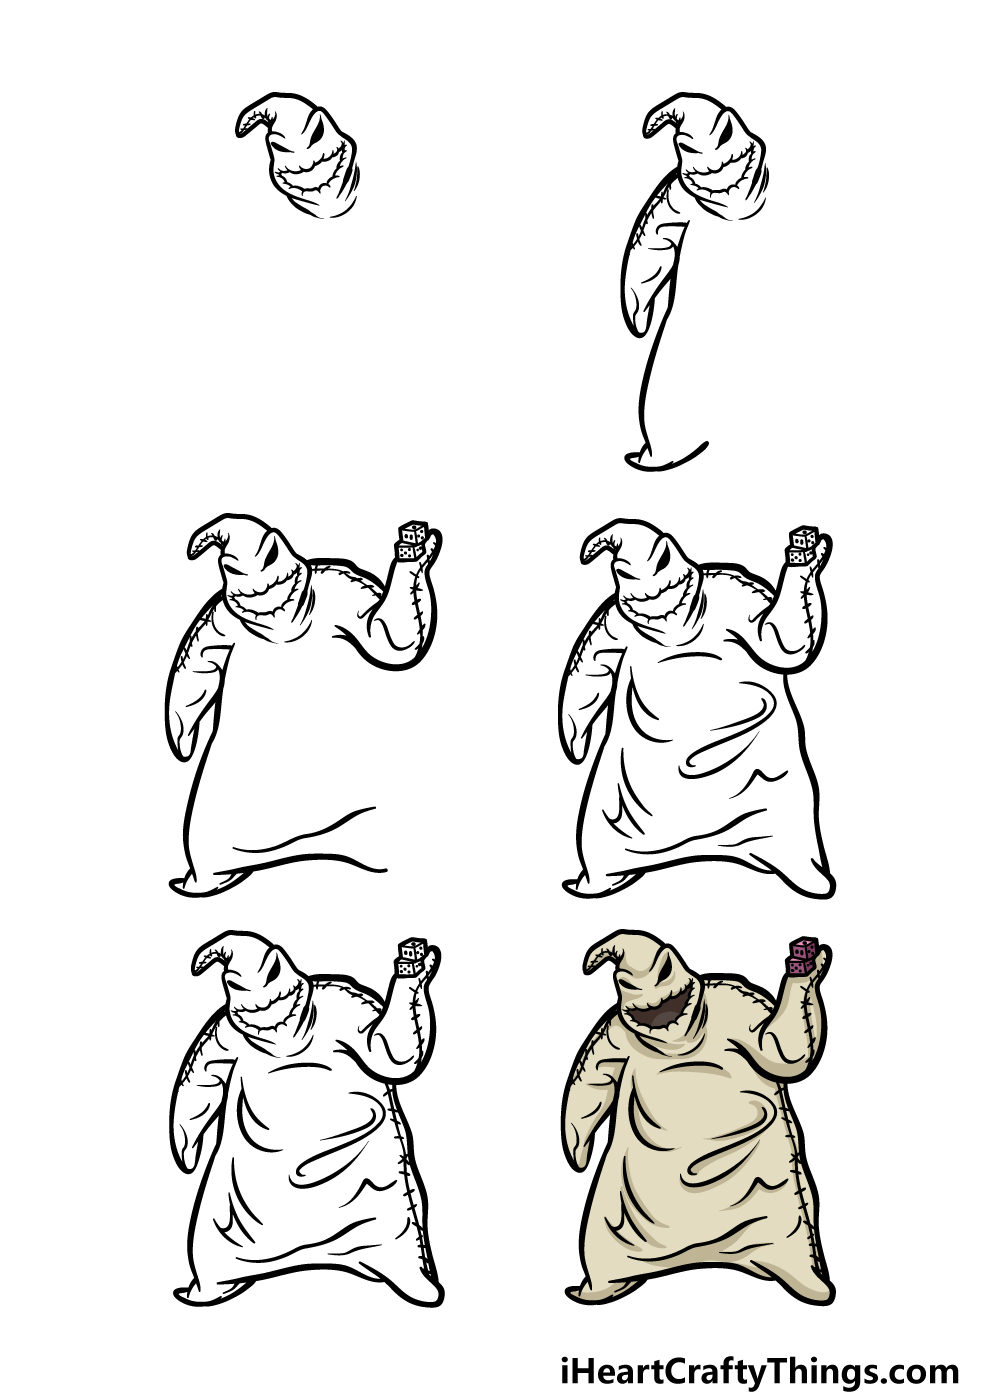
How to Draw Oogie Boogie – Let’s Get Started!
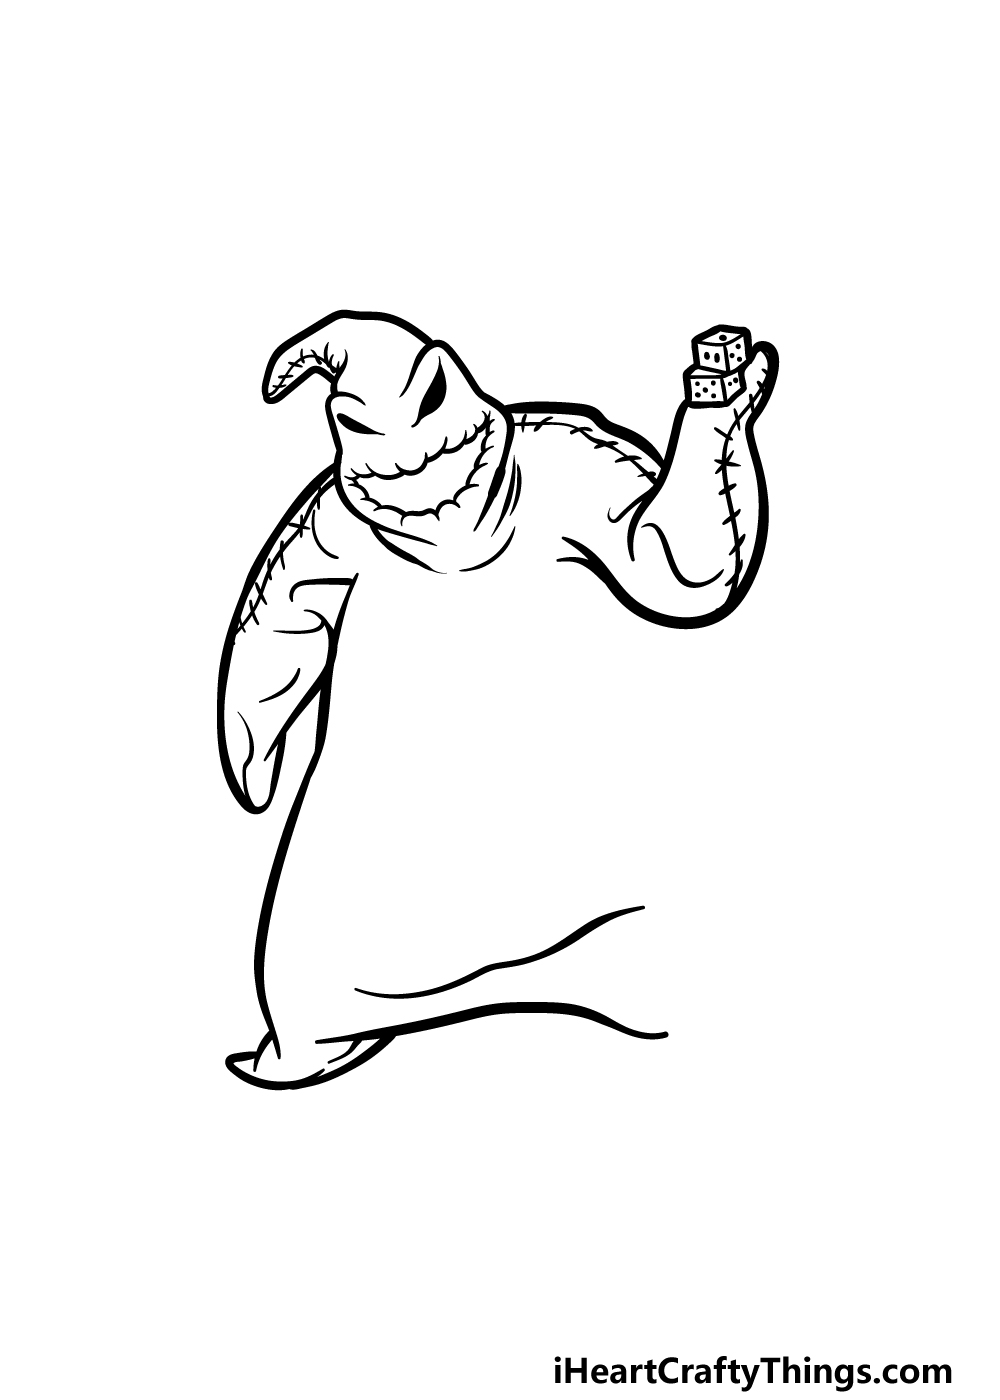
Step 1
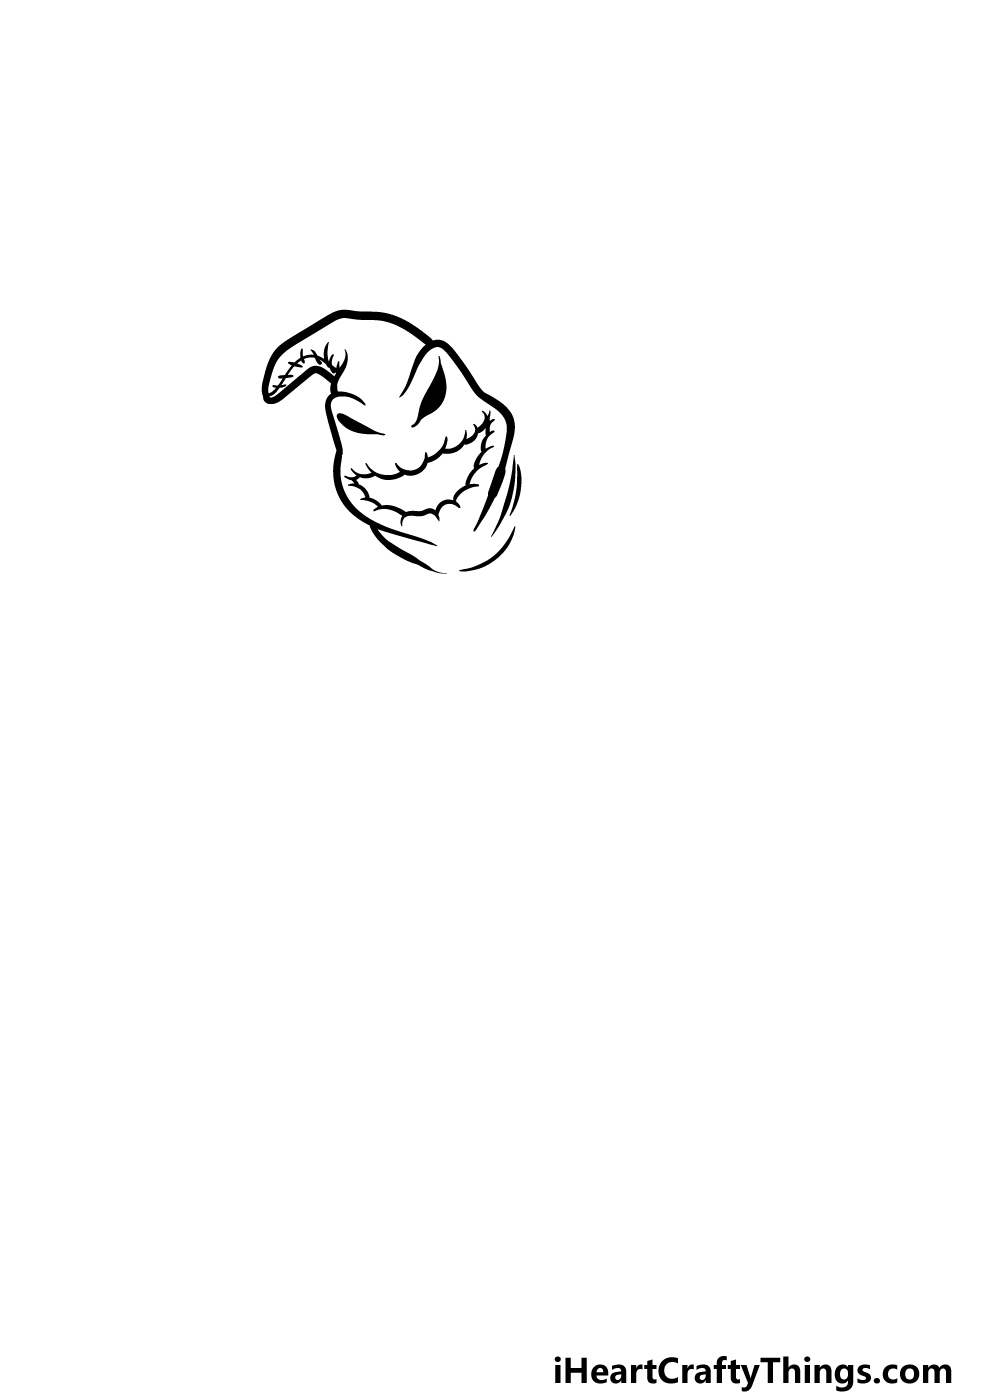
In the film, this character is depicted as made of burlap material, and this is worth keeping in mind as we begin this guide on how to draw Oogie Boogie.
For now, we will start with his head, and more specifically we will start with his eyes. To draw his eyes, we will be drawing two rounded shapes that have sharp sides to make him look nice and mean!
Then we will be drawing his head outline. The sides of his head are drawn with some smooth and slightly rounded lines, and the top of his head is a thin point flopping to the side.
This thin point will also have a line on it that has several smaller lines on it to make it look like he is stitched up.
Finally, we will be drawing his open, smiling mouth. To draw his mouth outline, we will be using lots of small, rounded lines connecting to one another to make the shape as it appears in the reference picture.
You can finish off this step with some more lines below his head for the start of his neck, and then we can move on!
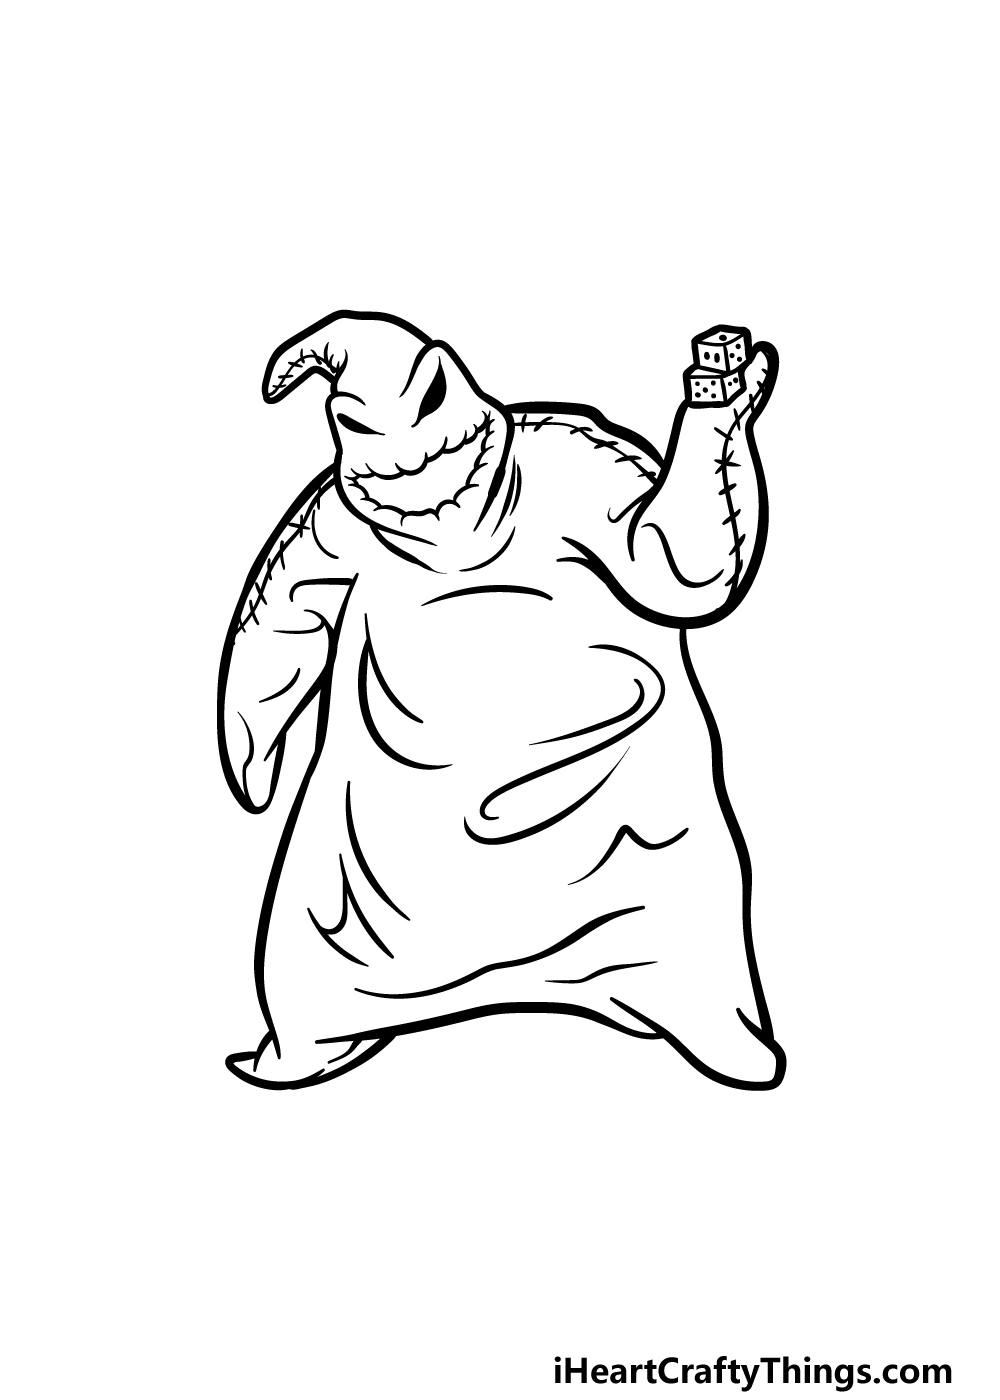
Step 2 – Next, draw the first arm and start of his body
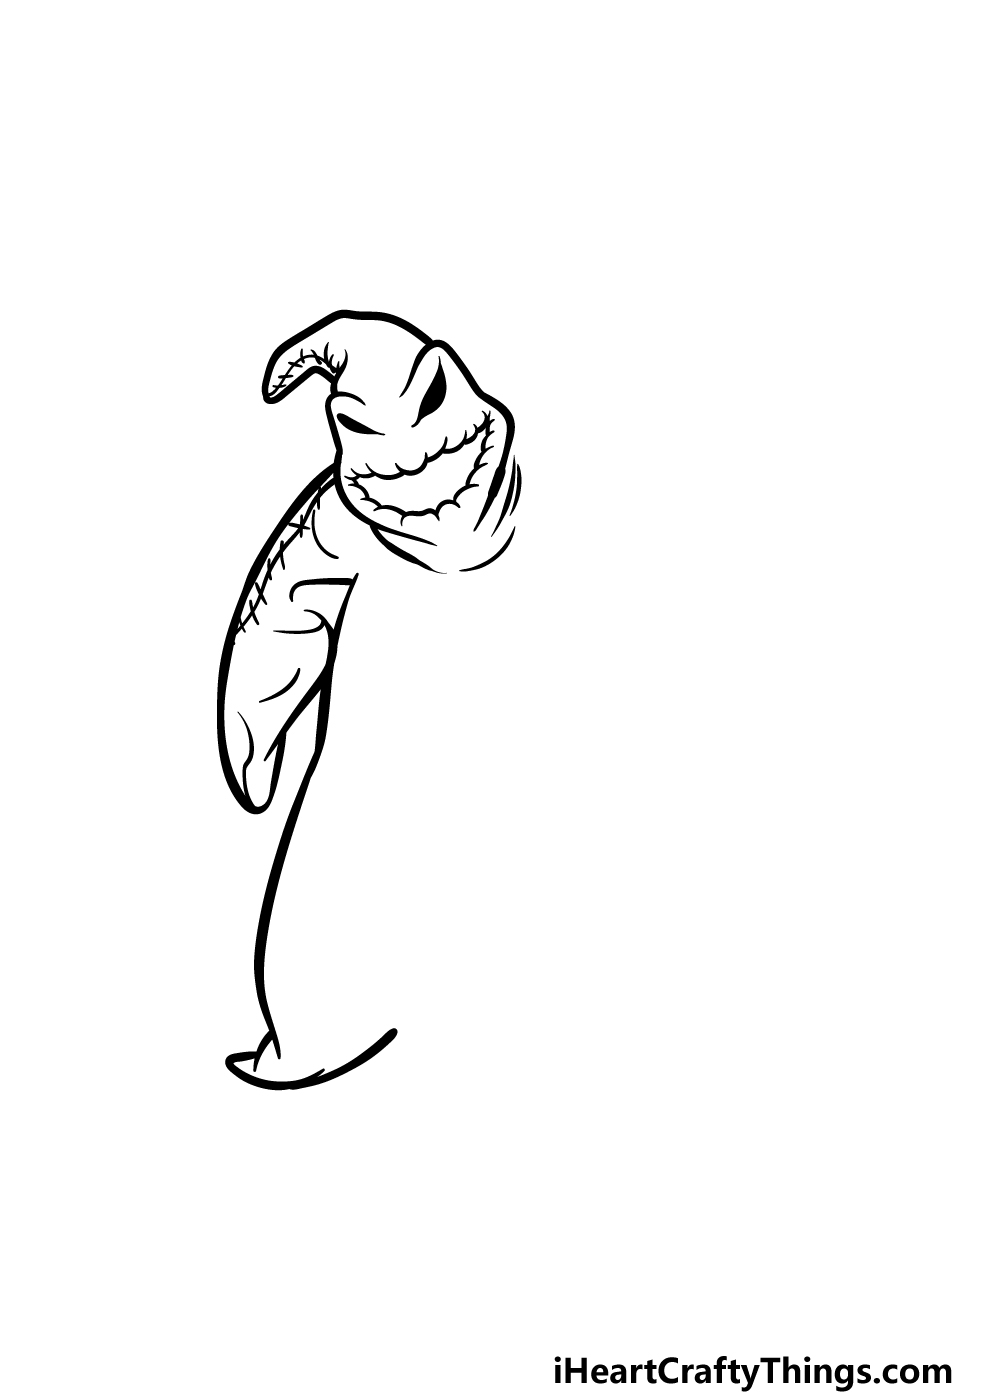
Now that you have his head drawn, we can now start on the body of your Oogie Boogie drawing. Use some long, curved yet smooth lines for his arm on the right.
It will be quite long and bent a bit at the bottom, and there will be another long stitched line along it as well.
Then you can start to draw his body. Draw a long line down from the pit of his arm, and then curve it into a point at the bottom for his foot.
Once you have drawn these elements, simply add some more detail to his arm to make it look more creased and then you’ll be ready for step 3!
Step 3 – Draw his other arm and the base of his body
One of the traits of this character is that he loves to gamble, and we will represent that in this step of our guide on how to draw Oogie Boogie!
First, draw some more curved lines to create his thick arm on the right bending up.
Then you can draw some small dotted cubes onto his hand for some dice, and that is what we meant by representing the gambling theme.
This arm will also have some more stitching going along it, and you can draw it as you have drawn the stitching previously.
Then, extend some slightly curved lines from the top of his leg for the base of his body.
Step 4 – Now, finish the outline for Oogie Boogie
This step of your Oogie Boogie drawing will see you finishing up the outline for his body. Simply extend a line down from his arm on the right, and bring it down until it curved into a rounded point.
It will connect to the base of his body as it appears in our reference image.
Then we will add a lot of wavy, curved lines inside of his body to make it look even more like he is made of flappy material. Once these aspects are drawn, it’s on to some final details in the next step!
Step 5 – Finish off your Oogie Boogie drawing
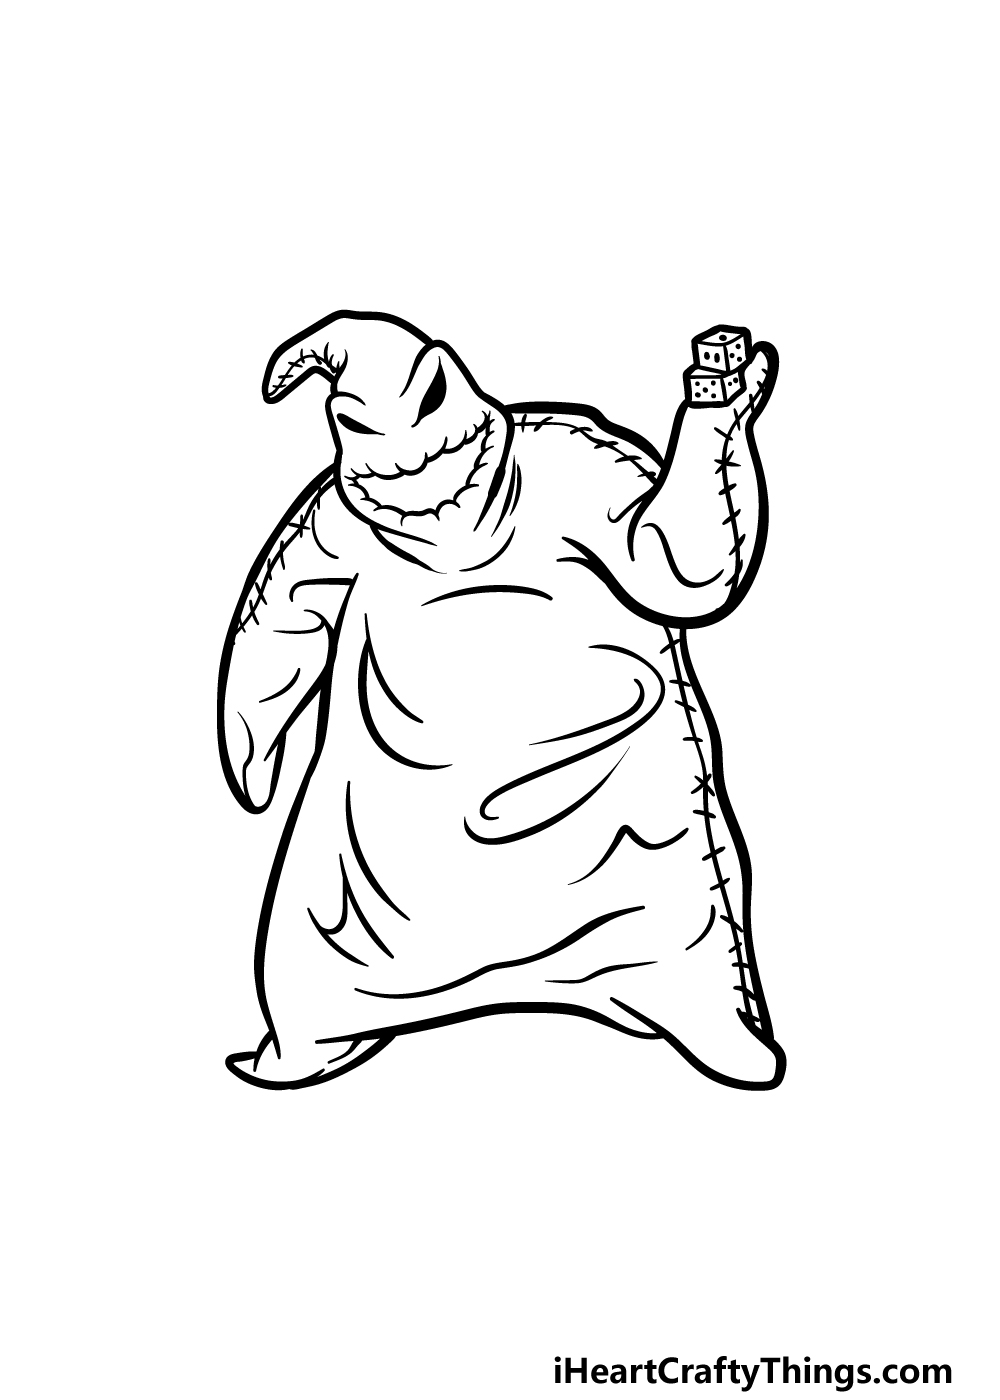
The final details that we will be adding in this step of our guide on how to draw Oogie Boogie will be quite simple, but there will be a chance to add your own touches as well!
To finish off our details, simply add one more long stitch to the right-hand side of his body. Then you are ready for the final step!
Before you proceed to that last step, this is your chance to add your own touches to the picture. You could draw a background to show off your favorite scene from the film or even draw some more characters from it that you love.
Maybe you could add his three henchmen! These are just some ideas, but what else can you think of to finish off this drawing?
Step 6 – Finish off your Oogie Boogie drawing with some color
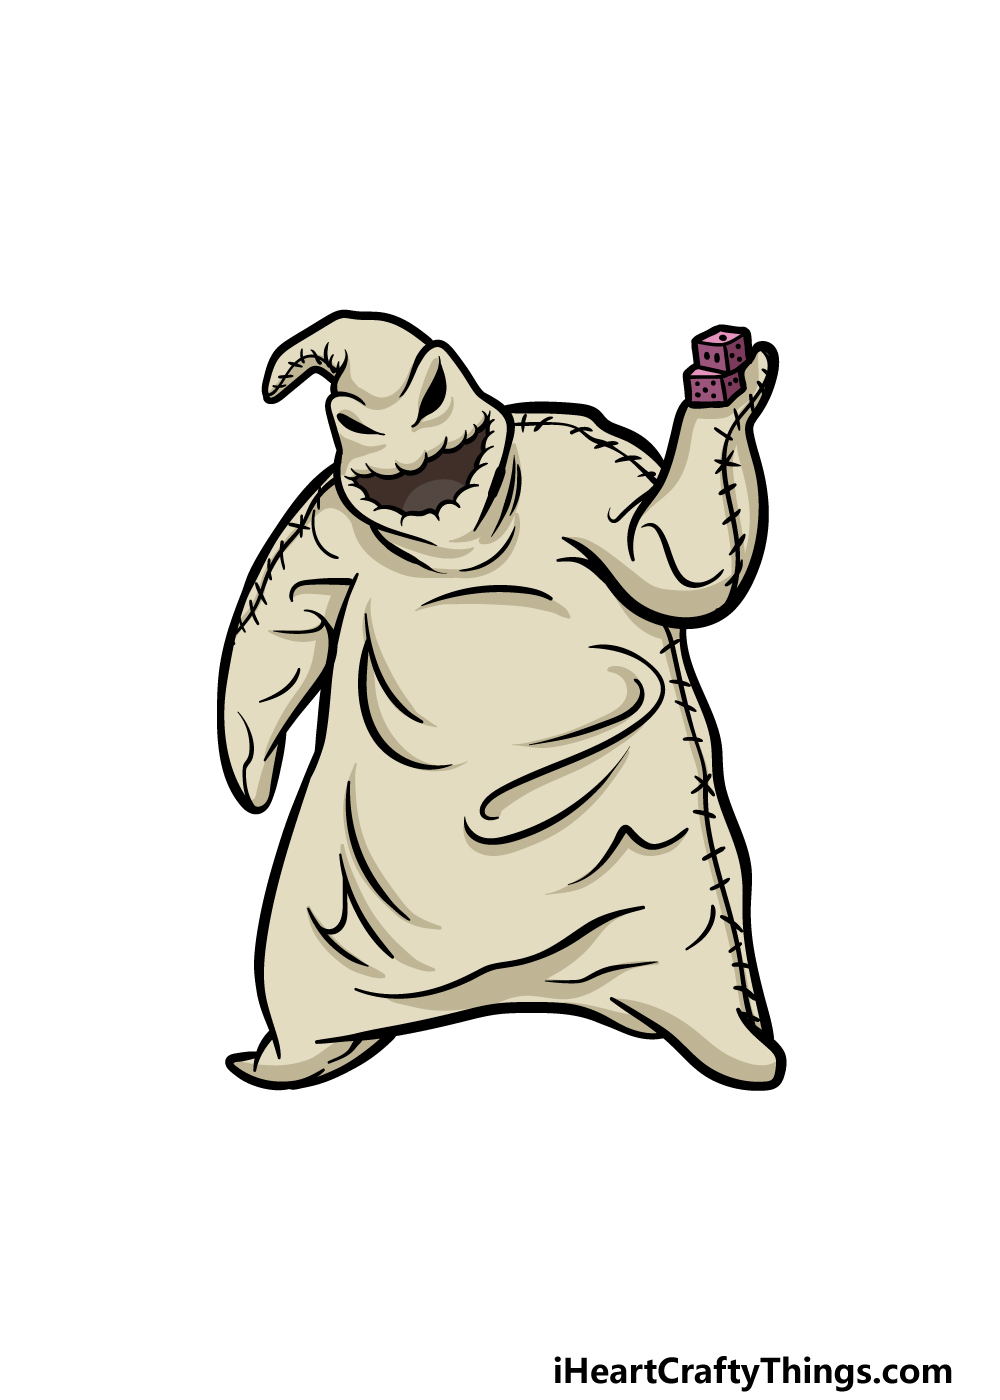
For the final part of your Oogie Boogie drawing, you can finish him off with some color.
He is meant to be made of burlap-like material, so we used a beige color for his body with some purple for the dice that he is holding.
These are the colors we chose for film accuracy, but you could also change up the colors if you wish!
Then, you can have some fun deciding which art tools and mediums you will use for the colors you want. How will you finish off this awesome drawing?
Do this to take your Oogie Boogie drawing to the next level
Recreate this character in all his fearsome glory with these tips for your Oogie Boogie sketch!
This repulsive character is one of many featured in the film The Nightmare Before Christmas. You could make this drawing of Oogie Boogie even greater by adding some more of these characters.
You would certainly have many to choose from! The iconic Jack Skellington or Sally would be great ones to start with, but they are far from the only ones you could use.
Which favorite characters from the movie would you like to portray with Oogie Boogie?
As mentioned previously, this character is known to be quite gruesome and disgusting. You could display this in your artwork to make it even more horrifying!
Oogie Boogie has bugs inside of him, so you could draw all kinds of disgusting bugs and creepy crawlies all around him. That is one idea to try, but you could also add some skulls, slime or other creepy objects to complete the scary effect.
What other gross things could you add to this horrifying portrayal?
The style that was used for this Oogie Boogie drawing looks great, but you could also experiment with alternative styles once you have the hang of it.
You could try out something more detailed to make him look even more like his film portrayal. Adding lots of color and texture details would really help with this.
Or, you may even prefer to make him look even more simple and stylized for a fun spin. It’s up to you, so will you stick with the style in our guide or go with something else?
Adding a background would be a great way to really bring this Oogie Boogie sketch together. There are so many iconic locations from the film, so you would have plenty to choose from.
If you include the other characters relating to those locations, you could recreate any of your favorite scenes and moments from the movie. What are some locations you could use?
Your Oogie Boogie Drawing is Complete!
This may be a despicable character, but he does have a really cool design! We hope that you enjoyed replicating this design in this guide on how to draw Oogie Boogie.
Drawing characters that seem simple at first can often be harder than expected, so in this guide we aimed to make sure it would be easy and fun for you to do.
When you’re ready for more drawing fun, be sure to check out our website! We have tons of guides there for you to enjoy, and we update the list all the time.
Then, when you have completed your Oogie Boogie drawing, we would be thrilled to see your creation.
You can let us take a look by sharing your artwork on our Facebook and Pinterest pages, and we can’t wait to see!