Hoods can be many things. They can be a source of mystery and intrigue, maybe covering the face of the mysterious stranger who just entered the tavern.
They can also be a garment that prevents your head from getting wet, but that is slightly less interesting.
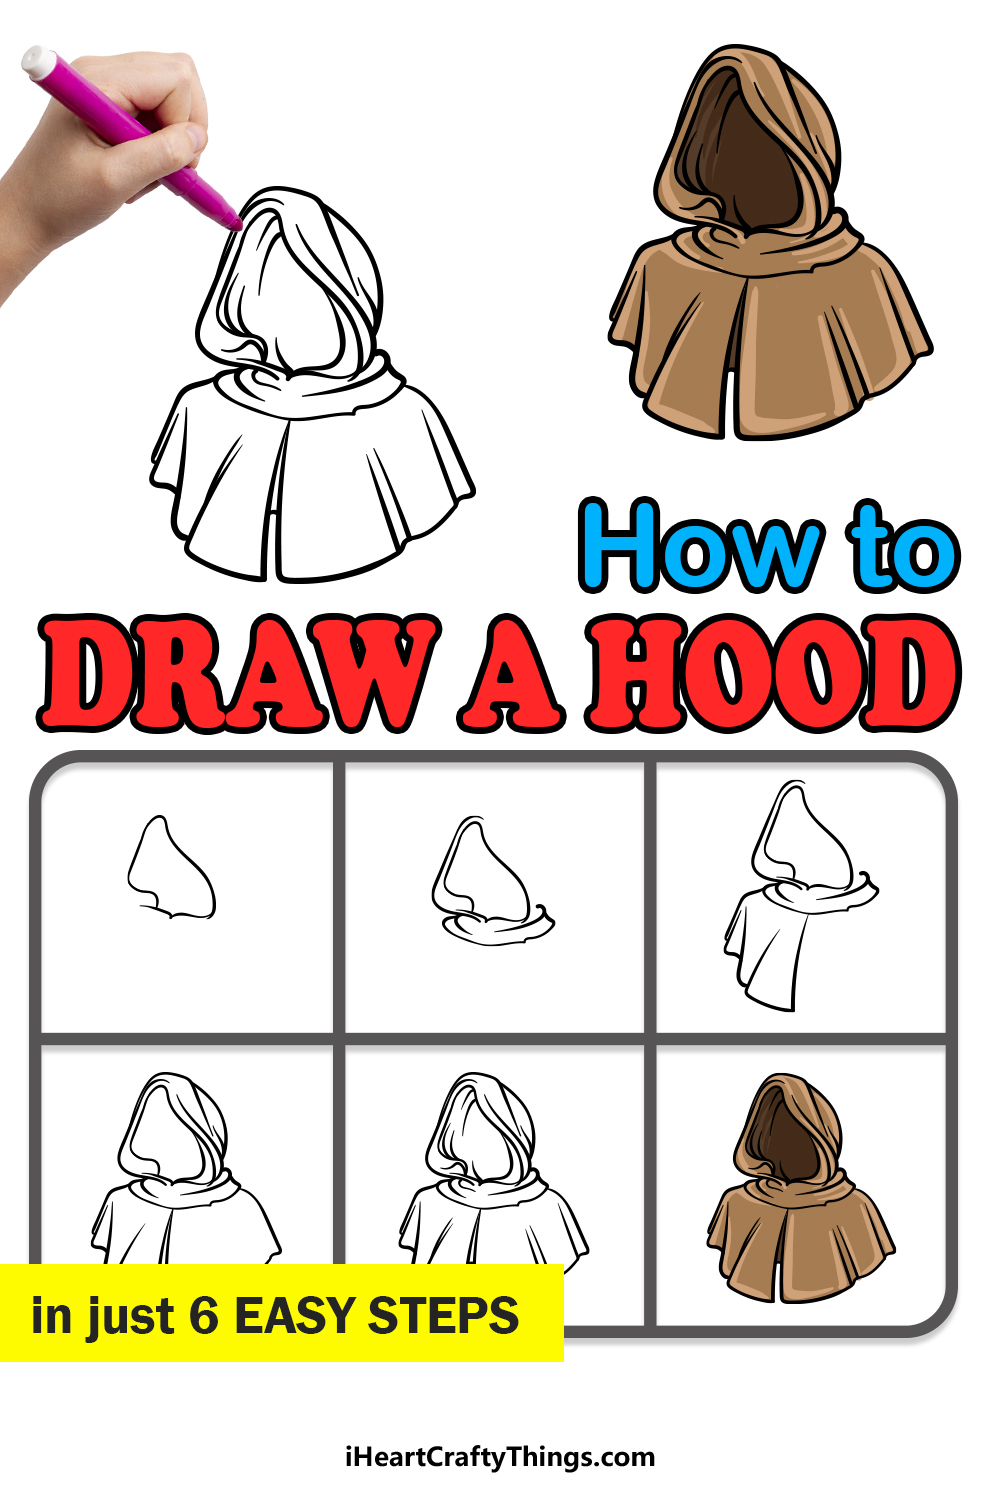
No matter the function they serve, they can come in many different styles and types. For this reason, learning how to draw a hood can be fun, as then you can create your own designs!
This is the guide to follow if you would like to learn how to do that.
Our step-by-step guide on how to draw a hood will show you how to create an awesome-looking hood that you can customize and add to!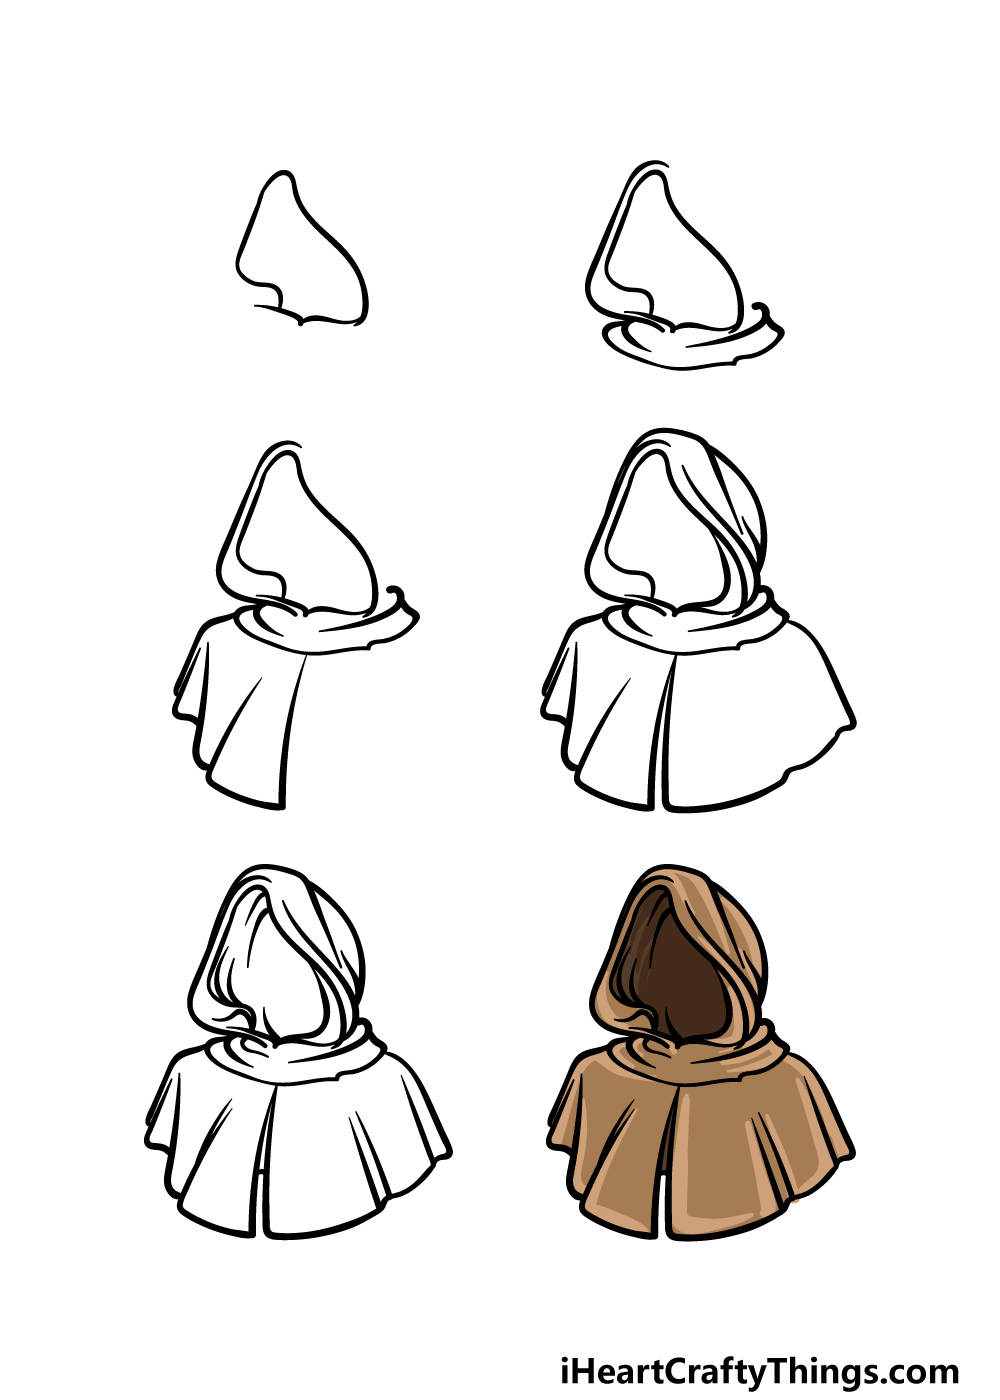
How to Draw A Hood – Let’s Get Started!
Step 1
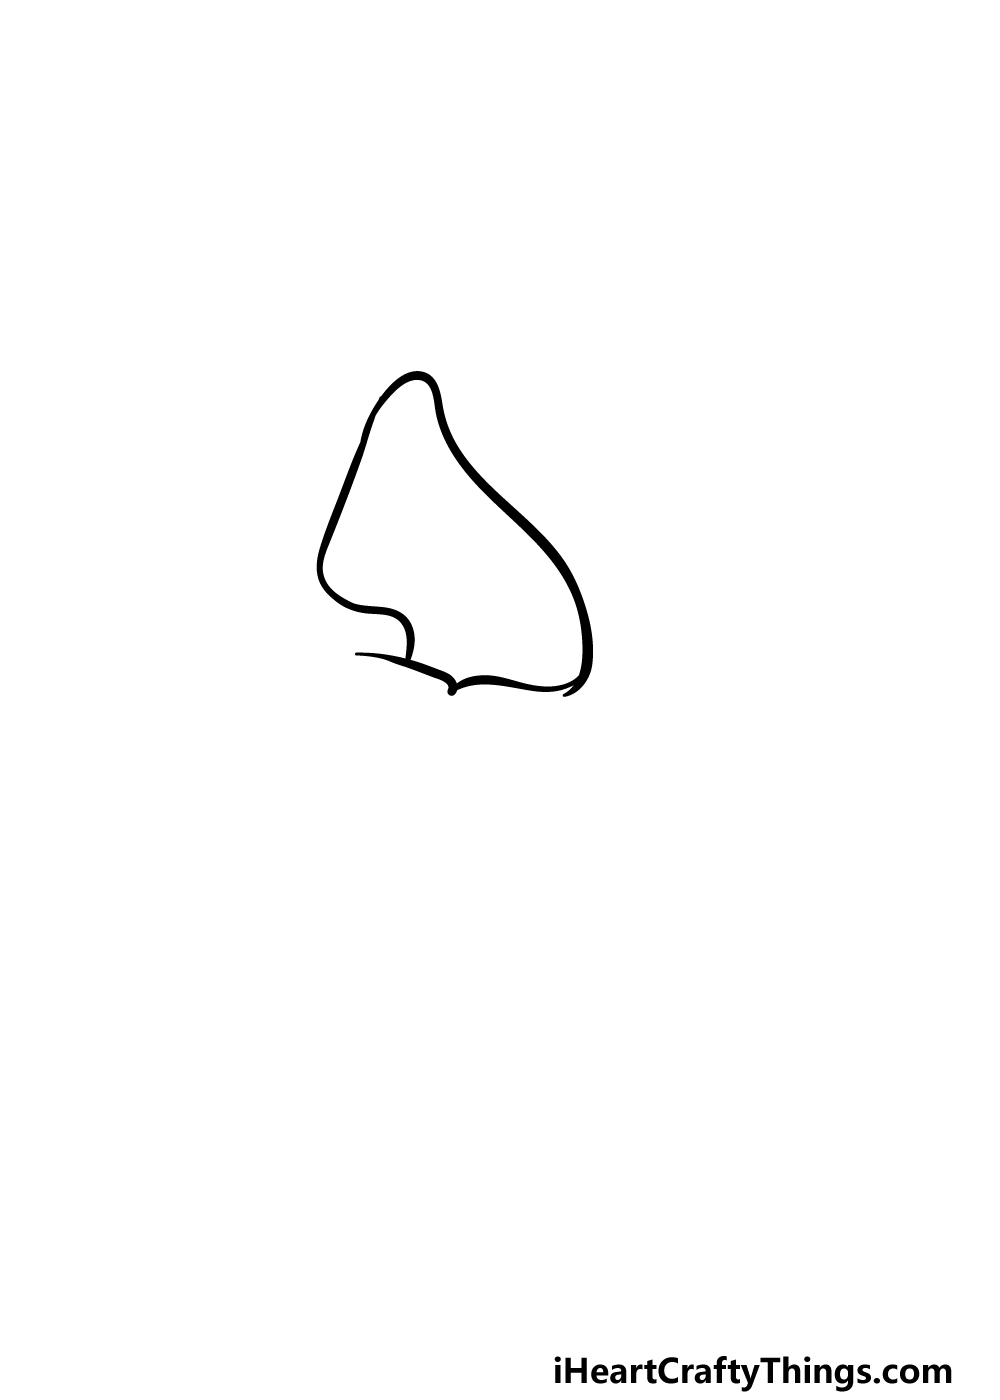
In this first step of our guide on how to draw a hood, we will be starting with the hole that the face would usually look through.
To draw this hole, we will be drawing quite a unique, lopsided shape. It will have a thin, rounded tip at the top of it and then get a bit thicker as it goes down. The right-hand side of it will be smooth and slightly curved, whereas the one on the left will be a bit more rounded.
Once you have replicated the shape as it appears in the reference image, you will be ready to add some more details in the next few steps.
Step 2 – Next, start drawing more of the hood

Hoods are made of soft fabric in real life, so the next few steps of your hood drawing will be about drawing some curved line details to represent the folds that fabric would have.
To start doing this, start by drawing a curved line down the left-hand side of the opening of the hood.
Then we will be drawing some fabric bunched up at the bottom of the hood using some more curved lines at the base of the shape that you drew in the previous step.
There will be an empty space on the right-hand side, but we will fill it in later, so let’s move on!
Step 3 – Draw the first of the flaps for the hood
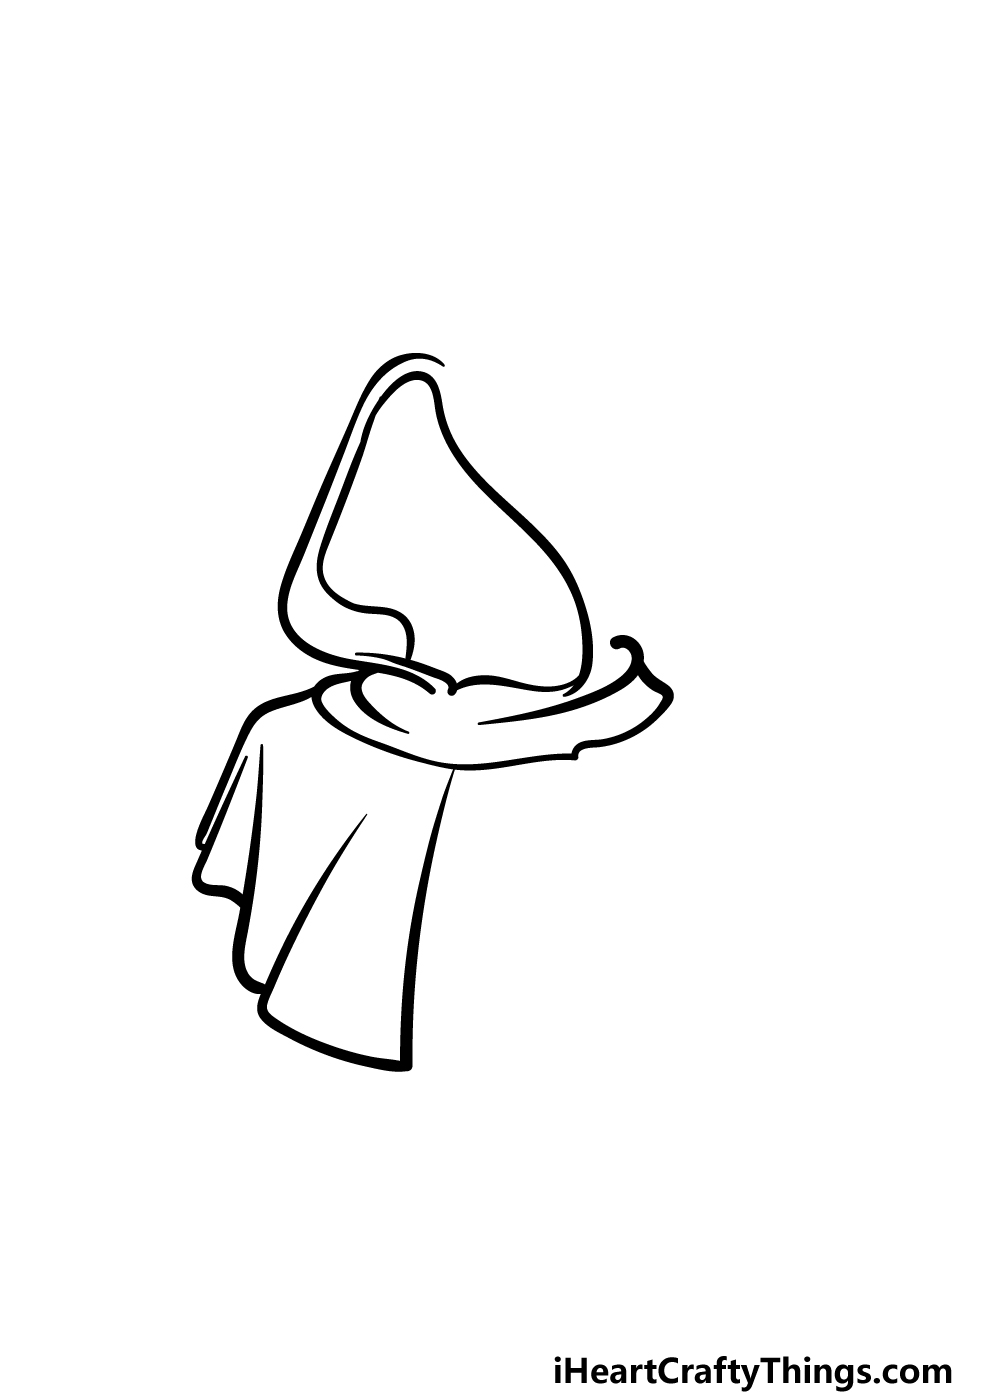
The particular hood that we will be drawing would have flaps that would go over your shoulders to protect them from wind and rainy weather.
We will be drawing the first of these flaps in this step of our guide on how to draw a hood.
First, draw a curved line down from the center of the base of the hod. Then, draw several flaps with some lines curving up until you bring it up at the end to meet the side of the base for the hood.
If that sounds confusing, then the reference image will show you how these flaps of fabric should look!
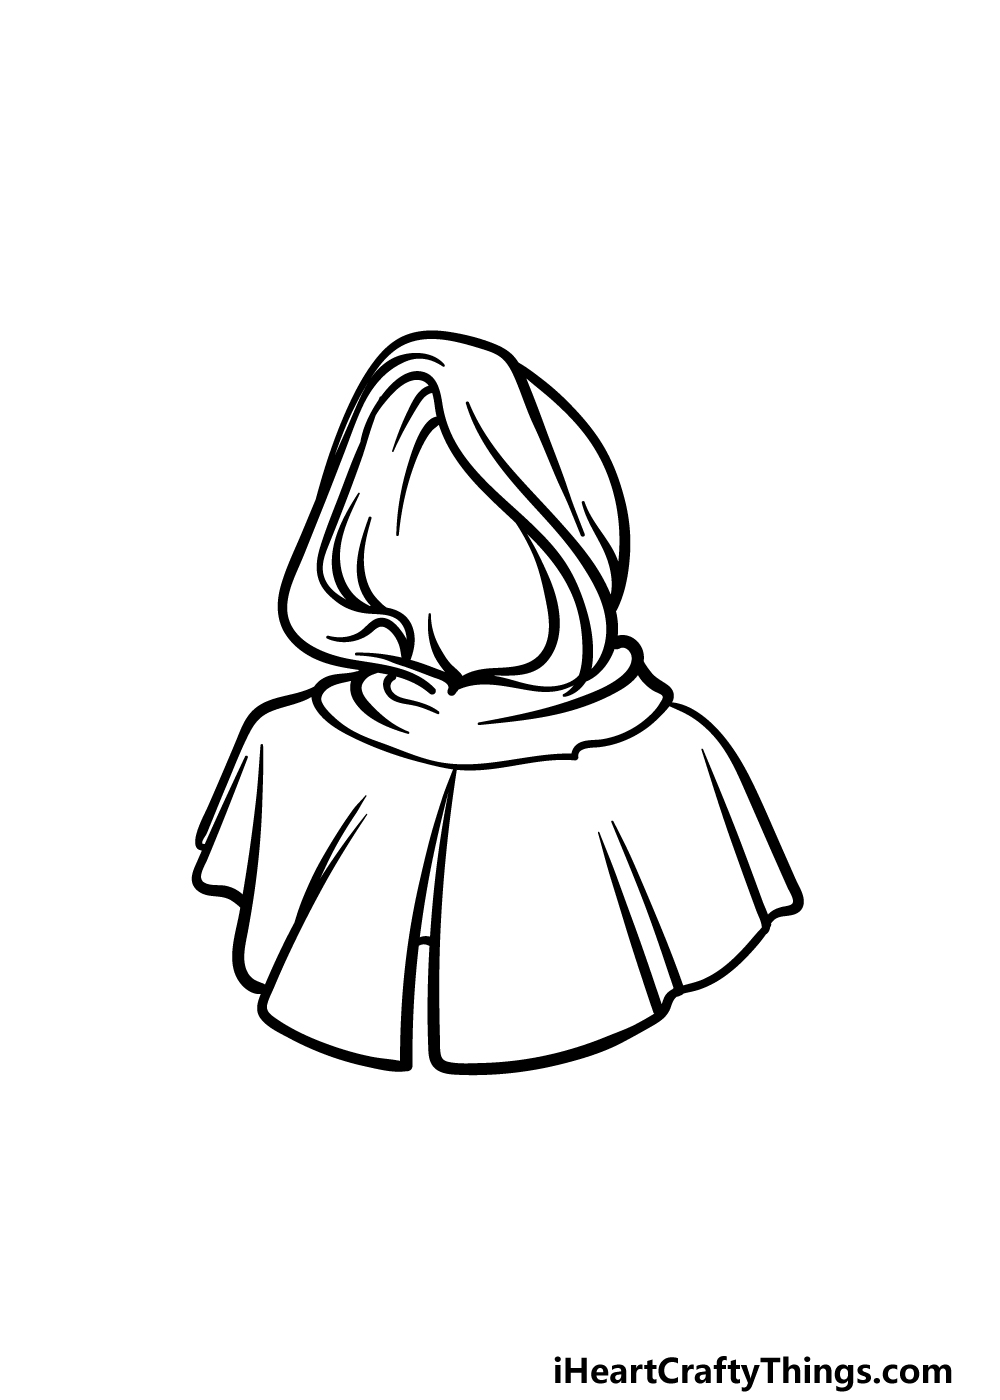
Step 4 – Next, finish the outline of the hood
For this part of your hood drawing, we will be finishing off the general outline of the hood.
First, use a series of curved lines to draw the right-hand side of the hood, and using lots of curved lines will also help it to look more like real fabric.
Once that is drawn, we will then be drawing the second flap on the right-hand side. Draw the outline for it in a similar way to how you drew the first one, except leave it a bit less detailed for now.
Don’t worry though, as we will add some detail along with some final touches in the next step!
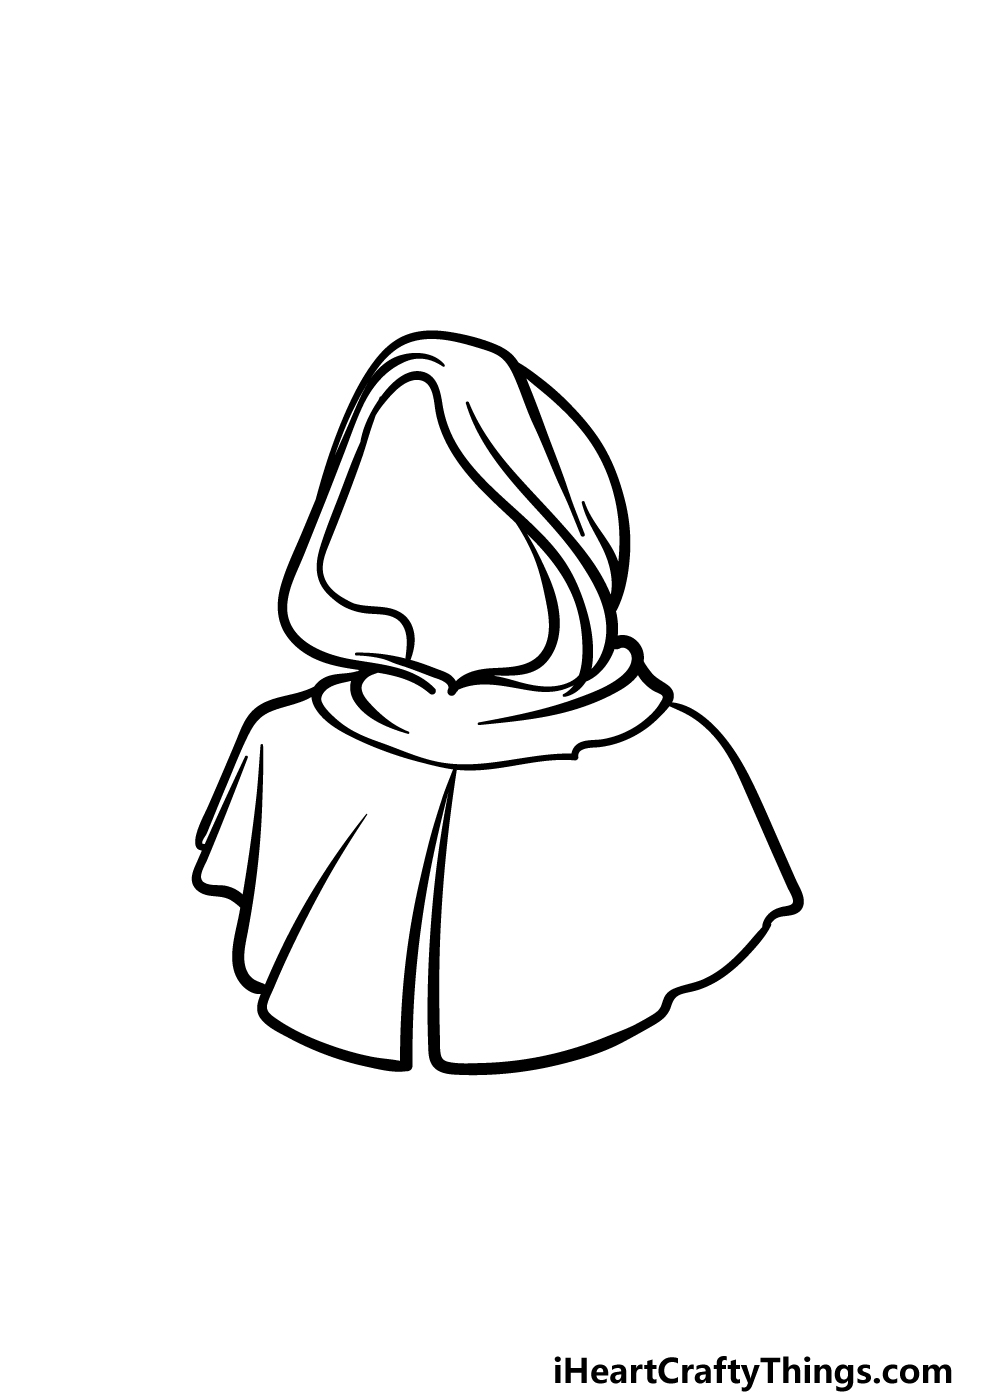
Step 5 – Finish off your hood drawing
The fifth step of this guide on how to draw a hood will be all about adding some final details and touches.
We mentioned in the previous step that there will be some details added to the second flap, and we stand by that promise!
You can add some straight lines poking up from the bottom of the flap for some fabric detail on it.
Then, add some more minor details inside the hood and to other areas to make it even more fabric-like!
Once you have finished all of the details in our guide, you can also add some details and elements of your own. Maybe you could draw a face and body for the person wearing the hood.
Doing that along with drawing a background could create a bit of a story around this cool hood. What ideas can you think of to add to this hood drawing?
Step 6 – Finish off your hood drawing with some color
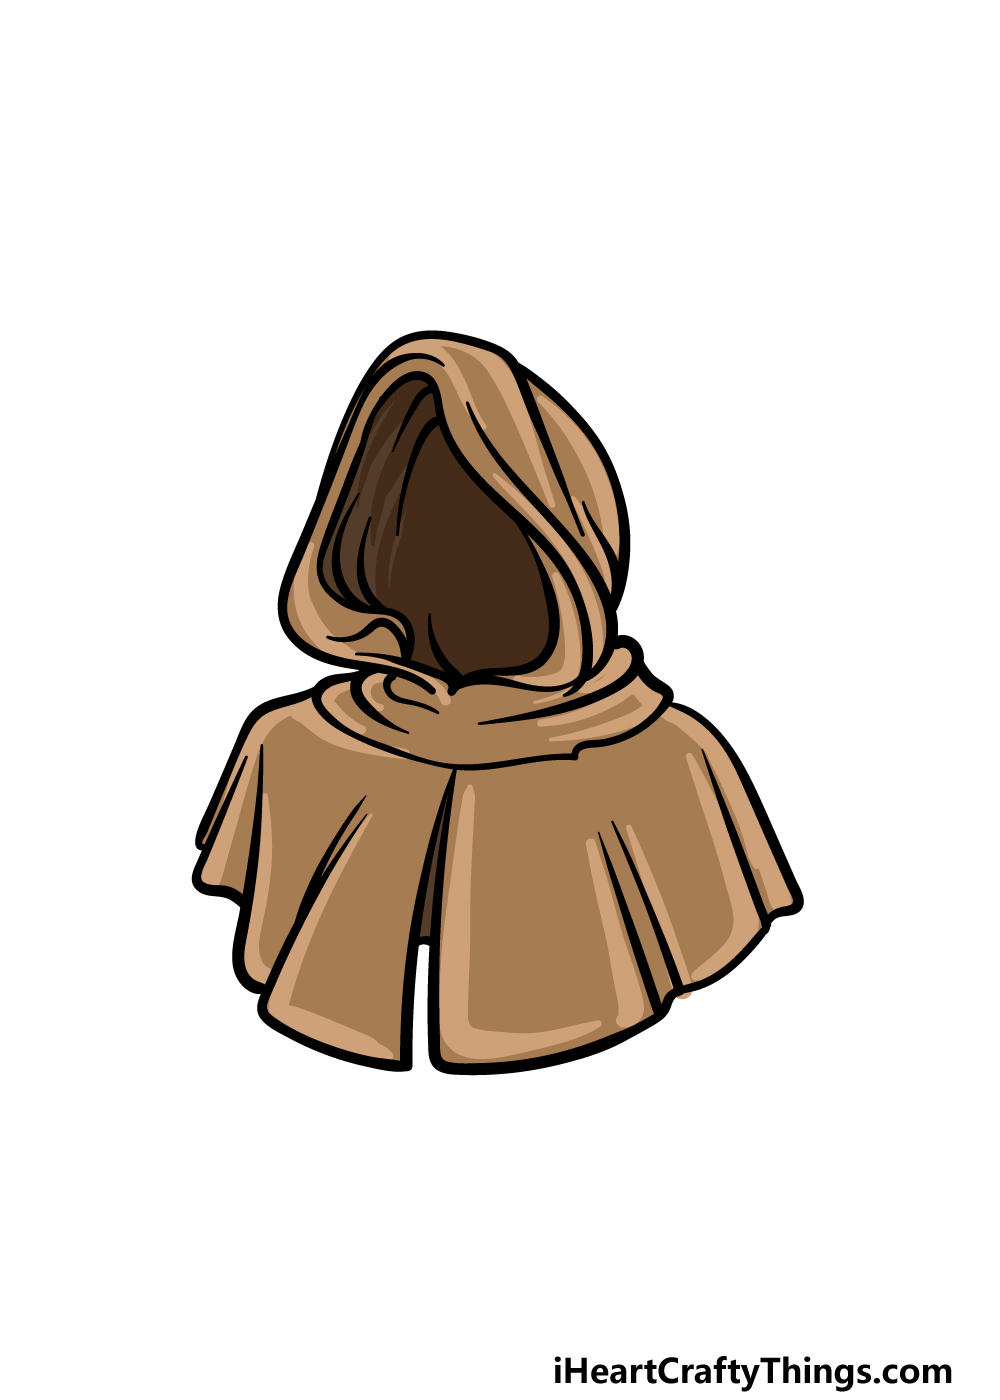
Now it’s time to fish up your hood drawing with some great colors! In our reference image, we went with some shades of brown to give the hood a look of being made of leather.
This is an approach that you could take for your own picture, but there are many different options that you could go for too!
Even if you went with this brown color scheme, you could incorporate darker colors for some weathering for it as well.
There are also many other colors that you could go for as well, so definitely go ahead and use your creativity as you pick your favorite colors!
It can also be fun to try out some new art mediums and tools, so maybe you could try a medium you’ve never used before to achieve your colors.
4 More Ways To Make Your Hood Drawing Unique
Make this awesome hood sketch even better with these fun and easy tips we have for you!
This hood drawing we have created in this guide looks like it is made of leather or some similar kind of material.
A hood can be made of pretty much any material, and they will all have their own textures and feels.
You could adapt a different material to this hood if you would like it to have a unique look. This could be done easily with a few details and color choices.
What kinds of materials would you like to use for this hood?
A hood will usually cover a head and face, and you could show this by drawing a face inside the opening of the hood.
It would be mostly covered by the hood and the shadow it casts, so we likely wouldn’t see much.
Regardless, you could make the face look like someone you know or even base it on yourself. What kind of facial expression do you think you would use for the face inside this hood?
This drawing of a hood is likely part of a larger outfit, so it could be fun to show what that outfit looks like. The hood looks like it could be a traveling hood, so the rest of the outfit could look similar.
Once you have drawn the rest of the outfit, you could also add some small details like mud and weathering to it and the hood to make it look well-traveled.
Another way to show where this hood sketch has been used would be to show a background. Maybe the person wearing it is going through a rainy forest or vast desert.
Adding a background would be an especially great idea if you drew more of the outfit and face as we spoke about in previous steps. There are so many possibilities and scenes you can potentially create!
We gave you a few ideas for some background settings, but what else can you think of to bring it all together?
Your Hood Drawing is Complete!
You’ve reached the end of this guide on how to draw a hood, and you have ended up with an awesome-looking hood!
Drawings like this can be a bit more tricky than expected, as there are many folds and smaller details to get right. Hopefully this guide made it much easier and more fun for you to do!
Finishing this guide is just a part of it, however, as you can also add some details of your own. We mentioned a few ideas such as drawing a face inside of the hood, but there are tons of ideas you can try!
Your drawing journey can continue on our website, as we have tons of awesome guides there for you to enjoy. Be sure to visit us there often to never miss out on what we have in store.
Please also share your awesome hood drawing on our Facebook and Pinterest pages for us to see when it’s done!