When it comes to different types of food, there are some that can prove to be quite divisive.
Olives are a great example of this, as they are a type of food that people either love or hate with little grey area in between.
The olive branch itself has also gained some symbolic significance over the years, as it represents peace and reconciliation.
Whether you’re an olive fan or like the symbolic meaning, this guide on how to draw an olive branch has you covered!
By the end of this tutorial, you will know exactly how you can represent this famous branch.
We hope that you end up loving this step-by-step guide on how to draw an olive branch in 6 steps no matter how you may feel about this controversial food!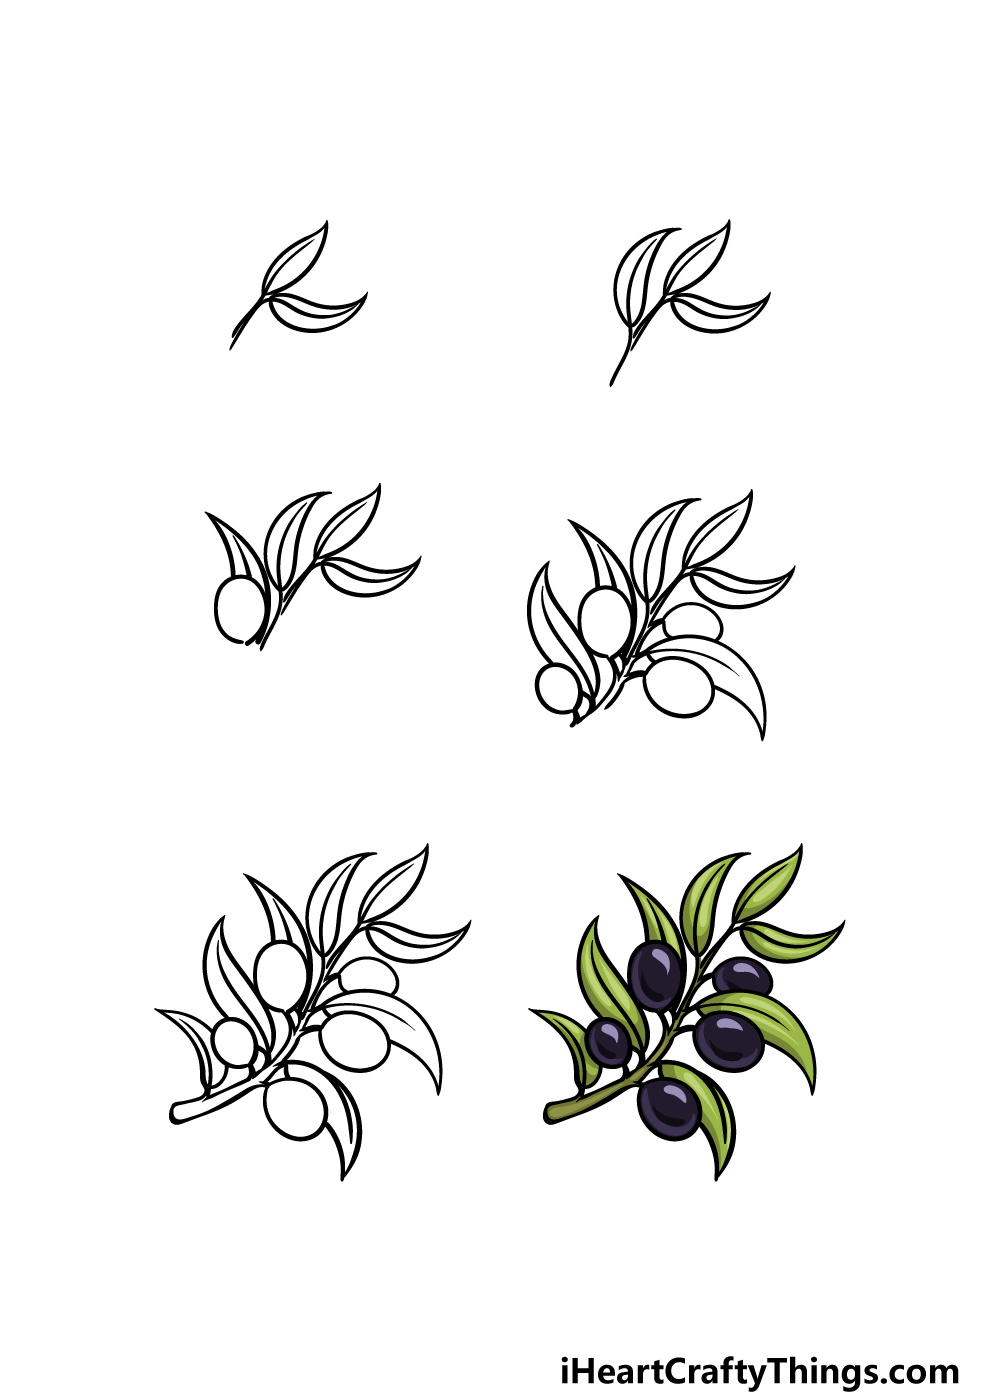
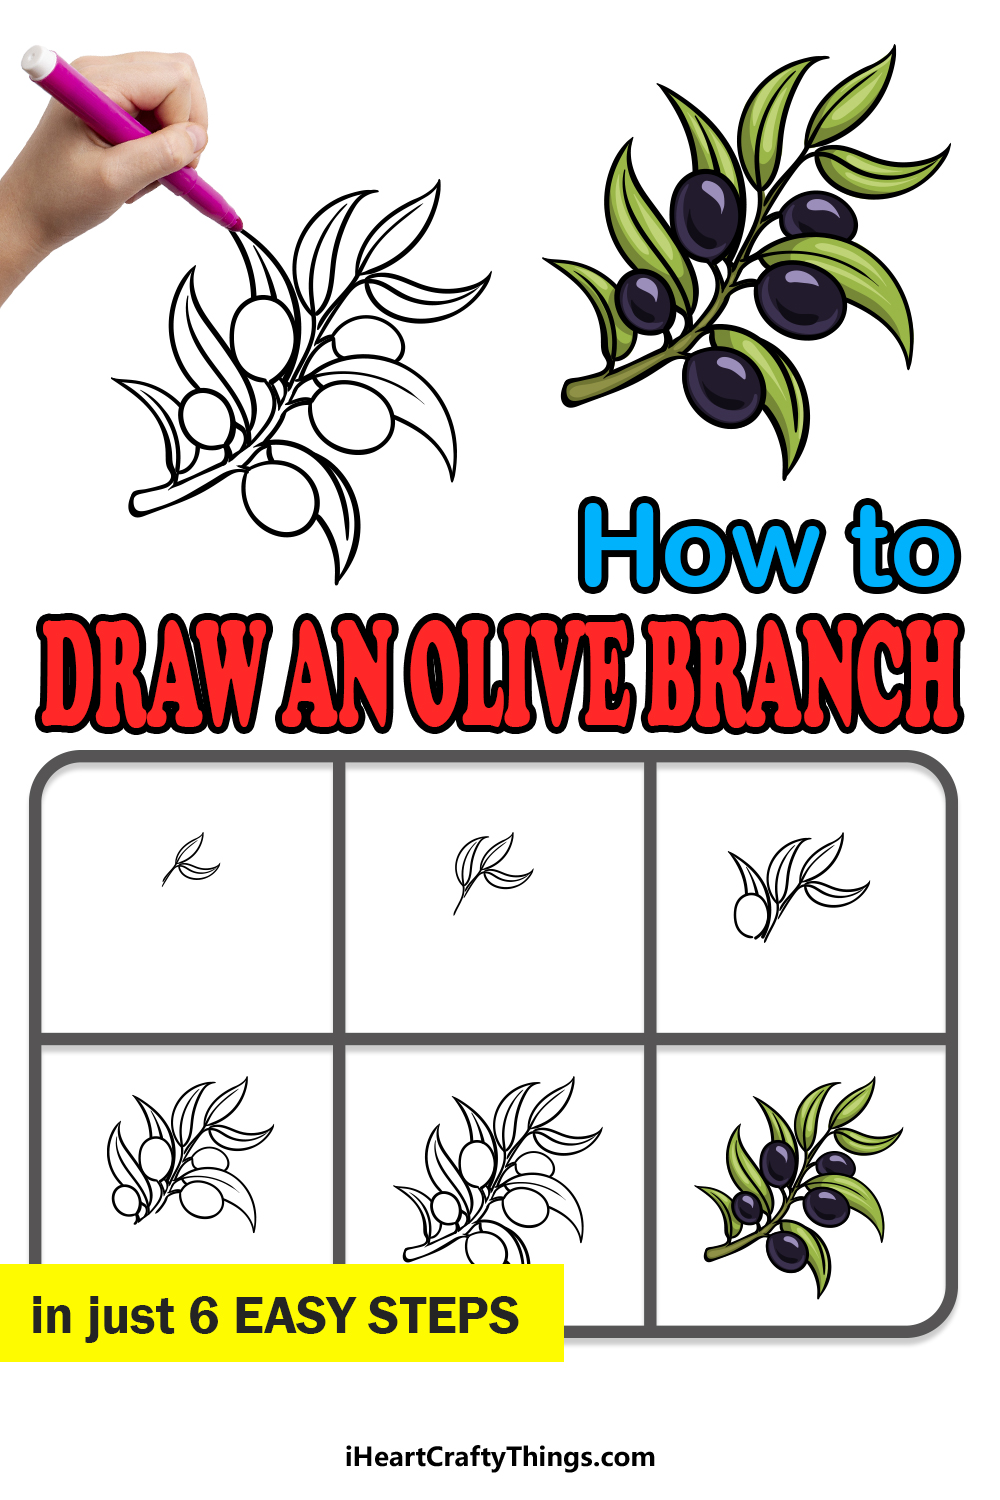
How to Draw An Olive Branch – Let’s Get Started!
Step 1

The olive branch has a rather distinctive look to it, and we will try to keep it looking as accurate as possible as we work through this guide on how to draw an olive branch.
One of the notable features of this branch are the thin, pointy leaves that cover it, and these are what we shall start with.
To start, draw two slightly curved lines very close to one another for the thin stem that the leaves will be attached to.
We will be drawing two leaves for now, and they will each have a really curvy outline with a sharp tip at the end of each one.
Draw a line down the center of each one, and then we can proceed to the next step of the guide.
Step 2 – Now, draw the third leaf for the olive branch

With the first two leaves of your olive branch drawing complete, we can now add the third leaf for the branch.
This one will also have a curvy line leading up to it, and then the leaf at the end of the stem will look very similar to the first ones.
The leaves of an olive branch have a rather distinctive placement to them, so be sure to replicate the way we placed them in the reference image as closely as you can.
With this third leaf, it’ll then be time to head on to step 3.
Step 3 – Draw the first olive and another leaf
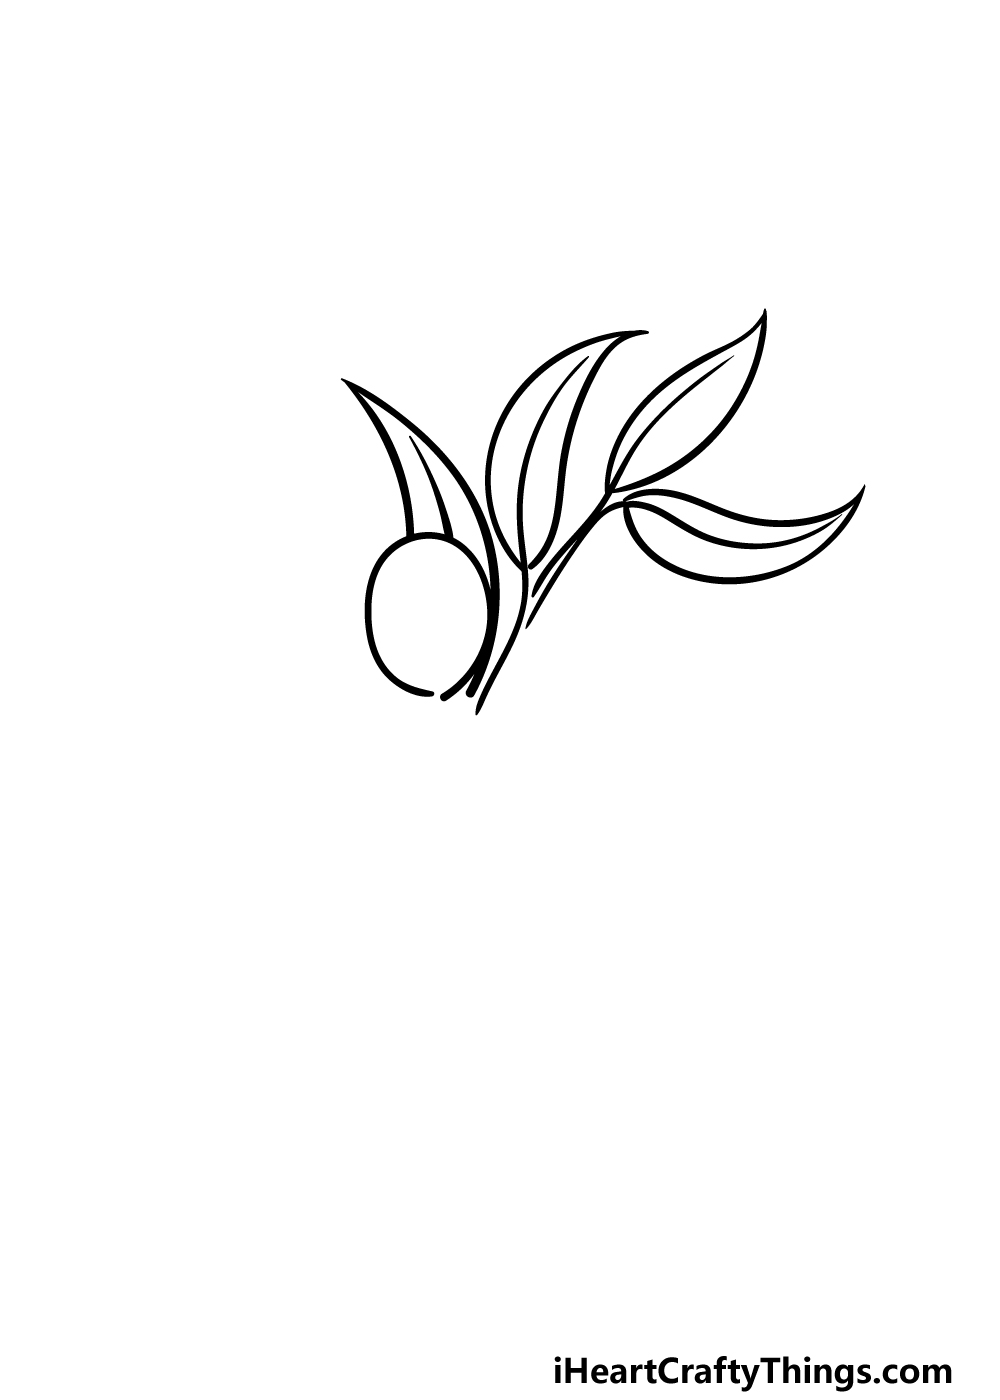
It’s about time that we added the first olive in this third step of our guide on how to draw an olive branch.
We will just be drawing the outline for this olive for now, and you can do that by drawing a fairly simple oval shape.
There will be a small space left empty at the base of this olive, but we will be attaching a stem to that in due time. Then, finish off by drawing one more pointy leaf poking out behind the olive.
Then, you’ll be ready to add some more olives and leaves in the fourth part of the guide.
Step 4 – Next, draw some more leaves and olives
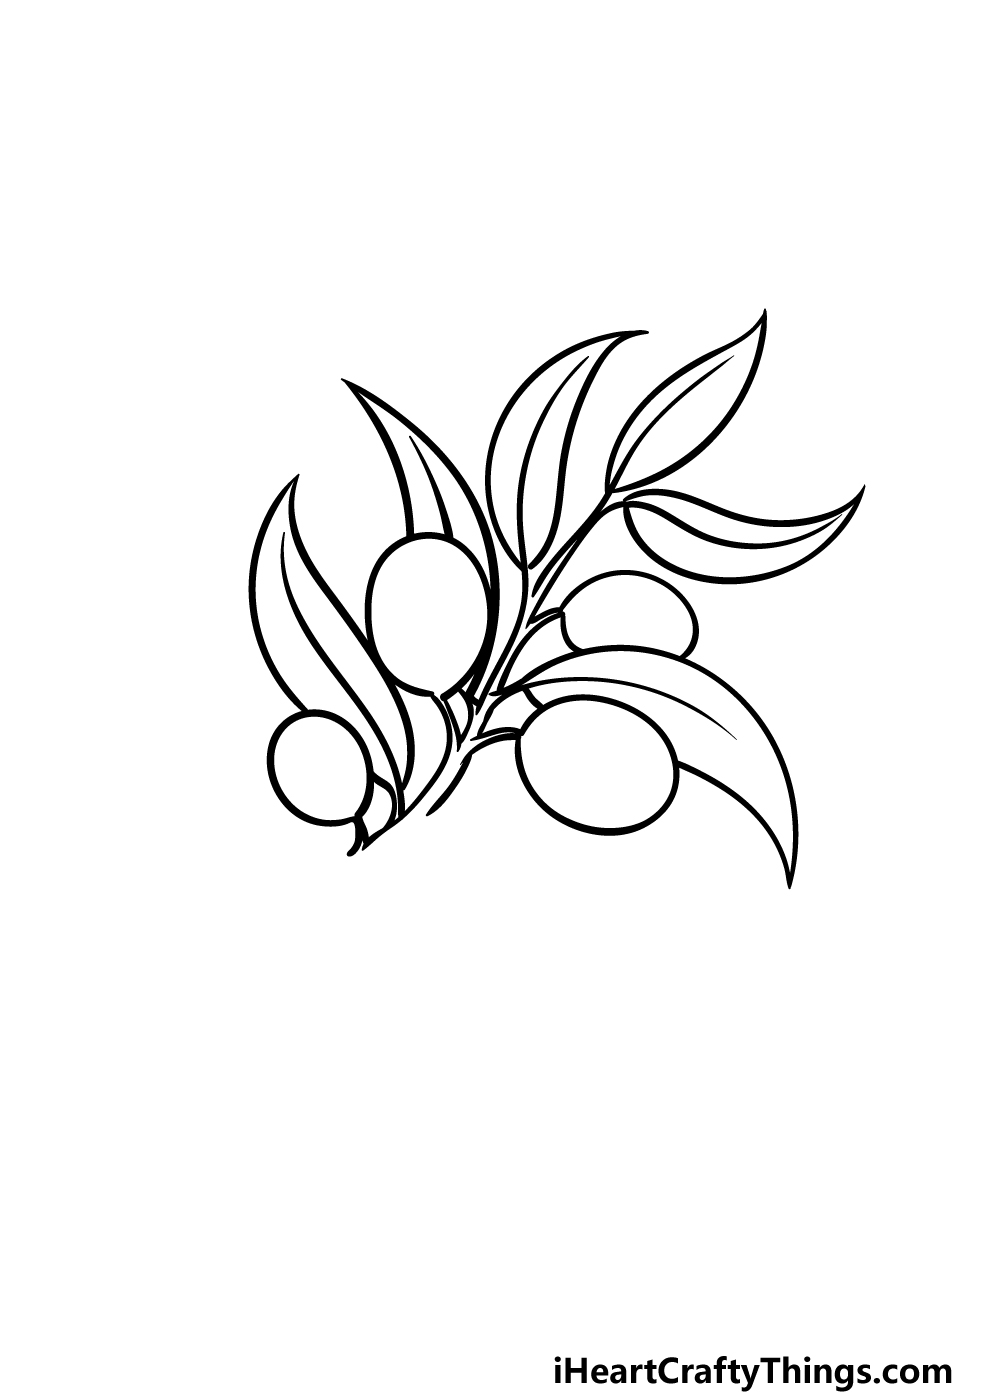
This olive branch drawing is still looking a bit bare, so we will be adding a lot more to it in this next step of the guide!
We will be using some curved lines to extend the main stem of the branch, and then several smaller ones will come off of that.
Each of these smaller stems will attach to either a leaf or a nice round olive. One of these stems will also attach to the olive that you drew in the previous step.
There will be another empty space at the base of the main branch now, but we will fill it in along with any additional final details in the next step of the guide.
Step 5 – Add the final details to your olive branch drawing

Before you add some color to this incredibly peaceful drawing, we just have a few final details and elements to add in this step of our guide on how to draw an olive branch!
First, you can use some more curved lines to create the base of the main stem. This part of the stem will be a bit thicker than the rest of the stem.
Otherwise, it will also have several smaller ones coming off of it, and each of these will again have a leaf or an olive attached to it.
Before you move on to the final part, you should feel free to add any other additional details, elements or ideas that you may have!
You could draw a background, and this could represent a realistic setting or even be a bit more symbolic in nature. How will you finish off this beautiful image?
Step 6 – Finish off your olive branch drawing with color
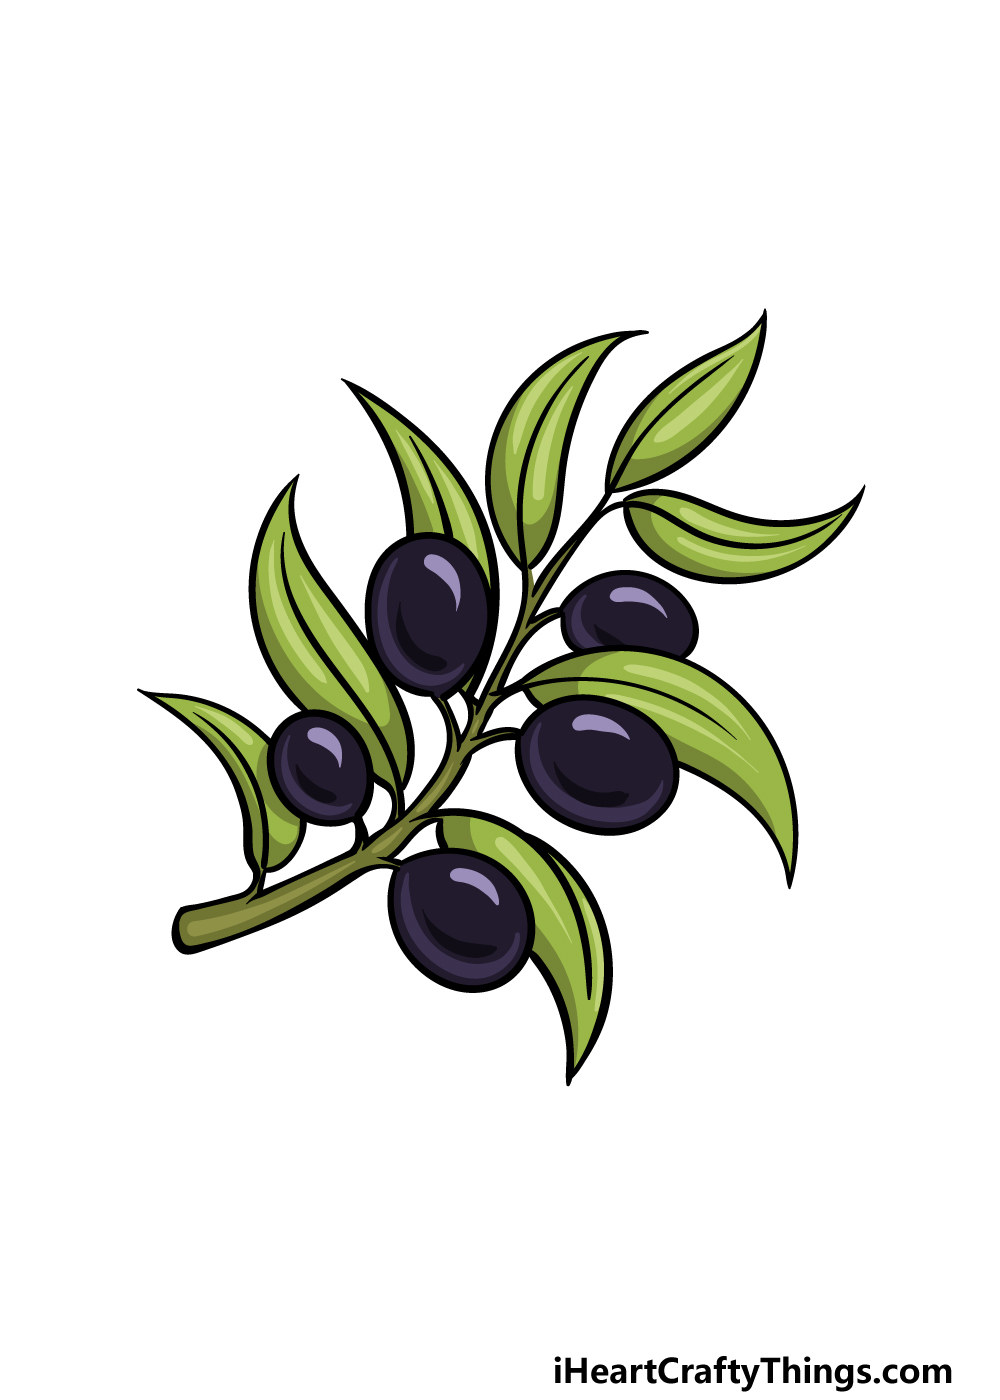
Now you’re ready to finish off this picture with some color! For the olives, we went with some dark purples with lighter shades incorporated as well.
This helps to give the olives a healthy, shiny look. Then, we used browns for the branch itself and finished off with beautiful bright greens for the leaves.
You could go for these colors as well if you like this look, but you could also go for some unique color choices.
Olives can be green sometimes, so you have that option for the olives as well. What colors and mediums will you choose for this olive branch?
Do this to take your olive branch drawing to the next level
Check out these tips on how to make your olive branch sketch look even better!
This drawing of an olive branch shows just a small section of the branch, but you could show a lot more of it!
Now that you know how to draw an olive branch, you could draw a lot more of the tree it is attached to.
You could even fill the page with olive branches if you have a lot of patience! If you have enough space on your page, then you could even draw the entire tree to finish off the scene.
An olive branch is a really famous branch as well as a symbolic one. You could make this drawing more interesting by adding some other famous branches or plants!
These could be plants that are also symbolic, or you could simply include plants and flowers that you like. Another interesting angle would be to include a dove holding the olive branch.
This is a common image of peace, and it would add a whole new angle to your artwork.
Olives not only look great on a tree, but many people also enjoy them as a delicacy. You could show this side of olives in your olive branch drawing!
You could do this by showing the olive branch along with other olive products. This could include a jar of olives, a salad containing them or even something like olive oil.
These are a few forms that olives can take, but you could include any others you can think of!
Finally, no matter what you decide to include in this olive branch sketch, you could finish it off with a background.
For example, if you kept the olive branch as it is, then you could draw a beautiful setting behind it.
You coil look up a beautiful Greek countryside for one example of an idyllic setting for this olive branch. What are some other amazing backgrounds you could use for this picture to finish it off?
Your Olive Branch Drawing is Complete!
We hope that you had a fun and peaceful time working on this guide on how to draw an olive branch!
Even though this picture may have seemed simple on the surface, getting all of the details and proportions correct can still prove a bit of a challenge.
As long as you follow all of the steps in this guide you will master it in no time!
Then, you can keep going by showing off your creativity with your own ideas and details. We briefly covered a few ideas you could try, but this is your chance to show off what you can do!
The fun doesn’t have to end here, either. Be sure to visit our website for access to many more amazing drawing guides to enjoy. Many more are coming soon, so you’ll want to check in often.
When your olive branch drawing is complete, please show us how it turned out by sharing it on our Facebook and Pinterest pages.