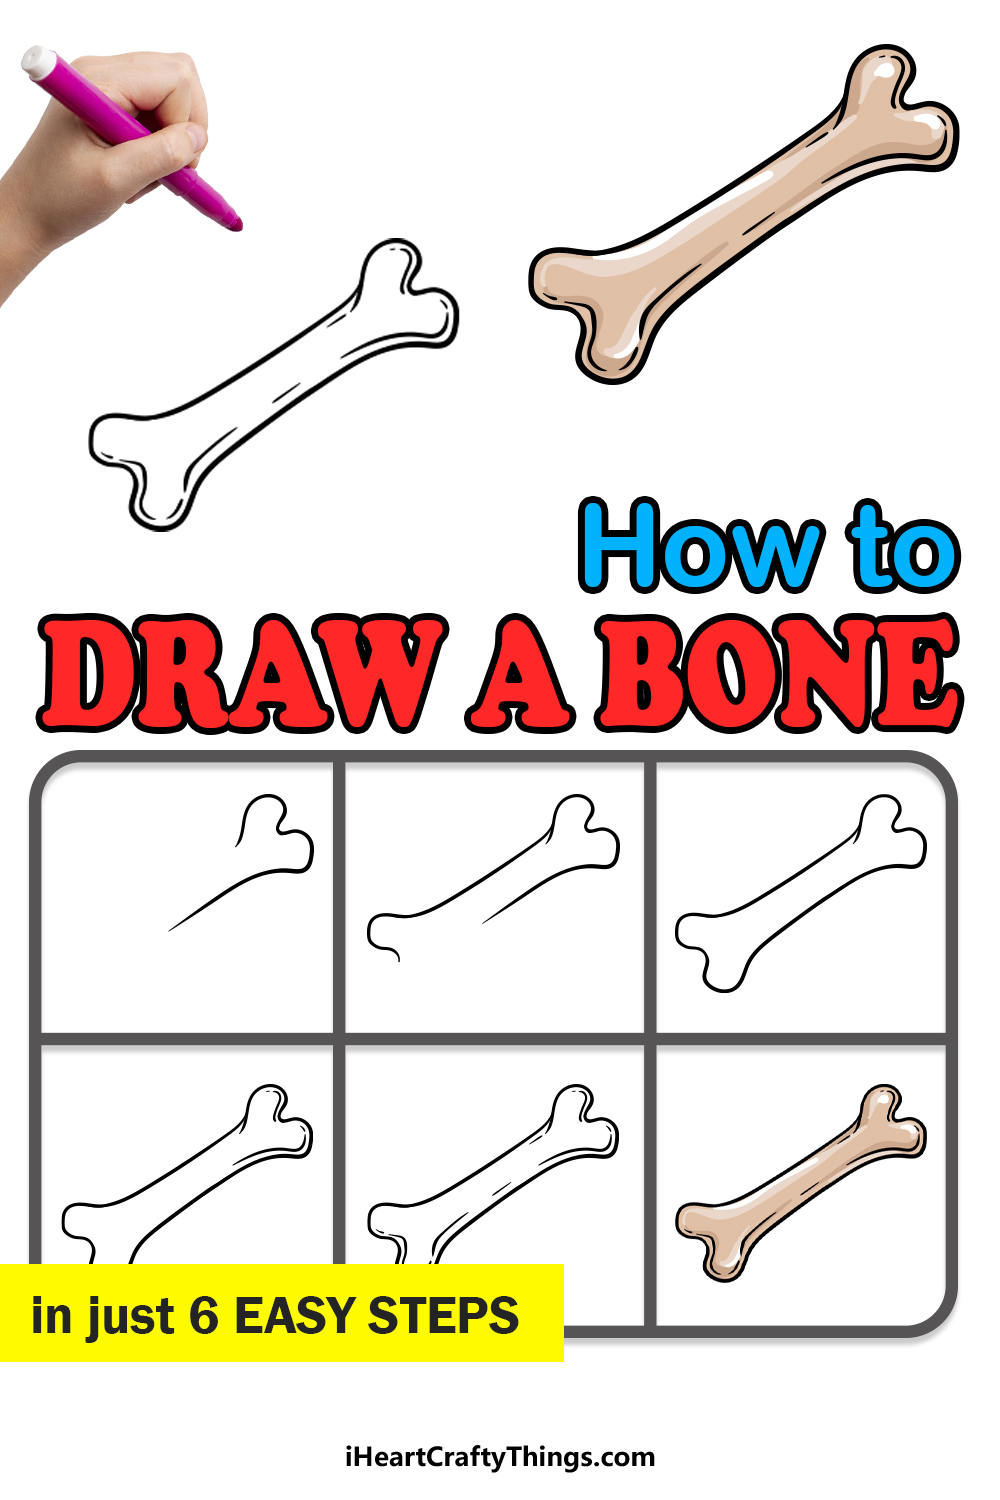
It’s time to learn how to draw a bone by following this guide for kids! You’re about to see that it’s easier to make this drawing than you may think.
There are no bones about it, a bone may seem like a simple thing to draw on the face of it. However, when you actually try to do it you may see that it’s quite tricky to get the shape looking just right.
You could use this design as a treat for a cartoon dog or perhaps as part of a dinosaur skeleton, but you won’t be able to make a drawing without knowing the correct steps.
In this guide, I will show you how to gradually build up your drawing so that you have something recognizable. Once you’ve seen how it’s done, you’ll wonder how you didn’t know it before!
Find Out How To Make Your Bone Drawing
How to Draw A Bone – Let’s Get Started!
Step 1

The bone that we will be drawing in this guide on how to draw a bone is the pretty standard, classic bone shape that you’ve probably seen before.
In this first step, we will begin with the first half of the bone.
The end of the bone is drawn with two rounded edges, and it should look a bit like the top of a heart shape.
It will be a heart shape without a bottom, and instead it will extend into some straight edges that will serve as the central pillar of the bone.
That will be all there is to it for this step, and now you’re ready for step 2!
Step 2 – Draw the other side of the middle of the bone
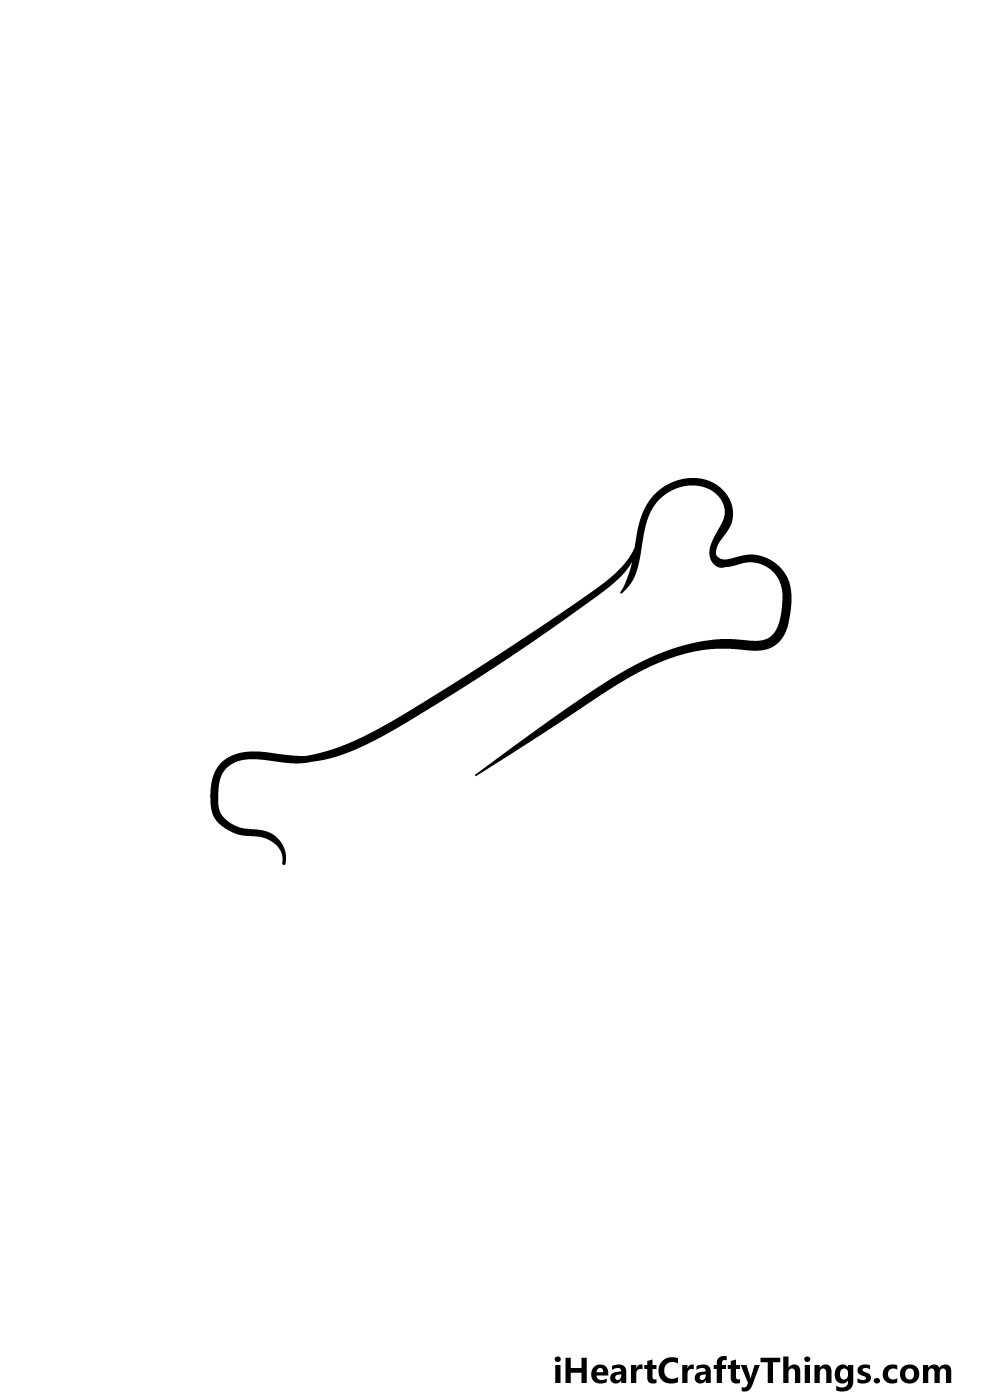
For this section of your bone drawing, you will be extending the center of the bone on the other side from the one that you drew previously.
To do this, simply extend another straight line from the end that you drew earlier. Then, this line will end in a rounded line at the end.
This rounded line will form the other side of the bone, which we will be working on in the following steps.
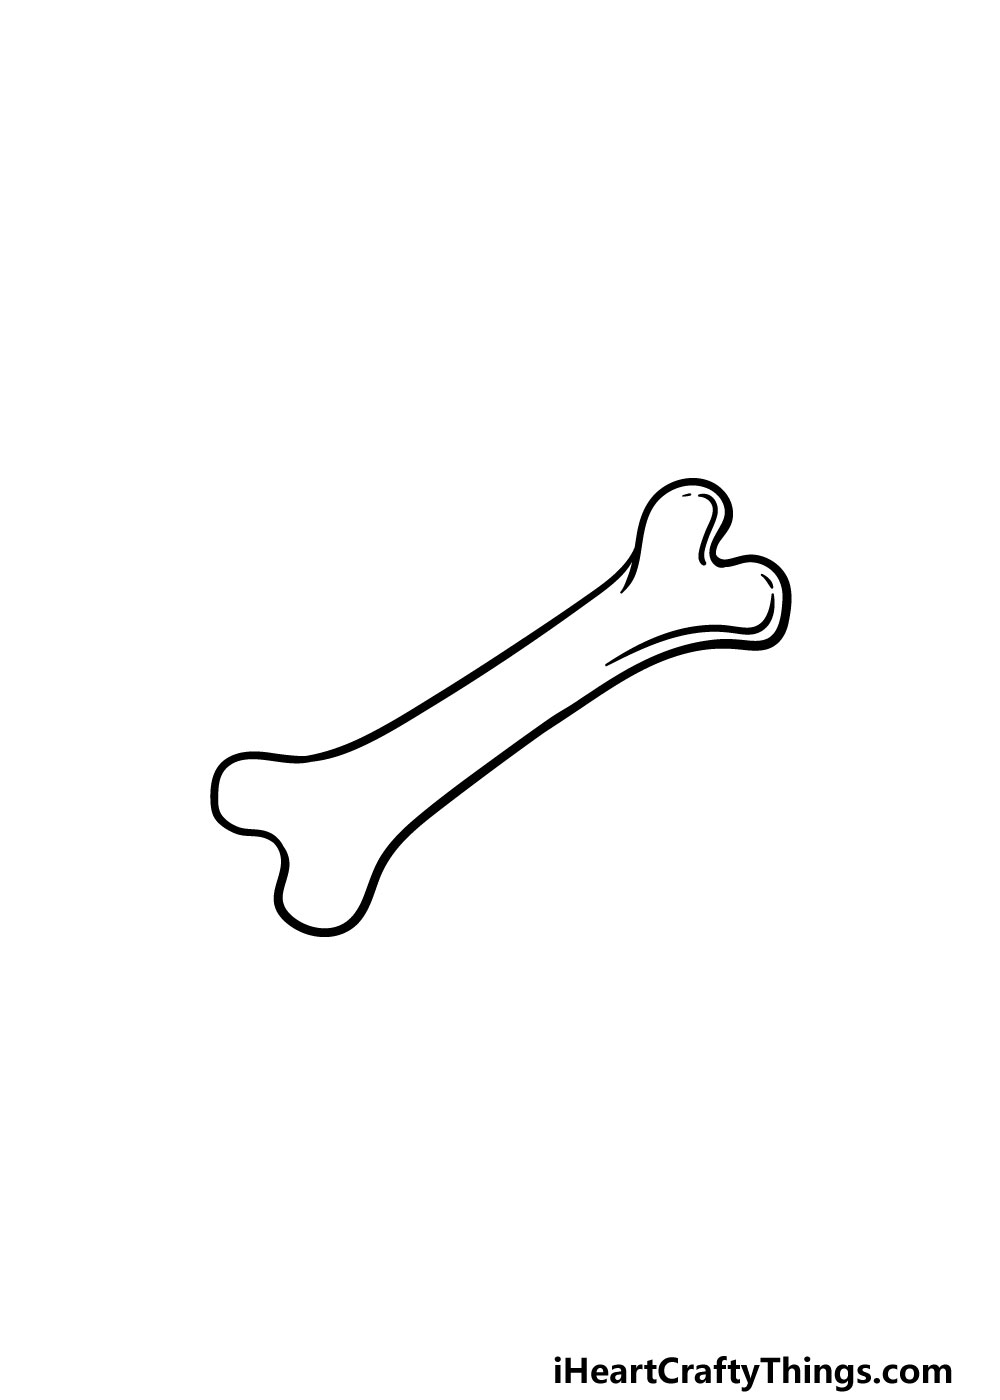
Step 3 – Now, finish off the bone outline
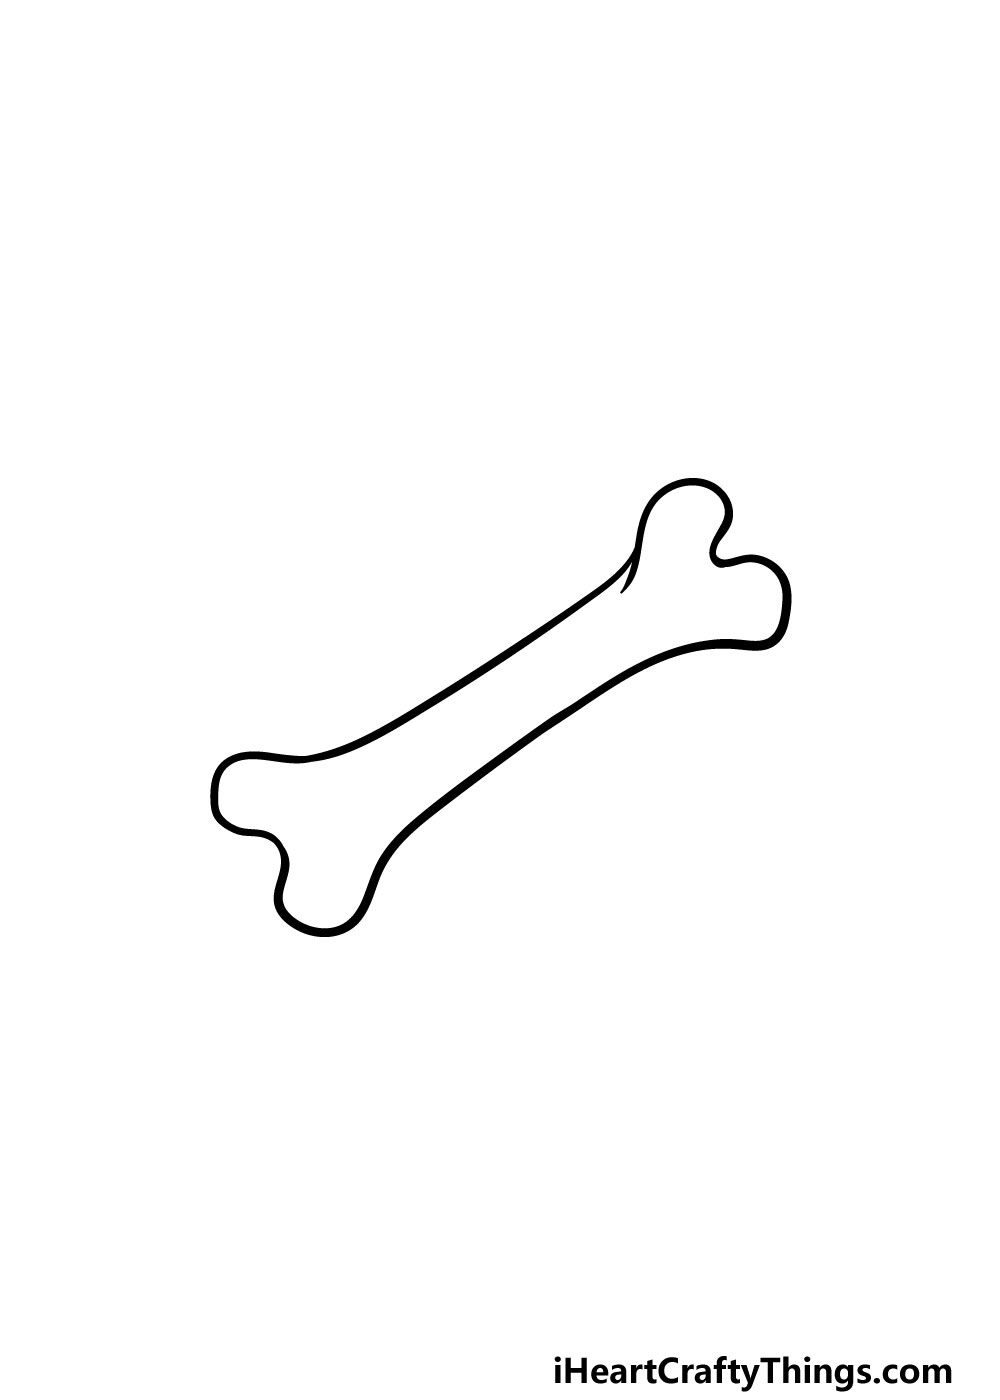
This step of our guide on how to draw a bone will see you finishing off the outline that you’ve been working on so far.
To do this, you can draw the second bulge of the shape at the end of the bone. This will connect to both sides of the inner column of the bone, as shown in the reference image.
That will take care of the outline of the bone, and now we will start to add some extra details and touches in the next few steps!
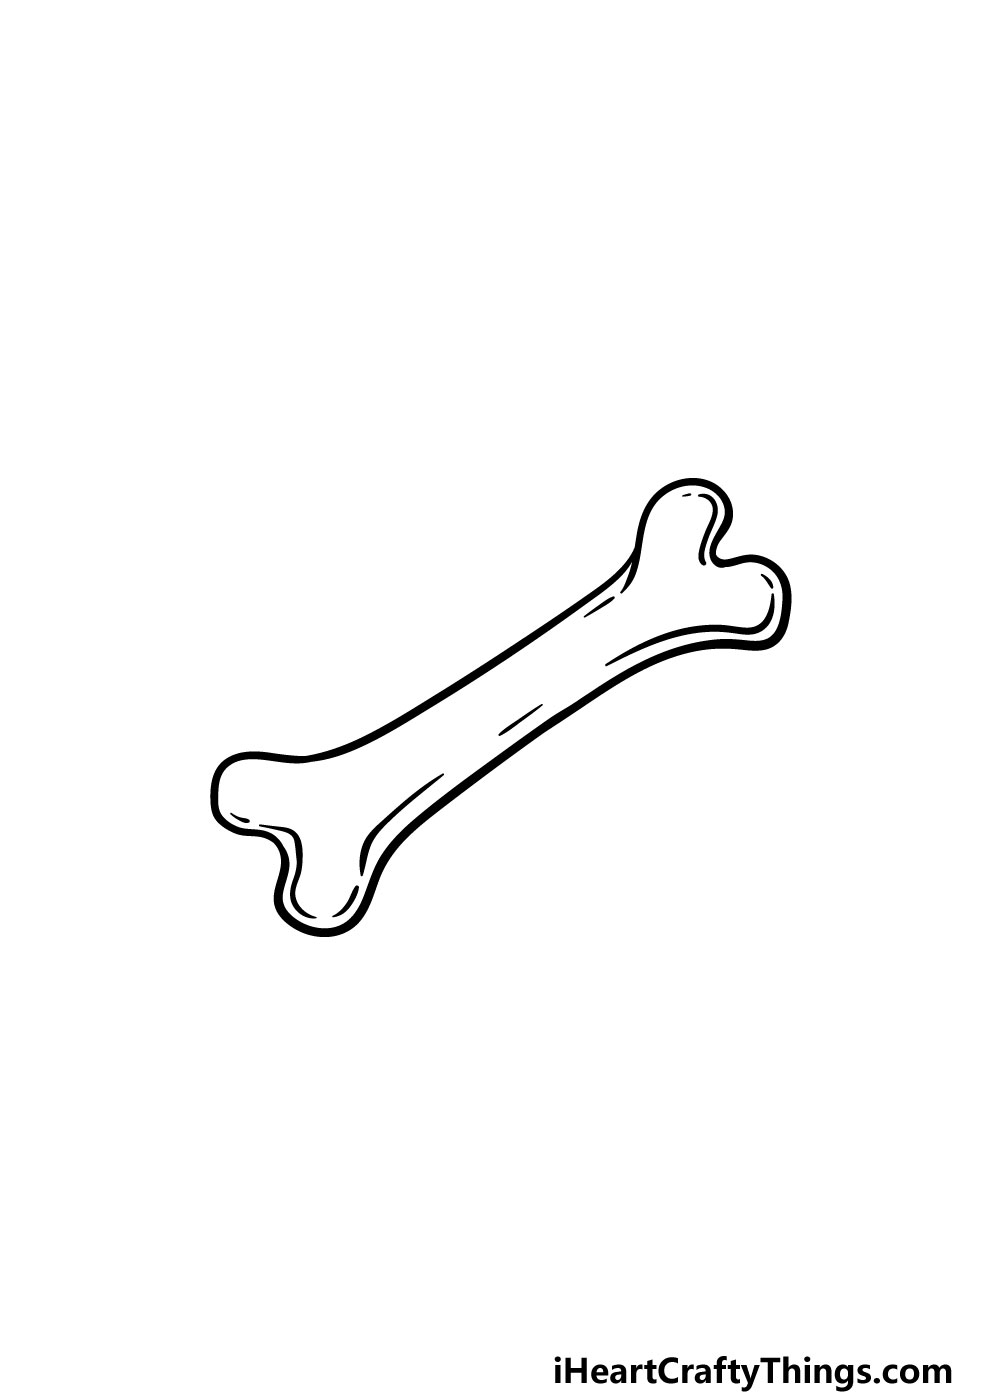
Step 4 – Next, draw some inner details for the bone
Now that you have the outline of your bone drawing done, you can start to add some inner details in the next few steps.
To start with, you can start to add some lines along the perimeter of the outline at the end of the bone. These details are simple yet effective, and you can finish them off in the next step before you color it in!
Step 5 – Now, you can finish off the final details
Before you move on to the final step of this guide on how to draw a bone, there are a few final details that you can add to really finish it off.
This step will also allow you to add some elements of your own to personalize this picture even more!
First, you can add some more lines along the inner perimeter of the bone, much as you did in the previous step.
Then, once you have those lines you are ready to move on to the final step! We mentioned adding some details of your own before proceeding, and you should be sure to do that now if you would like to!
Your own details could be small little texture touches or be big enough that they change the entire feeling of the image. Perhaps you could draw it to look like a giant chicken drumstick or incorporate it into a pattern.
You could even draw a cute puppy that’s about to enjoy this bone! What can you think of to finish off this drawing before you add some color?
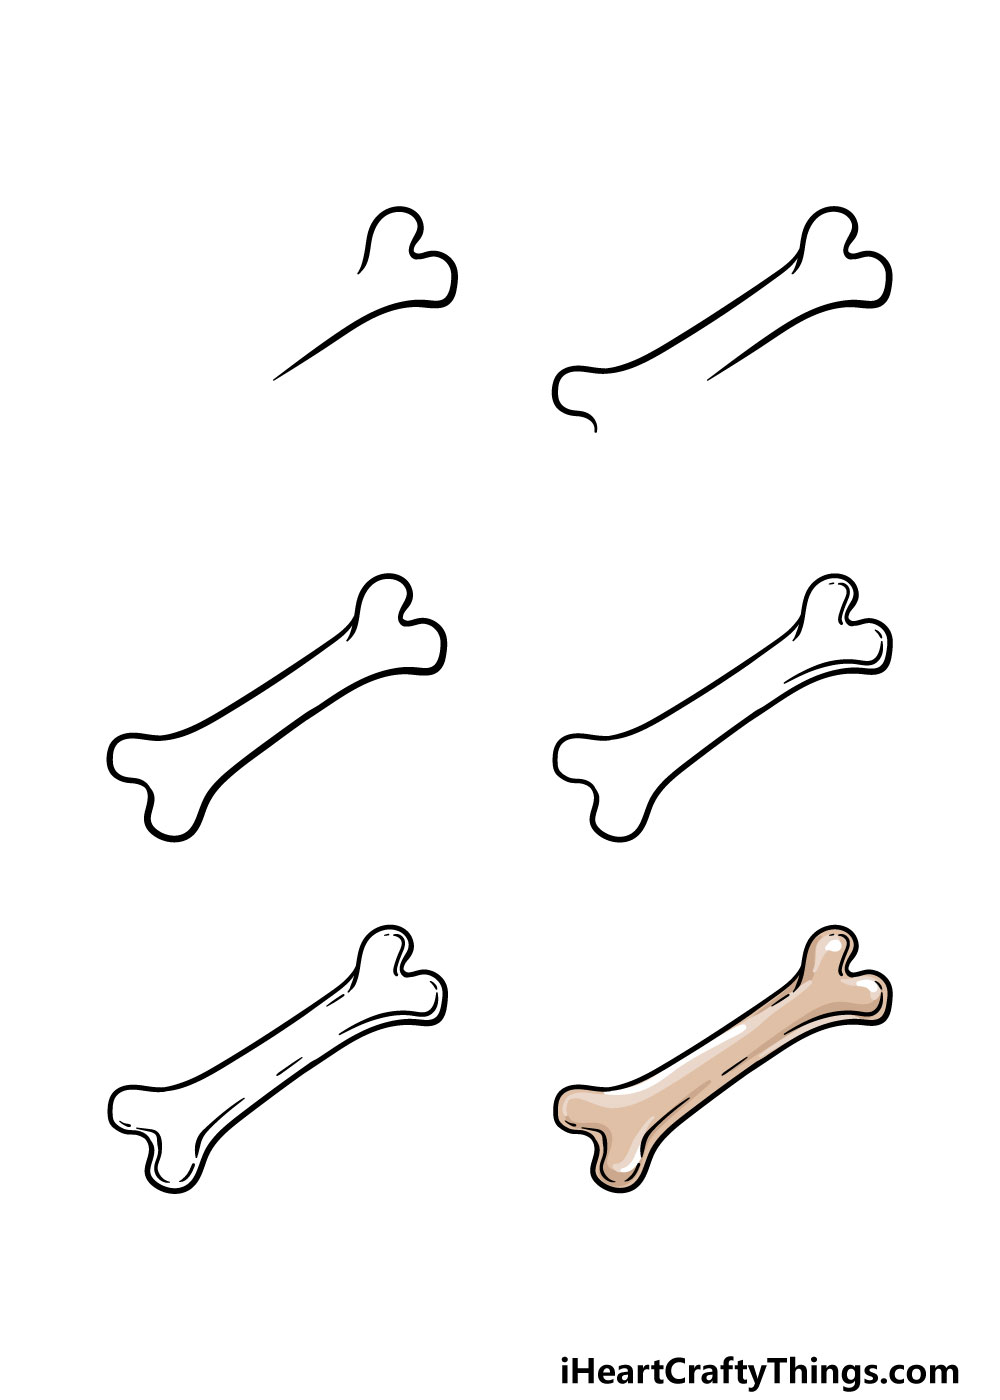
Step 6 – Finish off your bone drawing with some color

This final part of your bone drawing is the one where you get to relax with some fun coloring action! You’ve done a great job following this guide, and now you get to take over and show us what you can do with your creativity.
In our reference image we showed you just one way that you could color in your drawing. We used a few shades of brown for it, but while this is a suggestion you could use you certainly shouldn’t feel like you have to use these colors!
This is your chance to use any of your favorite colors to bring this drawing to life.
You can also experiment with your favorite art mediums to help achieve your color choices. Whether you use your art tools and mediums for a bright and vibrant color palette or go for a more muted, classic look, we know it will look incredible either way!
We can’t wait to see how you finish off this amazing bone drawing of yours.
Do this to take your bone drawing to the next level
Have some fun taking this bone sketch even further with these fun tips!
The specimen we created for this bone drawing is a pretty standard bone, but there are so many different kinds. You could add some of these different types near or even connected to the one we created!
These could be as complex as a full skull, or they could be similar to the one you created but in a different size.
You could make a whole skeleton or maybe just have them arranged together!
What other bones would you like to add to this drawing?
When you have decided on the bones you would like for this drawing of a bone, you could then create a background setting. If you made a full skeleton, then the background could make it look like a living one!
Or, the bones could be in the ground as if they are ancient fossils getting unearthed. Another idea would be to draw an x-ray screen to make it look as if someone is standing behind it.
These are a few of the backgrounds you could create, but what else can you think of?
Incorporating crafts and materials would be a great way to make this drawing even more dynamic. If you went with our suggestion of making it look like these bones are in the dirt, you could actually add some real dirt!
To do this, apply a thin layer of glue around the bones and then sprinkle some dirt over it. Blow the excess dirt away and then it will look like the bones are actually in the ground!
Just be sure to put some newspaper on the table so you don’t make too much of a mess.
Finally, you can also try out more conventional art tools and mediums for your bone sketch. Don’t be shy about trying out new, fun art tools that you maybe wouldn’t have thought of before!
Mixing different kinds of art tools can also help you achieve some very interesting color contrasts.
Your Bone Drawing is Complete!
That brings you to the end of this guide on how to draw a bone! We really hope that working through this guide gave you all of the tools that you needed to achieve this awesome drawing.
On top of that, we also hope that it was a lot of fun for you to do! Breaking down a new drawing into smaller steps is usually the best way to conquer a drawing challenge, so we know that with this guide you will have no problems mastering this picture.
Now you can make this image your own by adding your own touches, details and elements. We mentioned a few ideas that you could try, but also be sure to get creative with it as you let your imagination run wild!
You don’t have to stop here, however! We have many amazing guides for you to enjoy on our website. We also upload new ones frequently, so be sure to check in often to never miss out.
Once your bone drawing is finished and ready, we would love to see it! You can let us take a look by sharing it on our Facebook and Pinterest pages for us to enjoy.