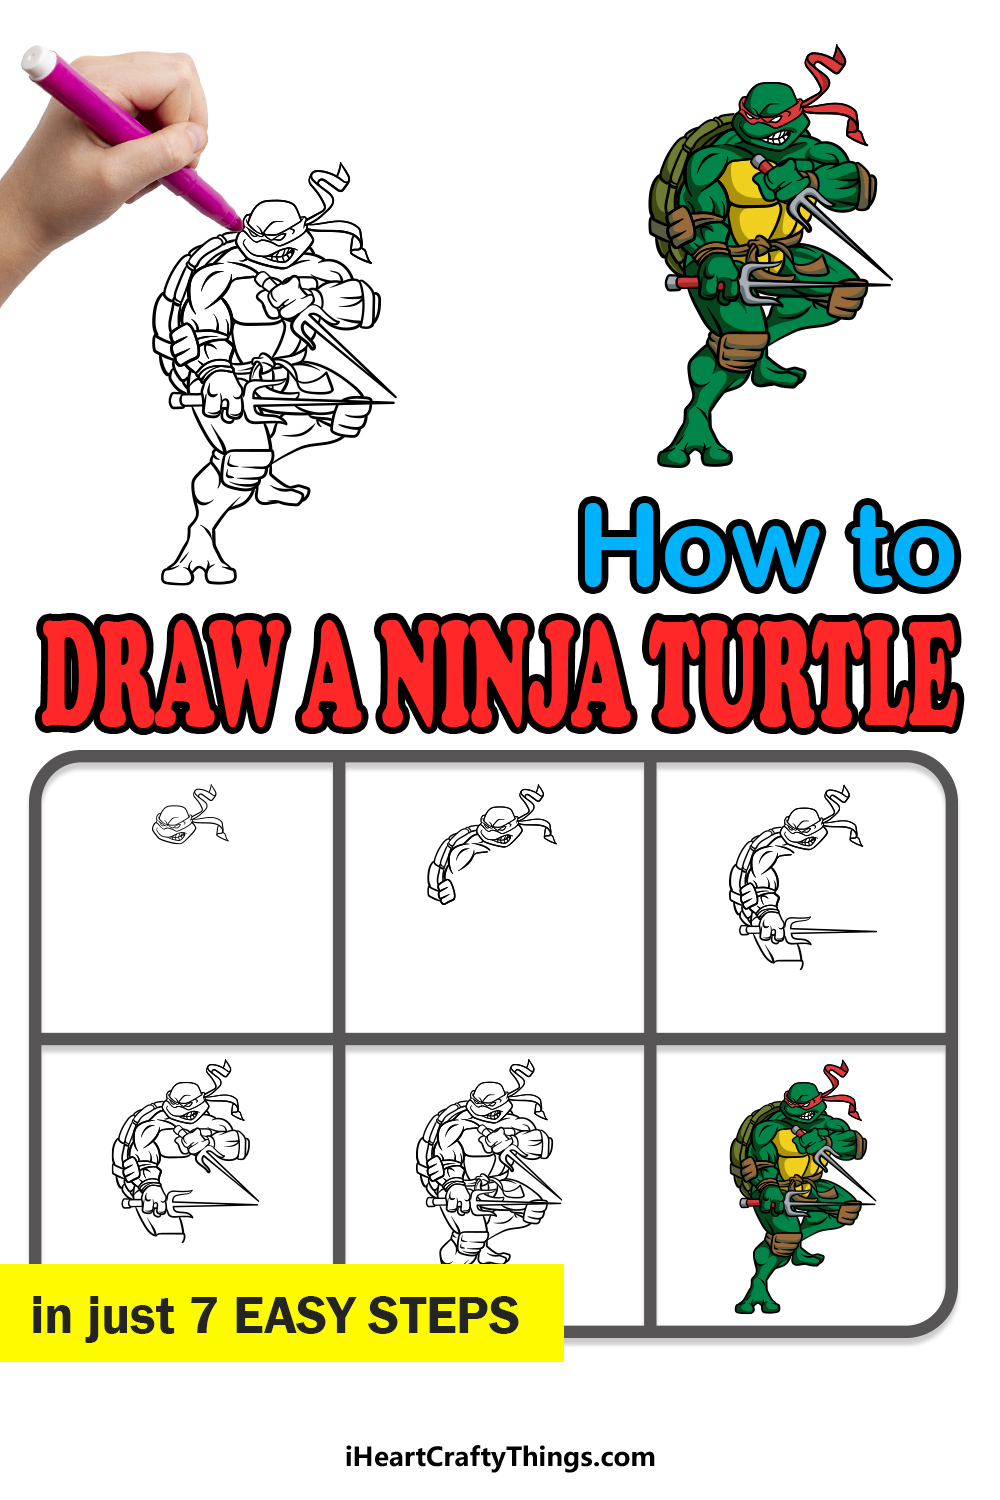
There are many unique and cool superheroes in media, but few are as unique as the Teenage Mutant Ninja Turtles!
These ninja brothers live in the sewers, only emerging to fight crime and protect their city. There are four of these heroes, and it can be lots of fun to learn how to draw a Ninja Turtle to recreate these heroes.
This guide you’re about to do will show you how to do just that!
We really hope that you have lots of fun with this step-by-step guide on how to draw a Ninja Turtle in just 7 easy steps!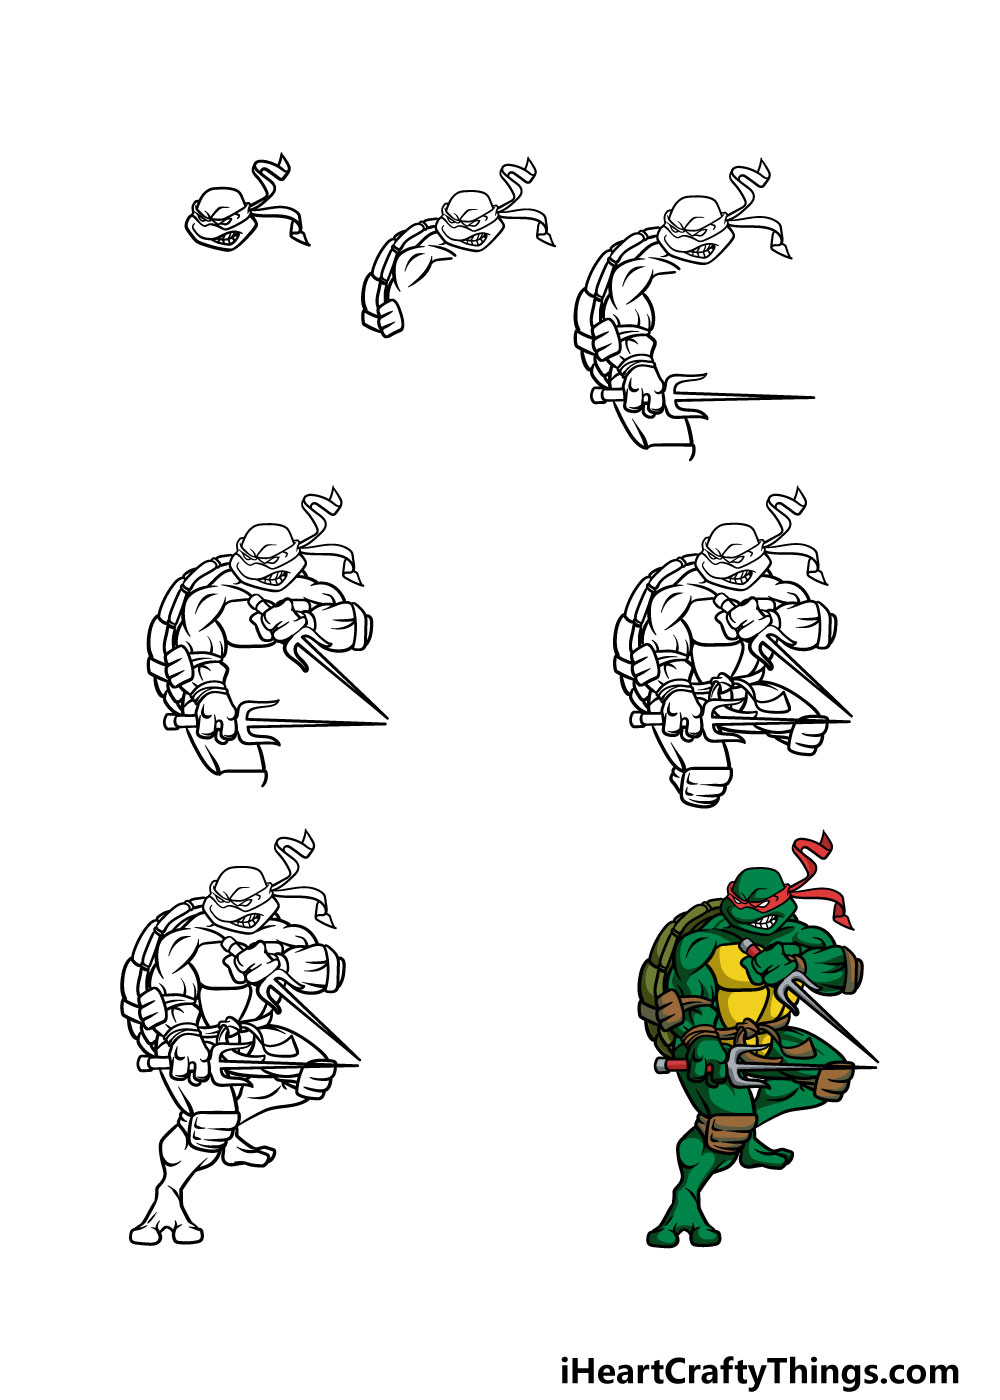
How to Draw A Ninja Turtle – Let’s Get Started!
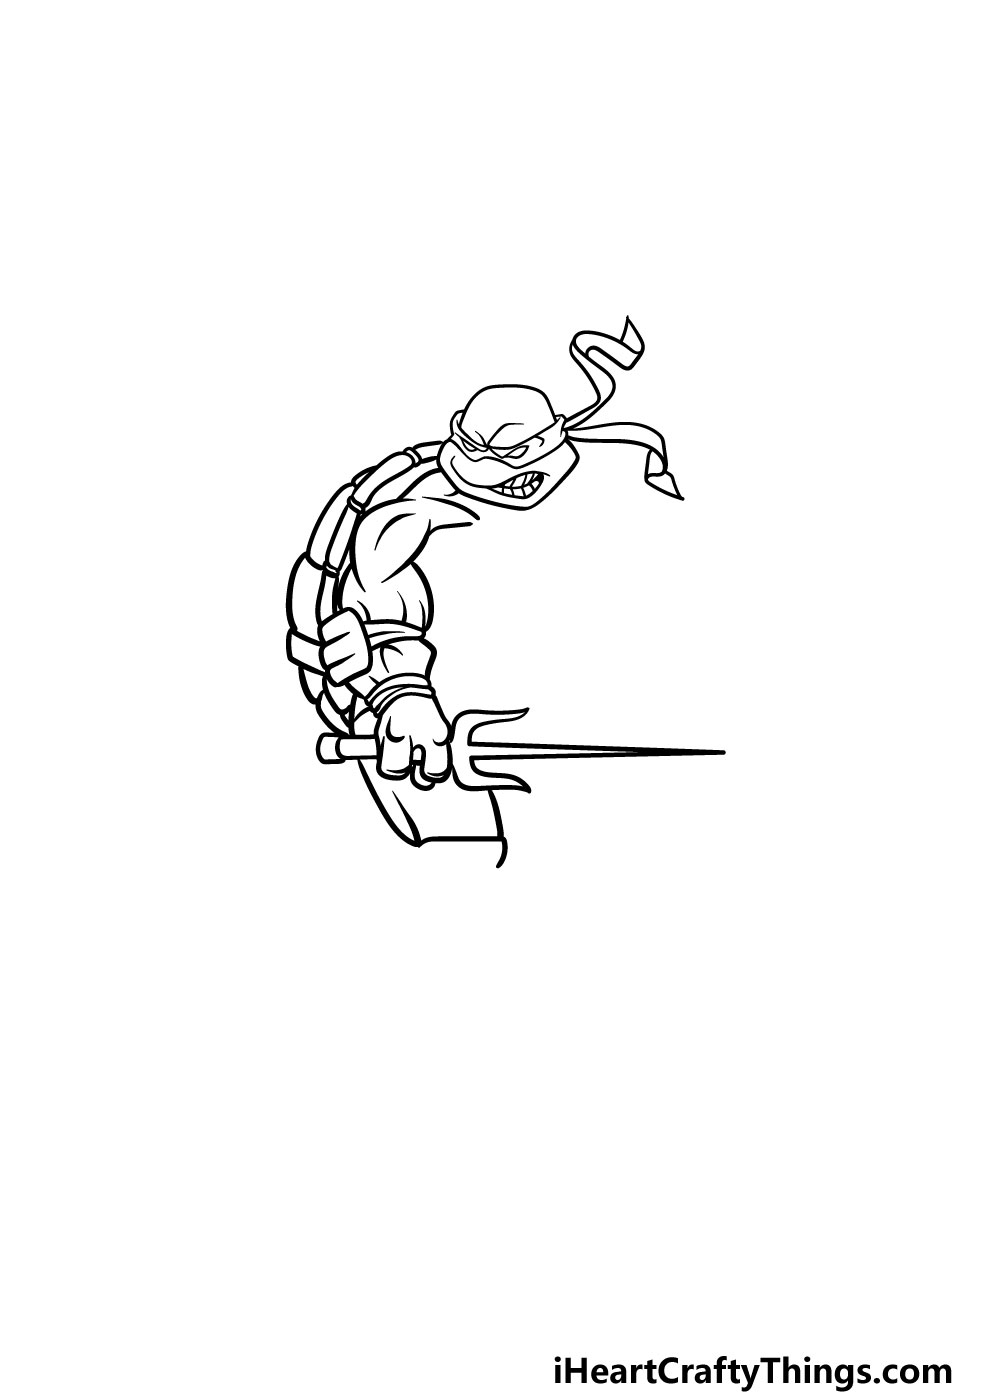
Step 1
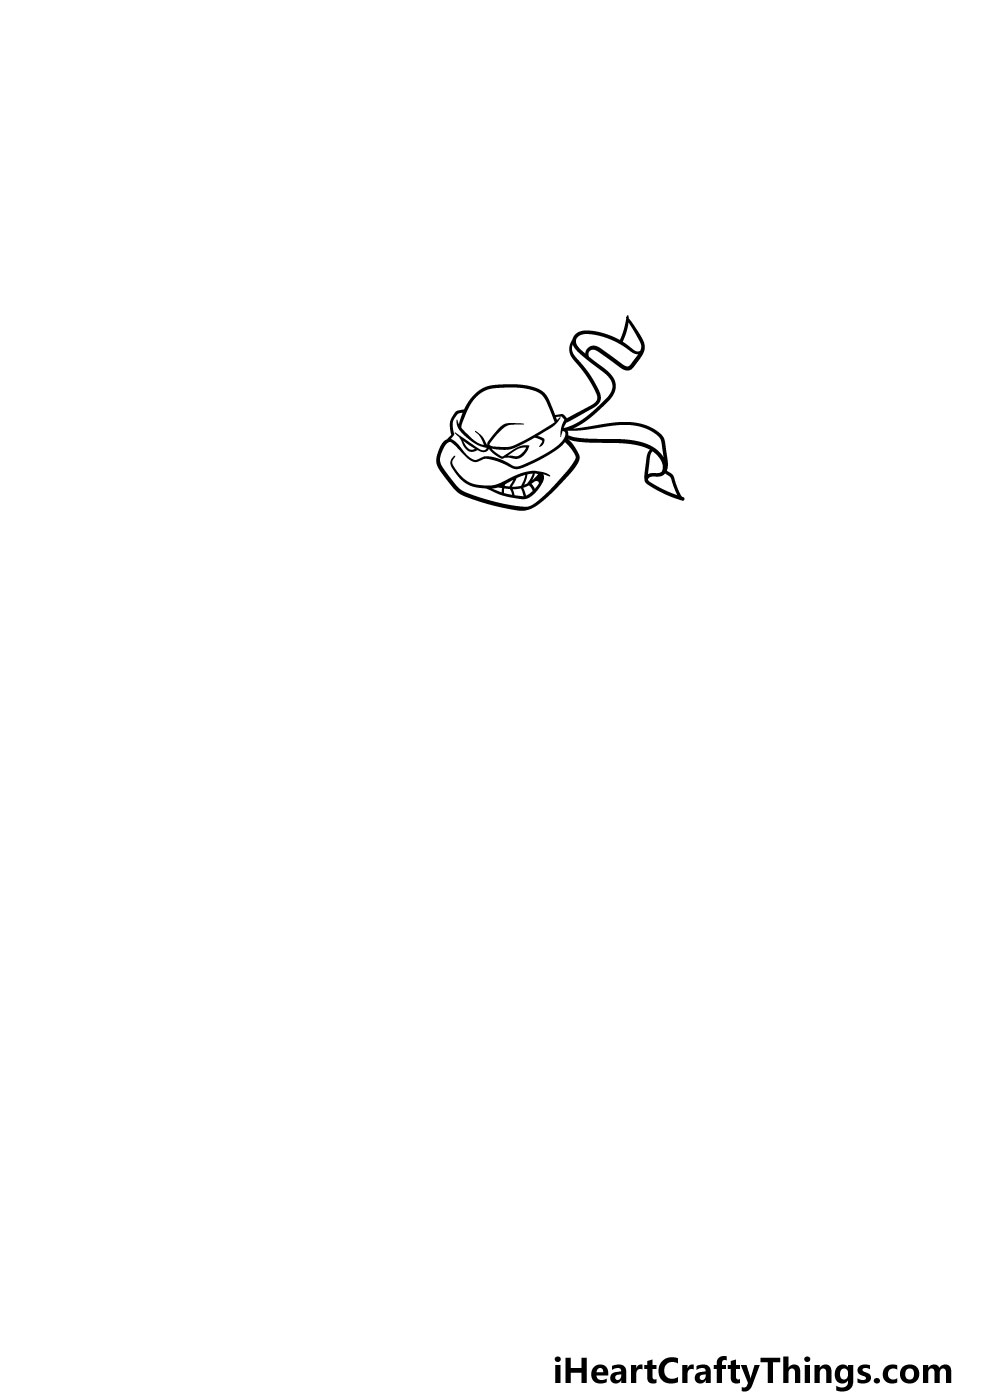
In this guide on how to draw a Ninja Turtle, we will be creating the hot-headed Raphael. While we will be drawing him specifically in this guide, later on we will show you how you could turn him into your favorite Ninja Turtle if you would like!
For now, we will be drawing his face. His head will be quite rounded at the top, whereas on the bottom half it will be a bit more angular.
He will also be wearing his signature Ninja Turtle mask, which you can draw going across his face. His angular eyes will be drawn straight onto the band of his mask, as shown in our reference image.
Finally, you can draw his rounded nose and mouth, and then finish off with his mask flowing behind his head.
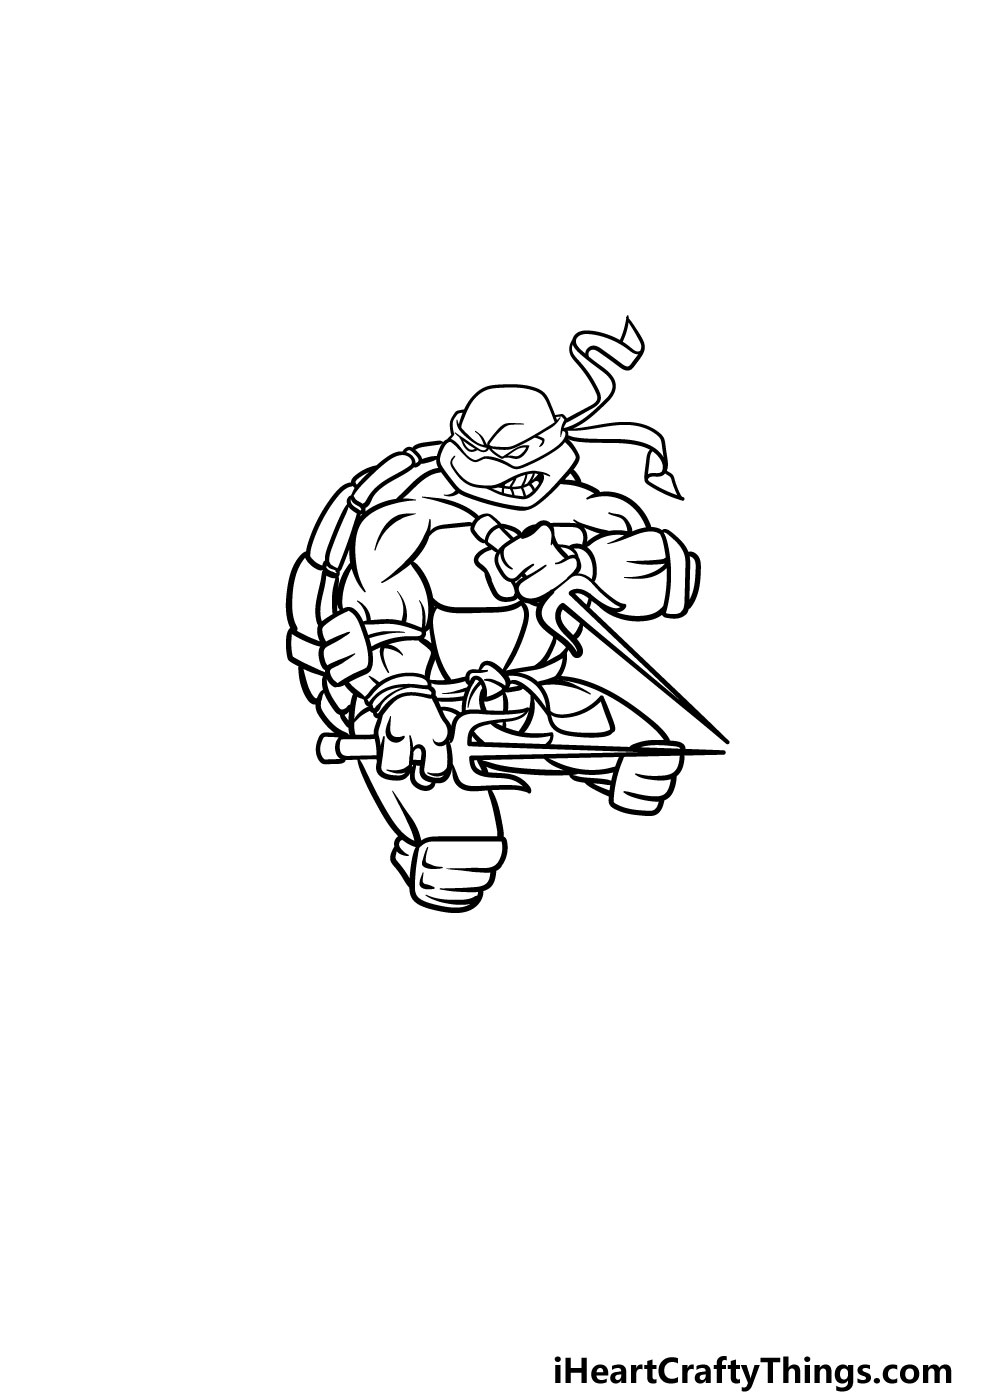
Step 2 – Start his shell and arm
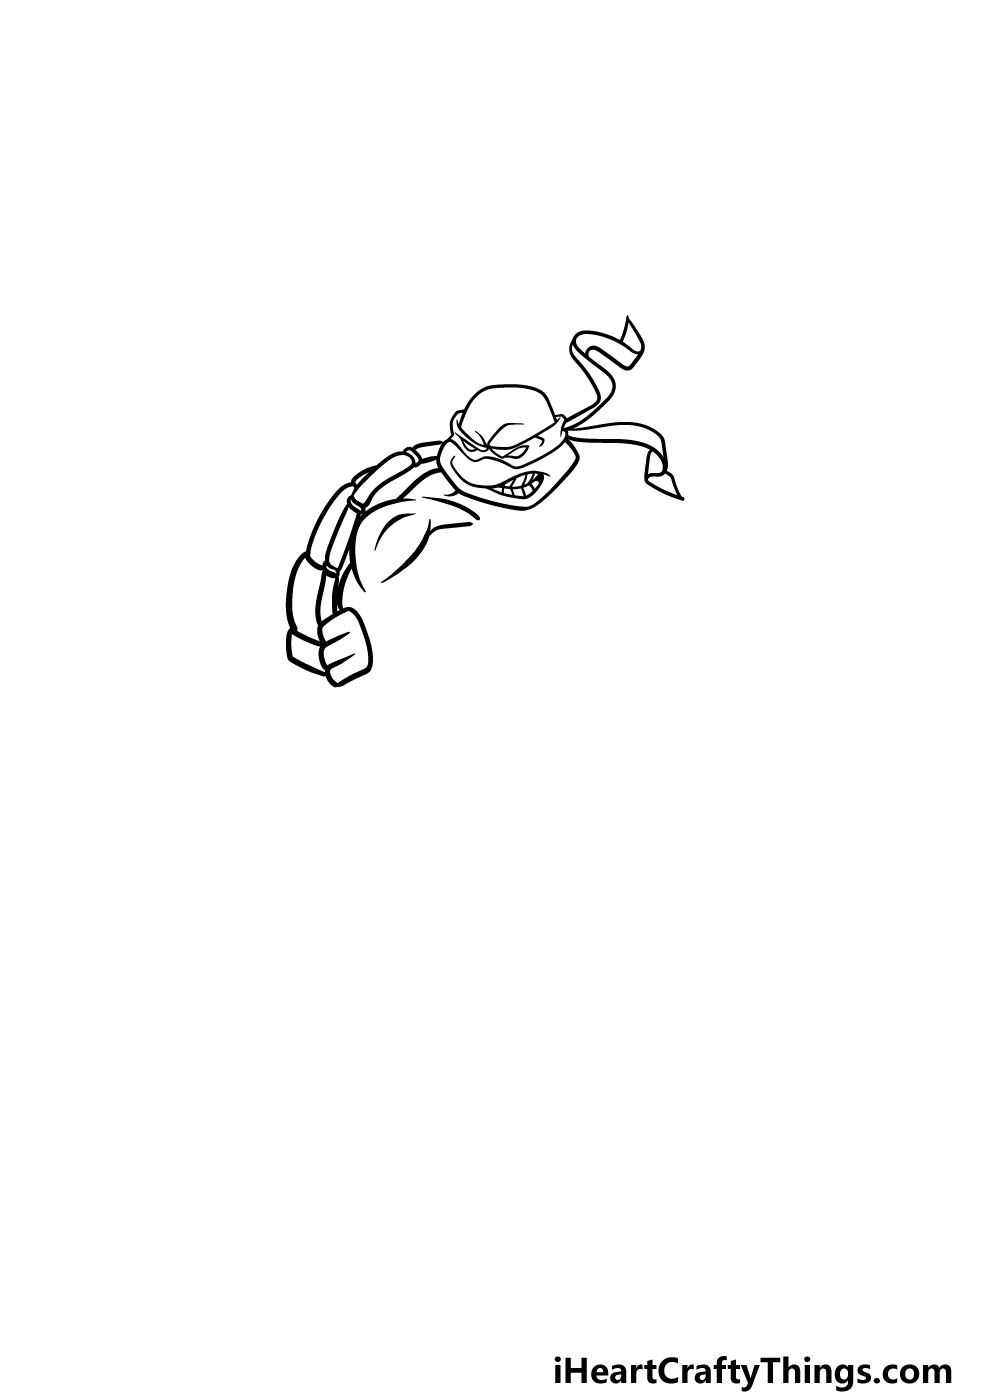
One of the most recognizable features of the heroes are their shells, so that is what we will be drawing along with the first arm in this step of your Ninja Turtle drawing.
For his arm, you will be using some curved lines to create his muscular arms, and there will be an elbow pad on it as well.
Finally, you can use some more curved lines to create the start of the shell on his back.
With these parts drawn, you’re ready for step 3!
Step 3 – Finish off his arm and draw his first weapon
In this part of our guide on how to draw a Ninja Turtle, we will be finishing off his arm and drawing the first of his weapons that we will be holding.
For the arm, you will use some more curved lines to draw his muscular forearm and his hand that is holding his signature sai.
Before drawing that sai, this is the step where you could turn him into your favorite turtle instead. Each turtle uses a signature weapon that helps to distinguish them.
Leonardo uses some katanas, Michelangelo uses nunchucks and Donatello uses a staff. You could look up some pictures online to help you draw these weapons if one of them is your favorite!
If you would like to draw Raphael, then you can use some curved and sharp lines to draw his first pointy sai.
Step 4 – Now draw his other arm and sai

You’ve drawn one arm for your Ninja Turtle drawing already, so this one should be no problem for you!
It will be at a different angle, but will be quite muscular like the other one. It will be under his face, but even if you changed the weapon you should be able to show him holding it!
You can also draw some curved lines for the top of his chest in this step.
Step 5 – Start drawing his legs
It’s time to start drawing the legs for Raphael in this step of our guide on how to draw a Ninja Turtle! Before this, you can draw his belt as it appears in the reference image.
Then, you can draw his legs. They will be muscular like his arms were, and while we will only be drawing the top half for now, they will end in some kneepads.
We will be finishing off the final details in the next step, so let’s proceed!
Step 6 – Now, finish off the final details
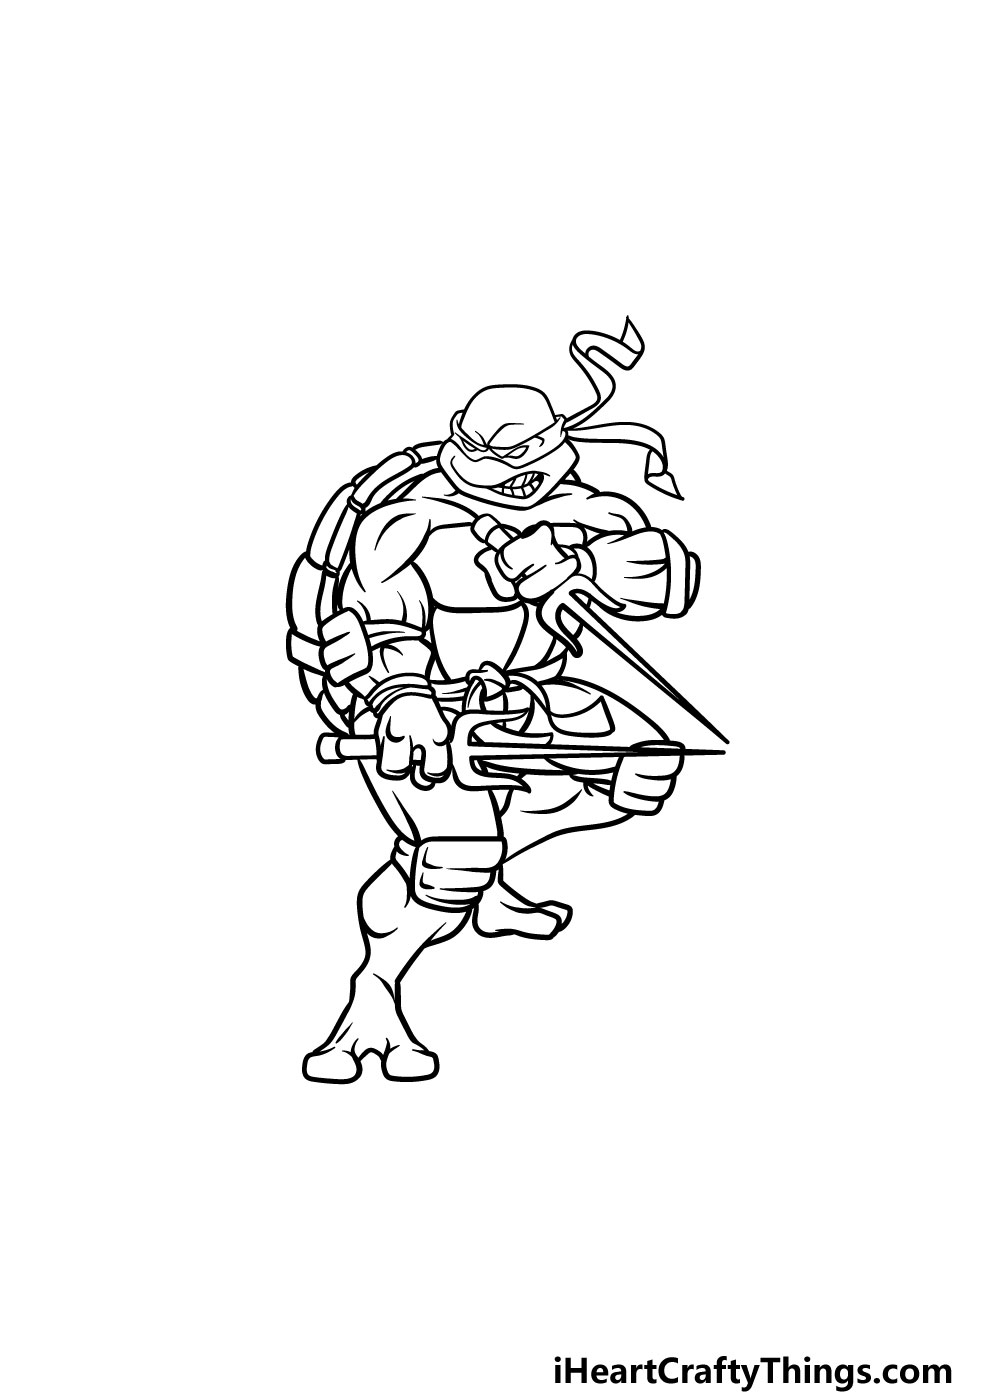
This step of your Ninja Turtle drawing will be all about finishing off the final details before we color him in.
The main element will be finishing off the bottom of his legs. They will also end in his distinctive two-toe feet! Then, you can add some lines to his body to give him even more muscle definition.
Once these parts are drawn, you’re ready for the final step! Before you proceed, be sure to add any final details of your own that you may like.
Perhaps you could draw a background to represent your favorite Ninja Turtle moment!
Step 7 – Finish off your Ninja Turtle drawing with some color
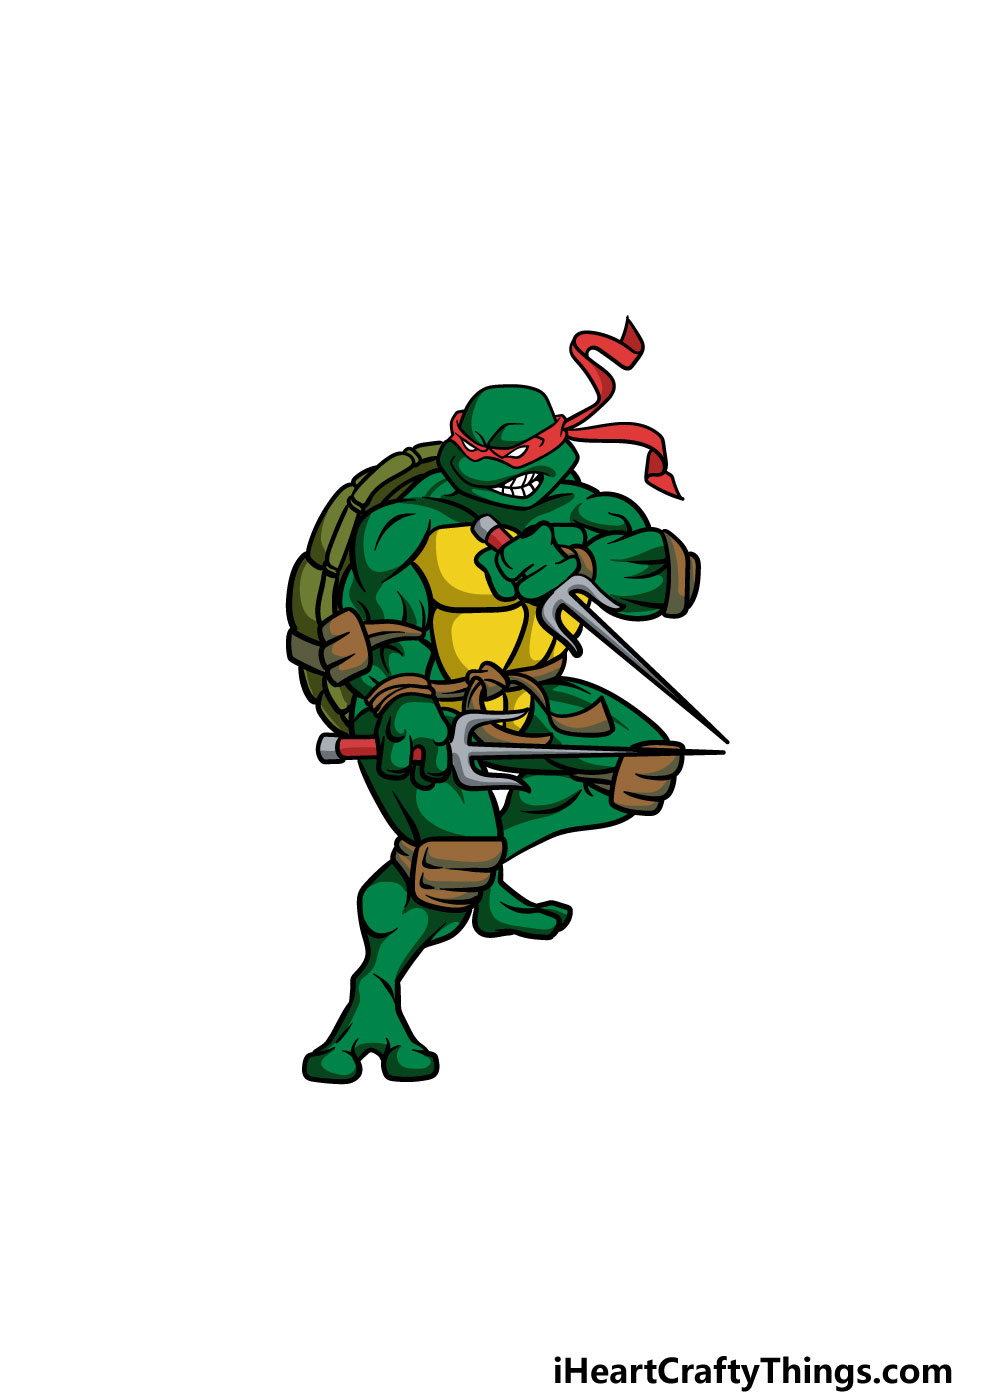
You’ve reached the final step of our guide on how to draw a Ninja Turtle, and this is a fun one! This is the step where you get to have some fun bringing your drawing to life with color.
In our reference image, we used different shades of green, brown and yellow to color in his body. We also used red for his mask and accessories, but if you decided to draw one of the other Ninja Turtles then you’ll want to change this color.
Raphael uses red, whereas Leonardo uses blue with orange for Michaelangelo and purple for Donatello.
Once you know which colors you would like to use, you can have some fun choosing your favorite art mediums to bring them to life!
5 Tips To Make Your Ninja Turtle Drawing Even Better!
Leap into action as we make this Ninja Turtle sketch even better!
This drawing of a Ninja Turtle shows just one of the quartet, Raphael, ready for action. You could make the scene more complete by adding one or more of his ninja brothers!
You could choose between Leonardo, Michelangelo or Donatello or add all three! Looking up pictures of these characters online would help you as you add your other favorite Ninja Turtles.
Will you add some more of the Ninja Turtle brothers?
If you want to keep it to just one Ninja Turtle for this picture but you have a different favorite turtle character, you could easily change this one.
If you want to portray Leonardo, you would change his weapons to katanas and make his mask blue.
Michelangelo has an orange color scheme with nunchucks whereas Donatello has purple with a bo staff.
Of course, there are many other allies and good characters you could add to your Ninja Turtle drawing. Some examples would be the turtle’s rat mentor Master Splinter or April O’Neill.
What other turtle allies can you think of that you could add to the picture to join your chosen turtle?
If you want more of an action scene, you could instead add a villain character to your artwork. Once again, you would have many different options to choose from!
One of the turtle’s main enemies is Shredder, and he would be a great option to add to the scene. He is one of many you could choose from, so which of your favorite Ninja Turtle enemies would you like to add?
Finally, one of the best ways to finish off your Ninja Turtle sketch would be by adding a background. This could be the sewer home of the turtles or maybe a scene from New York City.
That is just a very small selection of options you could use for the scene, but what other background settings could you think of?
Your Ninja Turtle Drawing is Complete!
We hope that you had an amazing time working with us on this guide on how to draw a Ninja Turtle!
This was a tricky drawing as there were lots of details, but by taking it slow and following the guide, we know you can do it.
You also don’t have to get it perfect on your first try, so be sure to keep trying if you have trouble with it!
Then, once you have mastered this drawing, you can keep the fun going by adding your own details, a background or by changing which turtle it is.
When you’re ready for your next drawing challenge, we look forward to seeing you on our website! We upload many new guides frequently, so be sure to visit often to never miss out.
We would also be thrilled to see your amazing Ninja Turtle drawing, so please remember to share it on our Facebook and Pinterest pages for us to enjoy!