


Finding Nemo is an animated film from back in 2003, but while it’s nearing becoming 20 years old, it remains popular with audiences today.
Thanks to the wondrous ocean setting and some unforgettable characters, the film has since inspired other forms of media such as a sequel, books, video games and many more.
At the heart of the story is Nemo himself, and he is who we will be focusing on for this guide on how to draw Nemo.
If you love this cute and memorable character, then this guide will be the perfect way to show your admiration for him!
Get ready to find Nemo yourself in our step-by-step guide on how to draw Nemo in 6 steps.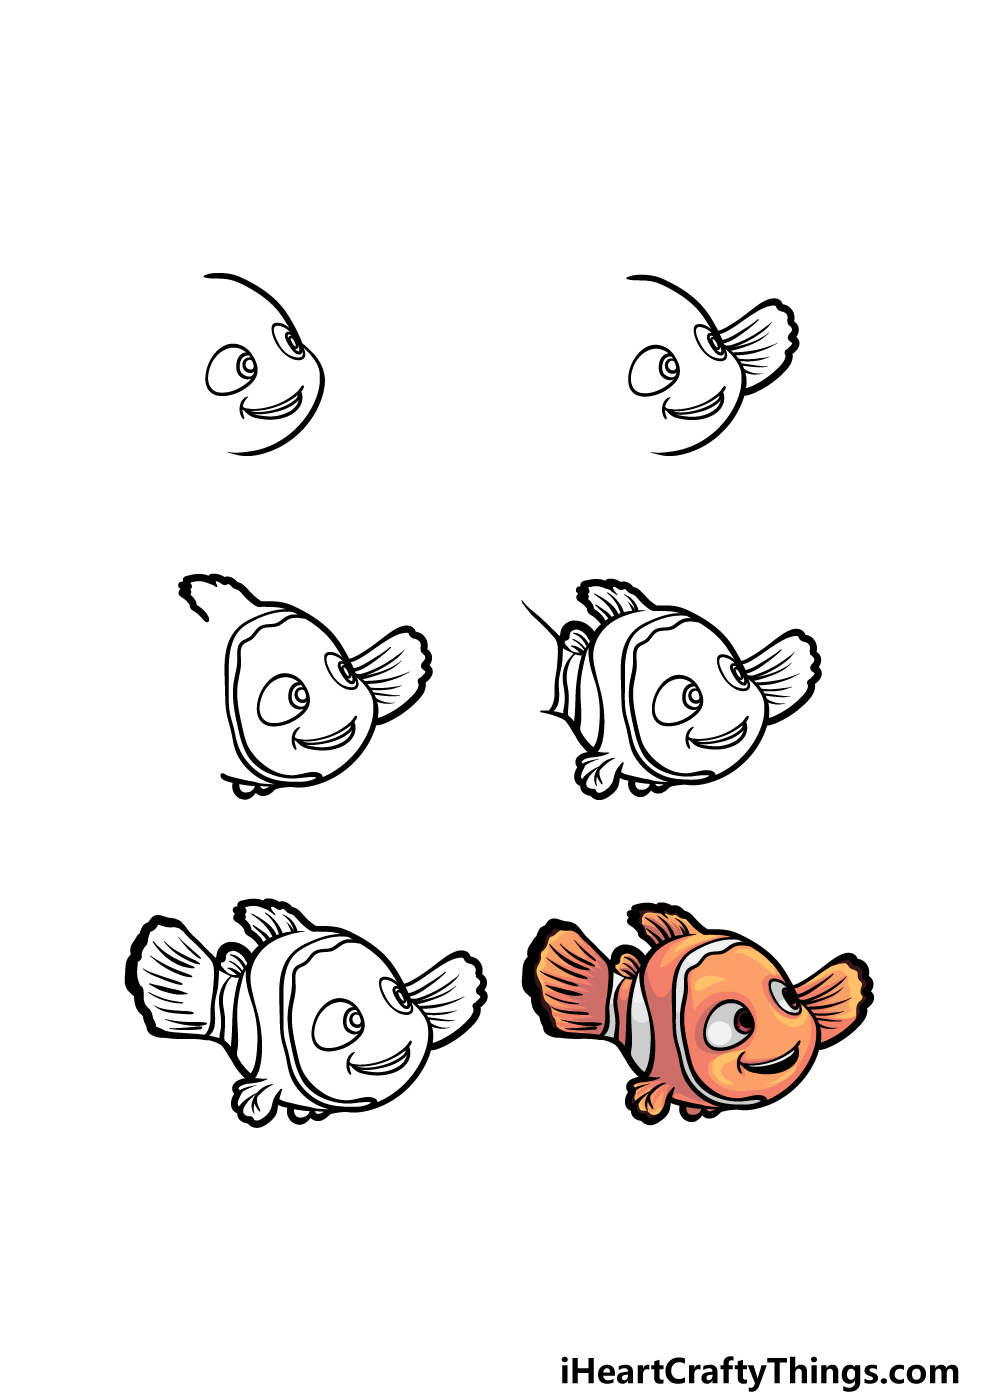
How to Draw Nemo – Let’s Get Started!
Step 1
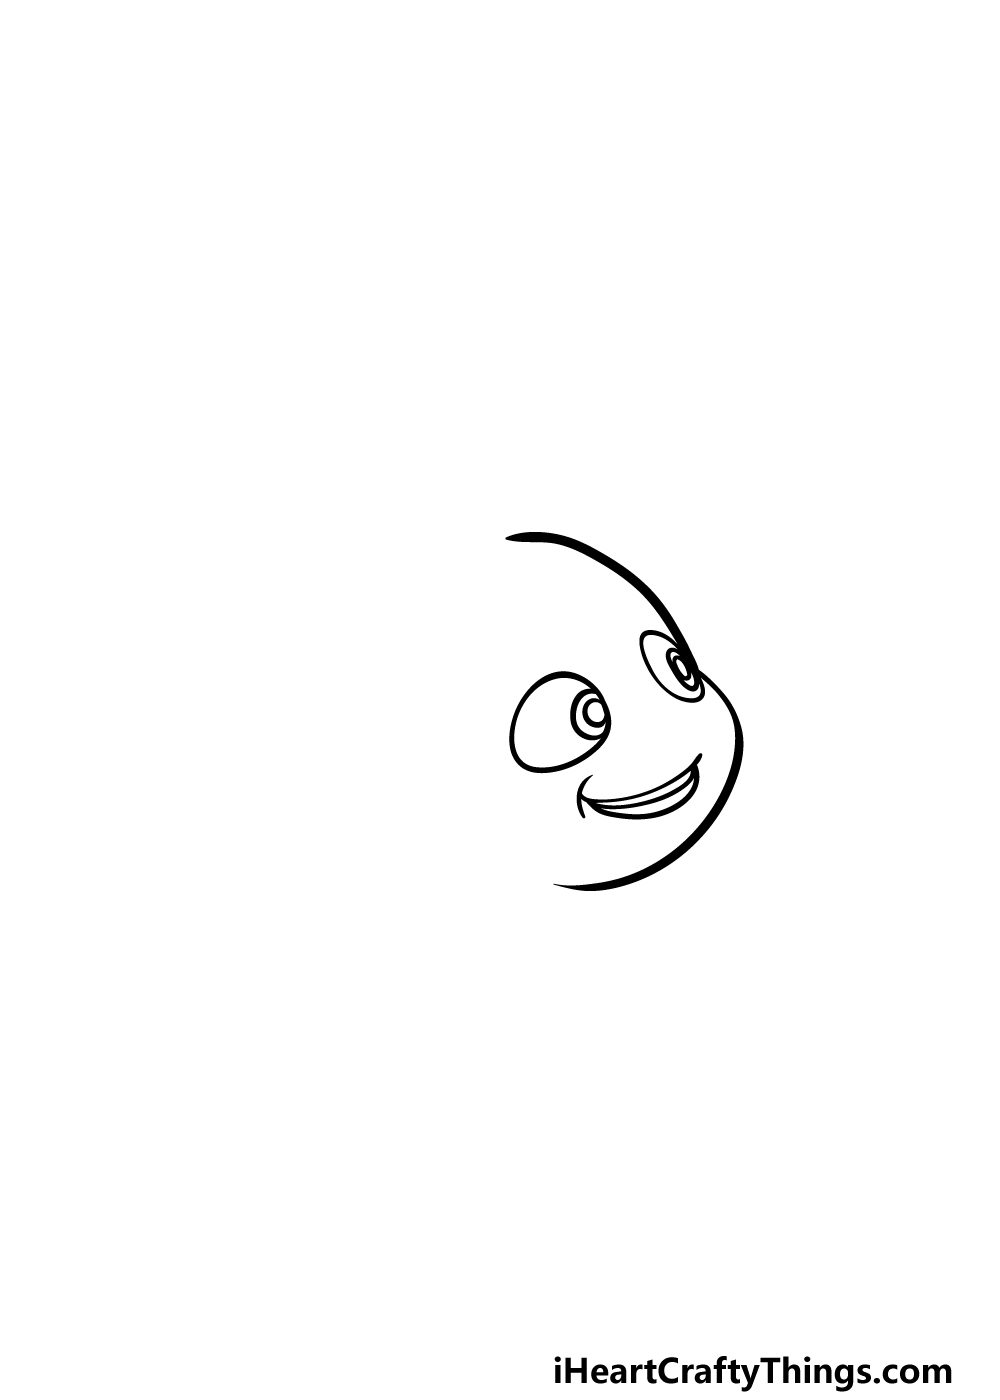
To dive right into this guide on how to draw Nemo, we will begin with his head and face. The best way to do this is by starting with his eyes.
For the eye on the left, we will be drawing a round shape that is a bit flatter than a perfect circle or oval.
Then, we will be drawing two circles inside of the eye outline, one within the other, for his pupil. You can then replicate a second eye on the right, but this one will be much smaller due to the angle.
After the eyes are drawn, we will use some more curved lines to depict his smiling mouth between them. Once that is done, we will then draw some more lines for the side of his face.
These lines will meet at a point on the eye on the right. Once it looks as it does in our reference image, we shall go on to step 2.
Step 2 – Next, draw the first fin for Nemo
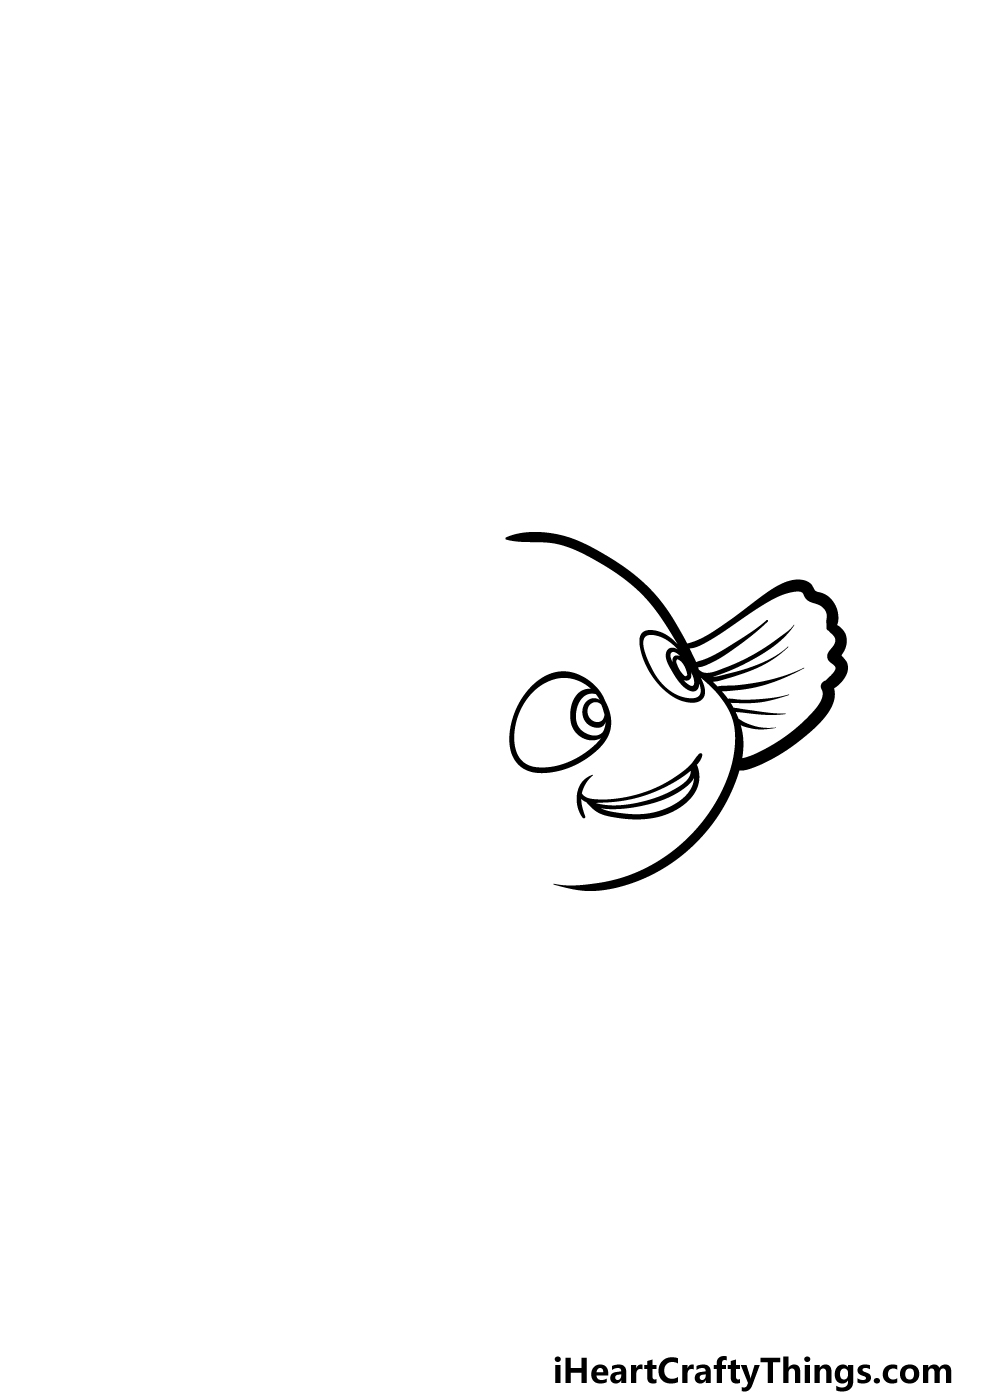
One of Nemo’s fins has a rather unique characteristic to it, but we will be drawing that one in a future step. For now, we will be adding the first fin to your Nemo drawing.
This fin will go on the right-hand side of Nemo, and the outline of the fin will be rounded with smaller jagged edges for the edge of the fin.
Then, you can finish off with some line detailing for the center of the fin, as shown in our reference image.
Step 3 – Draw some more of Nemo’s body in this step
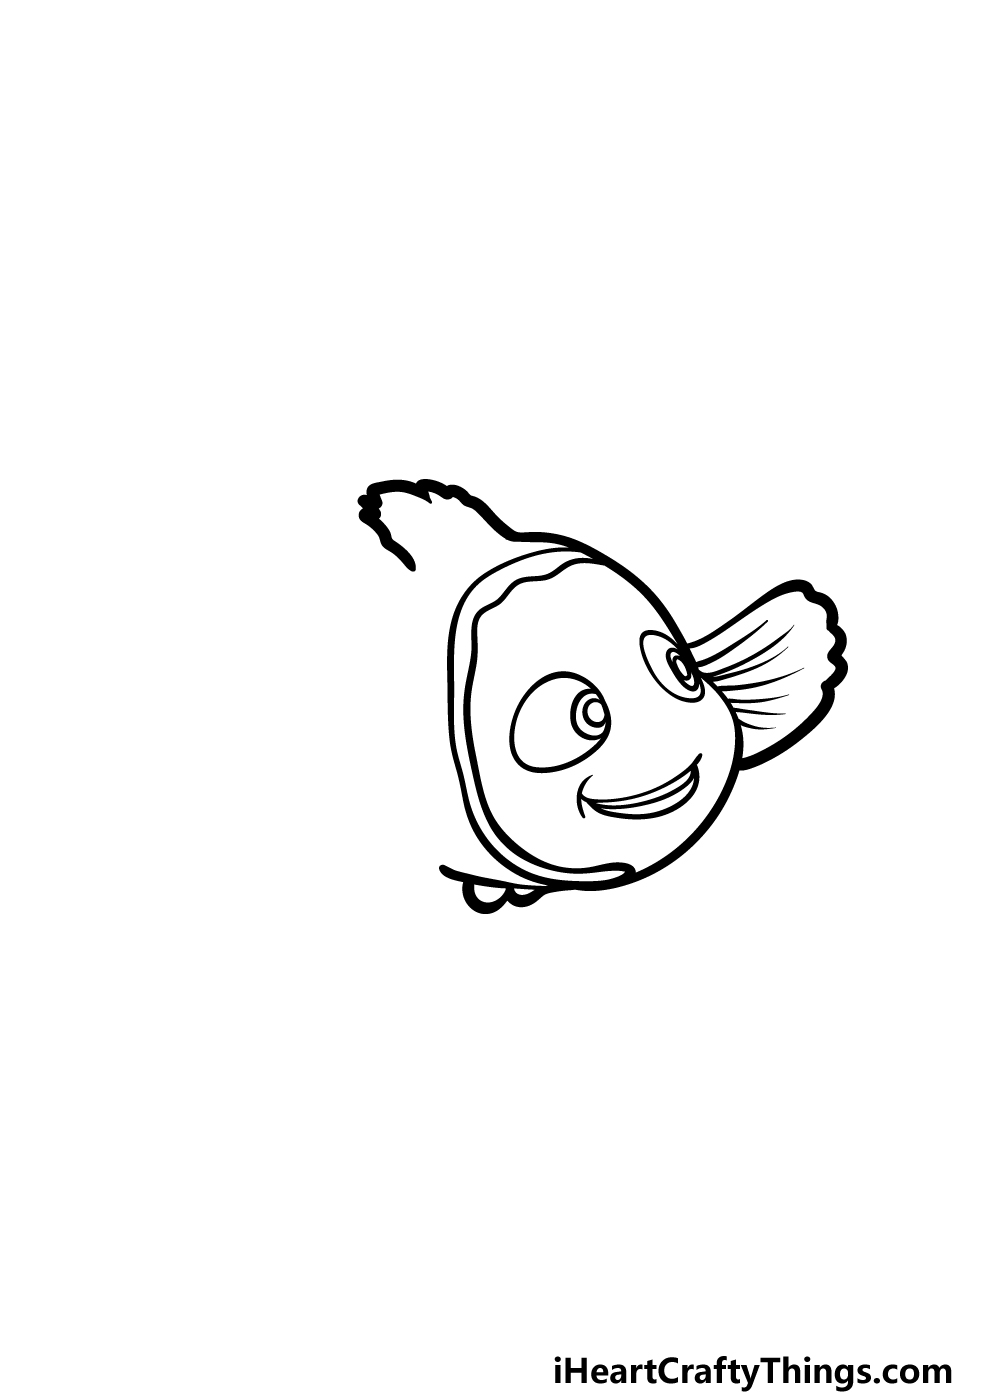
For the third part of our guide on how to draw Nemo, we will be adding another section to his body and head.
Using the thick line on top of his head, you can draw his dorsal fin using some more curved, bumpy lines. Then we will be drawing two lines around his face, almost as if he were wearing a necklace.
Finally, you can then draw a short line for the base of his body and add some small fins there as well. Then you’re ready for step 4!
Step 4 – Now, draw another fin and more of his body
We mentioned earlier that Nemo has one unusual fin, and we will be drawing that along with some other details in this step of your Nemo drawing!
This fin on the left is much smaller than the one on the right, and it functions as one of the most distinguishing features for the character’s design.
Then, once you have drawn this smaller fin we will add some more to his body. After drawing some more stripes for him, you can continue with his body outline.
This will get thinner as it move down towards his tail. There will also be another small fin on top of his back, and you can also start drawing his tail.
Then we will finish off the final details in the next step!
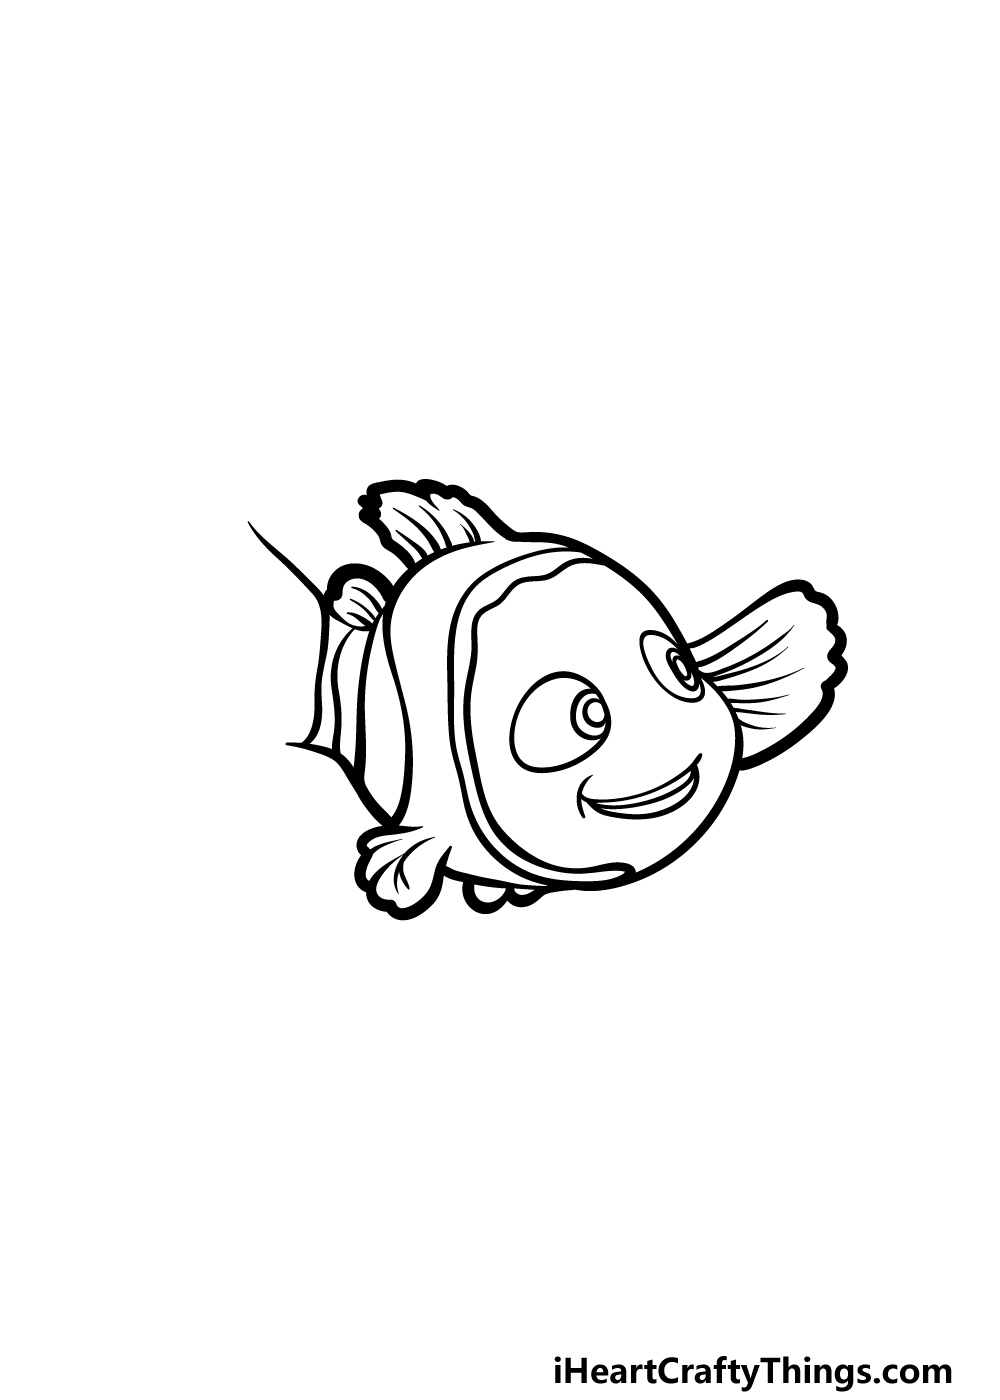
Step 5 – Finish off your Nemo drawing
This step of our guide on how to draw Nemo will be all about finishing up the final touches and elements.
First, use a thick, bumpy line for the edge of his tail, and then draw the sides of it. Once you have drawn this outline, you can finish off Nemo by adding some lines inside of his tail.
That’s all there is to it, and you can color him in for the next step! Before you do that, you could also add to this drawing.
A great way to do this would be to draw a background, and you could do this by recreating your favorite scenes from the movies. You could also draw some more characters, such as his father Marlin. How will you complete this picture?
Step 6 – Finish off your Nemo drawing with some color
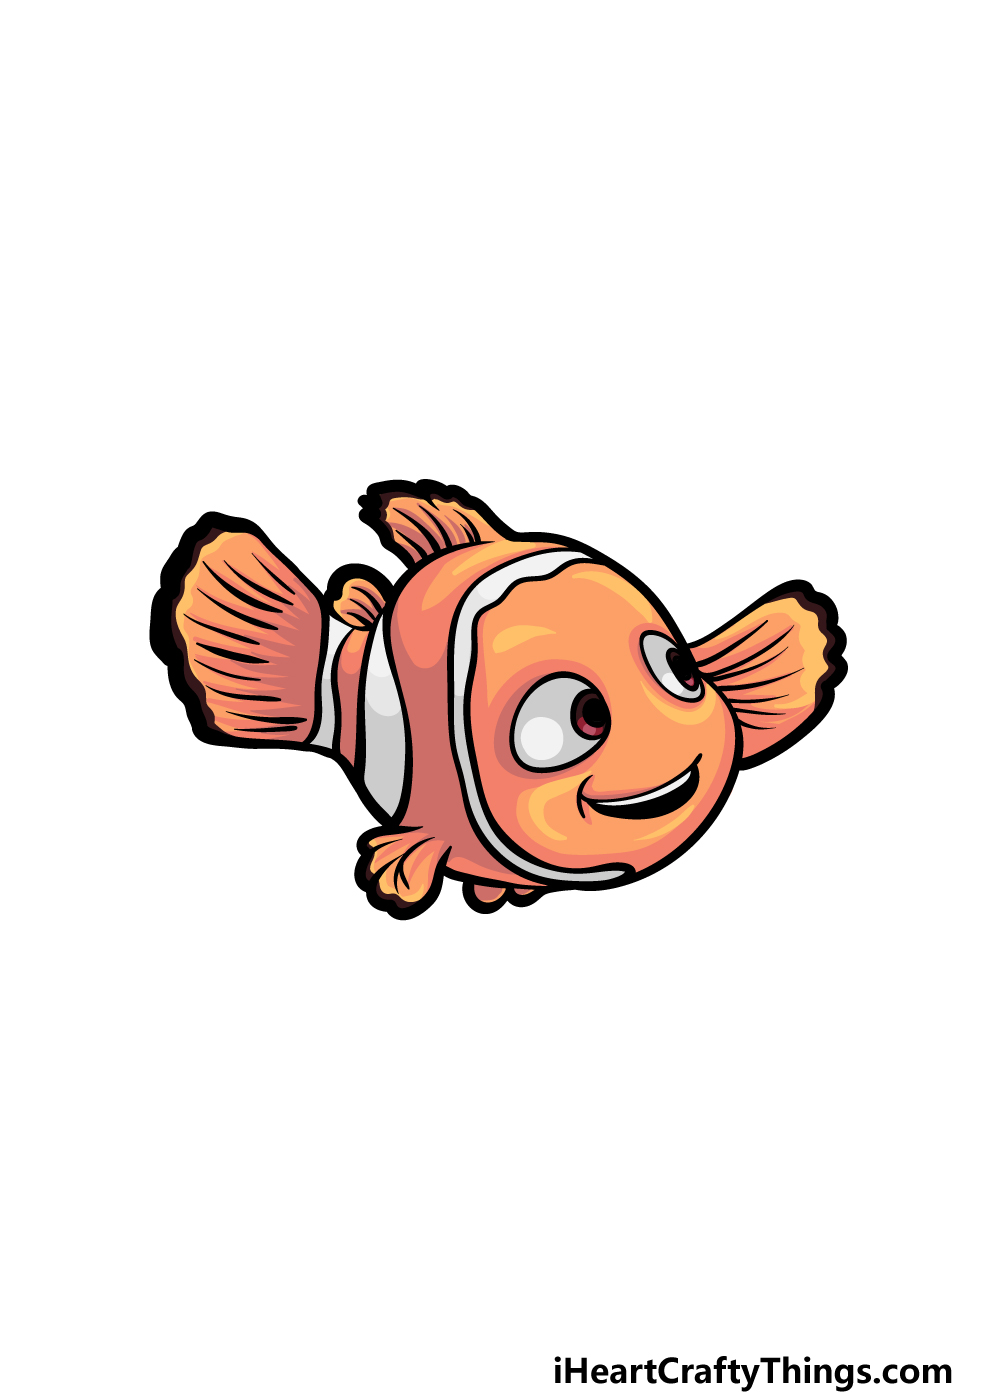
We will be adding some color to your picture in this final step of your Nemo drawing!
He has a nice and bright color scheme of vivid yellow with orange and black stripes, so these are the colors that we went with in our reference image.
You can use various shades of these colors to create an even more dynamic look to the image as well.
Then you can decide which art mediums to use in order to bring your image to life! It might be nice to use brighter mediums like colored markers for Nemo, and then use more subtle mediums like watercolor paints for the background.
This is just one of many approaches you could take, so be sure to have fun experimenting with some amazing colors!
4 More Ways To Make Your Nemo Drawing Unique
Dive underwater to make this amazing Nemo sketch even better with these tips!
This drawing of Nemo is looking great already, but it seems a bit incomplete without a certain character. Nemo’s father Marlin is a big part of the films, and it seems fitting to add him to this image.
Luckily, he looks rather similar to his son Nemo, so now that you have drawn him you should find it easy to draw Marlin beside Nemo.
You can also refer to the film or pictures online to help you get the finer details of this character right
You could also populate this drawing with more characters from the films. The movies are filled with many colorful and iconic characters to choose from if you want to do this.
These could include Dory, the fish from the dentist’s office in the first movie, the scary sharks or many more. You could include as many or as few of these characters as you like!
Once again, pictures online or the films themselves will help you as you draw these characters.
Another way to really enhance this Nemo drawing would be by adding a background. You would have many options if you wanted to try this.
First, you could replicate specific scenes and locations from the movies. Or, if you’re feeling extra creative, you could create a brand new location for Nemo to be exploring.
Do you think you will use an existing location or will you create your own for this picture?
If you decided to depict a certain scene from the films in your Nemo sketch, there are a few ways you can take it even further.
For example, if you have a favorite line from the movie, you could draw a speech bubble with that quote near the character. You could also make sure to include the appropriate backgrounds and characters relating to the scene.
This way, you could recreate any of your favorite moments from the movies to really finish off this artwork!
Your Nemo Drawing is Complete!
That will finish off this guide on how to draw Nemo! He is an adorable and vibrant character, so in this guide we aimed to help show you that recreating this design can be not only easy but also lots of fun. Hopefully we achieved that goal for you!
When you have completed this guide, you can have fun recreating your favorite moments from the films or add some more beloved characters.
That would be a great way to keep the fun going, so how will you finish off this picture with your own details?
Even after this drawing is completely finished, the fun doesn’t have to end! You can find more drawing guides similar to this one on our website, and we will be uploading new ones soon.
Once your Nemo drawing is finished and colored in, please do share it on our Facebook and Pinterest pages for us to admire!