There are many unique manga and anime series that are enjoyed by fans around the world, and My Hero Academia is one of the newer examples of these popular series.
The manga and its manga adaptation feature many intriguing superpowered characters, and this roster is led by the charming and good-hearted Izuku Midoriya.
This is the character that we will focus on as you learn how to draw My Hero Academia.
This guide will be essential for any fans of this series, so you’ll want to read all the way to the end!
Our step-by-step guide on how to draw My Hero Academia will show you how to recreate this popular character in no time.
How to Draw My Hero Academia – Let’s Get Started!
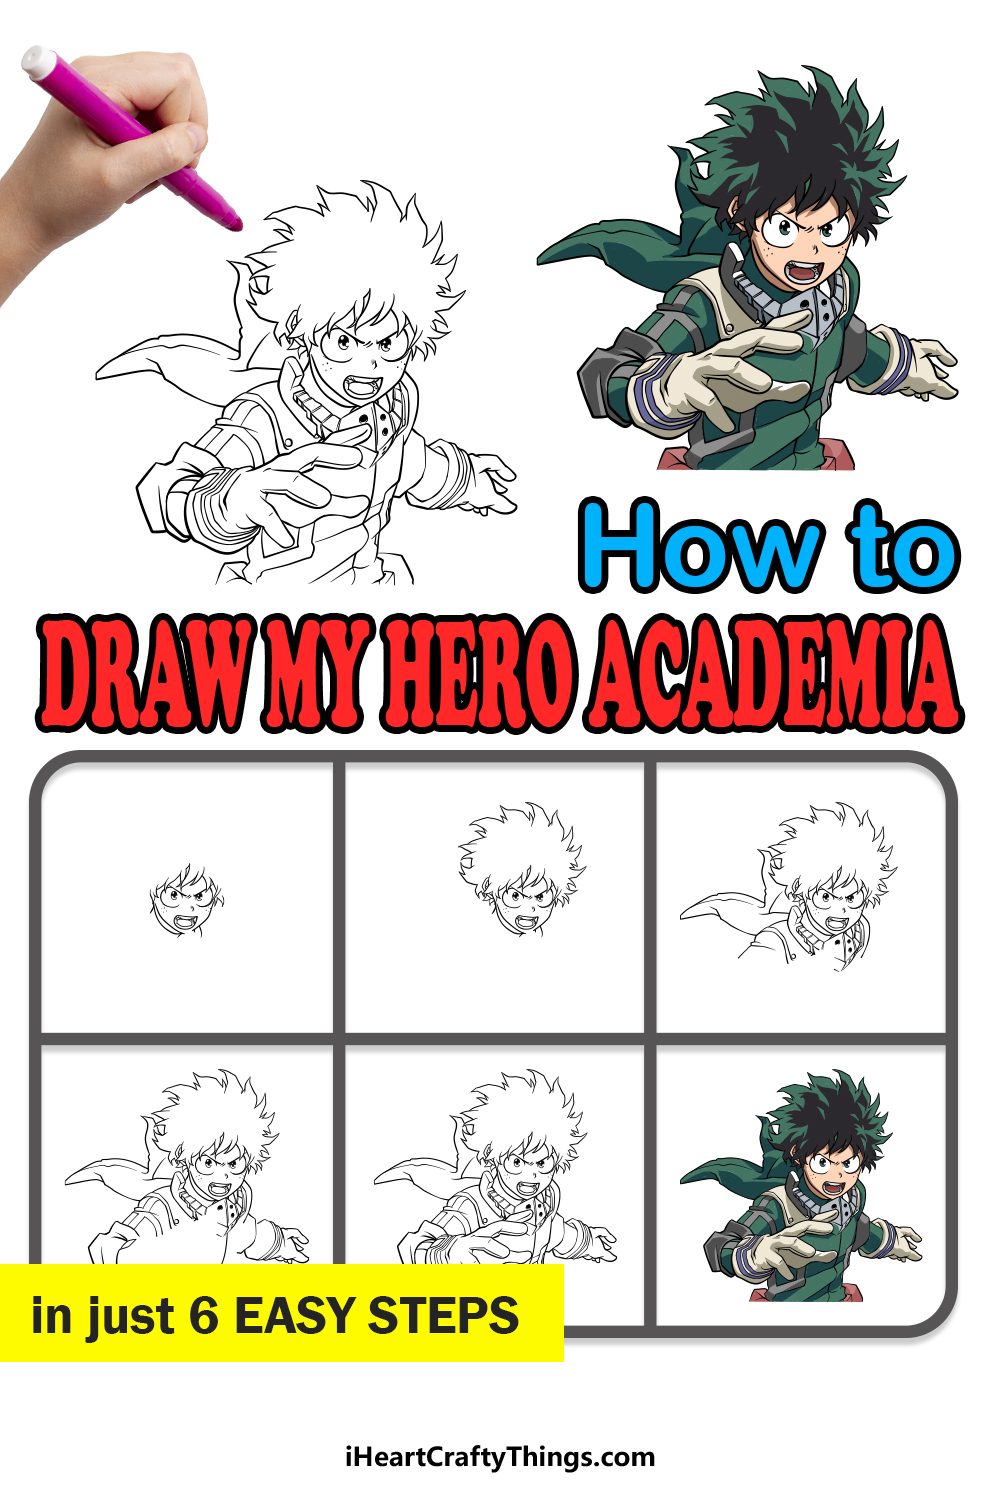
Step 1
In this guide on how to draw My Hero Academia, we will be focusing on the protagonist Izuku Midoriya.
To begin, we will start with his head and hair. His eyes are pretty large on his face, and they will be quite rounded.
Start off by drawing some straight diagonal lines and then draw some circular shapes on the bottom of them. Then, draw some oval shapes inside of the eyes with some minor detailing on them.
Then, you can use a small pointy line for his nose beneath the eyes, and then you can draw his open mouth beneath them.
His mouth will be drawn with a rounded shape with a fairly flat top, and you can add a row of teeth to the top.
This will help to give him an intense expression. Then we will be drawing the outline for his face, and you can also draw some dotted freckles onto his cheeks.
We will finish off by adding some pointy lines extending down onto his face for his spiky hair dropping down.
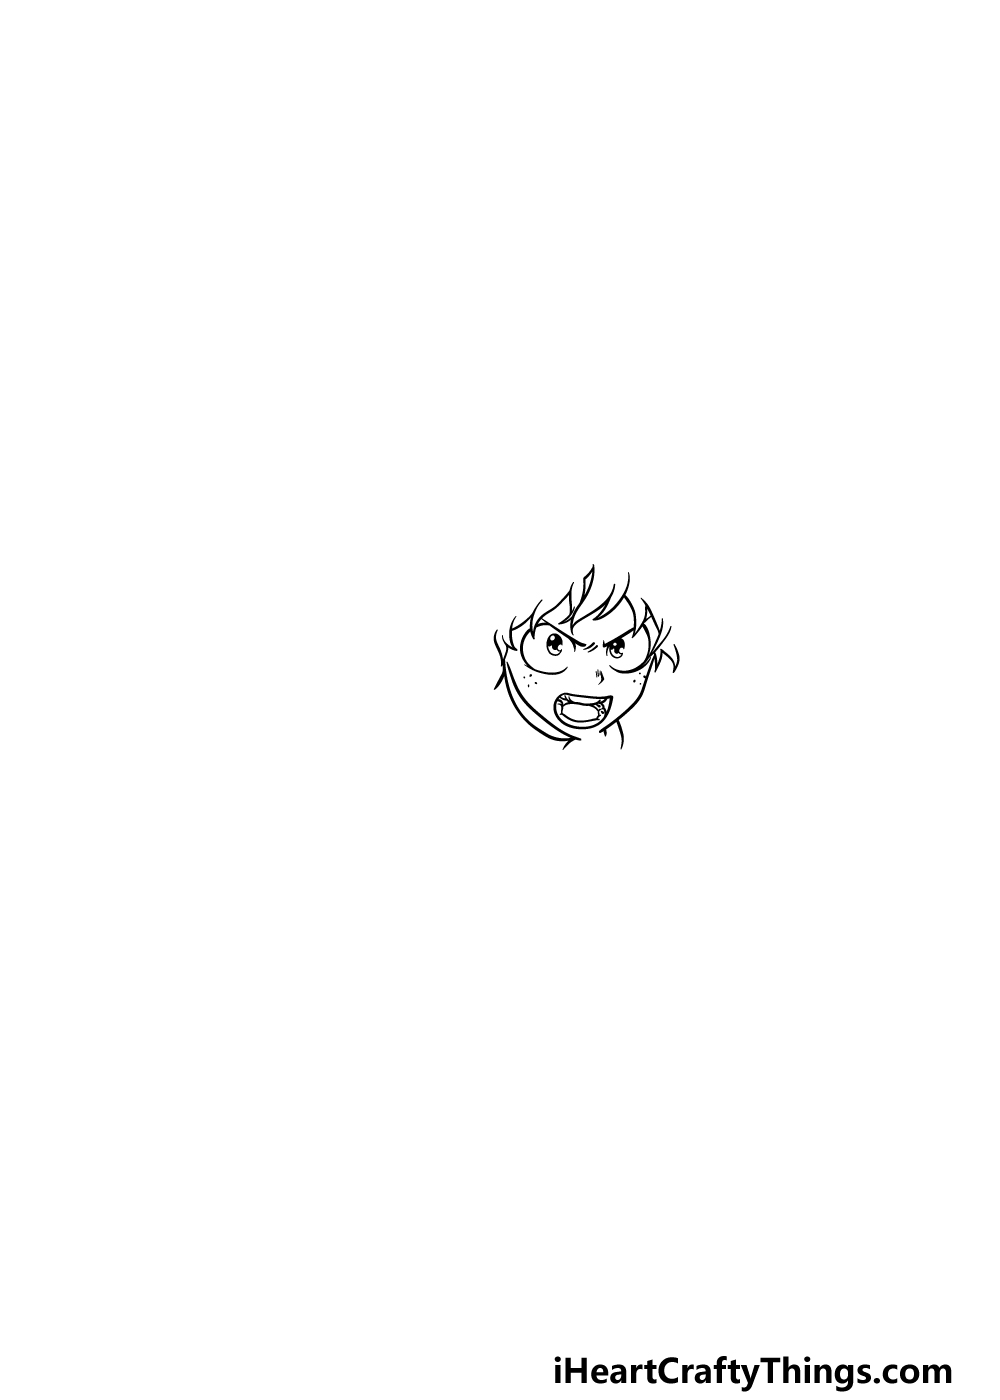
Step 2 – Next, finish off the outline for his hair
Like many manga and anime characters, Izuku will have a big, spiky head of hair.
Using the parts that you started in the previous step of your My Hero Academia drawing, you can continue the rounded top of the hair using some more of those spiky lines.
Once you have finished this hair outline, you will be ready to start drawing his clothing in the next step of this guide, so let’s proceed!
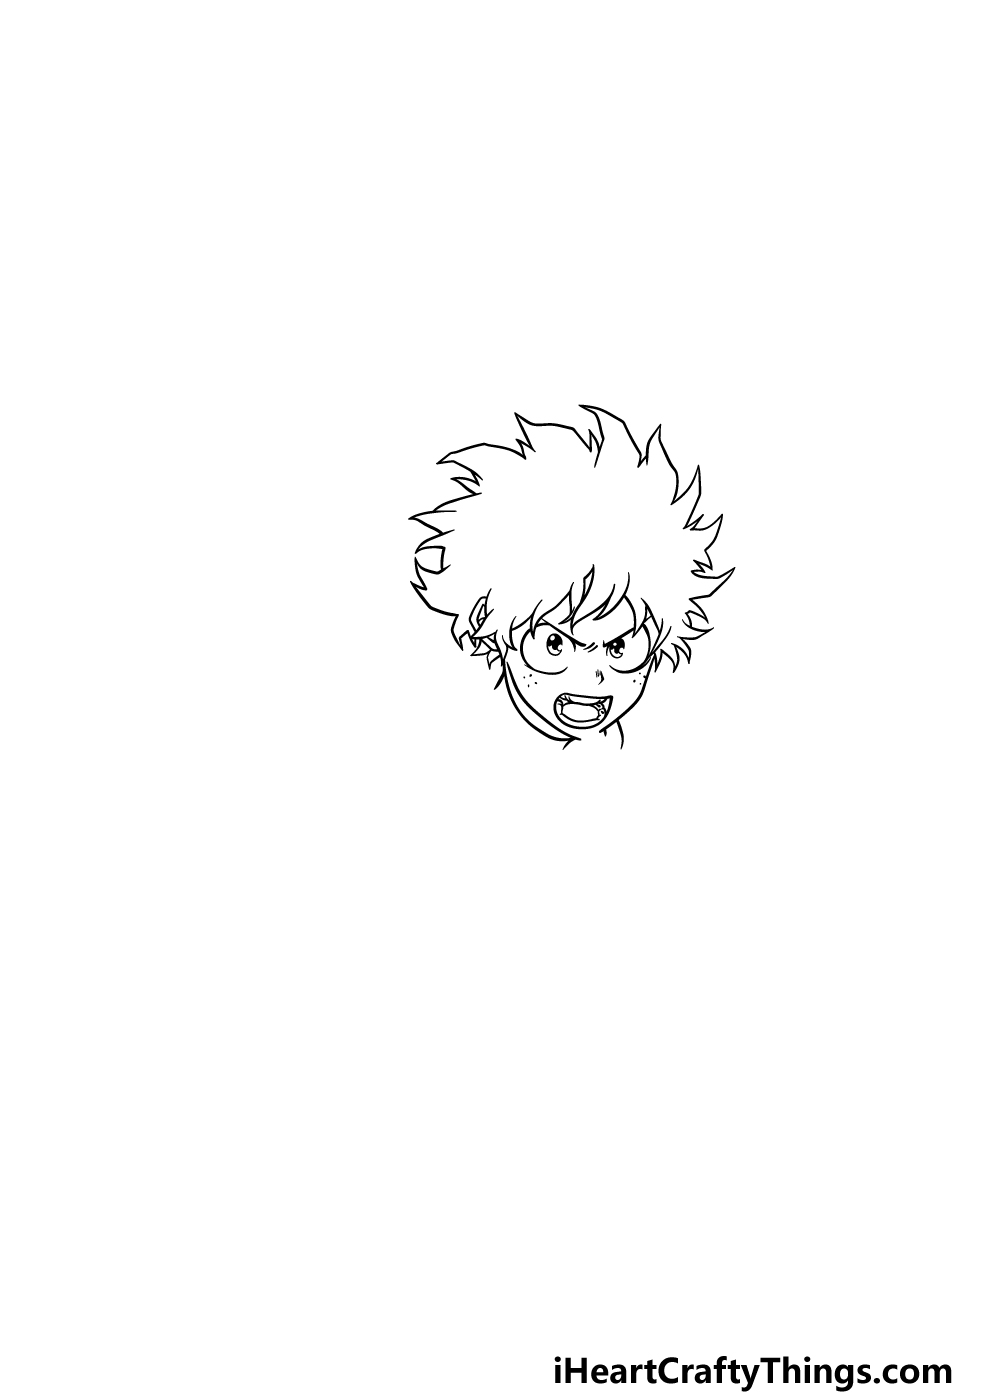
Step 3 – Start drawing his clothing in this step
The clothing for Izuku will be quite detailed, so we will work slowly on this and the next few steps of this guide on how to draw My Hero Academia.
He has an angular collar made up of several square segments in a row that you can start with. Then, there will be a pointy-shaped portion at the center of his collar that has some dots drawn on it.
We will then be using some curved lines for the top of the jacket that he is wearing. Finally, we will finish off this step by using some pointy lines for the two-pronged cape that he has flowing behind him.
As mentioned, there are a lot of intricate details to draw in this step, so be sure to follow the reference image closely as you draw!
Step 4 – Now, start drawing his arms in this part
We will continue moving downward on this picture in this step of our guide on how to draw My Hero Academia.
We will be starting on his arms in this fourth step, and these will be drawn to show that the sleeves of his top are quite flowy.
This effect will be achieved by drawing lots of curved and pointy lines, and there will also be some crossed line shapes on the sleeve on the left.
Once you are happy with how this step is looking, we will finish off the final details in the next part.
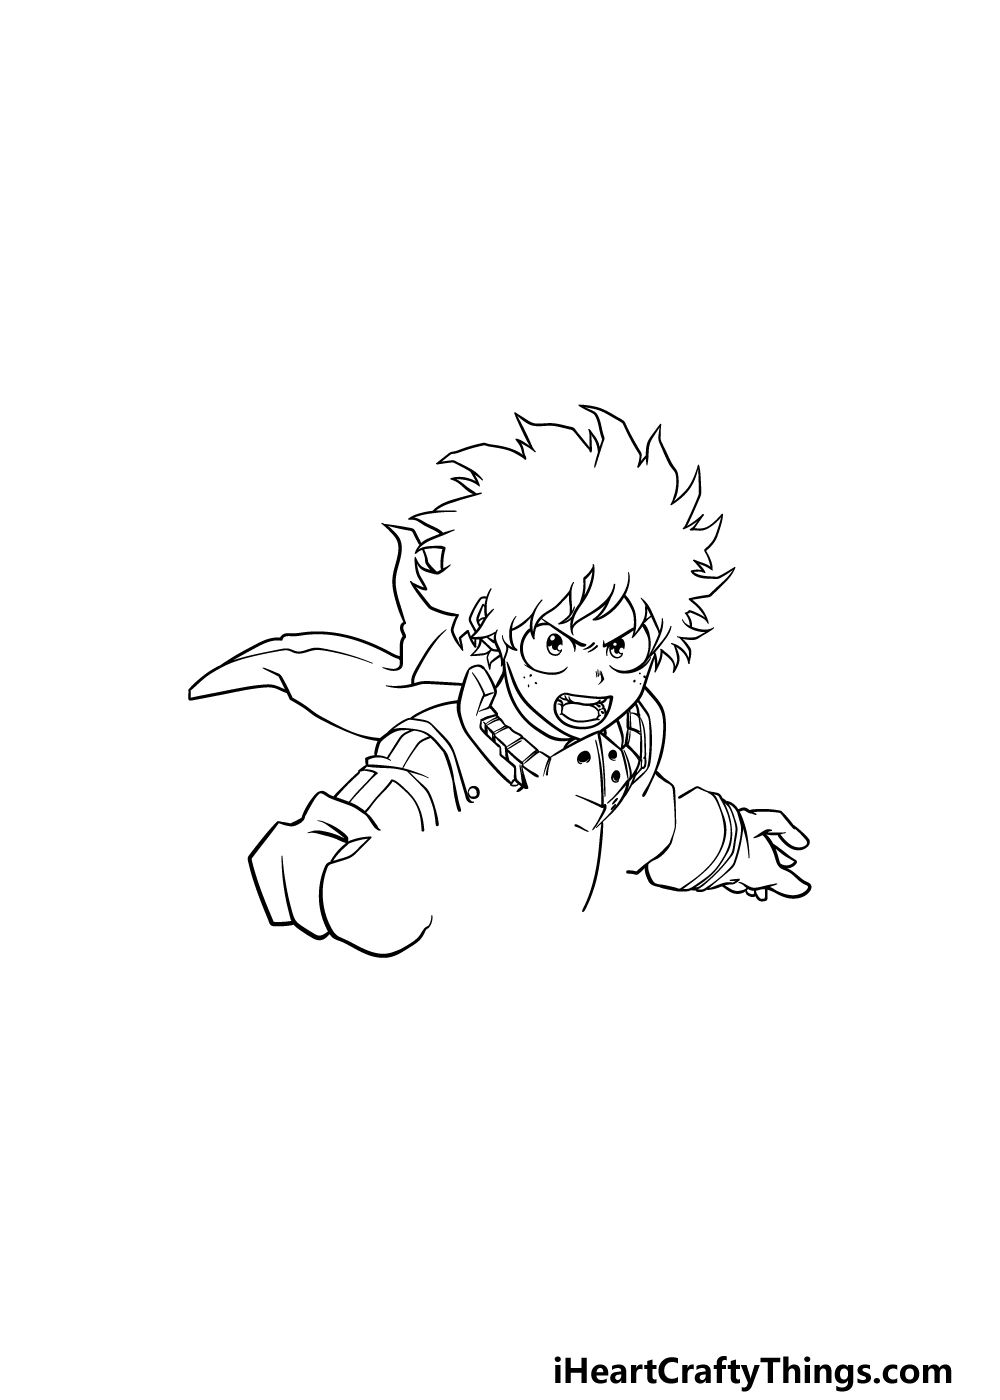
Step 5 – Finish off your My Hero Academia drawing
To finish off the drawing in this step of our guide on how to draw My Hero Academia, we will be adding his gloved hands along with the rest of his sleeves.
Much like all the other parts of his design, these will be quite highly detailed.
The hand on the left will pretty much be reaching out towards the viewer, whereas the one on the right will extend outwards. You can then finish off this step by drawing the rest of his chest and start of his waist.
That will finish off all the details that we will be covering in this guide, but there is more that you can do to really finish off with some more personalized touches.
You could add even more onto his body to complete the lower half or draw a background featuring some of your favorite My Hero Academia characters! How will you complete this picture with your own details?
Step 6 – Finish off your My Hero Academia drawing with some color
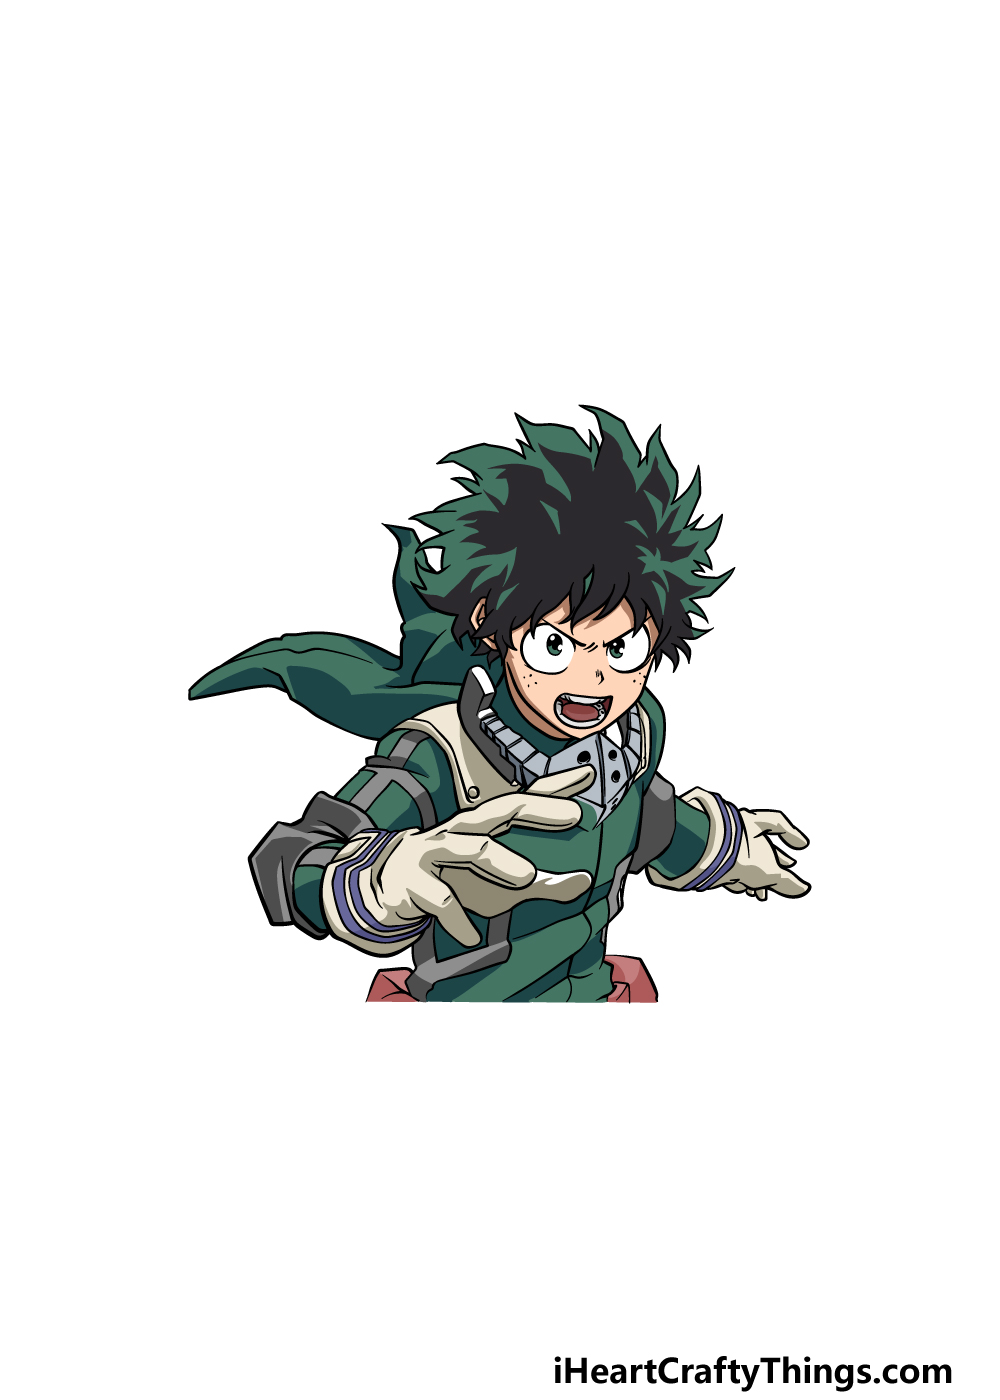
Now that you have finished off your My Hero Academia drawing, it will be time to finish off with some colors!
Izuku has a primarily green color scheme, and this is what we went for in our reference image. We also incorporated other colors like blue, red, grey and beige in order to recreate his look from the show.
You could also add some of your own color choices as well as experiment with various art mediums and tools to bring them to life! We know that no matter what you choose that it will look amazing.
Here’s how you can make your My Hero Academia drawing even better…
Have some heroic drawing fun as we make this My Hero Academia sketch even better!
The My Hero Academia series is full of many fascinating heroes and villains. We have featured the main character, Izuku, for this My Hero Academia drawing, but you could also add many more characters beside him!
If you were to do that, you could pick your favorite characters and find some poses of them in the anime or manga. You could use that to help you draw them, or you could find some pictures online.
Which characters would you add?
For this drawing of My Hero Academia, we created just a portion of main character Izuku. If you wanted to make it more complete, you could draw more of his body.
You would want to make sure that the portion we drew together is near the center of the page, as you’ll want to make sure you have plenty of room.
Then, you could use various pictures of him to draw his arms, legs and the rest of his body. That way you could also put him in some fun poses and situations!
The My Hero Academia series is also full of many different locations and settings, and these would make great backgrounds! You could add any of these settings to your My Hero Academia sketch to make it more complete.
If you love a particular scene or location, then you could refer to it as you add it to the background of the image. What place from the series would you like to portray?
Finally, you can really have a fun time with the colors you use for this drawing, and you can also experiment with the art tools and mediums you use.
We went with this character’s usual color scheme for this My Hero Academia drawing, but you could also give him a unique look.
If he has other outfits from the series that you like, then you could also replicate that by changing the colors and the details!
Your My Hero Academia Drawing is Complete!
You have completed this drawing and brought it to life with colors, so that means that you have finished this guide on how to draw My Hero Academia!
Even though there were loads of details and elements in this guide, we aimed to make it easy and fun for you to take on in these steps.
Don’t forget to put your own spin on it as you add your own details, elements, colors and art mediums to finish it off!
When you are ready to take on your next drawing, you can find many more amazing drawing guides on our website. We also have many more coming soon, so stay tuned!
We love to share your awesome artworks, so please remember to share your My Hero Academia drawing on our Facebook and Pinterest pages for us to admire!