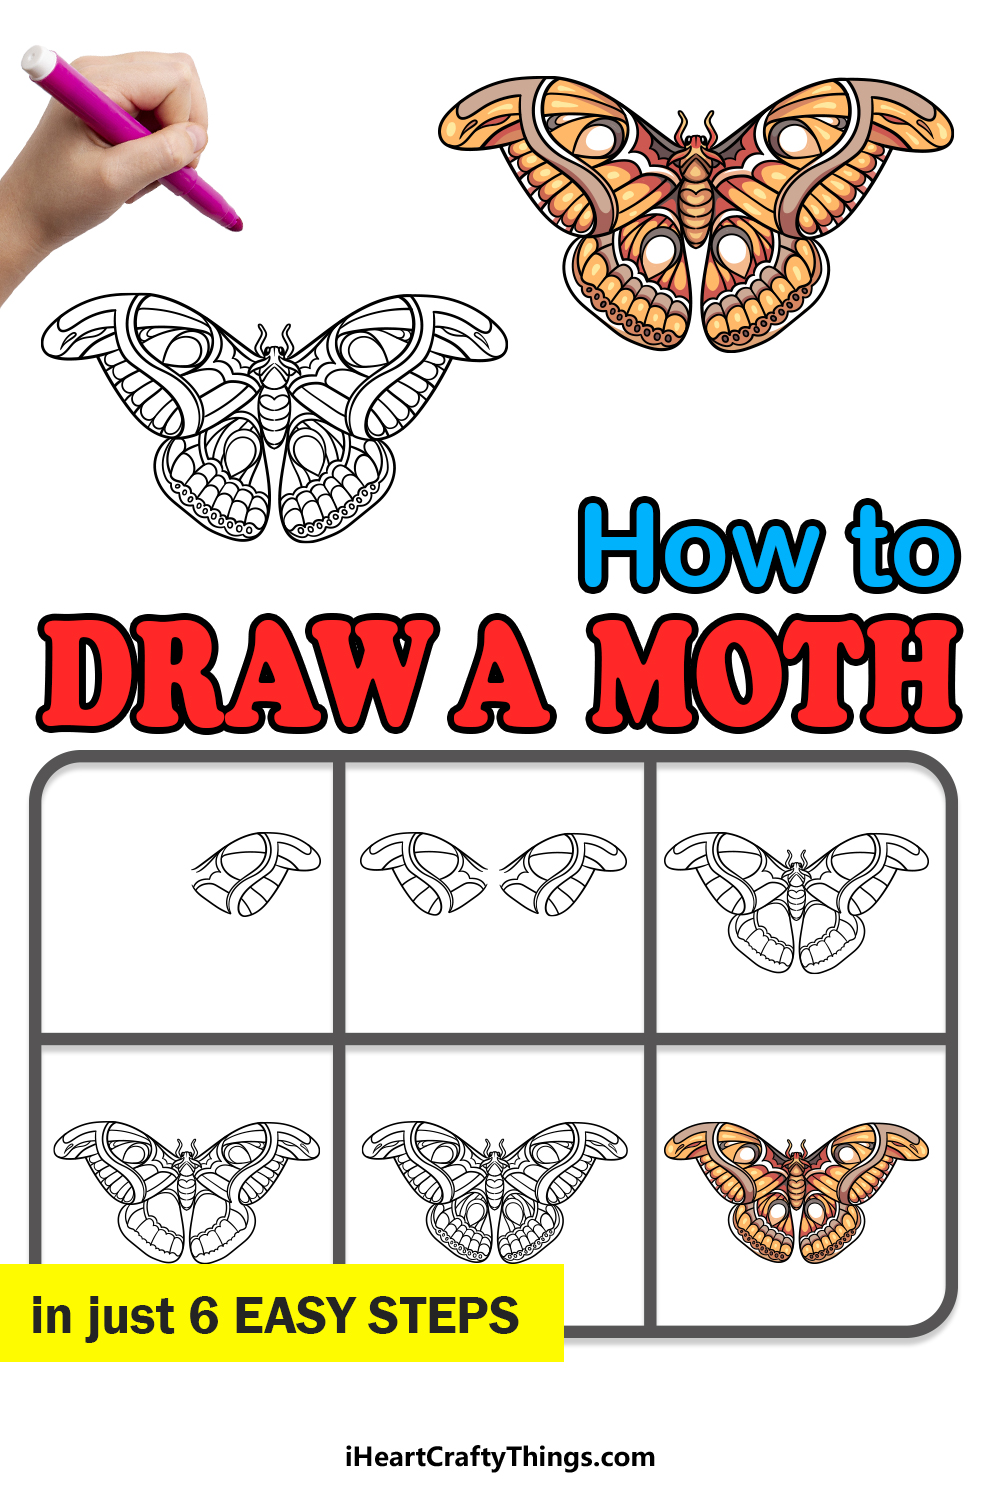
Learn how to draw a moth by following this simple guide for kids! All ages can enjoy this intuitive tutorial and create some stunning art in no time.
Moths are so beautiful with their big wings and intricate patterns. They come in all sorts of shapes, sizes and colors which makes them a popular subject for various forms of art.
Some people may find it frustrating to accurate draw one though, and that’s why this guide exists! Here, I will take you through each step to show you how to recreate this beautiful moth.
You will see how to draw the wings, head, thorax and more. Once you have finished the steps, you could even design your own patterns for the wings to make your own unique creations!
You’re just a few steps away from having a fantastic moth artwork to show off.
Watch And See How To Make Your Moth Drawing
How to Draw A Moth – Let’s Get Started!
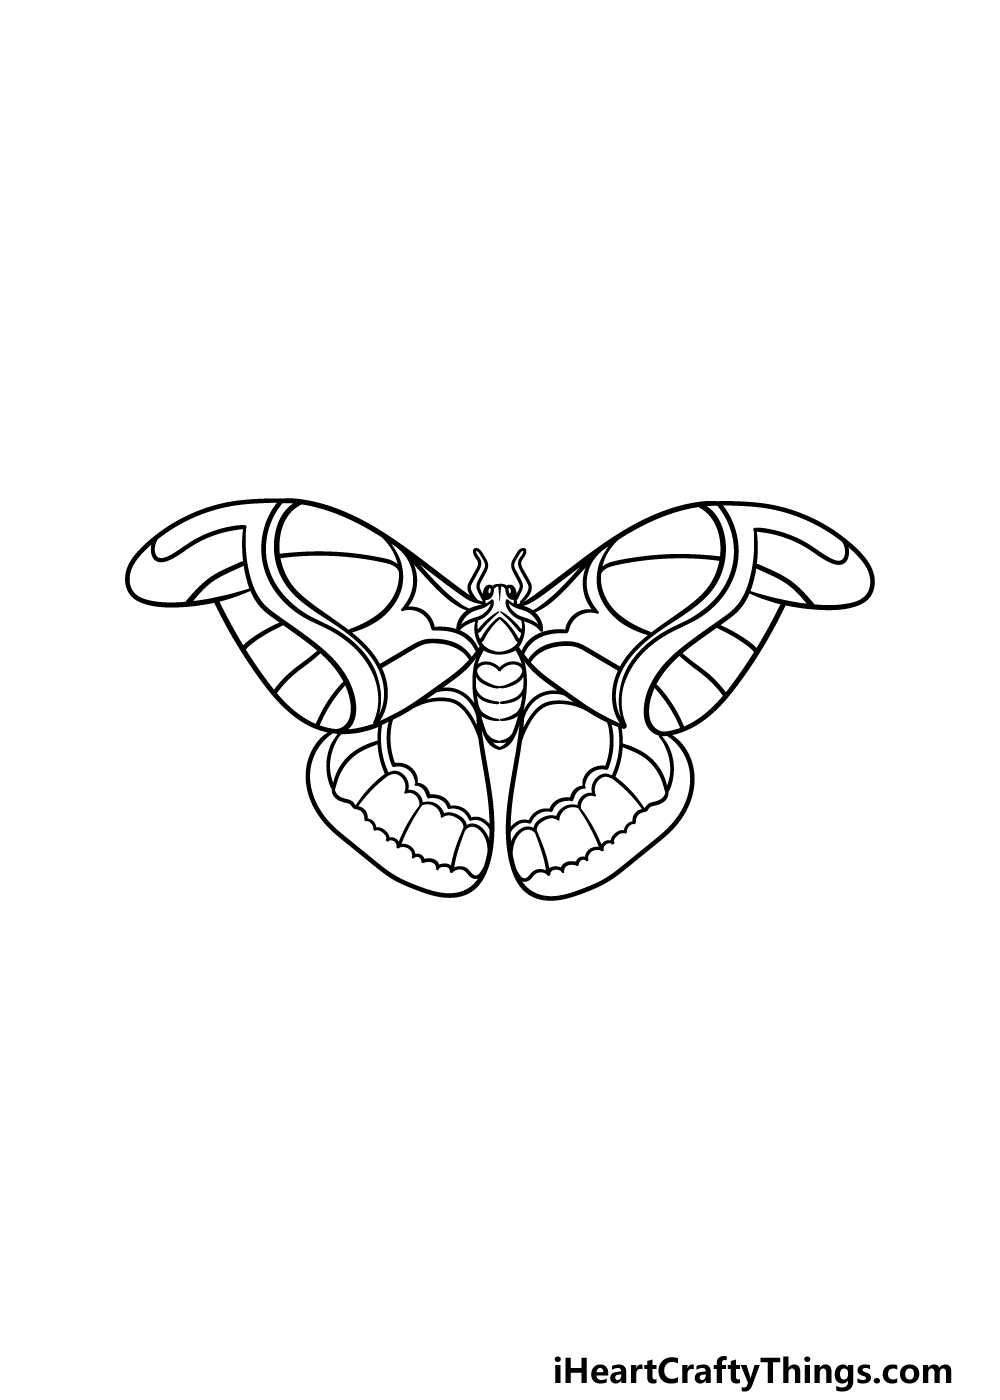
Step 1
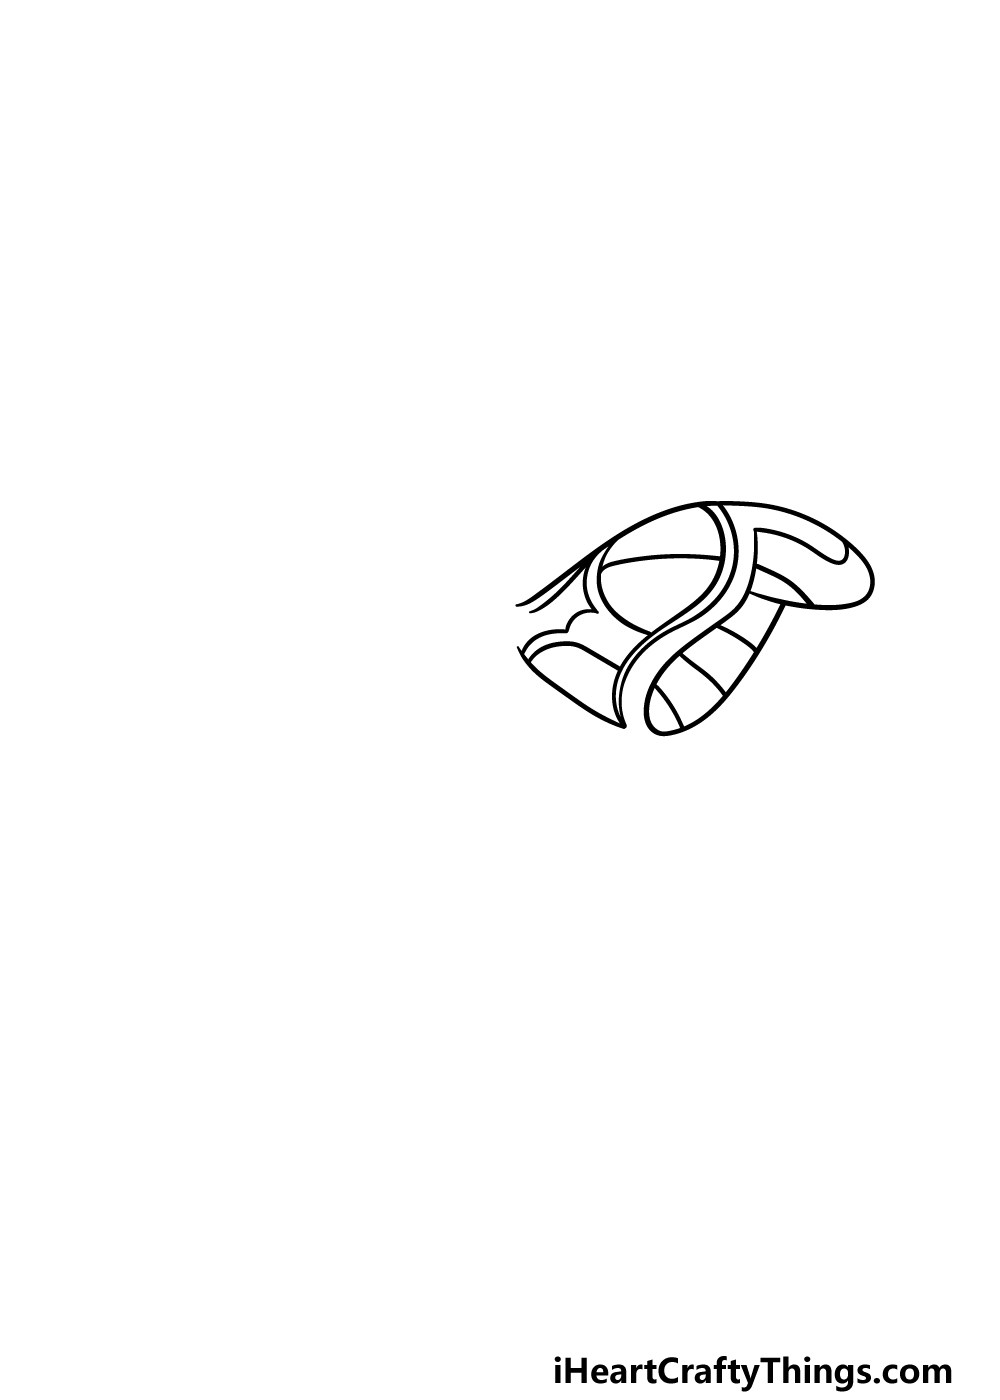
In this first step of our guide on how to draw a moth, we will be starting with its most distinguishing feature: the wings.
They are the most notable feature as they have beautiful patterning on them, but this can also make them the most tricky part to draw.
First, you can start with the outline of the upper right-hand side of the wing. This will be drawn with some rounded lines, as shown in the reference picture.
Once you have the outline of the wing drawn, we can then start with the pattern for them. The pattern looks pretty intricate, and while it is quite intricate it’s also not as hard as you may think to draw it.
Simply draw each part moving from left to right, and make sure to use the reference image and refer closely to it as you draw.
Once you’re happy with how the wing looks, we can move on to part 2!
Step 2 – Next, draw a mirror image for the next wing section
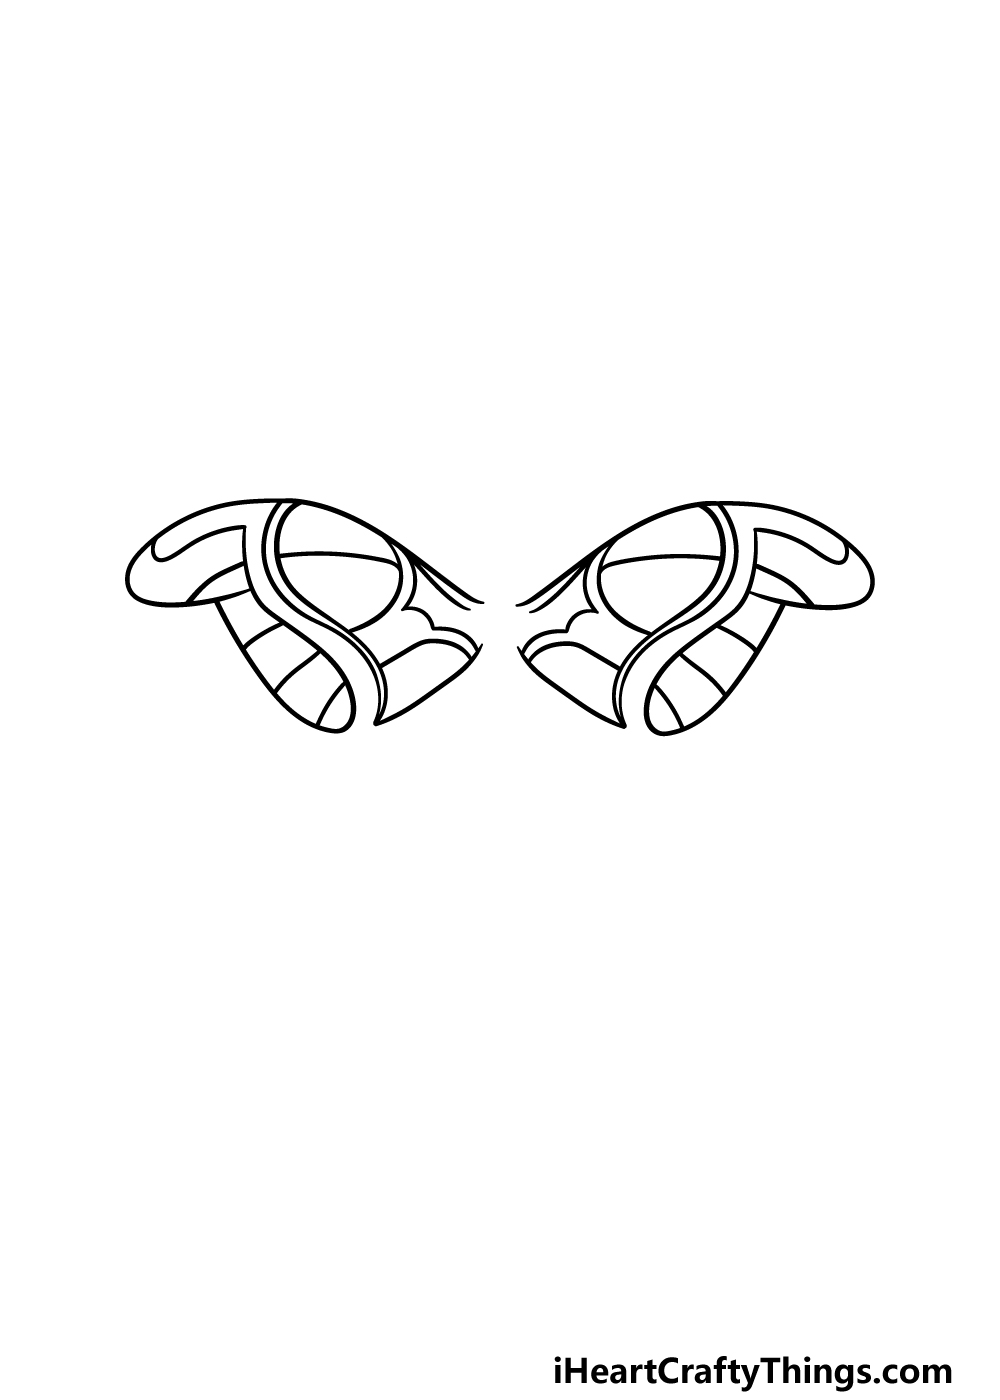
You have drawn one section of the wing so far, and for this part of your moth drawing we will be drawing the next one.
This one should be easier for you to do, as you will simply be replicating an opposite version of the wing that you just drew in part 1.
Everything should look as closely identical to that one as possible to create symmetry for the wings.
Even those there is a lot of decoration for these wings already, we will be adding even more detail to them later on in the guide.
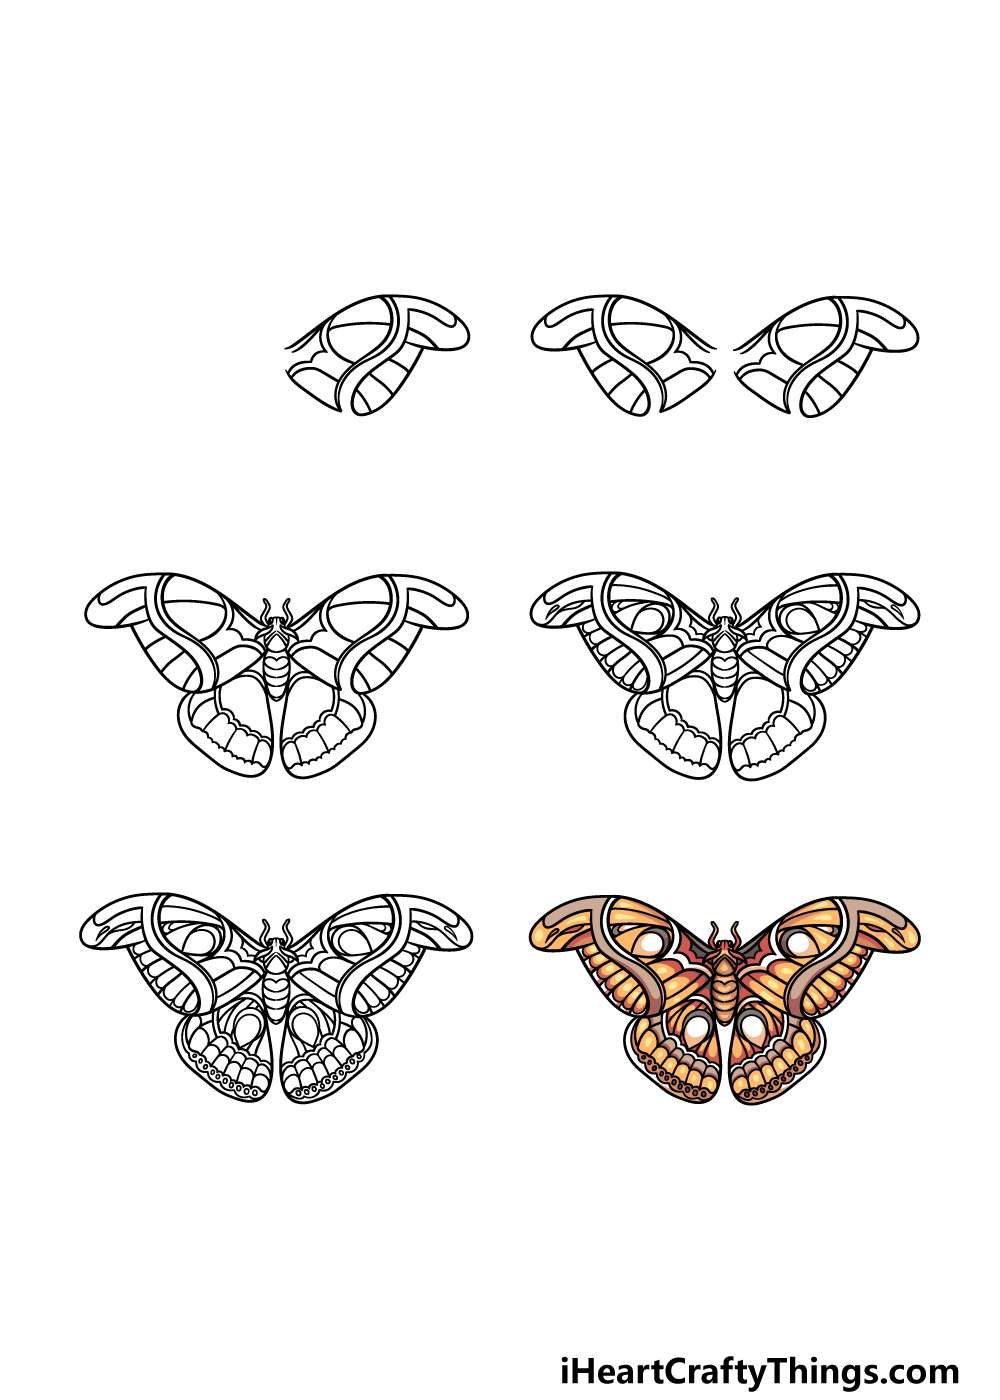
Step 3 – Draw the body and rest of the wings
We will be drawing quite a lot in this step of our guide on how to draw a moth, so let’s take it slowly! You’ll want to start with the head and body of the moth in this part.
You can draw these aspects using some curved and rounded lines to create the head and feelers of the moth. Then, draw some more curved lines for the various segments of the moth’s body.
Then you can draw the bottom halves of the wings, which will be much smaller than the top halves.
There will also be some detailing that you can replicate for your drawing, and once again you should aim to have symmetry between these wing segments.
Step 4 – Now, draw some more pattern detail for the wings
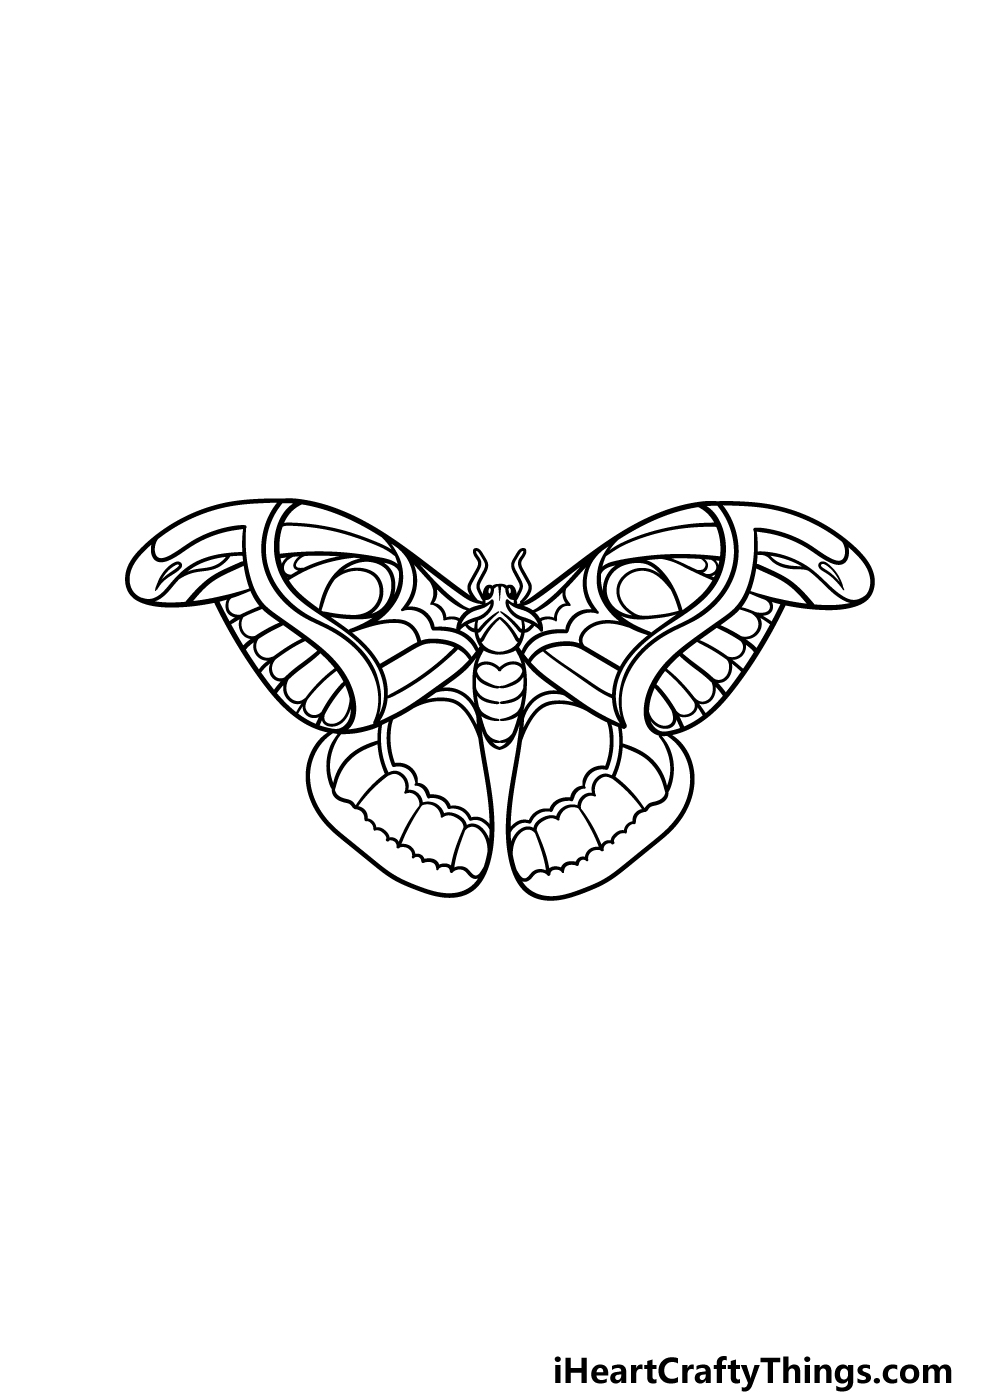
Earlier in this moth drawing guide, we mentioned adding some more fine details to the wing patterns, and we will start to add that now!
This step will be all about going in with your pen to add some additional lines, patterns and other details to the top wing sections.
These intricate details can create a stunningly detailed and beautiful look for the wings, and will finish them off nicely.
You’re almost finished now, and we will give the bottom halves of the wings the same treatment in the next step.
Step 5 – Finish off the final details for your moth drawing
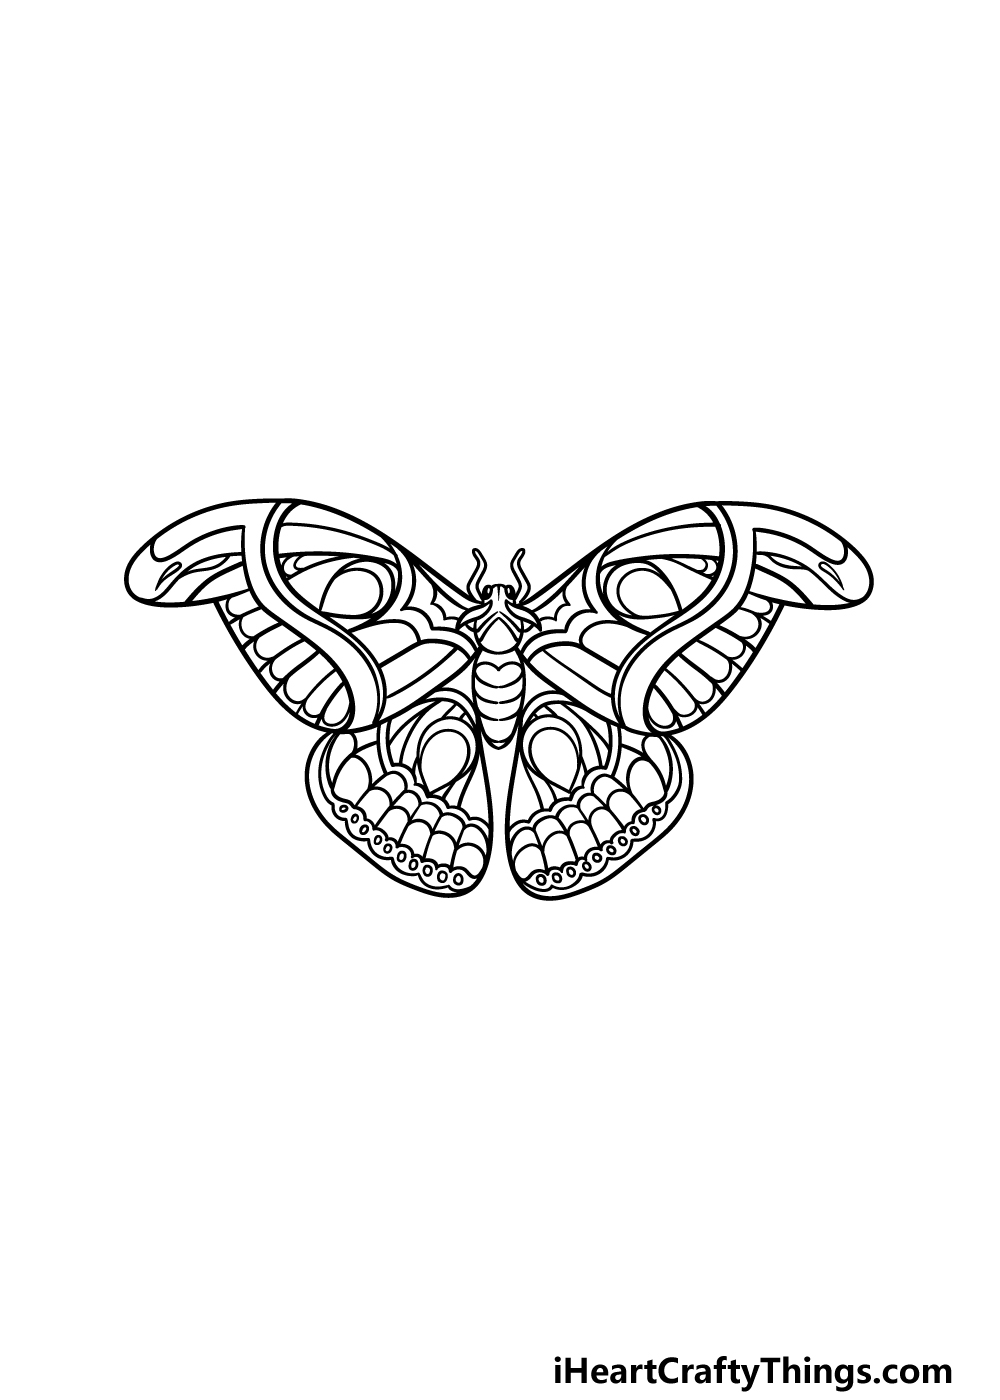
This step of our guide on how to draw a moth will be all about adding some final details to the wings.
We will be focusing on the bottom halves in this part, and our reference image will give you a great guide as to how you can structure the patterns.
You could also draw your own pattern details using the wing outline to create your own unique moth!
If you decide to go with this approach, there are no wrong ways to go about it! It will generally look better if both sides match each other, but otherwise there are no rules and you should feel free to use any pattern details you like!
Bonus: Make This Moth Drawing Even Easier With These Tips
You’re about to reach the final step of this guide on how to draw a moth, and that is where you will color your creation. While moths seem simple, it can actually be really hard to draw them.
We tried to make it as easy as possible in this guide, but we know that some people may struggle with it. The goal of this guide is to make it fun as well as easy, and that won’t be the case if you get frustrated!
So, we have a few more tips for anyone who may have struggled with the drawing up to this point. You could make it easier on yourself by looking up some photos and diagrams of moths.
These can be used along with the steps in this guide to help you get a better idea of the shapes and details. You may be surprised to see how much some additional perspectives can help!
If that doesn’t do the trick, then we would suggest getting some spare pieces of paper and a series of pencils. Using these pencils and pressing lightly on the page, you could do a few sketches.
Try to put no pressure on yourself, as if it doesn’t come out the way you wanted to then you can either erase it or start over. The more you practice, the more you will get the hang of the drawing.
If all else fails, you could also change the design of the drawing to a style that you’re more comfortable with. For instance, maybe you would prefer a simpler cartoon style.
If that’s the case, then be sure to go for it! Above all, just try your best, take it slow and remember to have fun with it, even if it takes time and practice to do it.
Step 6 – Finish off your moth drawing with some color

No moth would be complete without some beautiful colors for the wings, so we will add some in this next step of your moth drawing!
In our reference image, we went with a really warm color scheme with dark yellows, oranges and browns forming the majority of the color palette.
If you like this look, you could replicate the colors that we used, but you could also go wild with any other colors you love to finish it off.
You could also have some fun experimenting with various art tools and mediums such as acrylic and watercolor paints.
Mixing paint mediums with other ones like colored pens and pencils can be a great way to mix up the look of the picture, but we know whatever you choose will look great!
Do this to take your moth drawing to the next level
Take flight with these tips on how to make your moth sketch even more amazing!
Moths have many different variations of patterns on their wings and bodies, and you could use any you like for this moth drawing!
We showed you one way that you could decorate the wings, but you could try out any designs.
These could be based on existing moth wing patterns, or you could create your own awesome pattern. It doesn’t even need to be realistic to how a real moth would look!
What kinds of fun patterns and shapes could you use for this design?
Often when you see a moth, there will be several others in the vicinity. Adding some more specimens to this drawing of a moth could be a fun challenge!
If you were to do this, they could be identical to the first one, but each one could also be unique. It would be a challenge to do this second one, but it would be a fun challenge!
If you add some more moths to the page, which approach do you think you would take?
Moths don’t typically share the same bright and vibrant colors of most butterflies, but they can still show off loads of colors. You could have a lot of fun experimenting with colors with this moth sketch!
Choosing the colors is just a part of it, though. You could also have some fun experimenting with art tools and mediums.
Mixing colors, mediums and techniques can also be a great way to make the colors look more distinct.
You can find moths in all kinds of weird and wonderful places, and that means that you would be able to create all kinds of backgrounds. This is also a wonderful way to finish off this moth drawing!
It could be as simple as a brick wall texture or as complex as an entire yard with flowers and plants. These are just two ideas, but you could pick any background setting you want!
Your Moth Drawing is Complete!
That will conclude this step-by-step guide on how to draw a moth! Moths are incredibly beautiful in real life, and we hope that this guide made it easy and fun for you to replicate your very own moth variation.
Whenever you break down a drawing into smaller steps, it always makes it easier to take on, so that’s what we aimed to do for you in this guide.
Now you can take it to the next level by adding your own touches and variations!
These could include things like drawing a background or even changing the details of the wing patterns entirely. What else can you think of to finish off this moth drawing?
Our website has dozens upon dozens of amazing drawing guides for you to enjoy, so be sure to visit us there! We upload new ones often, so you’ll want to check in frequently.
Once your beautiful moth drawing is complete, please do share it on our Facebook and Pinterest pages for us to enjoy!