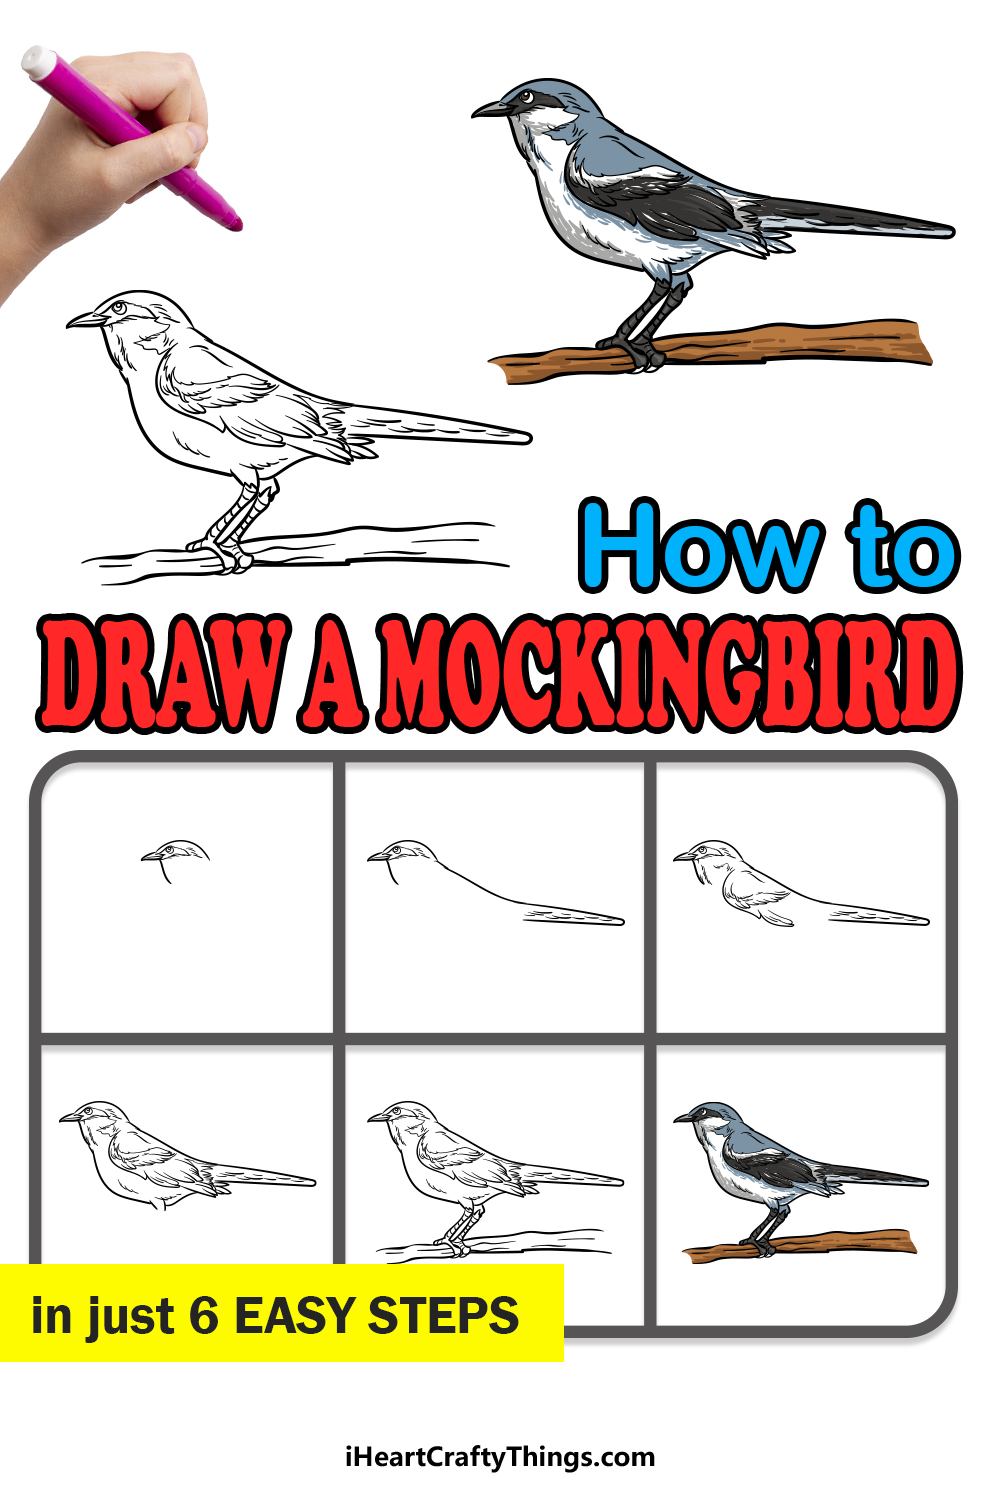
The mockingbird is one of the most well-known birds in the world. It’s known not only for being a pretty and dainty bird, but also for its uncanny ability to replicate noises of other birds and animals.
It is this impressive trick that gives the bird its name, and it helps it to distinguish itself from other wild birds.
Because of how pretty the bird is, it is also a common subject in wildlife artwork, and learning how to draw a mockingbird would allow you to make some of your own!
By the end of this tutorial you have in front of you, it will seem easier than ever before.
We hope that you really enjoy this step-by-step guide on how to draw a mockingbird in just 6 easy steps that we have prepared for you!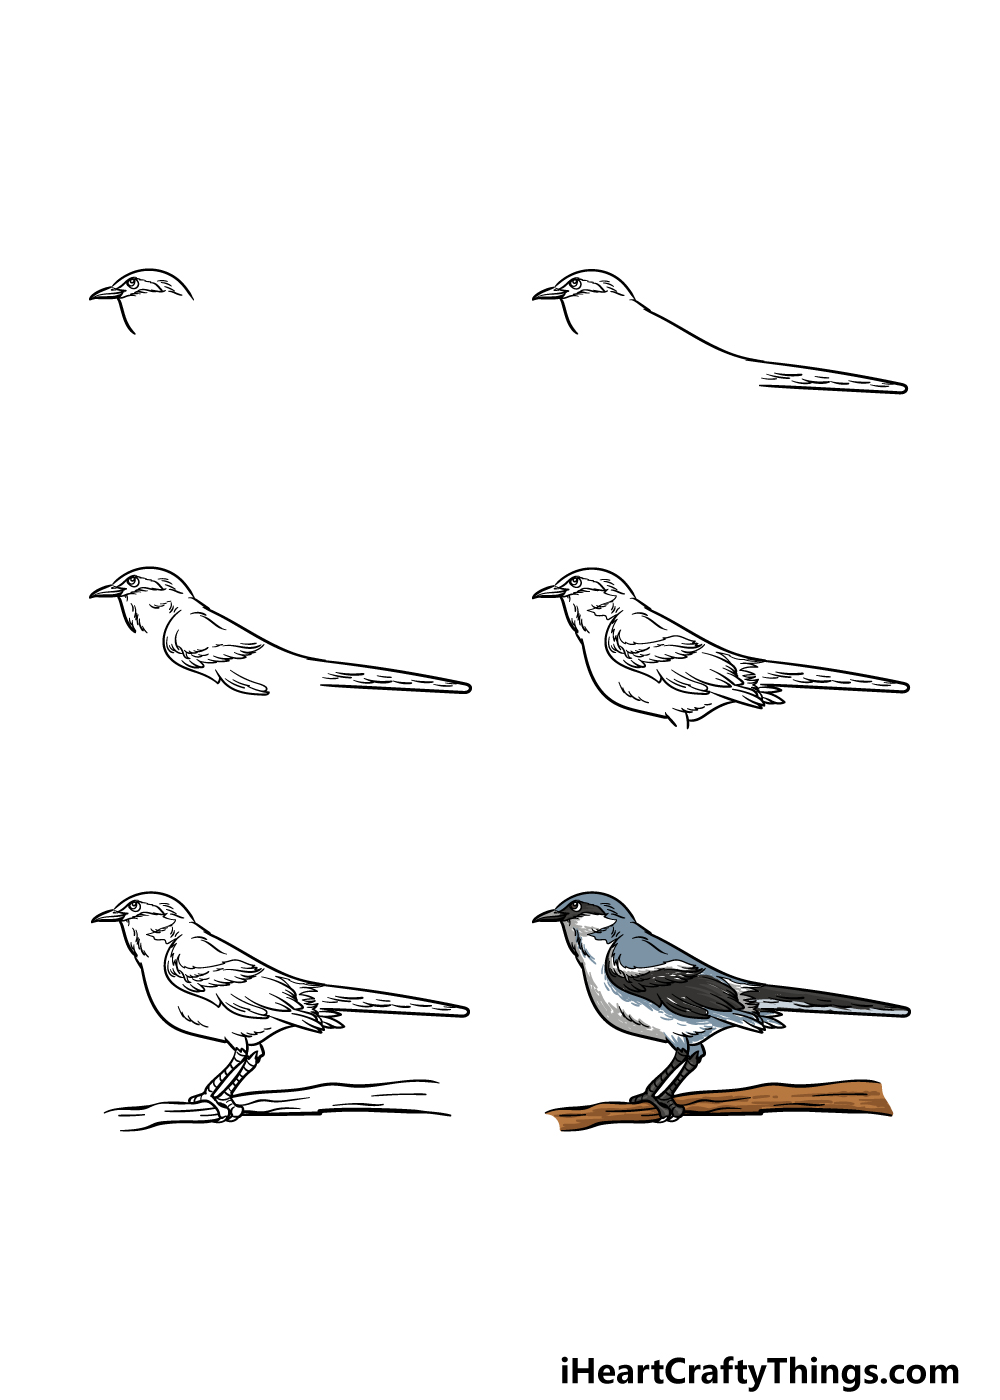
How to Draw A Mockingbird – Let’s Get Started!
Step 1
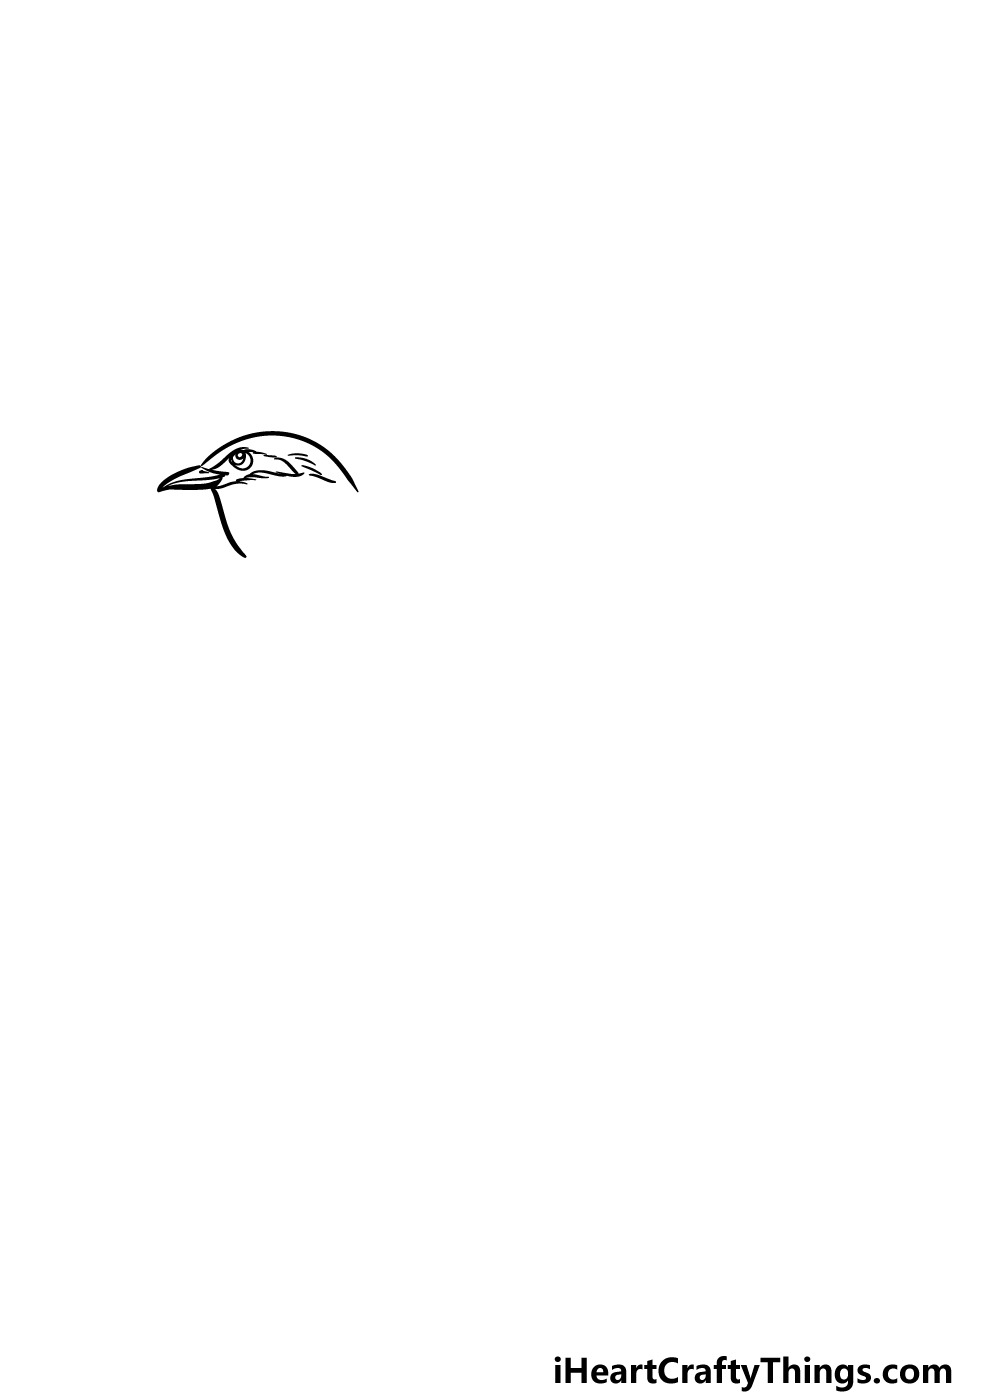
For this first step of our guide on how to draw a mockingbird, we will be drawing the head and beak of the bird.
For the top of the head, we will be using a curved, almost completely horizontal line. This will attach to the beak, and the beak is quite thin and pointy.
Next, attach another curved line coming down from the beak for the start of the neck.
For the eye, draw a small circular shape, and then draw an even smaller circle inside of it.
Then, we will be drawing an angular section around the eye area, and you can create some texture detail by adding small lines near to this shape.
Once these have all been drawn, we will be able to move on to the second step of the guide.
Step 2 – Now, draw the back and the tail of the mockingbird
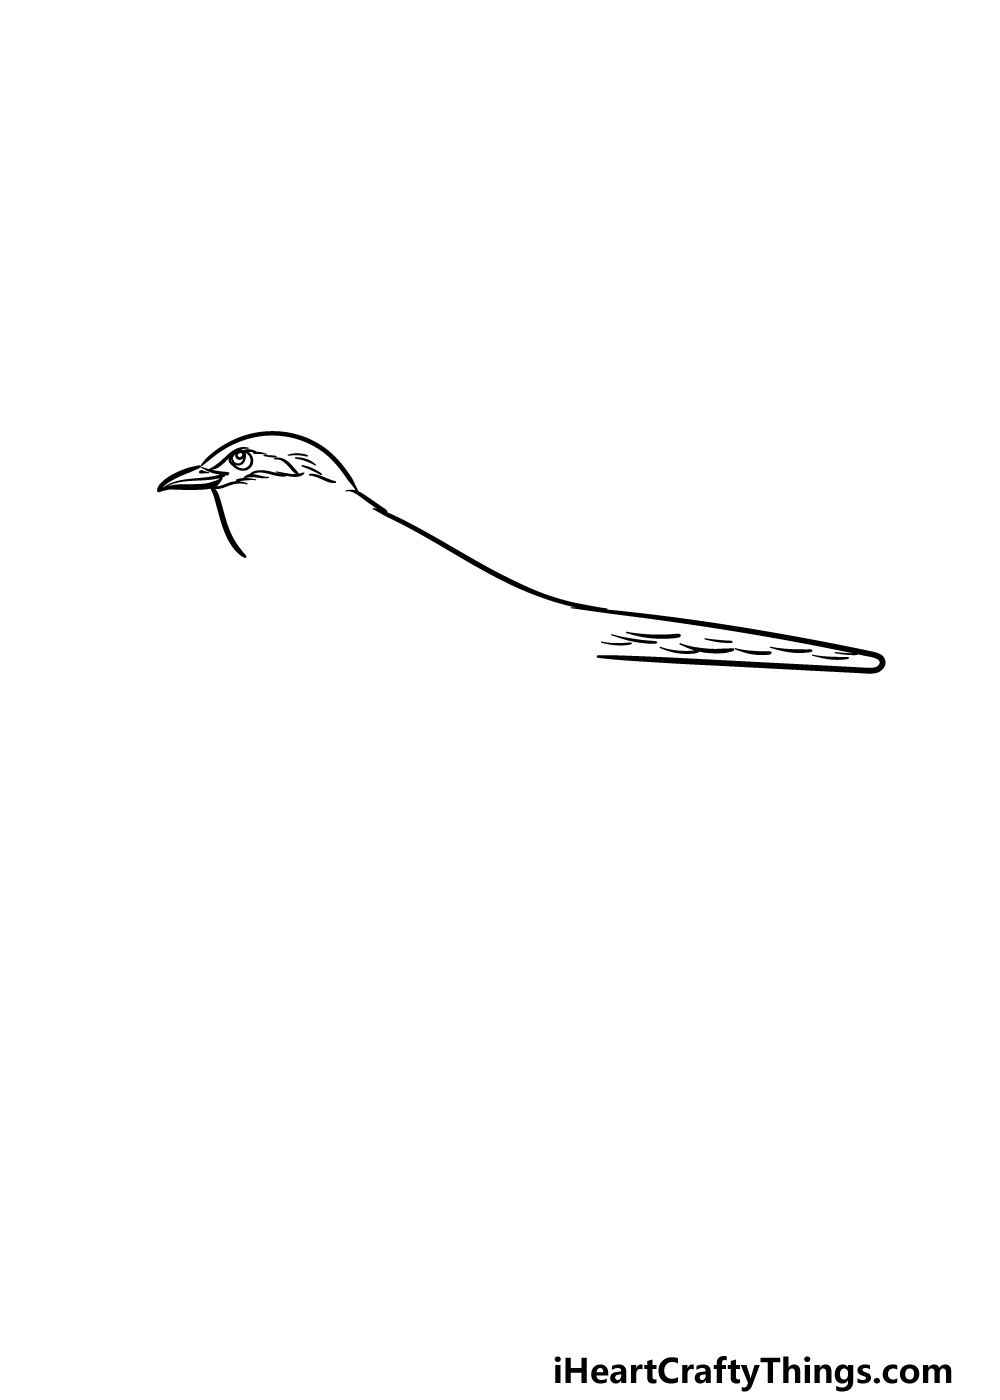
You have completed the head of your mockingbird drawing, and now we can start to draw the body.
The back of the bird will be long and slightly curved as it extends from the base of the neck. This will then curve in on itself as it turns into the thin, pointy tail of the bird.
Once the tail outline is drawn, we will also be adding some small, curved lines inside of it to further add some feathery texture details. Then it will be time to proceed to step 3 of the guide!
Step 3 – Draw the start of the wing for the mockingbird
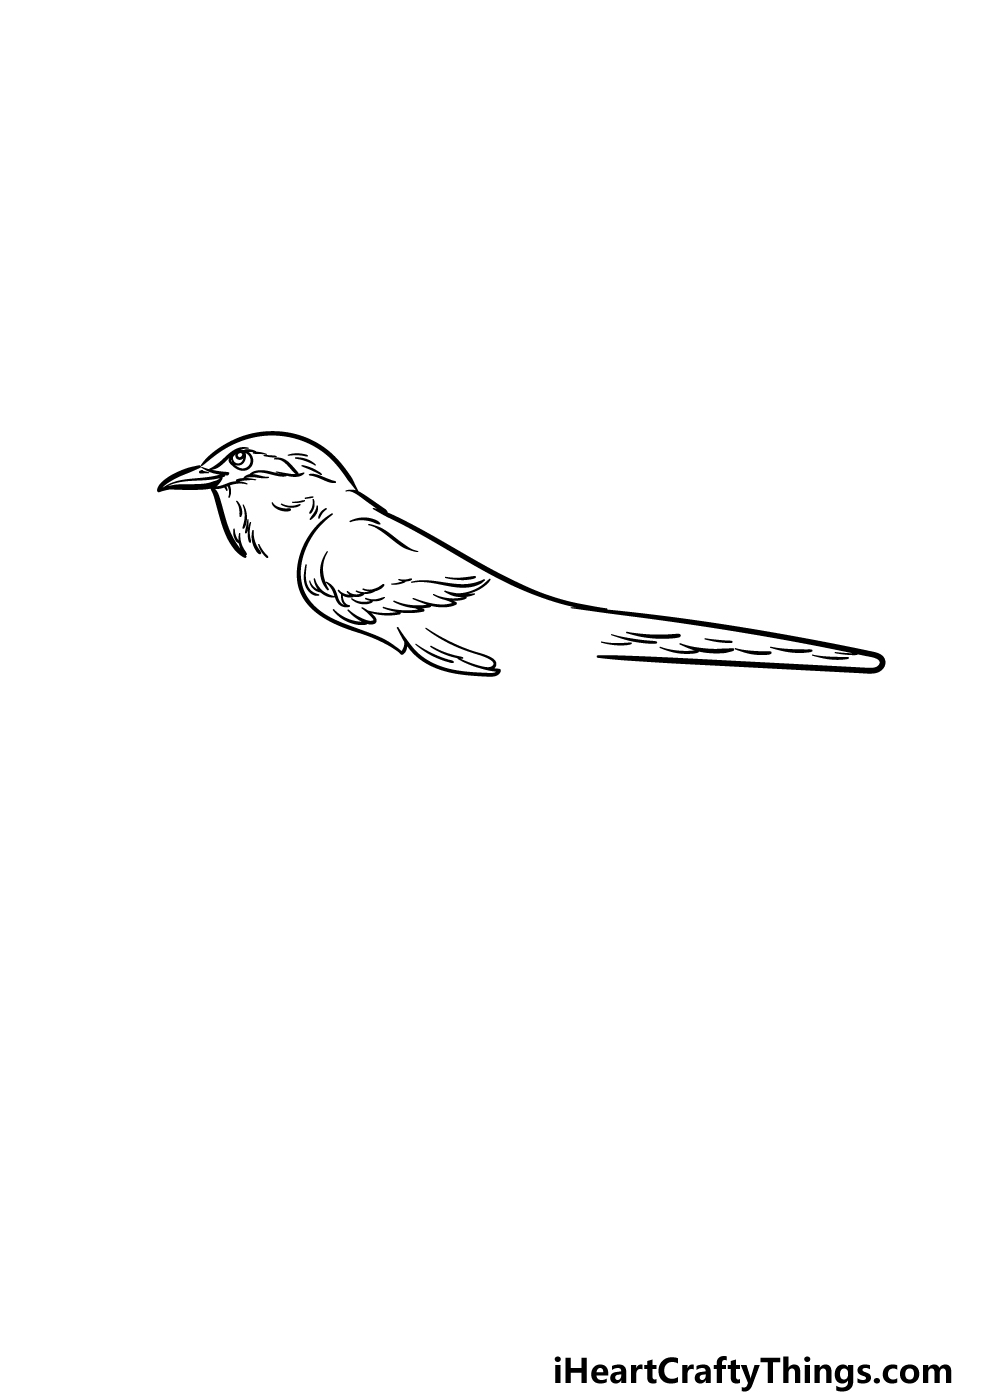
Mockingbirds have fairly short wings to match their small bodies, and we will draw the first section of the wing in this third step of this guide on how to draw a mockingbird.
The front of the wing can be drawn using some curved lines, and then for the back edge we will be using smaller curved lines to make the wing look more feathery.
We will also add some feather details to the interior of the wing, and then we shall also draw some more of these details onto the wing interior.
Then, we can start drawing more of the bird’s body in the fourth step of the guide.
Step 4 – Next, draw the body and rest of the wing
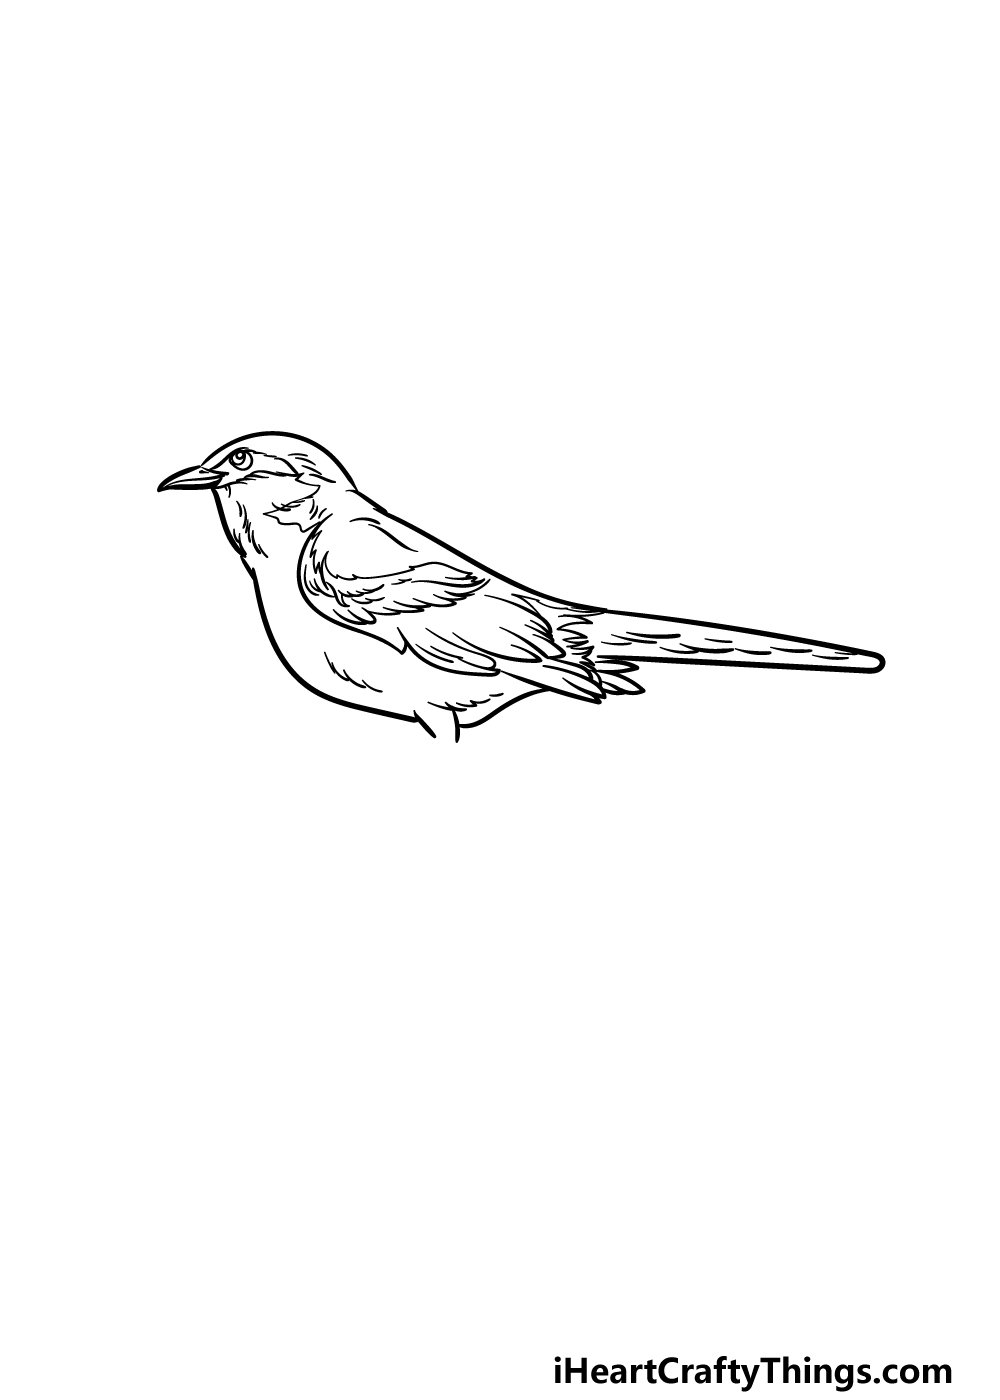
This fourth part of your mockingbird drawing will see you drawing more of the body as well as finishing off the wing.
For the back of the wing, you can draw some sharply curved lines to make it look like there are feathers poking off of it.
As mentioned earlier, the wings aren’t very large on this bird, and it will be poking only slightly out of the body outline.
You can then finish off this step by drawing the body of the bird.
You can use a slightly wavy line for the belly, and then draw a small sharp shape for the top of the leg where the legs will poke out of the feathers.
Step 5 – Add the final details to your mockingbird drawing
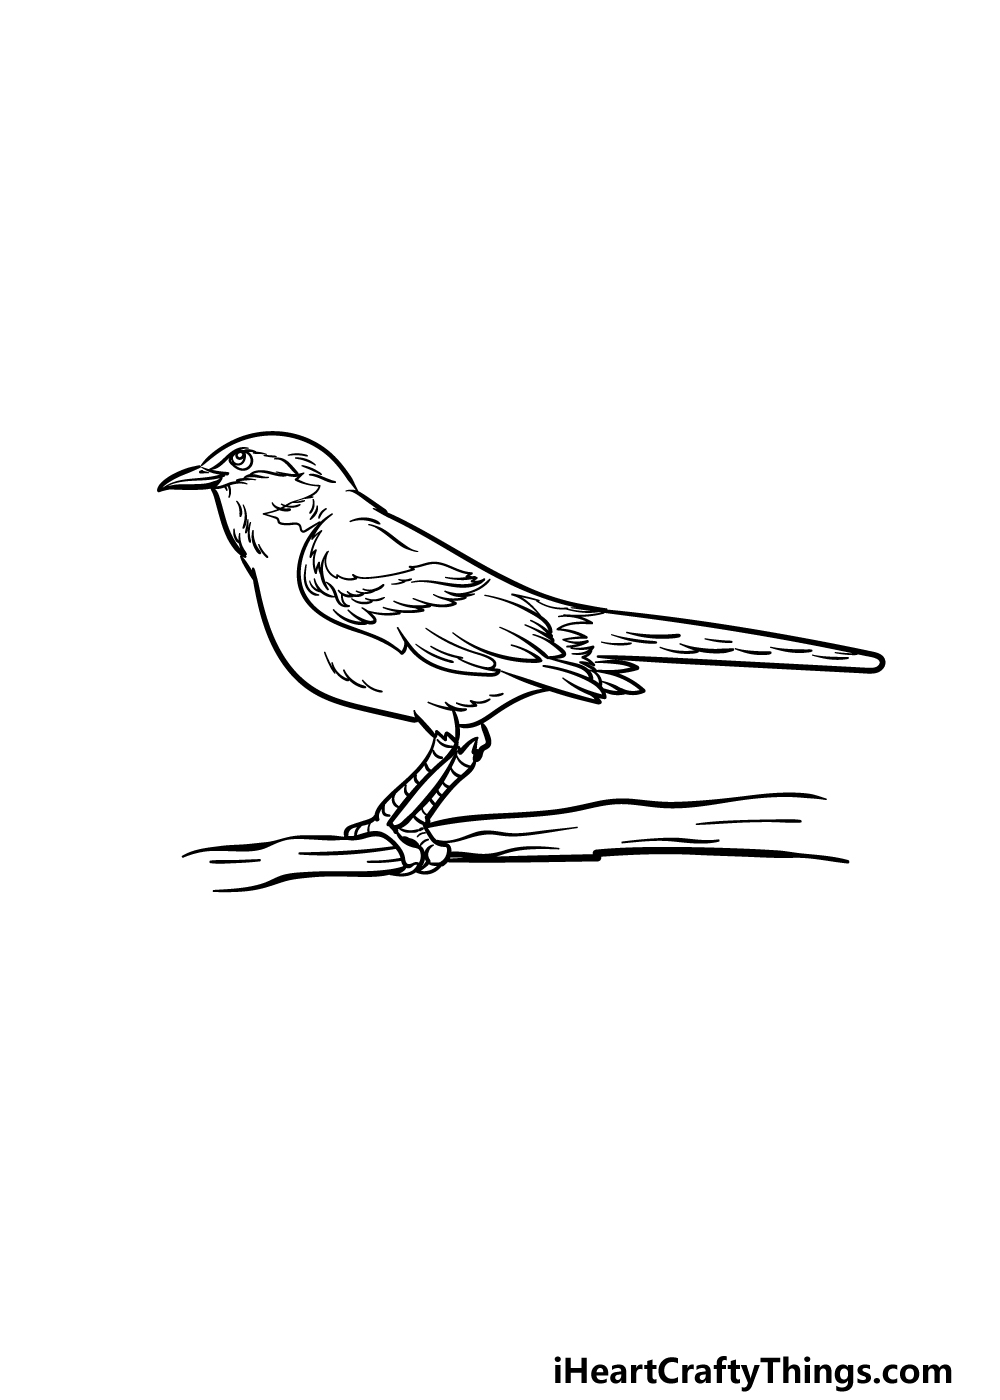
Now we can finish off the drawing in order to get you ready for this final step of this guide on how to draw a mockingbird.
First, we will be drawing the legs of the bird. Like many small birds, the mockingbird has very thin little legs, and you can draw them poking down from the feathery sections at the base of the body.
Then, the legs will have horizontal lines drawn across them to give them that leathery texture that bird legs have.
Finally, use some simple, slightly curved lines for the branch that the bird is sitting on. Once these aspects are drawn, feel free to draw any additional details of your own!
What kind of cool background can you think of for this pretty drawing?
Step 6 – Finish off your mockingbird drawing with color
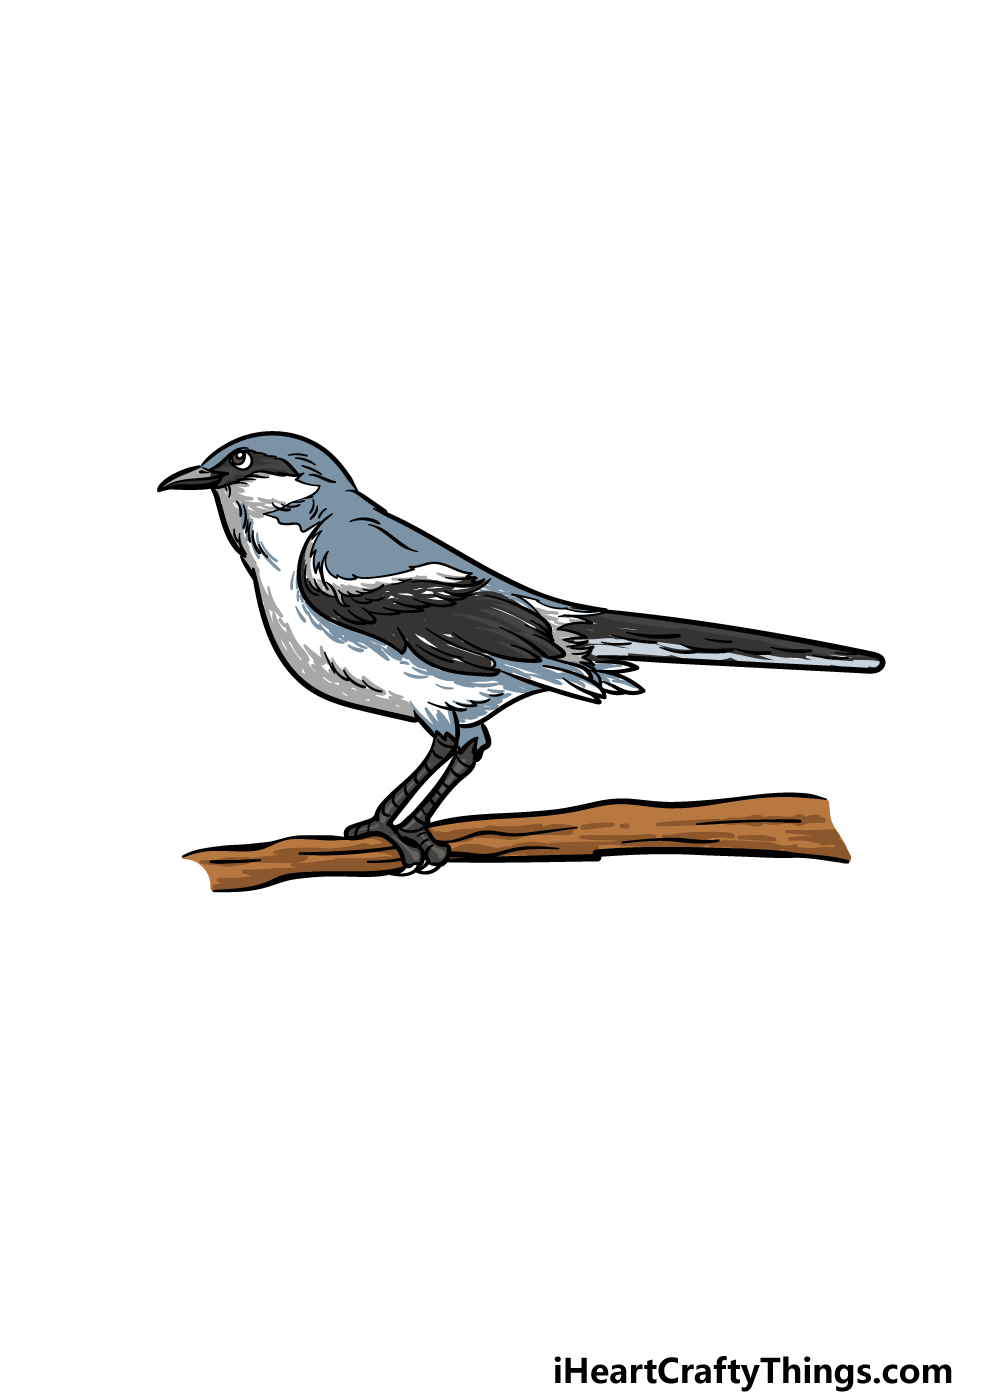
This final step of your mockingbird drawing will see you finishing up with some colors.
In nature, mockingbirds aren’t exactly well known for their bright color schemes, so in our reference image we kept things looking more realistic.
That means that we used light blues with darker areas and then some white for the belly of the bird.
Even if you want to use similarly realistic colors, you can inject some color variation by coloring in some background elements!
You can also get some variety by changing up the art tools and mediums that you use for the colors. We can’t wait to see how you finish this drawing off!
3 More tips to make your mockingbird drawing easy!
Make this pretty mockingbird sketch even easier with the help of these 3 tips!
The drawing of a mockingbird we created in this guide is done in such a wonderfully detailed style. Some people may find this style a bit more difficult to draw, so you may want to change the style.
The style you use for the drawing would depend on what you find the most comfortable drawing. For example, you could make the mockingbird more cartoony and stylized.
Or, you may like to go even more in with the details and realism. There is no wrong way to draw it as long as you’re feeling comfortable and having fun!
What are some styles you could use?
Whether you stick to the style we used or use your own, you can make this mockingbird drawing easy by using a pencil to prepare it. If you do this, you should try to use the lightest pencil you have.
Then, follow the guide and use the pencil to start drawing some basic shapes that form a rough outline for the mockingbird. Then, you can start to add some more layers of details.
Drawing with a pencil is so freeing, because you don’t need to worry about making mistakes. Then, when you’re happy with how it looks you can go over the pencil lines with your pen.
Simply erase the pencil lines, and then you’re good to go!
If you’re trying to replicate the detailed style of this mockingbird sketch and having a tough time, you may want to consult some photos.
You can find many photos of mockingbirds online, and these can be used along with our guide.
Try your best to find ones that are posed similarly to our example if you can. Even if the photos show one in another pose, you can still use it to help you with smaller details like the feathers and proportions.
Using photos would also be helpful if you want to create variations with mockingbirds in other poses.
Your Mockingbird Drawing is Complete!
You started this guide on how to draw a mockingbird wanting to learn how to draw this cute bird, and now you have a great drawing to show for it!
When drawing realistic birds, there can be a lot of challenges involved as you try to get all the details right, so you should be extra proud of your picture!
Now that this picture is complete, you can keep it going with your own details and ideas.
We mentioned how you could draw a background for the image, but you could even draw some more birds to go with it! What do you think you will do to finish this off?
With this drawing mastered, you can go and find some more awesome drawing guides on our website to enjoy. We upload new ones often, so be sure to check in often!
We would love to see your finished mockingbird drawing as well, so please share your artwork on our Facebook and Pinterest pages for us to see!