There are many different kinds of dog breeds, and everyone has their favorite! Some are big and boisterous while some are small and cuddly.
The French bulldog falls somewhere in the middle, as it is small and cute but also really tenacious.
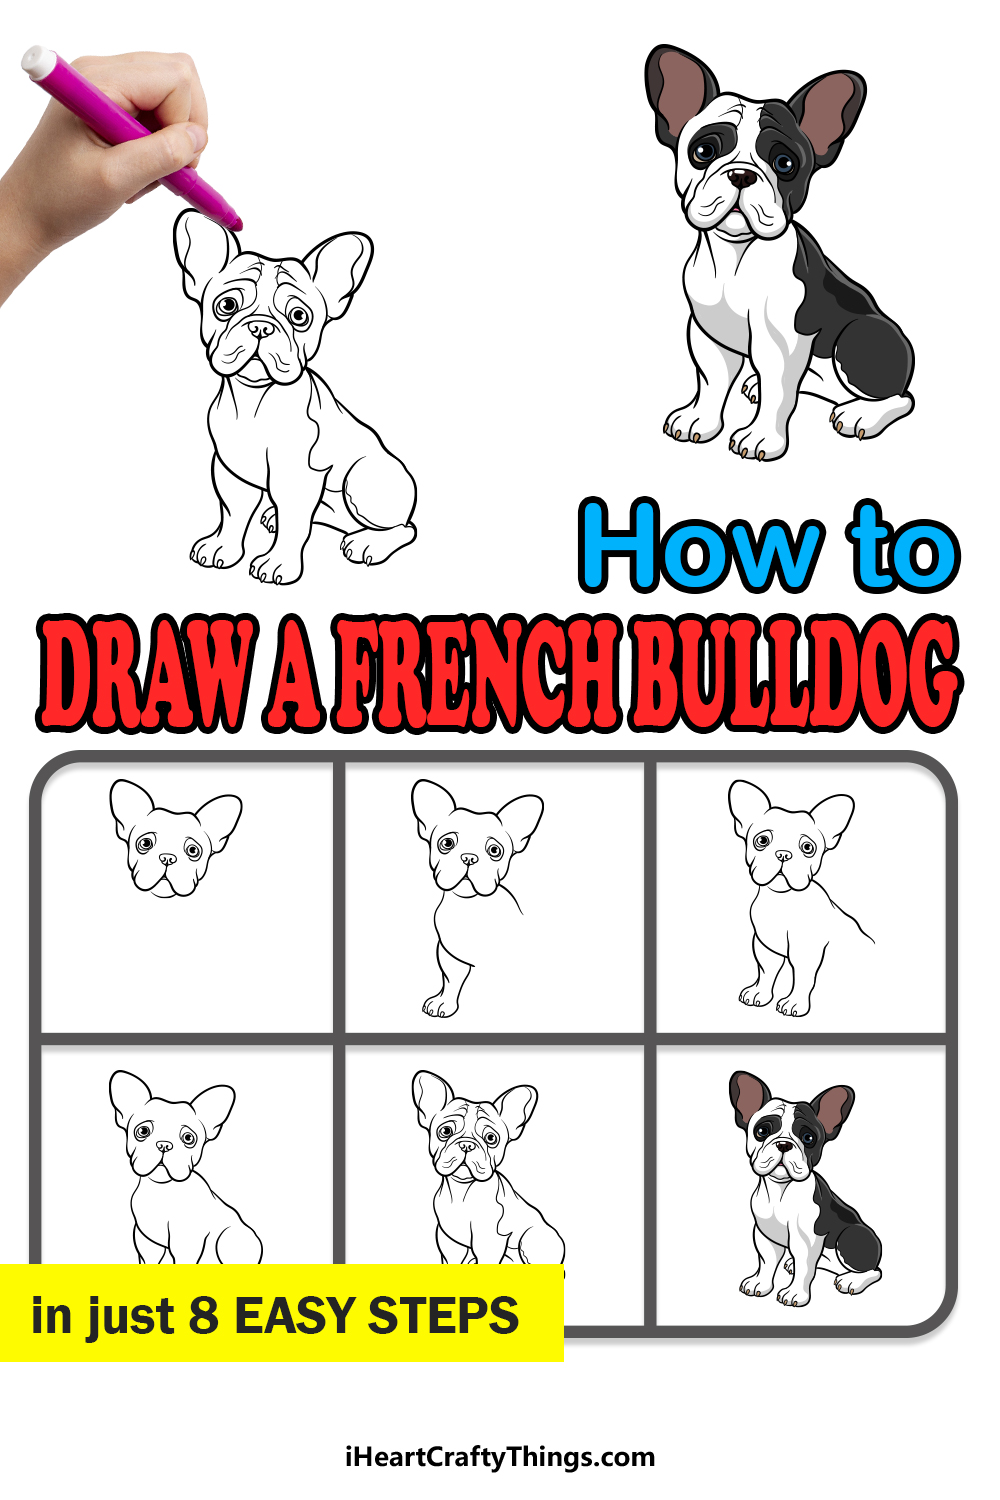
This combination of cuteness and toughness has made this a popular breed, and many fans of this dog like to show their love for it by learning how to draw a French bulldog.
This guide you’re about to do will show you how you can recreate this cute little dog!
We hope that you have a lot of fun working on this step-by-step guide on how to draw a French bulldog!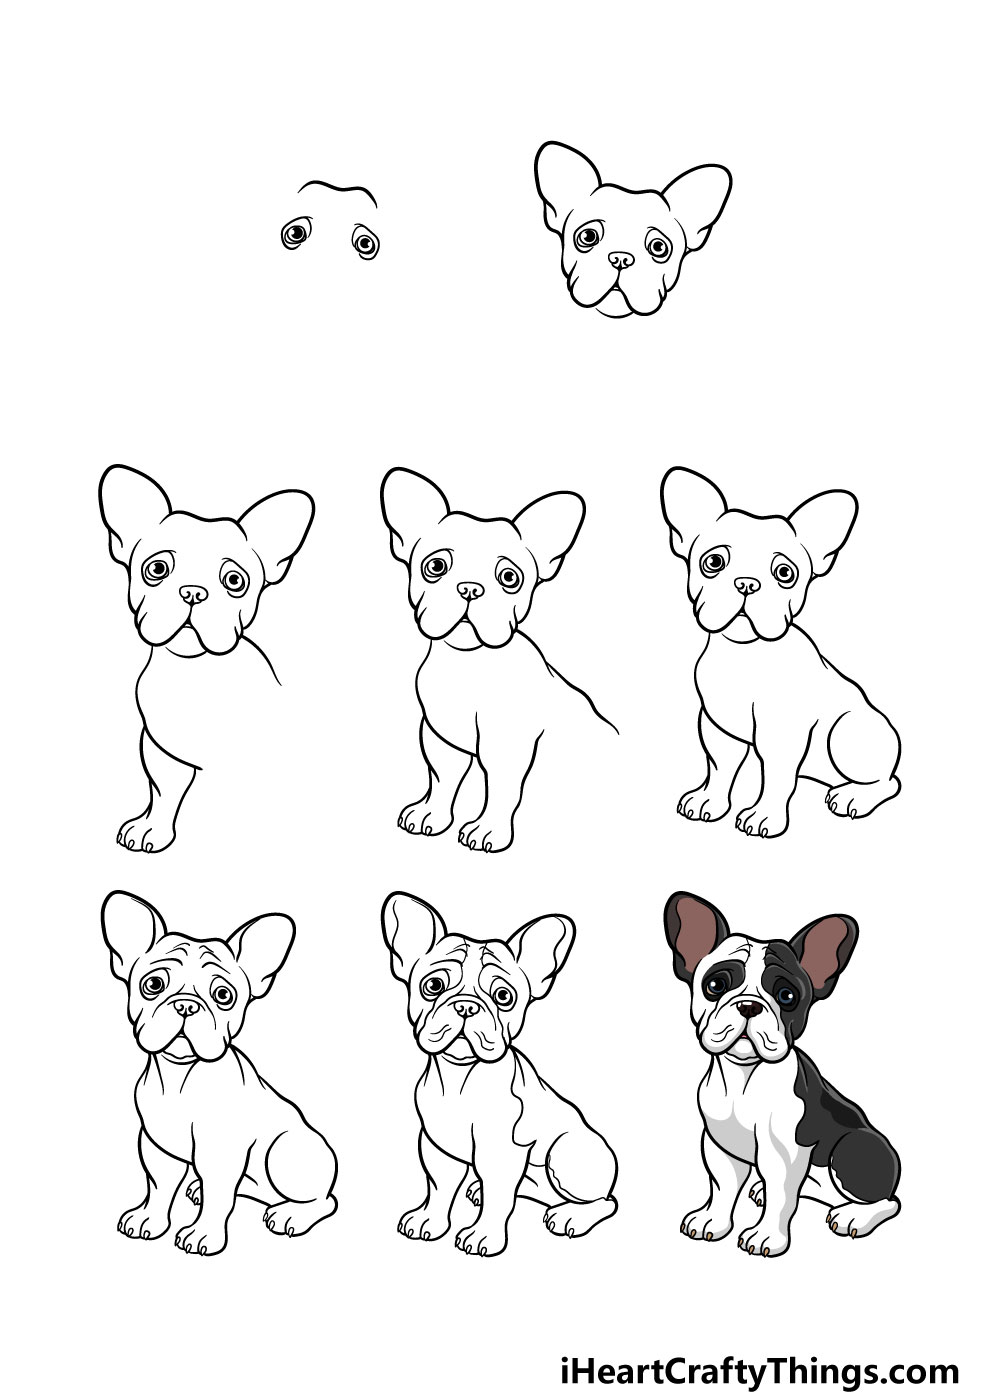
How to Draw A French Bulldog – Let’s Get Started!
Step 1
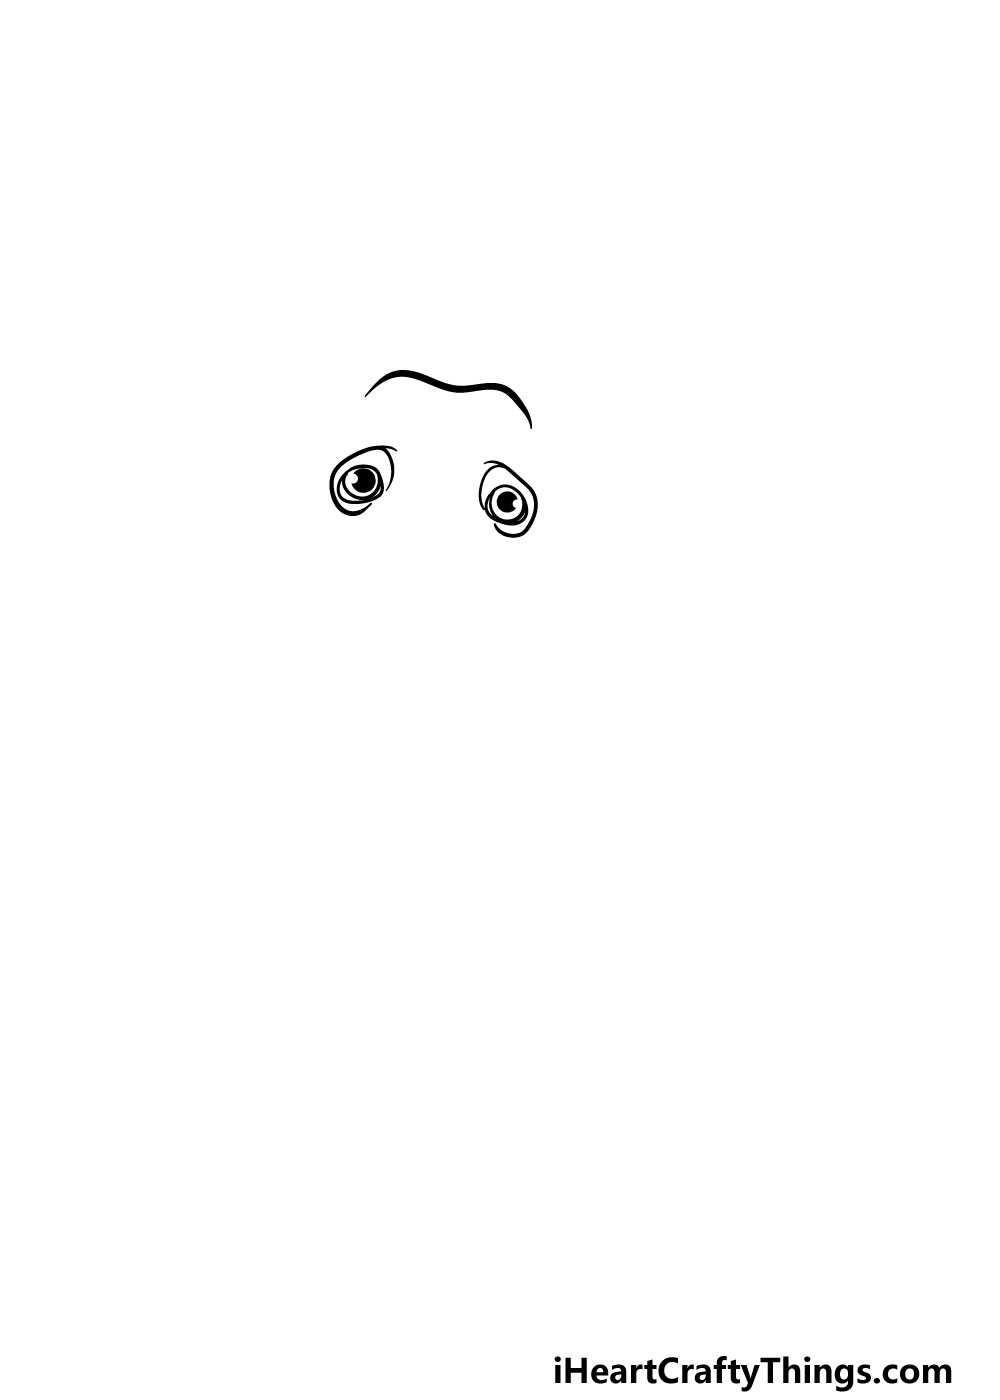
In this first step of our guide on how to draw a French bulldog, we will be focusing on the eyes and top of the head for the dog.
The eyes will be drawn with some small circles that have smaller black ones within them. Then, there will be some more rounded lines around them.
Finally, you can use a bumpy line above the eyes for the top of the head.
Step 2 – Next, draw the head outline of the dog
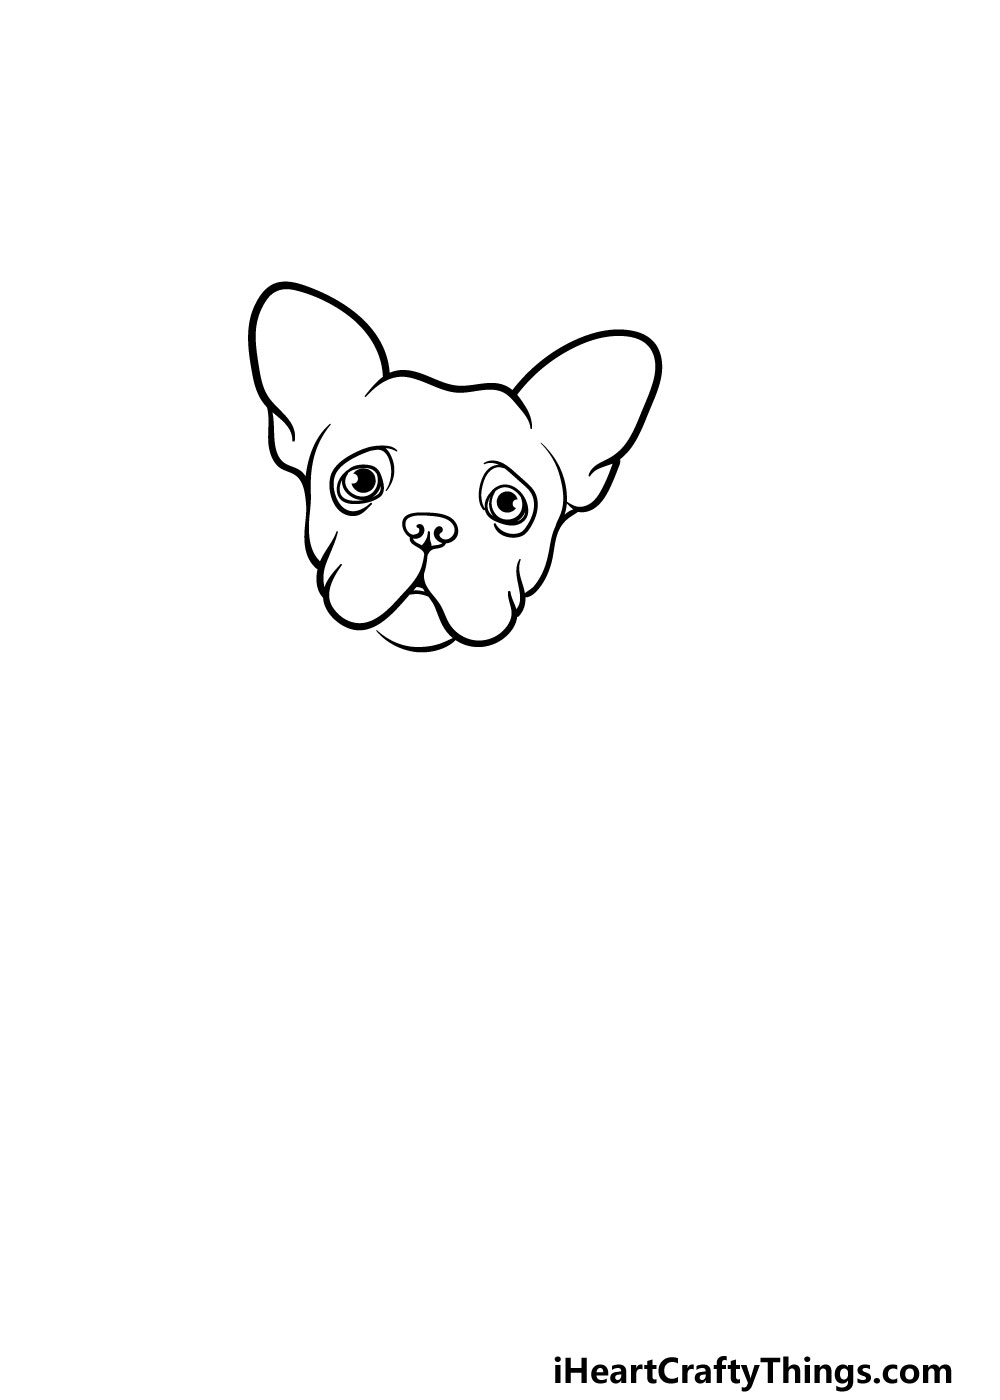
Now that you have the eyes and top of the head done for your French bulldog drawing, you are ready to draw the head outline and ears.
First, the muzzle will be separated into two sections that meet at the nose in the center. There will then be another curved line underneath the muzzle for the chin of the dog.
Then, you can draw the sides of the head and then finish off with the big pointy ears on top.
Step 3 – Now, start drawing the body and first leg
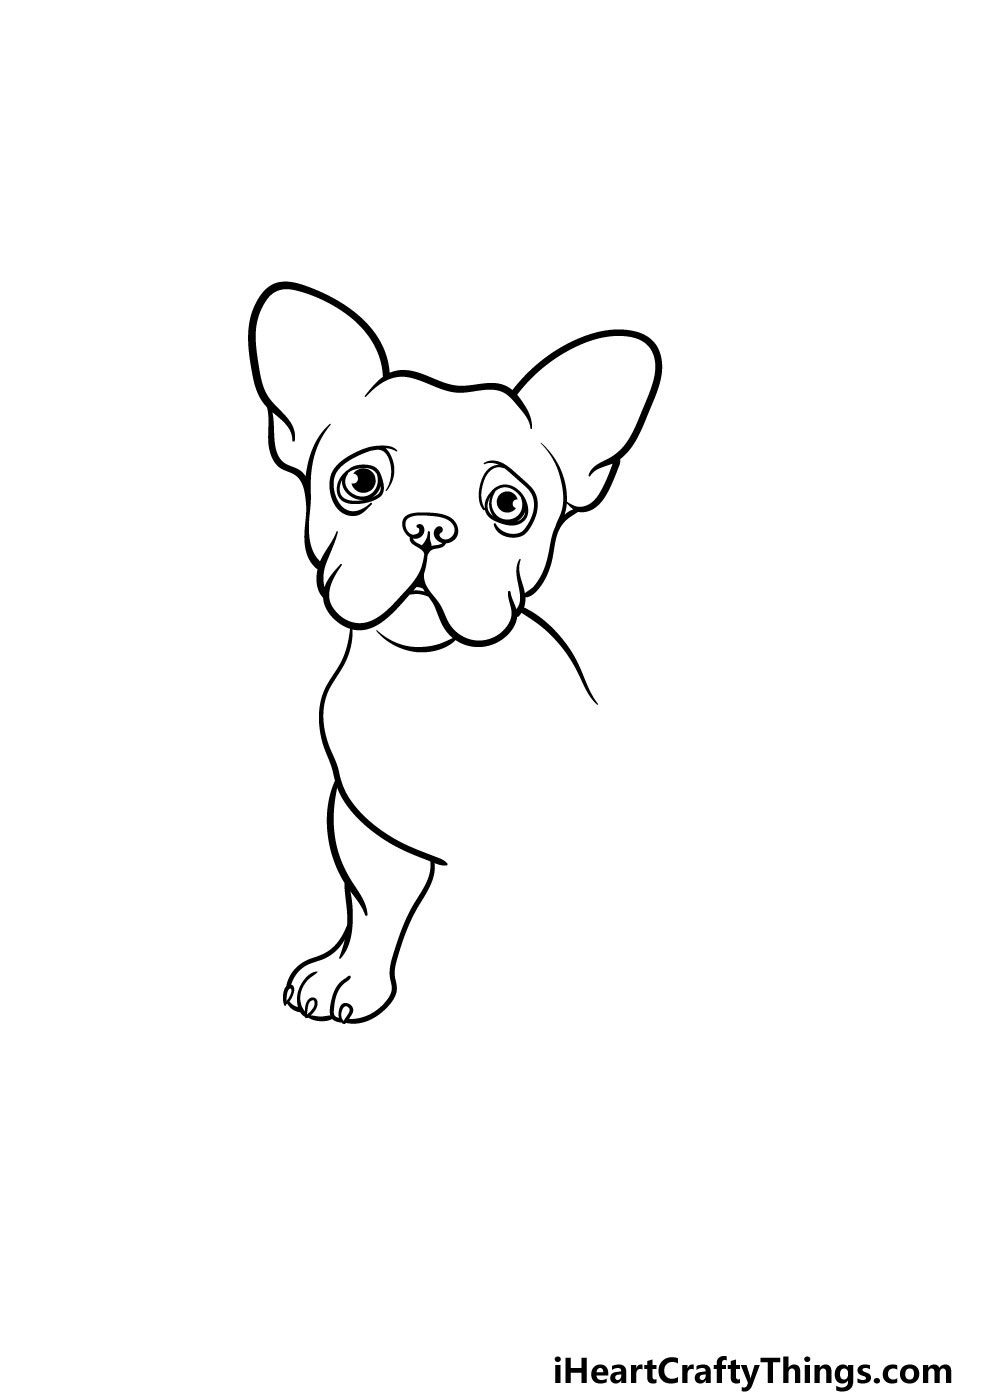
For this third step of our guide on how to draw a French bulldog, we will be starting on the body and first leg of the dog.
To do this, you will be using some more curved lines for the chest and the back of the dog.
Then, you can add the first short leg underneath the chest. It will also have three toes at the end, each of which has a little nail on the tip of it.
Step 4 – Next, draw another leg and the back of the dog
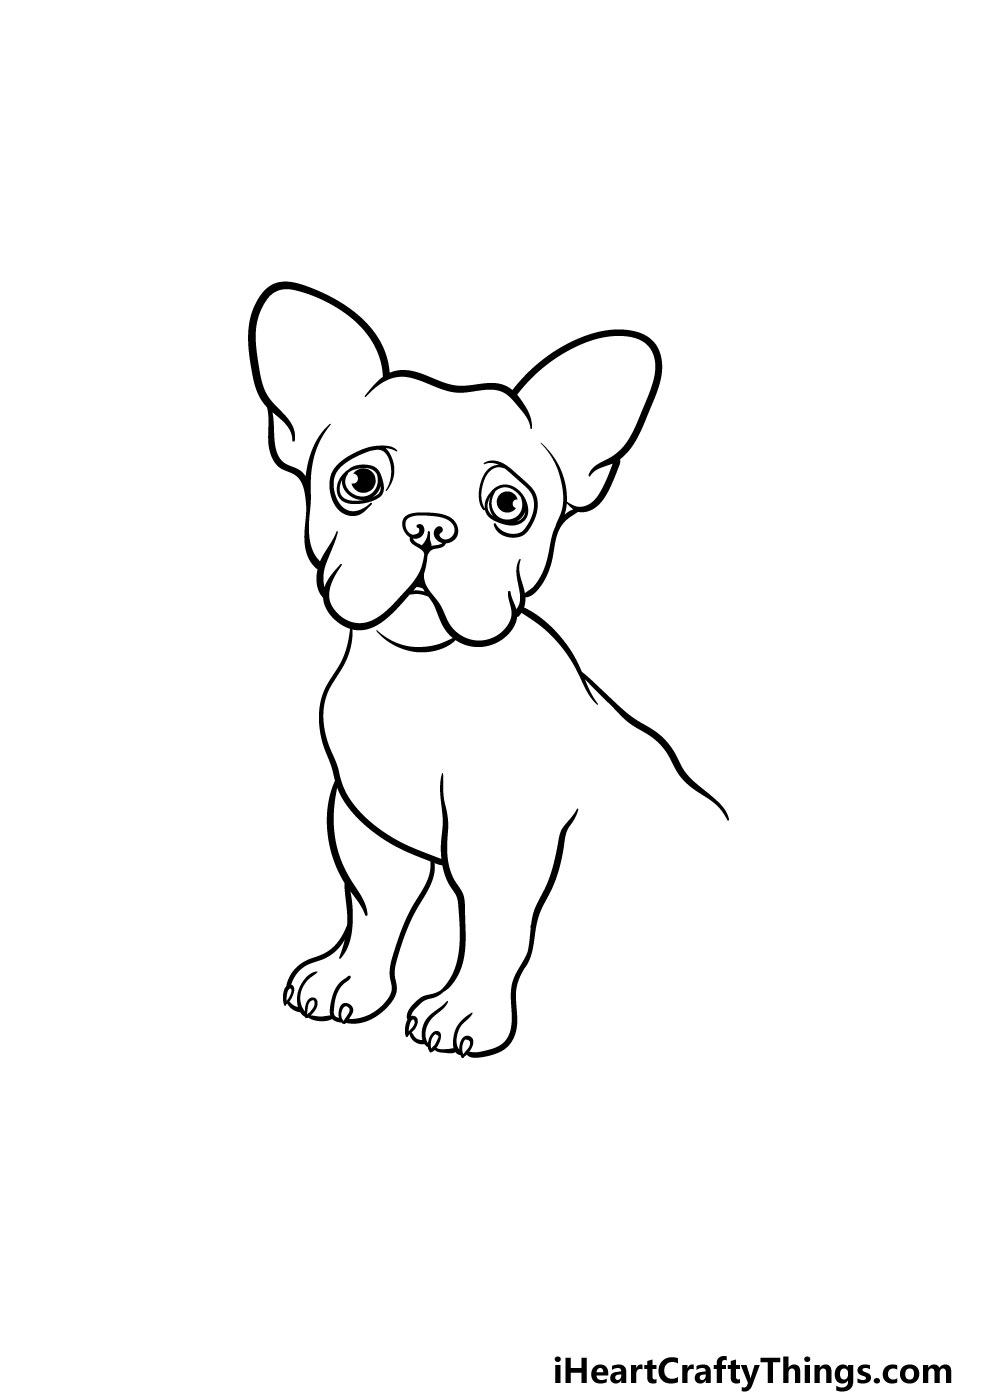
Now that you have drawn one leg for your French bulldog drawing already, so you should have no problem with drawing another one!
This leg will go next to the other one and extend down from the middle of the chest. Finally for this step, you can use a curved line for the back of the dog.
That’s all there is to it for this step, and you’re ready for the next one!
Step 5 – Now, draw the back of the leg
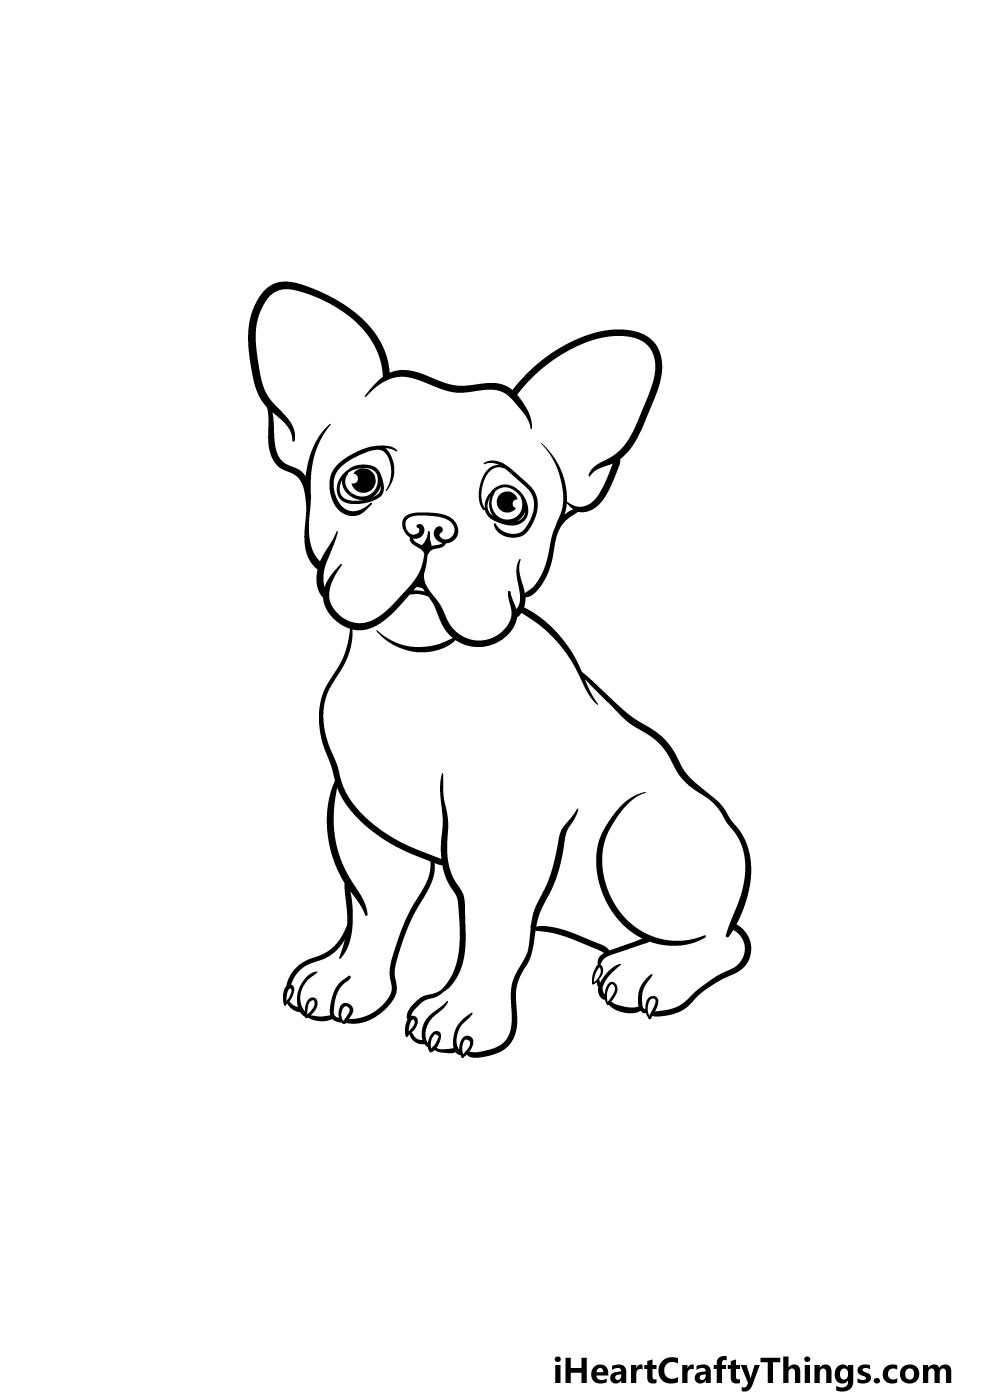
This step of our guide on how to draw a French bulldog will see you drawing the back leg of the dog. This one will be bent as the dog is sitting down.
For that reason, you will be using a curved line for the top of the leg, and then add the foot at the base of it.
The foot will also be a bit longer than the feet for the front legs. Finally, you can finish off by drawing the back of the dog.
Step 6 – Next, start drawing the details for the French bulldog
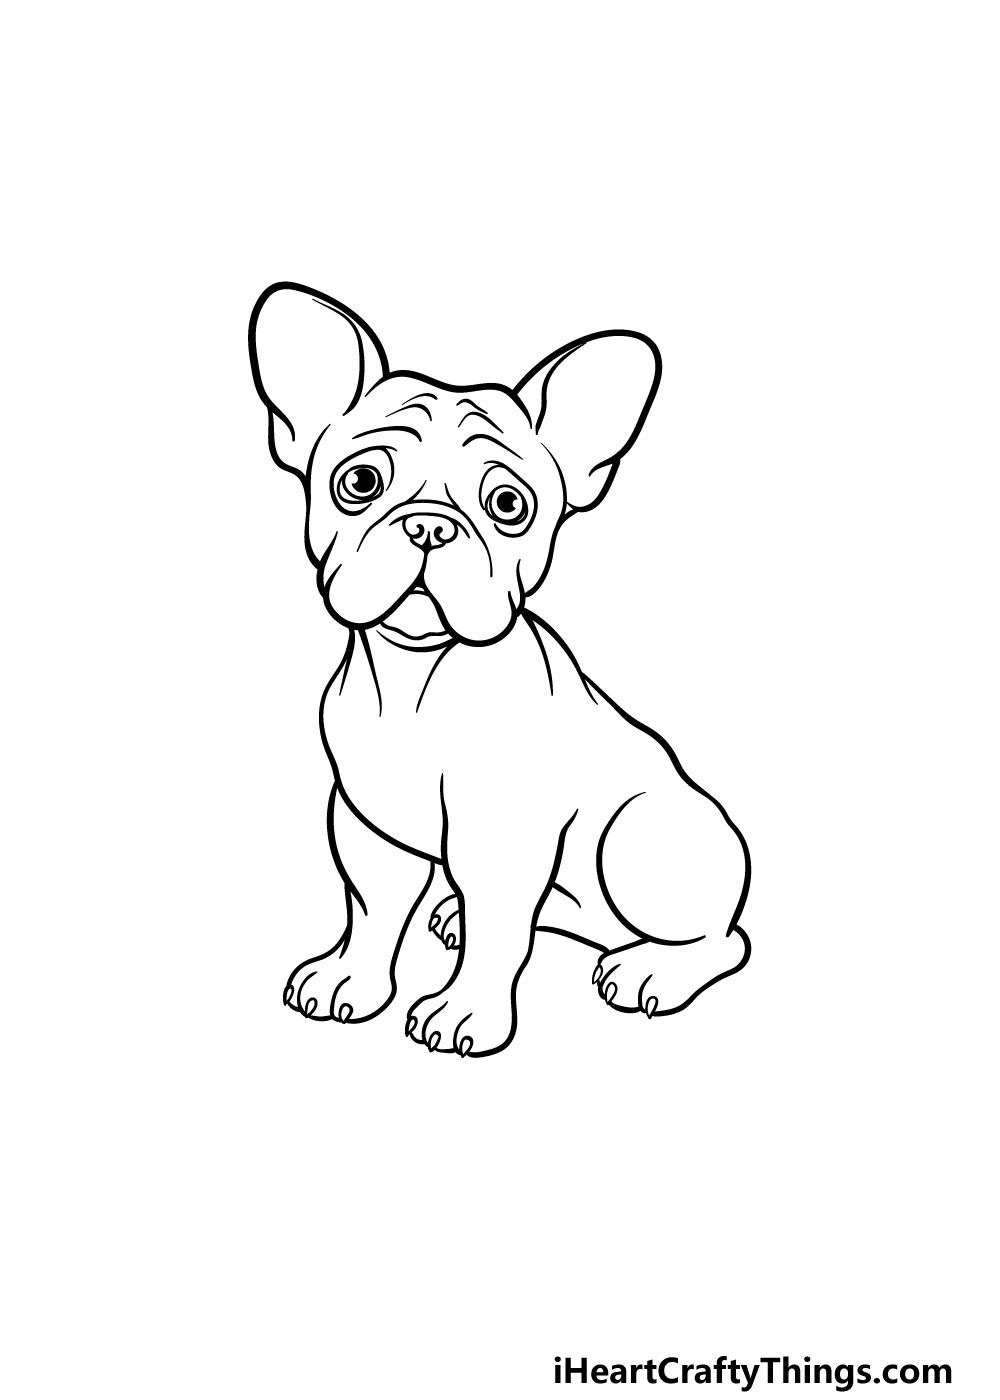
For the sixth part of your French bulldog drawing we will start to add some details to your picture. You can use some curved lines on the face to make it look wrinkly and more detailed.
You can also add some lines to the ears and also add some line detail to the neck.
Step 7 – Next, draw the final details of your French bulldog drawing
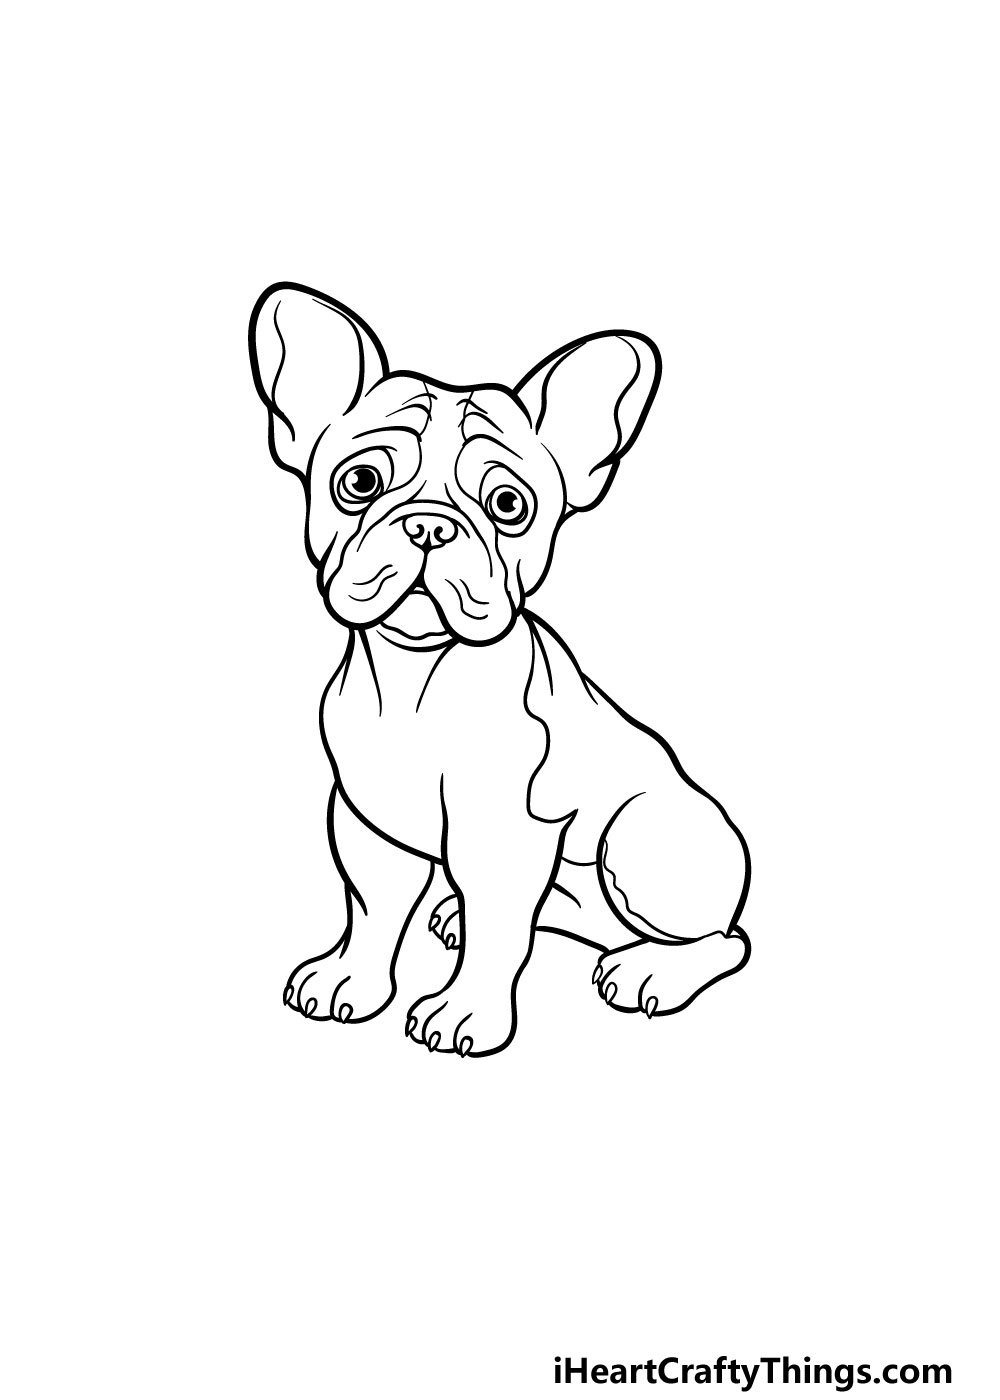
We will be adding some colors to your drawing soon, but first we have a few final details to add in this step of our guide on how to draw a French bulldog.
These details will mostly be kept to some curved lines throughout the dog to show the spots and other pattern detail for the dog.
That will do it for the details, but you could also add some more if you wish! Perhaps you could draw a background or maybe draw some toys for your French bulldog to be posed with.
What can you think of to finish off your French bulldog drawing?
Step 8 – Now finish off your French bulldog drawing with some color
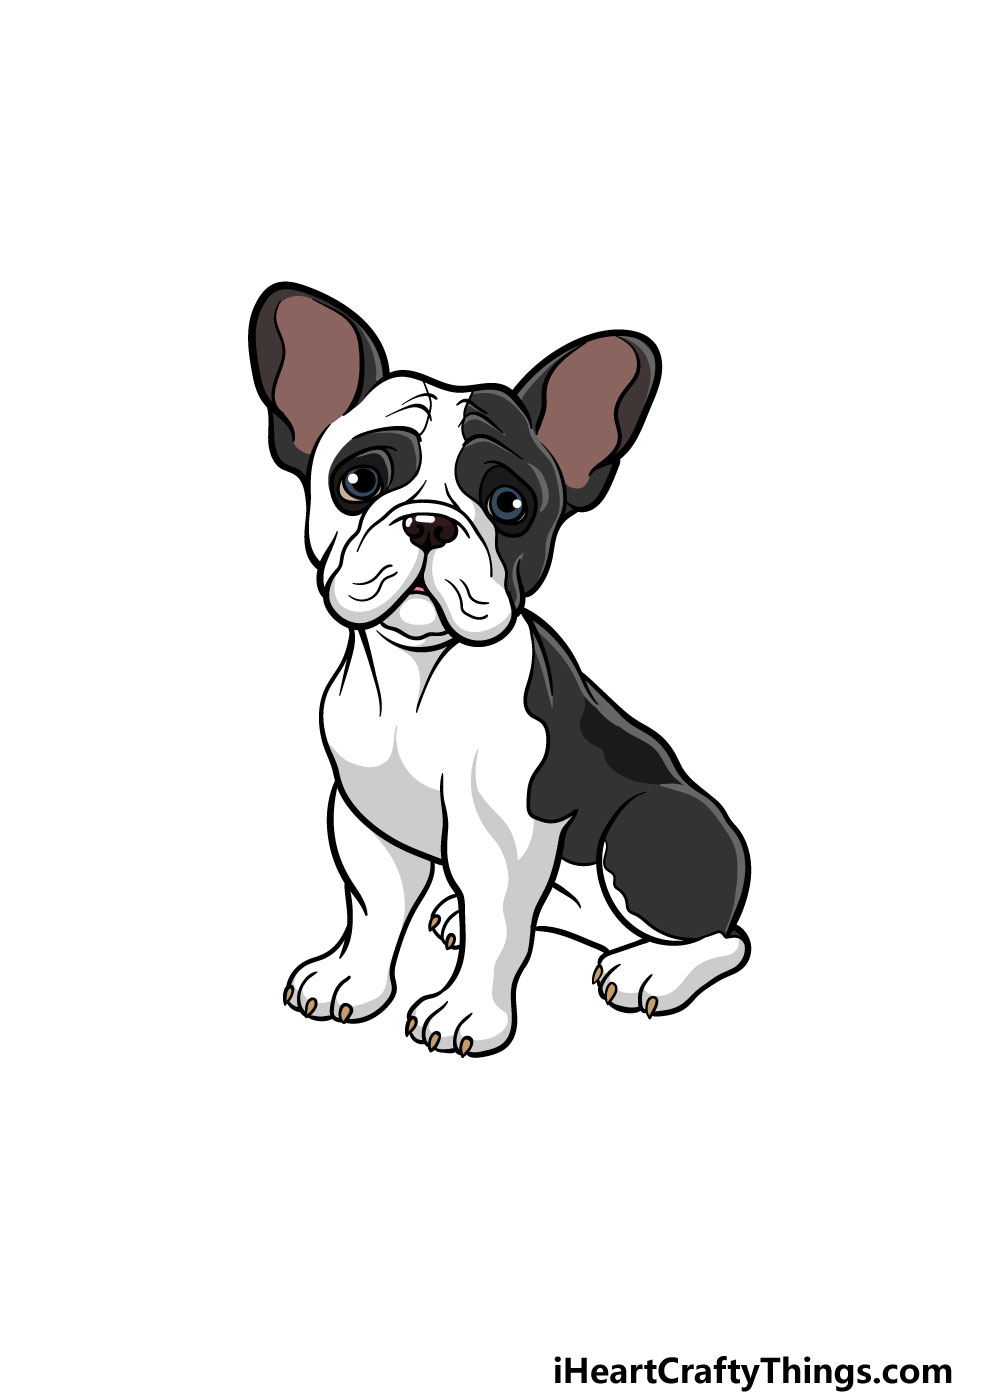
You’ve reached the final step of your French bulldog, and now you can finish it off with some amazing colors!
In our reference image, we used black for the spots of the French bulldog and pink for the inner ears. These are the colors that we chose, but you should feel free to use any colors that you would like!
You can also color in any additional background elements or extra objects for even more color variation.
You can also make your colors come to life depending on the art mediums that you choose to use. What colors and art tools do you think would best suit this drawing?
4 More Ways To Make Your French Bulldog Drawing Unique
Make this adorable French bulldog sketch even better with these awesome tips!
We tried to make this French bulldog drawing easy by keeping the expression quite neutral. This made it easier to do, but now that you have finished it you could change the expression up a bit!
There are many ways you could change the expression without much work. For instance, you could have the dog’s tongue hanging out.
This would immediately make it look a bit happier! Dogs don’t smile in real life, but that doesn’t mean that you couldn’t add a smile to this cute little guy.
In the same way that we kept the expression simple on this French bulldog drawing, we also maintained a basic pose. This is another element that you could change now that you have finished the drawing.
There are so many different poses you could create! For instance, the French bulldog could be running or playing.
If you wanted to create some of these poses, you could also add extra objects like a toy that it could be chasing. What other poses can you think of?
If you create a more dynamic pose for this drawing of a French bulldog, you could also benefit from drawing a background. There are so many fun settings you could choose for a background!
For example, we mentioned how it could be chasing a dog toy. If this is the case, then the French bulldog could be running through a yard.
What other backgrounds could you use?
Finally, if you’re feeling creative then you could add some more dogs to this French bulldog sketch. Once again, you would have many options for how you could do this!
One idea would be to draw another French bulldog buddy for this existing one. You don’t have to stick to this dog breed though!
If there is another breed of dog you love, then you could add that as a friend for this bulldog. Using pictures online would be very helpful for drawing a unique breed.
Your French Bulldog Drawing is Complete!
That brings you to the end of this guide on how to draw a bulldog! We hope that you had a wonderful time working on this drawing alongside us.
We also hope that the guide made it easy and less intimidating for you to do. Whenever taking on a new drawing, you can always make it easier if you break it down into smaller steps, and that is what we attempted to do for you in this guide.
Now you can take over and finish off the picture with your own details and extra elements. You could draw a background, add some objects to go with it or use some of your favorite art mediums to bring the colors to life.
These are just a few ideas, but be sure to let your creativity flow as you work on your drawing!
We also have some great guides for you to enjoy on our website. We upload new ones all the time as well, so be sure to check in frequently to never miss out!
Once your adorable French bulldog drawing is complete we would love to see it! You can let us take a look by sharing it on our Facebook and Pinterest pages for us to enjoy.