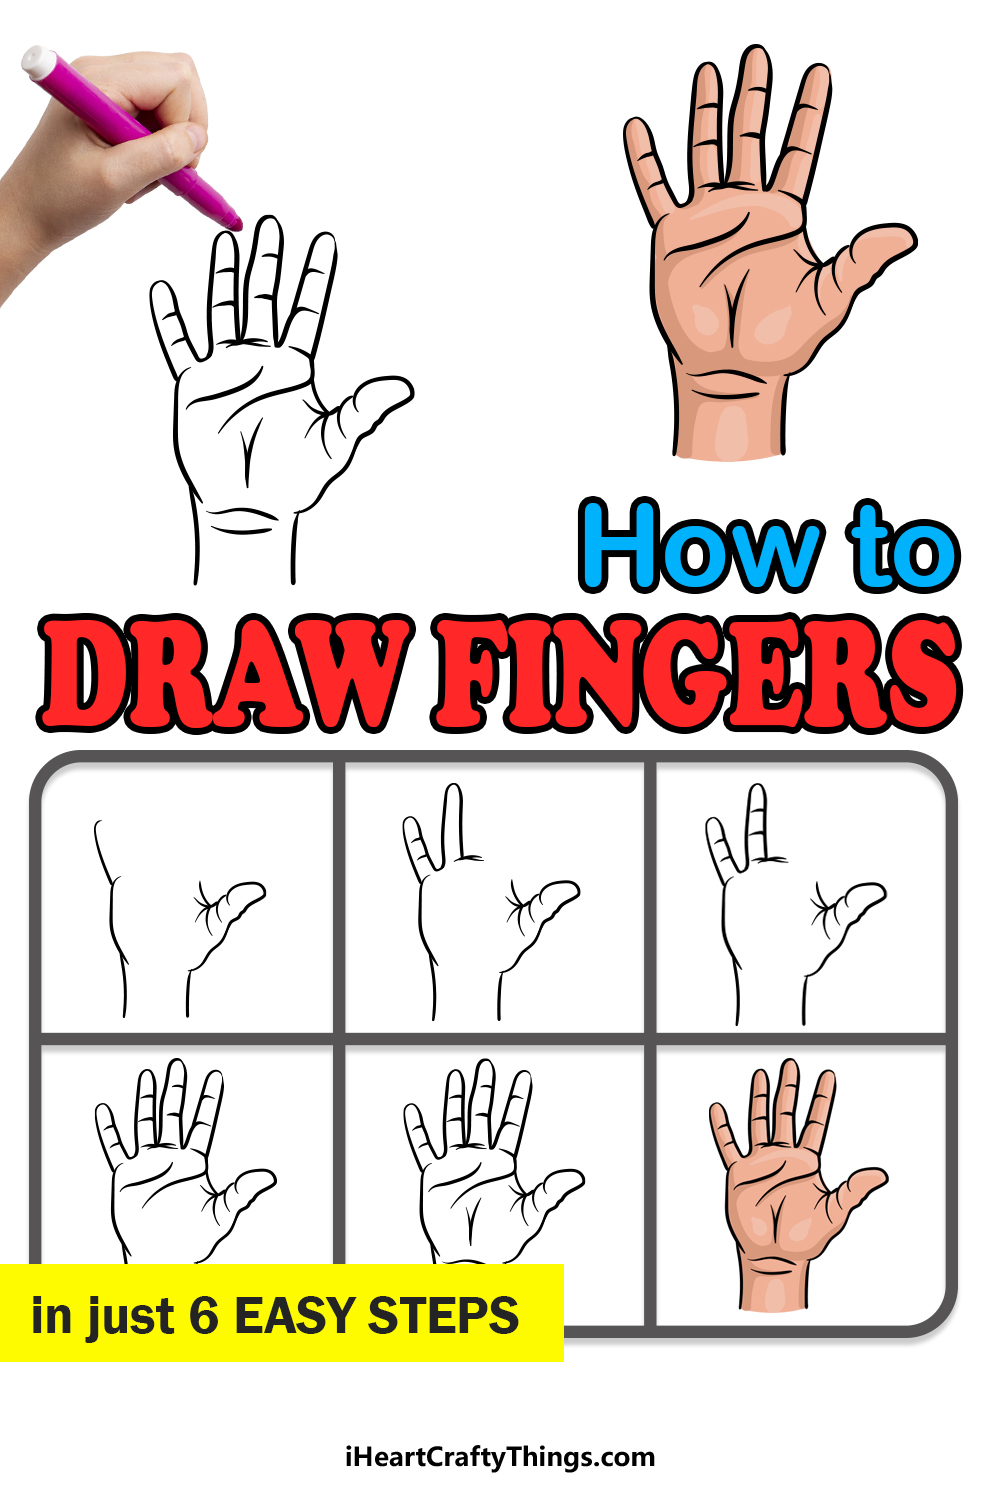
When people take on a drawing challenge, one thing that can be most surprising is that the things that we are most familiar with can be the most challenging.
If you ask any artist that has drawn human subjects, they will probably recount horror stories about drawing hands and fingers, as it can be very hard to get it looking right.
When trying to learn how to draw fingers it can be very helpful to have a guide to help you.
Lucky for you, that very guide is before you right now!
Our step-by-step guide on how to draw fingers will show you how easy and fun it can be to draw this challenging subject.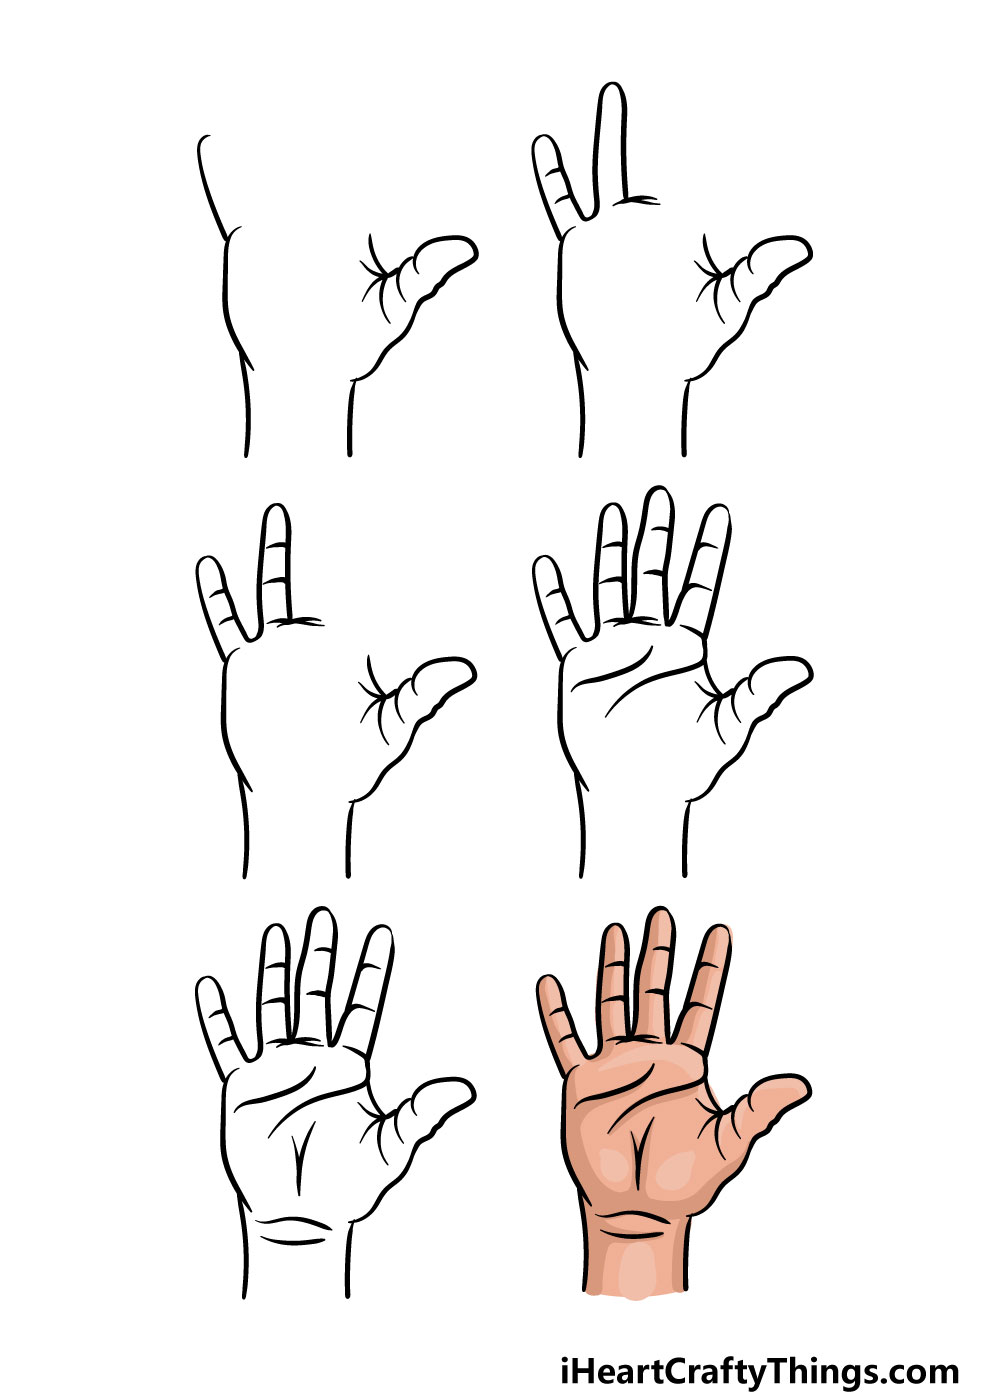
How to Draw Fingers – Let’s get Started!
Step 1
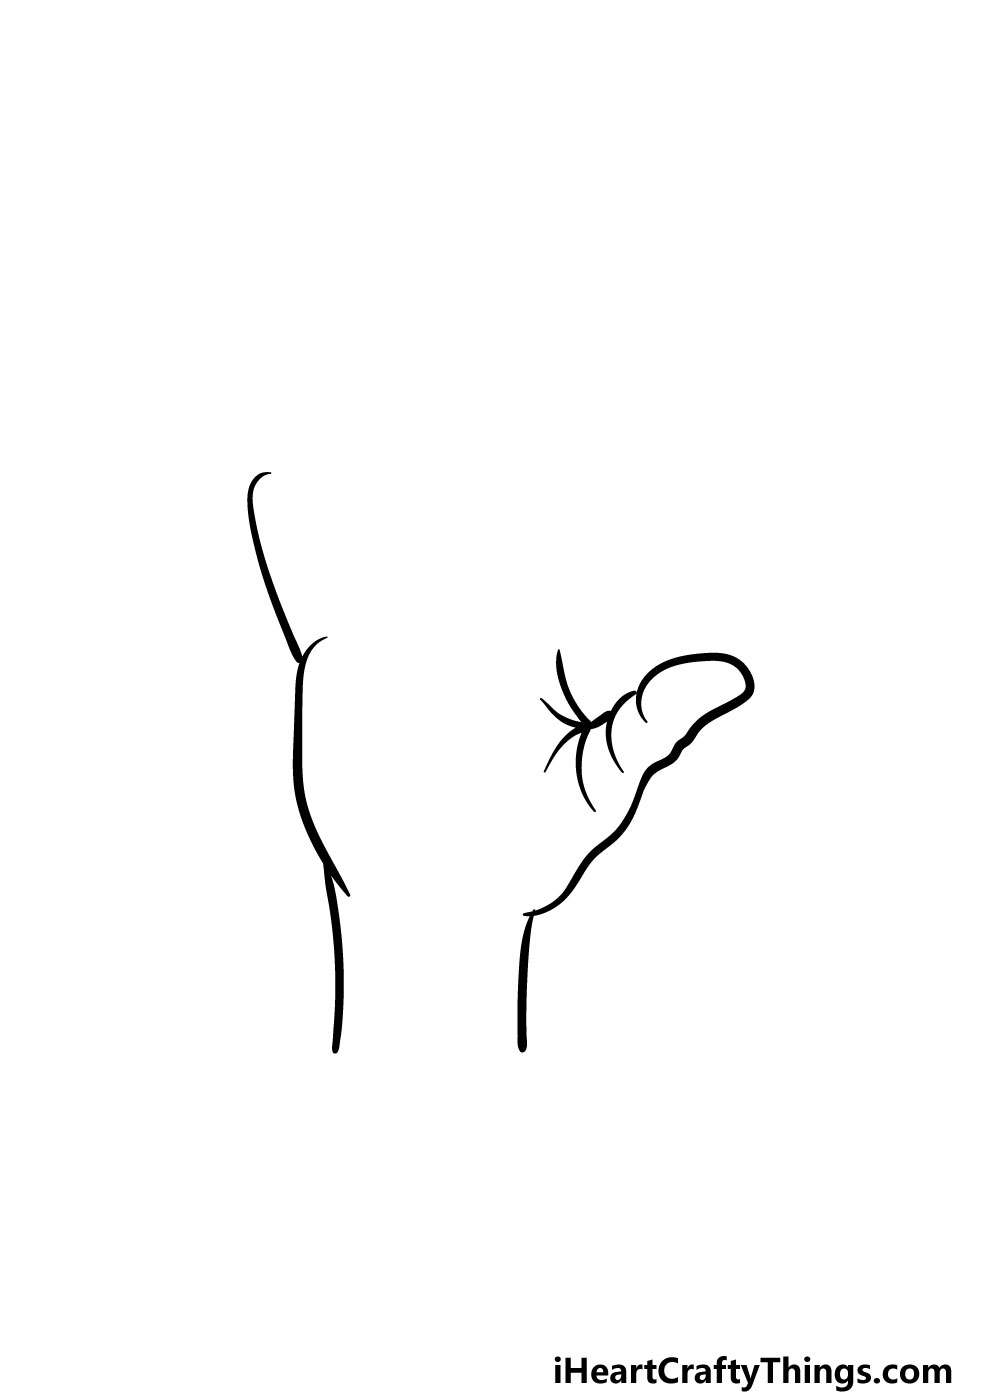
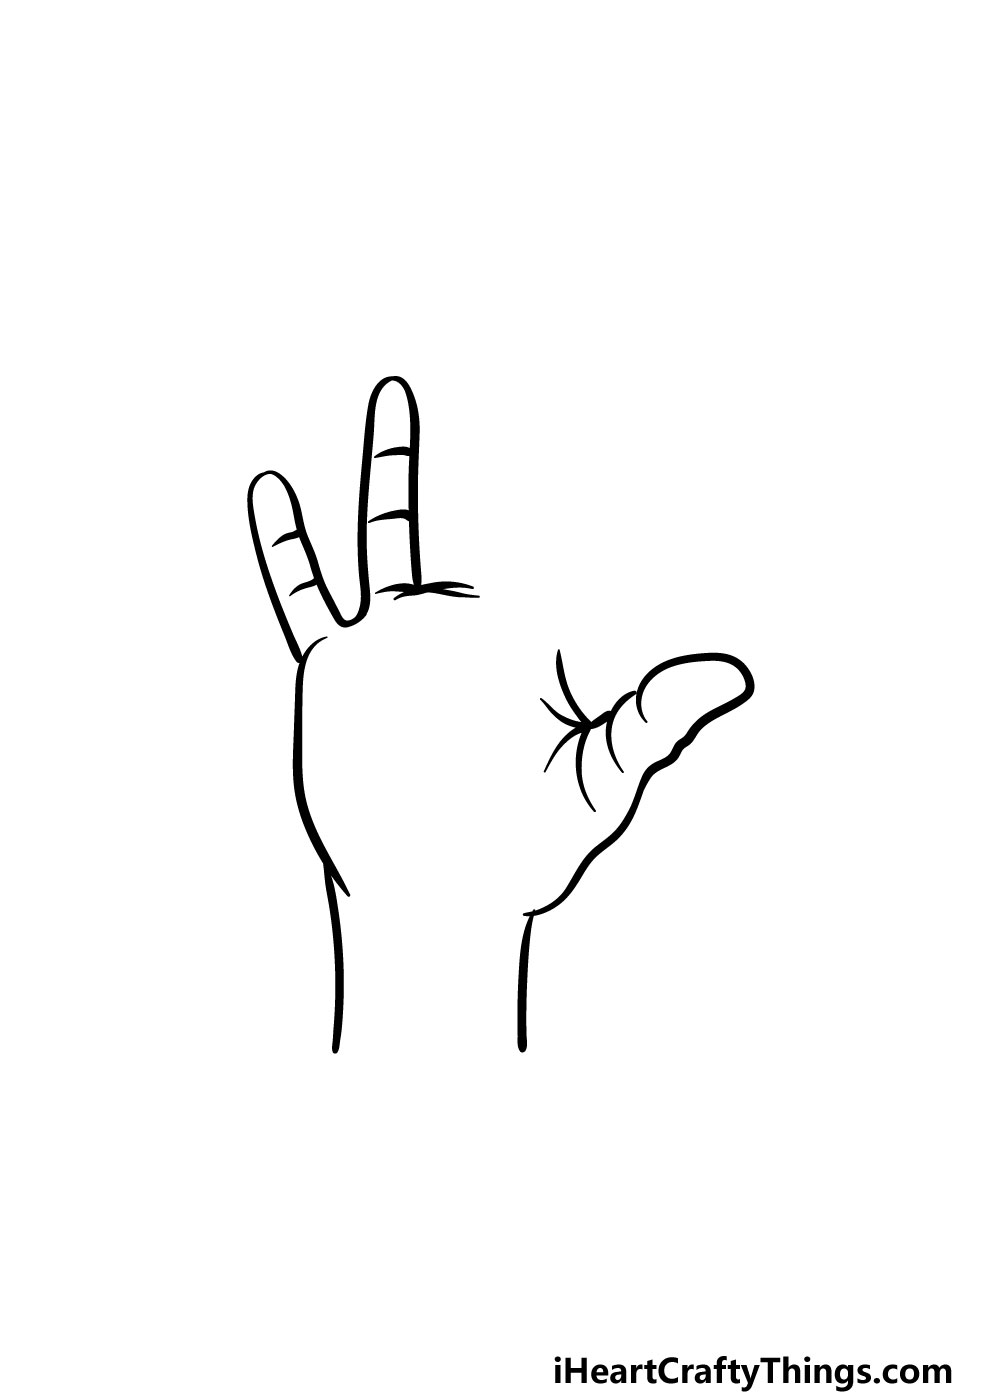
We will be drawing a right hand with the palm facing us in this guide on how to draw fingers. To begin this process, we will be starting with the thumb on the right and the pinky finger on the left.
First, you can start with a curved line for the left-hand side of the pinky.
Then, another curved line for the palm will go beneath that, with a slightly straighter line for the wrist beneath it finally, you will be using some curved lines to draw the thumb.
As you can see in the reference image, the thumb will be divided into several segments. It will also be attached to the wrist on the right-hand side.
Don’t be shy to follow the reference image very closely as you draw! Once you have these sides of the hands drawn then you’re ready for step 2!
Step 2 – Draw the first two fingers in this step
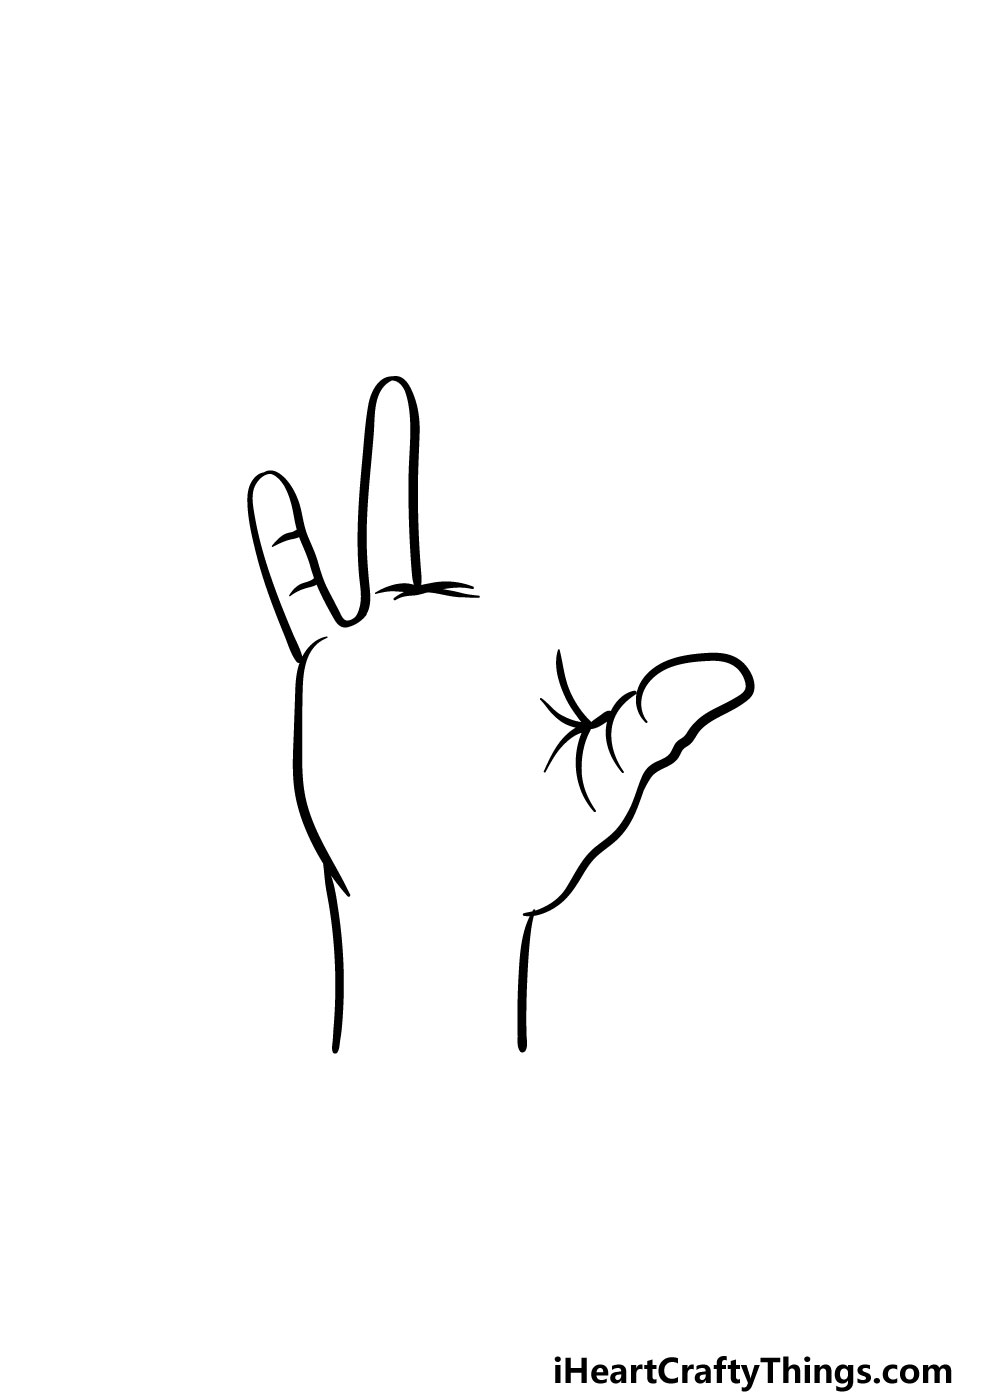
Continuing on from the previous step, you can finish the first two fingers in this part. First, you can use some more curved lines to create the segments of the pinky.
There will then be a small curved gap before you draw the curved outline of the second finger. Then, you can draw a horizontal line underneath where the second finger will connect to the third one in the next step.
Step 3 – Now, draw some detailing for the ring finger
We mentioned previously that each finger will be divided into segments, and that is what we will be drawing in this step of our guide on how to draw fingers.
To do this, simply add some horizontal lines near the top of the ring finger with another one lower down. These should start on the right-hand side and not quite touch the left side.
That’s all there is to this simple step, so let’s proceed!
Step 4 – Draw the next two fingers and some palm details
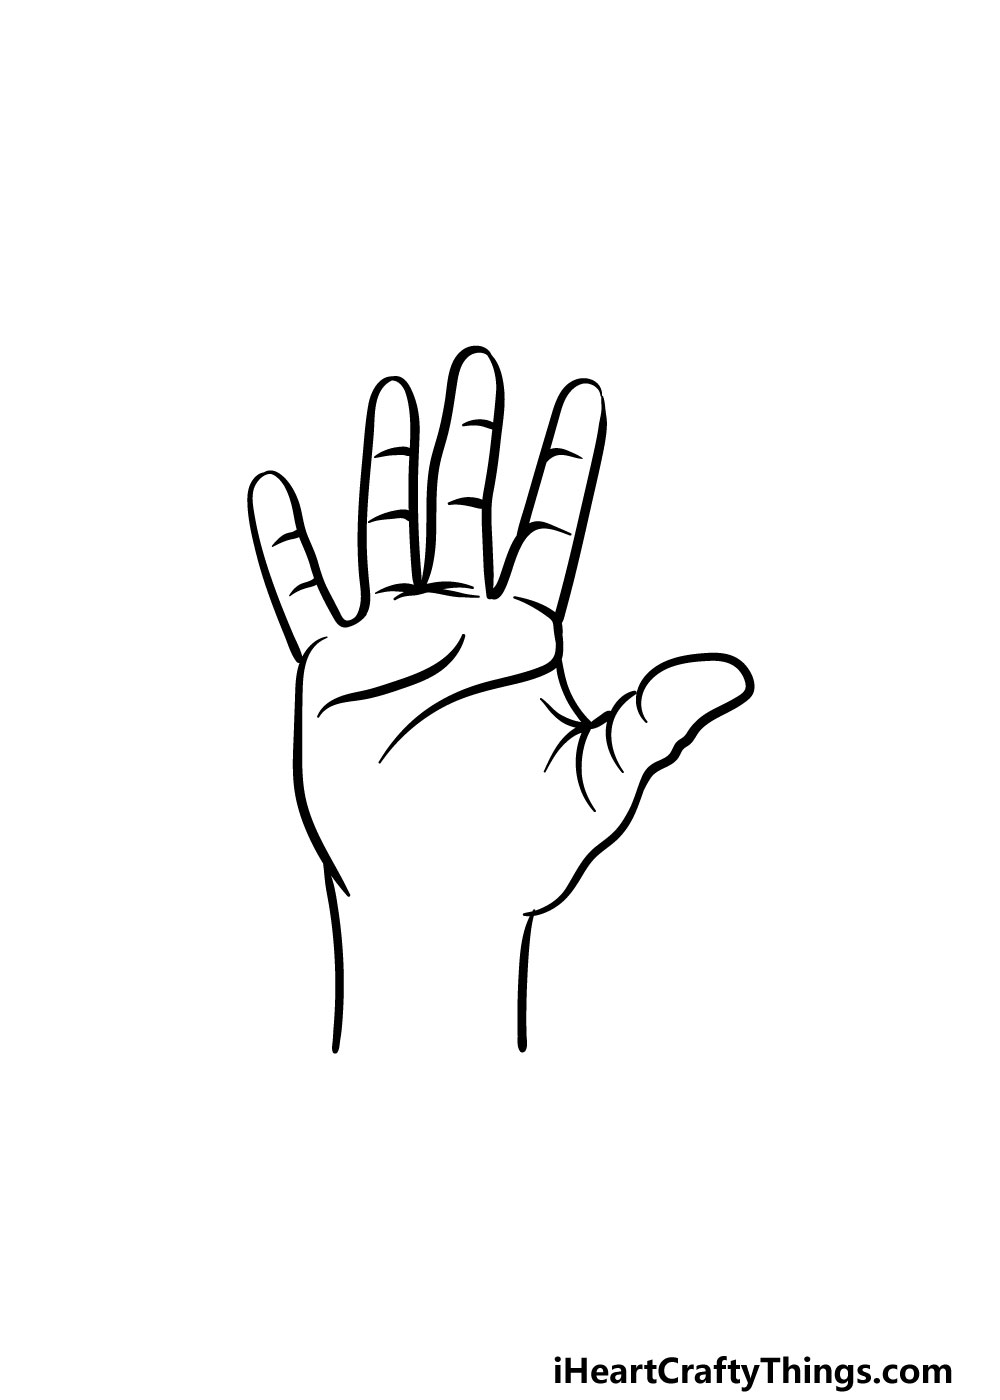
You’re really getting the hang of this drawing now! Now that you can draw these fingers so well, you can add the remaining two fingers.
The middle finger will be the tallest of all the fingers, whereas the index finger will be of a similar length to the ring finger.
Each of these fingers will also have two lines drawn inside them for the various segments. Then, there will be two slightly wavy lines near the top of the palm for some line detailing in that area.
Once you have those palm details drawn, you’re ready for some final details and elements in the next step of your fingers drawing.
Step 5 – Now, you can finish off the final details and elements
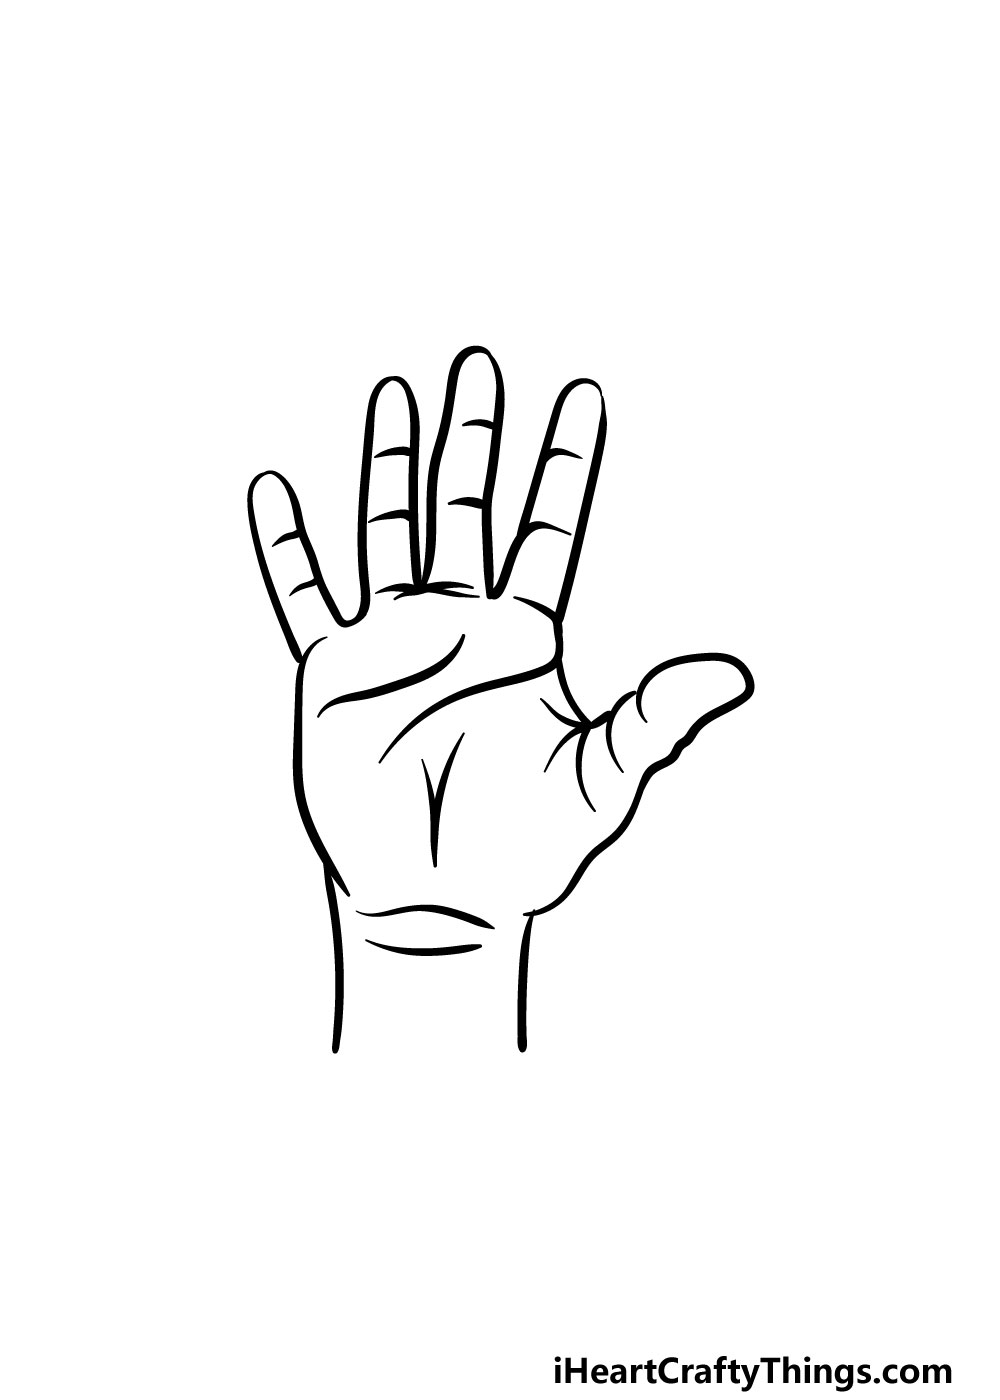
It’s almost time for you to bring some color to your drawing in the final step of our guide on how to draw fingers. Before that, however, we have just a few final details to add.
You’ll also be able to add some fun details of your own in this step as well! First, you should draw two lines that form a bit of a Y shape near the center of the palm.
Then, you can finish off the details by adding some horizontal curved lines near the top of the wrist.
That will finish off all of the details in this guide, but as we mentioned you can add some details of your own before moving on!
These details could include changing the positioning of the fingers for a more personalized image.
Now that you know what the finger structure should look like, you can use your own hand as a reference if you wish to change the positioning.
You could also add some rings onto the fingers or even add a tattoo design onto the hand! What details can you think of to add to this drawing of yours?
Step 6 – Finish off your fingers drawing with some color
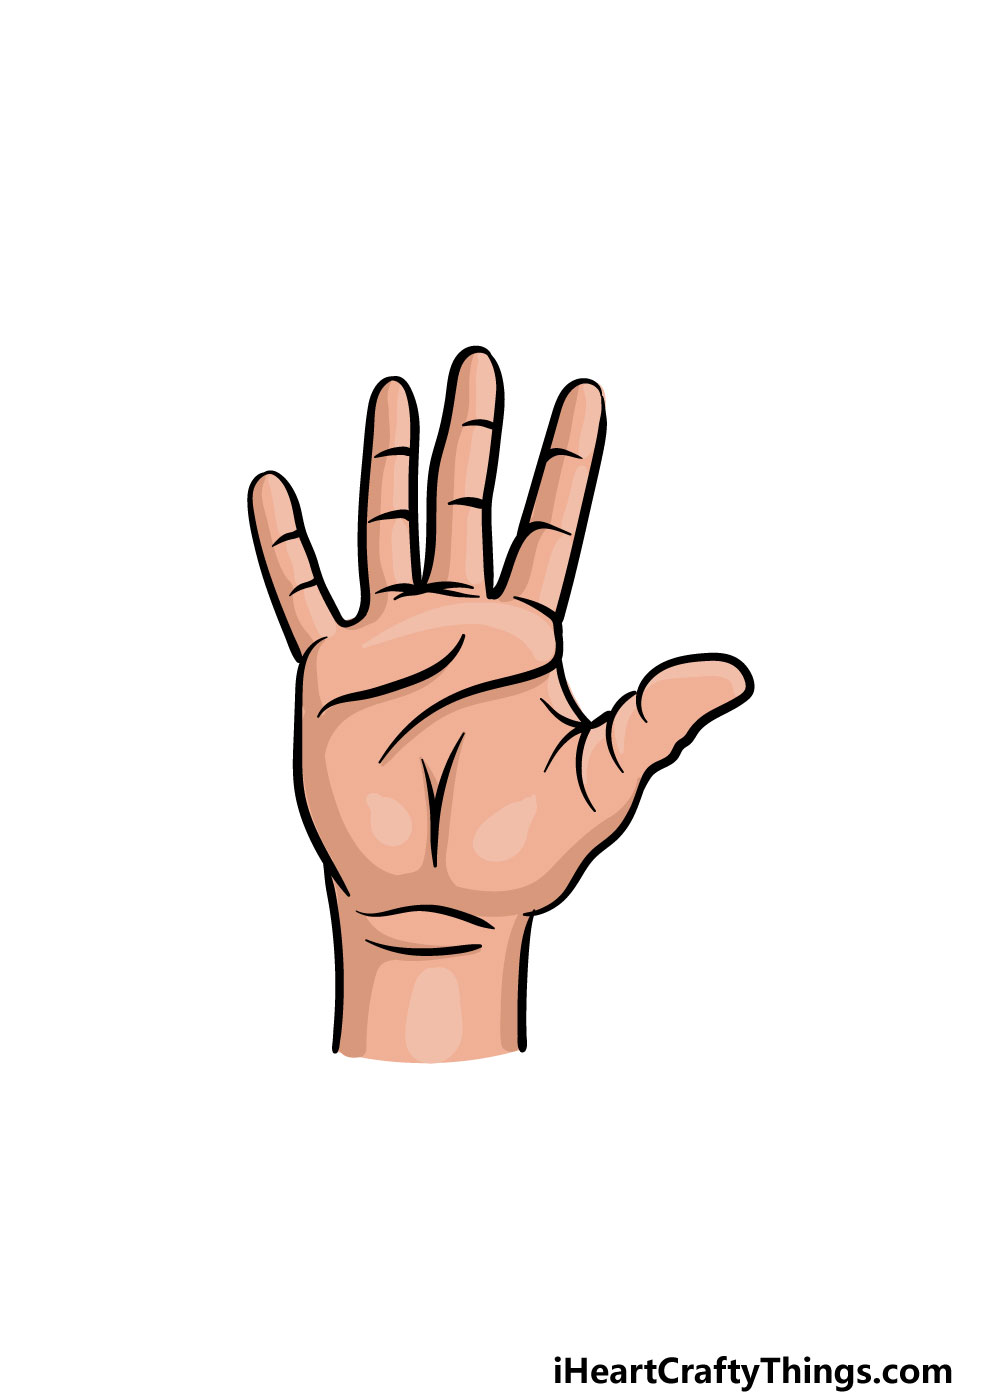
This final step of your fingers drawing will be all about bringing it to life with some incredible colors!
We showed you just one way that you could color it in, but this is just a suggestion and you should feel free to use your own color choices.
One fun idea to try would be using your art tools and mediums to replicate your own hand! That can be a great way to put a personal touch on this drawing.
If you drew any extra elements such as tattoos, a ring or some background elements then you can incorporate some amazing colors that way as well!
Be sure to get creative with your favorite colors and art mediums and see what happens!
3 More tips to make your fingers drawing easy!
Drawing hands is notoriously hard, but these tips for your fingers sketch should make it easier!
This drawing of fingers looks fairly detailed, and even though it is a bit cartoony it still has some realistic detailing. While you get the hang of this picture, you could remove some of these details.
One way of doing this would be by making the picture even more on the cartoony side. That way, you wouldn’t have to worry about adding the lines at the divides of the fingers.
Doing this would also potentially allow you to create a style of drawing that is more akin to your personal preferences. What are some styles you could use to make your drawing a bit easier?
Next, you could make this fingers drawing a bit easier by using a pencil to plan it out. When doing this, try to use the lightest pencil you can so that the lines will be easy to erase later.
We would suggest drawing an oval shape for the palm of the hand. Then, we would use longer oval shapes for each finger on the hand.
These shapes will make the lengths and proportions of the various details much easier to get looking accurate. Then, start adding more layers of details and sharpen up the shapes of all aspects.
Use a pen to add the final lines and then you will have a complete picture on your hands!
Using a reference is always a good idea when creating any drawing. Luckily, you have the perfect model literally at the tips of your fingers!
When drawing, you could use your own hand to help you as you draw. Using the real thing can help you to draw all of the smaller details.
It would also help if you want to create a different hand gesture or position. If you don’t want to use your hand as you draw, you could take a picture of it and then use that as your reference.
You may be surprised to see how much easier it can make it!
Your Fingers Drawing is Complete!
We mentioned earlier in this guide on how to draw fingers that drawing these body parts that we’re so familiar with can be more difficult than one might think!
Our goal with this guide was to hopefully show you that it can be not only easier but more fun than expected when you know what to do.
Now that you have mastered this guide, it’s up to you to really make this drawing your own.
We mentioned a few ideas such as adding rings, tattoos or a background, but you should be sure to let your creativity flow and see what else you can think of!
Finishing this guide is just the start of the fun, though! Once you’re ready for more, be sure to visit our website for more incredible drawing guides. We also upload new ones frequently for you to enjoy.
We would also love to see your finished fingers drawing, so once it’s done we hope that you will share it on our Facebook and Pinterest pages!