Scientists and researchers use many different tools and pieces of apparatus to conduct their research.
Some of these tools can be purchased to be used in our own homes, and the microscope is one of these tools.
Using a microscope can be a lot of fun, as it allows us to access a whole new world that goes unseen by the naked eye.
Using one, everyday objects take on a whole new level, and it can also be equally fun to learn how to draw a microscope.
You’re in the right place if you would like to know how it is done! By the end of this tutorial you will be able to draw your very own microscope design.
We hope you have a great time as you work with us on this step-by-step guide on how to draw a microscope in 6 steps!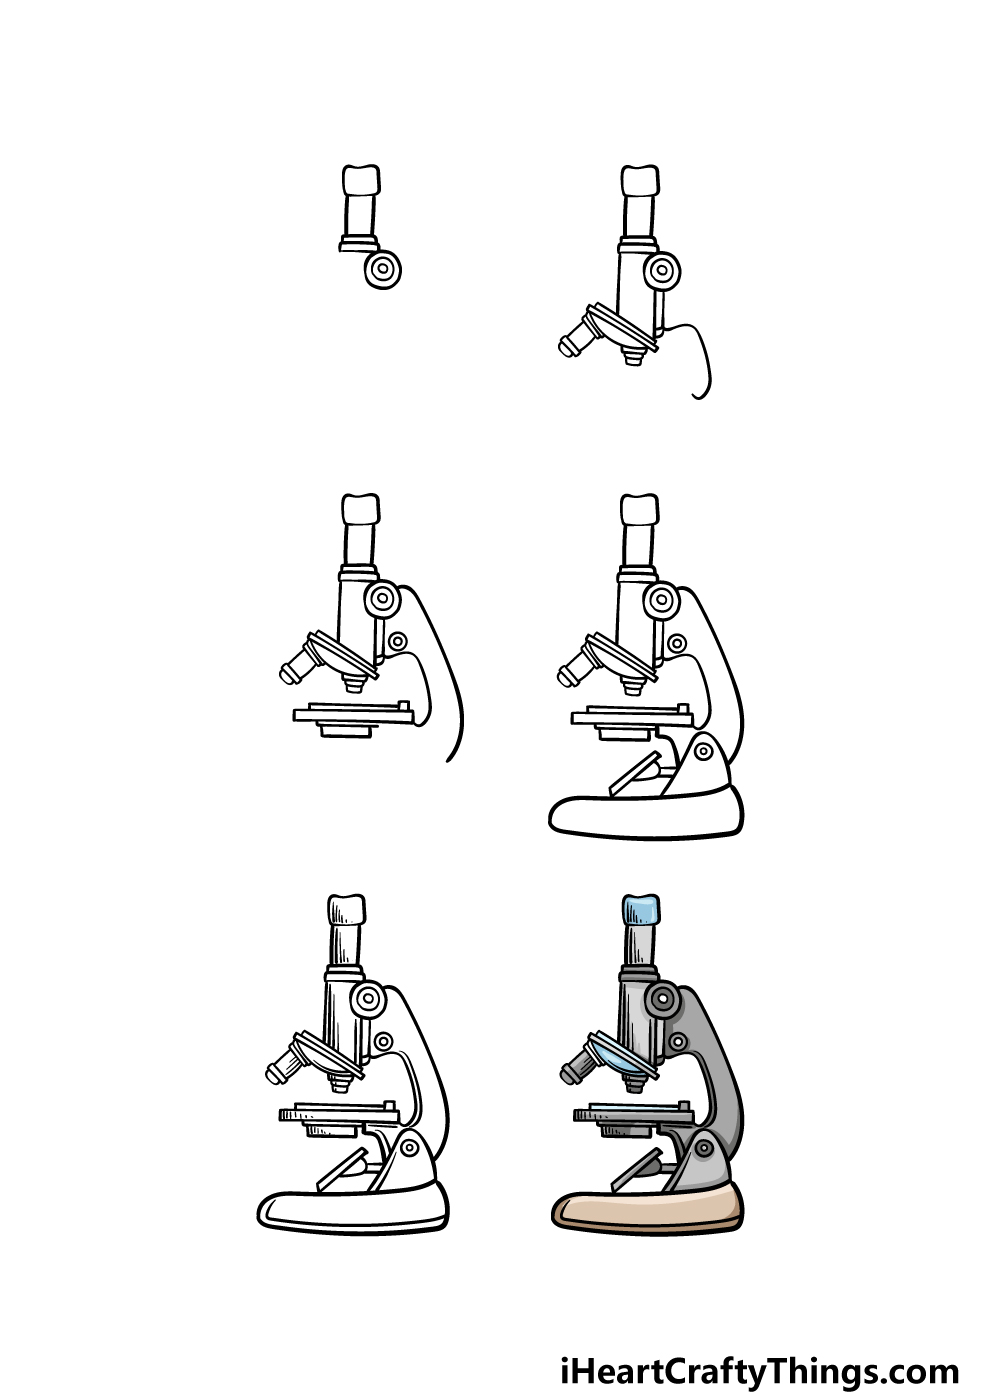
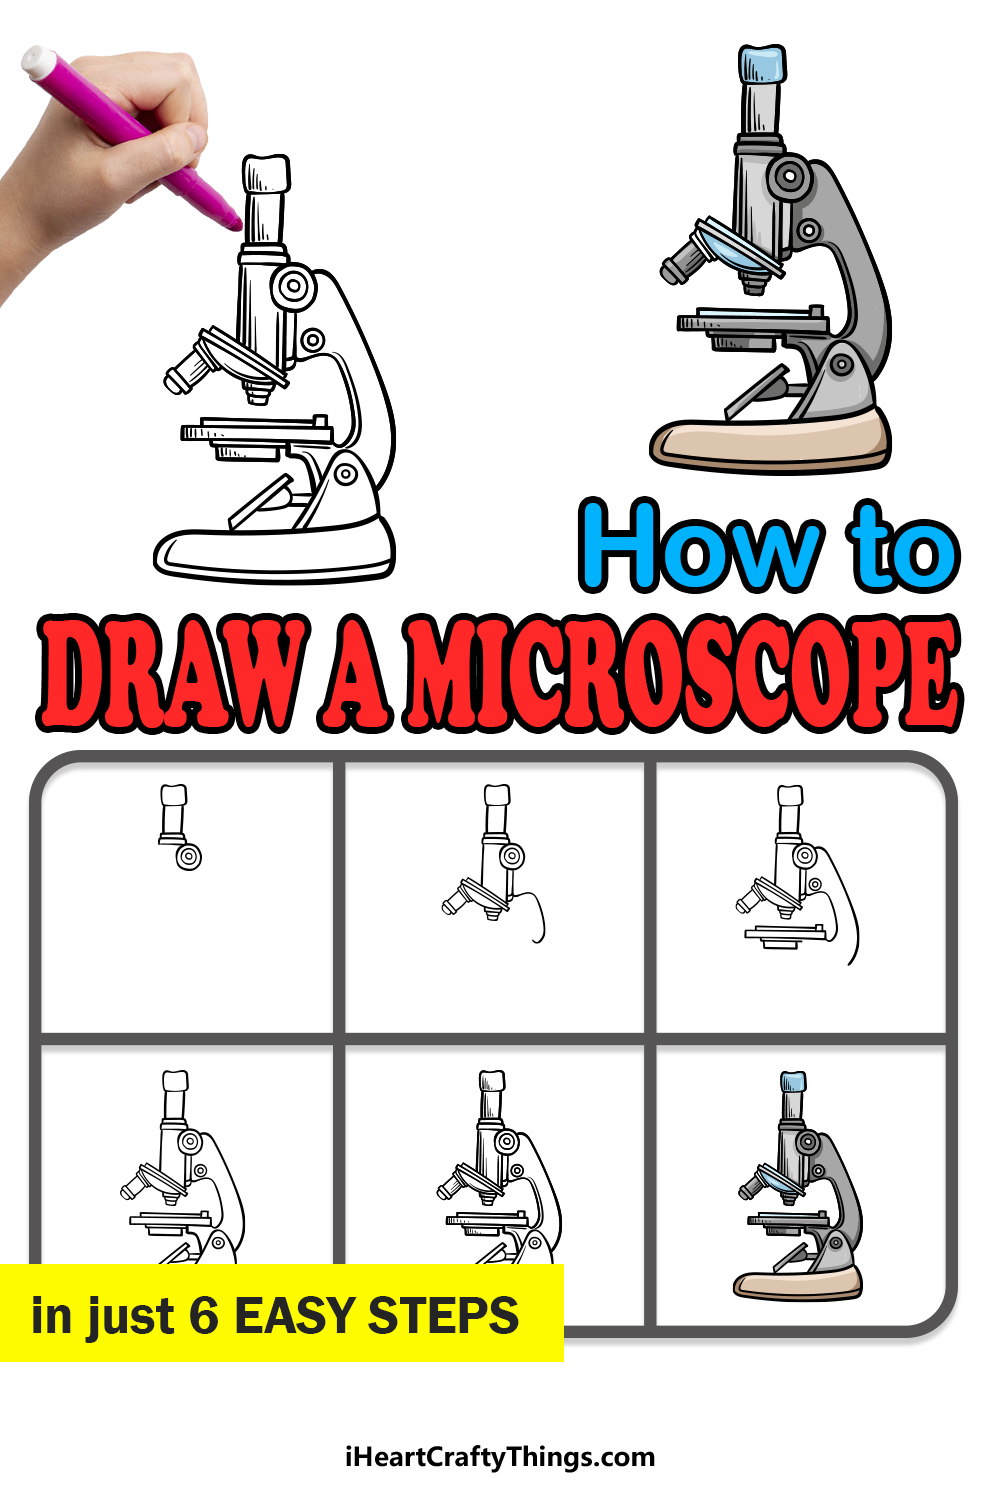
How to Draw A Microscope – Let’s Get Started!
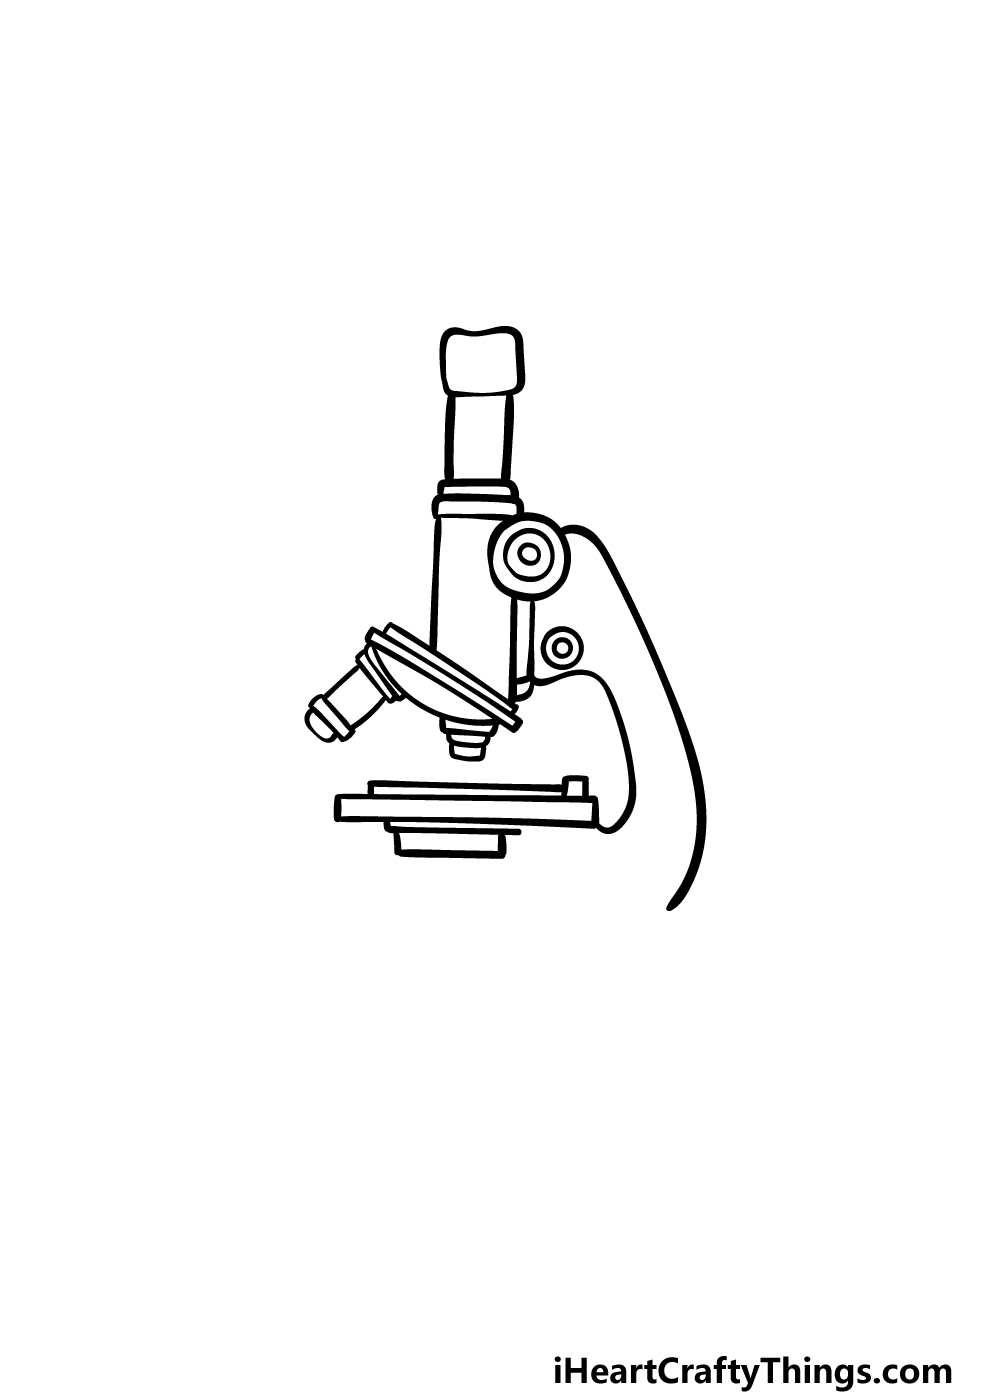
Step 1
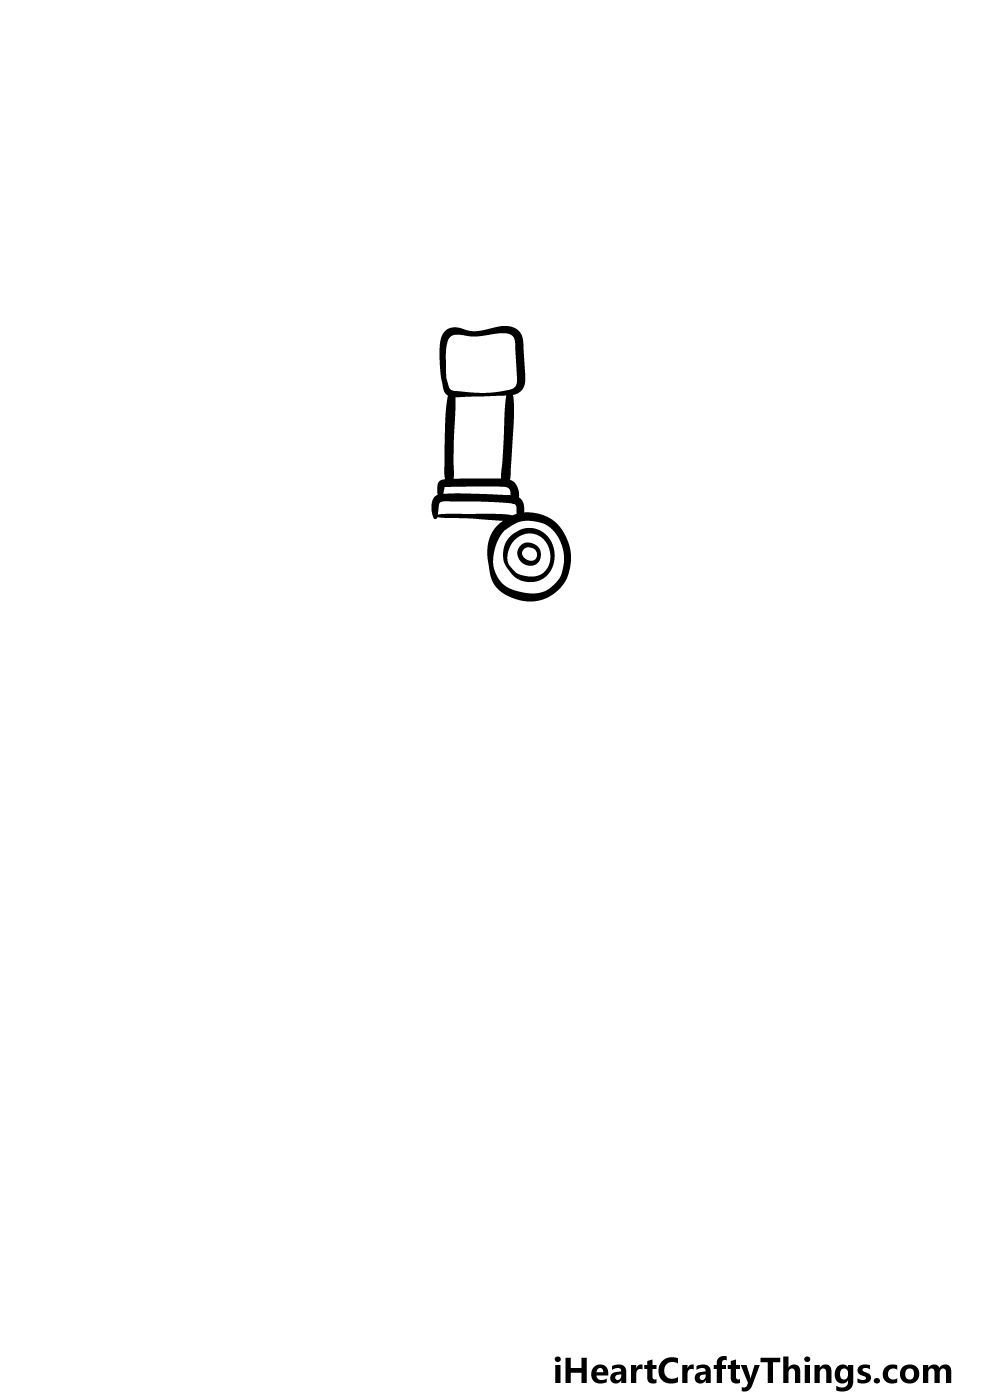
In this first step of our guide on how to draw a microscope, we will be starting with the top of the microscope.
That means that we will be beginning with the eyepiece of the instrument. To start the eyepiece, you can first draw a small, slightly rounded square shape.
Then, extend two straight lines down from this shape to extend the eyepiece.
Then you can add two small, thin rectangular shapes underneath this for the base of the eyepiece.
Finally for this step, we shall be drawing several circles within each other near the base of the eyepiece. This part will be one of the sections that are used for viewing adjustment.
Once you have drawn all of these aspects, we can move on to step 2.
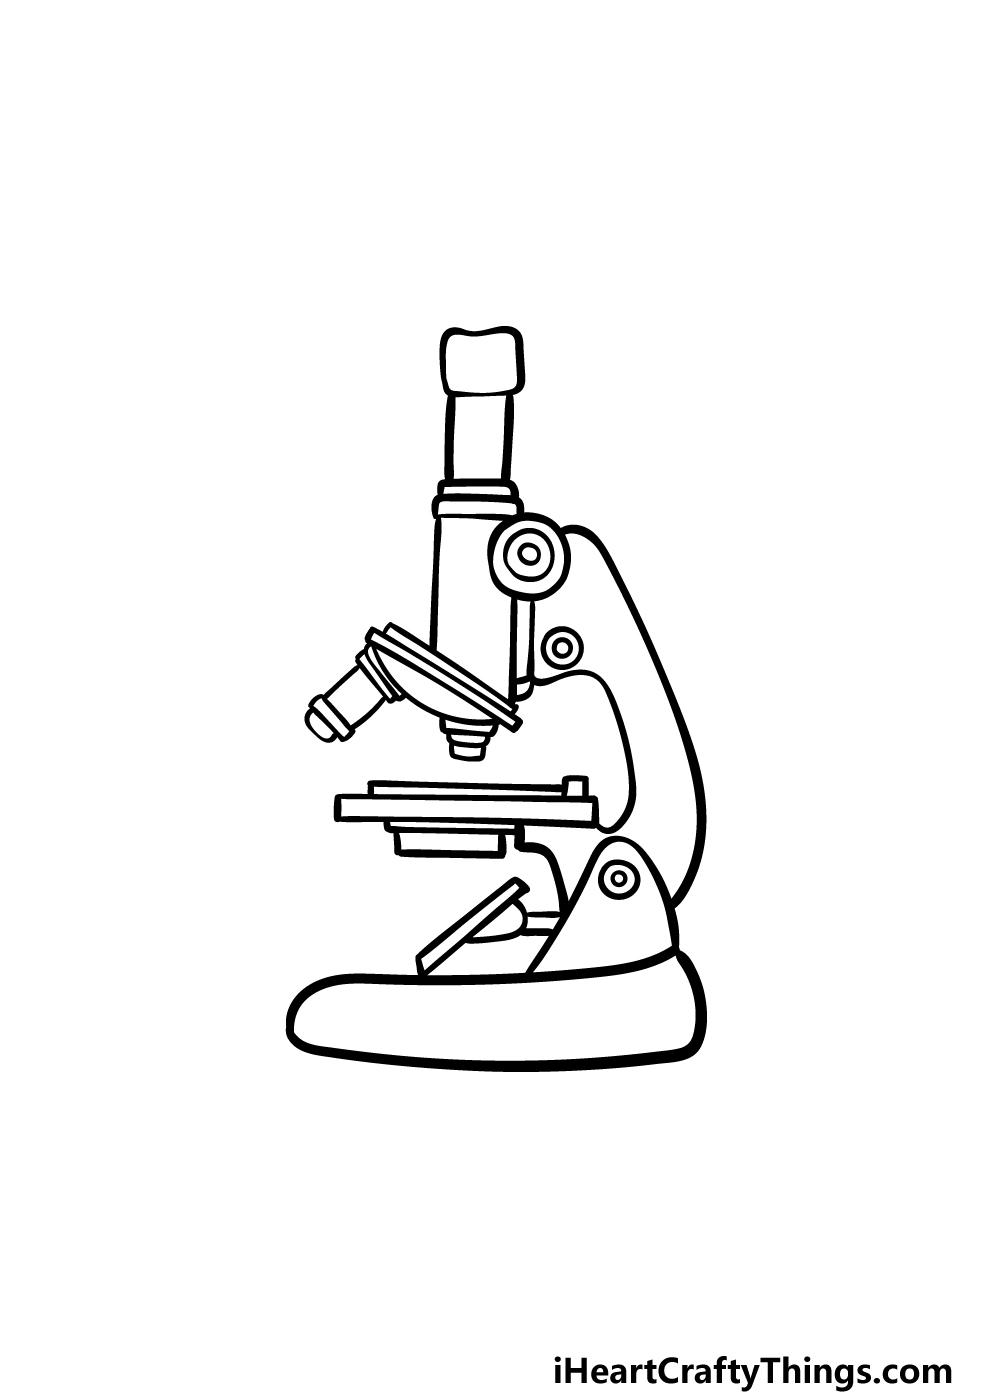
Step 2 – Now, draw the lenses for the microscope
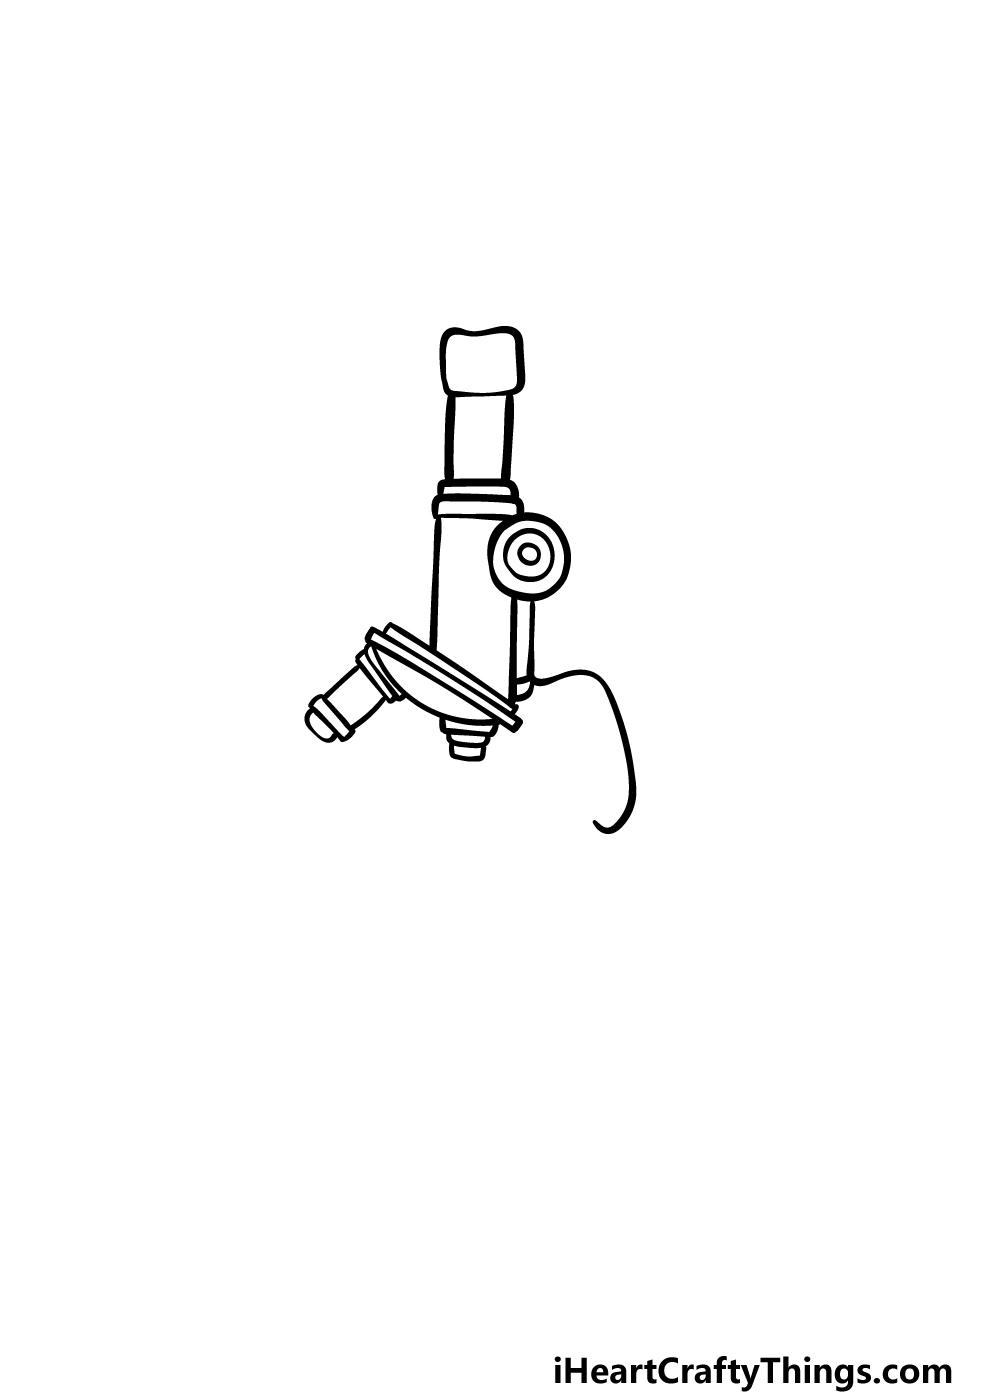
A microscope wouldn’t be much use without some lenses, so we shall add some to your microscope drawing in this step.
First, add some more straight lines down from the top section of the microscope downward. Once those are drawn, you will be ready to start drawing the section that houses the lenses of the microscope.
First, draw some thin, diagonal shapes next to one another in the same position that they appear in the reference image.
Then, use a rounded line connected to those thin shapes. The next thing that we will be drawing are the lenses themselves, and they will look like thin rectangles with some rounded sections at the end.
Finish off this step by drawing a curvy line coming down the right-hand side of the microscope.
Step 3 – Next, draw the arm and stage of the microscope
We will be expanding the arm of the microscope in this third step of our guide on how to draw a microscope.
Extend a curved line down from the top of the adjustment knob at the top of the microscope that you drew in a prior step.
Once you have drawn that arm outline as it appears in the reference image, we can then add the stage of the microscope.
This is where you would clip in slides containing the substance or object that you wish to view.
You can draw these using several thin, rectangular shapes connecting to one another, as shown in our example.
Step 4 – Now, finish off the outline for the base of the microscope
This step of your microscope drawing will see you finishing off the outline for the rest of the microscope.
First, draw a rounded shape underneath the arm and the stage of the microscope. This shape will also have some small circles on it.
Then, we will be drawing a small mirror on a hinge, and this would be used as a light source for the microscope.
Draw a small rectangular shape and then attach a thin rectangular shape onto it. Finally, finish off with one more rounded shape for the base of the microscope.
That’s all there is to it for this step, and in the next one we shall focus on some final details.
Step 5 – Add the final details to the microscope drawing
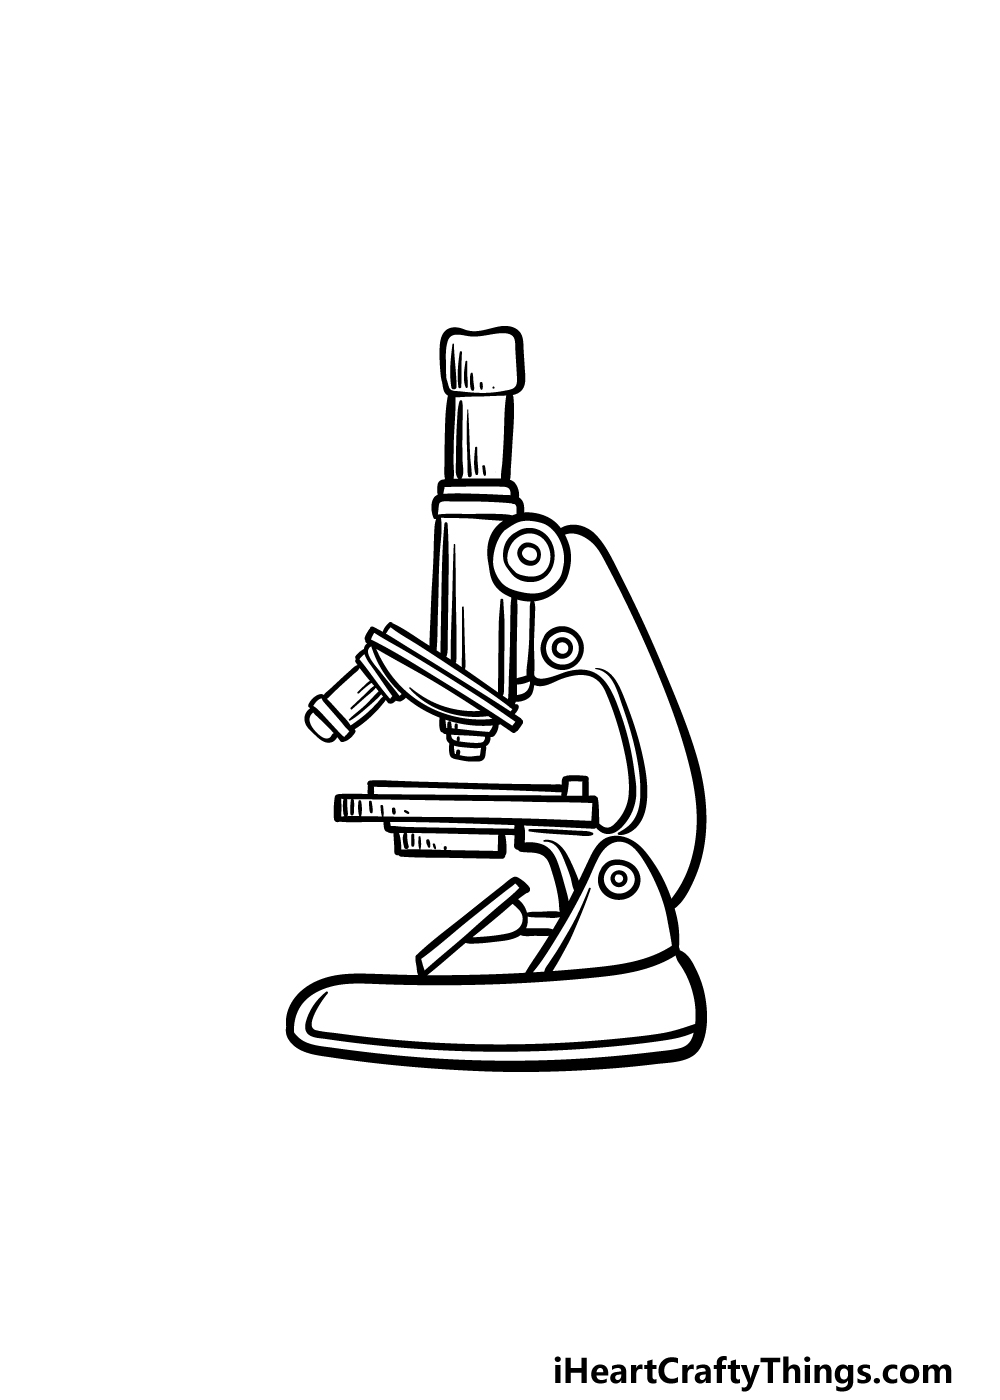
Now you are ready to add the final details and touches to your drawing in this step of our guide on how to draw a microscope.
To do this, we shall be adding various straight and curved lines details to every section of the microscope. This will help to give the various components more texture and depth.
When you have added these details, it’s your turn to take over and add some elements of your own!
You could draw a background to show off what other scientific equipment you would like to use with this microscope, or maybe even draw some objects you would like to view under it. These are just a few ideas, but what else would you like to add?
Step 6 – Finish off your microscope drawing with some color
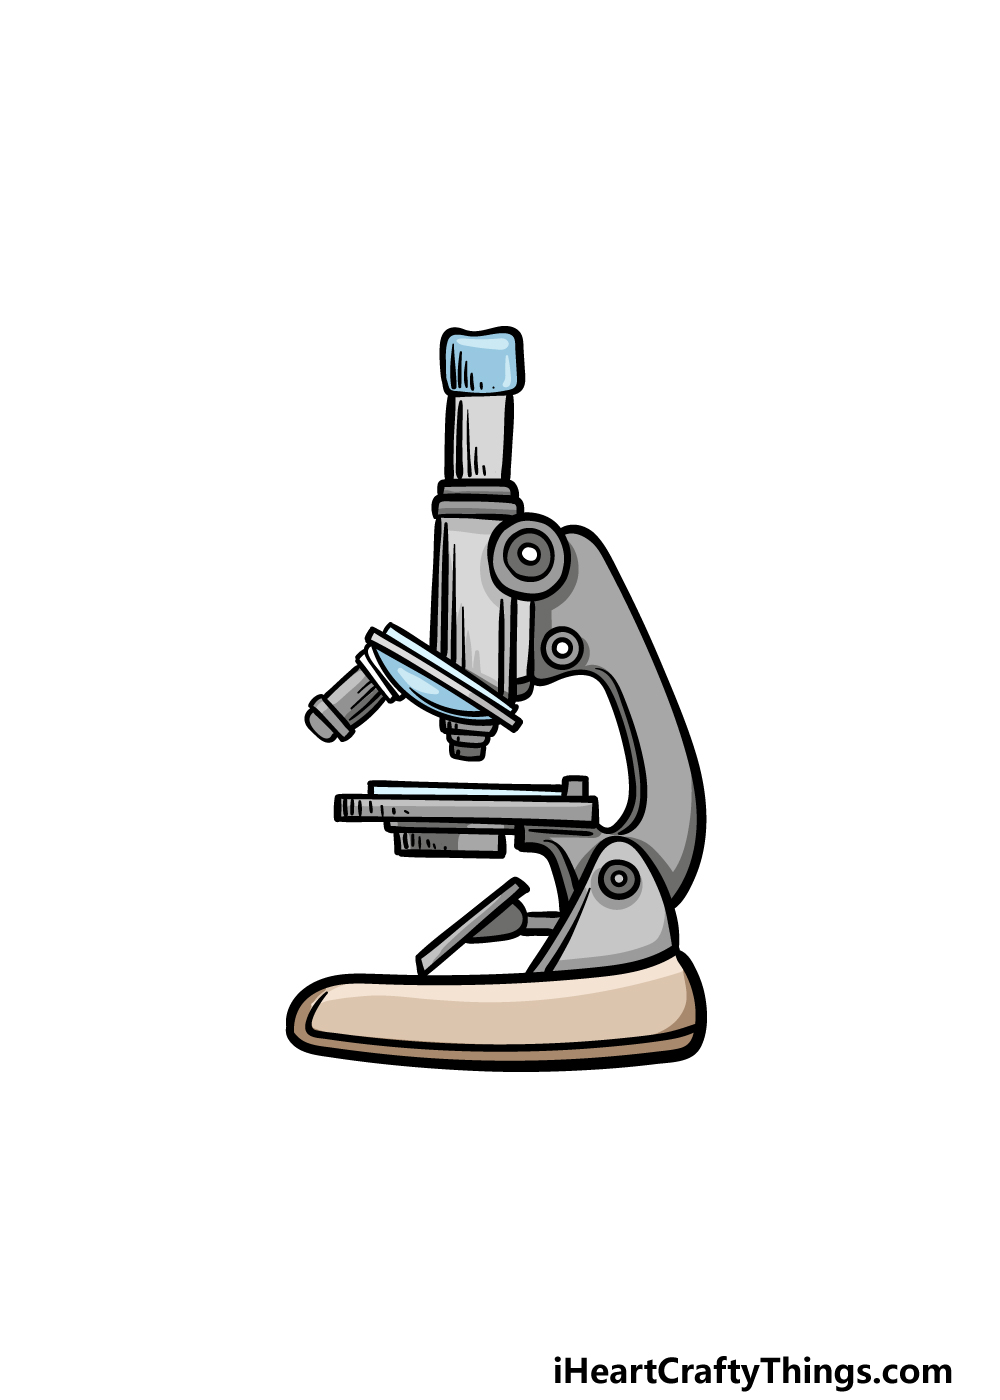
This is the final step of your microscope drawing, and in it we shall finish off with some color.
Microscopes aren’t typically that brightly colored, and we reflected this in our example image by using some lighter greys and blues to color it in.
You could go for a similarly clinical color scheme, but you should also feel free to change up the colors as you wish! Which colors, art mediums and techniques will you choose to finish it off?
5 Tips To Make Your Microscope Drawing Even Better!
Let’s examine how we can make your microscope sketch even better with these 5 tips!
One way you can make this drawing of a microscope educational as well as cool to look at would be by adding labels.
Microscopes have many parts to them that all have names, and you could find these names by looking up a diagram online. It could be as simple as drawing a line from each part and adding the name.
Next, you could show what is being examined with this microscope. One way to do this would be by drawing a line coming up from the glass bed of the microscope.
This could be attached to a circle that shows a magnified view of what is being looked at through this microscope. What are some things you would like to use this microscope to look at?
A microscope is one of many tools that scientists and science lovers enjoy using. To make this drawing more complete, you could add some more tools you would see in a lab environment.
This could include some beakers, slides to use on the microscope and maybe the box this microscope would be carried in. something larger like a telescope would also look good!
Once you have added other pieces of equipment, you could also add a background to really finish off the scene. This could be a lab setting filled with the kinds of equipment we mentioned earlier.
Or, you could show this microscope is used in a simple house setting. It’s up to you to decide, and you could show off where you would like to use this microscope if you owned it.
The final suggestion we would have would be to add a character to your microscope sketch. This would be a way that you could show who is using the microscope!
One of the more obvious ideas would be to use yourself as a model. Or, you could draw a scientist character or anyone else in any style you find most comfortable.
Your Microscope Drawing is Complete!
With those final details and colors added, you have successfully completed this guide on how to draw a microscope!
This guide was designed to break down the various components of the microscope down to make it easier for you to tackle.
We hope that we succeeded in this goal so you could focus on the fun of drawing!
Once you have finished this picture, don’t forget to put your own spin on it by adding some great details, elements and color choices of your own.
We will be very curious to see what you choose to do to put your own spin on this image!
There’s more good news, as we have many more amazing drawing guides for you to enjoy on our website! Keep checking in, as we upload new ones often.
We would be thrilled to see how your microscope drawing turned out, so please be sure to share it on our Facebook and Pinterest pages!