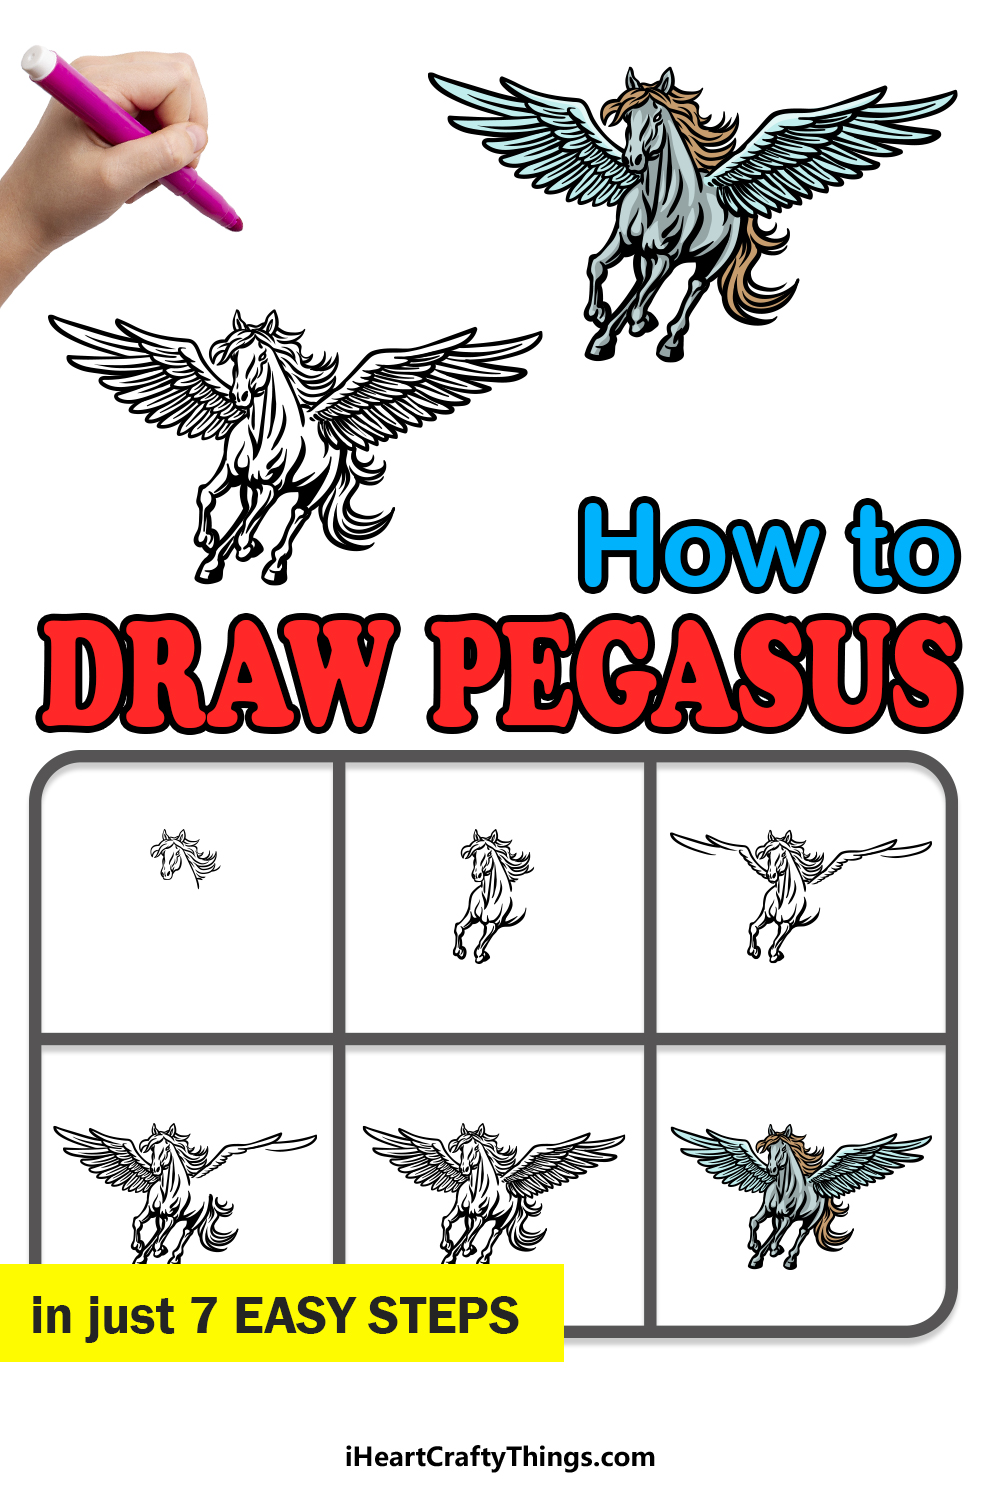
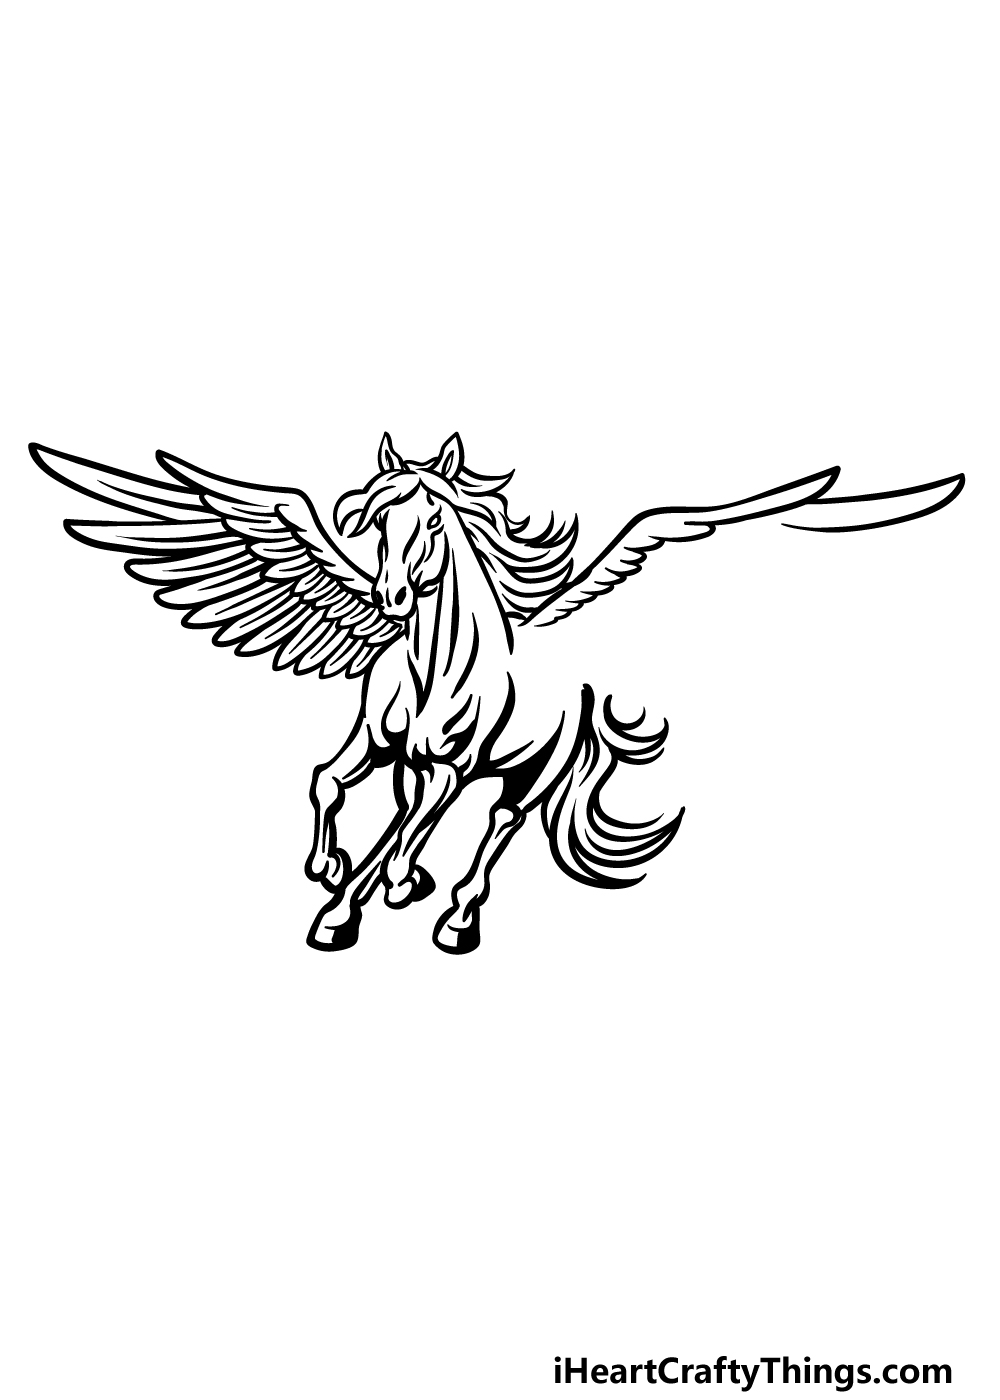
The winged horse Pegasus is one of the most popular and recognizable figures from Greek mythology.
She features in many stories from this ancient mythology, and she remains popular today, appearing in many different TV series, films, comics and video games, to name a few.
It’s easy to see why, as who wouldn’t like to ride a flying winged horse? This may not be feasible in real life, so learning how to draw Pegasus is the next best thing!
If you love this classic creature, then you will find a lot to love in this tutorial.
We hope you enjoy this step-by-step guide on how to draw Pegasus that we have prepared for you!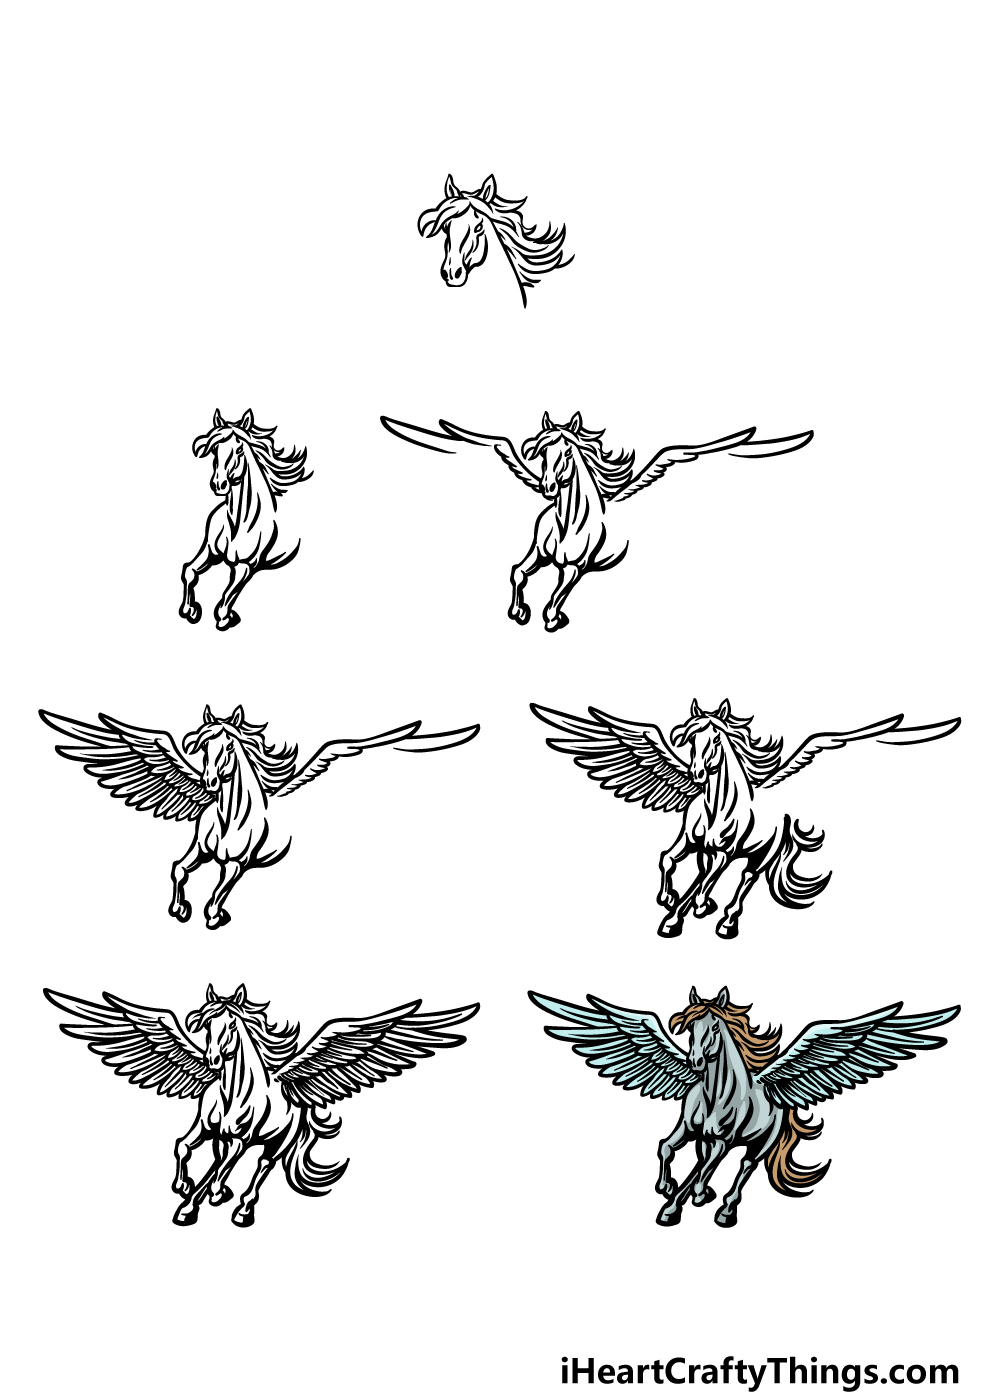
How to Draw Pegasus – Let’s get Started!
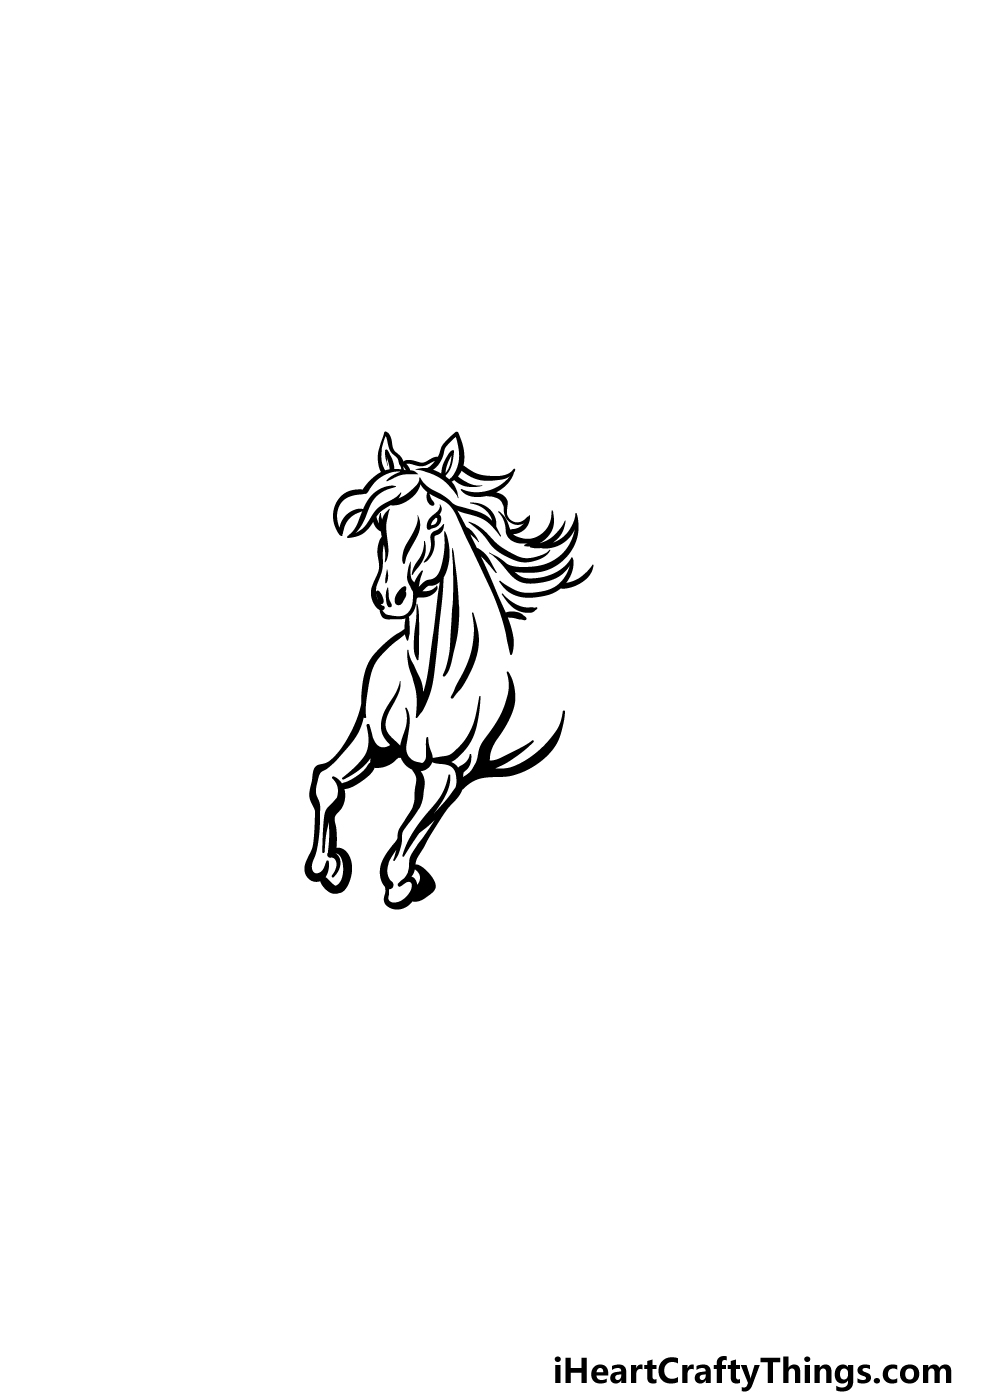
Step 1

There are no two ways about it; drawing horses is a challenge in the best of times. You don’t need to worry, however, for as long as you follow this guide and take it slowly you will manage to do it!
For now, let’s start with the face for Pegasus. Try your best to copy our reference image as best you can, and be sure to also include the line details that we show off. Don’t forget to add some details like the eyes and nostrils!
Once the face is drawn, we can then finish off by drawing the flowing hair and mane of Pegasus, and then we can move on to step 2.
Step 2 – Draw the first legs for Pegasus
Now that the head and mane are done, we can start adding the legs and body for your Pegasus drawing.
First, draw some curved lines going down the center and sides of the neck in the same way that they appear in the reference image.
Then, you can start to draw the legs, and this is where it can get tricky. Use some rounded lines for the front shoulders of the body, and then draw the thin legs coming down from them and bending to show that she is in a running stance.
That’s all there is to it for this step, and now it’s time for step 3!
Step 3 – Start drawing the wings for Pegasus

Without her signature wings, Pegasus would pretty much be a regular horse, and we don’t want that for this drawing!
For that reason, we shall start adding some wings for her in this step of our guide on how to draw Pegasus.
Use some curved lines to start the outline that begins at her shoulders and extends far to the sides.
These outlines will curve inward to give the appearance of large feathers, and our reference image will show you what we mean by this.
We will finish off these wings soon in the next few steps.
Step 4 – Now draw some large feathers for the wing
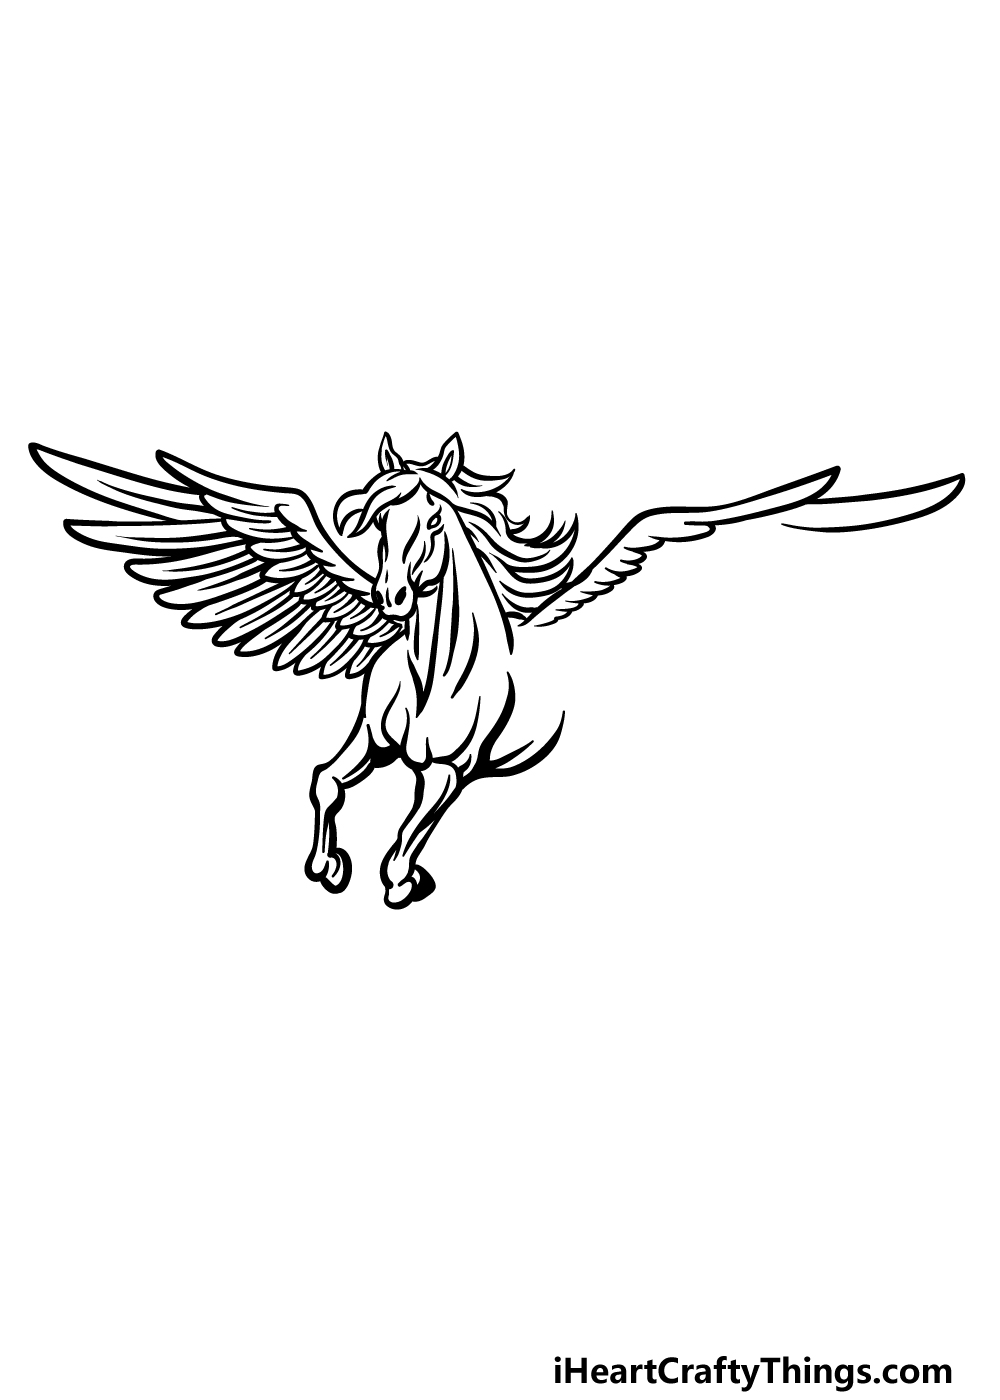
We will be adding some big feathers to the wing on the left for this part of your Pegasus drawing. Continuing on from what you started in the previous step, you can draw two layers of these feathers.
Each feather will be long with straight edges and pointy ends. Each feather will also have a line drawn through the center.
We won’t be adding feathers to the other wing just yet, but we will finish that wing off in a future step.
Step 5 – Draw the back legs and more of the body
Now you’re ready to finish off the final legs and body details in this step of our guide on how to draw Pegasus.
The back legs will look longer and straighter than the first ones did, and this will be to further emphasize that Pegasus is in a running stance for this picture.
Be sure to also draw the thick hip muscles at the top of the leg, and we will also be adding some shading detail to the base.
Once you have finished drawing and detailing these legs, finish off this step by drawing some wavy lines for the tail flowing behind her.
Once these are all drawn, we can then finish off the final touches in the next step.
Step 6 – Now, finish off the second wing
This part of your Pegasus drawing will be all about finishing the final details before you color her in.
To do this, we shall be drawing some feathers for the second wing in much the same way that you did for the very first wing.
That means adding two more layers of feathers that are also long and a bit pointy at the ends. Don’t forget to also add some lines to the center of each feather!
Once the wing is complete, you can also add some details of your own! You could draw a background to create a Greek mythology feel or add some more classic gods and creatures.
How will you finish off this Pegasus drawing?
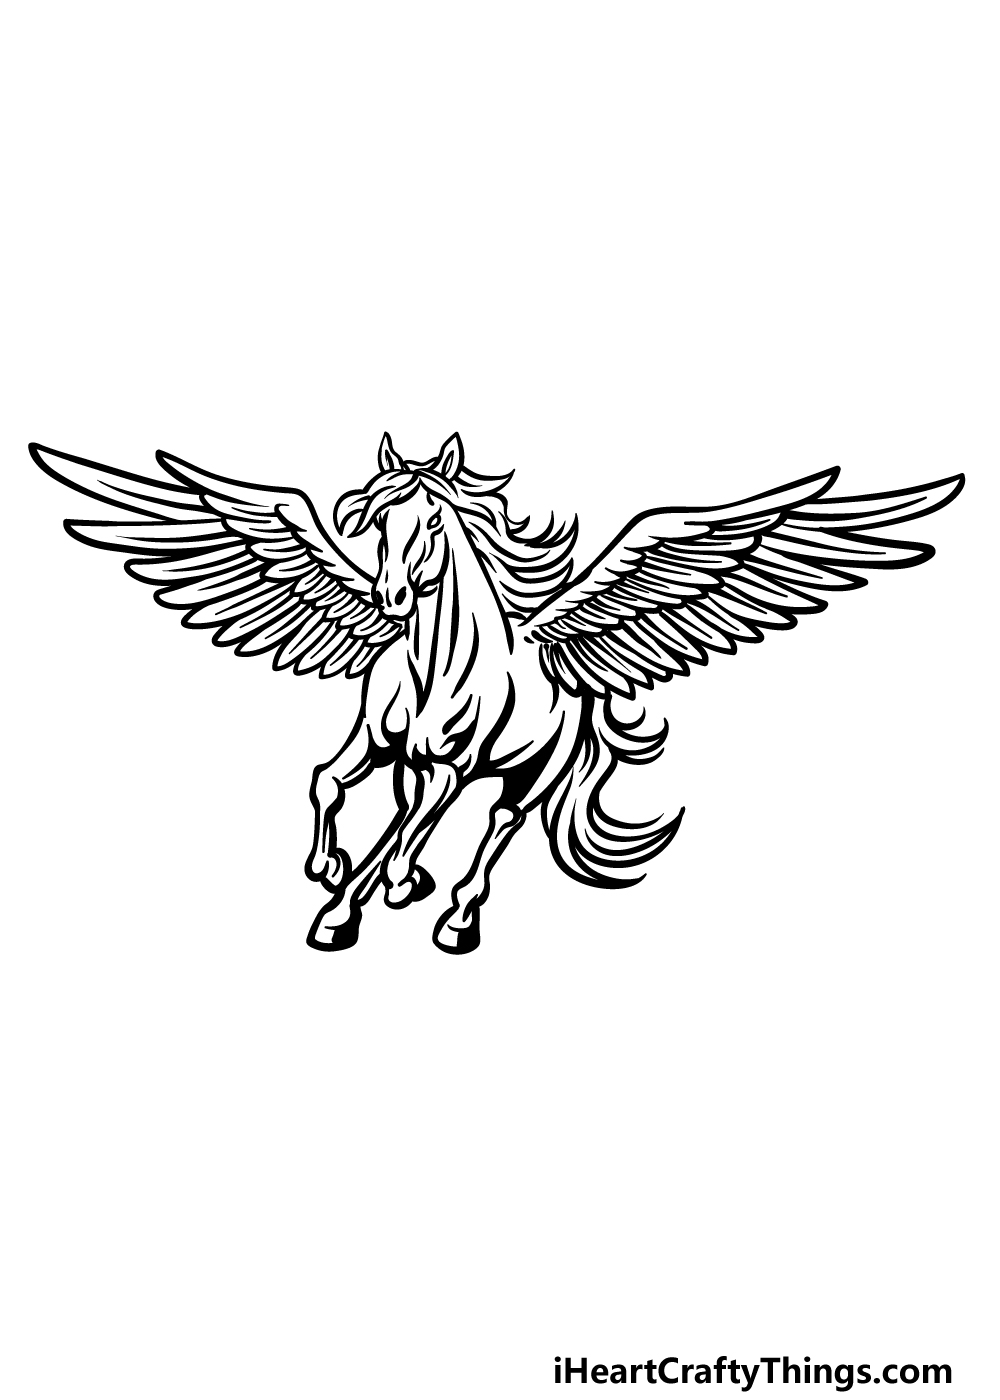
Step 7 – Finish off your Pegasus drawing with some color

Pegasus is often depicted as pure white, but there are other interpretations as well. We went for one of these interpretations in our example image for this final step of our guide on how to draw Pegasus.
We used greys, blues and browns for the various parts of Pegasus, but you could use any colors that you like!
Once you know the color scheme that you would like to use for her, be sure to also have fun experimenting with art mediums and tools to finish your drawing off.
3 More tips to make your Pegasus drawing easy!
Make this mythological character even easier to draw with these tips for your Pegasus sketch!
Horses are notoriously hard to draw, and this is made even more so with the added wing details included in this drawing of Pegasus.
The fact that this drawing is super detailed also makes things more difficult.
The level of detail would be a good place to start when it comes to making the drawing a bit easier.
You could go for a lower level of detail when it comes to aspects like the feather and texture details.
Making these simpler will help you to focus on the proportions of Pegasus first and then allow you to add some finer details to later attempts.
This Pegasus drawing may seem super complicated, but you can make it easier by breaking it down into simpler shapes. To do this, you can start by using a pencil.
Then, look at each individual element of the Pegasus design and try to simplify it into basic shapes. These shapes will help you to visualize the elements of the drawing in a simpler way.
Then, using darker lines or a darker pencil, you can slowly start adding more and more layers of details until it starts to look more like our design.
Once it’s done, you can then draw the final lines and erase your pencil line to finish off.
Even though Pegasus is a mythological creature, you can still use some real photos to make your Pegasus sketch easier to draw.
The obvious place to start would be by looking at pictures of horses to help you make that portion of the drawing easier.
Then, you could also use some images of bird wings to make the horse’s wings easier as well.
You can combine these different points of reference together along with the previous tips to make sure that this drawing is a lot less complicated.
These references would also allow for some variations on the design to make it more unique to you.
Your Pegasus Drawing is Complete!
We hope that you had an incredible time working alongside us on this guide on how to draw Pegasus!
As we mentioned, drawing horses can be quite a challenge, so we hope that by following this guide you found it to be easier than you may have expected!
Now, we will look forward to seeing how you decided to finish this drawing off with your own details, backgrounds and color choices!
For more drawing fun, our website is the place to be! We have some incredible guides there with more on the way, so definitely keep checking in.
We can’t wait to see your finished Pegasus drawing, so please share your artwork on our Facebook and Pinterest pages for us to see!