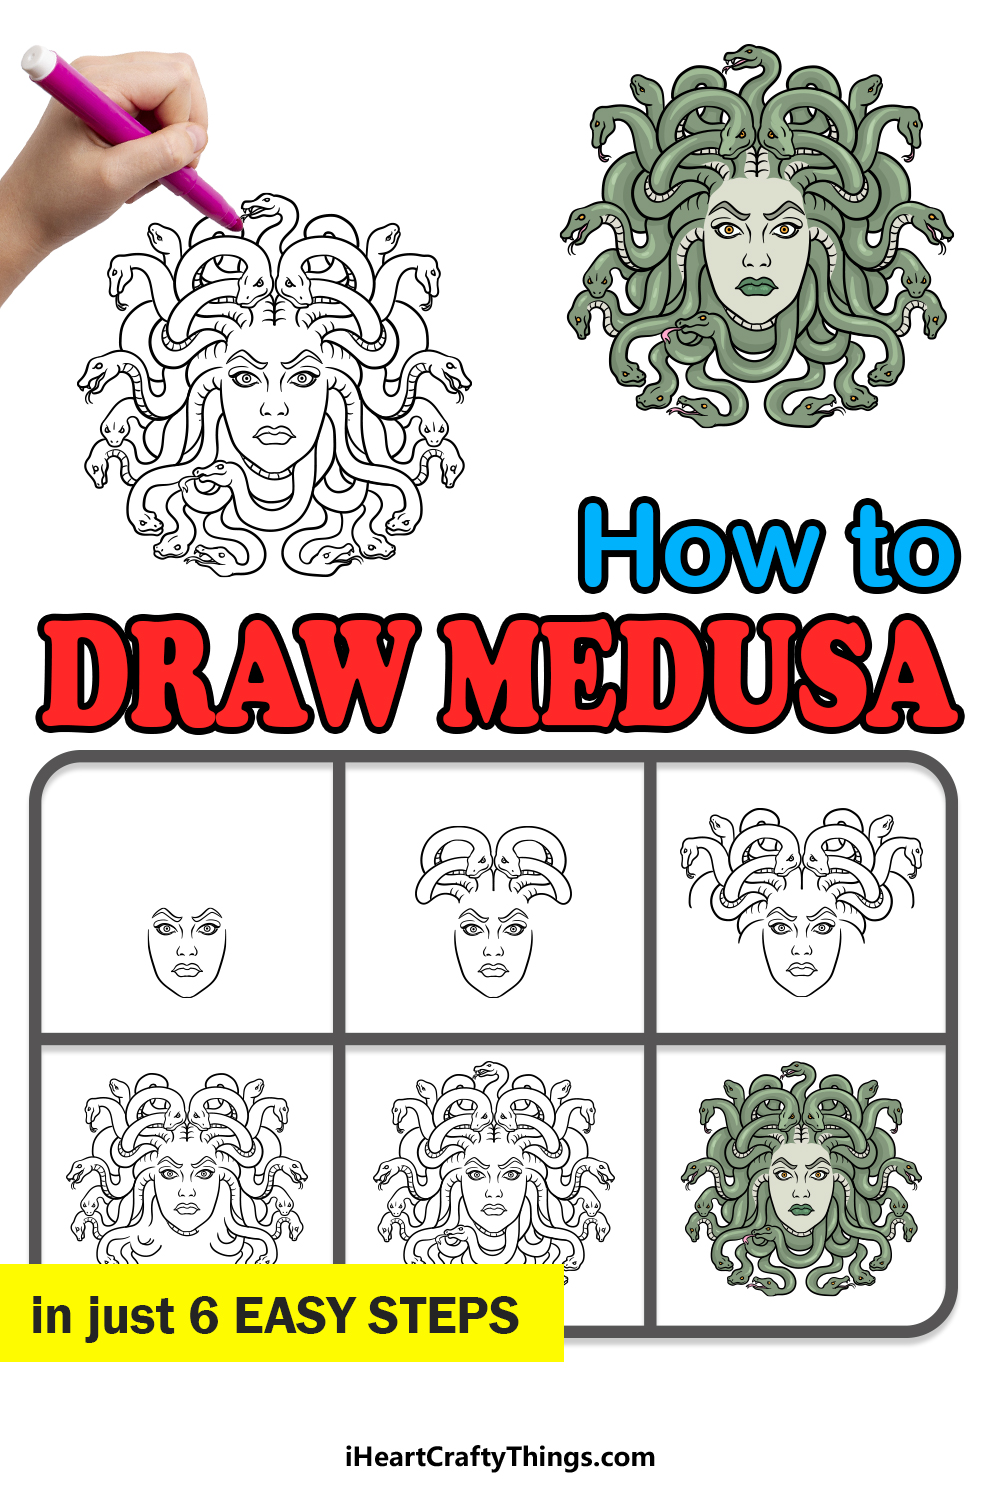
This guide on how to draw Medusa will make it so much easier for you to recreate this famous mythological figure. Medusa may be a terrifying character, but drawing her doesn’t have to be.
Of all the characters in Greek mythology, Medusa has to be one of the scariest. This creature has living snakes for hair and looking into her eyes would turn you to stone.
She has been featured in a lot of modern retellings and stories, and it’s easy to see why she’s such a popular figure. Many people might like to draw her but not know where to start.
This guide aims to make it much easier for you, as I will take you through all of the steps and explain each one along the way.
So let’s begin and see how you can draw the terrifying Medusa!
Watch And Learn How To Make A Medusa Drawing
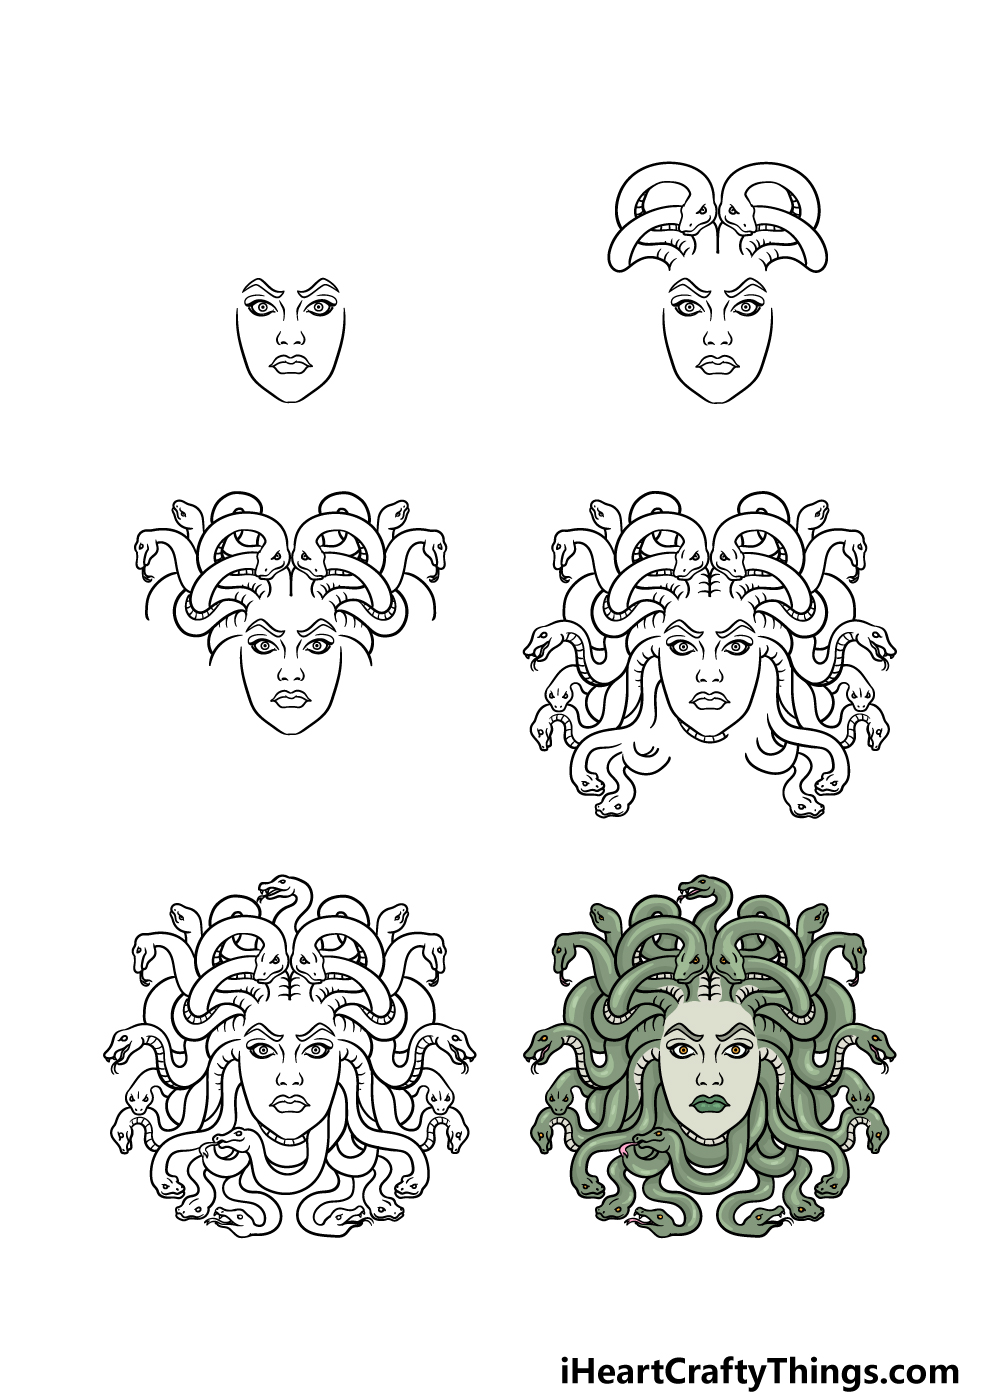
How to Draw Medusa – Let’s Get Started!
Step 1
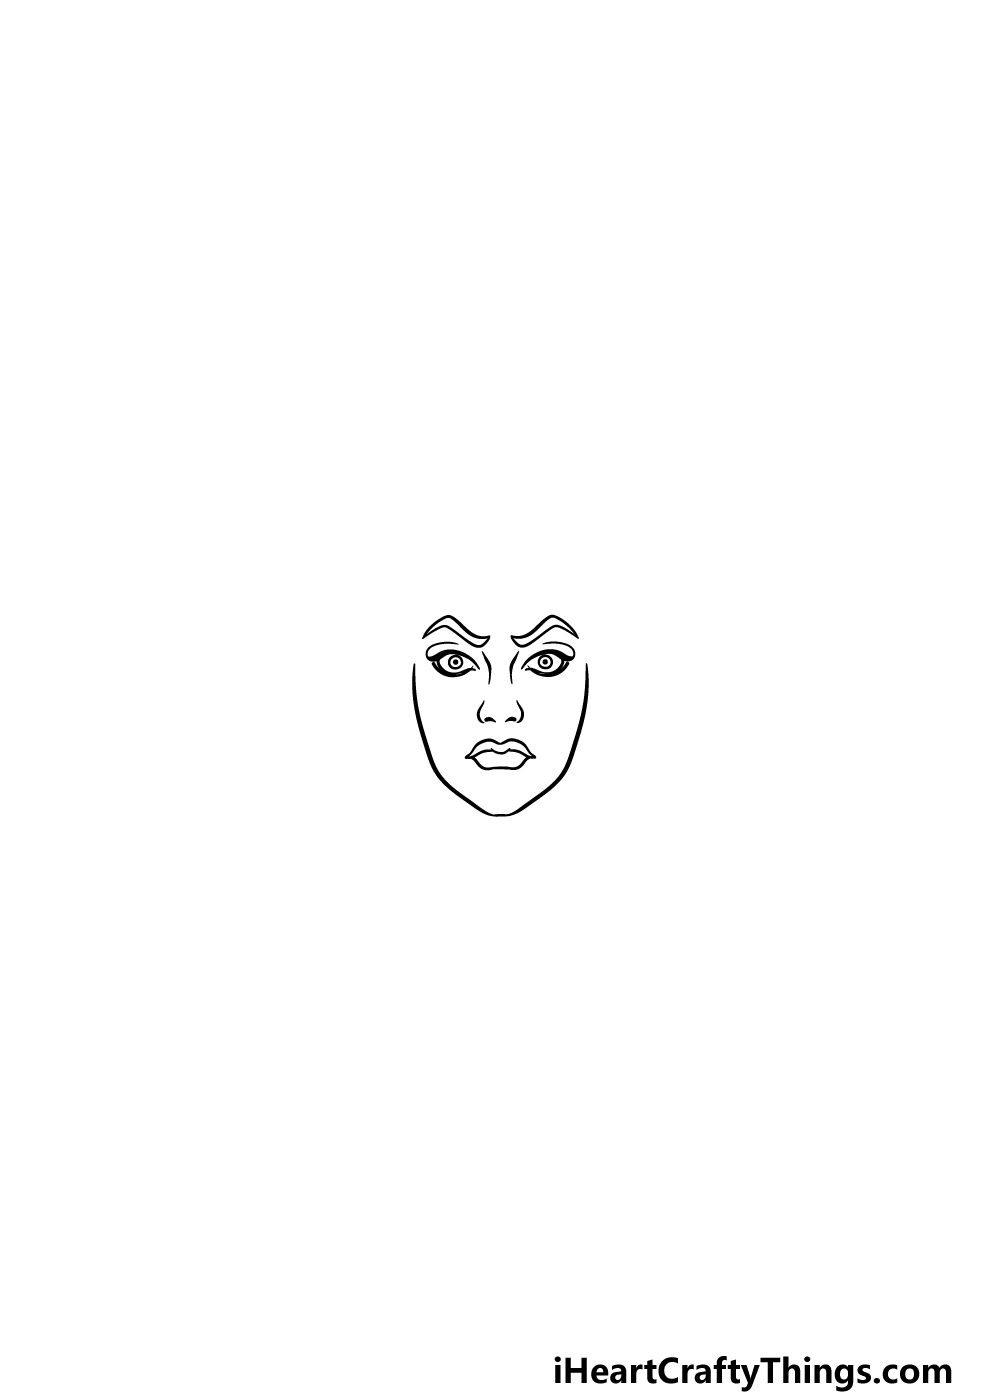
To start this guide on how to draw Medusa, we will be starting with her face. At this point in the drawing, you may be forgiven for thinking she looks like a pretty normal lady!
We shall start with her eyes first, which will be drawn with some fairly thick outlines. Then draw a small circle inside each one with a tiny dot inside.
Then, we will be using some rounded yet angular lines for her eyebrows, and the shape of these will give her a rather intense expression.
Then, use two small curved lines for the bridge of her nose, and you can draw the sides and nostrils a bit below that.
Finally, you can draw her mouth which will be downturned a bit in order to further give her an intense expression. Then this step can be finished off by drawing her facial outline.
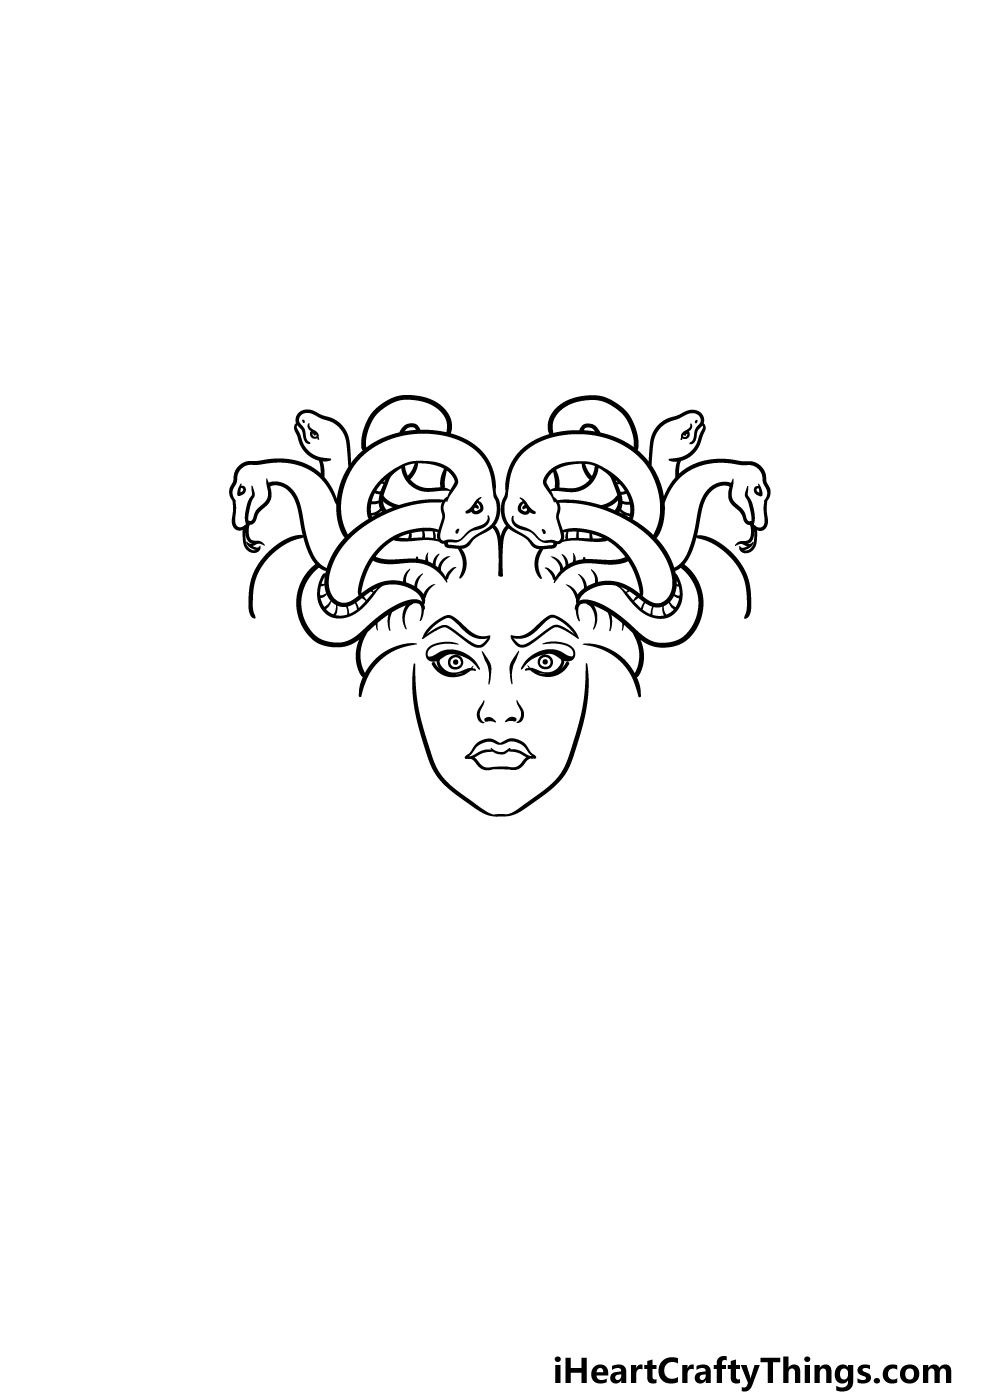
Step 2 – Next, draw the first snakes for her head
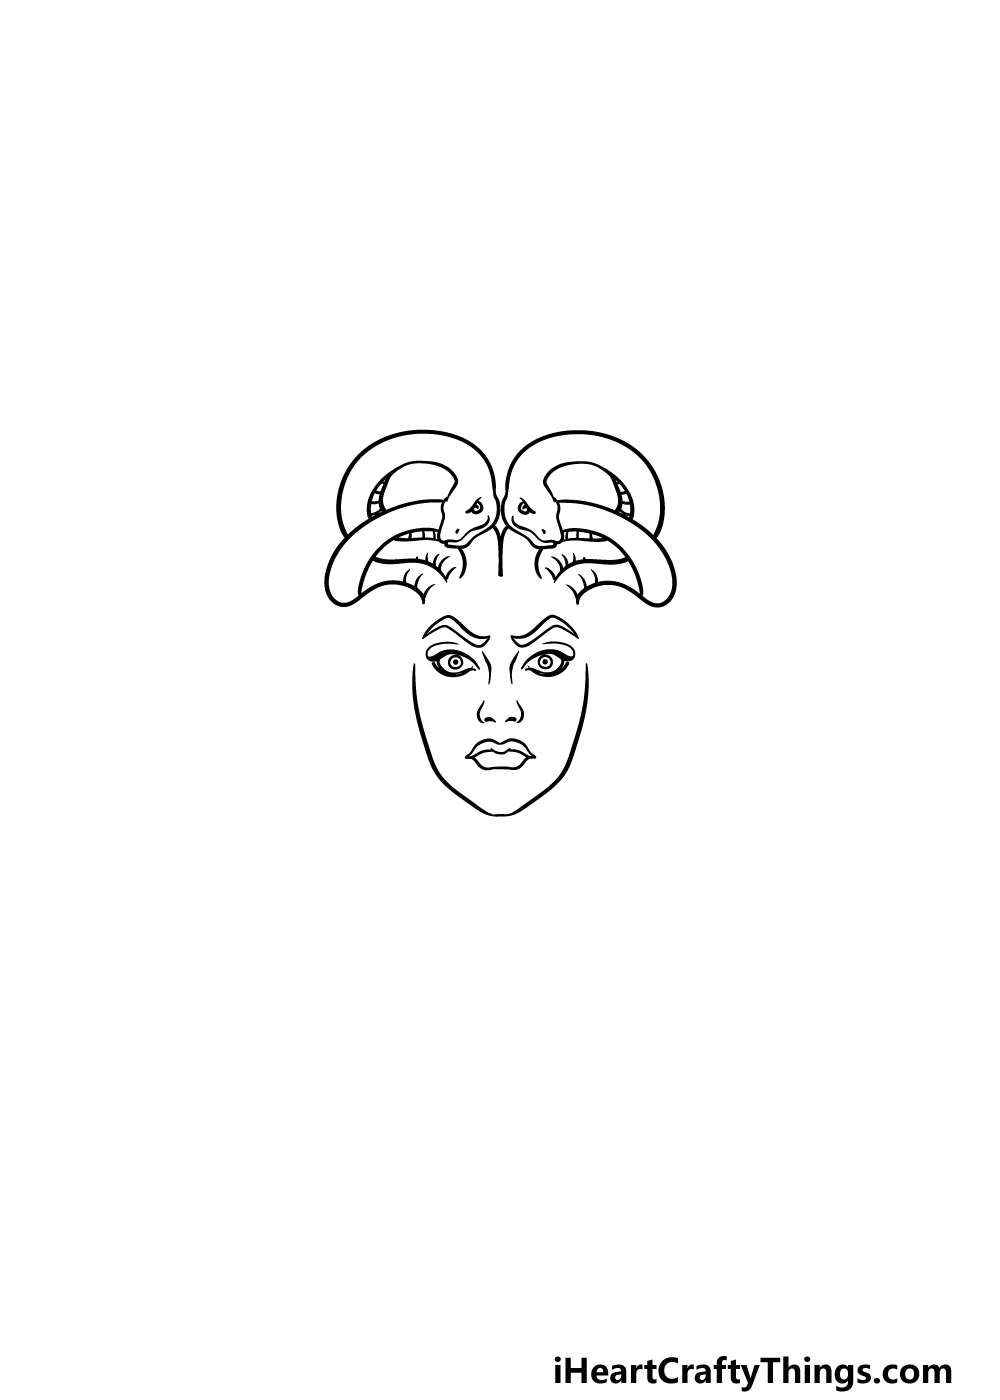
We mentioned that Medusa has a head full of living snakes instead of hair, and we will draw the first of these for your Medusa drawing now.
For her snake hair, we will be keeping both sides looking pretty symmetrical, and you can keep that in mind as you draw the first two snakes.
Use some curved lines for their wavy bodies, and then finish off by drawing their little faces at the ends of them.
We will be adding a lot more snakes to her head in the next few steps, so let’s move on to do that!
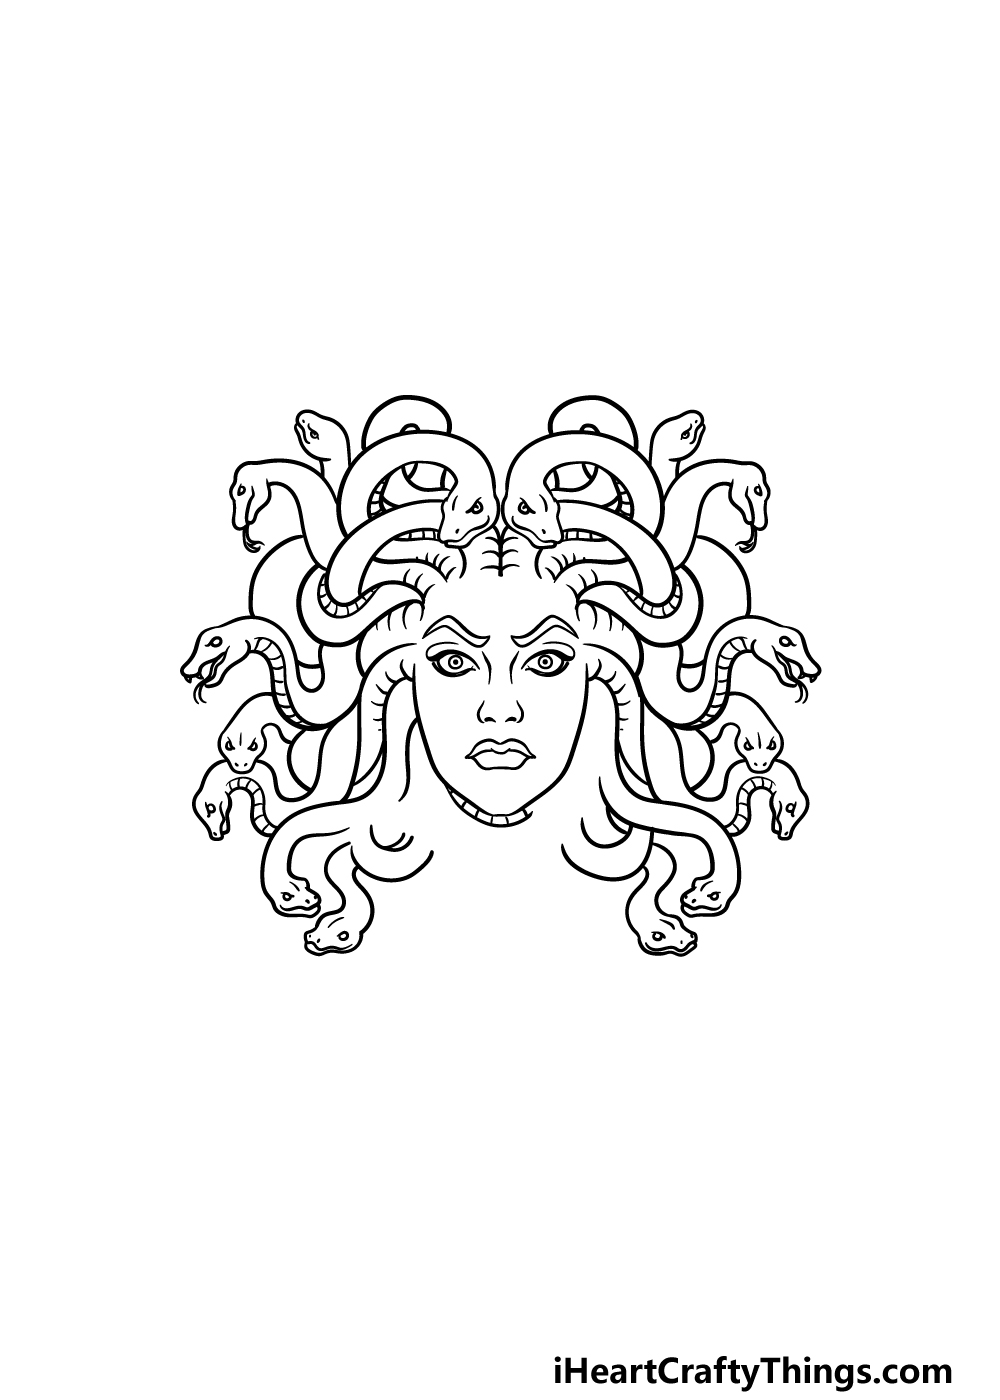
Step 3 – Draw some more snakes for her hair
This step of our guide on how to draw Medusa may look a bit intimidating, as we will be adding a lot of snakes to her head in this one. It’s not as hard as it looks though, and we will be taking it nice and slowly.
The best way to tackle this step would be to start on one side and refer closely to the reference image as you draw.
There are a lot of twisty lines for the bodies of the snakes, and it’s important to try and make the bodies connect to the heads in a logical way.
Once you have completed one side of the head of snakes, you can create a symmetrical copy of what you drew for the other side. You could copy the reference image for this side or simply try to mirror your own drawing!
Once you’re ready, we shall continue to step 4.
Step 4 – Now, draw even more snakes
In the previous part of your Medusa drawing, we added a mass of snakes to the top half of her head, and now we will focus on the central area of her head.
For this section of her head, we will be adding five snake heads and their corresponding twisty bodies.
This is another step that may look a bit complicated, but as long as you take it slow and follow the reference image you’ll be fine!
Then we can finish off the final details in the next part.
Step 5 – Finish off your Medusa drawing
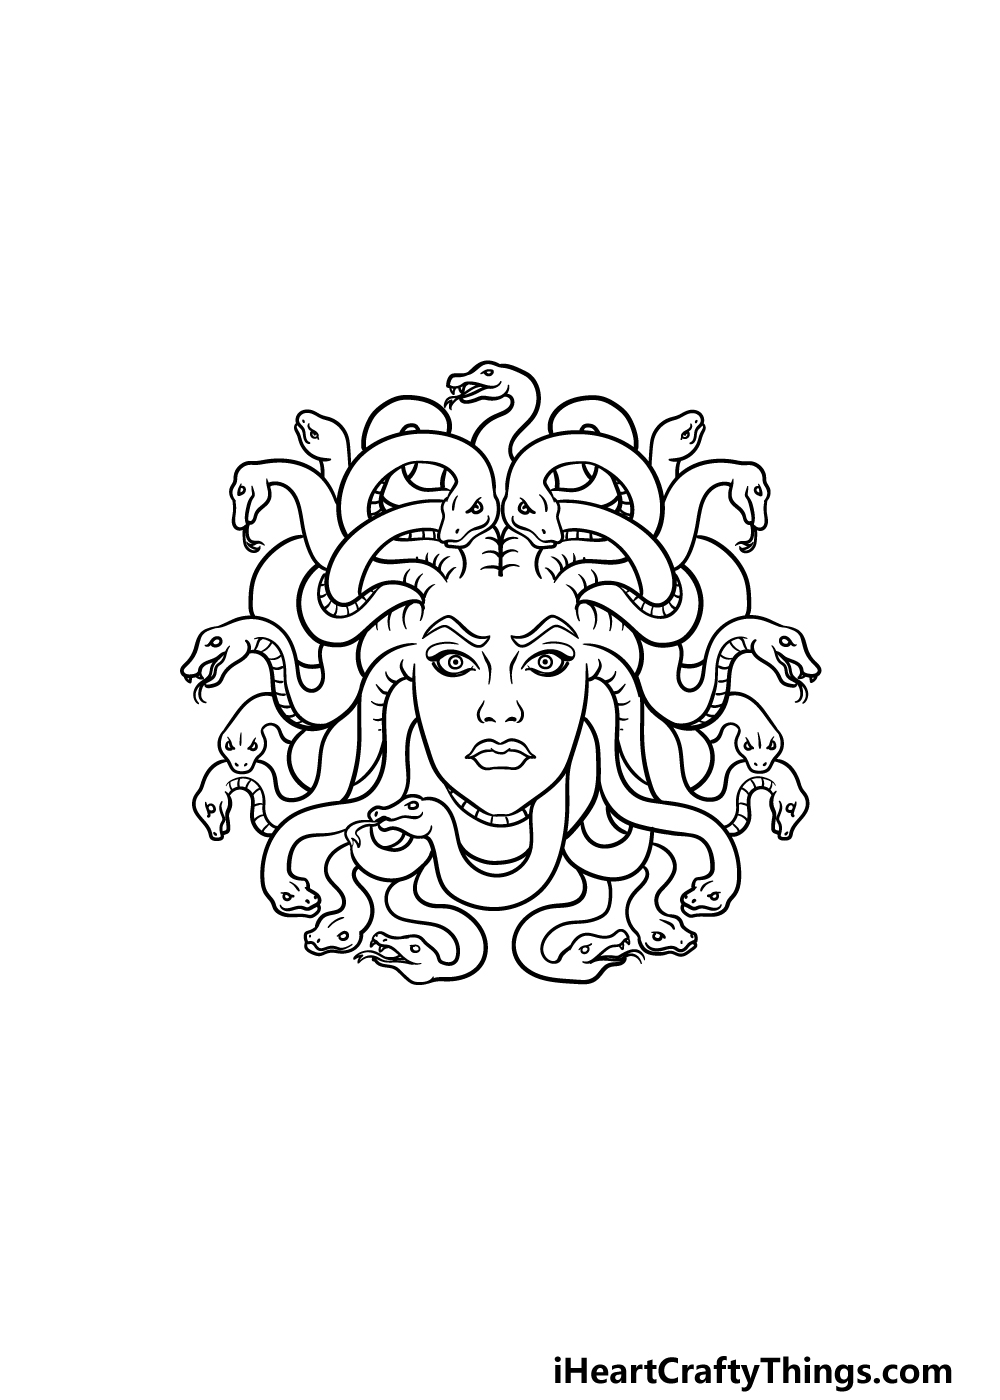
You’ve drawn most of the snakes that you will be adding in this guide on how to draw Medusa, and for this part we will add the final ones.
These remaining snakes will fill in the spaces at the top and bottom of her head to have her surrounded by snakes! You can draw one snake coming from the top and then three coming from below her face.
Once you have added these last snakes, you’re ready to move on to the final step! Before you do, be sure to add any details of your own that you may want.
You could draw more of her body, or maybe even draw a background showing some of the victims she has turned to stone! How will you finish off your picture before moving on to the final step?
Bonus: Use Additional Sources To Customize And Make This Drawing Easier
This drawing of Medusa looks so cool as it is, but there are many ways you can make it even cooler and more personalized. We wanted to go over a few ways that you could personalize the drawing before the final step.
We love the look of her face in this design, but there are some fun ways you could change it to make it more unique. One way of doing it would be to model her face on a real person’s face.
There are so many people you could choose as a model! It could be someone you know, or you could pick a favorite celebrity. Using your own face would be cool if you’ve ever fancied being a mythical monster.
If you were to change the face design, then you could also change the facial expression to fit any emotion you like. It’s a simple way to put your own spin on the drawing, and can lead to some fun variations.
Another interesting way to play with the design would be to use a different art style for the drawing. Right now, it has a fairly realistic look, or at least looks as realistic as a picture like this can.
You could go for a more cartoony look, for instance. This would be a way to drastically change the look of the design and maybe give it a more lighthearted feeling.
Combining that idea would also work with the previous idea of modelling the face to match someone real. If you based it on someone you know, then you could present this drawing as a fun gift!
These are a few ideas to try, and then you can move on to the next one where we will bring some color to your artwork.
Step 6 – Finish off your Medusa drawing with some color
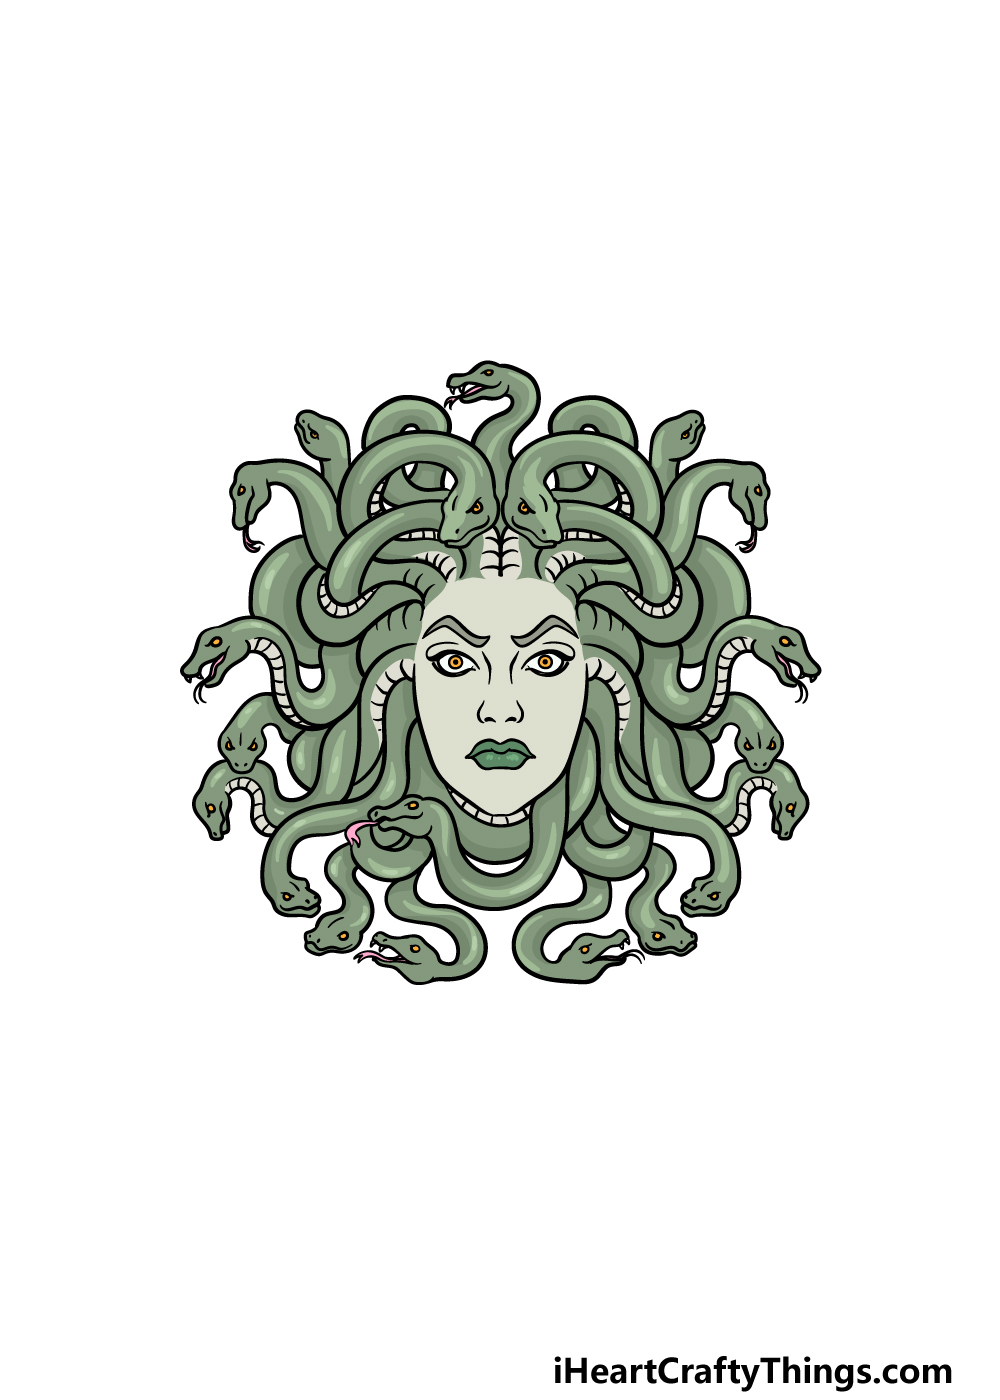
In this final part of your Medusa drawing, we can finish off by coloring her in. to suit her snake theme, we kept the colors darker and muted.
We used a liter green for her face while using some darker shades for the snakes themselves. These are the colors that we chose, but you should feel free to use any colors you like for your picture!
Once you have chosen the colors that you would like for your image, you can then decide on the art tools and mediums that you will use to achieve them.
For more intense colors, you could use some colored pens or acrylic paints. For a more muted look, watercolors and colored pencils would be a much better bet.
No matter what you use it will look great, so be sure to have fun with it and see what happens!
Here’s how you can make your Medusa drawing even better…
These tips for your Medusa sketch will make the process a lot less scary than she is!
For this Medusa drawing, we focused on her face and her hair made of snakes. It’s easy to see why, as this is one of her main attributes in the Grek myths that feature her.
While this looks great, you could also add some more of her body to make this drawing even better.
This could just be her neck, or it could include her shoulders and more!
What kind of pose would you feature her in if you were to draw some more of her body?
Medusa is one of many monsters from Greek legends. Another way you could make your drawing of Medusa even cooler would be by adding some more monsters alongside her.
You would certainly have many to choose from! There are ones like sirens and harpies for a few smaller creatures.
You could even portray the massive cyclops for a truly epic scene. These are just a few of the famous Greek monsters you could include, but what else can you think of?
Whether you went with some of our previous tips or not, it could also be fun to draw a background for this Medusa sketch. You could create some truly incredible scenes if so!
If you did add some more mythical monsters, then creating a scene around them would be easy. Or, maybe Medusa could be battling against some famous Grek heroes like Hercules.
What are some ideas for background scenes you could create around this image?
The color scheme we used for this Medusa drawing is quite light and muted, and it suits the image well. That being said, you may want to experiment with different colors and mediums for your own picture.
This is the kind of process where there are no wrong ways to do it! Whether you want the colors to be dark or bright, it will definitely look great in its own way.
How will you color in this fearsome artwork?
Your Medusa Drawing is Complete!
We hope that you had an amazing time recreating this classic mythological figure in this guide on how to draw Medusa!
We know that this looked like an intimidating drawing because of all the snakes involved, but hopefully this guide helped you to see that it can be easier than expected when broken down into smaller steps.
Now it’s up to you to add more details, elements and color choices to really finish it off!
Then, be sure to visit our website for more drawing guides like this one. We have many for you to enjoy, and we have more coming out very soon!
Once you have completed this Medusa drawing, we would love to see it shared on our Facebook and Pinterest pages for us to admire!
Here Is A Cartoon Drawing Of Medusa To Inspire You!
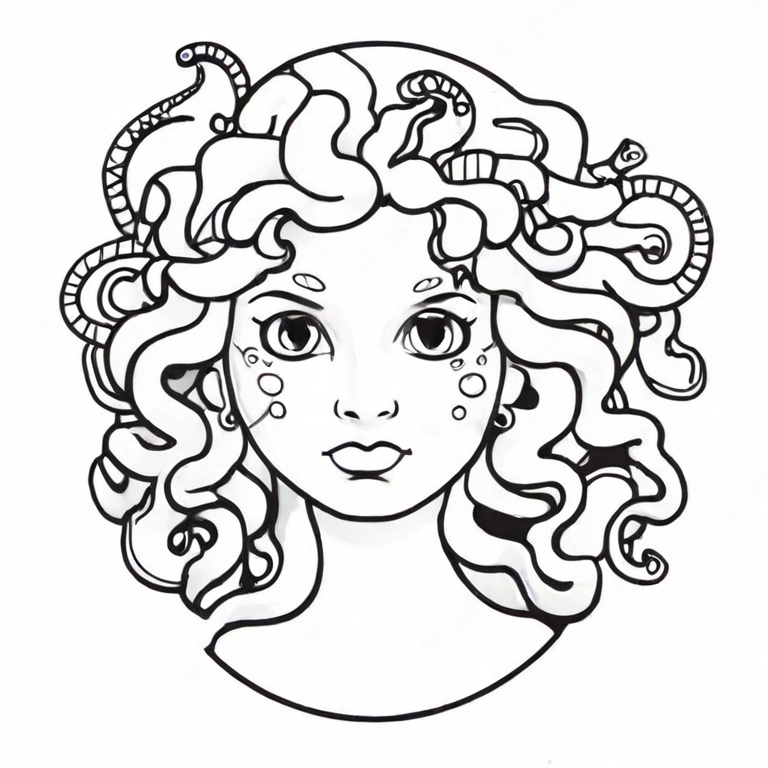
Medusa may be a terrifying character from mythology, but drawing her doesn’t need to be so scary! Our artist Amanda has shown us that drawing her in a cartoon style is not only possible but easy.
As you can see from her cartoon drawing of Medusa, even though she is in a cartoon style, there are some tricky elements. Most people would agree that the hardest part would be her snake hair.
These snakes twist and writhe on her head, and it can get a bit confusing. A top tip for these kinds of details would be to use a light pencil to map them out first.
You can also closely follow Amanda’s drawing and copy each snake so it matches her Medusa sketch. It may take a few tries, but you will soon see that it’s not as hard as it looks!