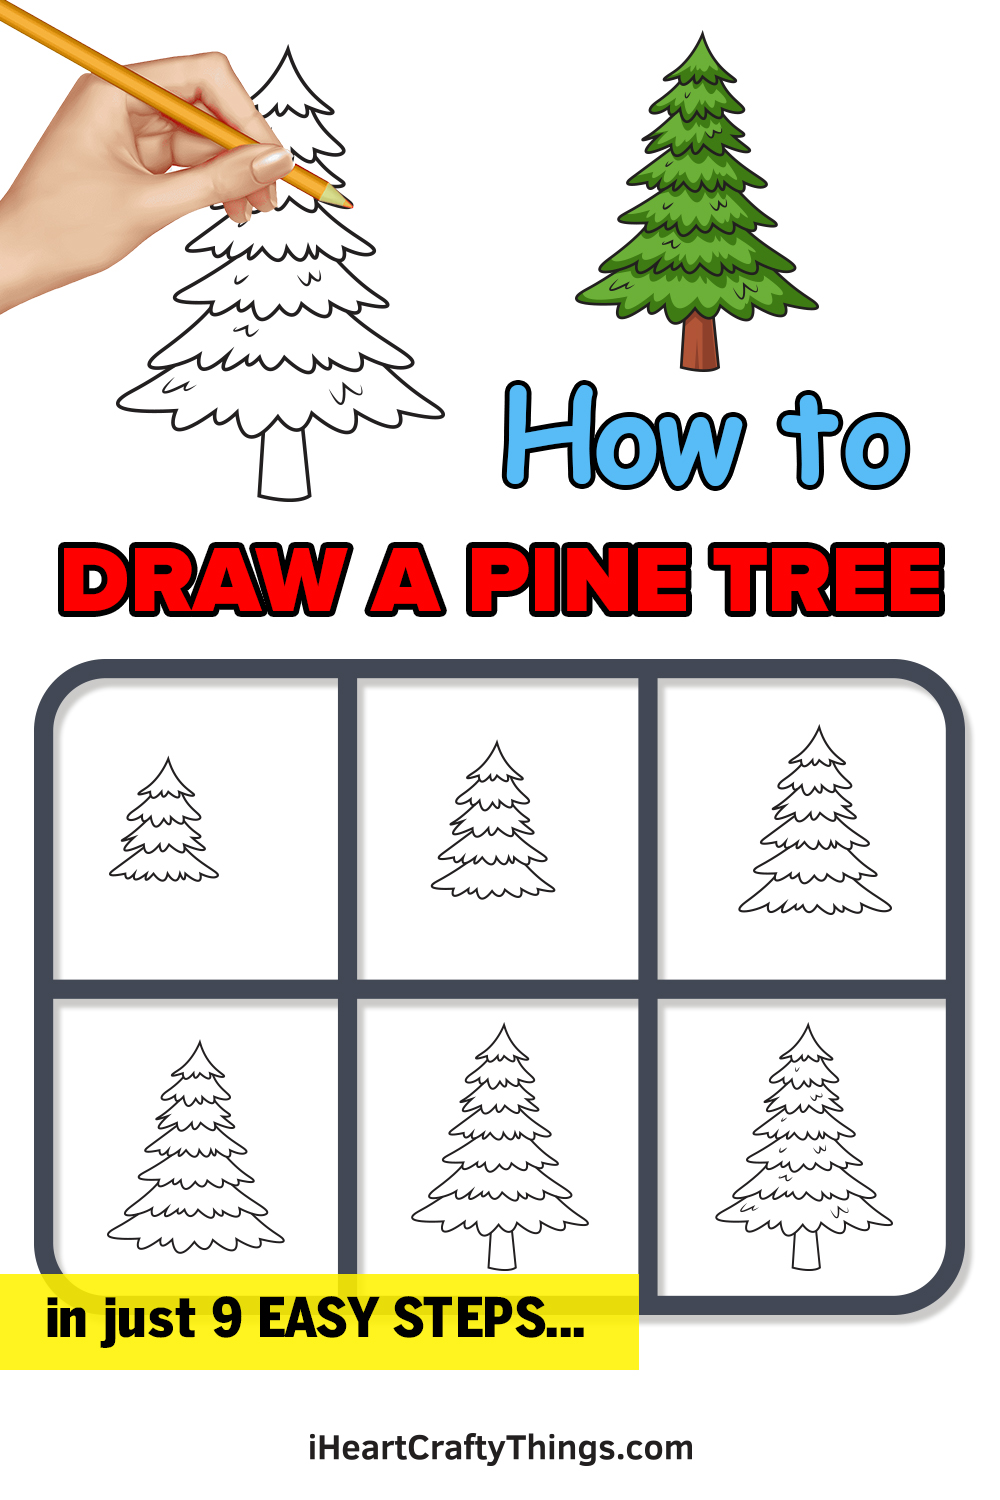
It’s easier than you think to learn how to draw a pine tree when you follow this guide for kids! By the end, you could make an entire forest of trees if you want.
Pine trees are so recognizable, and they always look amazing when there are many of them that form a forest. We also use them for Christmas trees, which further aids in how recognizable they are.
Despite how famous pine trees are, drawing one is often easier said than done. After this guide, that will no longer be the case!
I will take you through each step and show you how to make the design that you see below. Once you see how it’s done, it will click and you will see that it’s quite simple.
After you have the hang of it, you can even add your own elements, ideas and additions!
Watch And Learn How To Make A Pine Tree Drawing
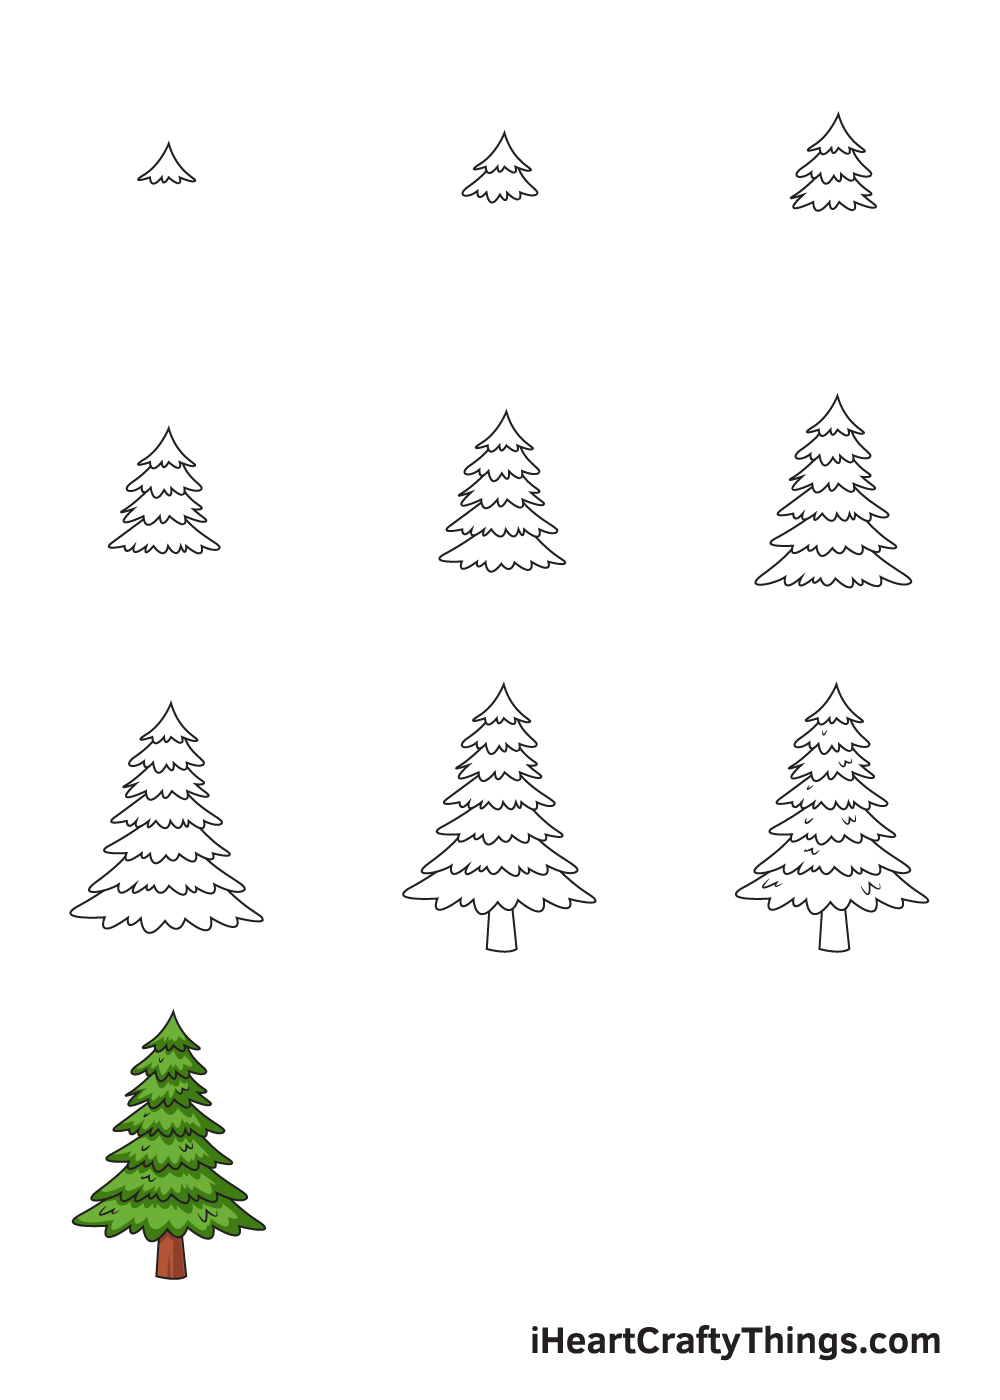
How to Draw a Pine Tree – Let’s get started!
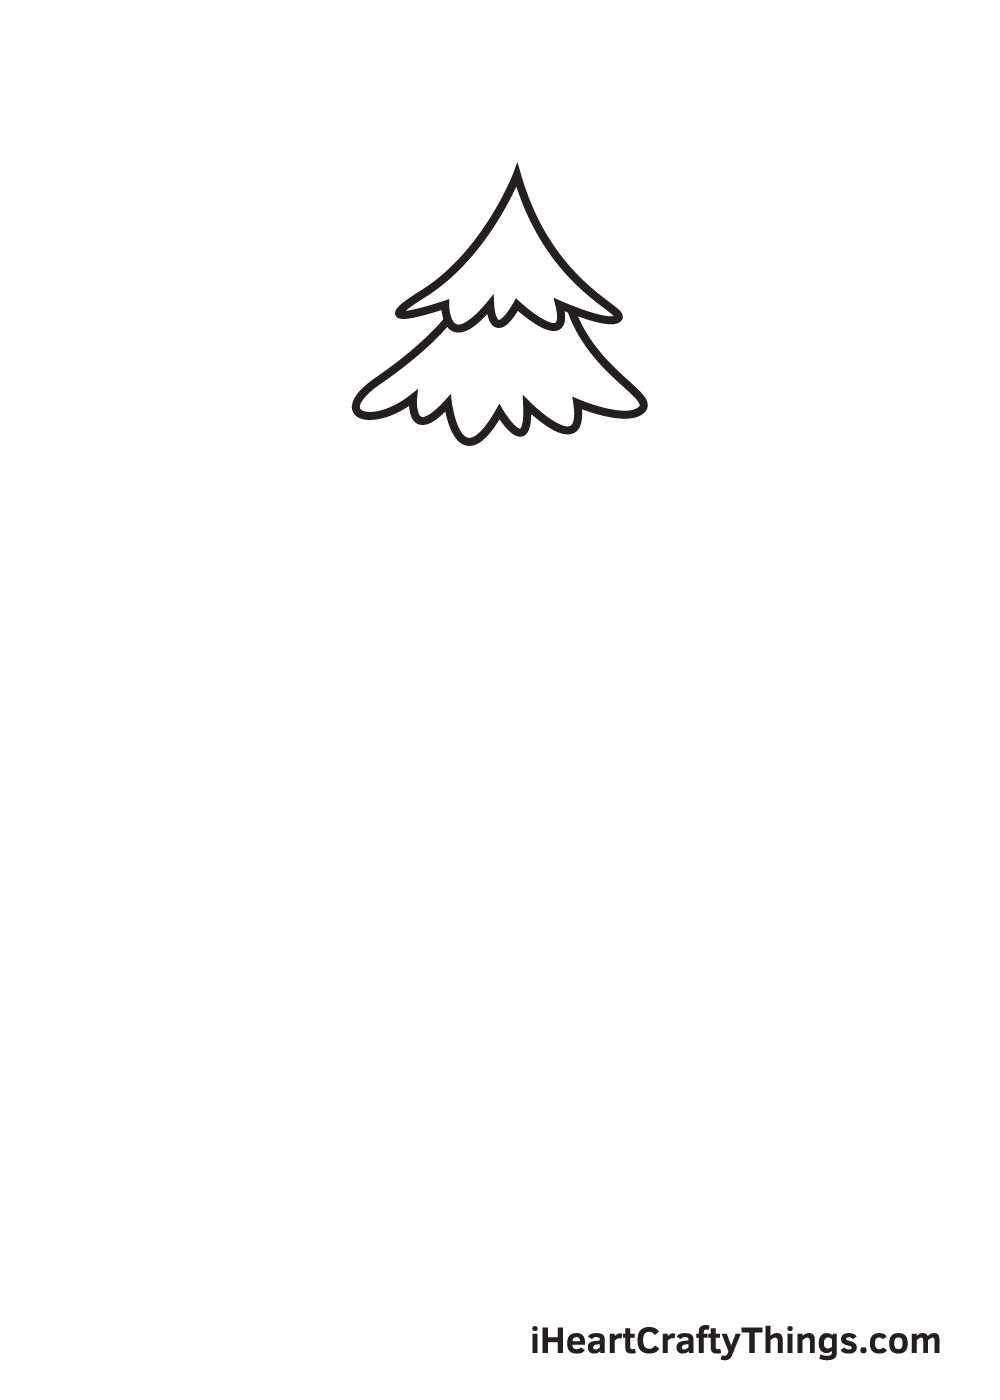
Step 1

Start by drawing the topmost part of the beautiful pine tree. Draw a slightly curved triangle with multiple curved figures at the bottom on the upper portion of your paper.
This forms the topmost layer of leaves of the pine tree.
Starting at the top ensures that there’s sufficient space for the rest of the layers of the pine tree.
Make sure that the top will be drawn at the top by creating reference lines. Simply draw an intersecting horizontal and vertical line across your paper and use it as guidelines.
The vertical line at the top of the horizontal line marks the spot where you should draw the topmost layer.
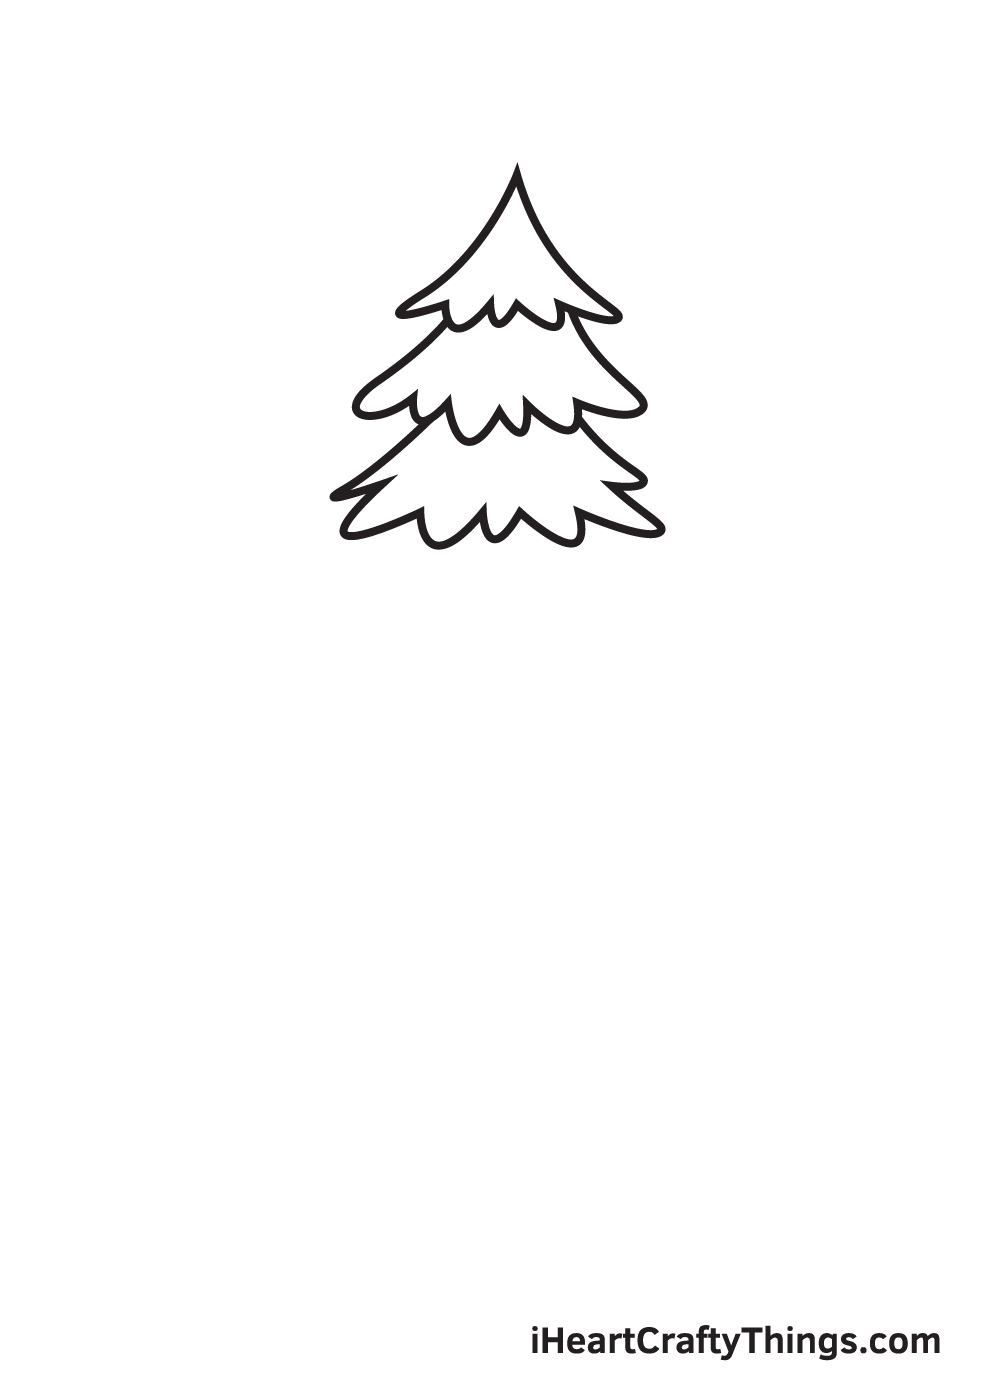
Step 2 – Draw the First Two Layers of the Pine Tree
Everything from this point on is easy and all about repetition (with slight changes in terms of size).
Create the second layer of the pine tree by drawing another figure similar to the one we drew previously right underneath the topmost layer.
Make it slightly bigger than the first one, similar to the one shown in the illustration above.
Step 3 – Next, Draw the Third Layer of the Pine Tree
Similar to the previous step, draw another layer of leaves of the pine tree. Make it look slightly different by changing the appearance of the curved figures, as shown in the illustration above.
Step 4 – Then, Draw the Fourth Layer of the Pine Tree
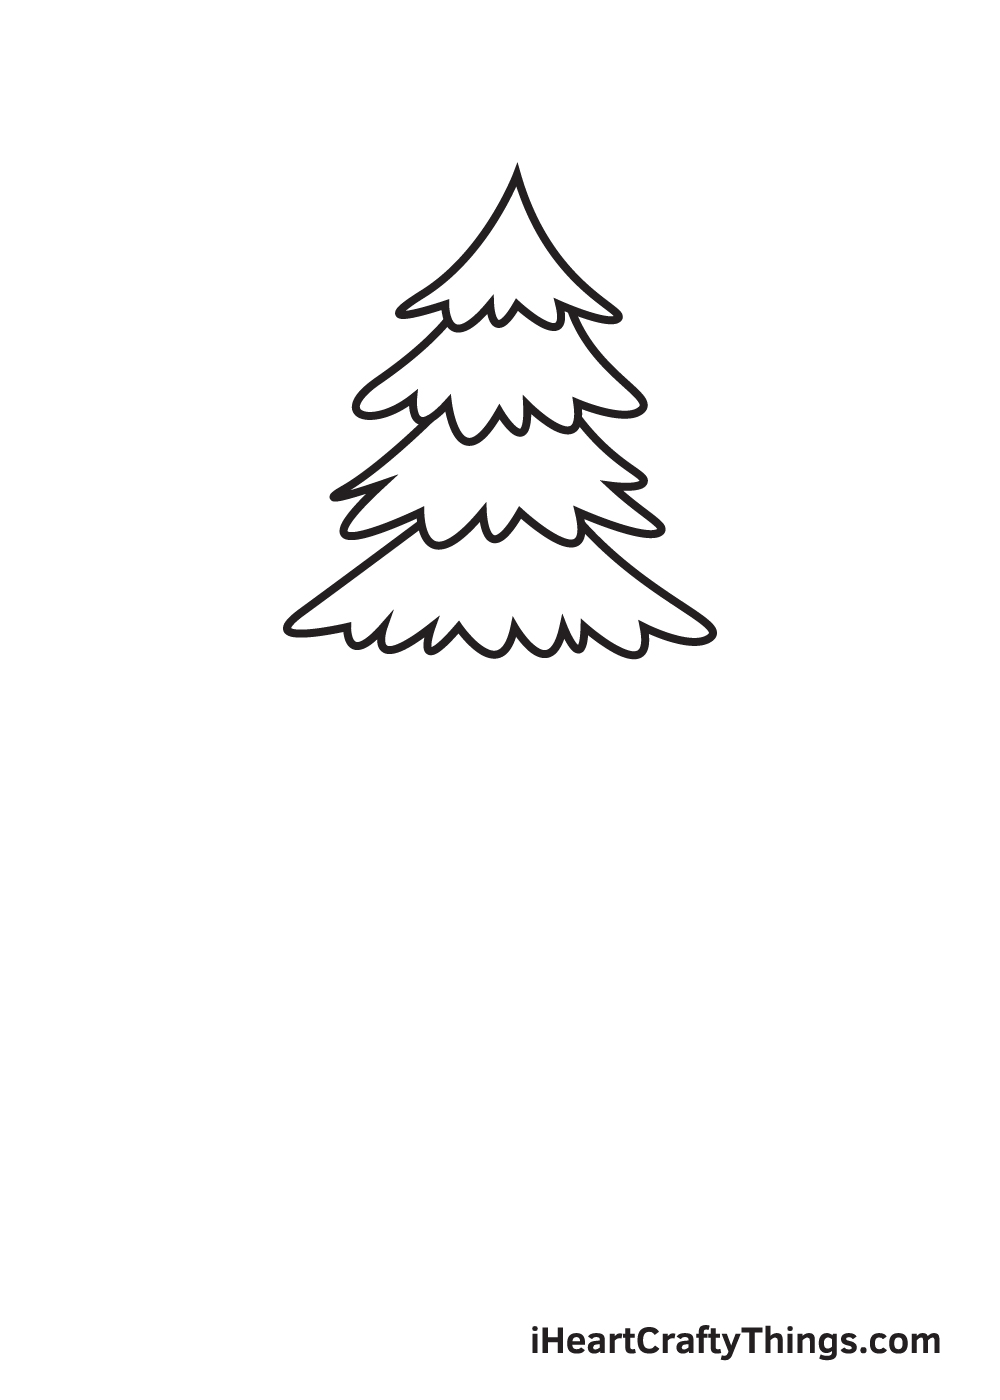
In this step, we will be drawing the fourth layer of the pine tree.
Make it look bigger and wider than all of the previous layers.
Step 5 – Afterwards, Draw the Pine Tree’s Fifth Layer
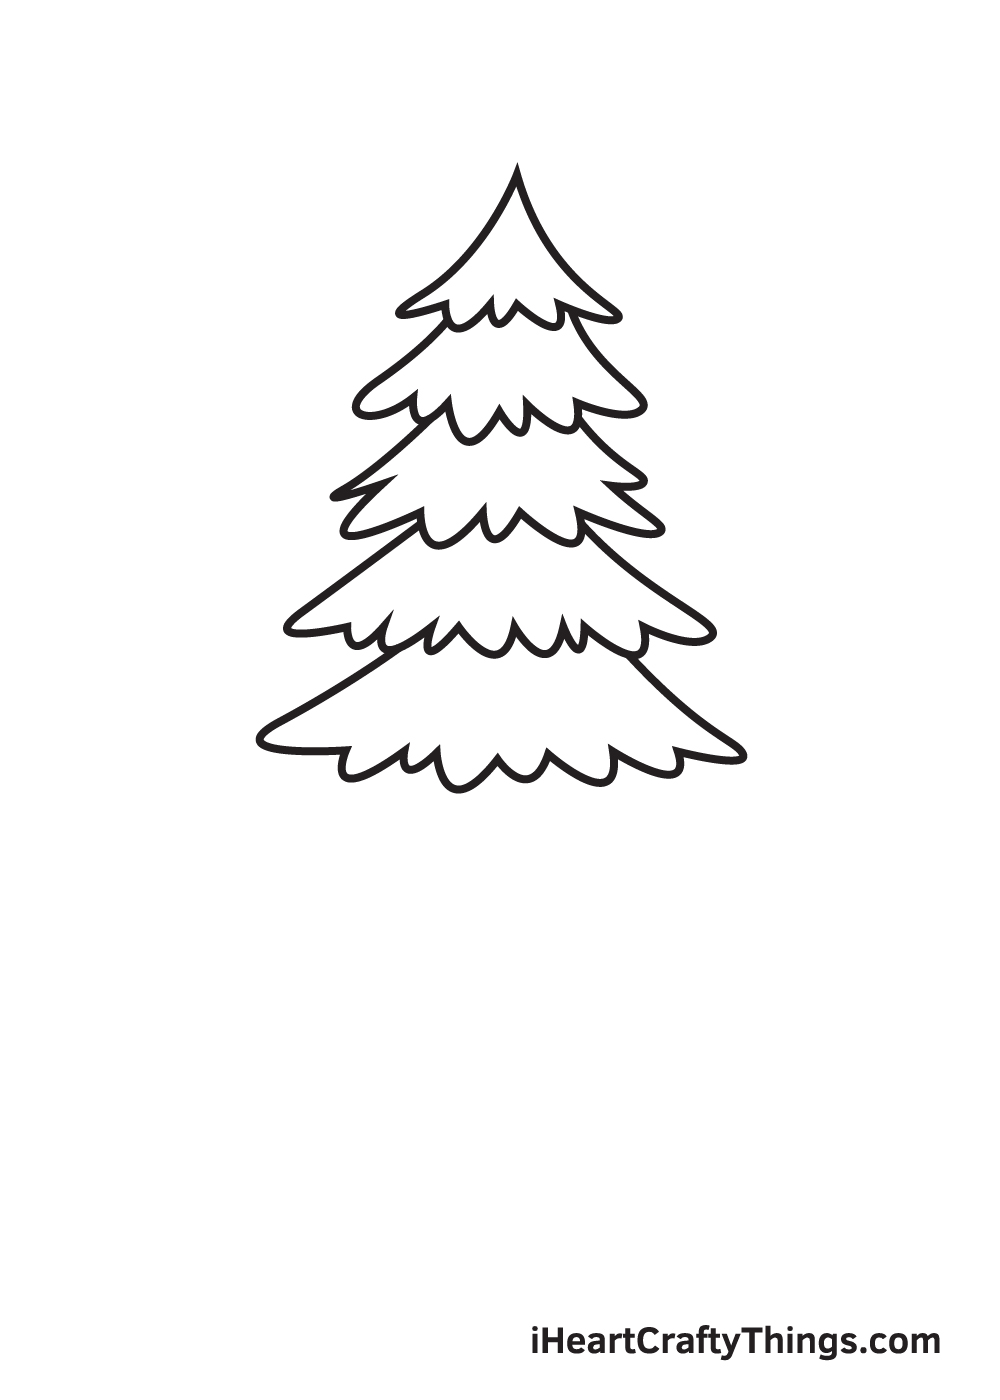
This one is another repetition. Create the fifth layer of the pine tree by drawing a similar figure. As usual, this layer should be slightly bigger than the previous one.
Don’t forget to add some uniqueness to those curved figures!
Step 6 – Next, Draw the Sixth Layer of the Pine Tree
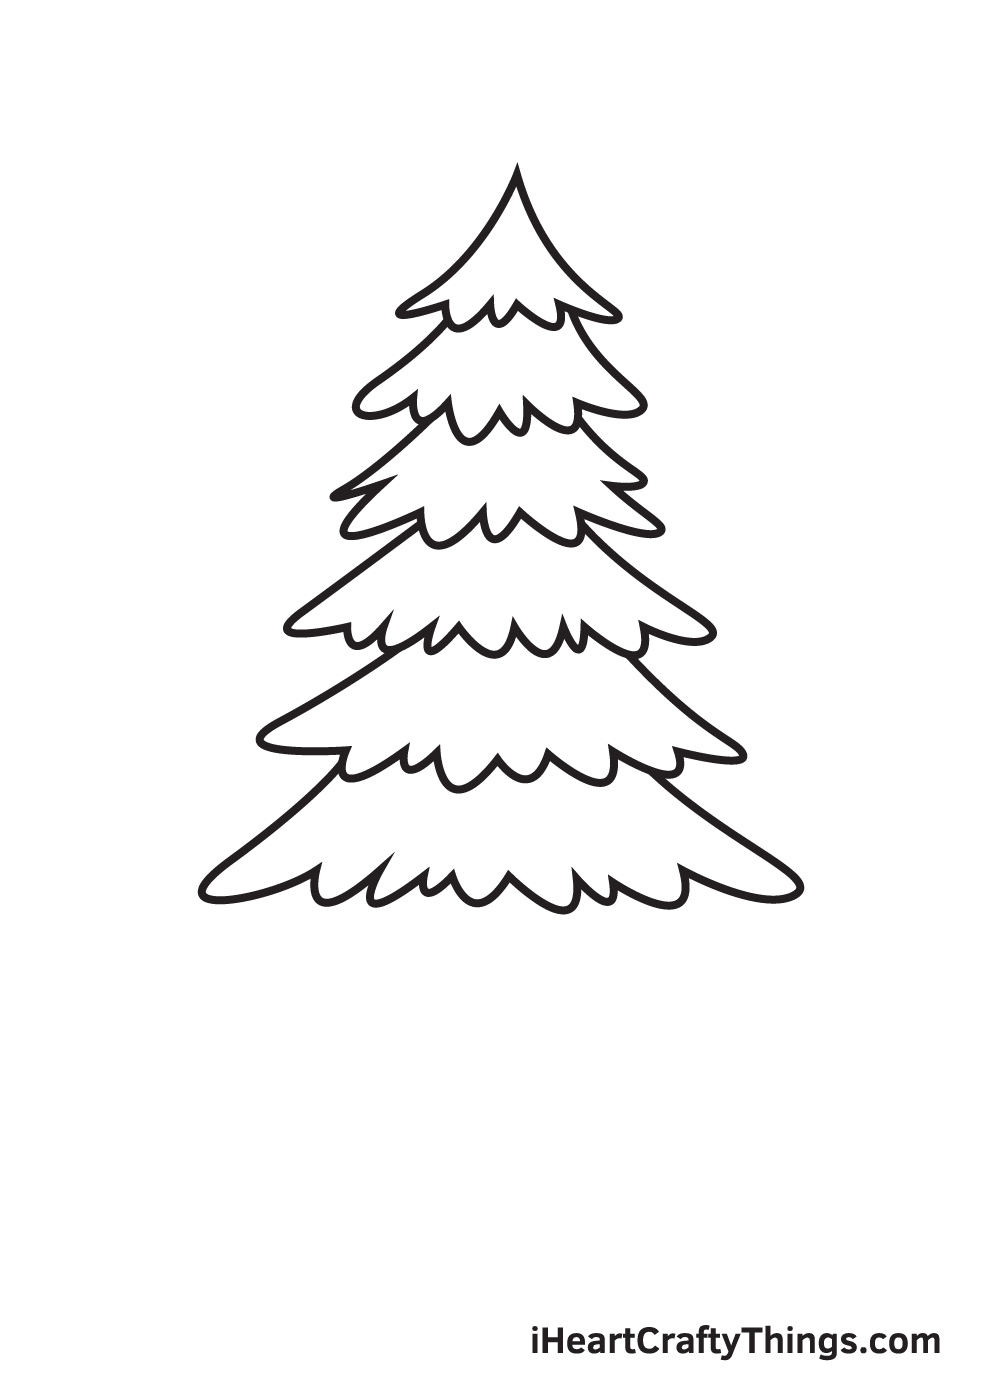
In this step, we will be drawing the second to the last layer of the pine tree.
Remember to make it bigger and wider than the previous one!
Step 7 – Now, Draw the Last Layer of the Pine Tree
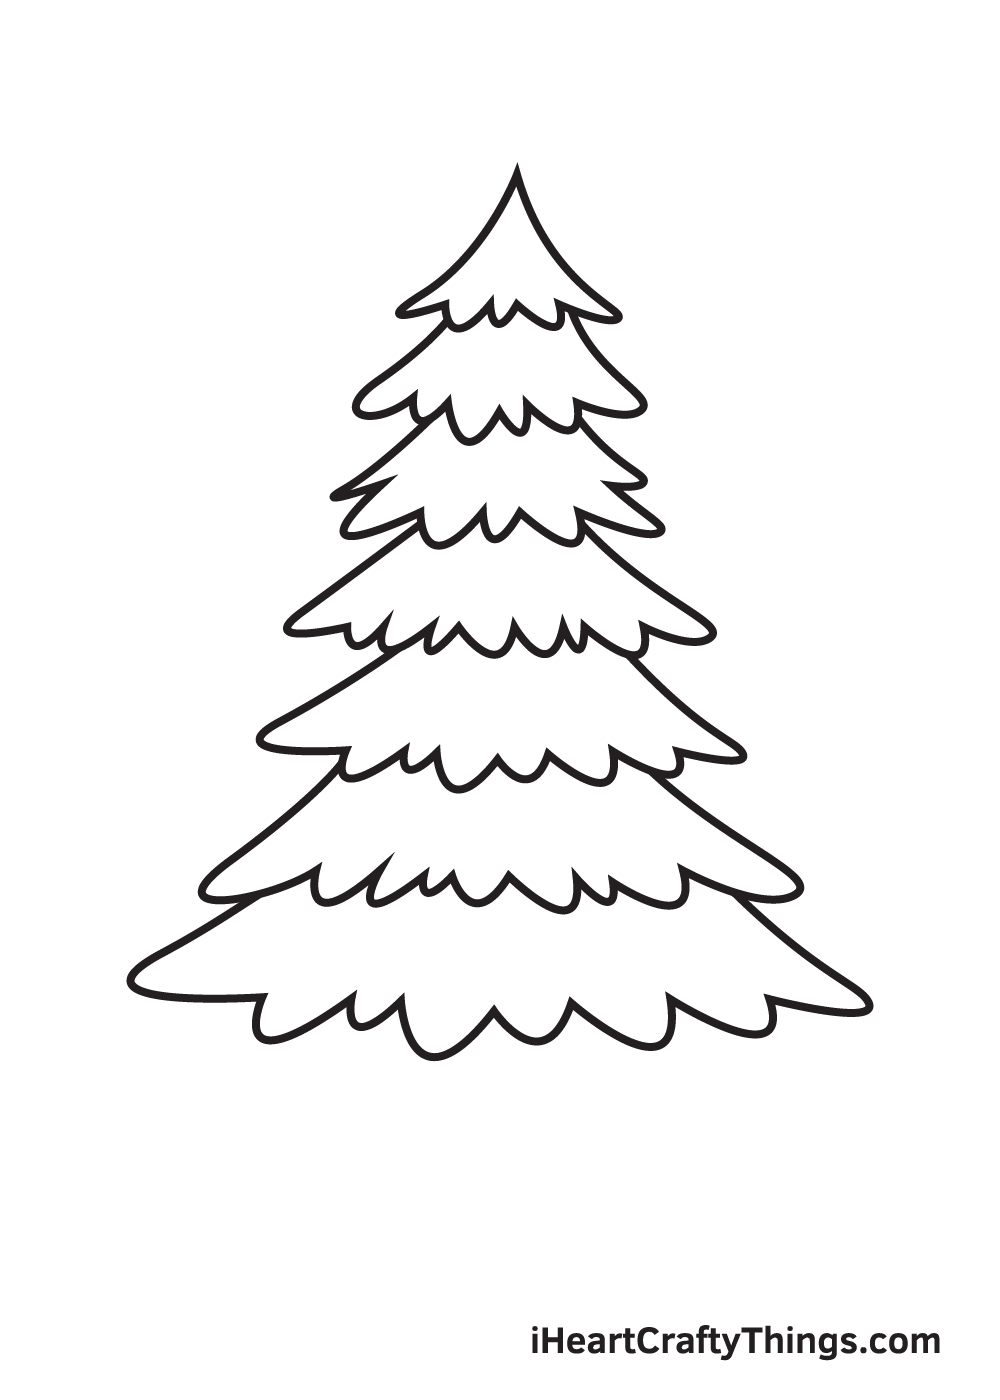
This is the final and lowermost layer of your beautiful pine tree.
Try to make it the widest and most unique of them all!
Step 8 – Afterwards, Draw the Trunk of the Pine Tree
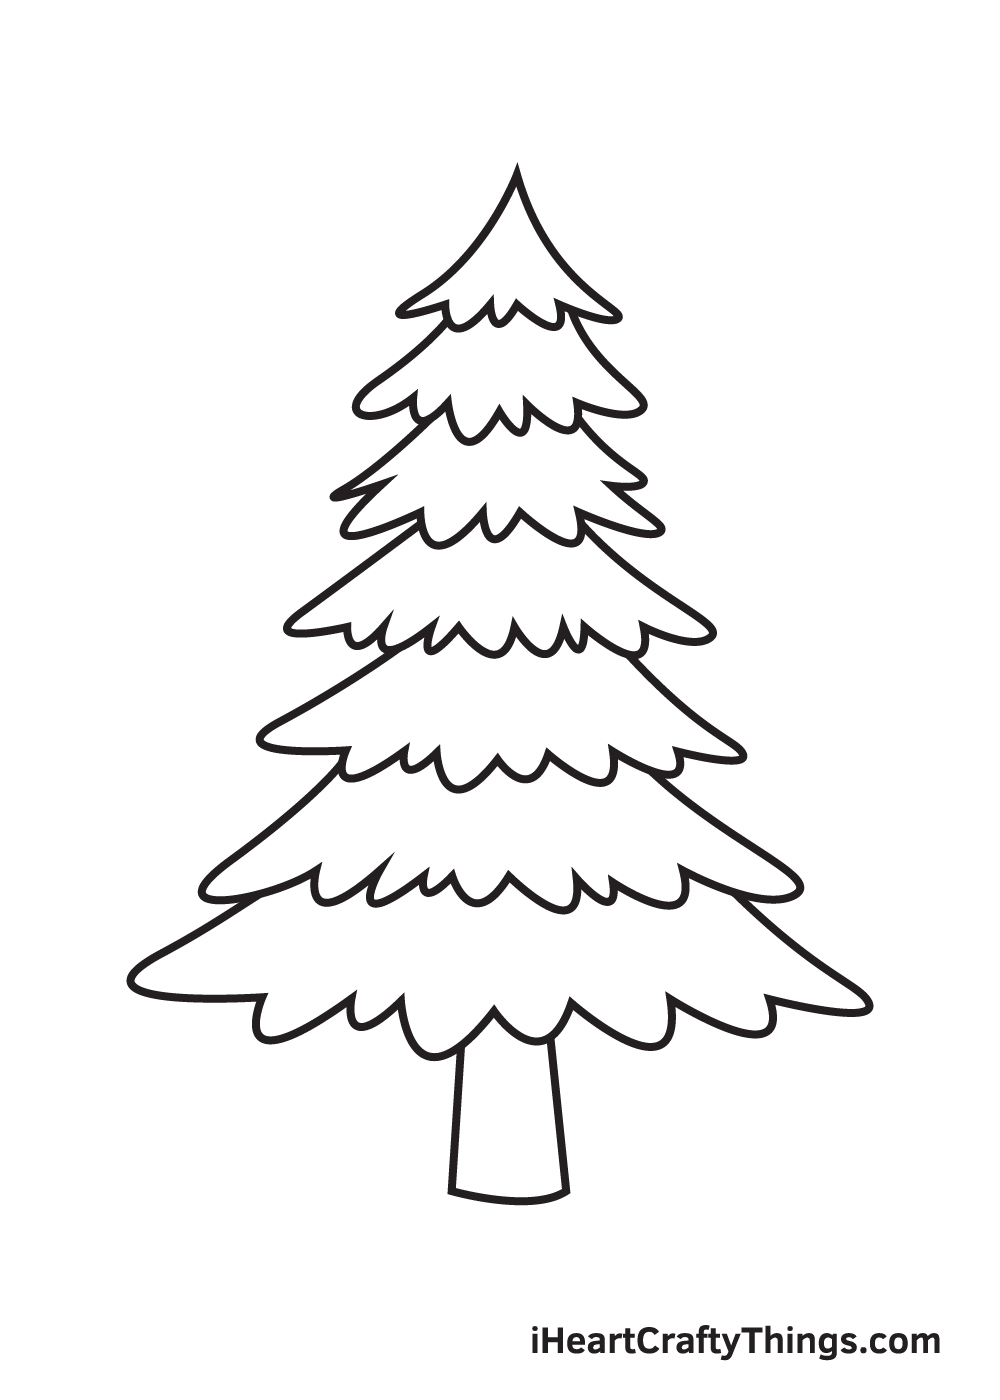
Now that you have completed all the layers of the pine tree, it’s time to create the trunk. Simply draw two parallel vertical lines with a horizontal line at the bottom.
The trunk supports the pine tree. Make it strong and sturdy and draw it similar to the illustration shown above.
Step 9 – Add Patterns and Texture All Over the Pine Tree
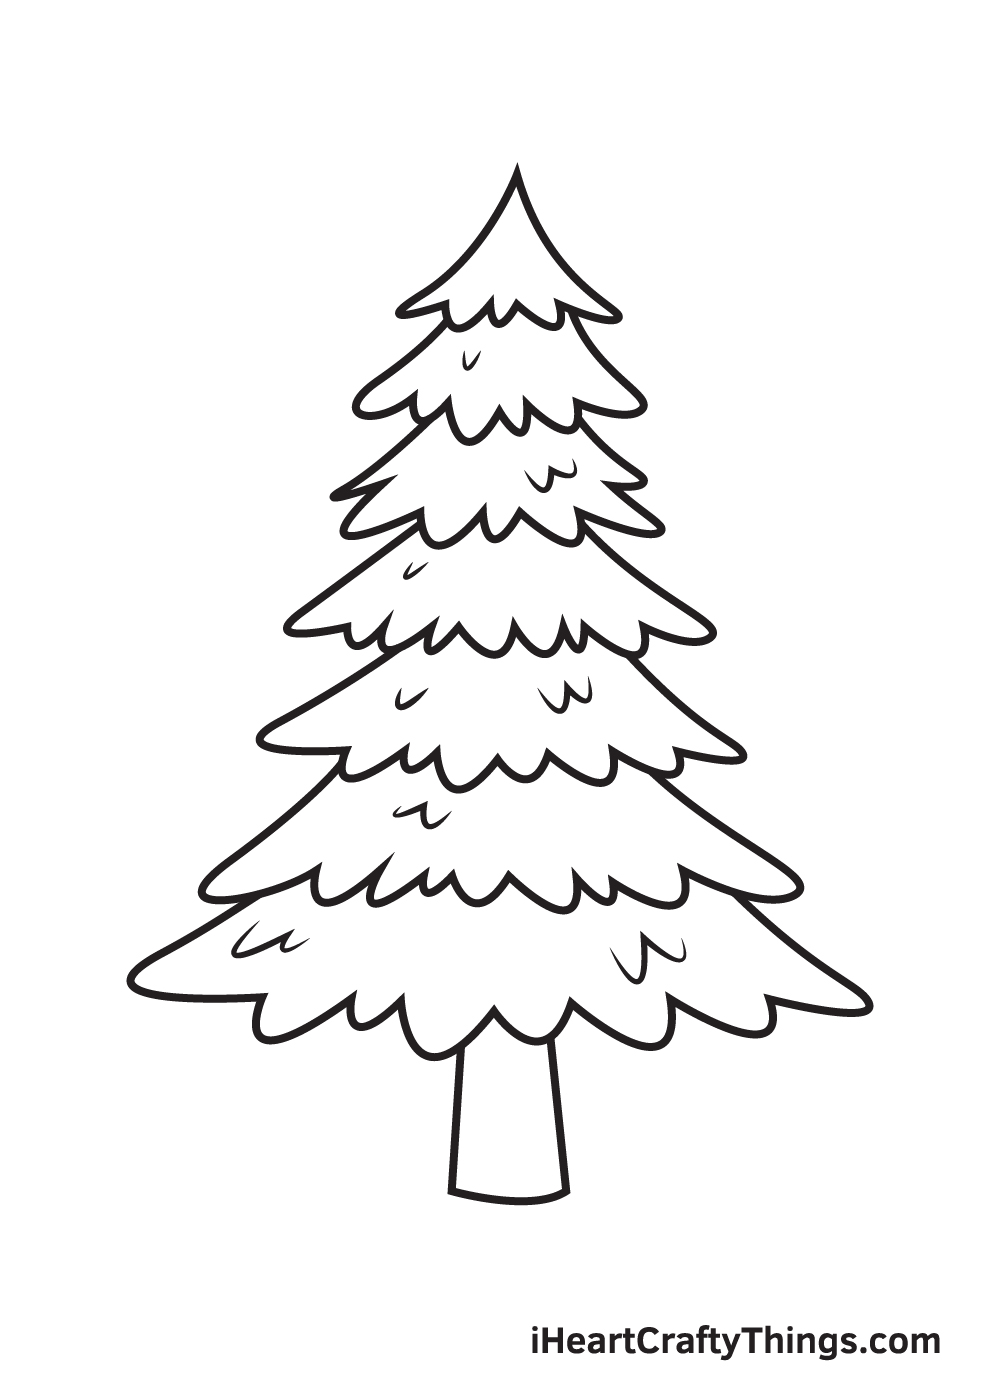
Before you add color to the tree, you must add the final touches of the drawing by adding some curved lines on the surface of the pine tree layers.
This adds texture and create the appearance of leaves, making the pine tree look more realistic!
It’s finally time to add some color! This is the part where you can showcase your artistic skills, especially your ability to mix and match various colors.
As you can see in the illustration, we used two different shades of green to the leaves of the pine tree.
We added a darker shade of green tint closer to the edges of each layer, as seen in the illustration. Then, we used a brown color on the trunk.
You can opt to color the pine tree similar to how we’ve done ours or handpick a unique set of colors. Either way, we’re sure the colors will turn out beautifully!
Have fun playing with colors and watch as the pine tree ultimately comes to life!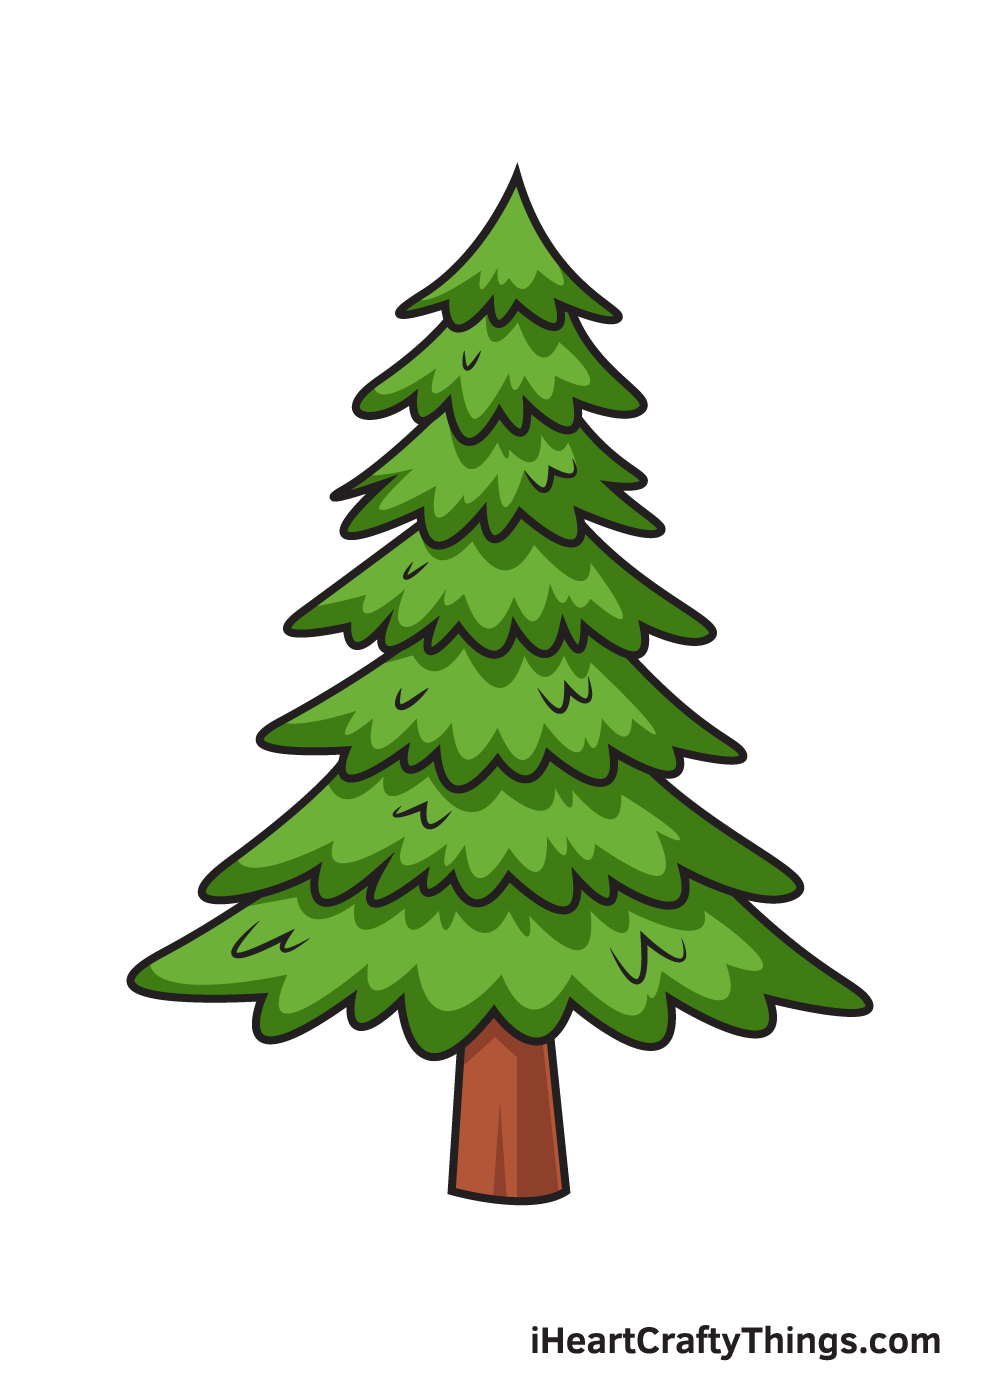
4 More Ways To Make Your Pine Tree Drawing Unique
Find out how to make your pine tree sketch look even greater with these 4 fun tips!
If you see any tree in real life, you are likely to see lots of wildlife in the trees. You could add some of these creatures to your pine tree drawing!
There are loads of ideas you could use to do this. The animals could include animals like owls, squirrels or other kinds of birds.
That is just a small selection of animals you could use, but what else can you think of to put in this pine tree?
This drawing of a pine tree looks great, but it could also be fun to make a pine forest! Now that you know how to draw a pine tree, you can easily add some more to this design.
You could add as many as you can fit on the page to make a majestic forest! Then, you could combine this tip with the previous one to make the forest look like it’s teeming with life.
How big of a forest would you like to create?
Once you have decided how to finish off this pine tree design, you could make it even better by adding the sky. You would have a few options for this!
It could be a bright and sunny day, or it could be nighttime with a big moon above. Adding some weather effects like rain and snow would also be a great addition to the scene.
What kind of scene would you like for this pine tree?
You can also make this pine tree sketch look exactly how you want it by using the right colors and art mediums. This would all depend on the kind of image you would like!
For instance, say you want a more realistic look for the picture. You could use paint and more muted colors to make it look more realistic.
Or maybe you would prefer a cartoony look, in which case you could use some colored pens, markers and other such mediums.
Your Pine Tree Drawing is Complete!
We hope you have fun with this step-by-step pine tree drawing tutorial. If you enjoyed drawing a tree, then you might also be interested in drawing other kinds of trees!
What kind of tree would you like to draw next? Let us know and we’ll do our best to create a drawing tutorial for it.
Completing a pine tree drawing is an achievement, so you should feel proud of yourself for finishing a masterpiece!
Don’t forget to take a photo of your artwork and share it on our Facebook page and Pinterest.
We’re looking forward to seeing your realistic pine tree drawing!