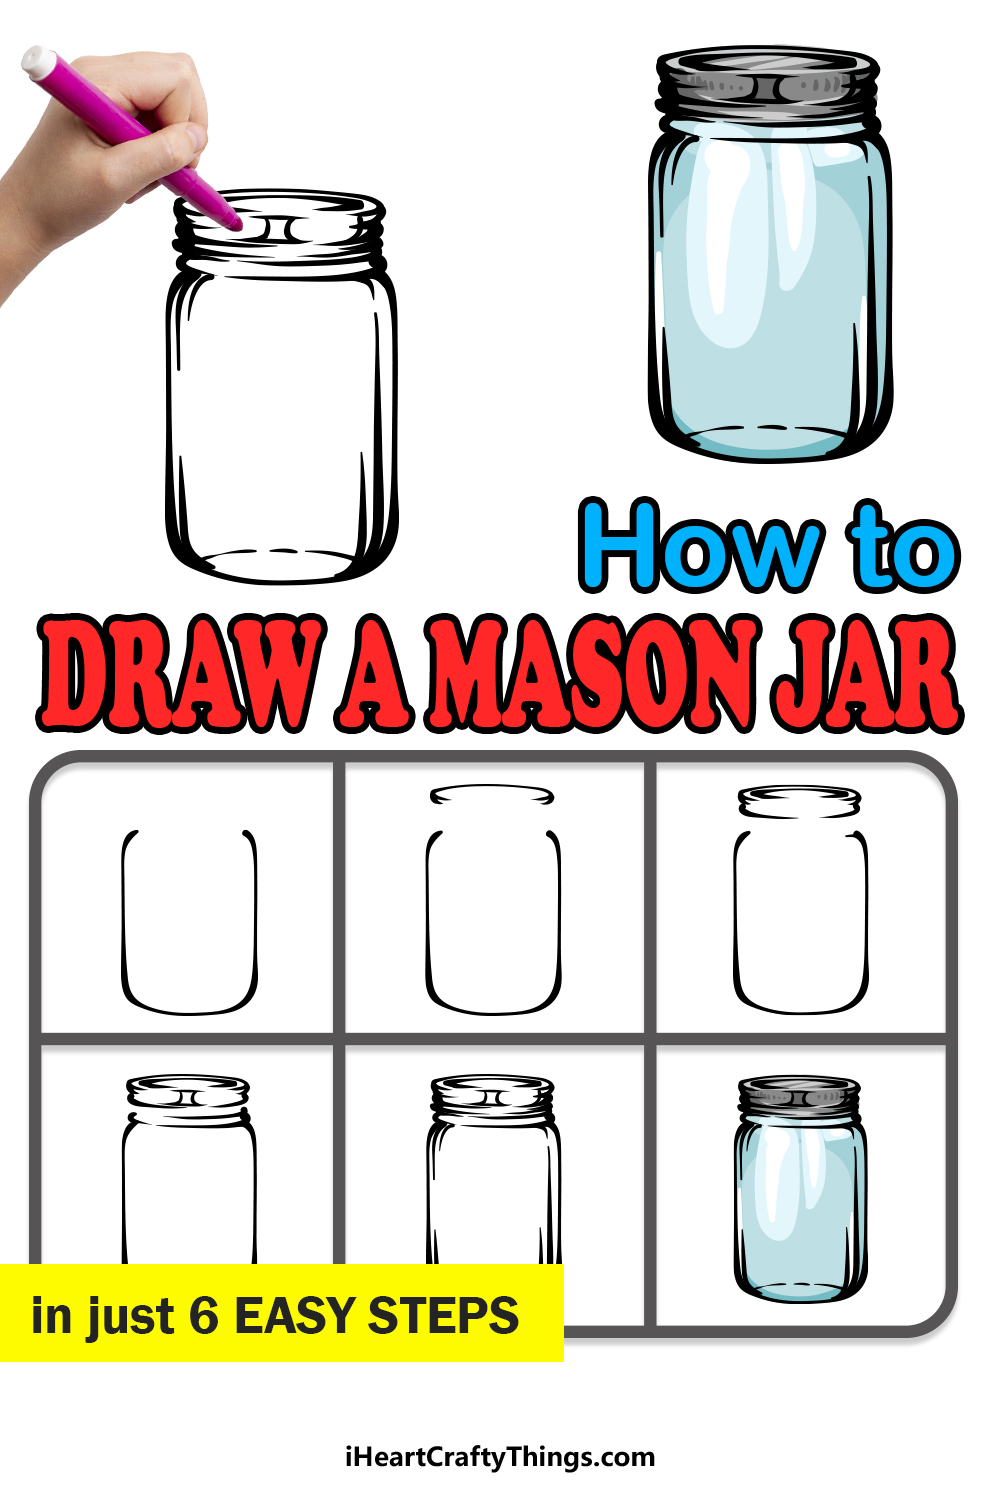
Mason jars are a common sight in many households, and the variety of things that can be stored within them is seemingly limitless.
From jams and spreads to candy and even beverages, you can certainly rely on a Mason jar to keep the contents nice and safe.
We’ve all seen many Mason jars throughout the year, but surprisingly enough they can be a bit of a challenge to draw.
That makes a guide on how to draw a Mason jar very helpful for anyone who would like to overcome the challenge.
This is just such a guide, so if you are one of those people then you’re in the right place!
We hope that you enjoy learning how to draw a Mason jar with us as we work through this step-by-step guide.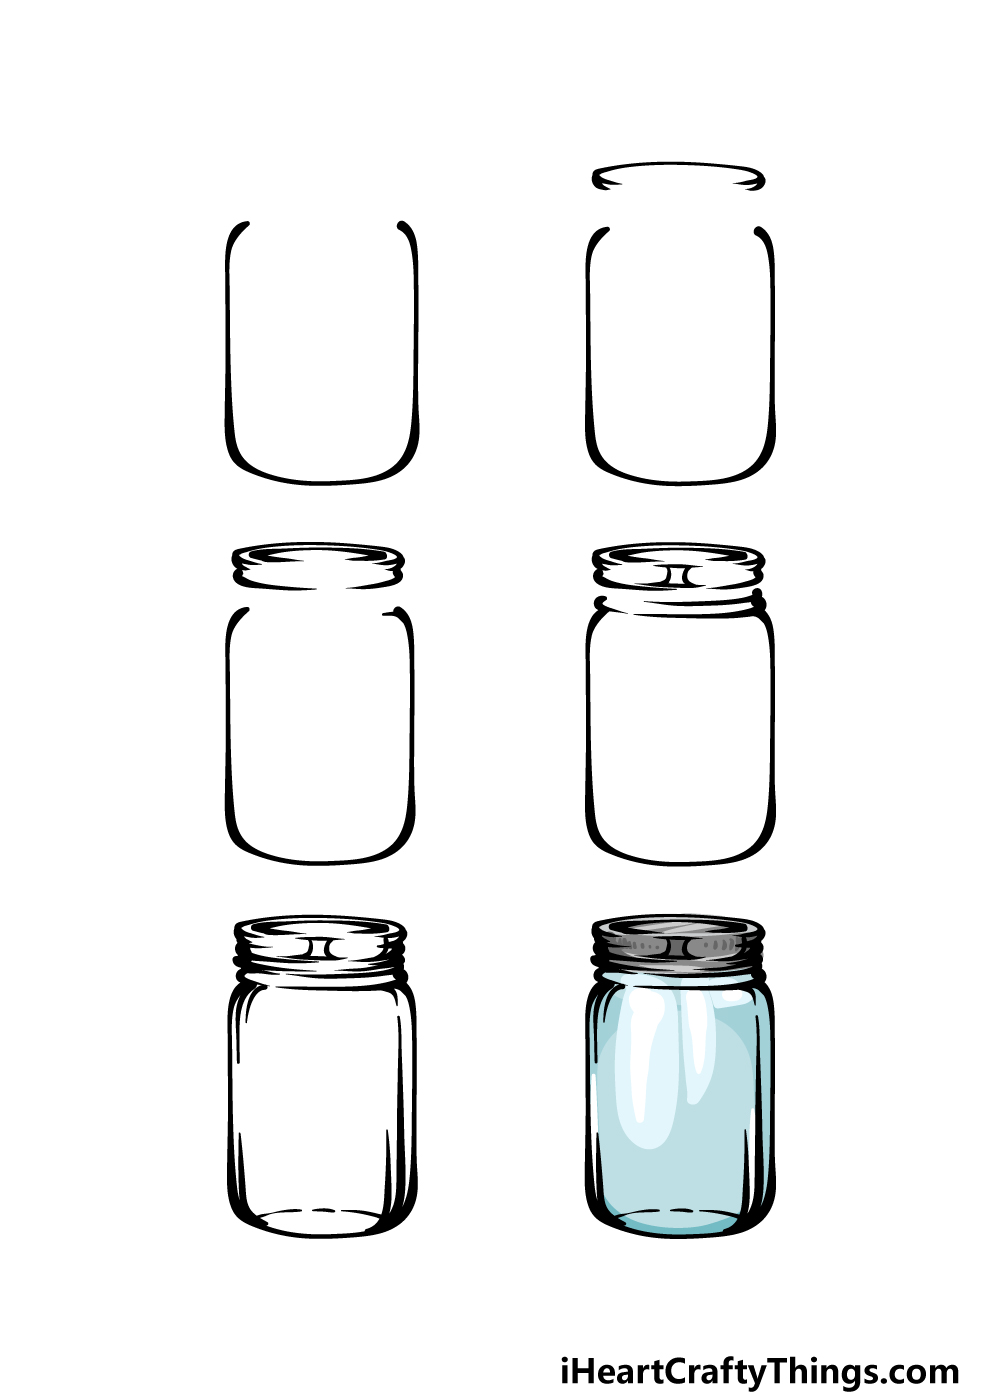
How to Draw A Mason Jar – Let’s Get Started!
Step 1
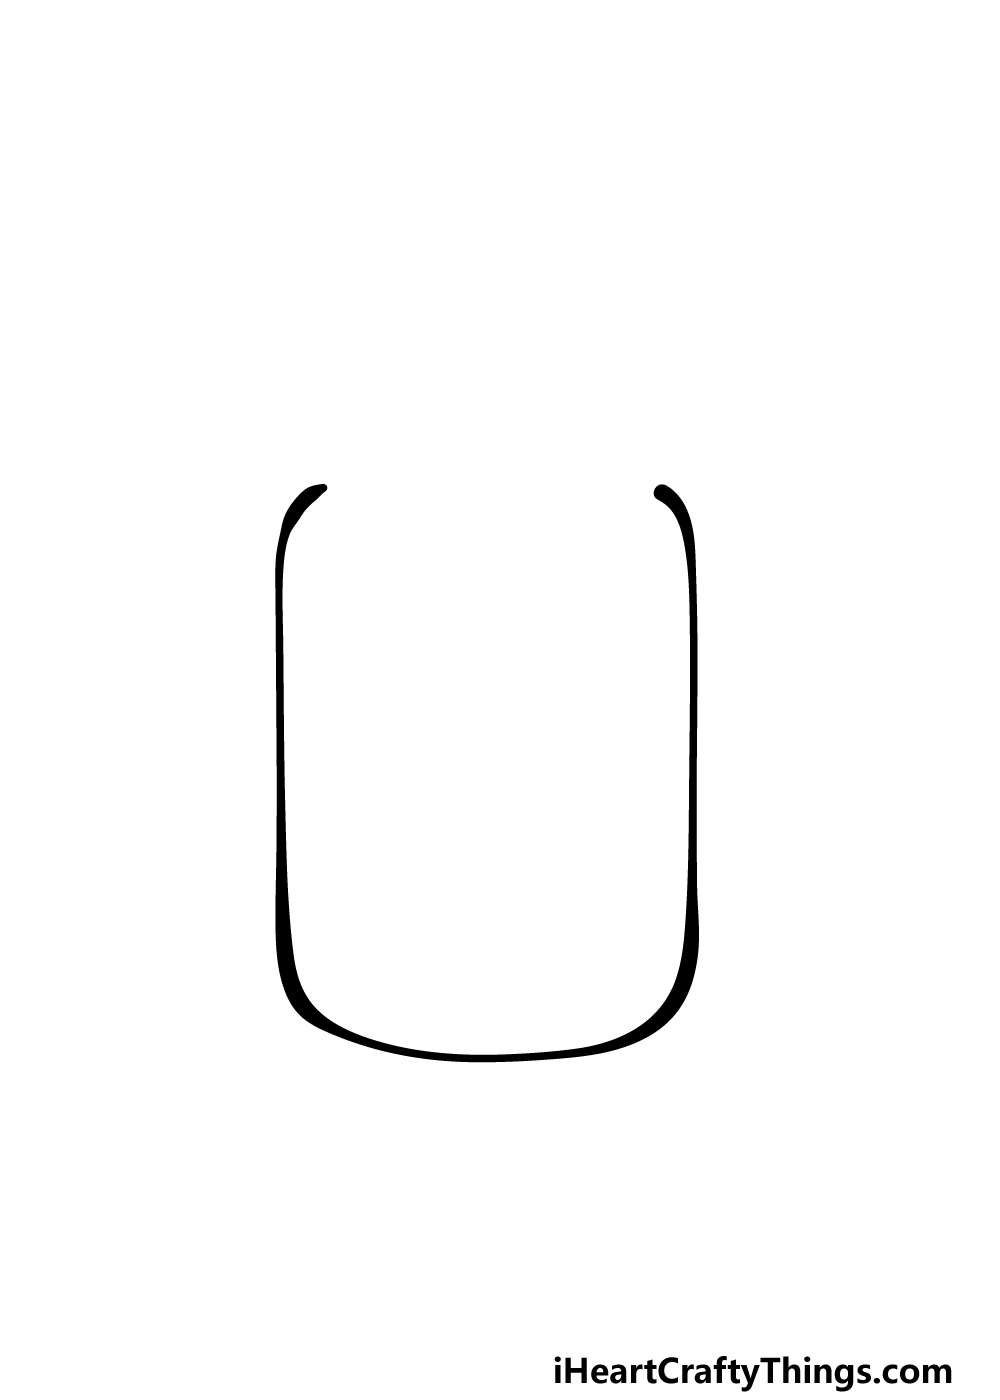
We will keep things simple for this first step of our guide on how to draw a Mason jar. To begin it, we will start by drawing the jar itself.
This can be drawn with a rounded line that is slightly curved at the top, heads straight down and then curves into the flat base.
Once you have drawn one half, you can then repeat the same process for the second half of the Mason jar.
That’s all that you need to do for this step, so once you have drawn this section of the jar we can then move on to the second step of the guide.
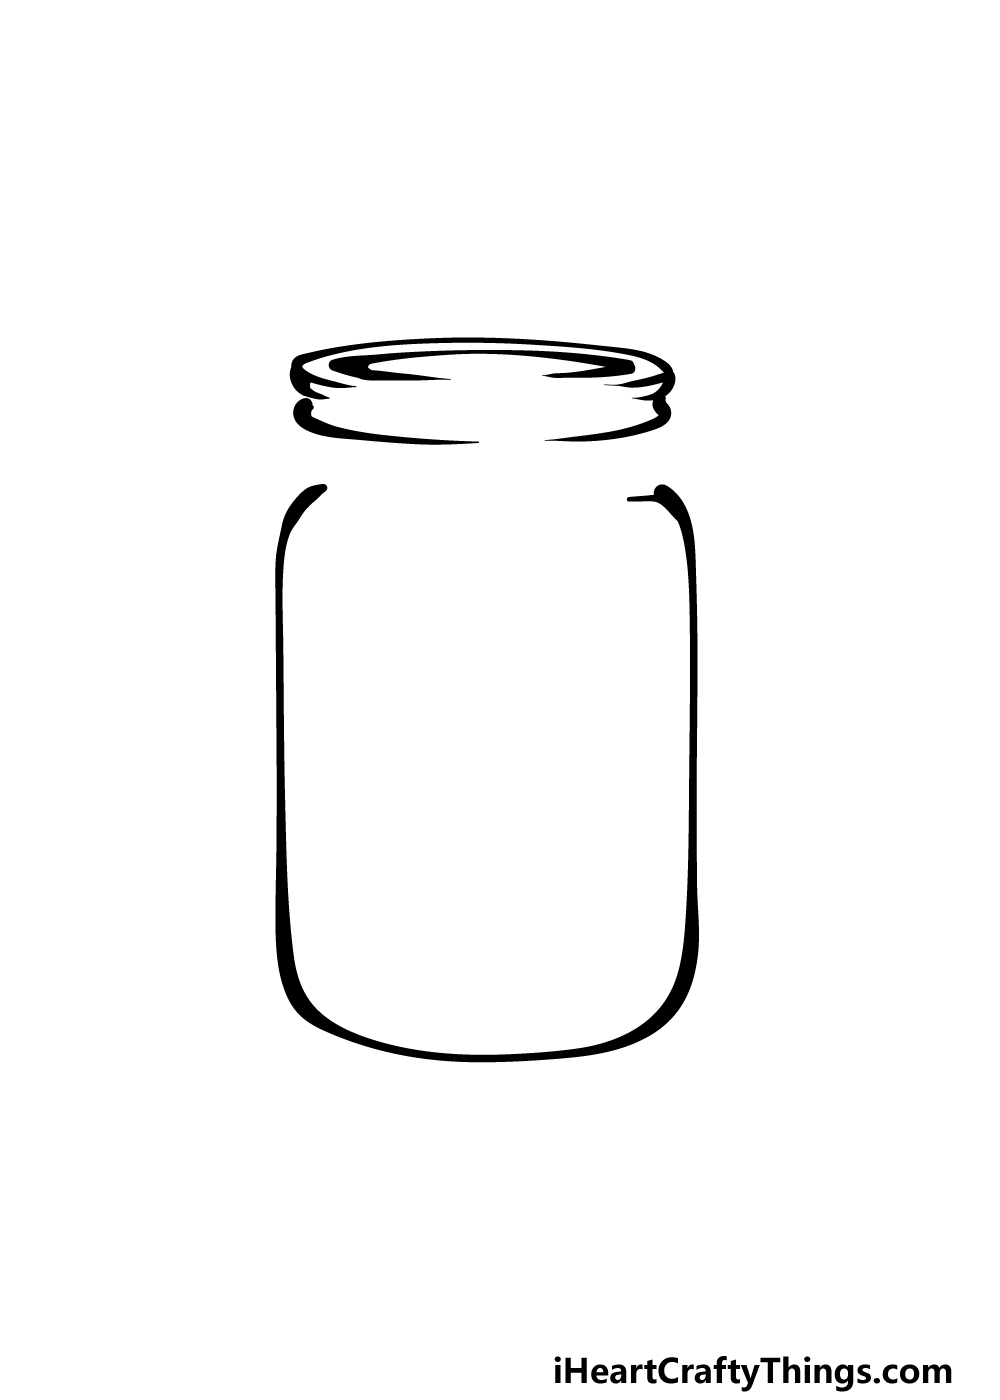
Step 2 – Now, start drawing the lid of the Mason jar
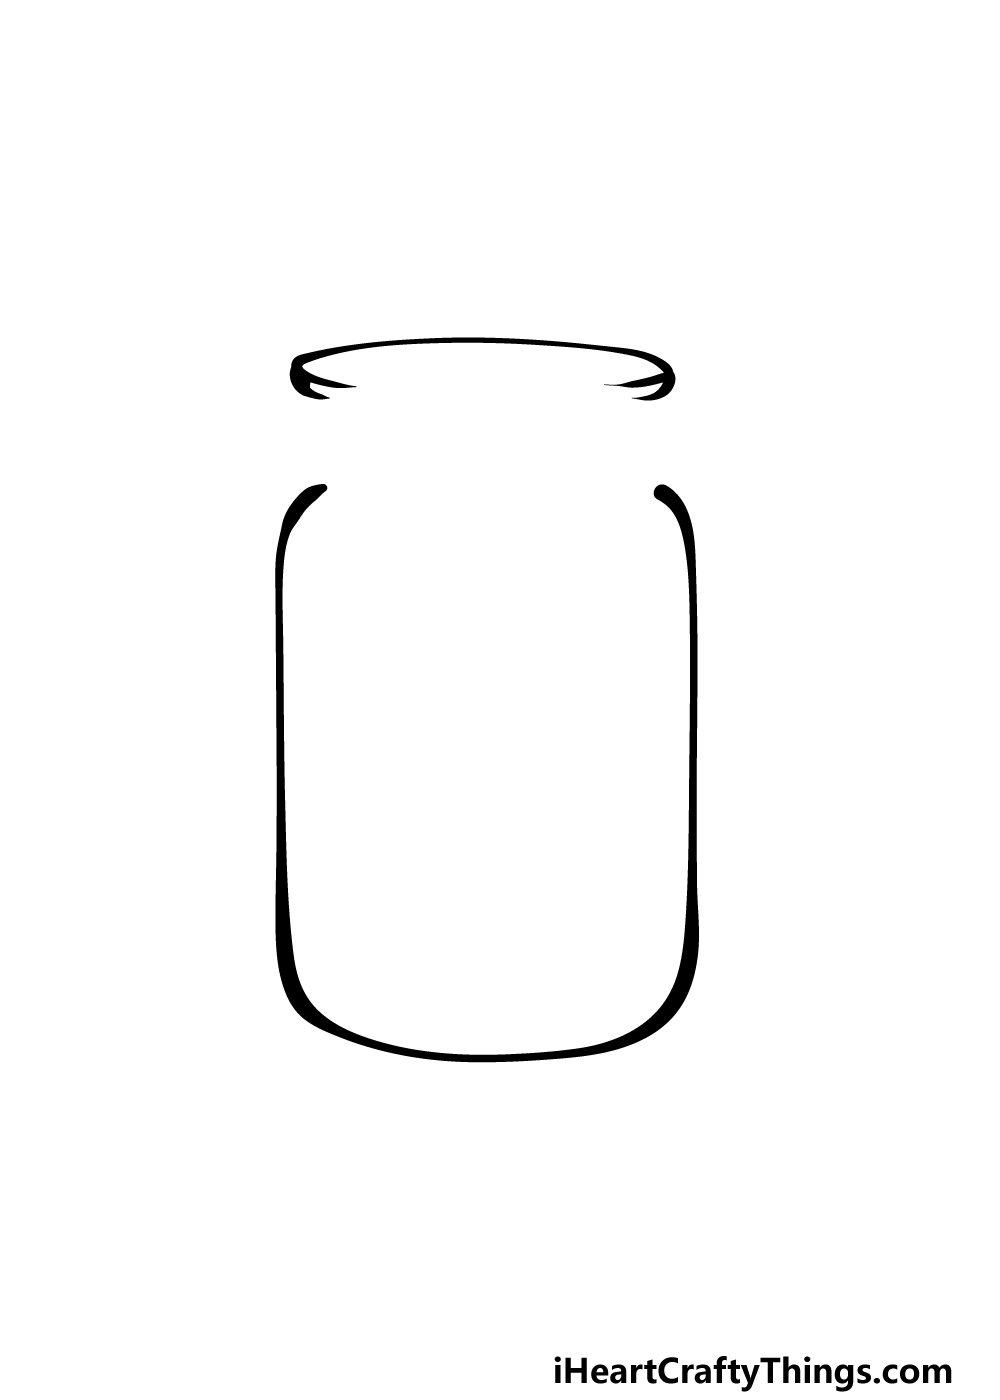
For this second step of this Mason jar drawing, we will be focusing on the lid of the jar.
The lid is possibly the trickiest part of the whole drawing, as it has lots of ridges that help it to screw onto the jar. Because it can be a little bit difficult, we will take it slowly as we focus on this lid.
That means that we will also start simply for the first part of the lid. Using the reference image to guide you in the placement of it, you can then draw a horizontal, curved line.
Try your best to make it as smooth and as even as you can to have it match our example.
Finally, add another small curved line coming down from each side of the lid. There will be a relatively large space left between the lid top and the jar, and now we’re ready to add to it.
Step 3 – Next, draw some more of the lid
Now we shall continue drawing the lid in this step of our guide on how to draw a Mason jar.
Draw a thin oval shape inside the interior of the lid and underneath the top line that you did in the previous part. Make sure to leave a small gap at the center bottom of this oval, however.
Then, draw two shapely curved lines underneath the ones that you already drew, and once again you should leave a gap between them.
Step 4 – Draw some more details for the Mason jar
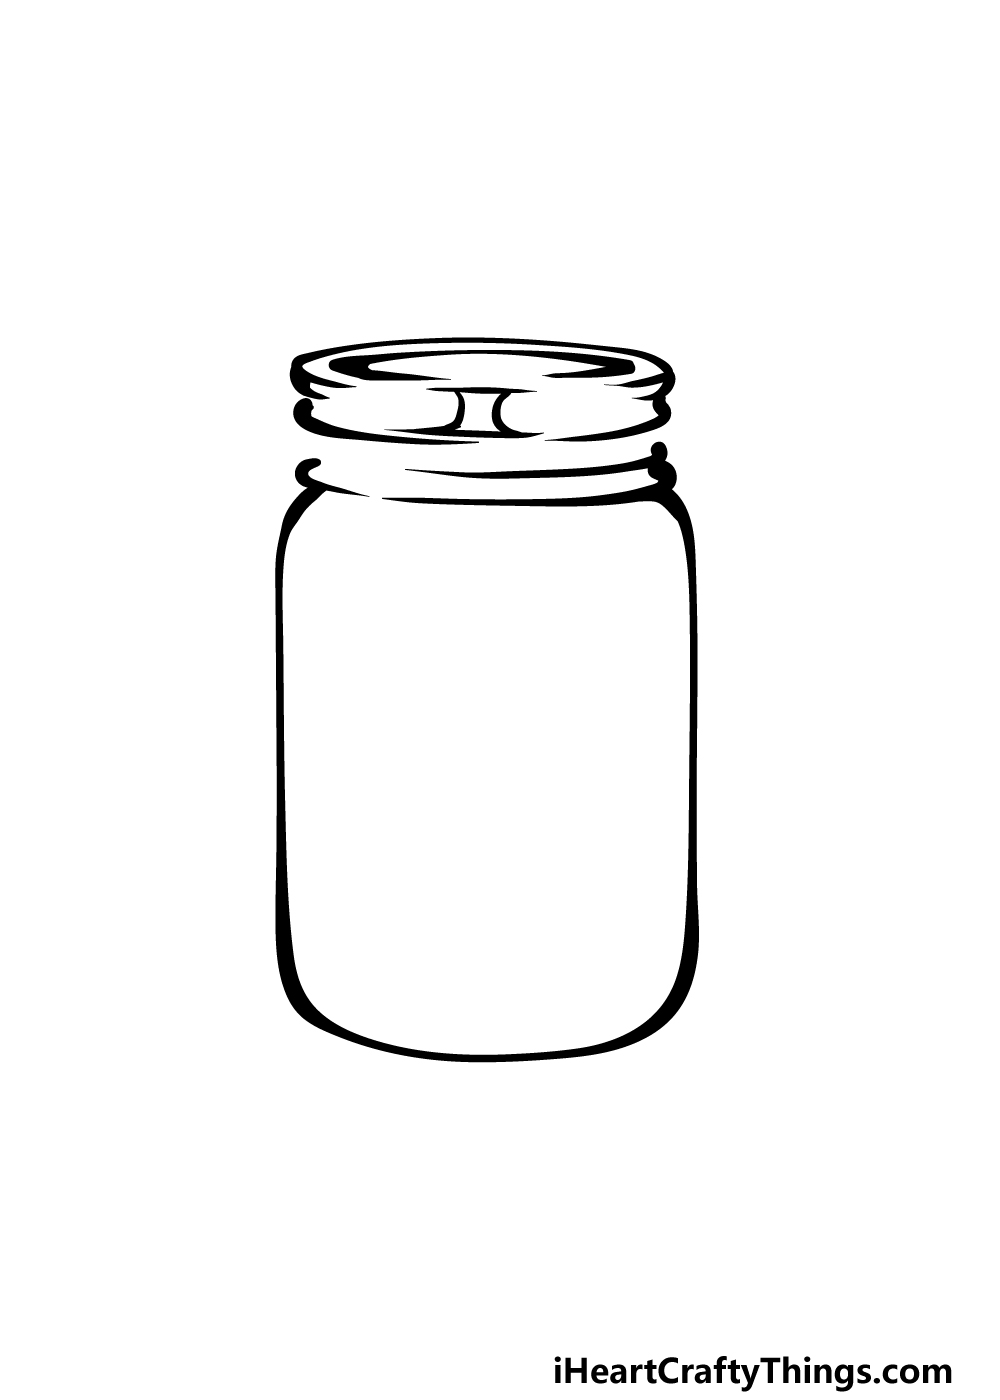
You can continue adding some detail to the lid of your Mason jar drawing in this step. Start by drawing a small shape at the center of the section of the lid that you have drawn already.
This shape will have straight lines at the top and base of it, and will have some curved vertical lines on either side. The reference image will show you how this should be shaped and positioned.
Finally, we will be adding a few more curved, horizontal lines at the base of the lid where it connects to the jar itself.
There will just be a few empty spaces left, but we will fill that in along with some final details soon!
Step 5 – Add the final touches for your Mason jar drawing
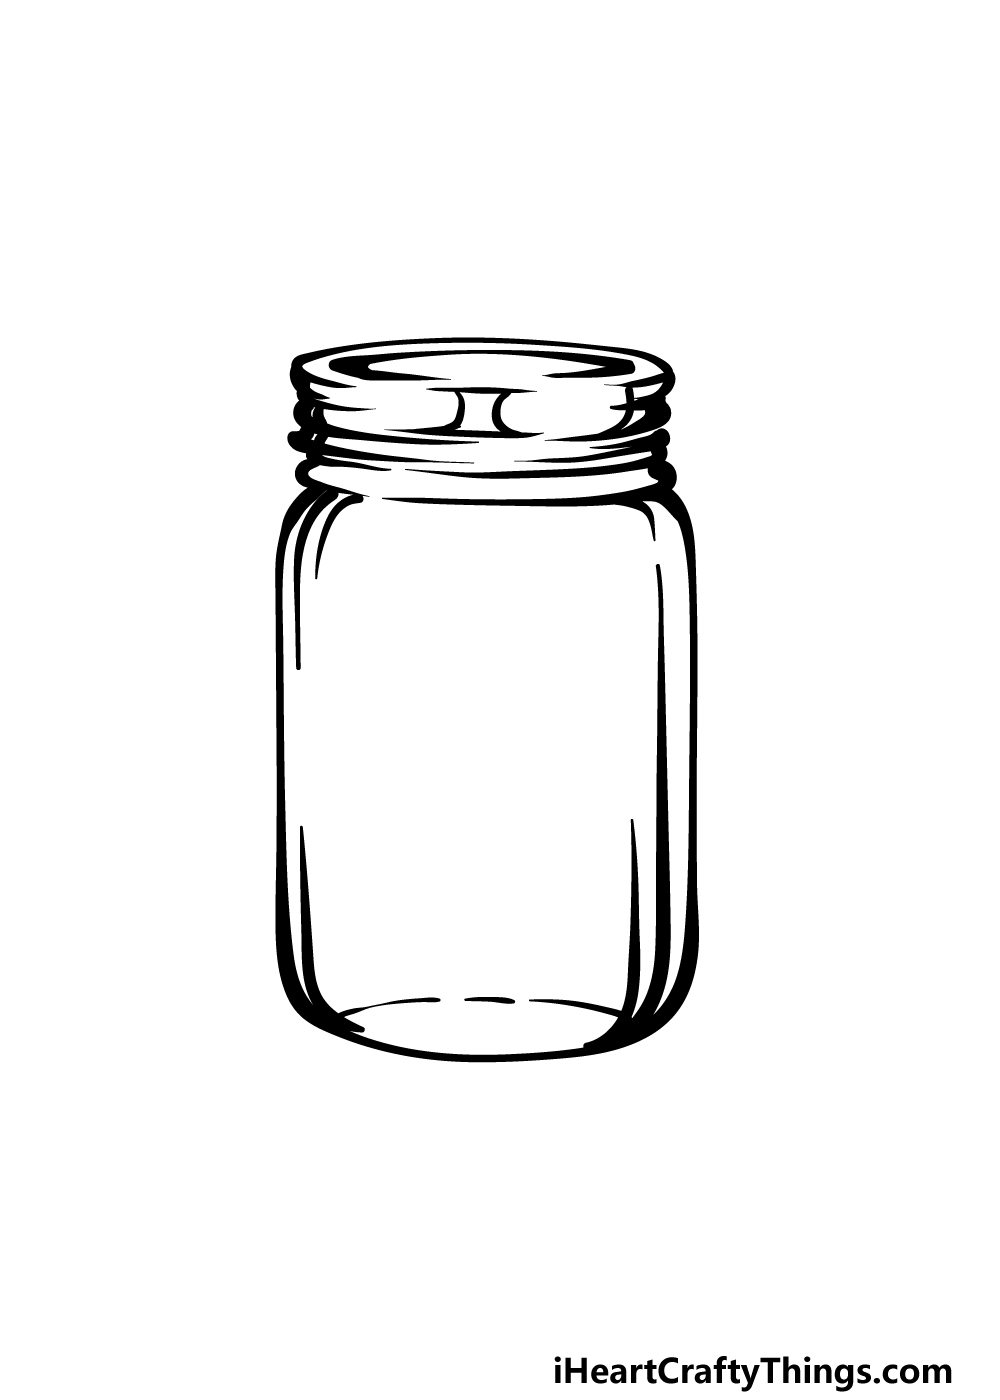
This step of our guide on how to draw a Mason jar will be all about adding some final details to it before you color it in.
First, finish off the lid by adding some more curved line details throughout it, and these will also help to fill in the final gap in the lid.
Then, we will be adding some vertical curved lines to the sides of the jar, and then finish off by adding some rounded lines near the interior of the base.
Once these final details have been drawn, you could also add some touches of your own! One fun idea would be to draw something contained within the Mason jar.
What kind of food or objects would you be storing within this jar? You can show us by drawing it inside to finish off!
Step 6 – Finish off your Mason jar drawing with some color

For the final step of your Mason jar drawing, we will be finishing it off with some colors. In our reference image, we went with some greys for the lid to give it a more metallic look.
Then, for the glass of the jar we used various shades of blues to create a transparent, reflective look to the glass.
If you drew anything inside of the jar, then you could add some colors for those as well!
Watercolor paints would be great for creating a softer color look for the glass, but you can also use more vibrant mediums for an equally great look. What will you choose for your Mason jar drawing?
3 More tips to make your mason jar drawing easy!
Check out these 3 fun tips on how to make this easy to draw mason jar even easier!
Drawing any object presents its challenges, but this is especially true of objects that have transparent elements.
That’s why for this mason jar drawing we would recommend using a real mason jar to help you.
Luckily, most homes have one or two handy, but you can also find them cheaply at many stores. Using one in real life would help you with the shape of the glass body.
It would also help you with smaller elements such as the way the cap fits on top. By using a real jar as your model, you’ll have a great drawing in no time!
While you still have that mason jar handy, you can also use it for the colors. If you want to make this image even more interesting, you could place a small object behind the jar.
Look closely at how the object looks through the glass of the mason jar, and then try your best to replicate it in the picture.
When coloring it in, you will find that softer mediums like watercolor paints or colored pencils are perfect for depicting glass.
It can be hard to visualize textures like glass, so using the real jar will help a lot with this mason jar sketch!
If you find yourself struggling with the glass effect of this drawing of a mason jar, you could make it easier by drawing something inside of the jar.
You might think that adding more elements to the drawing would make it harder, but you may be surprised!
The tricky part of this drawing is the translucent glass, and this is even more true when there is nothing in the jar.
You could add lots of small colorful circles inside of the jar to depict some gumballs or maybe fill it with a color to make it look like it’s full of liquid.
These are just a few ideas, but what else could you place inside of the jar to make it easier?
Your Mason Jar Drawing is Complete!
Drawing simple objects like this can often present unforeseen challenges, so we hope that this guide on how to draw a Mason jar made it easier for you to tackle the tricky elements!
As long as you follow what we shoed in the guide then you will be able to complete all aspects of the picture.
You can also really put your own spin on this drawing by adding your own details and elements, so get creative with it and see what you end up with!
When you’re ready for a new drawing, you can find plenty of amazing guides on our website to enjoy. You’ll want to keep checking in, as we upload new ones often.
Please also be sure to share your Mason jar drawing on our Facebook and Pinterest pages so we can see how it turned out!